USER MANUAL BKT3000C REMINGTON
Remington ^® is a Registered Trade Mark of Spectrum
Brands, Inc.,
or one of its subsidiaries
ÜRETİCİ FİRMA BİLGİSİ: VARTA Consumer Batteries GmbH &
Co. KGaA, Alfred-Krupp-Str. 9, 73479 Ellwangen, Germany
www.rermington-europe.com
© 2011SBI
smooth@silky®
natural_image
Illustration of a Remington electric shaver with visible blade and handle (no text or symbols on the device itself)
CORDLESS
BIKINI TRIMMER
BKT3000C
BIKINI TRIMMER
natural_image
Close-up of a black mechanical component with grooves and ribbed ends (no visible text or symbols)
13
natural_image
Black rectangular electronic device with a coiled cable and plug, isolated on white background (no text or symbols)
12
natural_image
Hand holding a small object with an arrow pointing to it, no visible text or symbols
natural_image
Line drawing of two hands holding a small object, no text or symbols present
natural_image
Illustration of a hand holding a pen with arrows indicating motion or force (no text or symbols)
natural_image
Illustration of a person performing a knee press or massage motion (no text or symbols)
natural_image
Illustration of hands holding a tool or device with a dark central component (no text or symbols visible)
Thank you for choosing Remington. Our products are designed to meet the highest standard of quality, functionality and design. We hope you enjoy using your new Remington® product. Please read the instructions for use carefully and keep in a safe place for future reference.

CAUTION
Use this appliance only for its intended use as described in this manual.
Do not use this product if it is not working correctly, if it has been dropped or damaged, or dropped into water.

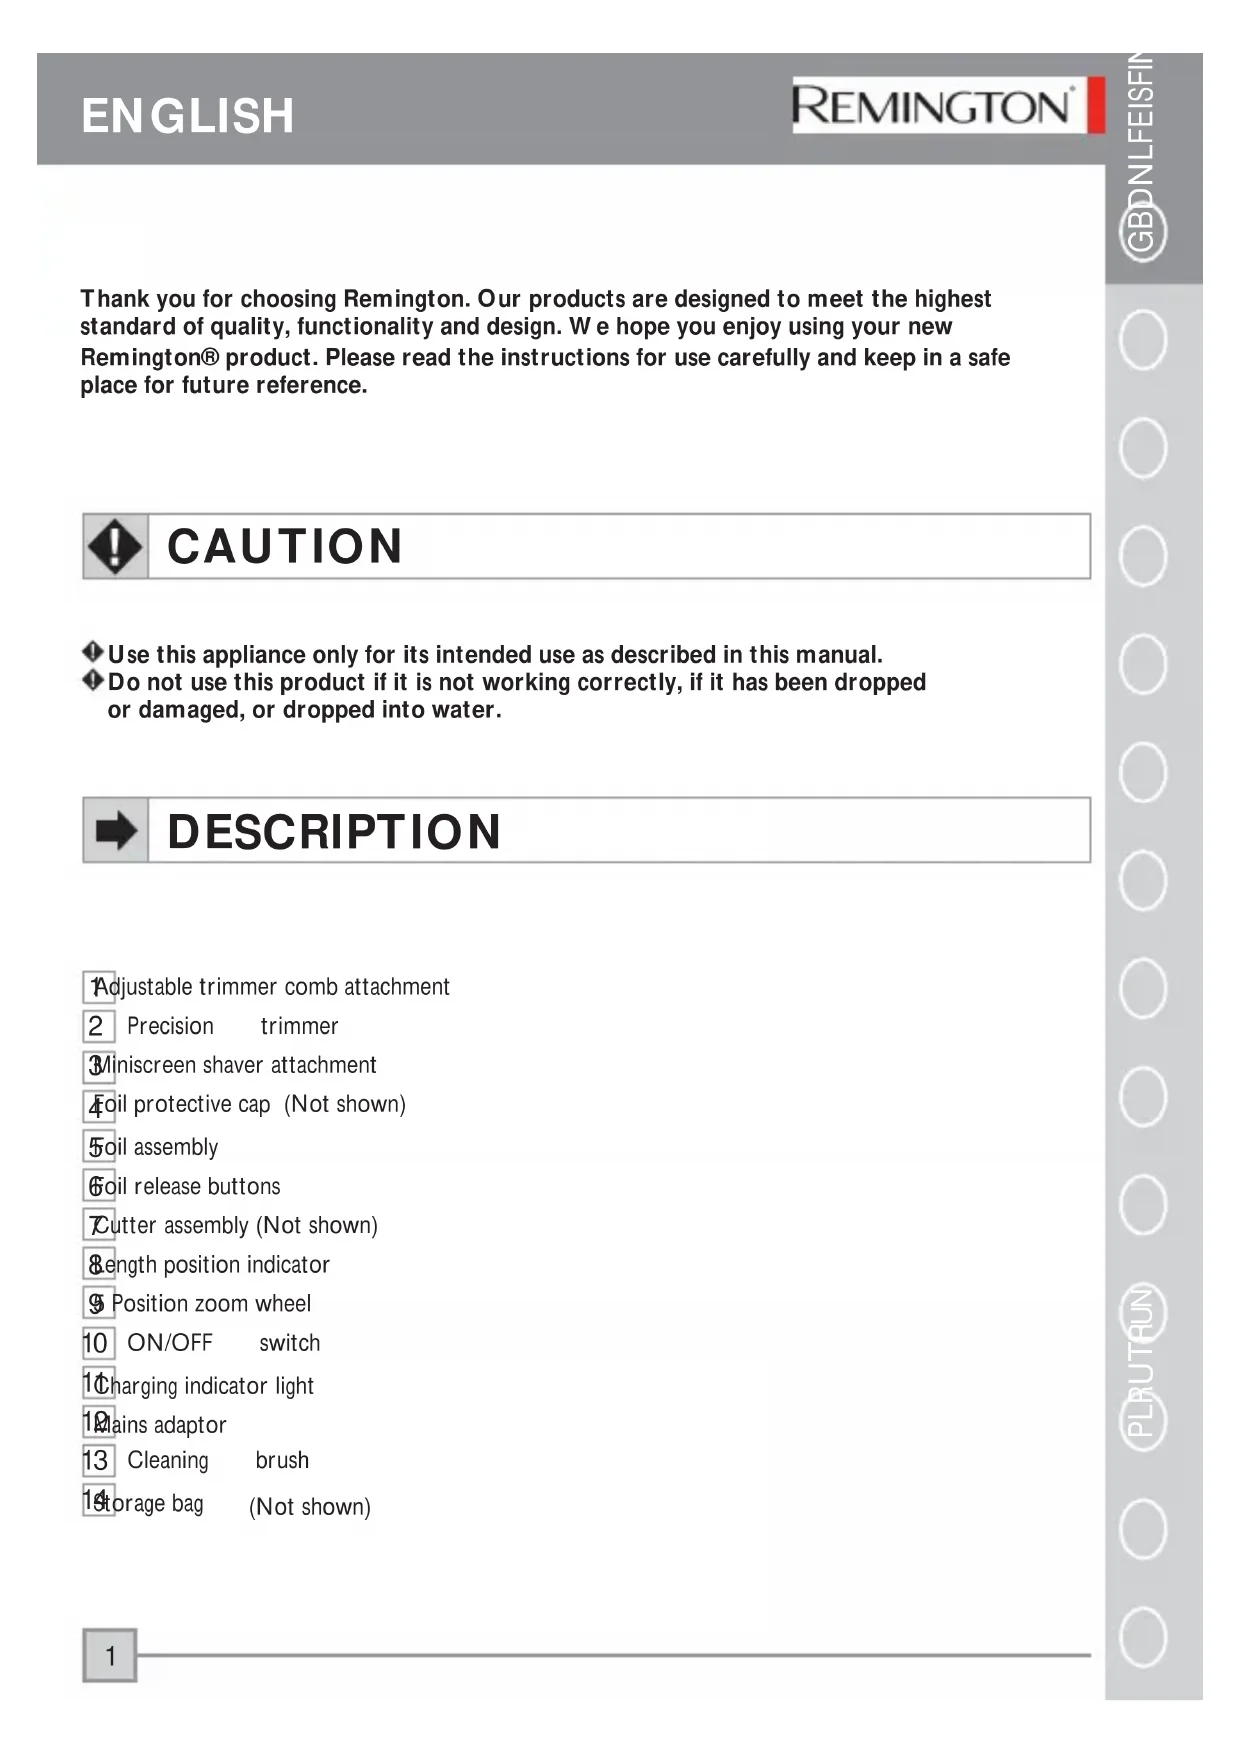
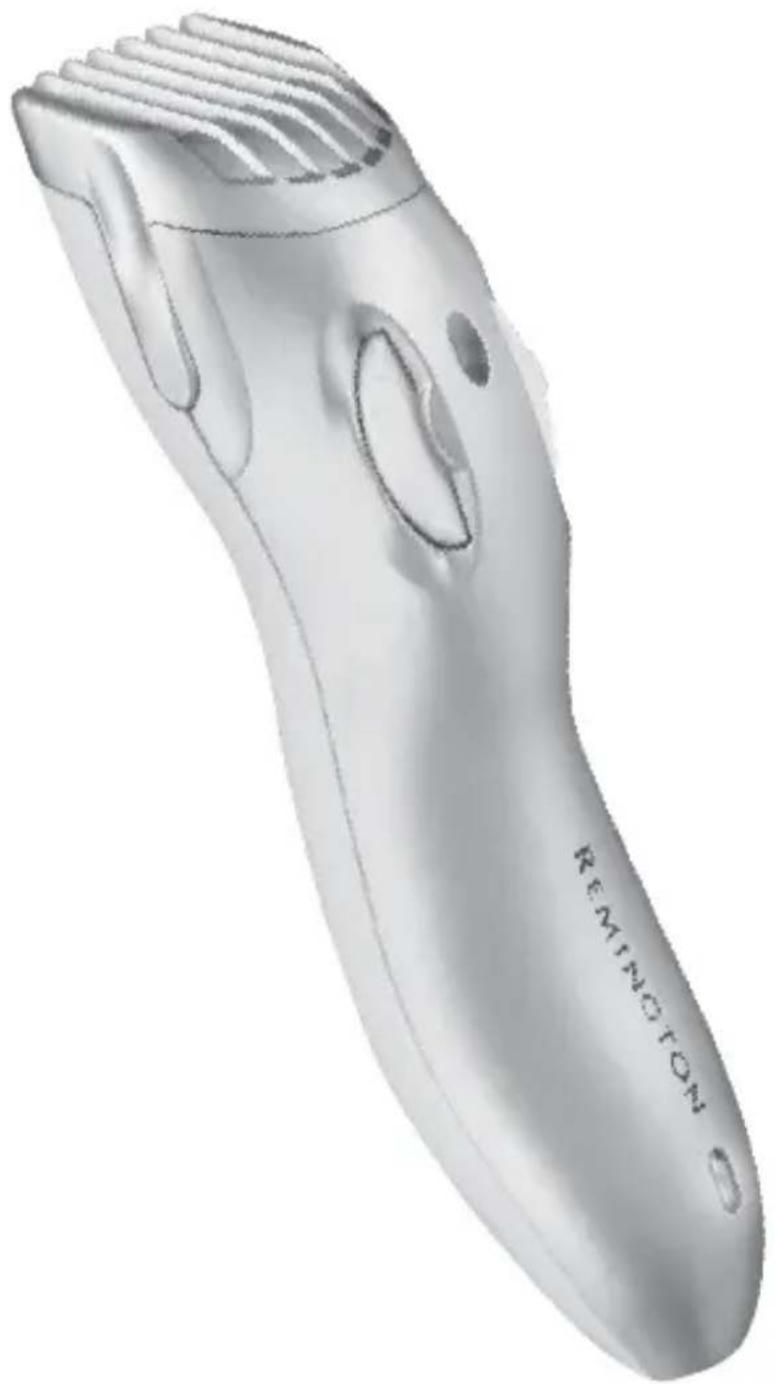
DESCRIPTION
Adjustable trimmer comb attachment
2 Precision trimmer
3Miniscreen shaver attachment
4oil protective cap (Not shown)
5oil assembly
Soil release buttons
Cutter assembly (Not shown)
&ength position indicator
9 Position zoom wheel
10 ON/OFF switch
1Charging indicator light
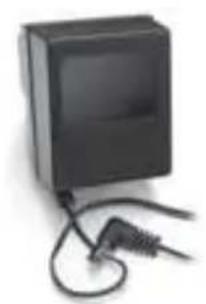
19 Mains adaptor
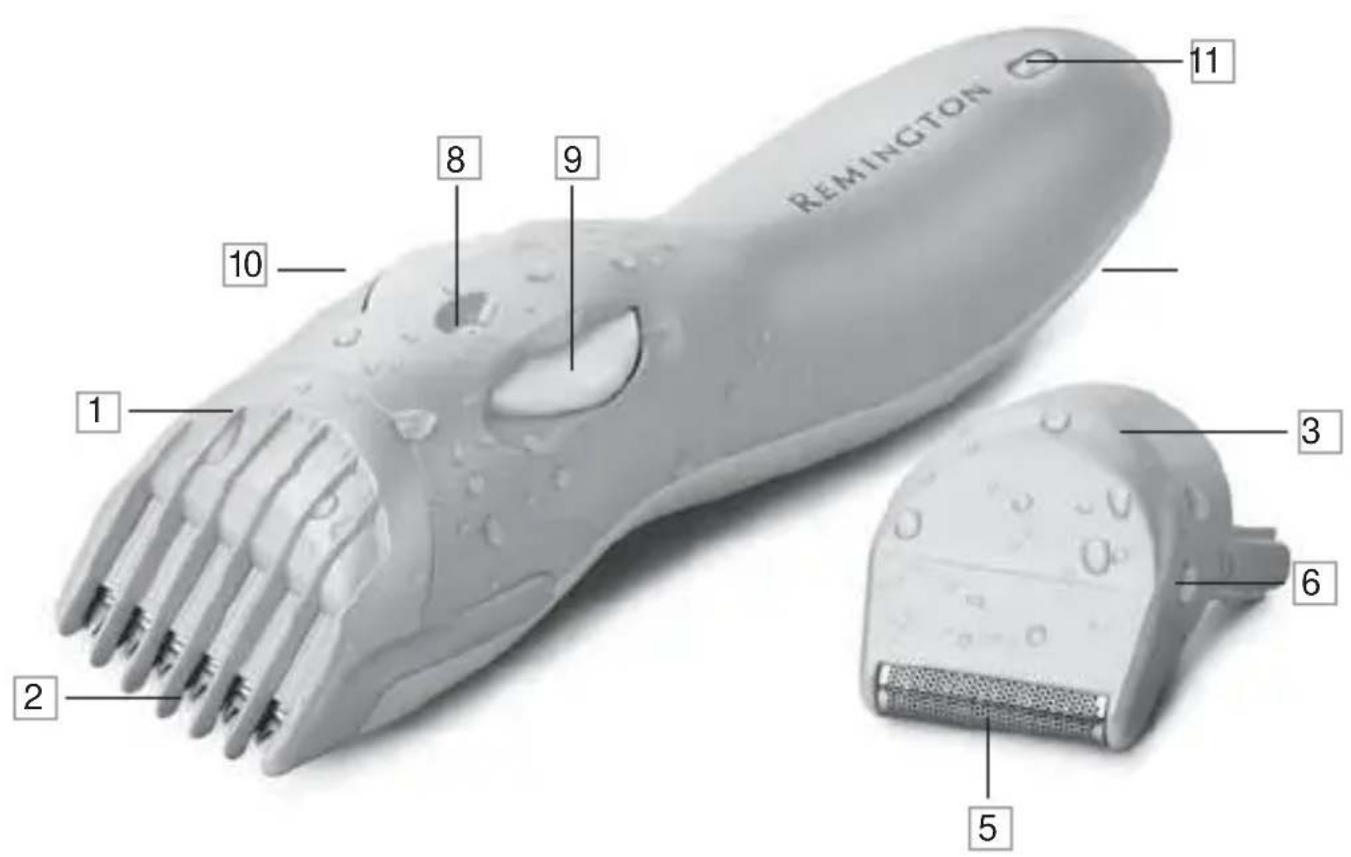
13 Cleaning brush
14 storage bag (Not shown)

GETTING STARTED
Be patient when fi rst using your bikini trimmer. As with any new product, it may take a little while to familiarise yourself with the product. Take the time to acquaint yourself with your new trimmer, as we are confi dent you will receive years of enjoyable use and complete satisfaction.
INSTRUCTIONS FOR CHARGING
RECHARGEABLE MODELS
Always ensure that your hands, trimmer and mains adaptor are dry before charging your bikini trimmer. Before using your bikini trimmer for the first time, charge for 14-16 hours. For subsequent uses, the battery will be fully charged within 14 hours. One full charge allows 45 minutes usage time.
▶ Ensure the product is switched off and attach the mains adaptor to the trimmer.
Connect the mains adaptor to the mains. The charging indicator will light up.
▶ Charge for the time indicated above.
▶ Use product until the battery is low. This is indicated by the trimmer working distinctly slower.
NOTE: This product is for cordless use only. Do not use your trimmer whilst plugged into the mains.
Your trimmer cannot be overcharged. However, if the product is not going to be used for an extended period time (2-3 months), unplug it from the mains and store. Fully recharge your trimmer when you would like to use it again.
To preserve the life of your batteries, let them run out every six months then recharge for 14-16 hours.
CHARGING CAUTIONS
▶ Do not attach the mains adaptor to the mains with wet hands.
▶ Always charge your trimmer in a cool, dry place.
Do not charge your trimmer in close proximity to water.
The trimmer can be attached to an electrical outlet voltage of 220V – 240V (UK, Europe, Australia standard). Please check the voltage of your destination country before travel.
YOUR BIKINI TRIMMER ATTACHMENTS
Your bikini trimmer has 1 or 2 attachments to meet all your bikini zone needs. An adjustable trimmer comb with precision trimmer and a Miniscreen shaver. Please see the 'How to use' section for guidance on which attachment to use for what purpose.
EXCHANGING THE ATTACHMENTS
Always ensure the trimmer is switched off before changing the trimmer and shaver attachments.
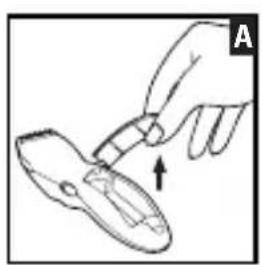
■ REMOVING THE TRIMMER COMB AND CUTTING ASSEMBLY
▶ Hold the trimmer in one hand with your thumb firmly on the zoom wheel to keep it from turning.
▶ With your other hand, gently pull the trimmer comb attachment off the trimmer holding the top of the comb (not the comb arms).
Remove the cutting assembly by firmly pushing the blade away from the trimmer with your thumb.
■ REMOVING THE SHAVER ATTACHMENT
▶ Hold the trimmer in one hand with your zoom firmly on the zoom wheel to keep it from turning.
▶ With your other hand, gently pull the shaver attachment off the trimmer holding the attachment either side of the foil (not the shaver arms).
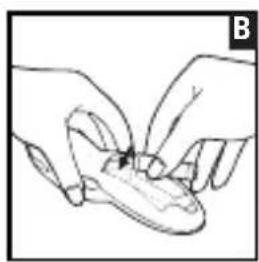
REPLACING THE TRIMMER COMB AND MINISCREEN SHAVER ATTACHMENT
▶ Hold the trimmer in one hand with your thumb firmly on the zoom wheel to keep it from turning. Ensure that the length position indicator is at 1.
▶ Slide the comb/shaver down the grooves until it clicks into place.
NOTE: The trimmer comb/shaver attachment can only be attached in one way. If it does not go on correctly, turn it around and try again. Do not force into position.
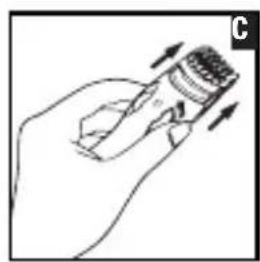
ADJUSTING THETRIM LENGTH
The trimmer comb can be adjusted to give you 5 different trim lengths simply by turning the zoom wheel to the desired setting. Turn the zoom wheel clockwise for shorter length, anti-clockwise for longer length. The wheel will click into place as it reaches each setting, and the setting number will appear on the length position indicator. (Diagram C)
| Setting Length | |
| 1 | 3 |
| 2 | 5 |
| 3 | 7 |
| 4 | 8 |
| 5 12 mm | |
NOTE: Trimmer comb must be attached to the product in order to use the hair length selector.

HOW TO USE
TRIMMING
▶ Attach the precision trimmer and trimmer comb.
▶ Use the trimmer with the comb attached.
▶ Use the zoom wheel to set the trimmer comb to the desired length setting. The setting will appear on the length position indicator. If you are trimming for the first time start with the maximum trimming length setting (5). (Diagram C)
▶ Turn the bikini trimmer on.
Place the fl at top of the trimmer comb against the skin.
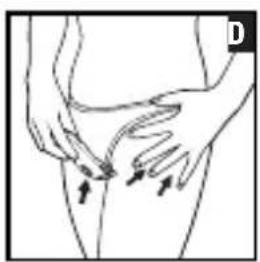
▶ Slowly slide the trimmer through the hair, in the direction of hair growth. (Diagram D)
If hair builds up in the trimmer comb during the trimming process, switch the unit off, remove the adjustable trimmer comb. Brush trimmer/rinse comb.
EDGING AND SHAPING
▶ Attach the precision trimmer.
Remove the trimmer comb attachment.
▶ Turn the bikini trimmer on.
▶ Hold the trimmer at a right angle to your skin and press down gently.
▶ Edge and shape the area as desired.
USING THE SHAVER ATTACHMENT
▶ Attach the shaving head and turn the bikini trimmer on.
▶ Stretch your skin with your free hand so hairs stand upright.
▶ Hold the shaving head to your skin. Only apply light pressure on the shaving head while shaving and shave against hair growth. (Diagram D)
Tips for best results
- If you have not shaved for a while, use the trimmer before shaving.
- After trimming, go over trimmed areas with the shaver foil to get a smooth, clean fi nish .
- Since all hairs do not grow in the same direction, you may want to try different trimming positions (i.e. upwards, downwards or across) for better results.
- Regularly exfoliate after trimming to avoid in-growing hair.
NOTE: The miniscreen shaver is designed to shave small detailed areas. It was not designed to shave large surfaces. For a close comfortable shave of these areas use one of Remington's female shavers.

STORAGE
YOUR STORAGE BAG
The easiest way to store your shaver and its parts is in the storage bag provided. It's also great for travelling! Ensure that your shaver is dry before storing.

To ensure the long lasting performance of your trimmer, clean regularly. The easiest and the most hygienic way to clean the shaver is by rinsing the product head after use with warm water. Always keep the protective cap on the shaving attachment and keep trimmer in the “off” position when not in use.
AFTER EACH USE
TO CLEAN THE COMB AND TRIMMER
Remove the adjustable trimmer comb and cutter assembly.
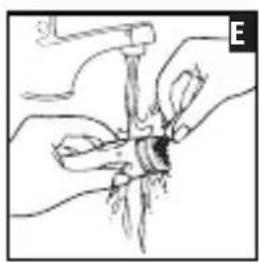
- Rinse the accumulated hair from cutters and shake of excess water. Alternatively, use a small soft brush. (Diagram E)
Leave the cutting assembly open to let the cutters dry completely.
TO CLEAN THE MINISCREEN FOIL
▶ Hold the trimmer in one hand, with the other press the foil release buttons and gently pull the foil assembly off the trimmer.
▶ Blow any loose debris from the foil.
▶ Brush or rinse the accumulated hair from the cutter assembly.
Leave the head assembly open to let the shaver dry completely.
To replace the foil assembly, hold either side of the foil and push down until you hear a click and it is firmly attached. Do not press down on the foil.
TO CLEAN THE MAIN UNIT
▶ Wipe the main unit with a damp cloth and dry immediately.
CAUTION:
▶ Do not submerge the trimmer in water.
▶ Ensure that the trimmer is turned off (and not attached to the mains) when cleaning.
▶ Do not clean the shaving foil with the brush.
At regular intervals, put a drop of sewing machine oil onto the foils and cutters head. Remove excess.
REPLACING THE FOIL & CUTTERS
To ensure the continued highest quality performance from your shaver, we recommend that the foil and cutter are replaced regularly.
■ REMOVING THE FOILS AND CUTTERS
▶ Gently push the buttons either side of the shaving foil. With the other hand lift the shaver cover.
REPLACING THE CUTTER ASSEMBLY
▶ Hold the trimmer in one hand. With your other hand, insert the lower part of the cutter assembly into the trimmer, push down the cutter until firmly attached.
Signs that your foils and cutters need replacing:
- Irritation: As foils get worn, you may experience skin irritation.
▶ 2. Pulling: As the cutters wear, your shave may not feel as close and you may feel your cutter pulling your hair.
- Wear through: You may notice that the cutters have worn through the foils. Do not use until foil has been replaced.
Replacement cutters and foils available. Model: SP03

IMPORTANT SAFETY INSTRUCTIONS
WARNING – TO REDUCE THE RISK OF BURNS, ELECTROCUTION, FIRE, OR INJURY TO PERSONS:
An appliance should never be left unattended when plugged in to a power outlet.
▶ Always unplug your unit when it is not in use, unless it is being recharged.
▶ Keep the power plug and cord away from heated surfaces.
Make sure the power plug and cord does not get wet. Do not reach for your unit if it has fallen into water – immediately unplug it from the electrical outlet.
▶ Do not plug or unplug the shaver with wet hands.
Do not store your unit where it can fall into a tub or sink of water.
Do not wrap the cord of your adaptor around the unit.
Do not use the product with a damaged cord. A replacement can be obtained via our International Service Centres.
▶ Charge, use and store the product at a temperature between 15°C and 35°C.
▶ Always unplug from the mains when cleaning or when being used under running water.
▶ Only use the parts supplied with the appliance. Use of non Remington parts with this product may give rise to a hazardous condition.
This product is for cordless use only. Do not use your Trimmer while it is plugged into the mains.
Do not submerge.
▶ Keep away from children.

PROTECT THE ENVIRONMENT
This appliance contains a rechargeable Nickel Metal-Hydride (NiMH)battery.
To protect the environment, do not dispose of the appliance or the battery in the household waste as restrictions exist in most countries. Adhere to any national or local regulations for collection and disposal that apply to your specific location.
CAUTION: Do not put in fire or mutilate your battery packs as they may burst or release toxic materials.

WARRANTY
Full 2 year warranty. We warrant this product against any defects that are due to faulty material or workmanship for a 2 year period from the original date of consumer purchase, this is offered over and above your normal consumer statutory rights. This warranty does not include damage to the product resulting from accident or misuse. If the product should become defective within the warranty period, we will repair it or elect to replace it free of charge. Simply mail the appliance to your nearest Service Centre, with proof of purchase.
For further information and advice please contact your nearest International Service Centre.
WYMIANA FOLII I NOŻYKÓW
Mo.-Fr. 9 a.m. - 5 p.m. Central European Time (free call)
E-Mail: service@remington-europe.com
www.remington-europe.com
▶ SPAIN
PORTUGAL
MALTA
UNITED KINGDOM
ČESKÁ REPUBLIKA
IRELAND
MAGYARORSZÁG
POLSKA
РОССИЯ
TÜRKİYE
U.A.E.
CROATIA
CYPRUS
ROMANIA
SLOVENIA
GREECE
+34 902 10 45 17; 08.00 - 13.00; lunes - viernes (Posventa)
+34 932 070 166 (Información al consumidor final)
+351 299 942 915;
renase@presat.net
Tel. +356 21 664488
Miller Distributors Ltd, Miller House - Airport Way, Tarxien Road, Luqa LQA 1814, www.millermalta.com
Tel. +44 0800 212 438 (free call)
Spectrum Brands (UK) Limited, Fir Street, Failsworth, Manchester, M35 0HS, UNITED KINGDOM, www.remington.co.uk
Tel. +420 487 754 605
VARTA Baterie spol. s r. o., Jindřicha z Lipé 108, 470 01 Česká Lípa, ČESKÁ REPUBLIKA, www.cz.remington-europe.com
Tel. +353 (0) | 460 4711
Remington Consumer Products, Unit 7C, Riverview Business Park, New Nangor Road, Dublin 22, IRELAND, www.remington.co.uk
Tel. +36 | 3300 404
Remington Szervizközpont, 1138 Budapest, Váci út 136/a, www.remington.hu
Tel. +48 22 328 11 50
Varta Baterie Sp. z o.o., ul. Fabryczna 5, 00-446 Warszawa, POLSKA, Fax +48 22 328 11 61, www.pl.remington-europe.com
Тел. 8 800 100 8011
ООО «КОМПАНИЯ «ПРОФСЕРВИС», РОССИЯ.
115201, Москва, 1-й Варшавский проезд, д. la, стр.3, www.remington-europe.com
Tel. +90 212 659 01 24
Varta Pilleri Ticaret Ltd. Şti., İstoç 25.Ada Sonu Kuzey Plaza Kat I D4, 34217, Mahmut-bey/İstanbul, TÜRKİYE, Fax +90 212 659 48 40, www.tr.remington-europe.com
Tel. +9714 355 5474
V.R.R Trading (L.L.C), Khalid Bin Waleed Street, Al Jawhara Bldg 504, Dubai, U.A.E., www.remington-europe.com
Tel. +385 12481111
Alca Zagreb d.o.o., Zitnjak bb, 10000 Zagreb, Croatia, www.remington-europe.com
Tel. +357 24-532220
Thetaco Traders Ltd, Eletherias Ave 75, 7100 Aradippou, Cyprus, www.remington-europe.com
Tel. +40 21 411 92 23
Best Expert Service Jak SRL, 4th, Drumul Taberei St., sector 6, Bucharest, Romania, www.remington-europe.com
Tel. +386 (0) | 561 66 30
Ježek Trgovina Servis d.o.o., Cesta 24.Junija 21, 1231 LJUBLJANA - Črnuče Republika Slovenija, www.remington-europe.com
Tel. +30 210 94 10 699
D. & J. DAMKALIDIS S.A., Import Agencies, 44 Zefyrou str., www.remington-europe.com