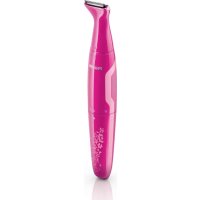
BikiniGenie HP6381 - Shaver PHILIPS - Free user manual and instructions
Find the device manual for free BikiniGenie HP6381 PHILIPS in PDF.
Download the instructions for your Shaver in PDF format for free! Find your manual BikiniGenie HP6381 - PHILIPS and take your electronic device back in hand. On this page are published all the documents necessary for the use of your device. BikiniGenie HP6381 by PHILIPS.
USER MANUAL BikiniGenie HP6381 PHILIPS
Always here to help you
Register your product and get support at
Congratulations on your purchase and welcome to Philips!
To fully benet from the support that Philips offers, register your
product at www.philips.com/welcome.
General description (Fig. 1)
1 Precision trimming head
6 Battery compartment cover
8 Shaving head (HP6383/HP6382 only)
9 Short trimming comb, 4mm - S (HP6383/HP6382 only)
10 Long trimming comb, 6mm - L (HP6383 only)
11 Cleaning brush (HP6383/HP6382 only)
12 1.5V R6 AA battery
Read this user manual carefully before you use the appliance and save it for
- This appliance can be used by children aged from 8 years and above
and persons with reduced physical, sensory or mental capabilities or
lack of experience and knowledge if they have been given supervision
or instruction concerning use of the appliance in a safe way and
understand the hazards involved. Children shall not play with the
appliance. Cleaning and user maintenance shall not be made by
children without supervision .
- Do not use the appliance when one of the attachments, combs or the
appliance itself is damaged or broken, as this may cause injury.
- For hygienic reasons, the appliance should only be used by one person.
- Only run the appliance on one 1.5V R6 AA battery.
- Remove the battery from the appliance if you are not going to use it
- This appliance is only intended for shaving (HP6383/ HP6382 only) and
trimming the bikini line. Do not use it for any other purpose.
- Do not clean the appliance with water that is hotter than shower
temperature (max. 40°C).
- Be careful with hot water. Always check if the water is not too hot, to
prevent your hands from getting burnt.
Use and store the appliance at a temperature between 10°C and 30°C.
Compliance with standards
- This Philips appliance complies with all applicable standards and
regulations regarding exposure to electromagnetic elds.
ENGLISH- This appliance complies with the internationally approved IEC safety
regulations and can be safely used in the bath or shower and cleaned
Inserting the battery
Make sure your hands and the appliance are dry when you insert the
One 1.5V R6 AA battery has an operating time of up to 2 hours.
1 Make sure the appliance is in ‘off’ (0) position.
2 Turn the battery compartment cover clockwise until the setting
indicator is in ‘open’ position.
3 Pull the battery compartment cover downwards to remove it.
4 Put the battery in the battery compartment. Make sure the + and
- marks on the battery match the + and - marks on the battery
Note: The appliance does not work if the battery is not inserted properly.
5 Put the battery compartment cover back onto the appliance
ENGLISH 56 Turn the battery compartment cover anticlockwise until the setting
indicator is in ‘off’ (0) position.
To avoid damage due to battery leakage:
- If you do not use the appliance on a regular basis, remove the battery
when you store the appliance.
Danger: If the battery leaks, remove it carefully. Do not let the leaking
uid come into contact with bare skin.
Attaching and detaching attachments
Note: The precision trimming head and shaving head can both be attached and
detached in the same way.
1 To attach one of the attachments, align the locking indicator with the
‘unlocked’ indication (upward arrowhead) and put the attachment
on the handle. Then turn the attachment clockwise until the locking
indicator points to the ‘locked’ indication (I).
2 To detach the attachment turn it anticlockwise until the locking
indicator points to the ‘unlocked’ indication (upward arrowhead).
Then pull the attachment off the handle.
Before you use the appliance for the rst time, test it on a small area of
For optimal performance, we advise you to use it on dry skin. You can safely
use the appliance on wet skin. If you want to use it on wet skin, we advise
you to use a small amount of shower gel or foam for a gentler trim or shave.
To ensure a good result during wet use, clean the shaving or precision
trimming head with water regularly during use.
If any irritation or allergic reaction occurs, discontinue use immediately.
Do no use the appliance on sensitive or irritated skin.
Note: Do not move the appliance too fast and do not press it too hard onto
the skin. Make smooth and gentle movements.
ENGLISH6Trimming the bikini line with precision trimming head and
comb (HP6383/HP6382 only)
Use the precision trimming head with the short comb (4mm - HP6383/
HP6382 only) or the long comb (6mm - HP6383 only) to trim your bikini line.
For optimal performance, use the appliance with the comb on dry skin.
1 Put the precision trimming head on the appliance (see section
‘Attaching and detaching the attachments’ in chapter ‘Preparing for
2 Put the comb on the back of the precision trimming head and push it
with your ngers untill you hear a click.
3 Switch on the appliance. Turn the battery compartment cover from
the ‘off’ position (0) to the ‘on’ position (I)
4 Move the appliance slowly and with light pressure on the skin against
the direction of hair growth.
Note: Make sure that the at part of the comb always touches the skin to
obtain an even result.
Note: To make trimming easier, stretch the skin with your free hand during
Note: Do not press the appliance with the comb onto the skin too hard. This
may cause the appliance to trim the hairs shorter than the length indicated on
Note: In areas where the hair grows in different directions, move the appliance
upwards, downwards and sideways.
5 Regularly remove cut hairs from the comb. If a lot of hairs have
accumulated in the comb, detach the comb from the appliance and
blow and/or shake the hairs out of it.
6 To switch off the appliance, turn the battery compartment cover
from the ‘on’ position (I) to the ‘off’ position (0).
7 To detach the comb, put your nger under the bottom edge of the
comb and pull it off the appliance.
ENGLISH 7Styling with the precision trimming head
You can use the precision trimming head to style your bikini line. With the
precision trimming head without the comb you shorten your hair to a
For optimal performance, only use the precision trimming head on dry skin.
1 Detach any comb from the precision trimming head.
2 Switch on the appliance.
3 Touch the skin lightly with the precision trimming head and move it
against the direction of hair growth.
Note: You can use the precision trimming head with the trimmer teeth pointing
towards the skin. You can also use it with the at part touching the skin and
the teeth pointing in the direction in which you move the appliance.
4 Switch off the appliance.
Shaving with the shaving head (HP6383/HP6382 only)
- Use the shaving head to remove stubbles along contoured edges of
your bikini line. This allows you to keep your bikini line smooth and
- If you do not use the appliance frequently, pre-trim the area to be
shaved with the precision trimming head (see section ‘Styling with the
precision trimming head’ in this chapter)
- The shaving head only works when the hairs have been pre-trimmed
ENGLISH81 Put the shaving head on the appliance.
2 Switch on the appliance.
3 Place the shaving head at a 45° angle onto the skin and move the
appliance slowly and smoothly against the direction of hair growth.
4 Make sure that the whole shaving head is in contact with the skin.
As hairs grow in different directions move the appliance in different
directions against the hair growth.
5 Switch off the appliance.
Cleaning and maintenance
Clean the attachments after each use.
Avoid too much pressure and impacts with hard objects on the top of the
trimming head and shaving head, as this may cause damage.
Never use compressed air, scouring pads, abrasive cleaning agents or
aggressive liquids such as petrol or acetone to clean the appliance.
Tip: Rub a drop of sewing machine oil onto the trimming and shaving unit
twice a year to extend the lifetime of the cutting element.
ENGLISH 9Cleaning the precision trimming head and combs (HP6383/
1 Make sure the appliance is switched off.
2 Detach any comb and/or attachment from the appliance.
3 Blow and/or shake out hair that has accumulated at the precision
trimming head and/or combs.
4 Clean the trimming head and the combs under the tap.
Note: You can also use the cleaning brush to clean the precision trimming head
5 Let all parts dry completely before you use the appliance again.
Store the appliance in a dry place.
Cleaning the shaving head (HP6383/HP6382 only)
Note: The shaving foil is very delicate. Handle it carefully. Replace the shaving
foil if it is damaged.
1 Make sure the appliance is switched off.
2 Detach the shaving head from the appliance.
3 To detach the shaving foil unit from the shaving head, press the two
release buttons with one hand and remove the shaving foil unit with
4 Clean the cutter and the inside of the shaving foil unit carefully with
the cleaning brush and under the tap.
Note: Do not use a towel to dry the shaving head, to avoid damage.
5 Let the shaving head air-dry completely before you assemble and
ENGLISH10Environment
- Batteries contain substances that may pollute the environment.
Remove the battery when it is empty or when you discard the
appliance. Do not throw away the battery with the normal household
waste, but hand it in at an ofcial collection point.
- Do not throw away the appliance with the normal household waste
at the end of its life, but hand it in at an ofcial collection point for
recycling. By doing this, you help to preserve the environment.
Guarantee and support
If you need information or support, please visit the Philips website at
www.philips.com/support or read the separate worldwide guarantee leae