
Arcitec RQ1062 - Shaver PHILIPS - Free user manual and instructions
Find the device manual for free Arcitec RQ1062 PHILIPS in PDF.
User questions about Arcitec RQ1062 PHILIPS
0 question about this device. Answer the ones you know or ask your own.
Ask a new question about this device
Download the instructions for your Shaver in PDF format for free! Find your manual Arcitec RQ1062 - PHILIPS and take your electronic device back in hand. On this page are published all the documents necessary for the use of your device. Arcitec RQ1062 by PHILIPS.
USER MANUAL Arcitec RQ1062 PHILIPS
text_image
PHILIPS A B C D E F G H I J K LENGLISH 6
FRANÇAIS 23
INDONESIA 42
한국어 60
BAHASA MELAYU 77
ภาษาไทย 95
TIÊNG VIÊT 110
繁體中文 127
简体中文 143
Introduction
Thank you for buying this Philips shaver. Please read this user manual, as it contains information about the wonderful features of this shaver as well as some tips to make shaving easier and more enjoyable.
Important
Read this user manual carefully before you use the shaver, the Power Pod and the charger. Save the user manual for future reference.
Danger
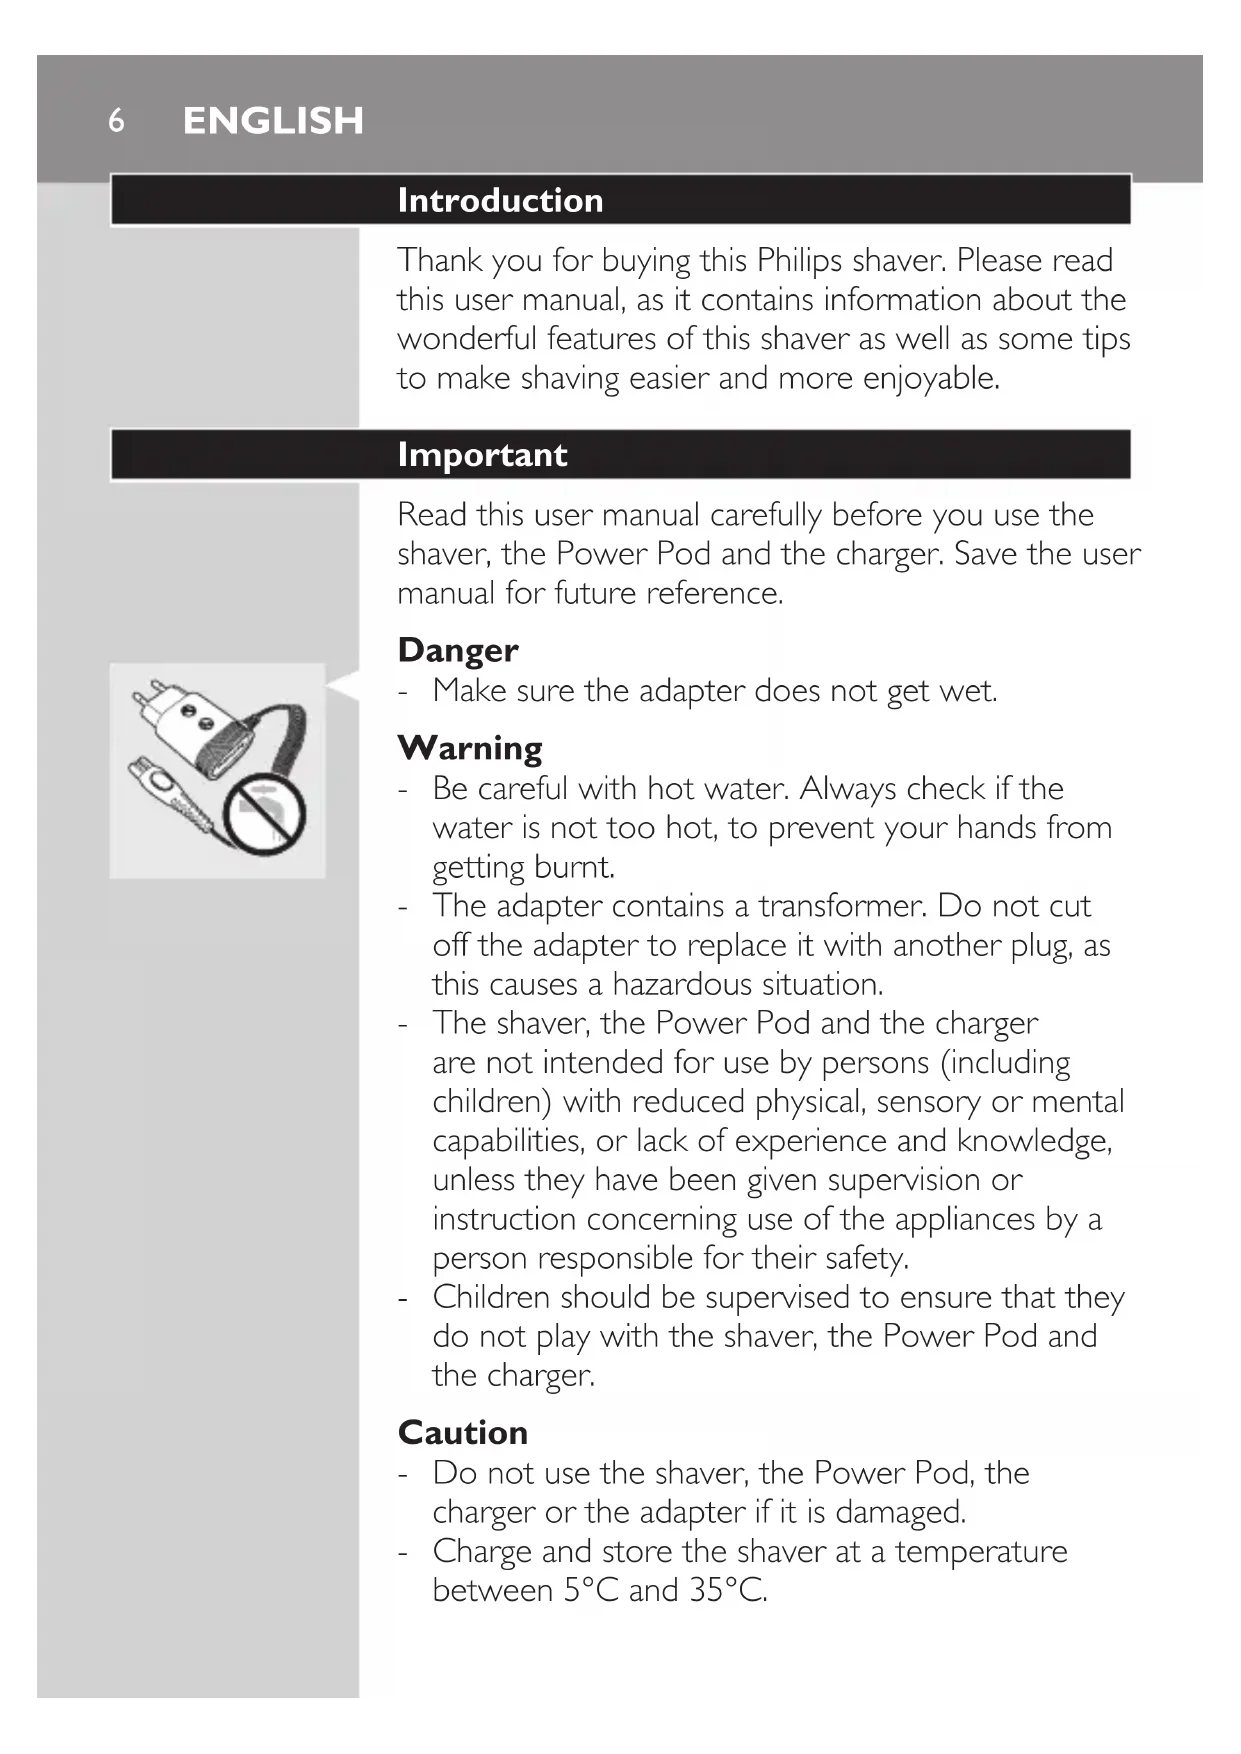
- Make sure the adapter does not get wet.
Warning
- Be careful with hot water. Always check if the water is not too hot, to prevent your hands from getting burnt.
- The adapter contains a transformer. Do not cut off the adapter to replace it with another plug, as this causes a hazardous situation.
- The shaver, the Power Pod and the charger are not intended for use by persons (including children) with reduced physical, sensory or mental capabilities, or lack of experience and knowledge, unless they have been given supervision or instruction concerning use of the appliances by a person responsible for their safety.
- Children should be supervised to ensure that they do not play with the shaver, the Power Pod and the charger.
Caution
- Do not use the shaver, the Power Pod, the charger or the adapter if it is damaged.
- Charge and store the shaver at a temperature between 5^ C and 35^ C.

natural_image
Illustration of a plug and plug with a prohibition symbol (no text or labels)
- Always put the protection cap on the shaver to protect the shaving heads when you are travelling.
- Never use scouring pads, abrasive cleaning agents or aggressive liquids such as petrol or acetone to clean the appliance.
- Only use the adapter supplied.
- If the adapter is damaged, always have it replaced with one of the original type in order to avoid a hazard.
- Never immerse the Power Pod in water, nor rinse it under the tap.
- Never immerse the charger in water, nor rinse it under the tap.
Compliance with standards
- The shaver complies with the internationally approved IEC safety regulations and can be safely cleaned under the tap.
- These Philips appliances comply with all standards regarding electromagnetic fields (EMF). If handled properly and according to the instructions in this user manual, the appliances are safe to use based on scientific evidence available today.
General
- The adapter transforms 100-240 volts to a safe low voltage of less than 24 volts.
Overview (Fig. 5)
A Protection cap
B Shaving unit
© Trimmer
D Trimmer on/off slide
E Shaver (RQ1090/RQ1062/RQ1060/RQ1052/RQ1050)
F Shaver on/off button
G Display
Power Pod
Cleaning brush
J Adapter
K Small plug
Charger
The display

text_image
LETISSION 85 MINUTES LEFTBefore you use the shaver for the first time, remove the protective foil from the display.
The five shaver types (RQ1090, RQ1062, RQ1060, RQ1052 and RQ1050) have different displays, which are shown in the figures below.
- RQ1090

natural_image
Pure diagram of a U-shaped container with internal compartments and arrows indicating flow or movement (no text or symbols)- RQ1062/RQ1060

text_image
f! D B ♥- RQ1052/RQ1050
Charging
- Charging takes approx. 1 hour.

- When you place the shaver in the Power Pod or in the charger, the display automatically switches off after approx. 5 hours.
RQ1090
- When the shaver is charging, the minutes indication and the plug symbol flash.
- The shaving minutes increase until the shaver is fully charged.
RQ1062/RQ1060
- When the shaver is charging, the plug symbol flashes.
- First the arrowheads of the bottom charge level flash, then the arrowheads of the second level flash, and so on until the shaver is fully charged.
RQ1052/RQ1050
- When the shaver is charging, the battery symbol flashes blue.
Battery fully charged

RQ1090
- When the battery is fully charged, the minutes indication is visible on the display and the plug symbol disappears from the display.
RQ1062/RQ1060
- When the battery is fully charged, all arrowheads and all charge level lights light up blue continuously and the plug symbol disappears from the display.
ENGLISH10

natural_image
Simple line drawing of a U-shaped object with internal dashed lines and an arrow, no text or symbols present.- When you remove the shaver from the Power Pod or the charger, the arrowheads of the top charge level light up blue to indicate that the battery is full.

natural_image
Diagram showing a battery icon and a starburst symbol inside a device (no text or labels)RQ1052/RQ1050
- When the battery is fully charged, the battery symbol lights up blue continuously.
Battery low

text_image
INTUATION 05RQ1090
- When the battery is almost empty (when there are only 5 or fewer shaving minutes left), the minutes indication and the plug symbol start to flash. - When you switch off the shaver, the shaving minutes and the plug symbol continue to flash for a few more seconds. You hear a beep when there are no minutes left.

natural_image
Diagram showing a battery icon above a curved structure with radiating lines and dots, no text or symbols present.RQ1062/RQ1060
- When the battery is almost empty (when there are only 5 or fewer shaving minutes left), the battery symbol flashes red and the arrowheads of the bottom charge level flash blue. - When you switch off the shaver, the battery symbol and the arrowheads of the bottom charge level continue to flash for a few seconds.

natural_image
Diagram showing a battery icon and a power button with a central indicator (no text or symbols)RQ1052/RQ1050
- When the battery is almost empty (when there are only 5 or fewer shaving minutes left), the battery symbol lights up red.
- When you switch off the shaver, the battery symbol starts to flash for a few seconds.
Remaining battery capacity

text_image
LINTUUM 85 MINIRQ1090
- The remaining battery capacity is indicated by the number of shaving minutes shown on the display.

natural_image
Simple line drawing of a U-shaped object with internal dashed lines and arrows, no text or symbols present.RQ1062/RQ1060
- The remaining battery capacity is indicated by the flashing arrowheads of a particular charge level
Clean shaver

text_image
Electrical diagram showing a switch symbol and a 32-pin LED display with power connectionsFor optimal shaving performance, we advise you to clean the shaver after every use.
- The tap symbol flashes to remind you to clean the shaver.
Note: The displays of types RQ1062, RQ1060, RQ1052 and RQ1050 look different but show the same indication.
Replace shaving unit
For maximum shaving performance, we advise you to replace the shaving unit every two years.

text_image
LITTED FAIR 20" MUSKING- To remind you to replace the shaving unit, the shaving unit symbol flashes (all types) and you hear a beep when you switch off the shaver (RQ1090 only). This happens at the end of 7 successive shaves to remind you to replace the shaving unit.
Note: The displays of types RQ1062, RQ1060, RQ1052 and RQ1050 look different but show the same indication.
Travel lock
You can lock the shaver when you are going to travel. The travel lock prevents the shaver from being switched on by accident.

text_image
Diagram showing a hand interacting with a digital device displaying '80' and a lock icon, indicating security or authentication.Activating the travel lock
1 Press the on/off button for 3 seconds to enter the travel lock mode.
The lock symbol appears on the display (all types) and you hear a beep (RQ1090 only) to indicate that the travel lock has been activated.
Note: The displays of types RQ1062, RQ1060, RQ1052 and RQ1050 look different but show the same indication.
Deactivating the travel lock
1 Press the on/off button for 3 seconds.
The motor starts running to indicate that the travel lock has been deactivated.
The shaver is now ready for use again.
Note: When you place the shaver in the plugged-in Power Pod or charger, the travel lock is automatically deactivated.
Blocked shaving heads

text_image
Diagram showing three labeled icons: a faucet with a handle, a connector pin, and a three-pin connector, likely illustrating a mechanical or electrical component layout.- If the shaving heads are blocked, the shaving unit symbol and the tap symbol with exclamation mark flash. In this case, the motor cannot run because the shaving heads are soiled or damaged.
Note: The displays of types RQ1062, RQ1060, RQ1052 and RQ1050 look different but show the same indication.
- When this happens, you have to clean the shaving unit or replace it.
- The shaving unit symbol and the tap symbol with exclamation mark continue to flash until you unblock the shaving heads.
Charging
Charging takes approx. 1 hour.
A fully charged shaver has a shaving time of up to 65 minutes, which is enough for approx. 21 shaves. The actual shaving time is calculated by the shaver. If you have a heavy beard, the shaving time may be less than 65 minutes. The shaving time may also vary over time, depending on your shaving behaviour and beard type.
Quick charge
After the shaver has charged for 5 minutes, it contains enough energy for one shave.
Charging in the Power Pod

natural_image
Simple line drawing of a tool tip emerging from a conical tip (no text or symbols)1 Put the small plug in the Power Pod.
2 Put the adapter in the wall socket.

text_image
Diagram illustrating a hand holding a device with labeled parts and directional arrows indicating motion or force.3 Pull at the top of the lid (1) and remove it (2).

text_image
Diagram showing two steps of a robotic manipulation or tool operation, labeled ① and ② with arrows indicating movement.4 First insert the top of the shaver into the Power Pod (1) and then press the bottom part into the Power Pod (2).
Note: The shaver cannot be placed in the Power Pod when the protection cap is on the shaving unit.
The display shows that the shaver is charging (see chapter ‘The display’).
Charging in the charger

natural_image
Illustration of a toothbrush with a black arrow indicating rotation (no text or symbols)1 Put the small plug in the charger.
2 Put the adapter in the wall socket.
3 Place the shaver in the charger. Press the shaver tightly into the holder to lock into place.
Note: RQ1090 only: If the shaver is placed correctly, you hear a beep.
The display shows that the shaver is charging (see chapter ‘The display’).
Using the shaver
Shaving
1 Press the on/off button once to switch on the shaver.
The display lights up for a few seconds.

natural_image
Line drawing of a person applying pressure to their neck area with arrows indicating direction (no text or symbols)2 Move the shaving heads over your skin. Make both straight and circular movements.
- Shaving on a dry face gives the best results.
- Your skin may need 2 or 3 weeks to get accustomed to the Philips shaving system.
3 Press the on/off button once to switch off the shaver.
The display lights up for a few seconds and then shows the remaining battery capacity (RQ1090/RQ1062/RQ1060 only).
Trimming

natural_image
Illustration of a hand holding a small object with an upward arrow, no text or symbols presentYou can use the trimmer to groom your sideburns and moustache.
1 Pull the shaving unit off the shaver.
2 Press the on/off button once to switch on the shaver.
The display lights up for a few seconds.
3 Press the trimmer slide forwards to slide out the trimmer.
4 You can now start trimming.
5 Press the trimmer slide backwards to retract the trimmer.
6 Press the on/off button once to switch off the shaver.
The display lights up for a few seconds and then shows the remaining battery capacity (RQ1090/RQ1062/RQ1060 only).

natural_image
Diagram of a mechanical component with an arrow indicating direction (no text or symbols)
text_image
Diagram illustrating a process with two steps: adding a light bulb to a container, then clicking a button on a hand.7 Insert the lug of the shaving unit into the slot in the top of the shaver (1). Then press the shaving unit downwards (2) to attach it to the shaver ('click').
Cleaning and maintenance
Never use scouring pads, abrasive cleaning agents or aggressive liquids such as petrol or acetone to clean the appliance.
- Be careful with hot water. Always check if the water is not too hot, to prevent your hands from getting burnt.
- Clean the shaver after every shave for optimal shaving performance.
- You can clean the outside of the shaver with a damp cloth.
- Regular cleaning guarantees better shaving performance.
Cleaning the shaving unit under the tap

natural_image
Illustration of a mechanical device with a hand and gear, showing motion or assembly (no text or symbols)1 Switch off the shaver.
2 Pull open the three shaving heads one by one.

natural_image
Illustration of a faucet cleaning process with a tool and spray bottle (no text or symbols)3 Rinse all three shaving heads and all three hair chambers under a hot tap for 30 seconds.
Be careful with hot water. Always check if the water is not too hot, to prevent your hands from getting burnt.

text_image
Diagram illustrating a hand cleaning water surface with labeled components including a faucet and bottle, alongside a magnified view of the water.4 Carefully shake off excess water and leave the shaving heads open to let the shaving unit dry completely.
Never dry the shaving unit with a towel or tissue, as this may damage the shaving heads.
For thorough cleaning, switch on the shaver and immerse the shaving unit in hot water with some liquid soap for 30 seconds. You can also clean the shaving unit with some alcohol.
Cleaning the shaving unit with the brush supplied

natural_image
Illustration of a mechanical device with a rotating arm and handle (no text or symbols)1 Switch off the shaver.
2 Pull open the three shaving heads one by one.

natural_image
Illustration of a robotic arm interacting with a robotic device (no text or symbols visible)3 Clean the shaving heads and the hair chambers with the brush supplied.
4 Close the shaving heads.
Cleaning the trimmer with the brush supplied
Clean the trimmer every time you have used it.
1 Switch off the shaver.

natural_image
Pure mechanical part diagram without any text, numbers, or symbols2 Press the trimmer slide forwards to slide out the trimmer.

natural_image
Close-up of a mechanical component with arrows indicating force or movement (no text or symbols)3 Clean the trimmer with the short-bristled side of the brush supplied. Brush up and down along the trimmer teeth.
4 Switch the shaver on and off and repeat step 3.
5 Press the trimmer slide backwards to retract the trimmer.
Tip: For optimal trimmer performance, lubricate the trimmer teeth with a drop of sewing machine oil every six months.
Storage

natural_image
Diagram of a mechanical lever mechanism with an arrow indicating motion (no text or symbols present)There are two ways to store the shaver or to take it with you when you travel:
- put the shaver in the Power Pod or in the charger. Make sure the protection cap is not on the shaving unit.
- slide the protection cap onto the shaving unit to prevent damage to the shaving heads.
Replacement
Replace the shaving unit when the shaving unit symbol appears on the display. Replace a damaged shaving unit right away.
For maximum shaving performance, we advise you to replace the shaving unit every two years.

natural_image
Illustration of a hand holding a small object with an upward arrow, no text or symbols presentOnly replace the shaving unit with an original RQ10 Philips arcitec Shaving Unit.
1 Pull the old shaving unit off the shaver.

text_image
① ① ② CLICK2 Insert the lug of the new shaving unit into the slot in the top of the shaver (1). Then press the shaving unit downwards (2) to attach it to the shaver ('click').
Ordering parts
The following parts are available:
- HQ8500 adapter
- RQ10 Philips arcitec Shaving Unit
- HQ110 Philips Shaving Head Cleaning Spray (not available in China)
Environment

natural_image
Symbol of a trash bin crossed with a diagonal line and a horizontal bar below (no text or numbers present)- Do not throw away the appliances with the normal household waste at the end of their life, but hand them in at an official collection point for recycling. By doing this, you help to preserve the environment.

natural_image
Symbol of a trash bin crossed with a diagonal line, representing waste or discharge (no text or numbers present)- The built-in rechargeable shaver battery contains substances that may pollute the environment. Always remove the battery before you discard or hand in the shaver at an official collection point. Dispose of the battery at an official collection point for batteries. If you have trouble removing the battery, you can also take the appliance to a Philips service centre. The staff of this centre will
remove the battery for you and will dispose of it in an environmentally safe way.
Disposal of the shaver battery
Only remove the battery when you discard the shaver. Make sure the battery is completely empty when you remove it.

natural_image
Illustration of a curved object with three small circular features and a magnified inset showing a small figure (no text or symbols)1 Remove the shaver from the Power Pod or the charger.
2 Let the shaver run until it stops.
3 Pull the shaving unit off the shaver.
4 Undo the 2 screws on the back of the shaver.
5 Insert a screwdriver between the front and back panel to open the shaver.

natural_image
Diagram of a mechanical component with an upward arrow indicating motion or force (no text or symbols present)6 Remove the side panels.

natural_image
Illustration of a hand pressing down on a curved mechanical component with a magnified inset showing internal components (no text or symbols)7 Unscrew the 3 screws on the inside of the shaver and remove the back cover.

natural_image
Top-down schematic of a vehicle with wheels and a small inset showing a hand holding a valve (no text or symbols)
text_image
Diagram showing a hand pressing a component labeled with number ① and ②, likely illustrating a mechanical or electrical process.8 Pull the wires out of the motor unit and remove the battery.
Be careful, the battery strips are sharp.
Do not put the shaver back into the plugged-in Power Pod or charger after you have removed the battery.
Guarantee & service
If you need information or if you have a problem, please visit the Philips website at www.philips.com or contact the Philips Customer Care Centre in your country (you find its phone number in the worldwide guarantee leaflet). If there is no Customer Care Centre in your country, go to your local Philips dealer or contact the Service Department of Philips Domestic Appliances and Personal Care BV.
Guarantee restrictions
The shaving heads (cutters and guards) are not covered by the terms of the international guarantee because they are subject to wear.
Frequently asked questions
1 Why doesn't the shaver shave as well as it used to?
- The shaver may not be properly clean. Switch on the shaver and immerse the shaving unit in hot water with some liquid soap (see chapter 'Cleaning and maintenance').
- The shaving heads may be damaged or worn. Replace the shaving unit (see chapter 'Replacement').
2 Why doesn't the shaver work when I press the on/off button?
- The battery may be empty. Recharge the battery (see chapter ‘Charging’).
- The travel lock may be activated. Press the on/off button for 3 seconds to deactivate the travel lock.
- The shaving unit is soiled or damaged to such an extent that the motor cannot run. In this case, the shaving unit symbol, the tap symbol and the exclamation mark flash. When this happens, you have to clean the shaving unit or replace it. Immerse the shaving unit in hot water with some liquid soap.
- The temperature of the shaver may be too high. In this case, the shaver does not work and the exclamation mark on the display flashes. As soon as the temperature of the shaver has dropped sufficiently, you can switch on the shaver again.
3 Why is the shaver not fully charged after I charged it in the charger/Power Pod?
- You may not have placed the shaver in the charger/Power Pod properly. Make sure you press the shaver until it locks into place.
Introduction
natural_image
Illustration of a plug and connector with a prohibition symbol (no text or labels)
natural_image
Illustration of a bone fragment with a prohibition symbol (no text or labels)
natural_image
Illustration of a pushpin with a circular stopper and a prohibition symbol (no text or labels)
natural_image
Line drawing of a handheld electric toothbrush with a water tap symbol (no text or labels)Attention
natural_image
Diagram of a vehicle's rearview and side profile with directional arrows and lock symbols (no text or labels)- RQ1062/RQ1060
FRANÇAIS26

text_image
Diagram showing a vertical panel with four labeled icons: a plus, a minus sign, a lock, and a heart symbol.- RQ1052/RQ1050
Charge

text_image
05 MINISSIONtext_image
Diagram showing electrical connections with a lightning bolt symbol and circuit lines, likely illustrating a power or current measurement setup.RQ1062/RQ1060
natural_image
Diagram of a device with battery icon and power button, no readable text or symbolsRQ1052/RQ1050
text_image
05 UNLESS FLOWFRANÇAIS28

natural_image
Diagram of a battery icon above a curved structure with internal lines and dots, no text or symbols presentnatural_image
Diagram showing a battery icon and a power button with radiating lines, no text or symbols presentRQ1052/RQ1050
text_image
65 MIN/100%RQ1090
natural_image
Simple line drawing of a U-shaped object with internal lines and a dashed arrow, no text or symbols present.RQ1062/RQ1060
text_image
Diagram showing a faucet symbol with power button and digital display, likely illustrating a circuit or control interface.text_image
Diagram showing three music-related icons: violin, musical note, and heart symbol with directional arrowstext_image
Diagram showing a hand inserting a lock into a digital device with a lock icon and display screentext_image
Diagram showing three labeled icons: a faucet with a handle, a connector labeled 'O', and a multi-pin connector.natural_image
Simple line drawing of a dental tool tip (no text or symbols)
text_image
Diagram showing two hands performing a manual task with labeled steps ① and ②, indicating a process with rotation arrows.text_image
Diagram showing two-step instructions for handling a mechanical component, labeled with arrows and numbered positions.natural_image
Illustration of a pair of hairbrushes on stands, showing head and neck movement (no text or symbols)natural_image
Illustration of a person applying pressure to their neck area with arrows indicating direction (no text or symbols)natural_image
Illustration of a hand holding a small object with an upward arrow, no text or symbols presentnatural_image
Pure mechanical component diagram without any text, numbers, or symbols
text_image
Diagram illustrating a process with two steps: adding a container and clicking a button, followed by a hand holding a tray.natural_image
Diagram of a mechanical device with a hand operating it, showing a rotating component (no text or symbols present)natural_image
Illustration of a faucet drain with water flowing from a pipe, showing spray and cleaning process (no text or symbols)text_image
Illustration showing a hand cleaning water with a faucet and bottle, accompanied by Chinese text labels.natural_image
Illustration of a mechanical device with a rotating arm and base mount (no text or symbols)natural_image
Illustration of a robotic arm gripping a tool, no text or symbols present
natural_image
Close-up of a mechanical component with a black arrow indicating a specific feature (no text or symbols visible)natural_image
Close-up of a hand holding a tool with arrows indicating movement or force (no text or symbols visible)natural_image
Diagram of a hand holding a small object with an arrow indicating motion (no text or symbols)Remplacement
text_image
Diagram illustrating a mechanical or robotic manipulation process with labeled steps and directional arrowsnatural_image
Symbol of a trash bin with crossed lines indicating no waste or restriction, and a solid black rectangle below (no text or symbols)
natural_image
Illustration of a baby swat with two arms and a small inset showing a baby's leg (no text or symbols)natural_image
Diagram of a mechanical component with an upward arrow indicating motion or force (no text or symbols present)natural_image
Illustration of a hand pressing down on a mechanical component with an inset showing a close-up of a component (no text or symbols present)
natural_image
Top-down schematic of a boat with visible wheels and a small inset showing a valve (no text or symbols)text_image
Diagram showing a hand using a tool to adjust or install a component, labeled with numbers 1 and 2 indicating specific parts.natural_image
Illustration of a plug and connector with a prohibition symbol (no text or labels)
text_image
8.5 MINUTES LEFTnatural_image
Pure diagram of a vertical container with internal flow arrows and small icons, no text or symbols present.- RQ1062/RQ1060

text_image
1 2 3 4- RQ1052/RQ1050
Pengisian daya

natural_image
Simple line drawing of a U-shaped object with internal dashed lines and an arrow, no text or symbols present.natural_image
Diagram showing a battery icon and a starburst symbol inside a device (no text or labels)RQ1052/RQ1050
natural_image
Diagram of a battery icon above a curved object with internal lines and dots, no text or symbols presentRQ1062/RQ1060
natural_image
Diagram showing a battery icon and a power button with a central indicator (no text or symbols)RQ1052/RQ1050
text_image
65 UNLESSRQ1090
natural_image
Simple line drawing of a U-shaped object with internal dashed lines and arrows, no text or symbols present.RQ1062/RQ1060
text_image
Diagram showing a pipe valve with directional arrow and a 32.8 digital display, likely indicating a control or monitoring device.text_image
Diagram showing three icons: a stylized eye, a musical note, and a lightbulb with directional arrows pointing to a central skull.Mengganti unit pencukur
text_image
Diagram showing a hand inserting a glucose meter into a device with an open lock icon and display screen displaying '88'.Mengaktifkan travel lock
text_image
Diagram showing three labeled icons: a faucet with a warning symbol, a three-pin connector, and a circular connector with a heart symbol.natural_image
Simple line drawing of a dental tool tip emerging from a tooth (no text or symbols)1 Taruh steker kecil dalam Power Pod.
2 Masukkan adaptor ke stopkontak dinding.

text_image
Diagram illustrating a hand holding a tool with labeled parts and directional arrows indicating motion or movement.text_image
Diagram showing two-step instructions for using a tool, labeled with arrows and numbered parts.natural_image
Illustration of a hand holding a device with a black arrow indicating rotation (no text or symbols)natural_image
Line drawing of a person applying a facial massage or pressure technique to their neck (no text or symbols)natural_image
Illustration of a hand holding a small object with an upward arrow, no text or symbols presentnatural_image
Close-up of a mechanical component with a black arrow indicating a specific feature (no text or symbols visible)text_image
① ① CLICK ②natural_image
Illustration of a hand holding a device with a circular component, showing a rotating arrow (no text or symbols)natural_image
Illustration of a faucet drain with water spray and a valve, showing fluid flow (no text or symbols)text_image
Diagram illustrating a hand pouring liquid into a container with a water outlet, accompanied by an icon showing a faucet and a bottle.
natural_image
Illustration of a mechanical device with a rotating arm and handle (no text or symbols)natural_image
Illustration of a robotic arm gripping a mechanical component (no text or symbols visible)natural_image
Diagram of a mechanical component with an arrow indicating direction (no text or symbols)natural_image
Diagram of a mechanical tool or device with an arrow indicating motion (no text or symbols present)natural_image
Illustration of a hand holding a small object with an upward arrow, no text or symbols presenttext_image
Diagram illustrating a process with labeled steps and a 'CLICK' button, likely from a software interface or tutorial.natural_image
Symbol of a trash bin crossed with no text or numbers, representing waste sorting or disposal (no text present)
natural_image
Illustration of a curved surface with three small circular features and a magnified inset showing a small object (no text or symbols)4 Lepaslah 2 sekrup di belakang alat cukur.

natural_image
Diagram of a mechanical component with an upward arrow indicating motion or force (no text or symbols)natural_image
Illustration of a hand pressing down on a curved mechanical component with an inset showing a close-up of a device (no text or symbols present)6 Lepaskan panel samping.

natural_image
Top-down schematic of a vehicle showing front wheel, side wheels, and top view (no text or symbols)text_image
Diagram showing a hand using a tool to adjust or install a mechanical component, labeled with parts ① and ②.natural_image
Illustration of a plug and connector with a prohibition symbol (no text or labels)
text_image
Three black-and-white illustrations showing food safety symbols: a roll of bread, a no-smoking sign, and a medical device with a faucet.natural_image
Diagram of a vehicle's rearview and side profile with directional arrows and lock symbols (no text or labels)- RQ1062/RQ1060

text_image
f! D B ♥- RQ1052/RQ1050
충전
text_image
Diagram showing electrical connections with a lightning bolt symbol and circuit lines, likely illustrating a power or current measurement setup.
natural_image
Diagram showing a battery icon and a power button with a central indicator (no text or symbols)natural_image
Simple line drawing of a U-shaped object with internal lines and arrows indicating flow or movement (no text or symbols)RQ1090
natural_image
Simple line drawing of a U-shaped object with internal dashed lines and an arrow, no text or symbols present.text_image
Diagram showing a battery icon and a starburst symbol with 'D' label, likely indicating a battery status or function.RQ1052/RQ1050
natural_image
Diagram of a battery icon and a curved pipe with directional arrows indicating flow or movement (no text or symbols)RQ1062/RQ1060
natural_image
Diagram showing a battery icon and a power button with a central indicator (no text or symbols)RQ1052/RQ1050
natural_image
Simple line drawing of a U-shaped object with internal dashed lines and arrows, no text or symbols present.RQ1062/RQ1060
text_image
Diagram showing electrical connections with labeled components and a 32-pin display paneltext_image
Diagram showing three icons: a stylized eye with three circles, a musical note, and a heart-shaped symbol inside a device or device.text_image
Diagram showing a hand interacting with a digital display device, featuring a lock icon and measurement markings.text_image
Diagram showing three labeled icons: a faucet with a handle, a connector pin, and a three-pin connector, likely illustrating a mechanical or electrical component layout.natural_image
Simple line drawing of a tool tip emerging from a pointed tip (no text or symbols)text_image
Diagram illustrating a hand holding a device with labeled parts and directional arrows indicating motion or force.text_image
Diagram illustrating two-step robotic manipulation or tool path with labeled steps ① and ②natural_image
Illustration of a toothbrush with a black arrow indicating rotation (no text or symbols)natural_image
Illustration of a person applying pressure to their neck area with arrows indicating direction (no text or symbols)natural_image
Illustration of a hand holding a small object with an upward arrow, no text or symbols presentnatural_image
Diagram of a mechanical component with an arrow indicating direction (no text or symbols)
text_image
① ① ② CLICKnatural_image
Illustration of a mechanical device with a rotating arm and base mount (no text or symbols)natural_image
Illustration of a faucet drain with water flowing from a pipe, showing spray and cleaning process (no text or symbols)text_image
Diagram illustrating a hand cleaning water with labeled components including a faucet and bottle, alongside a cartoon illustration.natural_image
Illustration of a robotic arm with a hand holding a tool, showing motion and movement (no text or symbols)natural_image
Illustration of a hand gripping a mechanical component (no text or symbols visible)natural_image
Diagram of a mechanical component with an arrow indicating direction (no text or symbols)
natural_image
Diagram of a mechanical tool or connector with directional arrows indicating movement (no text or symbols present)natural_image
Diagram of a mechanical lever mechanism with a lever and pivot point (no text or labels)natural_image
Illustration of a hand holding a small object with an upward arrow, no text or symbols presenttext_image
Diagram illustrating a process with labeled steps and a 'CLICK' button, showing a mechanical component before and after action.natural_image
Symbol of a trash bin crossed with no text or numbers, indicating no waste or discharge (no text present)natural_image
Symbol of a trash bin crossed with no text or numbers, representing waste sorting or disposal (no text present)natural_image
Illustration of a curved object with three small circular features and a magnified inset showing a small mechanical component (no text or symbols)natural_image
Diagram of a mechanical component with an upward arrow indicating motion or force (no text or symbols present)natural_image
Illustration of a hand pressing down on a small mechanical component with an inset showing a close-up of a device (no text or symbols present)6 옆면 패널을 분리하십시오.

natural_image
Top-down schematic of a vehicle with directional arrows indicating motion (no text or symbols)text_image
Diagram showing a hand pressing a component labeled with numbers 1 and 2, likely illustrating a mechanical or electrical process.natural_image
Illustration of a plug and connector with a prohibition symbol (no text or labels)
natural_image
Illustration of a bone fragment with a prohibition symbol (no text or labels)
natural_image
Illustration of a pushpin with a circular stopper and a prohibition symbol (no text or labels)
natural_image
Line drawing of a handheld electric toothbrush and a tap wrench (no text or symbols)Awas
text_image
LETS LUTTER 8.5 MINUTES LEFTnatural_image
Pure diagram of a vertical container with internal flow arrows and small icons, no text or symbols present.- RQ1062/RQ1060

text_image
1 2 3 4- RQ1052/RQ1050
Mengecas

natural_image
Simple line drawing of a U-shaped object with internal dashed lines and an arrow, no text or symbols present.
text_image
Diagram showing a battery icon and a lightning bolt symbol with a starburst background, likely illustrating a basic electrical or mechanical system.natural_image
Diagram of a car interior with battery icon and directional arrows indicating movement (no text or symbols)RQ1090
natural_image
Pure electrical circuit lines without any symbolsRQ1052/RQ1050
natural_image
Simple line drawing of a U-shaped object with internal horizontal lines and arrows, no text or symbols present.RQ1062/RQ1060
text_image
Diagram showing electrical connections with a switch, power plug, and 8.8Ω displaytext_image
Diagram showing three icons: a stylized eye, a musical note, and a lightbulb with directional arrows pointing to a central skull.text_image
Diagram showing a hand inserting a glucose meter into a device with an open lock icon and display screen displaying '88'.Mengaktifkan kunci kembara
1 Tekan butang hidup/mati selama 3 saat untuk memasukkan mod kunci kembara.
Simbol kunci muncul pada paparan (semua jenis) dan anda akan mendengar bunyi bip (hanya RQ1090) bagi menunjukkan bahawa kunci kembara telah diaktifkan.
text_image
Diagram showing three labeled icons: a faucet with a warning symbol, a circular connector, and a heart-shaped symbol inside a device.natural_image
Simple line drawing of a dental tool tip emerging from a tooth (no text or symbols)text_image
Diagram illustrating a hand holding a tool with labeled parts and directional arrows indicating motion or force.
text_image
Diagram showing two-step instructions for using a tool, labeled with arrows and numbered parts.natural_image
Illustration of a pair of hairbrushes with a black arrow indicating rotation (no text or symbols)natural_image
Line drawing of a person applying pressure to their neck area with arrows indicating direction (no text or symbols)natural_image
Illustration of a hand holding a small object with an upward arrow, no text or symbols presentnatural_image
Close-up of a mechanical component with a black arrow indicating a specific feature (no text or symbols visible)text_image
① ① CLICK ②natural_image
Illustration of a mechanical device with a hand operating it, showing a rotating component (no text or symbols)
natural_image
Illustration of a faucet drain with water flowing from a bucket (no text or symbols)
text_image
Diagram illustrating water pollution with labeled components including a faucet, fire extinguisher, and water discharge.natural_image
Illustration of a hand holding a device with a circular component, showing motion direction (no text or symbols)natural_image
Illustration of a robotic arm gripping a tool, no text or symbols presentnatural_image
Diagram of a mechanical component with an arrow indicating direction (no text or symbols)natural_image
Diagram of a tool interacting with a mechanical component, showing directional arrows (no text or symbols)natural_image
Diagram of a mechanical device with a lever and handle, showing motion direction (no text or symbols)natural_image
Illustration of a hand holding a small object with an upward arrow, no text or symbols presenttext_image
① ① CLICK ②natural_image
Symbol of a trash bin crossed with a diagonal line, no text or numbers presentnatural_image
Illustration of a curved object with three small protrusions and a small inset showing a knob (no text or symbols)4 Longgarkan 2 skru di belakang pencukur.

natural_image
Diagram of a mechanical component with an upward arrow indicating motion or force (no text or symbols present)natural_image
Illustration of a hand pressing down on a shoe component with an inset showing a close-up of the shoe (no text or symbols)6 Tanggalkan panel sisi.

natural_image
Top-down schematic of a vehicle with internal components and a small inset diagram (no text or labels)text_image
Diagram showing a hand holding a tool interacting with a mechanical component, labeled with parts ① and ②.natural_image
Illustration of a plug and connector with a prohibition symbol (no text or labels)
natural_image
Illustration of a bone fragment with a prohibition symbol (no text or labels)natural_image
Simple line drawing of a pushpin with a circular prohibition symbol (no text or labels)natural_image
Line drawing of a handheld electric shaver with control panel and tap symbol (no text or labels)text_image
LET SWITCH 85 MOURS LEFTtext_image
Diagram of a device control panel with labeled buttons and indicators- RQ1062/RQ1060

text_image
Diagram showing a vertical control panel with four labeled buttons: 'f', 'D', 'B', and '♥'.- RQ1052/RQ1050
การขาร์จแบตเตอรี่

text_image
05natural_image
Pure electrical circuit lines without any symbolsRQ1062/RQ1060
natural_image
Pure electrical circuit lines without any symbolsRQ1052/RQ1050
natural_image
Simple line drawing of a U-shaped object with internal dashed lines indicating horizontal and vertical features (no text or symbols)RQ1062/RQ1060
natural_image
Simple line drawing of a U-shaped object with internal lines and arrows, no text or symbols presentnatural_image
Diagram showing a battery icon and a power button with a starburst symbol (no text or labels)RQ1052/RQ1050
natural_image
Pure diagram of a battery and plug without any text, numbers, or symbolsRQ1062/RQ1060
natural_image
Diagram showing a battery icon and a power button with a central indicator (no text or symbols)RQ1052/RQ1050
natural_image
Simple line drawing of a U-shaped object with internal dashed lines and an arrow indicating direction (no text or symbols)RQ1062/RQ1060
text_image
Diagram showing a faucet symbol and a 88-segment display with power button, likely indicating a digital control or indicator.text_image
Diagram showing three icons: a stylized eye with three lobes, a musical note, and a heart-shaped symbol with radiating lines.text_image
Diagram showing a hand inserting a lock into a digital device with a 'OK' icon, indicating password or lock status.text_image
Diagram showing electrical connections with labeled components and symbols, including a faucet icon and three circular components.natural_image
Simple line drawing of a dental tool tip emerging from a tooth (no text or symbols)text_image
Diagram illustrating a hand massage technique with labeled steps ① and ②, showing motion direction and movement arrows.natural_image
Illustration of a device with a black arrow indicating rotation, showing no text or symbolsnatural_image
Line drawing of a person applying pressure to their ear with arrows indicating direction (no text or symbols)natural_image
Illustration of a hand holding a small object with an upward arrow, no text or symbols presentnatural_image
Diagram of a mechanical component with an arrow indicating direction (no text or symbols)text_image
Diagram illustrating a process with labeled steps and a 'CLICK' button, showing a hand holding a device.natural_image
Illustration of a mechanical device with rotating components and a hand holding a ring (no text or symbols)natural_image
Illustration of a faucet drain with water flowing from a pipe, showing spray and cleaning process (no text or symbols)text_image
Illustration showing a hand cleaning water with a faucet and bottle, accompanied by a magnified view of the water's components.natural_image
Illustration of a person performing a mechanical maneuver or maneuver (no text or symbols visible)1 ปิดเครื่องโกนหนวด
natural_image
Illustration of a robotic arm gripping a large tool (no text or symbols visible)natural_image
Pure mechanical component diagram without any text, numbers, or symbolsnatural_image
Diagram of a tool interacting with a mechanical component, showing directional arrows (no text or symbols)natural_image
Diagram of a mechanical tool or device with a lever and handle, showing motion direction (no text or symbols)natural_image
Illustration of a hand holding a small object with an upward arrow, no text or symbols presenttext_image
Diagram illustrating a process with two steps: adding a container to form a bottle, then clicking a button to a hand.natural_image
Symbol of a trash bin with crossed-out lines and a blank rectangular base (no text or numbers)natural_image
Diagram of a shoe being opened with an upward arrow indicating compression (no text or symbols)natural_image
Illustration of a hand pressing down on a shoe component with an inset showing a close-up of the part (no text or symbols present)6 ลอดแผงต้านข้างออก

natural_image
Top-down schematic of a vehicle showing steering wheel, gear shift, and dashboard (no text or labels)text_image
Diagram showing a hand using a tool to adjust or install a mechanical component, labeled with parts ① and ②.natural_image
Illustration of a plug and connector with a prohibition symbol (no text or labels)
text_image
85 MINUTES LEFTnatural_image
Pure diagram of a U-shaped container with internal arrows and symbols, no readable text or labels- RQ1062/RQ1060

text_image
打! D B ♥- RQ1052/RQ1050
Sạc điện

natural_image
Simple line drawing of a U-shaped object with internal dashed lines and an arrow, no text or symbols present.text_image
Diagram showing battery and power button with icons and labels, likely illustrating a basic electrical or mechanical system concept.RQ1052/RQ1050
natural_image
Diagram showing a battery icon above a curved road with directional arrows and a central point (no text or symbols)RQ1062/RQ1060
natural_image
Diagram showing a battery icon and a power button with radiating lines, no text or symbols presentRQ1052/RQ1050
natural_image
Simple line drawing of a U-shaped object with internal dashed lines and an arrow, no text or symbols present.RQ1062/RQ1060
text_image
Diagram showing a faucet symbol with control buttons and a digital display displaying '3.8'text_image
Diagram showing three icons: a stylized gear, a musical note, and a heart-shaped symbol with text '88' and '200000'.text_image
Diagram showing a hand inserting a lock into a digital device with a lock icon and '08' display, indicating authentication or security.text_image
Diagram showing three labeled icons: a faucet with a handle, a connector pin, and a three-pin connector, likely illustrating a mechanical or electrical component layout.natural_image
Simple line drawing of a tool tip emerging from a conical tip (no text or symbols)text_image
Diagram illustrating a hand holding a device with labeled parts and directional arrows indicating motion or force.text_image
Diagram illustrating two-step robotic manipulation or tool path with labeled steps ① and ②natural_image
Illustration of a pair of hairbrushes on a base, showing left and right side views with no text or symbolsnatural_image
Line drawing of a person applying pressure to their ear with arrows indicating direction (no text or symbols)natural_image
Illustration of a hand holding a small object with an upward arrow, no text or symbols presentnatural_image
Diagram of a mechanical component with an arrow indicating direction (no text or symbols)
text_image
Diagram illustrating a process with two steps: adding a container to a bottle and clicking a button, then adding a magnifying glass to a hand.natural_image
Illustration of a mechanical device with rotating components and a hand holding a cable (no text or symbols)natural_image
Illustration of a faucet drain with water spray and a valve, showing fluid flow (no text or symbols)text_image
Diagram illustrating a hand pouring liquid into a container with a water outlet, accompanied by a labeled diagram showing a faucet and bottle.natural_image
Illustration of a mechanical device with a rotating arm and housing (no text or symbols)natural_image
Illustration of a robotic arm gripping a mechanical component (no text or symbols visible)natural_image
Pure mechanical component diagram without any text, numbers, or symbolsnatural_image
Close-up of a mechanical component with arrows indicating force or movement (no text or symbols)natural_image
Diagram of a mechanical lever with an arrow indicating motion (no text or symbols)natural_image
Illustration of a hand holding a small object with an upward arrow, no text or symbols presenttext_image
① ① CLICK ②text_image
Symbol of a trash bin crossed with the prohibition sign, indicating no waste or disposal.natural_image
Symbol of a trash bin crossed with a diagonal line, representing waste or discharge (no text or numbers present)natural_image
Illustration of a curved object with three small circular features and a magnified inset showing a small figure (no text or symbols)natural_image
Illustration of a banana-shaped object with an upward arrow indicating growth or direction (no text or symbols)natural_image
Illustration of a hand using a tool to adjust or install a component, with an inset showing a close-up of a mechanical part (no text or symbols visible)natural_image
Top-down schematic of a vehicle showing steering wheel, gear shift, and gear assembly (no text or labels)text_image
Diagram showing a hand using a tool to adjust or install a mechanical component, labeled with parts ① and ②.natural_image
Illustration of a plug and plug with a prohibition symbol (no text or labels)繁體中文128

text_image
85 MINUTES LEFTtext_image
Diagram showing a vehicle's rearview and side view with directional arrows and lock symbols- RQ1062/RQ1060

text_image
f! D B ♥- RQ1052/RQ1050
充電
text_image
Diagram showing electrical connections with a lightning bolt symbol and dashed lines indicating current paths or measurement points.RQ1062/RQ1060
natural_image
Diagram showing a battery icon and a button with a central dot, no text or symbols presentRQ1052/RQ1050
natural_image
Simple line drawing of a U-shaped object with internal dashed lines and dots, no text or symbols present.RQ1062/RQ1060
natural_image
Diagram showing a battery icon above a curved object with radiating lines and dots, no text or symbols present.
natural_image
Diagram showing a battery icon and power button with a central indicator light (no text or symbols)RQ1090
natural_image
Simple line drawing of a U-shaped object with internal dashed lines and an arrow indicating direction (no text or symbols)RQ1062/RQ1060
text_image
Diagram showing electrical connections with a switch, power plug, and digital display labeled '33'text_image
Diagram showing three icons: a stylized gear, a musical note, and a heart-shaped symbol with arrows pointing to it.text_image
Diagram showing a hand inserting a lock into a digital device with a lock icon and '0.8' displaytext_image
Diagram showing three labeled icons: a faucet with a handle, a device with '60' label, and a three-pin connector symbol.natural_image
Simple line drawing of a dental tool tip emerging from a jawbone (no text or symbols)text_image
Diagram illustrating two-step instructions for handling a device, labeled with arrows and numbered positions ① and ②.
text_image
Diagram illustrating two-step procedure for handling a small object, labeled with steps 1 and 2.natural_image
Illustration of a toothbrush with a black arrow indicating rotation (no text or symbols)natural_image
Illustration of a person applying a medical or therapeutic tool to their face, showing curved arrows indicating direction (no text or symbols present)text_image
Diagram illustrating a mechanical or fluidic process with labeled steps and directional arrows, including 'CLICK' and numbered instructions.natural_image
Illustration of a robotic arm with motion arrows indicating movement (no text or symbols)natural_image
Illustration of a faucet drain with water flowing from a pipe, showing spray and cleaning process (no text or symbols)natural_image
Diagram of a mechanical device with rotating components and a hand holding a cable (no text or symbols)natural_image
Illustration of a robotic arm gripping a mechanical component (no text or symbols visible)natural_image
Pure mechanical component diagram without any text, numbers, or symbols每次使用鬢角刀後,請進行清潔。
natural_image
Diagram of a tool interacting with a mechanical component, showing directional arrows (no text or symbols)natural_image
Diagram of a mechanical tool or device with an arrow indicating direction (no text or symbols present)natural_image
Illustration of a hand holding a small object with an upward arrow, no text or symbols present1 將舊的電鬍刀組從電鬍刀抽出。

text_image
① ① CLICK ②text_image
Symbol of a trash bin crossed with a crossed-out line, indicating no waste or discharge.natural_image
Symbol of a trash bin crossed with no text or numbers, representing waste sorting or disposal (no text present)natural_image
Illustration of a curved surface with three small circular features and a magnified inset showing a flower (no text or symbols)natural_image
Diagram of a shoe with an upward arrow indicating growth or direction (no text or symbols)6 拆卸兩邊的護板。

natural_image
Illustration of a hand using a tool to adjust or install a component, with an inset showing a close-up of a mechanical part (no text or symbols visible)natural_image
Top-down schematic of a vehicle with gear and wheel components (no text or labels)
text_image
Diagram showing a hand operating a mechanical device with labeled parts ① and ②, likely illustrating a process or assembly.8 將馬達組的電線拉出,即可取下電池。
電池固定帶非常銳利,請小心。
natural_image
Illustration of a thermocouple with a plug and a circular warning symbol (no text or labels)
natural_image
Illustration of a bone fragment and a prohibition symbol (no text or labels)
natural_image
Illustration of a pushpin with a circular prohibition symbol (no text or labels)natural_image
Line drawing of a handheld electric toothbrush and a tap wrench symbol (no text or labels)符合标准
text_image
LET SWITCH 85 MINTES LEFTtext_image
Diagram of a vehicle door with labeled parts including lock, seat, and valve- RQ1062/RQ1060

text_image
Diagram showing a vertical control panel with four labeled buttons: '←', '→', '←', and '♥'.- RQ1052/RQ1050
充电
natural_image
Simple line drawing of a U-shaped object with internal dashed lines and a vertical line (no text or symbols)
natural_image
Simple line drawing of a U-shaped object with internal dashed lines and arrows, no text or symbols present.RQ1090
natural_image
Diagram showing a battery icon and a starburst symbol with a lightning bolt, no readable text or labelsRQ1052/RQ1050
natural_image
Pure electrical circuit lines without any symbolsRQ1062/RQ1060
natural_image
Diagram showing a battery icon and a power button with radiating lines, no text or symbols presentRQ1052/RQ1050
natural_image
Simple line drawing of a U-shaped object with internal dashed lines and an arrow, no text or symbols present.RQ1062/RQ1060
text_image
Diagram showing a faucet symbol with power button and 80-segment display, likely indicating a control or status indicator.text_image
Diagram showing music key icons including clef, musical note, and heart with text labels like '38' and 'WELCOME'text_image
Diagram showing a hand interacting with a device displaying a 80% display, with an open lock icon labeled in the background.text_image
Diagram showing a device with labeled ports and icons, including a faucet icon and three connector symbols.natural_image
Simple line drawing of a tool tip emerging from a conical tip (no text or symbols)text_image
Diagram illustrating two-step instructions for handling a device, labeled with arrows and numbered positions ① and ②.text_image
Diagram showing two-step instructions for handling a tool, labeled with arrows and numbered positions.natural_image
Diagram of a hairbrush with a black arrow indicating rotation, showing two sequential states (no text or symbols)natural_image
Line drawing of a person applying pressure to their neck area with arrows indicating direction (no text or symbols)natural_image
Illustration of a hand holding a small object with an upward arrow, no text or symbols presentnatural_image
Pure mechanical component diagram without any text, numbers, or symbolstext_image
Diagram illustrating a process with two steps: adding a container to a lamp, then clicking a button on a device.natural_image
Illustration of a person using a tool to interact with a device (no text or symbols visible)
natural_image
Illustration of a faucet drain with water flowing from a pipe, showing spray and cleaning process (no text or symbols)
text_image
Diagram illustrating a hand cleaning water surface with labeled components including a faucet, bottle, and container.natural_image
Illustration of a mechanical device with a rotating arm and handle (no text or symbols)
natural_image
Illustration of a robotic arm gripping a large tool (no text or symbols visible)natural_image
Pure diagram of a mechanical component with no text or symbols每次使用后都要清洁修发器。
natural_image
Close-up of a hand holding a small electronic device with directional arrows indicating movement (no text or symbols)natural_image
Diagram of a mechanical lever with an arrow indicating motion (no text or symbols)natural_image
Illustration of a hand holding a small object with an upward arrow, no text or symbols present1 将旧剃须刀头部件拉出剃须刀。

text_image
Diagram illustrating a process with labeled steps and a 'CLICK' button, showing a mechanical or electronic component before and after adjustment.natural_image
Symbol of a trash bin crossed with no text or numbers, representing waste sorting or disposal (no text present)natural_image
Symbol of a trash bin crossed with no text or numbers, representing waste sorting or restriction (no text present)natural_image
Illustration of a curved object with three small circular features and a magnified inset showing a small figure (no text or symbols)natural_image
Diagram of a mechanical component with an upward arrow indicating motion or force (no text or symbols)6 拆除侧面板。

natural_image
Illustration of a hand pressing down on a mechanical component with an inset showing a close-up of a component (no text or symbols present)natural_image
Top-down schematic of a vehicle showing wheel positions and gear mechanism (no text or labels)8 将电线从马达装置中拉出并拆下电池。

text_image
Diagram showing a hand using a tool to adjust or install a mechanical component, labeled with parts 1 and 2.注意,电池带非常锋利。
