KMX98 - Blender KENWOOD - Free user manual and instructions
Find the device manual for free KMX98 KENWOOD in PDF.
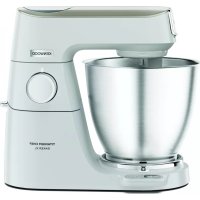
| Product type | Food processor / Stand mixer |
| Brand | Kenwood |
| Model | KMX98 |
| Power supply | 220-240 V ~ 50/60 Hz |
| Main functions | Beat, whisk, knead, mix |
| Number of speeds | Variable with electronic control (includes « fold » position) |
| Bowl material | Stainless steel |
| Included accessories | K-beater, whisk, dough hook, spatula, splash guard |
| Safety | Automatic stop when head is raised, locking, soft start |
| Maximum capacities | Shortcrust pastry 680 g flour, cake 2.72 kg, bread dough 1.35 kg, egg whites 12 |
| Maintenance and cleaning | Body wiped with damp cloth; bowl and accessories dishwasher safe |
| After-sales service | Contact the retailer or an authorized Kenwood repairer |
| Additional features | Electronic speed sensor control, indicator light |
| Use | For household use only |
Frequently Asked Questions - KMX98 KENWOOD
User questions about KMX98 KENWOOD
0 question about this device. Answer the ones you know or ask your own.
Ask a new question about this device
Download the instructions for your Blender in PDF format for free! Find your manual KMX98 - KENWOOD and take your electronic device back in hand. On this page are published all the documents necessary for the use of your device. KMX98 by KENWOOD.
USER MANUAL KMX98 KENWOOD
know your Kenwood kitchen machine
before using your Kenwood appliance
- Read these instructions carefully and retain for future reference.
- Remove all packaging and any labels.
safety
- Switch off and unplug before fitting or removing tools/attachments, after use and before cleaning.
- Keep your fingers away from moving parts and fitted attachments.
- Never leave the machine on unattended.
- Never use a damaged machine. Get it checked or repaired: see 'service', page 6.
- Never let the cord hang down where a child could grab it.
- Never let the power unit, cord or plug get wet.
- Never use an unauthorised attachment or both outlets at the same time
- Never exceed the maximum capacities on page 4.
- When using an attachment, read the safety instructions that come with it.
- Take care when lifting this appliance as it is heavy. Ensure the head is locked and that the bowl, tools, outlet cover and cord are secure before lifting.
- This appliance is not intended for use by persons (including children) with reduced physical, sensory or mental capabilities, or lack of experience and knowledge, unless they have been given supervision or instruction concerning use of the appliance by a person responsible for their safety.
Children should be supervised to ensure that they do not play with the appliance. - Only use the appliance for its intended domestic use. Kenwood will not accept any liability if the appliance is subject to improper use, or failure to comply with these instructions.
know your Kenwood kitchen machine
before plugging in
- Make sure your electricity supply is the same as the one shown on the underside of your machine.
- This machine complies with European Economic Community Directive 89/336/EEC.
know your Kenwood kitchen machine
① mixer head
(2) attachment outlet
③ outlet cover
④ bowl
⑤ tool socket
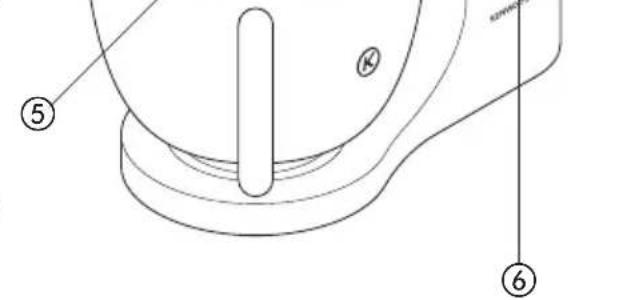
⑥ on/off and speed switch
⑦ mixer ready indicator light
⑧ mixer body
(9) head release lever
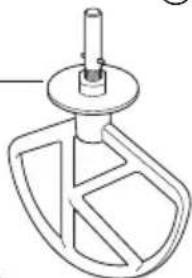
10 K beater
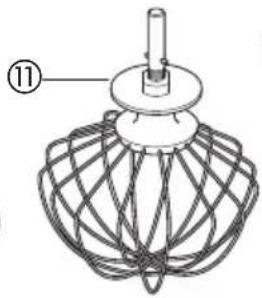
whisk
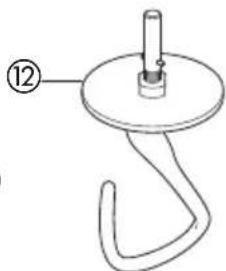
⑫ dough hook
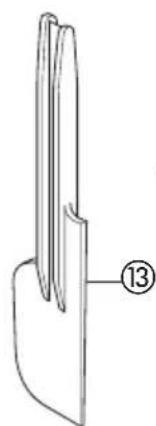
⑬ spatula
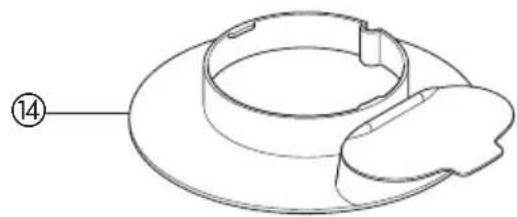
⑭ splashguard
the mixer
the mixing tools and some of their uses
beater - For making cakes, biscuits, pastry, icing, fillings, éclairs and mashed potato.
whisk - For eggs, cream, batters, fatless sponges, meringues, cheeses, mousses, soufflés. Don't use the whisk for heavy mixtures (eg creaming fat and sugar) - you could damage it.
dough hook For yeast mixtures.
to use your mixer
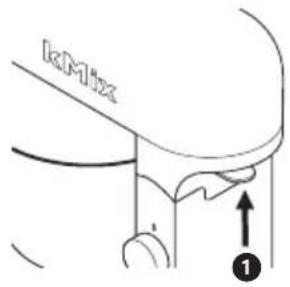
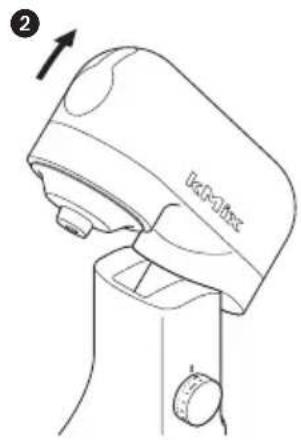
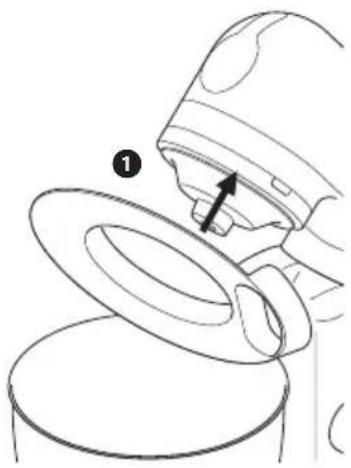
1 Lift the head release lever at the back of the appliance 1 and at the same time lift the head until it locks in the raised position 2.
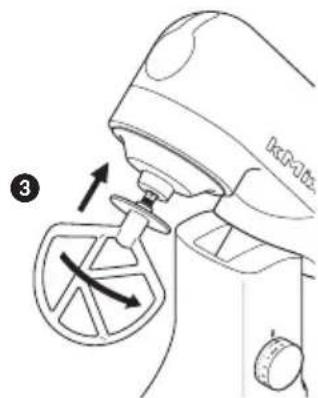
to insert a tool 2 Push up until it stops then turn 3.
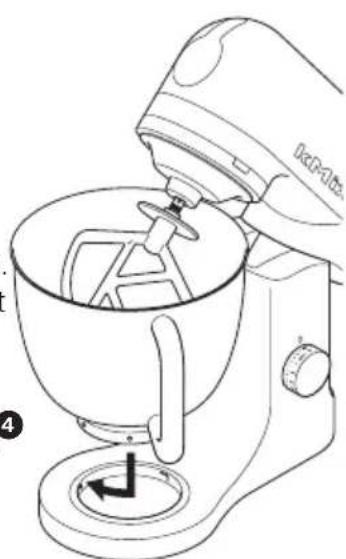
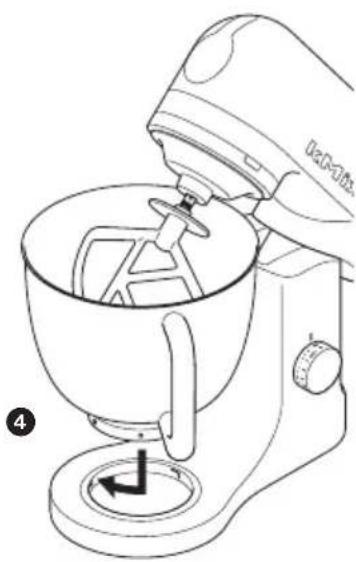
3 Fit the bowl onto the base, press down and turn clockwise to lock 4.
4 Lift the head release lever at the back of the appliance and at the same time lower the mixer head.
5 Plug into the power supply and the mixer ready indicator light will glow.
6 Switch on by turning the speed switch to the desired setting.
to remove a tool 7 Turn and remove.
important
-
If the mixer head is raised during operation, the machine will stop working straight away. To re-start the mixer, lower the mixer head, turn the speed switch to the off position, wait a few seconds and then re-select the speed. The mixer should resume operating straight away.
-
Whenever the mixer head is raised the mixer ready indicator light will go out. When the head is lowered, the light will glow indicating the mixer is ready to use.
Hints - Switch off and scrape the bowl with a spatula when necessary.
-
Use the fold position for slow incorporation of ingredients such as when mixing flour and fruit into cake mixes. Simply turn the switch to The mixer will operate for 2 1/2 revolutions and then automatically stop. The switch should then be returned to the off 'O' position. Repeat as necessary.
-
Eggs at room temperature are best for whisking.
-
Before whisking egg whites, make sure there's no grease or egg yolk on the whisk or bowl.
-
Use cold ingredients for pastry unless your recipe states otherwise.
-
When creaming fat and sugar for cake mixes, always use the fat at room temperature or soften it first.
-
Your mixer has been fitted with a 'soft start' feature to minimise spillage. However if the machine is switched on with a heavy mixture in the bowl such as bread dough, you may notice that the mixer takes a few seconds to reach the selected speed.
the mixer
points for bread making
important - Never exceed the maximum capacities below - you will overload the machine.
- To protect the life of the machine always allow a rest of 20 minutes between loads.
- If you hear the machine labouring, switch off, remove half the dough and do each half separately.
- The ingredients mix best if you put the liquid in first.
- At intervals stop the machine and scrape the mixture off the dough hook.
- Different batches of flour vary considerably in the quantities of liquid required and the stickiness of the dough can have a marked effect on the load imposed on the machine. You are advised to keep the machine under observation whilst the dough is being mixed; the operation should take no longer than 5 minutes.
speed switch
These are a guide only and will vary depending upon the quantity of mix in the bowl and the ingredients being mixed.
beater • creaming fat and sugar start on ‘min’, gradually increasing to a higher speed.
- beating eggs into creamed mixtures 4 - 'max'.
- folding in flour, fruit etc 'min - 1 or fold
- all in one cakes start on 'min', gradually increase to 'max'.
- rubbing fat into flour 'min - 2.
whisk Gradually increase to 'max'.
dough hook Start on 'min', gradually increasing to 1.
electronic speed sensor control
Your mixer is fitted with an electronic speed sensor control that is designed to maintain the speed under different load conditions, such as when kneading bread dough or when eggs are added to a cake mix. You may therefore hear some variation in speed during the operation as the mixer adjusts to the load and speed selected - this is normal.
maximum capacities
shortcrust pastry 680g flour
fruit cake mix 2.72 Kg total mix
stiff bread dough 1.35 Kg flour
soft bread dough 1.3 Kg flour
egg whites 12
to fit and use your splashguard
1 Raise the mixer head until it locks.
2 Fit the bowl onto the base.
3 Push the splashguard onto the underside of the mixer head 1 until fully located. The hinged section should be positioned as shown.
4 Insert required tool.
5 Lower the mixer head.
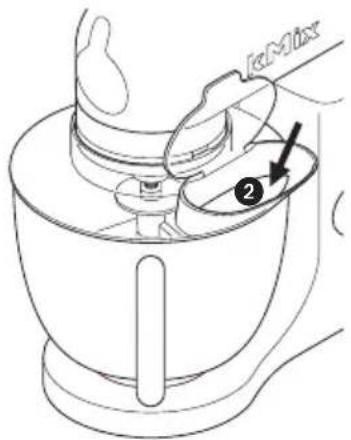
- During mixing, ingredients can be added directly to the bowl via the hinged section of the splashguard 2.
- You do not need to remove the splashguard to change tools.
6 Remove the splashguard by raising the mixer head and sliding it down.
troubleshooting
problem
- The whisk or K-beater knocks against the bottom of the bowl or isn't reaching the ingredients in the bottom of the bowl.
- Adjust the height. Here's how:
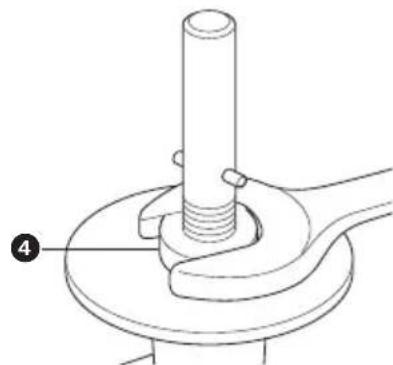
1 W with the mixer switched off, insert the beater or whisk and lower the mixer head. Check the clearance between the tool and the bottom of the bowl ③. Ideally the tool should be almost touching the bottom of the bowl.
2 If the clearance needs to be adjusted, raise the mixer head and remove the tool.
3 Using a suitable spanner loosen the nut sufficiently to allow adjustment of the shaft 4. To lower the tool closer to the bottom of the bowl, turn the tool shaft anti-clockwise. To raise the tool away from the bottom of the bowl turn the shaft clockwise.
4. T. ighten the nut.
5 Fit the tool to the mixer and lower the mixer head. Check its position (see point 1).
6 Repeat the above steps as necessary until the tool is set correctly. Once this is achieved tighten the nut securely.
Note: No adjustment of the dough hook is necessary.
problem
The mixer stops during operation.
solution If for any reason power to the mixer is interrupted and the machine stops working, turn the speed switch to the off position, wait a few seconds and then re-select the speed. The mixer should resume operating straight away.

cleaning and service
care and cleaning
Always switch off and unplug before cleaning.
mixer body, Wipe with a damp cloth, then dry.
outlet cover Never use abrasives or immerse in water.
bowl, tools, Wash by hand, then dry thoroughly or wash in the dishwasher.
splashguard · Never use a wire brush, steel wool or bleach to clean your stainless steel bowl. Use vinegar to remove limescale.
- Keep away from heat (cooker tops, ovens, microwaves).
service and customer care
- If the cord is damaged it must, for safety reasons, be replaced by KENWOOD or an authorised KENWOOD repairer.
If you need help with:
using your machine
servicing or repairs
- Contact the shop where you bought your machine.
Røremaskinen stopper under betiening.
TO6blMOXHO 6blIO BCTaBNTb
npncnocobnna 2 OToXmTe do ynpa, 3aTe m nobepHnTe 3.
3 YcTaHOBnTe YaSy Ha OCHOBaHne, HaxMNTe Ha Hee N NOBepHnTe No YacBOB CTpeNKe Do FHKcauN 4.
4ПиногнIMITEpbIaXOKOTCOeINHeHRAJONOBKHa3aHcH cTOpOHe np6opa,ИODHOBpeMeHHOOnyCTnTe RoIOBky MInKcepa.
5 POncoeHnHTe np6op K cetn 3neKtpoNTaHna, nocne yero Ha Mnkcepe 3arOpNTcBcETOBOHNDAkATOP rOTOBHOCTN Ka6ote.
6 BkIIOUHTe 6bITOBOINpHOp, NOBepHyB peryJrTOp cKOpocTN B HxKHOe noLoXKeHne.
TTOYTO6bI 3BJeHb
EcnBam HyxHa NOMOUB B:
- NOJb3OBaHn npu6opom nnn
Texo6cnyxuBaHn nn peMOHTe O6paTntecb B mara3nH, B KOTOpOM Bbl npno6peHn np6op.
Yia va yvwpiOεTε Tnv kouζivounxavn Tns Kenwood
TPIV XpnoiopoToinOeTe Tn OuaKeun Kenwood
oJolai jnall Jjgjjll ggs. 1
15.2016 15
i j 1
a 0 a j 1 2
c
gall gagall bali kss sss hbs aegyogagall
- g bali 2. giall
100 (s) min 8
aall aegull
-4easllgssalpaglllgl
()max
-()min aegllg gss
aagao pia aalal ae yaae aee
( x,y - 1) ( y,0) = 1
bI I I I I I I I I I I I I I I I I I I
Jaaai Jia aai jai jai jai jai jai jai jai jai
P( 1,0) .D( -34,34)
Jiaag ahyiee yie gale galegale
111 111 111 111 111 111 111 111 1
a aalaaal 0 aagaae gaae aee
c_l = | s| , s x
alala yaiail kull co dali sic aell sla jnall gdo
S OBC = S BOC + S_ CDF
aai 11 aaii iai jai jaiil "gaii ai" ao bai
111 111 111 111
Jg jn nn nnnn nn nnnn nn nnnn
Lall lallll lllllllllllll
gll jai jiaaiial Ls g jaoa oaoo
VII 1
a 100 100 100 100 100 100 100 100 100 100 100 100 100 100 100 100 100 100 100 100 100 100 100
ailll gaiall gagg lge gllg bll
jLJLJU
a 1
Jgss
p00xu j
jellpeiepeoStll JlalblaaXoo
Jenwood Jaa 2.
alokall oikipjbjpae jcaii