Living LV3 - Speaker AUDIO PRO - Free user manual and instructions
Find the device manual for free Living LV3 AUDIO PRO in PDF.
User questions about Living LV3 AUDIO PRO
0 question about this device. Answer the ones you know or ask your own.
Ask a new question about this device
Download the instructions for your Speaker in PDF format for free! Find your manual Living LV3 - AUDIO PRO and take your electronic device back in hand. On this page are published all the documents necessary for the use of your device. Living LV3 by AUDIO PRO.
USER MANUAL Living LV3 AUDIO PRO
natural_image
Product line drawing of a audio streaming device with black and white stands, connected to a USB port (no text or symbols on main components)
AUDIO PRO WIRELESS
BRUKSANVISNING
OWNERS MANUAL
MANUEL D'UTILISATION
BEDIENUNGSANLEITUNG
MANUAL DEL PROPIETARIO
KÄYTTÖOPAS
GEBRUIKERSHANDLEIDING

audio pro
SOUND OF SCANDINAVIA
audio pro
SOUND OF SCANDINAVIA
www.audiopro.com
www.audiopro.se
© Audio Pro AB Sverige
© Audio Pro AB Sweden
Audio Pro ^® , the Audio Pro logotype, the 'a' symbol, and ace-bass ^® are all registered trademarks of Audio Pro AB, Sweden. All rights reserved. Audio Pro follows a policy of continuous advancement in development. Specifications may be changed without notice.
SVENSKA
FAKTA
100W + 35W + 35W digital Class D
natural_image
Black USB device with a circular logo and 'Dealing pro' text, connected to a USB port (no readable text beyond branding)natural_image
Close-up of a black cylindrical electronic device with a metallic connector (no visible text or symbols)House Code omkopplare 3.5mm stereo kontakt*
natural_image
Illustration of a laptop connected to a device with three curved lines radiating outward (no text or symbols)Innan du kopplar till din dator, se Mac eller PC setup.
natural_image
Two black electronic devices with speaker stands, one displaying a logo and the other showing a speaker icon (no visible text or symbols)MAC SETUP
iPod/iPhone/iPad docka
Mobiltelefon
CD-spelare
Nätverksspelare
Stereo/receiver
TV
natural_image
Diagram showing a connected audio jack and two cylindrical devices with earphones, no text or symbols present.DISPLAY OCH KNAPPAR
text_image
825natural_image
Close-up of a black electronic device with a metallic connector (no visible text or symbols)

- Built-in wireless receiver in each speaker
- Wireless full CD quality sound
- Wireless range room to room: Up to 20 meters
- Wireless range same room: Up to 50 meters
- Wireless range open field: Up to 100 meters
- No interference or delays
- Works with both Mac and PC
- RF band: 2.4GHz
- Sample rate: 48 KHz
- Dedicated proprietary protocol
- Room adaptation
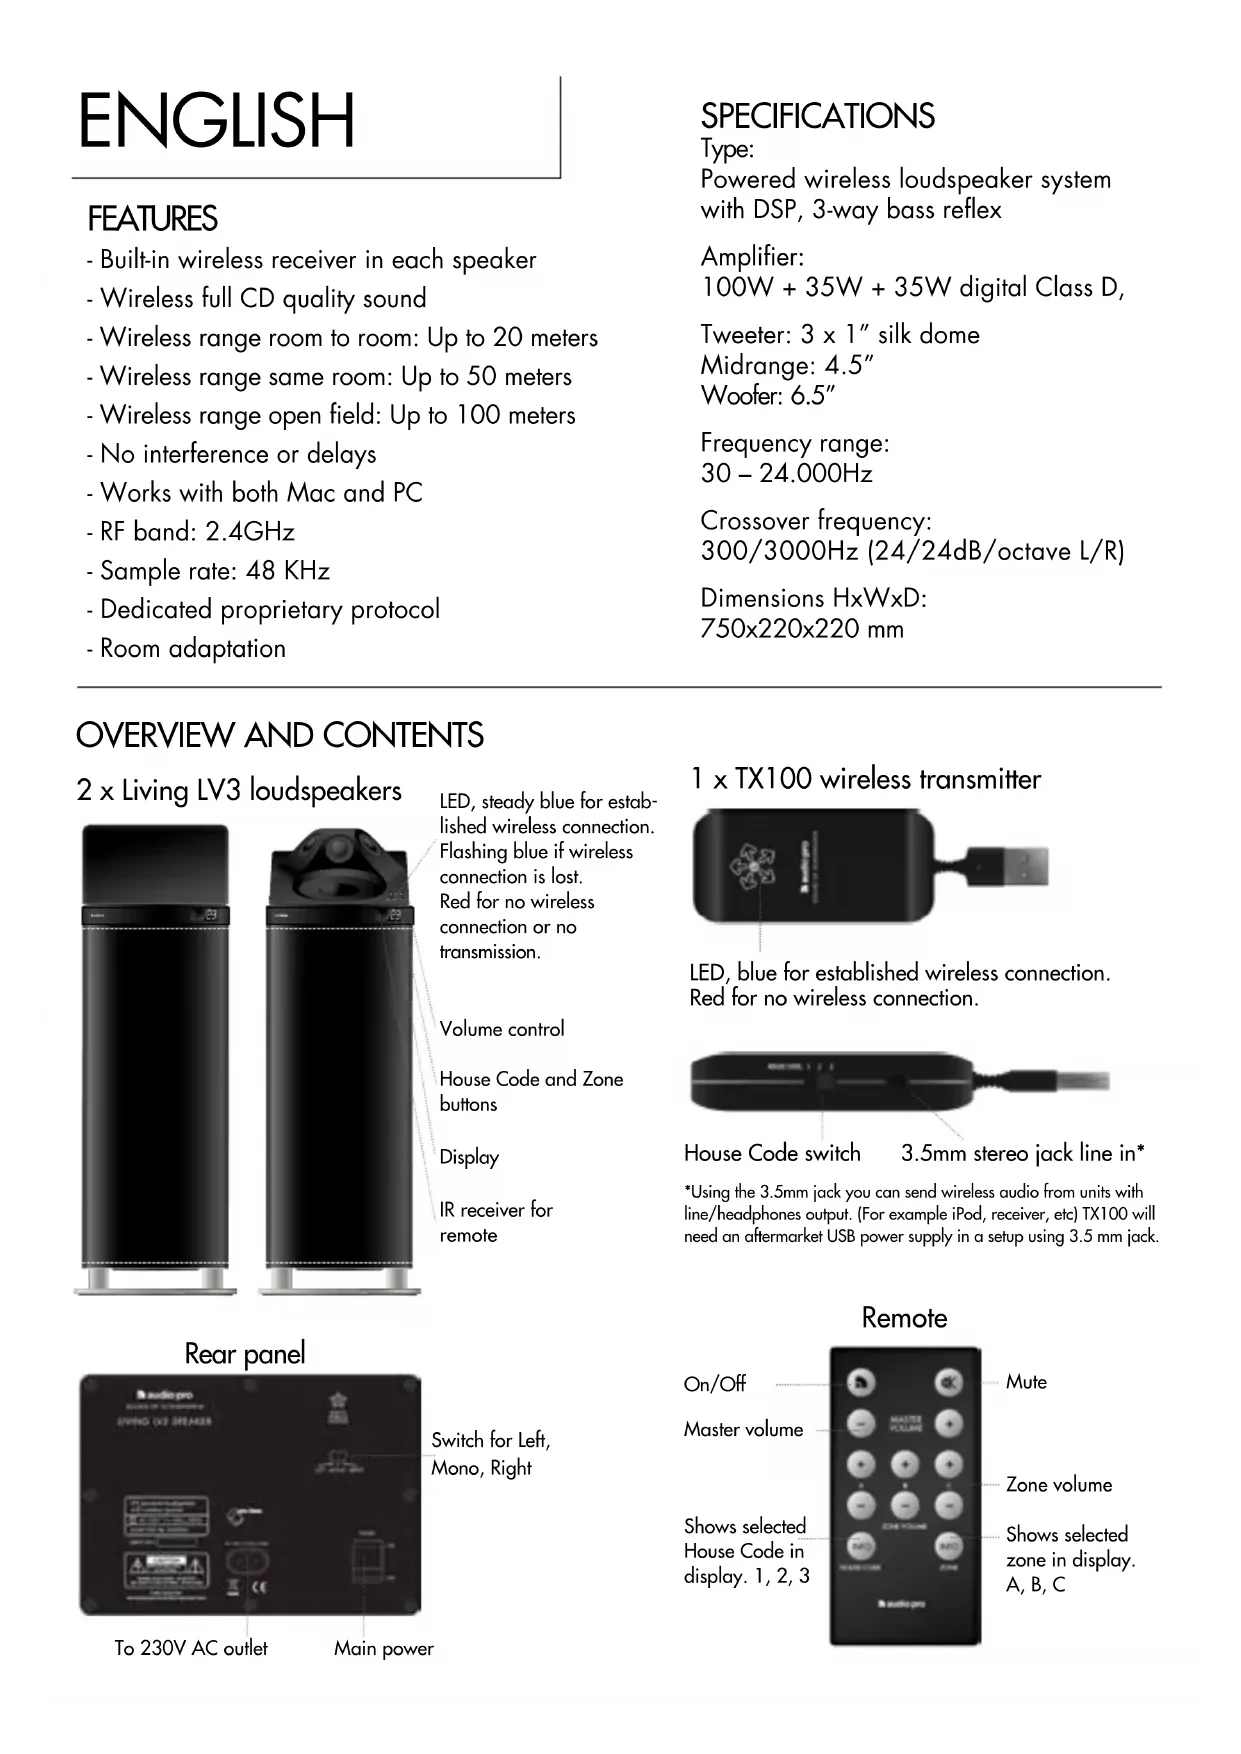
SPECIFICATIONS
Type:
Powered wireless loudspeaker system with DSP, 3-way bass reflex
Amplifier:
$$ 1 0 0 \mathrm{W} + 3 5 \mathrm{W} + 3 5 \mathrm{W} \text { digital Class } D, $$
Tweeter: 3 x 1" silk dome
Midrange: 4.5"
Woofer: 6.5"
Frequency range:
$$ 3 0 - 2 4. 0 0 0 \mathrm{Hz} $$
Crossover frequency:
$$ 3 0 0 / 3 0 0 0 \mathrm{Hz} (2 4 / 2 4 \mathrm{dB} / \text { o c t a v e } L / R) $$
Dimensions HxWxD:
$$ 7 5 0 \times 2 2 0 \times 2 2 0 \mathrm{mm} $$
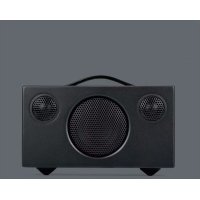
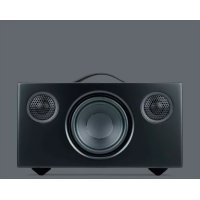
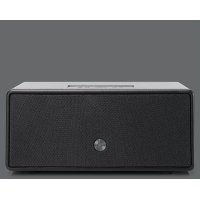
OVERVIEW AND CONTENTS
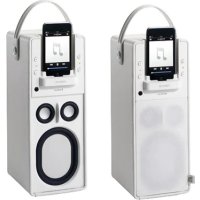
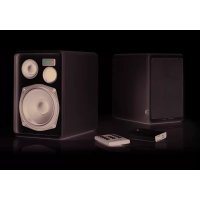
2 x Living LV3 loudspeakers
text_image
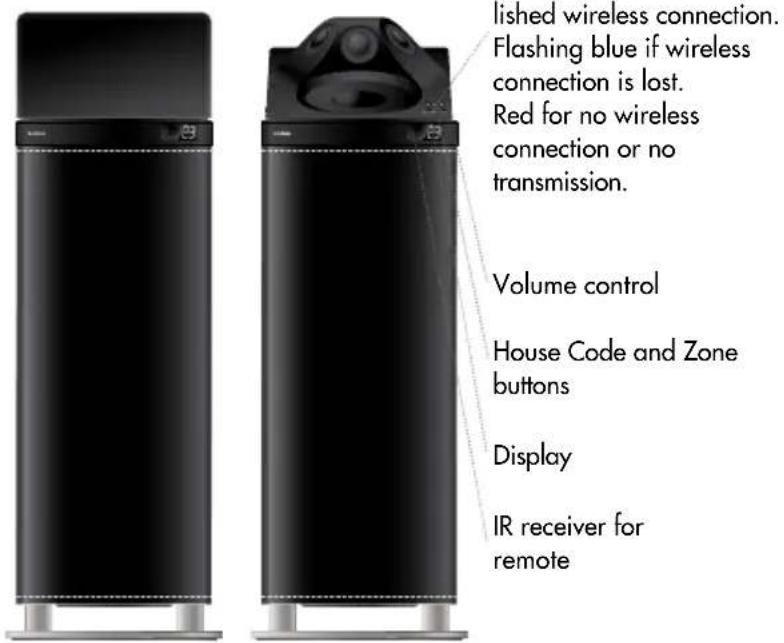
lished wireless connection. Flashing blue if wireless connection is lost. Red for no wireless connection or no transmission. Volume control House Code and Zone buttons Display IR receiver for remoteRear panel
text_image
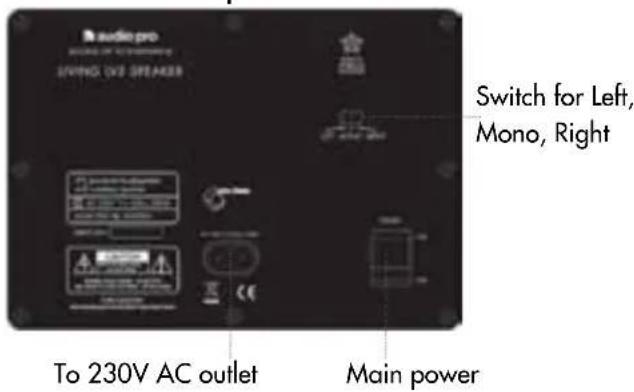
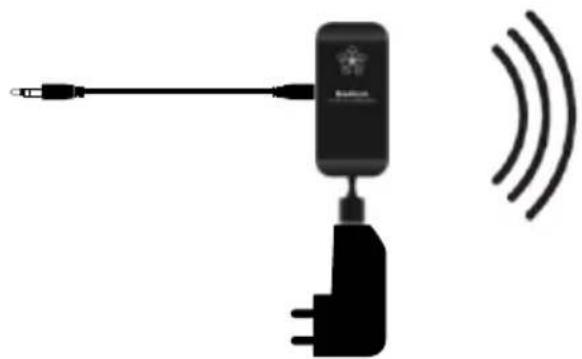
audio-pro SINING 1/2 SPEAKER Switch for Left, Mono, Right To 230V AC outlet Main power1 x TX100 wireless transmitter
natural_image
Black USB device with a flower-shaped logo and '3D health-pro' text, no visible text or symbols on the device body.LED, blue for established wireless connection. Red for no wireless connection.

natural_image
Close-up of a black electronic device with a cable extending from its side (no visible text or symbols)House Code switch
3.5mm stereo jack line in*
*Using the 3.5mm jack you can send wireless audio from units with line/headphones output. (For example iPod, receiver, etc) TX100 will need an aftermarket USB power supply in a setup using 3.5 mm jack.
text_image
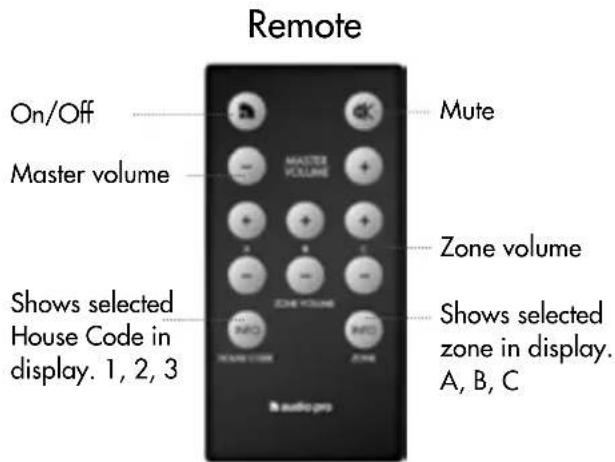
Remote On/Off Master volume Shows selected House Code in display. 1, 2, 3 Mute Zone volume Shows selected zone in display. A, B, CBASIC CONFIGURATION
natural_image
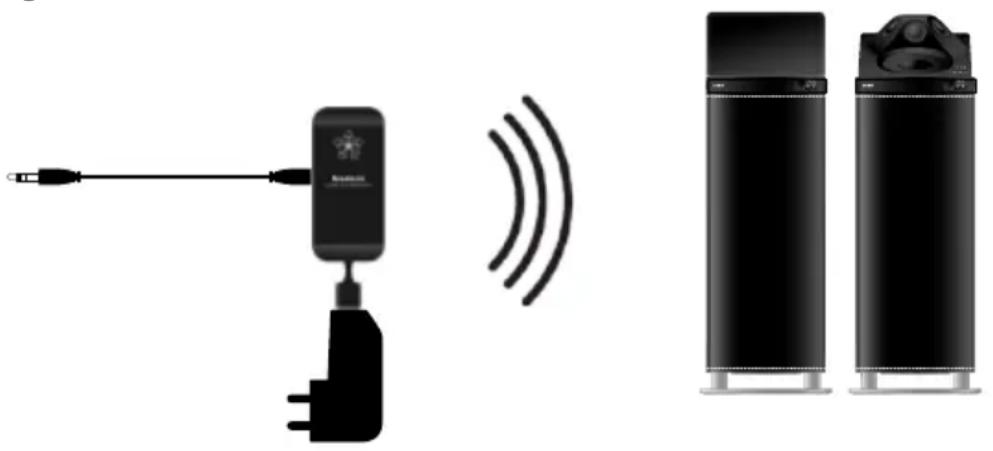
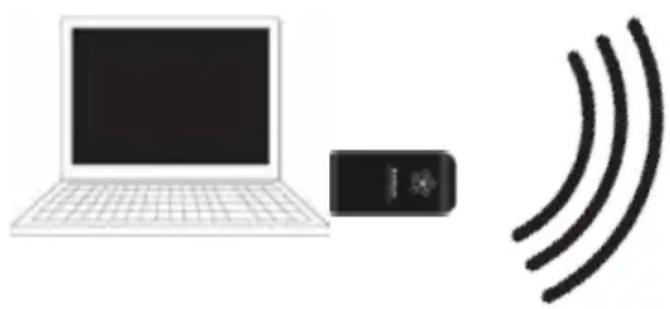
Illustration of a laptop connected to a device and wireless signal wave (no text or symbols)Before connecting to computer, see Mac or PC setup.
- Connect the TX100 transmitter to the computer.
- Connect both LV3 speakers to 230V outlet.
Done! Play your music on your computer.
natural_image
Two black cylindrical electronic devices with metallic legs, one showing a top panel and the other a speaker icon (no text or symbols visible)WIRELESS STATUS:
LED lights up blue on speakers and transmitters when wireless connection is established. LED lights up red on speakers and transmitters when no wireless connection is established.
Note:
- Make sure that both speakers and transmitter are using same House Code (channel 1, 2 or 3).
- If speakers are in automatic standby mode, LED is red even though wireless connection is established. Turns blue when speakers receive signal.
MAC SETUP
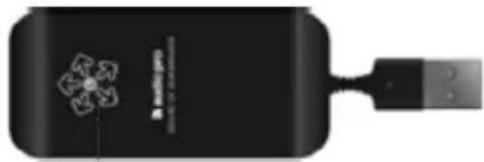
- Connect TX100 transmitter to a free USB socket.
- Go to System Preferences, choose Sound under Hardware.
- Click Output in menu, choose "USB Headset".
Done! You can now send audio from your computer.
PC SETUP
Please do following setup before using music playing software (for example iTunes or Spotify).
- Connect TX100 transmitter to a free USB socket. Wait until software has been installed.
(See lower right hand corner, message window will open when sound device is ready to use.)
Done! You can now send audio from your computer.
For some PC computers ( i e Windows 7) you may need to perform these settings:
2. Click Start button, go to Control Panel and choose Sound & Sound devices.
3. Under playback of audio, default unit, choose "USB Headset".
Done! You can now send audio from your computer.
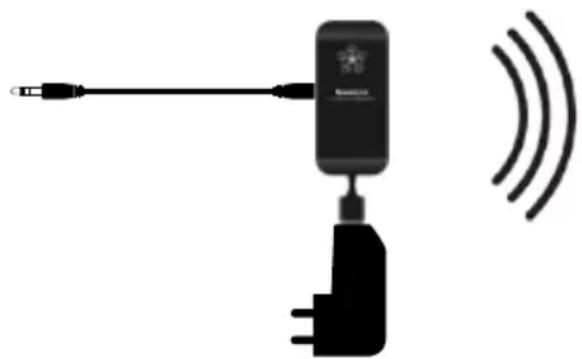
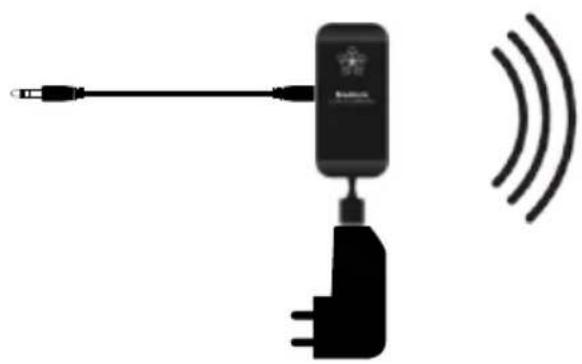
PLAY WIRELESS FROM ANY OTHER SOUND SOURCE
The TX100 transmitter has a sound input on its side to connect to a 3.5mm stereo cable. You can connect any device with sound output/headphones to the transmitter. Computer, mp3-player, iPod/iPhone/iPad dock, cellphone, stereo/receiver, cd-player, radio, etc. TX100 contains an advanced Burr-Brown A/D converter for best sound reproduction. The transmitter TX100 must be powered by Audio Pro USB power adaptor if connected by cable (sold separately).
Connect all devices with sound output/headphones.
Examples:
iPod/iPhone/iPad dock
Cellphone
CD-player
Network player
Stereo/receiver
TV
natural_image
Diagram of a wireless device with an AC input and power plug, emitting sound waves (no text or symbols)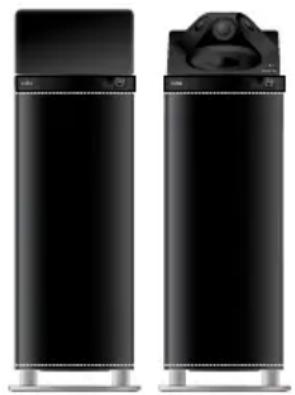
natural_image
Two black rectangular electronic devices with metallic bases, one front view and one side view showing a speaker (no text or symbols visible)DISPLAY AND BUTTONS
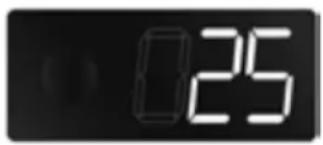
text_image
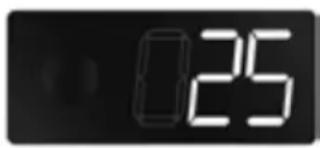
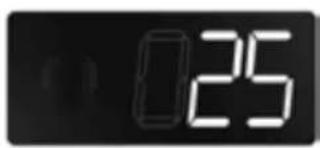
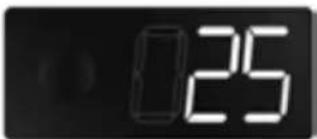
025On the front of LV3 you find display and IR-eye for remote control.
- To use remote, aim at IR-eye.
(Only speaker set to RIGHT or MONO Master can be used via remote.)
- The displays shows: volume level, chosen channel (House Code), chosen zone, and mute (-).
Note: Display only shows information for 3 seconds after setting (on buttons or with remote). Then it is turned off.
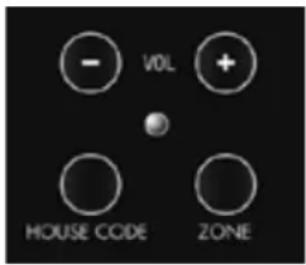
text_image
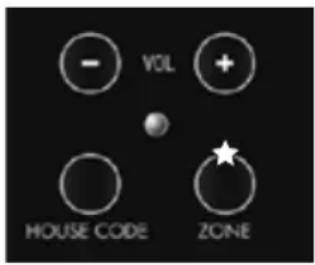
- VOL + ○ HOUSE CODE ZONEBeneath the grille on LV3 top is LED status indicator, buttons for volume, button for House Code selection, button for Zone selection.
- Volume, + to increase, - to decrease.
- House Code (channel), one push displays chosen channel (1, 2, 3).
Further pushes changes channel 1>2>3 and back to 1. - Zone, one push displays chosen volume zone (A, B, C).
Further pushes changes channel A>B>C and back to A.
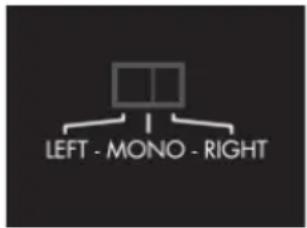
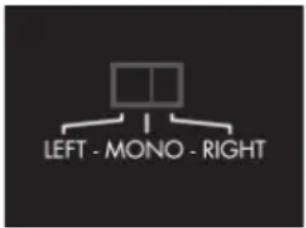
LEFT, MONO AND RIGHT
text_image
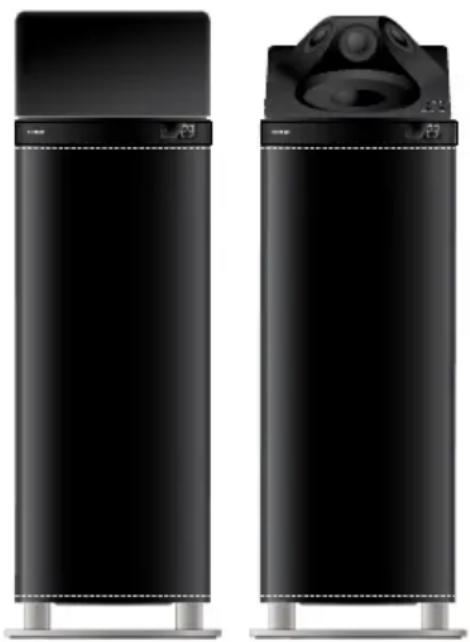
LEFT - MONO - RIGHTOn the rear of LV3 is a switch for left, mono and right. Normally two LV3 speakers are used in one room for stereo sound. Set one speaker to RIGHT, the other to LEFT.
NOTE: Only speaker set to RIGHT can receive commands from remote.
MONO is used if you have only one LV3 in one room, and the other in another room. Or very large room, or reception hall where all speakers play in mono. Note that the speakers will reproduce sound in mono, not stereo.

text_image
MASTER VOLUME EQUITY VOLUME HENSIVE VOLUME 2014 EQUITY VOLUME HENSIVE VOLUME 2014 EQUITY VOLUMEMONO MASTER
If you have your LV3 speakers set to MONO, you will need to make one of them MONO MASTER to be able receive commands from the remote.
Setting one speaker as MONO MASTER:
- Aim remote at desired speakers, push Zone INFO button for 5 seconds.
- Display will show "111". Now the speaker is mono master speaker.
To change back to slave mode mono speaker, push Zone info button on remote again for 5 seconds, display shows "000".
ROOM ADAPTATION
When placing LV3 in your home, you may experience too much bass or too little, depending on where you place it. To solve this, LV3 has built in room adaptation (+10/-10 dB bass equalizer). By adjusting bass levels, you can find a good bass balance that suits your room.
Generally, placing LV3 in a corner will reproduce more bass, placing LV3 in the middle of your room less bass. With room adaptation you can place LV3 anywhere you like, and then adjust bass levels to your liking.

text_image
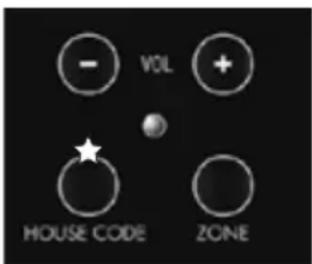
- VOL + HOUSE CODE ZONEADJUST BASS EQ:
- Use buttons on speaker (not remote)
- Press button "House Code" and hold it pressed
- While holding "House Code" button pressed, adjust bass EQ with VOL + and -. Press + to increase bass, - to decrease bass
Display will show your settings: -10, -9, -8 ... 0 ... 8, 9, 10
RESET SPEAKER
Returning to default settings (volume 17, bass EQ 0):
Turn off speakers with remote. Turn on again and press MUTE on remote while LED flashes. Push Mute once more. Now speaker pair (or all speakers in same Zone) are in default setting.
MULTIROOM
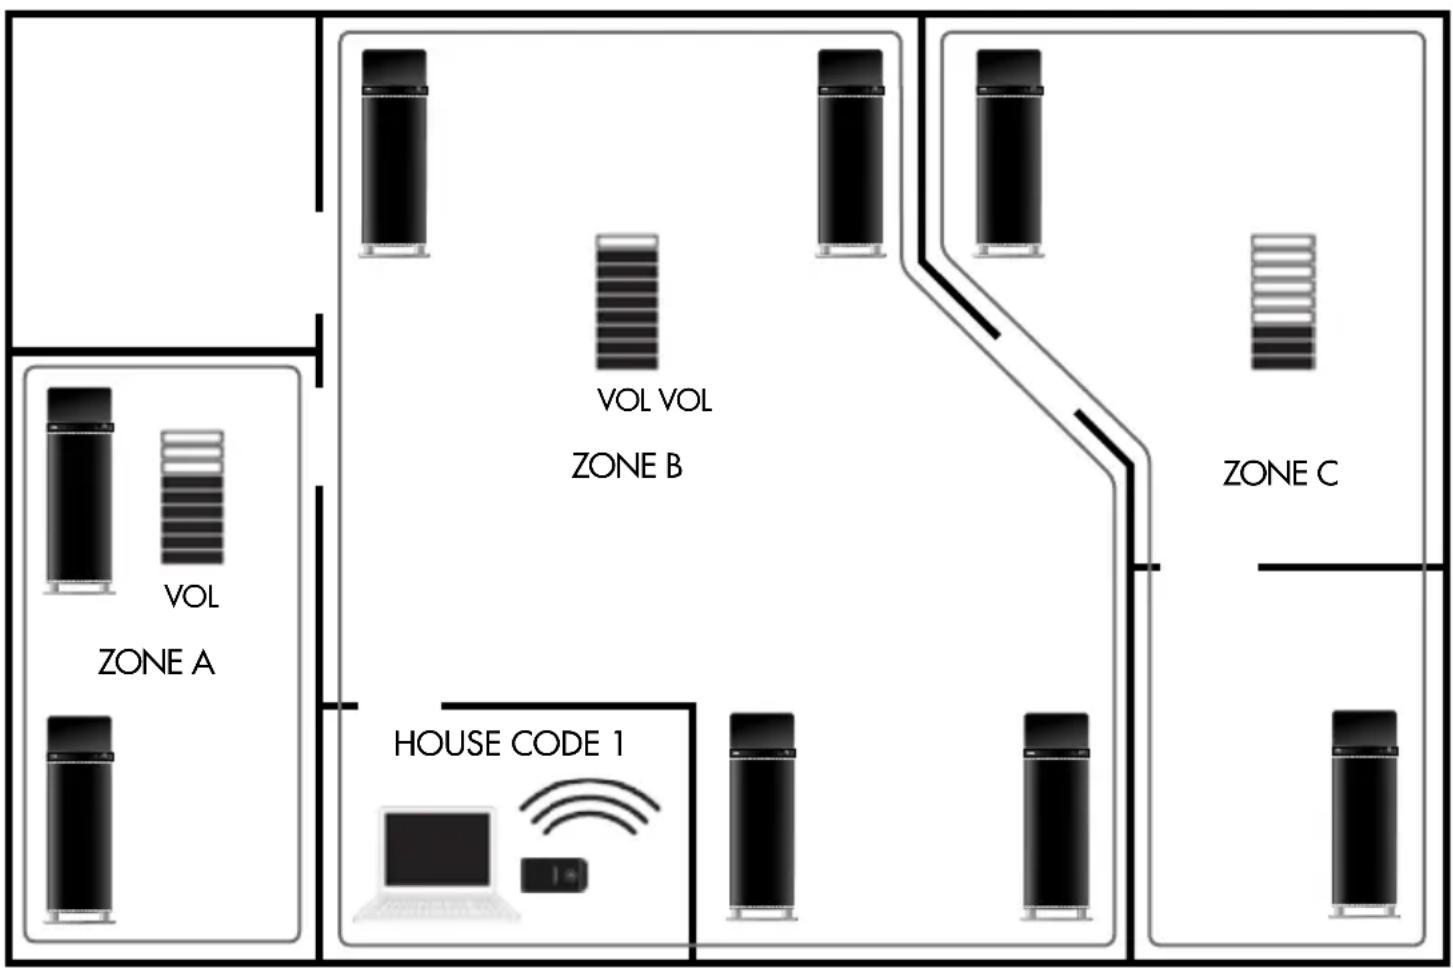
VOLUME ZONES, DIFFERENT LEVELS IN DIFFERENT ROOMS
You can extend your audio network with infinite number of LV-speakers. But you might not always want the same volume level in all your rooms. Volume zones solves this. Each channel (House Code) can be divided in up to 3 volume zones. Each zone can have its own volume level. One level in the livingroom, another in the kitchen. You can adjust volume on all speakers at the same time with Master volume. You can have as many LV speakers in each zone as you like, or just one pair. Zone volume is adjusted by remote control.
flowchart
graph TD
    subgraph_Zone_A["Zone A"]
        A1["VOL"] --> A2["VOL VOL"]
        A3["VOL"] --> A4["VOL VOL"]
    end
    subgraph_Zone_B["Zone B"]
        B1["VOL VOL"] --> B2["VOL VOL"]
        B3["VOL VOL"] --> B4["VOL VOL"]
    end
    subgraph_Zone_C["Zone C"]
        C1["VOL"] --> C2["VOL VOL"]
        C3["VOL"] --> C4["VOL VOL"]
    end
    subgraph_HOUSE_CODE_1["House Code 1"]
        D["Computer"] --> D
        E["Signal"] --> D
    end
    A1 --> B1
    A2 --> B2
    A3 --> B3
    A4 --> B4
    A5 --> B5
    A6 --> B6
    A7 --> B7
    A8 --> B8
    A9 --> B9
    A10 --> B10
    A11 --> B11
    A12 --> B12
    A13 --> B13
    A14 --> B14
    A15 --> B15
    A16 --> B16
    A17 --> B17
    A18 --> B18
    A19 --> B19
    A20 --> B20
    B1 --> C1
    B2 --> C2
    B3 --> C3
    B4 --> C4
    B5 --> C5
    B6 --> C6
    B7 --> C7
    B8 --> C8
    B9 --> C9
    B10 --> C10
    B11 --> C11
    B12 --> C12
    B13 --> C13
    B14 --> C14
    B15 --> C15
    B16 --> C16
    B17 --> C17
    B18 --> C18
    B19 --> C19
- Each channel (House Code) can be divided in up to three zones (A, B and C).
- In zones you can adjust volume, on/off and mute individually in each zone.
Master volume on remote will adjust volume in all zones at the same time.
- A zone does not have to be one room, can be whole housefloor or departments (within range of transmitter).
Volume zones works with all speakers in the Living series.
Use Living LV1, LV2, LV3 and LV-SUB in same zones.
SETTING A VOLUME ZONE
text_image
- VOL + ○ HOUSE CODE ZONEZone button on the top of LV3.
One push to display current zone.
Change zone by pushing again. A, B, C and back to A.
Zone letter is displayed.
When zone is selected, display will turn black after 3 seconds.
MULTIROOM
CHANNELS, PLAY FROM DIFFERENT SOURCES AT THE SAME TIME
By House Codes (1, 2, 3), the audio network can be divided in up to three separate channels. This feature allows you to play different music from different soundsources (with 3 transmitters). You can play all channels at the same time to different LV speakers in your home. You can add as many LV-speakers as you like in each House Code (within range of transmitter).

flowchart
graph TD
    A["House CODE 1"] --> B["Computer"]
    C["House CODE 2"] --> D["Laptop"]
    E["House CODE 3"] --> F["Laptop"]
    B --> G["Mobile Device"]
    D --> H["Mobile Device"]
    F --> I["Mobile Device"]
    style A fill:#f9f,stroke:#333
    style C fill:#f9f,stroke:#333
    style E fill:#f9f,stroke:#333
    style B fill:#ccf,stroke:#333
    style D fill:#ccf,stroke:#333
    style F fill:#ccf,stroke:#333
    style G fill:#dfd,stroke:#333
    style H fill:#dfd,stroke:#333
    style I fill:#dfd,stroke:#333
Note:
- Set to same House Code on both transmitter and loudspeaker to make wireless connection.
- You can add as many LV-speakers as you want in each House Code, within range of transmitter.
- House Codes are the same for all speakers in the Living-series.
You can use Living LV1, LV2, LV3 or LV-SUB int the same wireless network.
SETTING CHANNEL (HOUSE CODE):
text_image
- VOL + HOUSE CODE ZONEHouse Code button on the top of LV3.
One push to display current channel.
Change House Code by pushing again. 1, 2, 3 and back to 1.
House Code number is displayed.
When channel is selected, display will turn black after 3 seconds.
House Code switch on side of transmitter TX100.
Set to same number as the speakers you want to play wirelessly to.

natural_image
Close-up of a black electronic device with a USB cable and indicator lights (no visible text or symbols)

The lightning flash with arrowhead symbol, within an equilateral triangle, is intended to alert the user to the presence of uninsulated "dangerous voltage" within the product's enclosure that may be of sufficient magnitude to constitute a risk of electric shock to persons.

The exclamation point within an equilateral triangle is intended to alert the user to the presence of important operating and maintenance (servicing) instructions in the literature accompanying the appliance.
WARNING:
TO REDUCE THE RISK OF FIRE OR ELECTRIC SHOCK, DO NOT EXPOSE THIS APPARATUS TO RAIN OR MOISTURE.
CAUTION:
TO REDUCE THE RISK OF ELECTRIC SHOCK, DO NOT REMOVE COVER (OR BACK). NO USER-SERVICEABLE PARTS INSIDE. REFER SERVICING TO QUALIFIED SERVICE PERSONNEL.
IMPORTANT SAFETY INSTRUCTIONS
- Read these instructions.
- Keep these instructions.
- Heed all warnings.
- Follow all instructions.
- Do not use this apparatus near water.
-
Clean only with dry cloth.
-
Do not block any ventilation openings. Install in accordance with the manufacturer's instructions.
-
Do not install near any heat sources such as radiators, heat registers, stoves, or other apparatus (including amplifiers) that produce heat.
-
Protect the power cord from being walked on or pinched particularly at plugs, convenience receptacles, and the point where they exit from the apparatus.
-
Only use attachments/accessories specified by the manufacturer.
-
Unplug this apparatus during lightning storms or when unused for long periods of time.
-
Refer all servicing to qualified service personnel. Servicing is required when the apparatus has been damaged in any way, such as power-supply cord or plug is damaged, liquid has been spilled or objects have fallen into the apparatus, the apparatus has been exposed to rain or moisture, does not operate normally, or has been dropped.
-
Damage Requiring Service
Unplug the apparatus from the wall outlet and refer servicing to qualified service personnel under thee following conditions:
A. When the power-supply cord or plug is damaged,
B. If liquid has been spilled, or objects have fallen into the apparatus,
C. If the apparatus has been exposed to rain or water,
D. If the apparatus does not operate normally by following the operating instructions. Adjust only those controls that are covered by the operating instructions as an improper adjustment of other controls may result in damage and will often require extensive work by a qualified technician to restore the apparatus to its normal operation,
E. If the apparatus has been dropped or damaged in any way, and
F. When the apparatus exhibits a distinct change in performance this indicates a need for service. -
Object and Liquid Entry
Never push objects of any kind into the apparatus through openings as they may touch dangerous voltage points or short-out parts that could result in a fire or electric shock. The apparatus shall not be exposed to dripping or splashing and no objects filled with liquids, such as vases shall be placed on the apparatus. Don't put candles or other burning objects on top of this unit.
- Batteries
Always consider the environmental issues and follow local regulations when disposing of batteries.
- The power supply and power cord for this apparatus is intended for indoor use only.
FRANÇAIS
CARACTÉRISTIQUES
(Tweeter): 3 x dôme souple 1 "
(Midrange): 4.5"
Dimensions HxLxP: 750x220x220 mm
APERÇU & CONTENU
natural_image
Black USB device with a flower-shaped logo and connector port (no visible text or symbols)natural_image
Close-up of a black USB flash drive with a cable (no visible text or symbols)natural_image
Illustration of a laptop connected to a device and emitting sound waves (no text or symbols)natural_image
Two black cylindrical electronic devices with metallic legs, one showing a top-mounted speaker (no visible text or symbols)Station iPod/iPhone/iPad
Téléphone portable
Lecteur CD
Lecteur en réseau
Stéréo/récepteur
TV
natural_image
Diagram of a wireless device with an AC input and power plug, emitting sound waves (no text or symbols)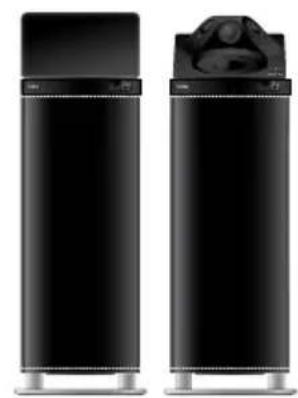
natural_image
Two black cylindrical devices with metallic legs, one showing a lid and the other with a circular object (no text or symbols visible)AFFICHAGE ET BOUTONS
text_image
025text_image
MASTER VOLUME STOCK VOLUME HOME CORE HOME audio ptsCOMMANDE MONO
natural_image
Close-up of a black electronic device with a cable and indicator lights (no visible text or symbols)

natural_image
Black USB device with a flower-shaped logo on its side, connected to a USB port (no visible text or symbols)natural_image
Close-up of a black electronic device with a cable connector (no visible text or symbols)Gerätecode-Schalter
natural_image
Illustration of a laptop connected to a small device and three curved lines (no text or symbols)natural_image
Two black cylindrical electronic devices with metallic legs, one showing a top-mounted speaker (no visible text or symbols)natural_image
Diagram of a wireless device with an AC input and power plug, emitting sound waves (no text or symbols)
natural_image
Two black rectangular electronic devices with metallic bases, one showing a top-mounted display (no visible text or symbols)DISPLAY UND TASTEN

text_image
825text_image
MASTER VOLUME ZONE VOLUME HOUSE SIZE Audio portsMONO MASTER
natural_image
Close-up of a black electronic device with a cable and indicator lights (no visible text or symbols)

natural_image
Black refrigerator with a white top and silver legs (no visible text or symbols)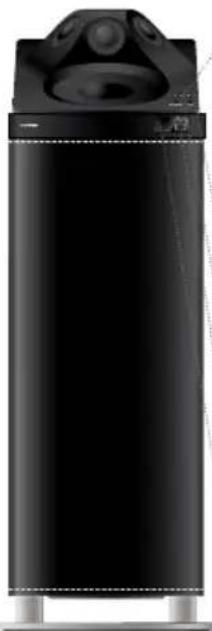
natural_image
Black cylindrical electronic device with a speaker and top-mounted head (no visible text or symbols)natural_image
Black USB device with a flower-shaped logo and connector port (no visible text or symbols on the device body)natural_image
Close-up of a black electronic device with a cable and indicator lights (no visible text or symbols)natural_image
Illustration of a laptop connected to a device with three curved lines, symbolizing wireless signal or communication (no text or symbols present)natural_image
Two black cylindrical electronic devices with metallic legs and a speaker grille, shown from different angles (no text or symbols visible)natural_image
Diagram of a wireless device with an antenna, power plug, and signal waves (no text or symbols)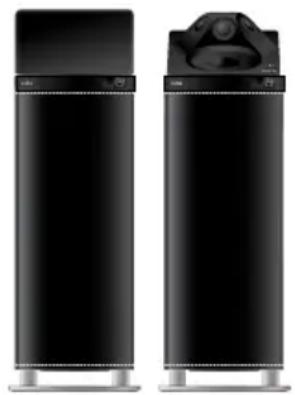
natural_image
Two black rectangular electronic devices with metallic bases, one front view and one side view showing a speaker (no text or symbols visible)PANTALLA Y BOTONES

text_image
825text_image
MASTER VOLUME ZONE VOLUME HOUSE CORE SOME audio portsMONO PRINCIPAL
natural_image
Close-up of a black electronic device with a USB cable extending from its side (no visible text or symbols)

text_image
Audio pro SINEMA OF 10 MACHINES SINEMA U23 STEAMER OFF-OPEN ACCESS OFF-OPEN ACCESS OFF-OPEN ACCESS OFF-OPEN ACCESS OFF-OPEN ACCESS OFF-OPEN ACCESS OFF-OPEN ACCESS OFF-OPEN ACCESS OFF-OPEN ACCESS OFF-OPEN ACCESS OFF-OPEN ACCESS OFF-OPEN ACCESS OFF-OPEN ACCESS OFF-OPEN ACCESS OFF-OPEN ACCESS OFF-OPEN ACCESS OFF-OPEN ACCESS OFF-OPEN ACCESS OFF-OPEN ACCESS OFF-OPEN ACCESS OFF-OPEN Accessibility OFF-OPEN Accessibility OFF-OPEN Accessibility OFF-OPEN Accessibility OFF-OPEN Accessibility OFF-OPEN Accessibility OFF-OPEN Accessibility OFF-OPEN Accessibility OFF-OPEN Accessibility OFF-OPEN Accessibility OFF-OPEN Accessibility OFF-OPEN Accessibility OFF-OPEN Accessibility OFF-OPEN Accessibility OFF-OPEN Accessibility OFF-OPEN Accessibility OFF-OPEN Accessibility OFF-OPEN Accessibility OFF-OPEN Accessibility OFF-OPEN Accessibility OFF-OPEN accessibility OFF-OPEN accessibility OFF-OPEN accessibility OFF-OPEN accessibility OFF-OPEN accessibility OFF-OPEN accessibility OFF-OPEN accessibility OFF-OPEN accessibility OFF-OPEN accessibility OFF-OPEN accessibility OFF-OPEN accessibility OFF-OPEN accessibility OFF-OPEN accessibility OFF-OPEN accessibility OFF-OPEN accessibility OFF-OPEN accessibility OFF-OPEN accessibility OFF-OPEN accessibility OFF-OPEN accessibility OFF-OPEN accessibility OFF-OPEN Accessibility OFF-OPEN Accessibility OFF-OPEN Accessibility OFF-OPEN Accessibility OFF-OPEN Accessibility OFF-OPEN Accessibility OFF-OPEN Accessibility OFF-OPEN Accessibility OFF-OPEN Accessibility OFF-OPEN Accessibility OFF-OPEN Accessibility OFF-OPEN Accessibility OFF-OPEN Accessibility OFF-OPEN Accessibility OFF-OPEN Accessibility OFF-OPEN Accessibility OFF-OPEN Accessibility OFF-OPEN Accessibility OFF-OPEN Accessibility OFF-OPENAccessibilityVasen/mono/oikea -kytkin
natural_image
Black USB device with a flower-shaped logo and connector port (no visible text or symbols)natural_image
Close-up of a black USB flash drive with cable connector (no visible text or symbols)Talokoodi-kytkin
text_image
MASTER VOLUME ZONE VOLUME MASC MASC HARD CLOW ZONEaudio ports
Mykistys
natural_image
Illustration of a laptop connected to a speaker and wireless signal wave (no text or symbols)natural_image
Two black cylindrical electronic devices with metallic legs, one showing a top-mounted display (no visible text or symbols)LANGATTOMAN YHTEYDEN TILA:
natural_image
Diagram of a wireless device with an AC input and power plug, emitting sound waves (no text or symbols)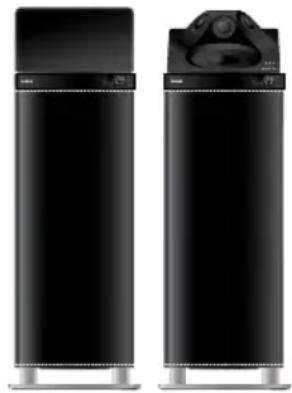
natural_image
Two black rectangular electronic devices with metallic bases, one showing a speaker icon (no text or symbols visible)NÄYTTÖ JA PAINIKKEET

text_image
025VASEN, MONO JA OIKEA
text_image
LEFT - MONO - RIGHTnatural_image
Close-up of a black handheld electronic device with a metallic connector (no visible text or symbols)

natural_image
Black rectangular appliance with a flat top and metallic base, no visible text or symbols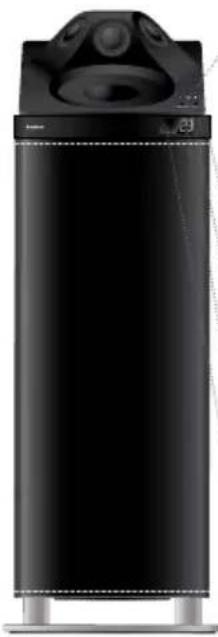
natural_image
Black cylindrical electronic device with a speaker grille and control panel, no visible text or symbolsnatural_image
Black USB device with a flower-shaped logo on its side, connected to a USB port (no visible text or symbols on the device body)natural_image
Close-up of a black electronic device with a cable and indicator lights (no visible text or symbols)Huiscodeschakelaar
3,5 mm stereoplug line-in*
natural_image
Illustration of a laptop connected to a small device and wireless signal symbol (no text or labels)natural_image
Two black cylindrical electronic devices with metallic legs, one showing a speaker grille and the other a camera (no text or symbols visible)iPod/iPhone/iPad dock
Mobiele telefoon
Cd-speler
Netwerkspeler
Stereo/receiver
Tv
natural_image
Diagram of a wireless device with an AC input and power plug, emitting sound waves (no text or symbols)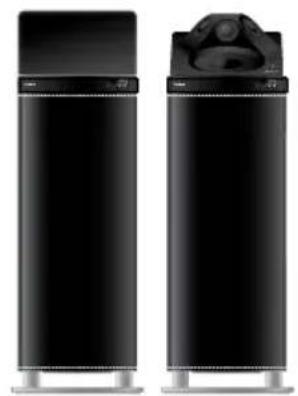
natural_image
Two black cylindrical devices with metallic legs, one with a camera on top (no visible text or symbols)SCHERM EN KNOPPEN
text_image
25flowchart
graph TD
    subgraph_Zone_A["Zone A"]
        A1["VOL"] --> A2["VOL VOL"]
        A2 --> A3["VOL VOL ZONE B"]
    end
    subgraph_Zone_B["Zone B"]
        B1["VOL"] --> B2["VOL VOL"]
        B2 --> B3["VOL VOL ZONE B"]
    end
    subgraph_Zone_C["Zone C"]
        C1["VOL"] --> C2["VOL VOL"]
        C2 --> C3["VOL VOL ZONE B"]
    end
    subgraph_HOUSE_CODE_1["House Code 1"]
        D1["Computer"] --> D2["Wireless Signal"]
    end
natural_image
Close-up of a black USB flash drive with a cable (no visible text or symbols)