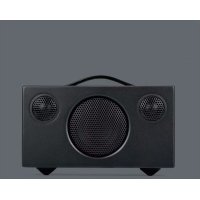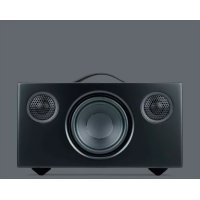
Porto Go - Speaker AUDIO PRO - Free user manual and instructions
Find the device manual for free Porto Go AUDIO PRO in PDF.



User questions about Porto Go AUDIO PRO
0 question about this device. Answer the ones you know or ask your own.
Ask a new question about this device
Download the instructions for your Speaker in PDF format for free! Find your manual Porto Go - AUDIO PRO and take your electronic device back in hand. On this page are published all the documents necessary for the use of your device. Porto Go by AUDIO PRO.
USER MANUAL Porto Go AUDIO PRO
sound, science and style
© Audio Pro AB Sweden 2008.
Audio Pro ^® , the Audio Pro logotype, the 'a' symbol and acebass ^® are all registered trademarks of Audio Pro AB, Sweden. All rights reserved. Audio Pro follows a policy of continuous advancement in development. Specifications may be changed without notice.
EmbracingSound™
EmbracingSound™ is the single-point loudspeaker technology for consumers and professionals alike to experience more of the recording with better resolution and clarity than ever before. Thanks to the unique speaker placement and an ingenious signal treatment, the stereo signal is optimized to reach our ears instead of separate speakers. Just sit back and experience more of your music and maybe you will find new favorites, as well as, making excursions into music genres that you where totally unfamiliar with before. For further information please visit www.embracingsound.com.
The trademark EmbracingSound ^™ is owned by Embracing Sound Experience AB. US Patent # 7,010,128 Patents pending.

The "Made for iPod" logo indicates that this product has been designed specifically to work with iPod. The manufacturer certifies that this accessory has been made in accordance with the high standards of quality and performance that you expect from iPod and Apple.
iPod doesn't come in just one size or shape. The Universal Dock provides a single, elegant way to connect any iPod with dock connector to your iPod accessory. iPod fits into the Universal Dock through the use of interchangeable inserts called Dock Adapters.
audio pro
sound, science and style
© Audio Pro AB Sweden 2008.
sound, science and style
© Audio Pro AB Sverige 2008.
sound, science and style
5th generation (video)
30GB (9)

iPod
5th generation (video)
60GB 80GB (10)

iPod nano
2nd generation (aluminium)
2GB 4GB 8GB (11)

iPod classic
80GB (9) 160GB (10)

iPod nano
3rd generation (video)
4GB 8GB (13)

iPod touch
8GB 16GB (14)
NOTERA:
natural_image
Two technical diagrams showing mechanical components with arrows indicating direction (no text or symbols)Byta batteri
natural_image
Diagram of a battery connector with an output socket and arrow indicating direction (no text or symbols)NOTERA:
Included dock adaptors:

iPod
5th generation (video)
30GB (9)

iPod
5th generation (video)
60GB 80GB (10)

iPod nano
2nd generation (aluminium)
2GB 4GB 8GB (11)

iPod classic
80GB (9) 160GB (10)

iPod nano
3rd generation (video)
4GB 8GB (13)

iPod touch
8GB 16GB (14)
NOTE:
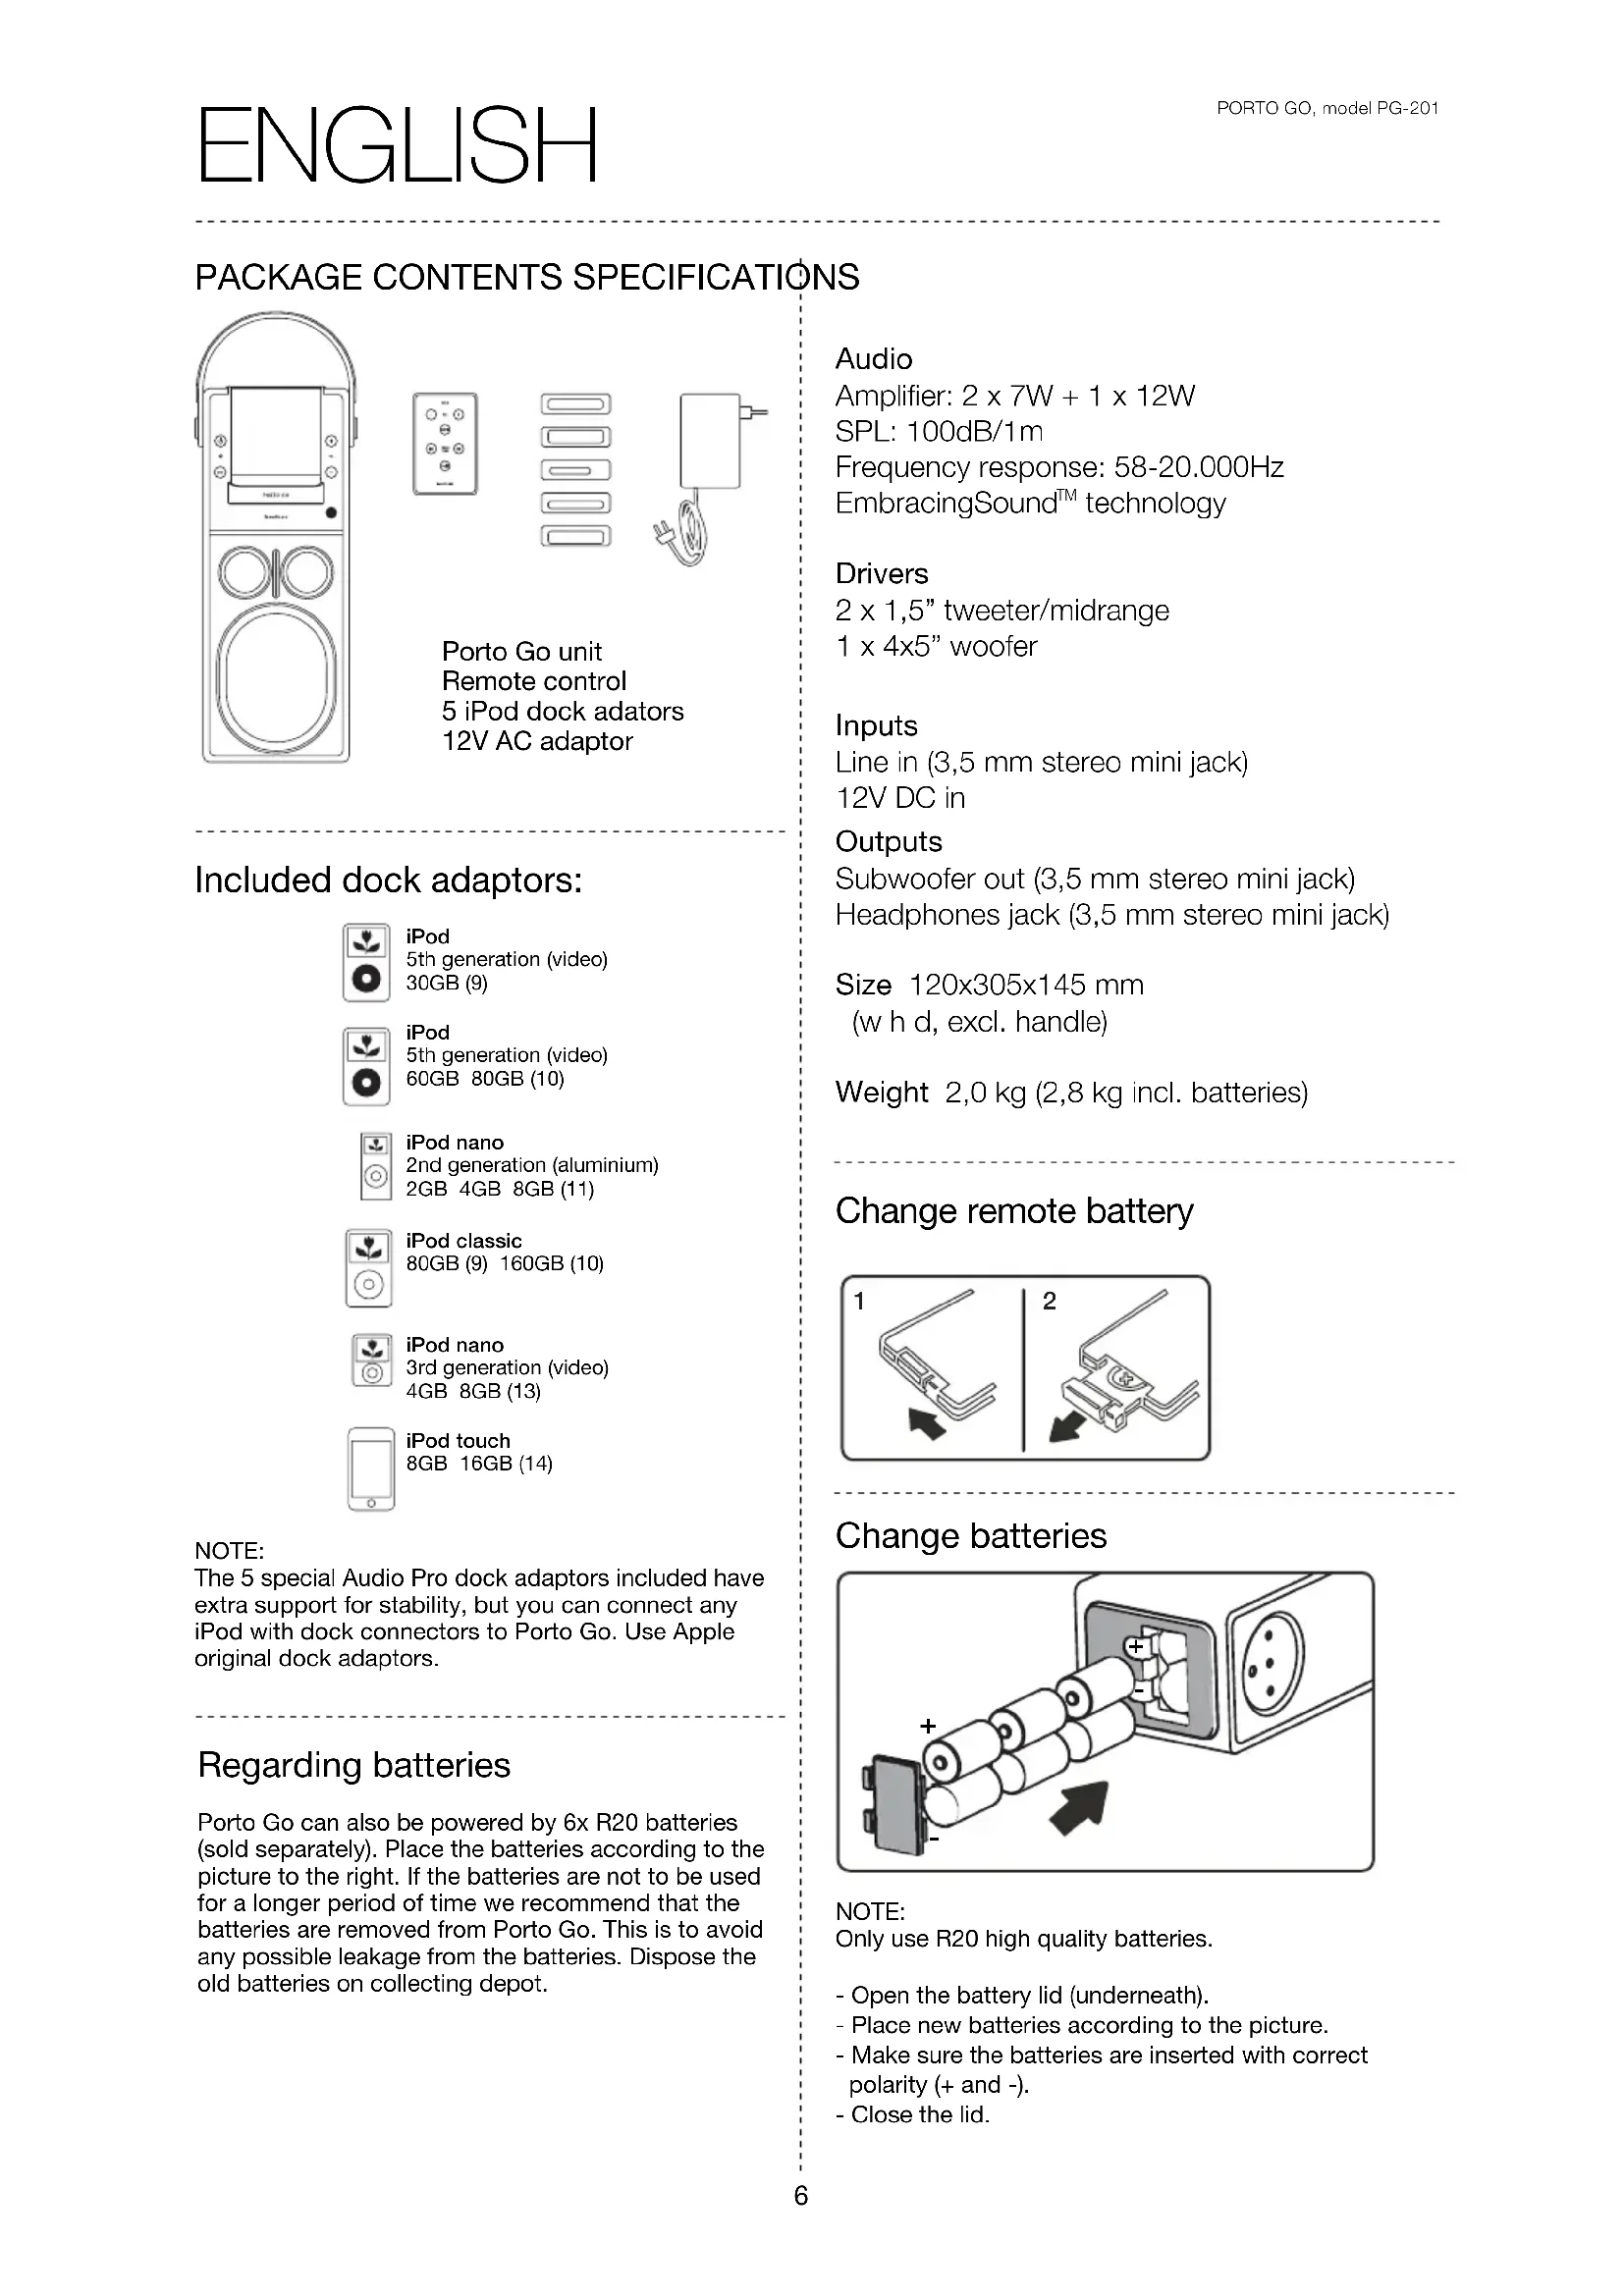
The 5 special Audio Pro dock adaptors included have extra support for stability, but you can connect any iPod with dock connectors to Porto Go. Use Apple original dock adaptors.
Regarding batteries
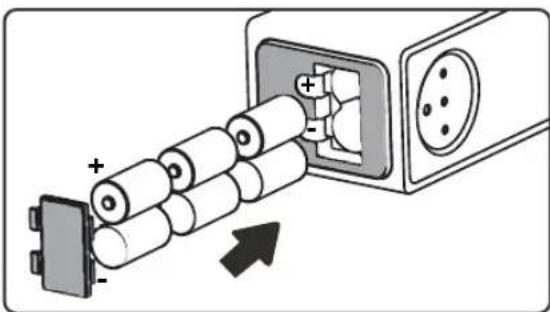
Porto Go can also be powered by 6x R20 batteries (sold separately). Place the batteries according to the picture to the right. If the batteries are not to be used for a longer period of time we recommend that the batteries are removed from Porto Go. This is to avoid any possible leakage from the batteries. Dispose the old batteries on collecting depot.
Audio
Amplifier: 2 x 7W + 1 x 12W
SPL: 100dB/1m
Frequency response: 58-20.000Hz
EmbracingSound™ technology
Drivers
2 x 1,5" tweeter/midrange
1 x 4x5" woofer
Inputs
Weight 2,0 kg (2,8 kg incl. batteries)
Change remote battery
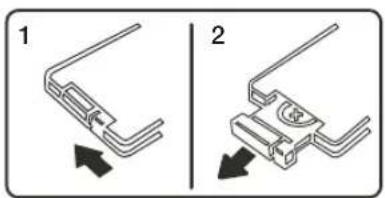
natural_image
Two technical diagrams showing mechanical components with arrows indicating direction (no text or symbols)Change batteries
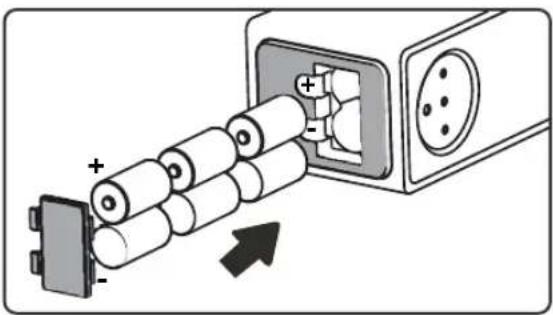
natural_image
Diagram of a battery connector with an output socket and power supply, showing no text or symbolsNOTE:
Only use R20 high quality batteries.
- Open the battery lid (underneath).
- Place new batteries according to the picture.
- Make sure the batteries are inserted with correct polarity (+ and -).
- Close the lid.
FRONT
1. Stand by
Turns Porto Go on and off.
2. LED status
System on: Green steady light
System off: No light
3. SRC
Source selection, toggle between connected sources (iPod and Line in). Goes automatically into iPod mode when an iPod is connected.
4. iPod universal dock
You can use any iPod adaptor to connect any iPod model.
5. Volume up
Single push changes 1 step at a time. Long push increases volume faster.
6. Volume down
Single push changes 1 step at a time. Long push decreases volume faster.
- Infrared sensor for remote control
8. Acoustic divider
Part of the EmbracingSound™ technology.
-
Tweeters
-
Woofer
-
Battery lid
BACK
- Bass reflex port
- Place for remote control
- Line in
Connect other sound sources, such as CD-player, Mp3-player, PC, etc.
-
Headphones
-
Subwoofer out
Connect to powered subwoofer.
- 12V DC IN
Connect the external AC adaptor or DC 12V from car or
boat to run Porto Go.

DC plug 2.1 mm.
REMOTE CONTROL
- Volume down
Single push changes 1 step at a time.
Long push decreases volume faster.
- Volume up
Single push changes 1 step at a time.
Long push increases volume faster.
- Mute
Push to turn sound off. Push again to turn sound on.
- Press once to change to previous iPod track
Press continuously to search backward within the track.
- Press once to change to next iPod track
Press continuously to search forward within the track.
- Play/pause
Play or pause when in iPod mode.

The lightning flash with arrowhead symbol, within an equilateral triangle, is intended to alert the user to the presence of uninsulated "dangerous voltage" within the product's enclosure that may be of sufficient magnitude to constitute a risk of electric shock to persons.

The exclamation point within an equilateral triangle is intended to alert the user to the presence of important operating and maintenance (servicing) instructions in the literature accompanying the appliance.
WARNING:
TO REDUCE THE RISK OF FIRE OR ELECTRIC SHOCK, DO NOT EXPOSE THIS APPARATUS TO RAIN OR MOISTURE.
CAUTION:
TO REDUCE THE RISK OF ELECTRIC SHOCK, DO NOT REMOVE COVER (OR BACK). NO USER-SERVICEABLE PARTS INSIDE. REFER SERVICING TO QUALIFIED SERVICE PERSONNEL.
Important Safety Instructions
-
Read these instructions.
-
Keep these instructions.
-
Heed all warnings.
-
Follow all instructions.
-
Do not use this apparatus near water.
-
Clean only with dry cloth.
-
Do not block any ventilation openings. Install in accordance with the manufacturer's instructions.
-
Do not install near any heat sources such as radiators, heat registers, stoves, or other apparatus (including amplifiers) that produce heat.
-
Protect the power cord from being walked on or pinched particularly at plugs, convenience receptacles, and the point where they exit from the apparatus.
-
Only use attachments/accessories specified by the manufacturer.
-
Unplug this apparatus during lightning storms or when unused for long periods of time.
-
Refer all servicing to qualified service personnel. Servicing is required when the apparatus has been damaged in any way, such as power-supply cord or plug is damaged, liquid has been spilled or objects have fallen into the apparatus, the apparatus has been exposed to rain or moisture, does not operate normally, or has been dropped.
-
Damage Requiring Service
Unplug the apparatus from the wall outlet and refer servicing to qualified service personnel under thee following conditions:
A. When the power-supply cord or plug is damaged,
B. If liquid has been spilled, or objects have fallen into the apparatus,
C. If the apparatus has been exposed to rain or water,
D. If the apparatus does not operate normally by following the operating instructions. Adjust only those controls that are covered by the operating instructions as an improper adjustment of other controls may result in damage and will often require extensive work by a qualified technician to restore the apparatus to its normal operation.
E. If the apparatus has been dropped or damaged in any way, and
F. When the apparatus exhibits a distinct change in performance this indicates a need for service.
- Object and Liquid Entry
Never push objects of any kind into the apparatus through openings as they may touch dangerous voltage points or short-out parts that could result in a fire or electric shock. The apparatus shall not be exposed to dripping or splashing and no objects filled with liquids, such as vases shall be placed on the apparatus. Don't put candles or other burning objects on top of this unit.
- Batteries
Always consider the environmental issues and fo low local regulations when disposing of batteries.
-
If you install the apparatus in a built-in installation, such as a bookcase or rack, ensure that there is adequate ventilation. Leave 20 cm (8") of free space at the top and sides and 10 cm (4") at the rear. The rear edge of the shelf or board above the apparatus shall be set 10 cm (4") away from the rear panel or wall, creating a flue-like gap for warm air to escape.
-
This device has no mains switch. To disconnect this device from mains supply, the power cord must be disconnected.
-
The power supply and power cord for this apparatus is intended for indoor use only.
-
Do not move the apparatus if another devise, such as an iPod or any other audio device, is connected to it.
-
Only use the enclosed AC adaptor.
A DC cord (to connect 12V in car) is a not included accessory. Contact your local authorized dealer.
CONTENU DE L'EMBALLAGE CARACTÉRISTIQUES TECHNIQUES
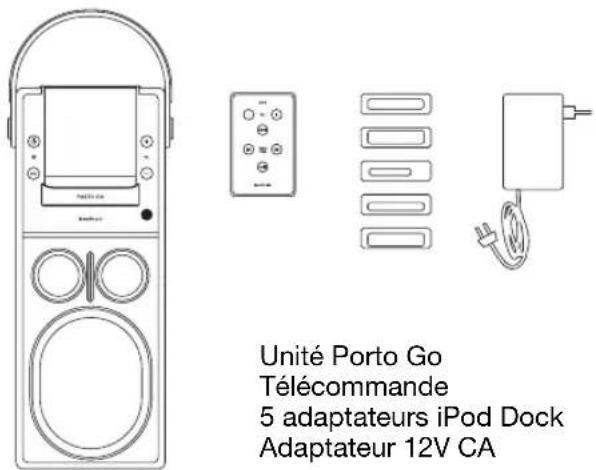
5th generation (video)
30GB (9)

iPod
5th generation (video)
60GB 80GB (10)

iPod nano
2nd generation (aluminium)
2GB 4GB 8GB (11)

iPod classic
80GB (9) 160GB (10)

iPod nano
3rd generation (video)
4GB 8GB (13)

iPod touch
8GB 16GB (14)
REMARQUE:
natural_image
Two technical diagrams showing mechanical components with arrows indicating direction (no text or symbols)natural_image
Diagram of a battery connector with an output socket and arrow indicating direction (no text or symbols)REMARQUE:
5th generation (video)
30GB (9)

iPod
5th generation (video)
60GB 80GB (10)

iPod nano
2nd generation (aluminium)
2GB 4GB 8GB (11)

iPod classic
80GB (9) 160GB (10)

iPod nano
3rd generation (video)
4GB 8GB (13)

iPod touch
8GB 16GB (14)
HINWEIS:
natural_image
Diagram of a battery connector with an output socket and power supply, showing no text or symbolsHINWEIS:
5th generation (video)
30GB (9)

iPod
5th generation (video)
60GB 80GB (10)

iPod nano
2nd generation (aluminium)
2GB 4GB 8GB (11)

iPod classic
80GB (9) 160GB (10)

iPod nano
3rd generation (video)
4GB 8GB (13)

iPod touch
8GB 16GB (14)
OPMERKING:
natural_image
Diagram of a battery connector with multiple cylindrical cells and an output socket, showing polarity indicators (no text or symbols)OPMERKING:
5th generation (video)
30GB (9)

iPod
5th generation (video)
60GB 80GB (10)

iPod nano
2nd generation (aluminium)
2GB 4GB 8GB (11)

iPod classic
80GB (9) 160GB (10)

iPod nano
3rd generation (video)
4GB 8GB (13)

iPod touch
8GB 16GB (14)
NOTA:
natural_image
Two technical diagrams showing mechanical components with arrows indicating direction (no text or symbols)natural_image
Diagram of a battery connector with an output socket and power supply, showing no text or symbolsNOTA:
5th generation (video)
30GB (9)

iPod
5th generation (video)
60GB 80GB (10)

iPod nano
2nd generation (aluminium)
2GB 4GB 8GB (11)

iPod classic
80GB (9) 160GB (10)

iPod nano
3rd generation (video)
4GB 8GB (13)

iPod touch
8GB 16GB (14)
NOTA:
natural_image
Two technical diagrams showing mechanical components with arrows indicating direction (no text or symbols)natural_image
Diagram of a battery connector with an output socket and arrow indicating direction (no text or symbols)NOTA:
5th generation (video)
30GB (9)

iPod
5th generation (video)
60GB 80GB (10)

iPod nano
2nd generation (aluminium)
2GB 4GB 8GB (11)

iPod classic
80GB (9) 160GB (10)

iPod nano
3rd generation (video)
4GB 8GB (13)

iPod touch
8GB 16GB (14)
HUOMAA:
natural_image
Diagram of a battery connector with an output socket and power supply, showing no text or symbolsHUOMAA:
natural_image
Line drawing of a handheld electronic device with handle, buttons, and circular ports (no text or symbols)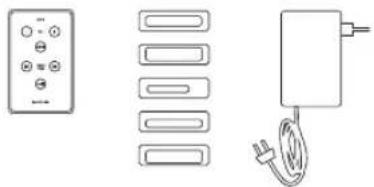
natural_image
Pure electrical circuit lines without any symbolsiPod 5th generation (video) 30GB (9)

iPod 5th generation (video) 60GB 80GB (10)

iPod nano 2nd generation (aluminium) 2GB 4GB 8GB (11)

iPod classic 80GB (9) 160GB (10)

iPod nano 3rd generation (video) 4GB 8GB (13)

iPod touch 8GB 16GB (14)
ПРИМЕЧАНИЕ:
natural_image
Two technical diagrams showing mechanical components with arrows indicating direction (no text or symbols)natural_image
Diagram of a battery connector with an output socket and arrow indicating direction (no text or symbols)ПРИМЕЧАНИЕ:
sound, science and style
© Audio Pro AB Sweden 2008.
sound, science and style
sound, science and style
© Audio Pro AB Sweden 2008.
sound, science and style
text_image
audio pro® Designed and engineered by Audio Pro AB, Sweden PORTO GO, model PG-201 Serial no: 1 EmbracingSound™ The trademark EmbracingSoundTM is owned by Embracing Sound Experience AB, US Patent #7,010,128 Patents pending. 2 Serial no: 3 LINE IN 4 HEADPHONES 5 SUB OUT 6 DC IN 12V CE FCaudio pro
www.audiopro.com
www.audiopro.se