GigaCam 4 - Surveillance Camera MARMITEK - Free user manual and instructions
Find the device manual for free GigaCam 4 MARMITEK in PDF.

User questions about GigaCam 4 MARMITEK
0 question about this device. Answer the ones you know or ask your own.
Ask a new question about this device
Download the instructions for your Surveillance Camera in PDF format for free! Find your manual GigaCam 4 - MARMITEK and take your electronic device back in hand. On this page are published all the documents necessary for the use of your device. GigaCam 4 by MARMITEK.
USER MANUAL GigaCam 4 MARMITEK
GIGACAM 4 wireless camera with receiver
Thank you for purchasing the Marmitek GIGACAM 4. To fully enjoy your purchase, we advise you to read this manual first. Please observe all information with regard to safe use of this product.
1. SAFETY WARNINGS
- To prevent short circuits, this product (except the outdoor camera) should only be used inside and only in dry spaces. Do not expose the components to rain or moisture. Do not use the product close to a bath, swimming pool etc.
- Do not expose the components of your systems to extremely high temperatures or bright light sources.
- In case of improper usage or if you have altered and repaired the product yourself, all guarantees expire. Marmitek does not accept responsibility in the case of improper usage of the product or when the product is used for purposes other than specified. Marmitek does not accept responsibility for additional damage other than covered by the legal product responsibility.
- This product is not a toy. Keep out of reach of children.
- Do not open the product: the device contains live parts. The product should only be repaired or serviced by a qualified repairman.
- Only connect the adapter to the mains after checking whether the mains voltage is the same as the values on the identification tags. Never connect an adapter or power cord when it is damaged. In that case, contact your supplier.
2. USING THE PRODUCT
The GIGACAM 4 is a wireless camera system. The images of the camera are transmitted through walls and ceilings to the receiver, which can be connected to a TV.
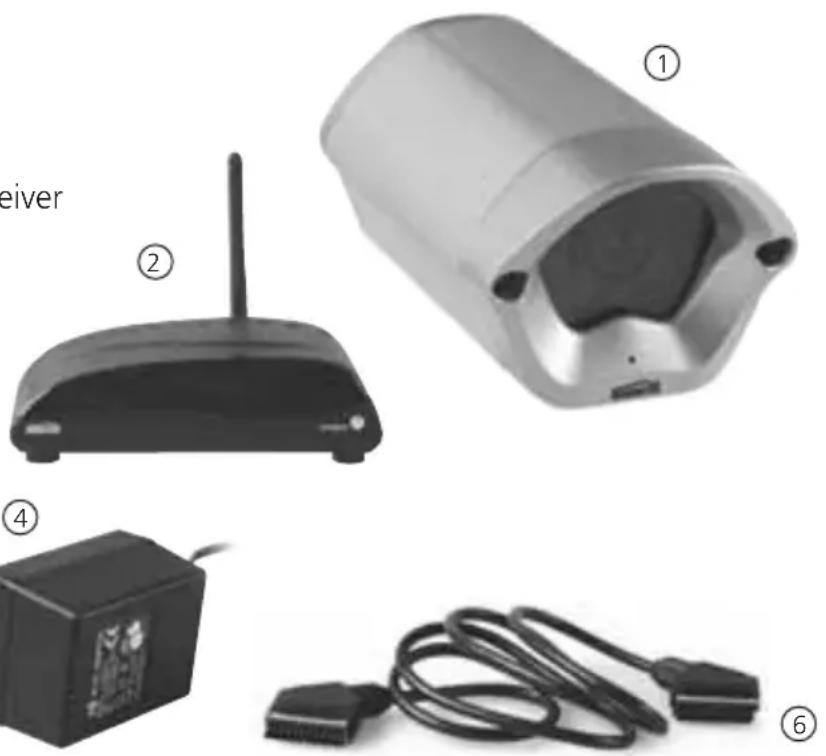
3. SET CONTENT
- Wireless camera
- Receiver
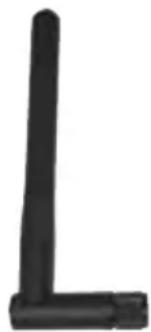
- Antenna for camera and receiver
- Power adapter for camera and receiver
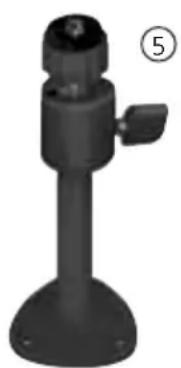
- Wall bracket
- Scart cable
- User manual
③
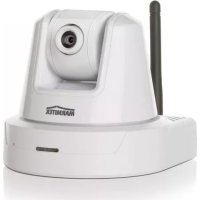
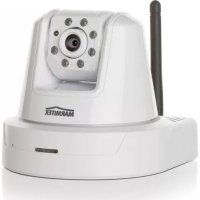
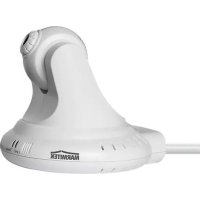
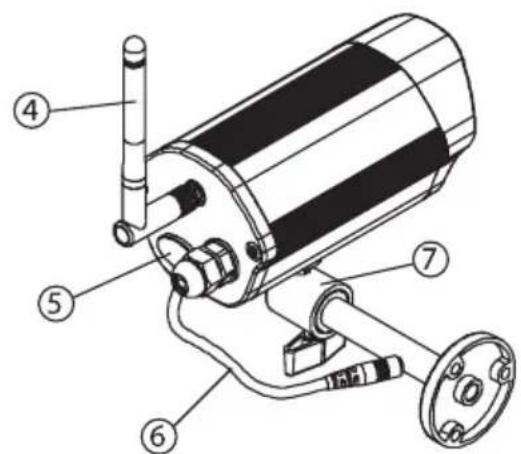
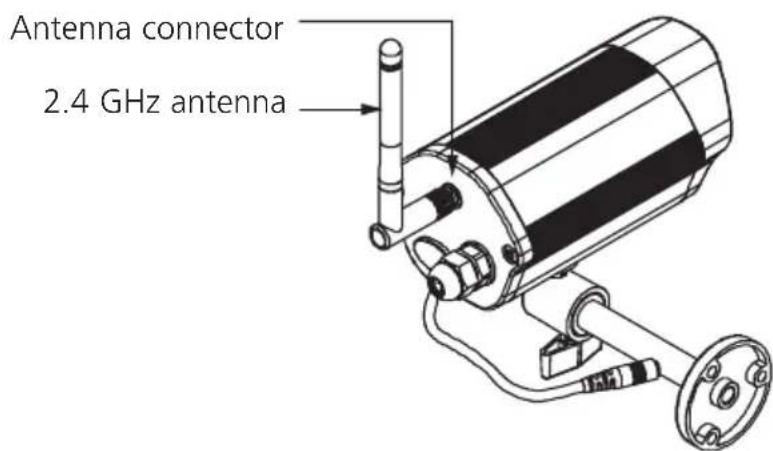
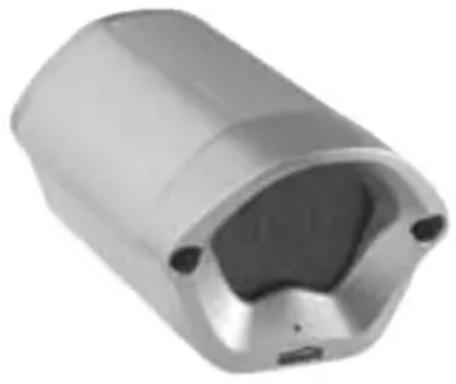
4. GIGACAM 4 WIRELESS CAMERA
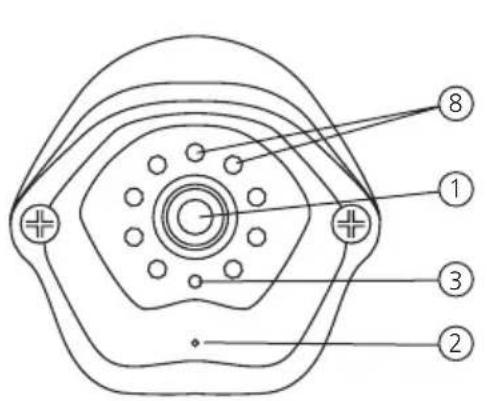
- Camera lens
- Microphone
- Channel indicator
4.2.4 GHZ antenna - Cover for the channel switch
- Connection for the power adapter
- Wall bracket
- IR LEDs for night view (only with the optional 'wireless black/white camera with night view', see chapter 8)
4.1. HOW TO ACTIVATE THE CAMERA
- Screw the 2.4 GHz antenna, included in the set, into the back of the camera. Place the antenna in an upright position.
- Transmitter and receiver have to be set to the same channel. The factory setting of the camera is Camera Channel 1. Normally, you do not need to change this setting. If the camera suffers from interference, you can switch both the camera and receiver to another channel. The switch for the channel setting can be found under the rubber cover on the back of the camera.

- Connect the power adapter to the camera (6) and plug the adapter into a wall socket.
- The channel indicator (3) will blink once, twice, three or four times to indicate which channel it is set to (Channel 1 = once, Channel 2 = twice, etc.).
5. RECEIVER
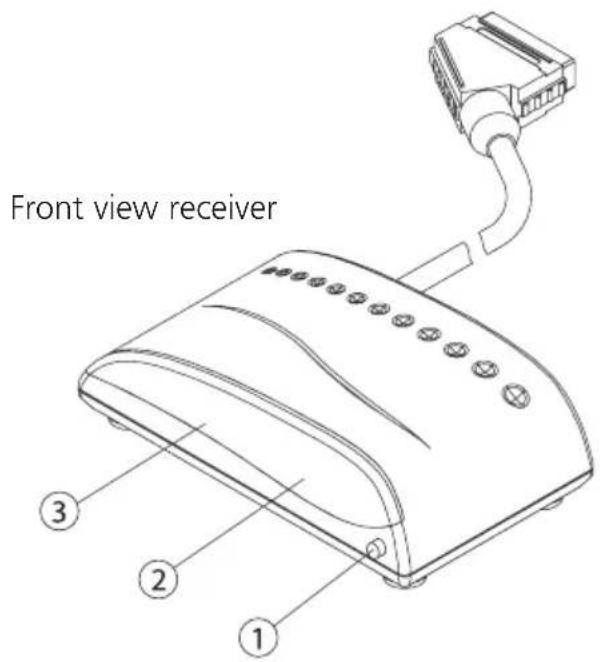

- ON/OFF switch
- Power indicator
- Channel indicator
- AV output cable with Scart plug
5.2.4 GHz antenna - AV input (Scart)
- Connection for the power adapter
- Setting for channels and switch time
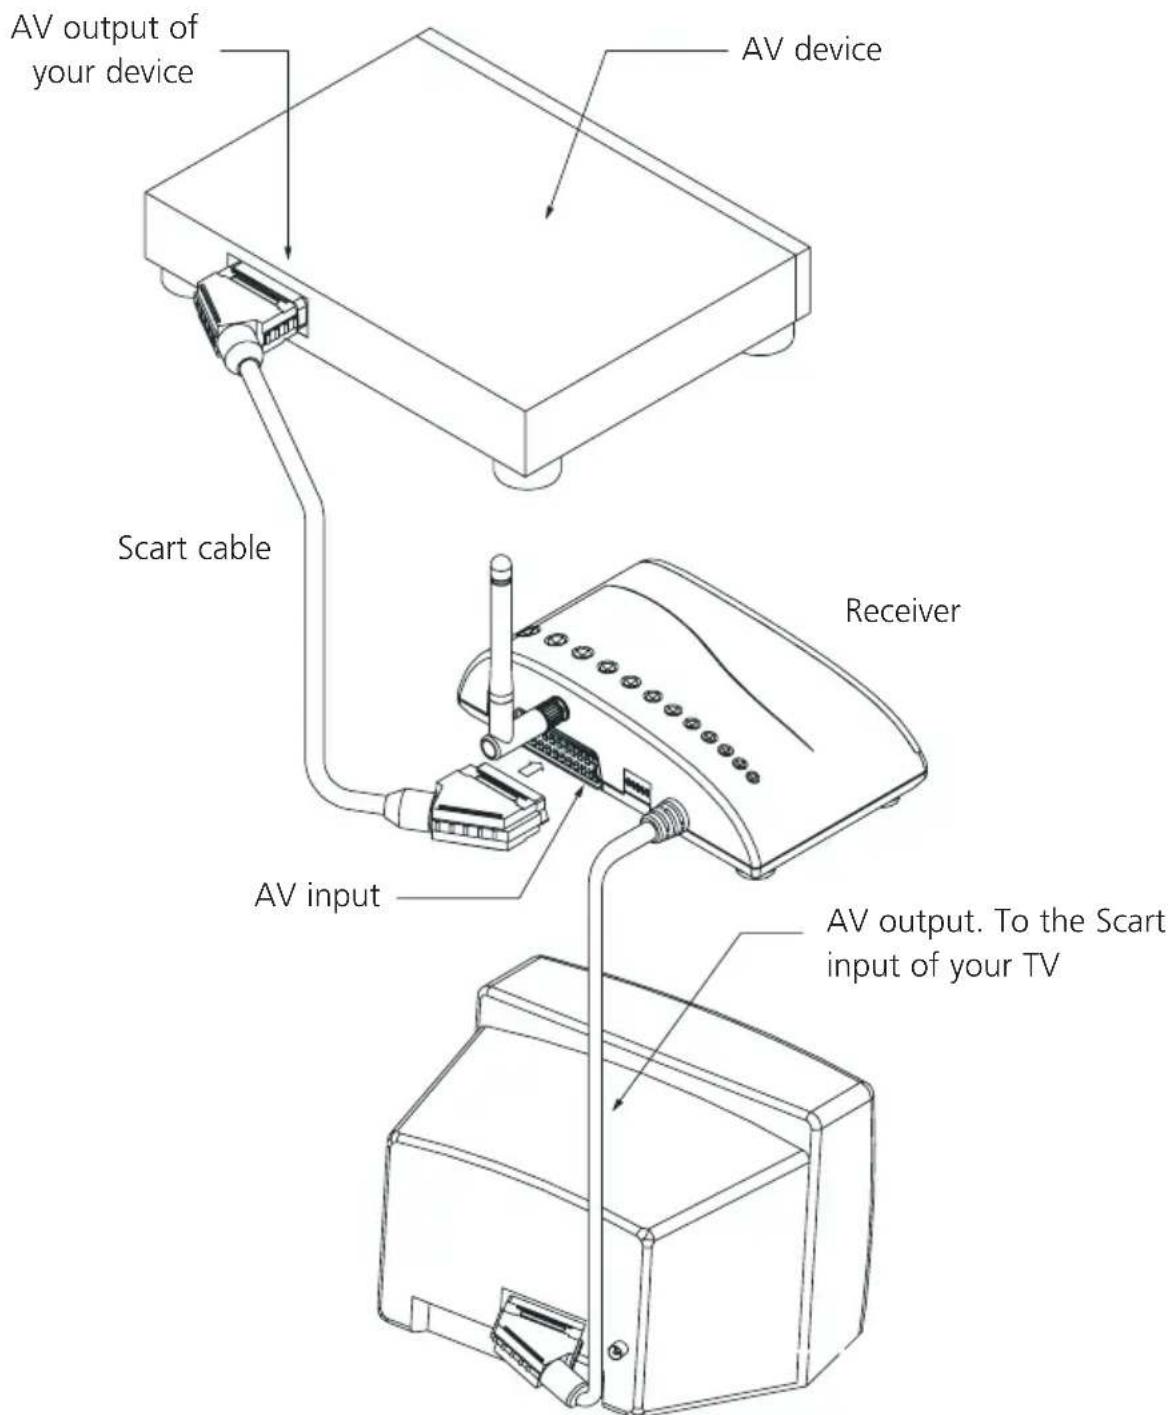
5.1. HOW TO ACTIVATE THE RECEIVER
-
Screw the 2.4 GHz antenna, included in the set, into the back of the receiver. Place the antenna in an upright position.
-
Connect the power adapter to the receiver and plug the adapter into a wall socket.
- Connect the receiver to your TV as shown below.
You can connect another device (DVD, VCR, satellite receiver, etc.) to the input (6) on your receiver. If you switch off the receiver with button (1), the image of your device will be shown. If you switch on the receiver, the image of your device will disappear and the camera image will be shown.
The factory setting of the receiver is Channel 1. The switch for the channel setting can be found on the back of the receiver (8).
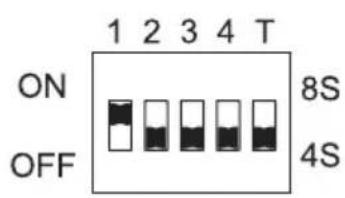
Setting for channel 1
- Transmitter and receiver have to be set to the same channel. If the camera suffers from interference, you can set it to a different channel.
- Switch on the receiver by pressing the ON/OFF switch (1).
- Switch your TV channel to the AV input (number 0 or AV/Scart).
- You can now watch the camera images on your TV.
- The channel indicator (3) will blink once, twice, three or four times to indicate which channel it is set to (Channel 1 = once, Channel 2 = twice, etc.).
6. INSTALLING THE CAMERA
The range of the camera and the receiver is dependent on the local situation, but usually somewhere between 15 and 30m
The camera is splash-waterproof, according to the IP44 norm. The camera is allowed to get wet, but hard jets of water or heavy rain can enter the camera and cause damage. The camera should be mounted in a sheltered spot (under the eaves, porch etc.).
The signal from the camera can travel through walls and ceilings. The route the signal travels, is not a straight line. Any time the signals go through walls, ceilings and other obstacles, the signal will bend. This can mean that by slightly moving the camera (sometimes just a few centimetres) you can greatly improve the reception. We advise you to first check where you can get optimal range, before fixing the camera in place.
First attach the wall bracket, and then place the camera. Drill a hole through the wall to connect the camera to the power adapter. The plug connecting the camera with the power adapter should preferably be placed on the inside.
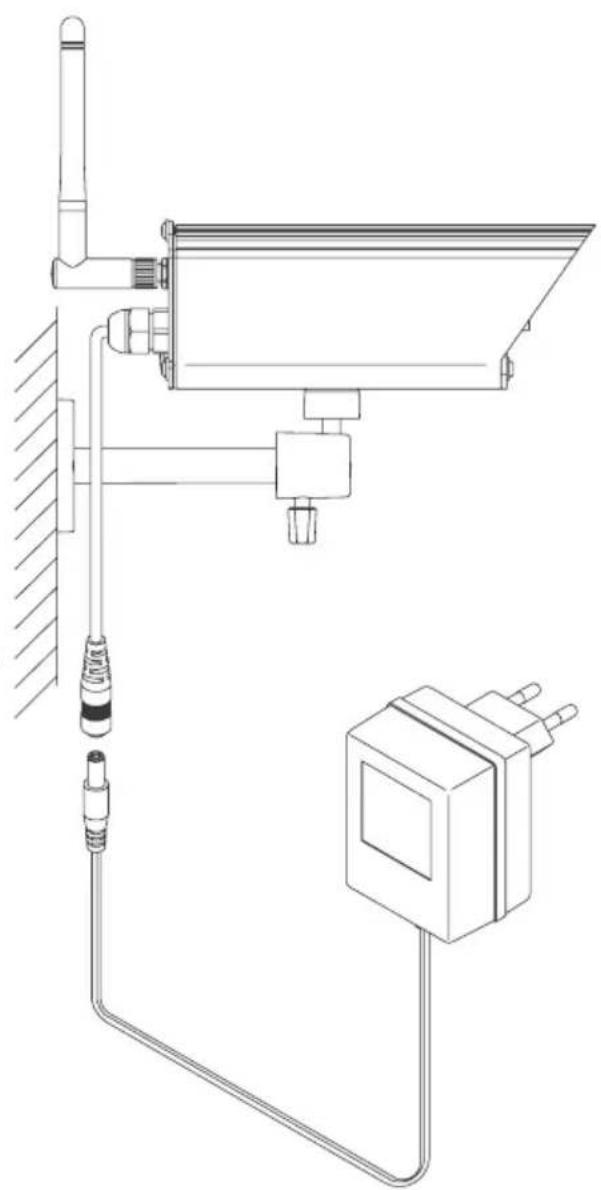
THE POWER ADAPTER SHOULD ALWAYS BE PLACED INSIDE.
7. AUTOMATICALLY SWITCHING BETWEEN CAMERA IMAGES
You can combine up to 4 cameras with one receiver. The receiver will then automatically switch between the camera images. Every camera should be set to a different channel number.
You can have the receiver switch between images of multiple cameras by setting more than one of the channel switches on the receiver to ON. The switch time is 4 or 8 seconds, depending on the setting of the interval switch (T).
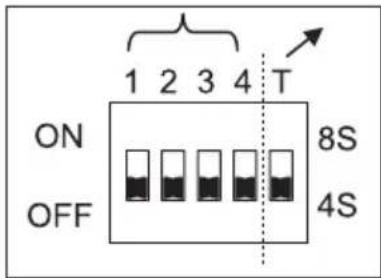
The first 4 switches are for activating channels 1, 2, 3 and 4. Use the T switch to select an interval time of 4 or 8 seconds. Examples: Using one camera
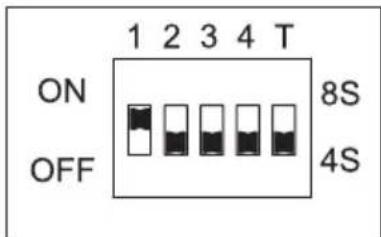
Camera Channel 1 activated. The channel indicator on the receiver will blink once with intervals of 4 seconds.
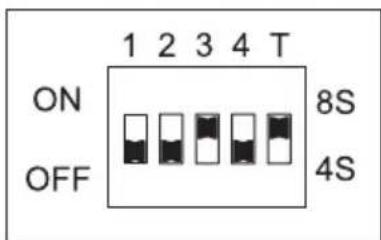
Camera Channel 3 activated. The channel indicator on the receiver will blink three times with intervals of 8 seconds.
Using several cameras
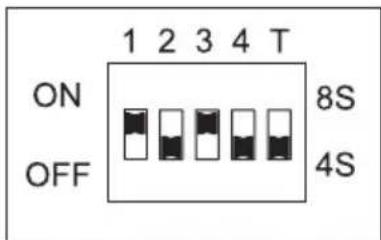
Camera Channels 1 and 3 are activated alternately. The interval time is 4 seconds. The channel indicator on the receiver will blink once and then three times four seconds later to indicate the active camera channel.
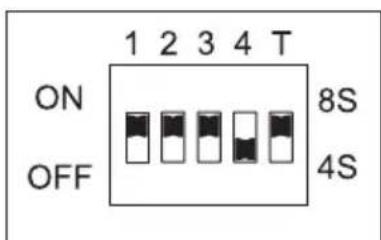
Camera Channels 1, 2 and 3 are activated alternately. The interval time is 8 seconds. The channel indicator on the receiver will blink once, then twice eight seconds later, and eight seconds later it will blink three times to indicate the active camera channel.
8. EXTRA CAMERAS
The cameras below can be purchased separately:
GIGACAM 4 Wireless colour camera
This camera is the same as the camera included in the set.
Art.No. 09621 (European version)
Art.No. 09624 (UK version)

GIGACAM 4 wireless black/white camera with night view (0.5 lux)
The combination of the extremely sensitive CCD camera technique with 9 infrared LEDs makes sure this camera even has some vision in the dark.
Art.No. 09623 (European version)
Art.No. 09626 (UK version)
9. FREQUENTLY ASKED QUESTIONS
Does the GIGACAM 4 cause a conflict with my wireless network (WLAN/WIFI/802.11)?
Both systems use the same frequency band (2.4 GHz). You can however choose different channels, both on your GIGACAM 4 system and your WLAN system. This means you can use the systems together most of the times.
Can I look at the images of my camera on more than one location?
Yes, it is best to purchase a second GIGACAM 4 set. The cameras and receivers are mutually compatible.
Any more questions?
Visit www.marmitek.com > Customer Service for an up to date list of frequently asked questions for your product.
10. TECHNICAL DETAILS
GIGACAM 4 Wireless colour camera - Art. Nr. 09621
Camera element: 1/3" CMOS colour
Lens: F 1.8/f6.0mm 64^ wide-angle lens
Video system: PAL
Number of pixels: 628(H) x 582 (V)
Resolution: 380 screen lines
Min. Illumination: 3 lux
Microphone: Electret Condenser
Transmission power: 10 dBm
IP Class: IP44
2.4 GHz frequencies: 2.411 GHz
2.432 GHz
2.453 GHz
2.473 GHz
Power: 12VDC, 500mA
GIGACAM 4 Receiver - Part.No.27173
Reception sensitivity: -80dBm ~ -30dBm
Output level video: 1Vpp typ 75 Ohm
Output level audio: 1Vpp typ 600 Ohm
2.4 GHz frequencies: 2.411 GHz
2.432 GHz
2.453 GHz
2.473 GHz
Scart output (Scart in to Scart out):
CVBS Video, Stereo audio, source select
Power: 12VDC, 500mA
Technical details optional GIGACAM 4 wireless black/white camera with night view:
GIGACAM 4 B/W Extreme NightView camera - Art.No. 09623
Camera element: 1/3", CCD black/white
Lens: F 2.0/f3.6mm 90^ wide-angle lens
Video system: CCIR
Number of pixels: 500(H) × 582(V)
IR LED range:
5-10m
Resolution: 420 screen lines
Min. Illumination: 0.5 lux
Microphone: Electret Condenser
Transmission power: 10 dBm
IP Class: IP44
2.4 GHz frequencies: 2.411 GHz
2.432 GHz
2.453 GHz
2.473 GHz
Power: 12VDC, 500mA
Encore des questions?
plage LED IR: 5-10 metres
Telecamera wireless GigaCam4 a colori
1. VEILIGHEIDSWAARSCHUWINGEN
2. TOEPASSING EN WERKING
DECLARATION OF CONFORMITY
Hereby, Marmitek BV, declares that this GigaCam4 is in compliance with the essential requirements and other relevant provisions of the following Directives:
Directive 1999/5/EC of the European Parliament and of the Council of 9 March 1999 on radio equipment and telecommunications terminal equipment and the mutual recognition of their conformity
Council Directive 89/336/EEC of 3 May 1989 on the approximation of the laws of the Member States relating to electromagnetic compatibility
Environmental Information for Customers in the European Union
e product should be disposed of separately from regular household waste streams. It is your responsibility to dispose of this and other electric and electronic equipment via designated collection facilities
appo t a i t the disposal of your old equipment, please contact your local authorities, waste disposal service, or the shop where you purchased the product.

Marmitek is a trademark of Marmidenko B.V. Gigacam 4^TM is a trademark of Marmitek B.V. All rights reserved. Copyright and all other proprietary rights in the content (including but not limited to model numbers, software, audio, video, text and photographs) rests with Marmitek B.V. Any use of the Content, but without limitation, distribution, reproduction, modification, display or transmission without the prior written consent of Marmitek is strictly prohibited. All copyright and other proprietary notices shall be retained on all reproductions.