IP RoboCam 541 - Surveillance Camera MARMITEK - Free user manual and instructions
Find the device manual for free IP RoboCam 541 MARMITEK in PDF.

User questions about IP RoboCam 541 MARMITEK
0 question about this device. Answer the ones you know or ask your own.
Ask a new question about this device
Download the instructions for your Surveillance Camera in PDF format for free! Find your manual IP RoboCam 541 - MARMITEK and take your electronic device back in hand. On this page are published all the documents necessary for the use of your device. IP RoboCam 541 by MARMITEK.
USER MANUAL IP RoboCam 541 MARMITEK
o To prevent short circuits, this product should only be used inside and only in dry spaces.
Do not expose the components to rain or moisture. Do not use the product close to a bath, swimming pool etc.
o Do not expose the components of your systems to extremely high temperatures or bright light sources.
o In case of improper usage or if you have altered and repaired the product yourself, all guarantees expire. Marmitek does not accept responsibility in the case of improper usage of the product or when the product is used for purposes other than specified. Marmitek does not accept responsibility for additional damage other than covered by the legal product responsibility.
o This product is not a toy. Keep out of reach of children.
o Do not open the product: the device may contain live parts. The product should only be repaired or serviced by a qualified expert.
o Only connect the adapter to the mains after checking whether the mains voltage is the same as the values on the identification tags. Never connect an adapter when it is damaged. In that case, contact your supplier.
1 Getting Started
Package Contents
Check the items contained in the package carefully. You should have the following items. Once any item contained is damaged or missing, contact the authorized dealer of your locale.
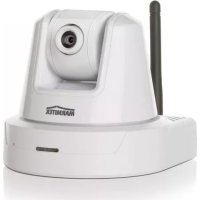
One IPRobocam 541 or 641 H.264/MPEG4/MJPEG Pan-Tilt Megapixel Network Camera
One AC Power Adapter
One Wall Mount Kit
One External Antenna
One Ethernet Cable (RJ-45 type)
One GPIO Connector
One Installation CD-ROM
One Quick Installation Guide
System Requirement
Networking
LAN: 10Base-T Ethernet or 100Base-TX Fast Ethernet.
WLAN: IEEE 802.11b/g/n (for wireless model).
■ Accessing the Camera using Web Browser
Platform: Microsoft® Windows® XP/Vista/WIN 7
CPU: Intel Pentium III 800MHz or above
RAM: 512MB
Resolution: 800x600 or above
User Interface: Microsoft® Internet Explorer 6.0 or above; Apple Safari 2 or above; Mozilla Firefox 2.00 or above
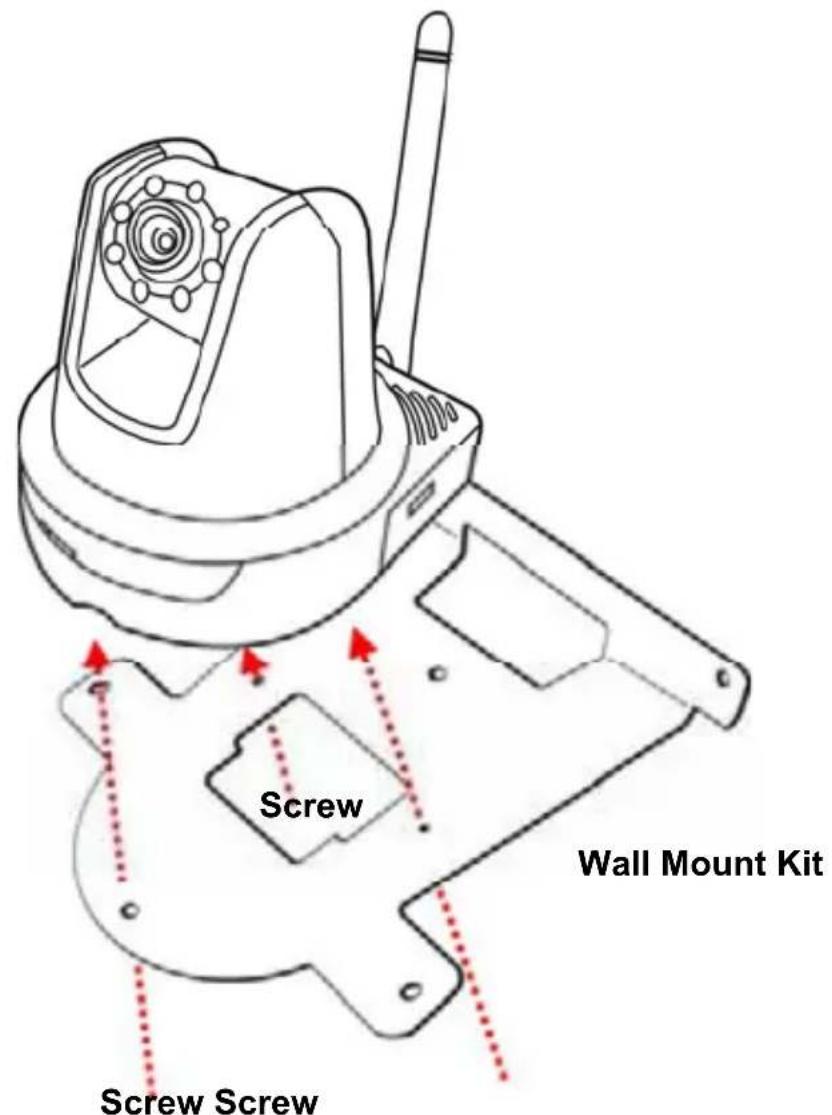
2 Setting Up the Camera Installing the Wall Mount Kit
The camera comes with a Wall Mount Kit, which allows you to place your camera anywhere by mounting the camera through the three screw holes located in the base of the Wall Mount Kit.
Connecting the Camera to LAN
Use the provided Ethernet cable to connect the camera to your local area network (LAN).
When you connect the AC power adapter, the camera is powered on automatically. You can verify the power status from the Power LED on the front panel of the camera.
Once connected, the Link LED starts flashing green light and the camera is on standby and ready for use now.
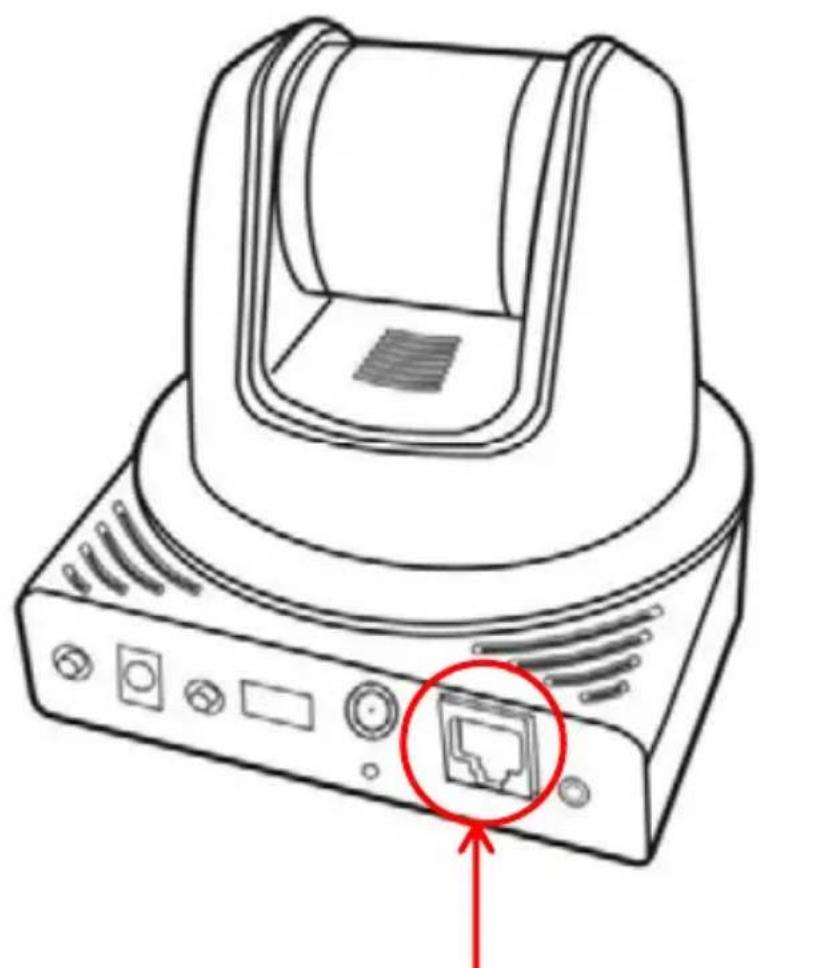
Connecting the Ethernet cable
Connecting the Camera to WLAN
If you use a wireless network in your application environment, you need to attach the included external antenna to the camera.
When the camera is powered on, the camera will automatically search any access point with "default" SSID.
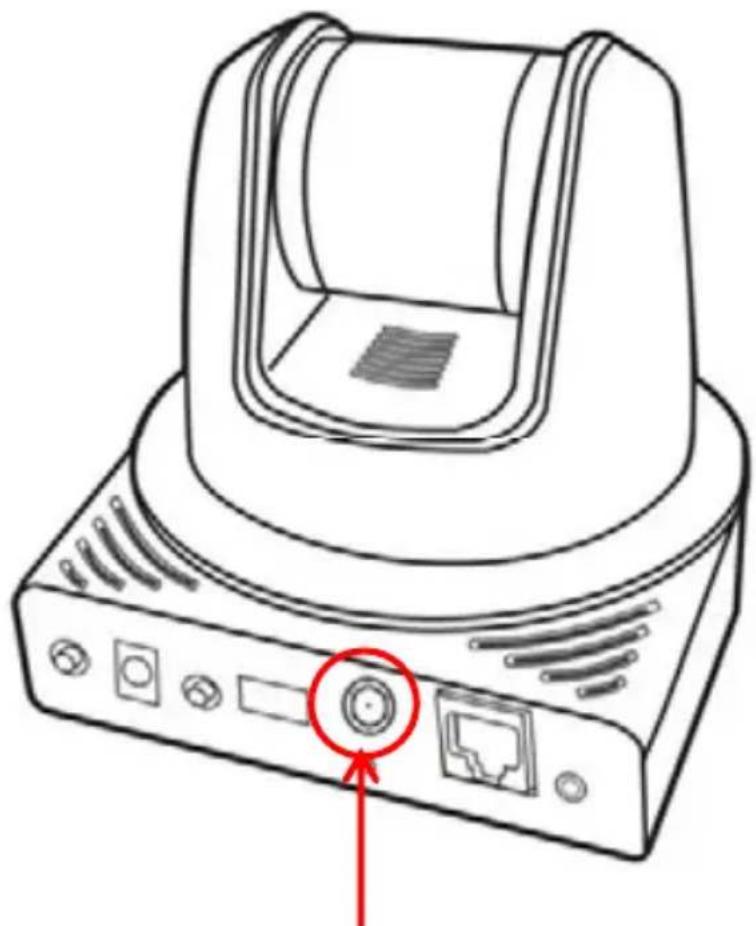
Attaching the external antenna
NOTE If the camera cannot to your wireless network, you need to install the camera in LAN and proceed with WLAN settings.
3 Accessing the Camera
Using IPFinder
-
Insert the Installation CD-ROM into your computer's CD-ROM drive to initiate the Auto-Run program.
-
Click the IPFinder item to launch the utility. The control panel will appear as below.

- Once you get the IP address of the camera, launch the Web browser or UltraView Pro to access your camera.
TIP The Installation CD-ROM provides a setup program that allows you to install IPFinder on your computer. To install IPFinder, click Install Software then select IPFinder on the Auto-Run screen.
Accessing to the Camera
- Since the default configuration of the camera is DHCP mode enabled, you are recommended to launch IPFinder to search the IP address that is assigned to the camera by the DHCP server, and then click Link to access the camera via the Web browser.
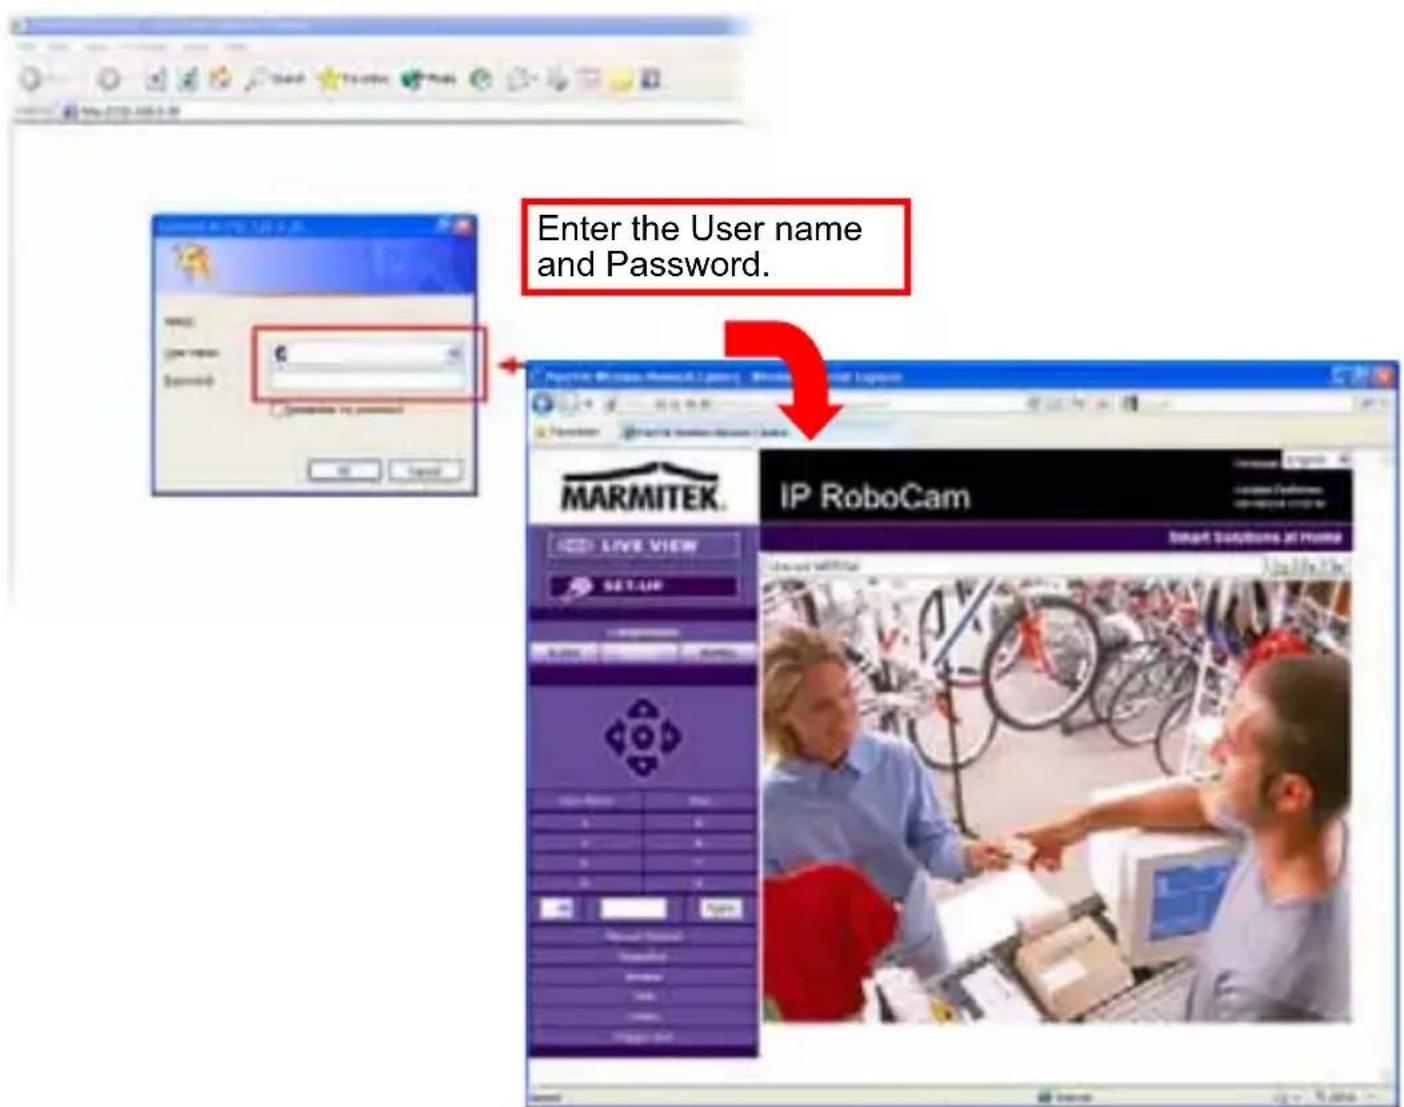
- If Network Camera can't get IP Address under DHCP mode, the default IP Address will be 192.168.0.30.
- When the login window appears, enter the default User name (admin) and password (admin) and press OK to access to the main screen of the camera's Web Configuration.
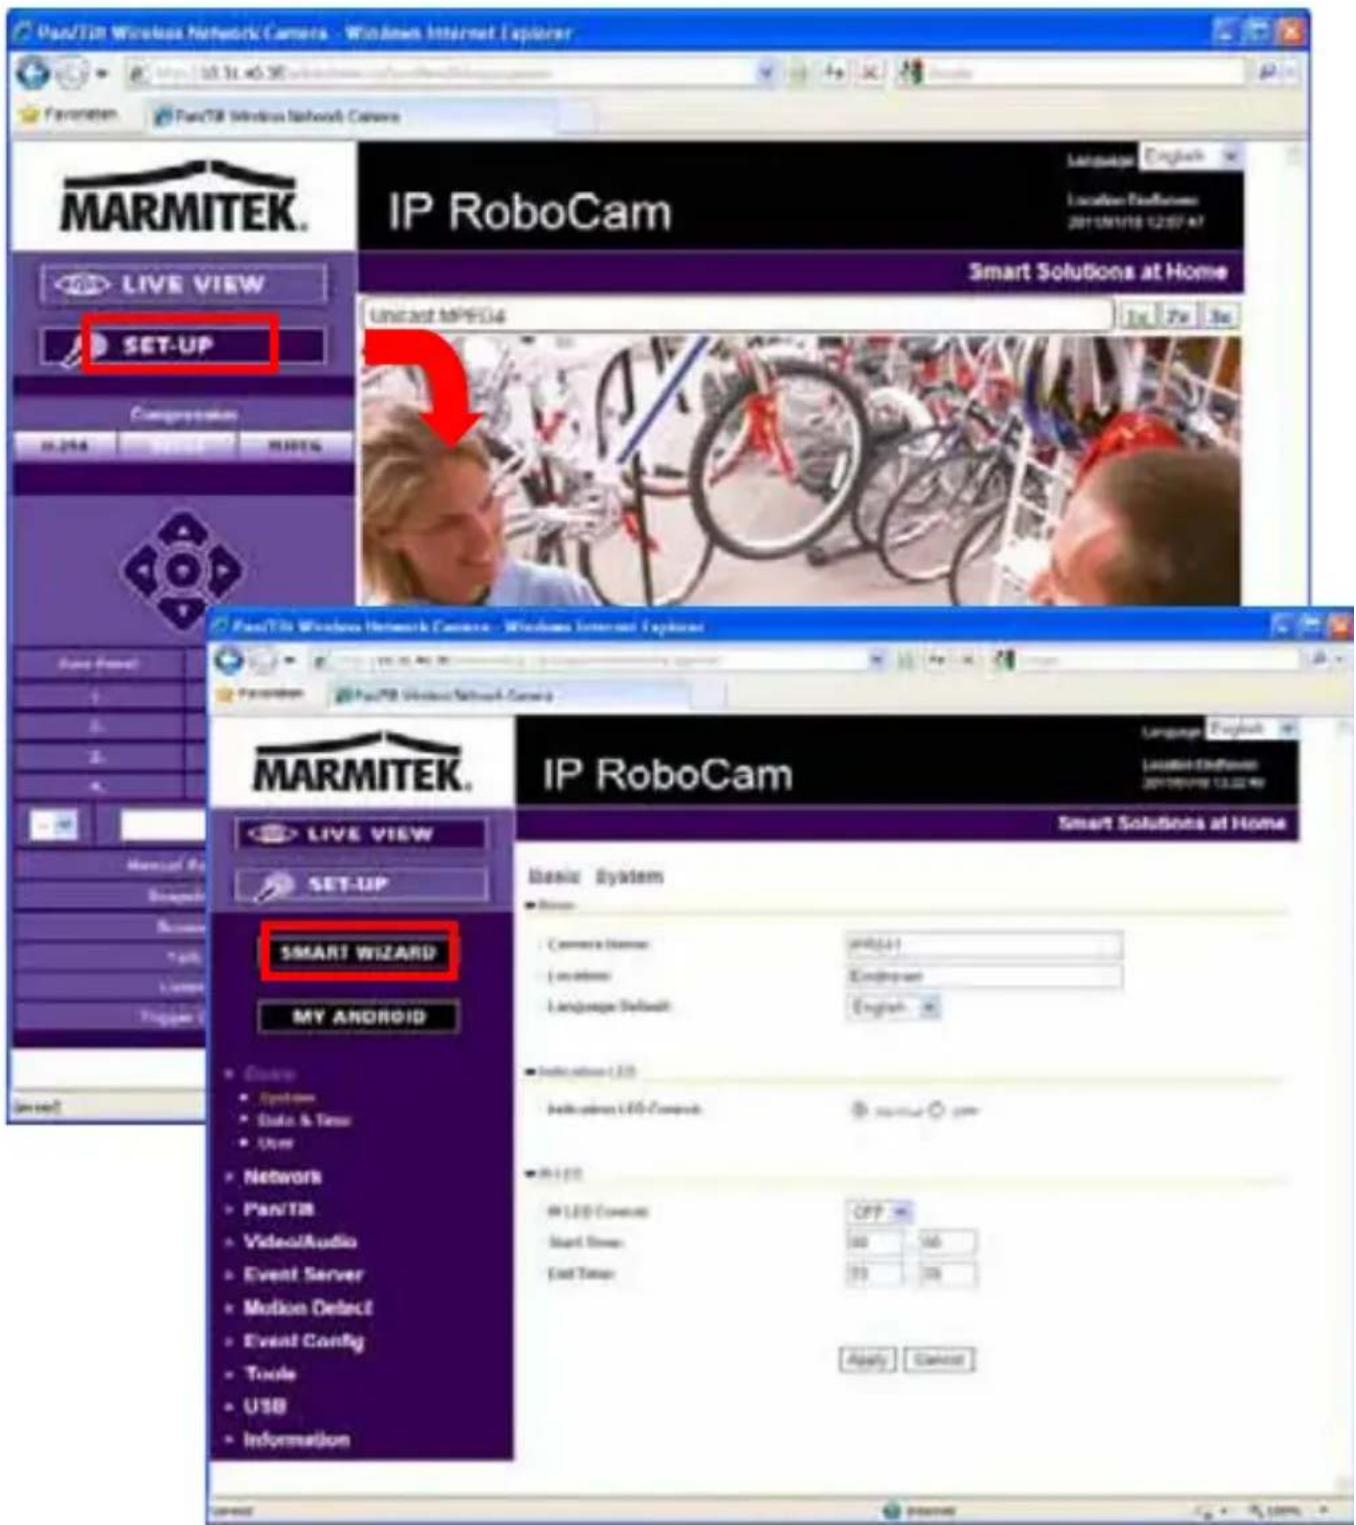
- Click Setup and then Smart Wizard to set up your camera quickly. The Smart Wizard will guide you through the necessary settings with detailed instructions on each step.
4 Tips
For more information, please refer to the Advanced Installation Guide on the provided Installation CD-ROM.
For details of operating UltraView Pro, please refer to the Software User Guide on the provided Installation CD-ROM.
If you have any problem on the product(s), please contact your local authorized dealer.

Environmental Information for Customers in the European Union
European Directive 2002/96/EC requires that the equipment bearing this symbol on the product and/or its packaging must not be disposed of with unsorted municipal waste. The symbol indicates that this product should be disposed of separately from regular household waste streams. It is your responsibility to dispose of this and other electric and electronic equipment via designated collection facilities appointed by the government or
local authorities. Correct disposal and recycling will help prevent potential negative consequences to the environment and human health. For more detailed information about the disposal of your old equipment, please contact your local authorities, waste disposal service, or the shop where you purchased the product.
SICHERHEITSHINWEISE
VEILIGHEIDSWAARSCHUWINGEN
| Technical data | |
| Image Sensor | 1/4" Color CMOS Sensor |
| Resolution | 1280 x 1024, 640 x 480, 320 x 240, 160 x 120 |
| Ligh Minimum Illumination | 0.1 LUX |
| Lens | |
| Lens Type | Board Lens |
| Aperture (F/No.) | 2.8 |
| Focus Length | 4 mm |
| View Angle(Diagonal) | 60 degree |
| Build in IR blocking filter | IPR 641 |
| True Colour | IPR 641 |
| Image Processing | |
| compression | H.264 baseline, MPEG4 simple profile and MJPEG |
| Auto Exposure Control | Yes |
| Auto White Balance | Yes |
| Auto Gain control | Yes |
| Image Resolution and Frame rate | SXGA (1280 x 1024) : 15fps |
| VGA (640 x 480) : 30 fps | |
| QVGA (320 x 240) : 30 fps | |
| QQVGA (160 x 120) : 30 fps | |
| Multi-profile | H.264@SXGA/VGA/QVGA/QQVGA and MPEG4@VGA/QVGA/QQVGA and MJPEG@SXGA/VGA/QVGA/QQVGA |
| System | |
| Network Processor | ARM9 base |
| System ROM | 8MByte NOR Flash |
| System RAM | 64MByte SDRAM |
| Power | DC12V, 230VAC 50 Hz |
| Power Consumption | < 10 watts |
| Environment Operation: | Operation: Temp: 0 ~ 45 Humidity: 20% ~ 85% non-condensing |
| Storage: Temp: -15 ~ 60 Humidity: 0% ~ 90% non-condensing | |
| Approvals | FCC/CE class B |
| Pan/Tilt | |
| Pan | +165 ~ -165 degree |
| Tilt | +90 ~ -15 degree |
| Preset positions | 8 positions |
| Audio | |
| Audio in | Internal Omni-directional Microphone |
| Sensitivity: | more than -48dB +/- 3dB |
| Freq Response: | 100~10000Hz |
| Audio Codec | PCM/AMR |
| Audio out | Line level out ;1 Vrms ; 3.5mm phone jack; Mono |
| Audio S/N ratio | More than 60dB |
| Communication | |
| Ethernet | One RJ45 port; IEEE 802.3u compliant 10/100 Mbps Fast Ethernet with Auto-MDIX |
| Wireless | IEEE802.11n Wireless LAN |
| Supported Protocols | TCP/IP, UDP, ICMP, DHCP, NTP, DNS, DDNS, SMTP, FTP, HTTP, Samba, PPPoE, UPnP, RTP, RTSP, RTCP, BONJOUR |
| LED and Button | |
| Power LED | Orange Color |
| Link/act. LED | Green Color |
| Reset button | Push and Release button will be Reboot Push and hold over 5 sec will be Factory reset |
| Others | |
| Antenna | External Dipole Antenna |
| USB Port | One Type A receptacle Connector USB 2.0 Host port (Power distribution: 500mA Max.) |
| USB dismount button | Push and hold over 3 sec will be dismount USB device |
| GPIO | 1 in / 1 out |
| Night vision | 940nm IR LED (Switch by light sensor, manually and schedule control) |
| Night vision | 940nm IR LED (Switch by light sensor, manually and schedule control, IPR 541) |
| Dimensions | 106 x 112 x 98 mm |
| Feature | |
| Image setting | Brightness |
| Sharpness | |
| Saturation | |
| Upside down and Mirror | Yes |
| Digital Zoom | 1/4x,1/2x, 1x , 2x ,3x |
| Frame rate setting | Yes (1-30fps) |
| Compression Ratio Setting | 5 levels setting : Lowest ,Low ,Normal ,High ,Highest |
| 3GPP support | Yes (MPEG4) |
| Pre-buffer | Yes |
| Pre/Post buffer | Yes |
| IP Setting | Static IP Address |
| DHCP | |
| PPPoe | |
| Bonjour | |
| Support SMTP mail | |
| Scheduling | |
| Two destination email account | |
| SSL suport | |
| Time Management | Manual Time Setting |
| Time Server and NTP Support | |
| Real Time Clock | |
| event server | FTP |
| Netstorage | |
| USB | |
| Instant Message | |
| Picasa | |
| YouTube | |
| Event Management | Events Triggered by Motion detection or according to schedule or GPIO |
| Event Management | Image Upload/Send over email ,FTP, Picasa |
| Event Management | Trigger GPIO out |
| Event Management | Auto Lighting 7 IR LEDs when environment is low illumination |
| Event Management | Video Upload/Send to PC, Network Storage , USB Flash Disk, YouTube |
| FTP Upload | Schedule trigger |
| Motion Trigger | |
| GPIO Trigger | |
| Motion detection | 3 scalable windows |
| IP Filter | Yes (deny, Allow) |
| System Management | Web Based Administration Application Software |
| Device Configuration | Backup/Restore to/from Configuration file |
| User Administration | Password protected and 3 levels of Authorization (Guest, User, Administrator) |
| User Administration | Guest User just have View video function only. |
| User Administration | General User have all authority in Live view page |
| User Administration | Administrator have View video and All configuration setting.(default: admin/admin) |
| Wireless Security | WPS button |
| Wireless Security | WEP 64/128 bit, WPA (TKIP), WPA2, WPS button |
| System log | 100 items ( max) store in SDRAM |
| LED control | Normal / Off |
| Smart Setup Wizard | Quick Installation setup step by step |
| Reset Function | System reboot button. |
| Reset Function | Reset all configuration to factory default values button. |
| Browser | Internet Explore 6.0 above |
| Browser | Non IE Browser (MJPEG server push, QuickTime plug-in for MPEG4/H.264) |
| API | For developing application software |
| Browser Interface | 6 languages |
| Software | UltraViewPro 32 Channels |
| Supported OS | Windows 2000/ XP/Vista/7 |
| Application Software | UltraViewPro 32 Channels |
| Application Software | Record |
| Application Software | Playback |
| Application Software | Motion detect |
| Application Software | Audio support |
| Application Software | Backup/Restore to/from Configuration file |
| IPFinder | Auto search IP Address of Camera in LAN |
| Minimum system requirements | |
| General | |
| hardware | CD ROM drive |
| Operating system | Microsoft® Windows® 2000/XP/Vista/7 |
| network | 10Base-T Ethernet or 100Base-TX Fast Ethernet, IEEE 802.11b/g |
| Camera | |
| Processor Intel Pentium III 800MHz or above | |
| Memory 512MB | |
| Screen Resolution | 800x600 or above |
| Web browser | Microsoft® Internet Explorer 6.0 or aboveApple Safari 2 or aboveMozilla Firefox 2.00 or above |
| UltraviewPro Software | |
| Platform: | Microsoft® Windows® XP/Vista*, and Windows 7 |
| Processor | 1~8 cameras: Intel Core 2 Duo; 2GB RAM9~32 cameras: Intel Core 2 Quad; 4GB RAM |
| Screen Resolution | 1024x768 or above |
| Memory | see processor |
DECLARATION OF CONFORMITY
Hereby, Marmitek BV, declares that this IPROBOCAM 541 / 641 is in compliance with the essential requirements and other relevant provisions of the following Directives:
Directive 1999/5/EC of the European Parliament and of the Council of 9 March 1999 on radio equipment and telecommunications terminal equipment and the mutual recognition of their conformity
Directive 2004/108/ec of the european parliament and of the council of 15 December 2004 on the approximation of the laws of the Member States relating to electromagnetic compatibility
Directive 2006/95/EC of the European Parliament and of the Council of 12 December 2006 on the harmonisation of the laws of Member States relating to electrical equipment designed for use within certain voltage limits
Directive 2002/95/EC of the European Parliament and of the Council of 27 January 2003 on the restriction of the use of certain hazardous substances in electrical and electronic equipment
Commission Regulation (EC) No 278/2009 of 6 April 2009 implementing Directive 2005/32/EC of the European Parliament and of the Council with regard to ecodesign requirements for no-load condition electric power consumption and average active efficiency of external power supplies
Marmitek is a trademark of Pattitude B.V. | IPRobocam 541 / 641 is a trademark of Marmitek B.V.
Copyright and all other proprietary rights in the content (including but not limited to model numbers, software, audio, video, text and photographs) rests with Marmitek B.V. Any use of the Content, but without limitation, distribution, reproduction, modification, display or transmission without the prior written consent of Marmitek is strictly prohibited. All copyright and other proprietary notices shall be retained on all reproductions.
MARMITEK
www.mamitek.com