
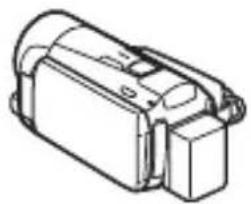
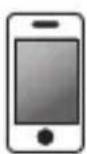
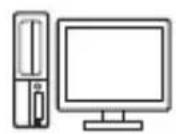
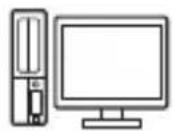
Legria HF M56 - Camcorder CANON - Free user manual and instructions
Find the device manual for free Legria HF M56 CANON in PDF.
| Product type | Camcorder |
| Brand | Canon |
| Model | Legria HF M56 |
| Wi-Fi technology | IEEE 802.11b/g/n, 2.4 GHz band |
| Wi-Fi modes | Infrastructure (with access point) and Ad hoc (direct with iOS device) |
| Wi-Fi setup | Wi-Fi Protected Setup (WPS) - button or PIN code |
| Network functions | Transfer to computer (Windows), FTP server, YouTube, Facebook, DLNA playback |
| Software compatibility | Network Utility (Windows), Movie Uploader (iOS) |
| Wi-Fi antenna | Built-in, on the right side of the camcorder (do not obstruct) |
| Power supply | Rechargeable battery |
| Manual languages | FR, DE, EN, ES, IT, JA, RU, ZH |
| Trademarks | Wi-Fi Certified, WPA, WPA2, DLNA, YouTube, Facebook |
Frequently Asked Questions - Legria HF M56 CANON
User questions about Legria HF M56 CANON
0 question about this device. Answer the ones you know or ask your own.
Ask a new question about this device
Download the instructions for your Camcorder in PDF format for free! Find your manual Legria HF M56 - CANON and take your electronic device back in hand. On this page are published all the documents necessary for the use of your device. Legria HF M56 by CANON.
USER MANUAL Legria HF M56 CANON
natural_image
Simple line drawing of a syringe and plug (no text or symbols)iPhone / iPad / iPod touch
iPhone に接続して
アップロードする
( PDF 273)

YouTube や
Facebook に
アップロード
する
( PDF 270)
JP
3
パソコン / FTP サーバー
パソコンなどに
ワイヤレスで転送する
( PDF 264)
本機の無線LAN 規格について
Wi-Fi 規格:
IEEE 802.11b/g/n 準拠
周波数:2.4 GHz
最大伝送速度(規格値)*:
natural_image
Illustration of a person sitting at a desk using a laptop with a screen showing two speech bubbles (no text or symbols present)iPhone/iPad/ iPod touch
natural_image
Diagram showing a syringe connected to a computer monitor via cable (no text or symbols present)3 Getting Started
3 Introduction to Wi-Fi
5 Connecting to a Wi-Fi Network (Wi-Fi Protected Setup)
8 Requirements for Wi-Fi Functions
12 Troubleshooting
Trademark Acknowledgements
- Microsoft and Windows are trademarks or registered trademarks of Microsoft Corporation in the United States and/or other countries.
- App Store, iPhone, iTunes, Mac OS and Macintosh are trademarks of Apple Inc., registered in the U.S. and other countries.
- YouTube is a trademark of Google Inc.
• Facebook is a registered trademark of Facebook, Inc. - Wi-Fi is a registered trademark of the Wi-Fi Alliance.
- Wi-Fi Certified, WPA, WPA2, and the Wi-Fi Certified logo are trademarks of the Wi-Fi Alliance.
- WPS as used on the camcorder's settings, onscreen displays and in this manual signifies Wi-Fi Protected Setup.
- DLNA, the DLNA Logo and DLNA CERTIFIED are trademarks, service marks, or certification marks of the Digital Living Network Alliance.
- Other names and products not mentioned above may be trademarks or registered trademarks of their respective companies.
Getting Started
This manual covers how to connect your camcorder to a wireless router, or access point. To learn more about advanced Wi-Fi functions and to see more detailed procedures, refer to the full-version Instruction Manual (PDF file). In this guide, the PDF mark indicates the name of the section in the Instruction Manual to which you should refer. Use the table of contents or the PDF's search feature to help find the section.
To install the full-version Instruction Manual, see Installing the Cam-corder's Instruction Manual (PDF file) in the supplied Quick Guide.
Introduction to Wi-Fi
The camcorder's Wi-Fi functions allow you to send files wirelessly, which means that you will not need to fuss with cables. You can wirelessly connect the camcorder to a Wi-Fi network (wireless LAN) using an access point. This type of connection is commonly referred to as infrastructure mode. You can also connect the camcorder directly to an iOS device* without using an access point. This type of connection is commonly referred to as ad hoc mode. This guide covers how to set up a connection for infrastructure mode. Refer to Glossary (11) for a definition of the frequently used terms in this text.
The following illustrates the convenient uses of each type of Wi-Fi connection.
* "iOS device" is used in this text to collectively refer to Wi-Fi-enabled iOS devices.
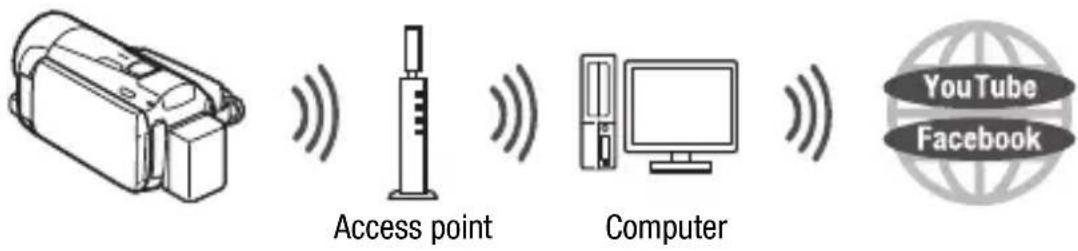
Connect the camcorder to an access point on a Wi-Fi network (explained in this guide). Use this connection if you plan to save your recordings on a computer or FTP server (PDF) Transferring Files to a Computer or FTP Server) and then upload videos to YouTube and Facebook (PDF) Uploading Recordings to YouTube and Facebook).
natural_image
Line drawing of a handheld electronic device (no text or symbols)

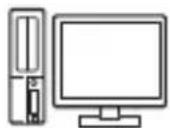
Access point
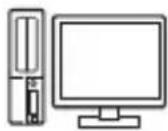
Computer


Wi-Fi connection B
Ad hoc mode
Connect the camcorder to an iOS device (PDF) Uploading Videos Using an iOS Device). Use this connection type if you plan to upload videos to YouTube and Facebook on the go (PDF) Uploading Recordings to YouTube and Facebook).
natural_image
Line drawing of a handheld electronic device (no text or symbols)

iOS device
Wi-Fi connection ©
Infrastructure mode
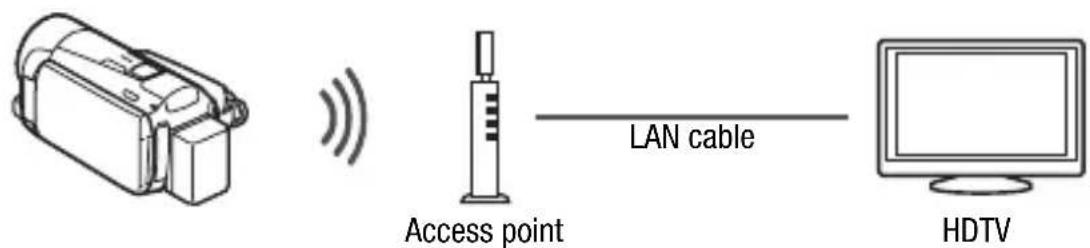
Connect the camcorder to an access point on a Wi-Fi network (explained in this guide). Use this connection if you plan to play back videos on a DLNA-compatible TV (PDF) Wireless Playback on a DLNA-Compatible Device) connected to the network using a LAN cable.
natural_image
Line drawing of a handheld electronic device (no text or symbols)
LAN cable
Access point
HDTV
About the camcorder's Wi-Fi standard
The camcorder's Wi-Fi standard complies with the IEEE 802.11b/g/n protocol and operates in the 2.4 GHz band. As such, the maximum data transfer rate is 11 Mbps for IEEE 802.11b, 54 Mbps for IEEE 802.11g, and 150 Mbps for IEEE 802.11n. Note that these are theoretical values and actual data transfer rates may differ.
Connecting to a Wi-Fi Network (Wi-Fi Protected Setup)
Wirelessly connecting to a Wi-Fi network via an access point (wireless router) is commonly referred to as infrastructure mode. If your wireless router supports Wi-Fi Protected Setup (WPS), setup will be easy and require minimal configuring. Perform the following procedure. If your wireless router does not support WPS or you wish to manually configure settings, refer to Manual Setup (PDF) Connecting to a Wi-Fi Network).
Refer also to the instruction manual of your wireless router and other devices you will use.
General requirements
- Correctly configured Wi-Fi network or hotspot that uses the 802.11b/g/n protocol.


POINTS TO CHECK
- Using an unprotected Wi-Fi network can expose your files and data to monitoring by unauthorized third parties. Be aware of the risks involved.
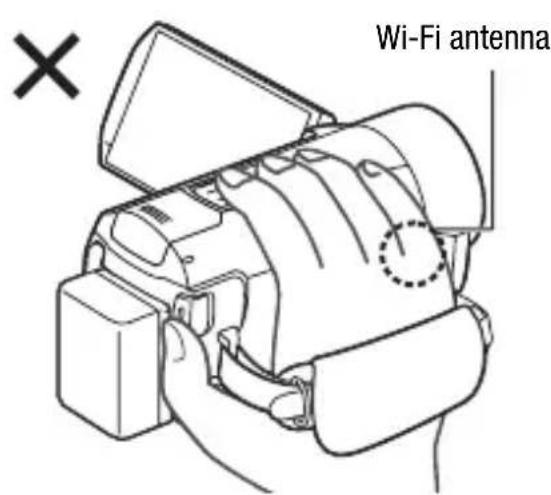
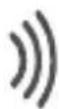
- When using the camcorder's Wi-Fi functions, do not cover the right side of the camcorder with your hand or other object. The Wi-Fi antenna is located on the right side and covering it may interfere with wireless signals.
natural_image
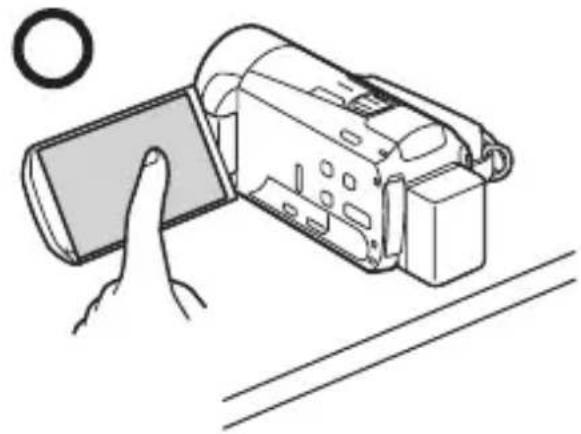
Line drawing of a hand inserting a digital camera into a flat surface, with no text or symbols present.Place the camcorder on a table or similar surface and then use the Wi-Fi functions, as shown in the illustration on the left.
Operating modes:

If your wireless router has a WPS button, setup will be easy and all automatic. Some wireless routers that support WPS do not have a dedicated button but use a PIN code instead. For setup using a PIN code, you will need to know in advance how to activate the wireless router's WPS function.
1 Press ☐ to set the camcorder to playback mode and then press HOME.
2 Set up a new connection point.

[◀] W i ▶ -[Wi-Fi Setup] ▶ [Network Setup] ▶ Desired connection point ([◀] to [3]) ▶ [Set Up New]* ▶
[WPS: Button] or [WPS: PIN Code], depending on whether your wireless router has a WPS button or uses a PIN code
* To replace the settings of an existing connection point, touch [Edit] instead and then manually change the settings. To delete the settings, touch [Delete] and then [Yes].
- You can set up up to three connection points for infrastructure mode ([(1)] to [3]). Once set up, you can use the same Wi-Fi network without any further settings.
3 WPS button setup: Press and hold the WPS button on your wireless router.
WPS PIN code setup: After a PIN code appears on the camcorder's screen, enter it into your wireless router's setup screen.
In most cases, the wireless router's setup screen is accessed using your Web browser. For details about how to activate the Wi-Fi protected setup, refer to the instruction manual of your wireless router.
4 Within 2 minutes, touch [OK] on the camcorder's screen.
You can touch [Stop] and then [OK] to interrupt the Wi-Fi Protected Setup while it is in progress.
5 Touch [Automatic] to automatically obtain an IP address.
- To assign the IP address manually, touch [Manual] and perform the procedure in To manually assign an IP address below.
- A screen to test the settings will appear.
6 Select whether to test the settings.
- You can touch [Check Current Configuration] to review the network settings.
- If you touched [Yes], a test of the settings will be performed and a confirmation screen will appear. Touch [OK].
7 Save the settings of the connection point.

[Yes] ➤ [OK]* ➤ [×]
* After touching [OK], you can review the network settings. Touch [Wi-Fi Setup] ▶ [Check Current Configuration] ▶ Desired connection point ([◀1] to [◀3]) ▶ [▼] or [▲] ▶ [→] three times when finished.
Congratulations! You have connected your camcorder to the access point on your Wi-Fi network. You can now use the camcorder's convenient Wi-Fi features. The general requirements for each feature are outlined in the next section. For more details, refer to the full-version Instruction Manual (PDF file).
Requirements for Wi-Fi Functions
You have connected the camcorder to your Wi-Fi network and are ready for the next step. You can now wirelessly transfer recordings to a computer or FTP server, upload recordings to the Internet, and play back your recordings on a DLNA-compatible player.
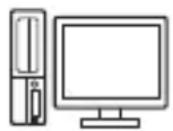
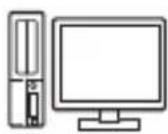
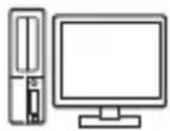
Transferring Files to a Computer or FTP Server
You can wirelessly transfer recordings directly to a computer running the supplied software Network Utility (Windows only) or an FTP server. For a full explanation, refer to the full-version Instruction Manual (PDF) Transferring Files to a Computer or FTP Server).
natural_image
Technical line drawing of a mechanical device (no text or symbols)


Access point
General requirements
For computers running Windows OS:
- A computer correctly connected to the same network as the camcorder with the supplied software Network Utility correctly installed, configured and running (appears in the notification area, depending on the OS). Network Utility will be installed automatically after you install VideoBrowser. For details about the software, refer to the ‘Network Utility Software Guide’ (PDF file on the PIXELA CD-ROM in the folder \Network Utility\Manual\English).
For FTP servers:
- Correctly configured FTP server, such as a Macintosh computer or network-attached storage (NAS) drive. You will need to enter the IP address, port, user name, password and file transfer destination as part of the manual setup.
You can upload movies to YouTube and movies and photos to Facebook using the supplied software Network Utility running on a Windows computer. For a full explanation, refer to the full-version Instruction Manual (PDF) Uploading Recordings to YouTube and Facebook).
General requirements
- A computer correctly connected to a network with the supplied software Network Utility correctly installed, configured (including your YouTube and Facebook account settings) and running (is in the notification area). Network Utility will be installed automatically after you install VideoBrowser. For details about the software, refer to the 'Network Utility Software Guide' (PDF file on the PIXELA CD-ROM in the folder \Network Utility\Manual\English).
Uploading Videos Using an iOS Device
You can connect the camcorder to an iOS device to upload your recordings to YouTube and Facebook even when you are away from your home network. Make sure you have downloaded and are using the Movie Uploader app provided by PIXELA, available for free from the App Store (http://itunes.com/apps/movieuploader). Using this feature will require that you make a wireless connection in ad hoc mode with the iOS device. For a full explanation, refer to the full version Instruction Manual (PDF) Uploading Videos Using an iOS Device). For details about the Movie Uploader app, visit http://www.pixela.co.jp/oem/canon/e/movieuploader/ (English only).

iOS device
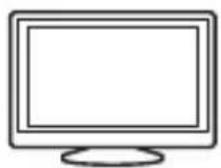
If you have a DLNA-compatible player, such as an HDTV, on your home network, you can watch your recordings wirelessly. In such case, the camcorder acts as a digital media server (DMS) and the HDTV acts as a digital media player (DMP).
General requirements
- An HDTV or other media player certified as a DLNA Digital Media Player (DMP), correctly configured and connected to the network. We recommend

using a LAN cable to connect the HDTV or media player. Look for the DLNA Certified logo on the HDTV and refer to the instruction manual of the HDTV for details on connecting it to the network.
For a full explanation, refer to the full-version Instruction Manual (PDF) Wireless Playback on a DLNA-Compatible Device).
Glossary
This is a glossary of some of the basic terms used frequently in this text. The documentation for your wireless router may also contain a glossary you can refer to.
Access Point
A wireless access point (WAP) is a device that allows wireless devices, like your camcorder, to connect to a wired network (including to the Internet) using the Wi-Fi standard. In most cases, this will be your wireless router.
Ad hoc mode
A Wi-Fi connection made directly from one device to another without using an access point.
DLNA
Digital Living Network Alliance. A standard for easy communication and content sharing among consumer electronic devices, computers and mobile devices across a home network.
FTP server
An FTP server is an application running on a computer that allows users to transfer files to and from that computer.
Infrastructure mode
A Wi-Fi connection in which devices are connected through an access point.
IP Address
Exclusive number assigned to each device connected to the network.
WPS
Wi-Fi Protected Setup. Standard for easy and secure setup of Wi-Fi networks created by the Wi-Fi Alliance.
Troubleshooting
If you cannot successfully connect the camcorder to the wireless router, check below. Refer also to the instruction manual of your wireless router and other devices you will use. Consult your dealer or a Canon Service Center if the problem persists.
Cannot connect with the wireless router.
- Check that the wireless router is working correctly.
- The effective communication range between the camcorder and wireless router may vary depending on the strength of the wireless signal. Try using the camcorder closer to the wireless router.
- Cordless phones, microwave ovens, refrigerators and other appliances in the line of sight between the wireless router and the camcorder may interfere with the wireless signal. Try using the camcorder in a location farther away from such appliances.
- Wi-Fi networks with a stealth function that do not broadcast their network name (SSID) will not be detected by the camcorder during the Wi-Fi network setup. Perform the setup manually (PDF) Manual Setup in Connecting to a Wi-Fi Network) or turn off the stealth function of the wireless router.
List of Messages (in alphabetical order)
Refer to these messages if a message appears during Wi-Fi Protected Setup. If a message not in this list appears, refer to the full-version Instruction Manual (PDF) List of Messages).
In some cases, Wi-Fi functions may not be usable with certain accessories. For details, refer to the full-version Instruction Manual (PDF file).
Multiple access points detected. Try the operation again.
- There are multiple wireless routers (access points) sending out a WPS signal at the same time. Try the operation again later or perform Wi-Fi Protected Setup using the PIN code option.
Unable to complete WPS.
- Turn off the camcorder and wireless router. After a short while, turn them on again and try again. If the problem persists, perform the Wi-Fi network setup manually (PDF) Manual Setup in Connecting to a Wi-Fi Network).
Unable to complete WPS. Try the operation again.
- Some wireless routers require pressing and holding the Wi-Fi Protected Setup (WPS) button. For details, refer to the instruction manual of your wireless router.
- Make sure to touch [OK] on the camcorder's screen within 2 minutes of activating the Wi-Fi Protected Setup signal on the wireless router, whether by pressing the button or by entering the PIN code.
Wi-Fi connection terminated
- Cordless phones, microwave ovens, refrigerators and other appliances may interfere with the wireless signal. Try using the camcorder in a location farther away from such appliances.
- The camcorder may not be able to connect to the wireless router if too many devices are accessing the wireless access point.
Wireless communication is not working correctly
- Cordless phones, microwave ovens, refrigerators and other appliances may interfere with the wireless signal. Try using the camcorder in a location farther away from such appliances.
- Turn off the camcorder and wireless router. After a short while, turn them on again and perform the Wi-Fi network setup again. If the problem persists contact a Canon Service Center.
Table des matières
3 D é m a r r a g e
natural_image
Technical line drawing of a mechanical device (no text or symbols)
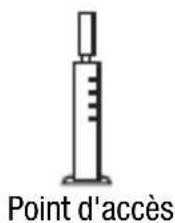
Point d'accès
Ordinateur

Connexion Wi-Fi B
Mode ad hoc
natural_image
Line drawing of a handheld electronic device (no text or symbols)

Dispositif iOS
Connexion Wi-Fi ©
natural_image
Technical line drawing of a mechanical device component (no text or symbols)
natural_image
Line drawing of a hand inserting a digital camera into a rectangular device (no text or symbols)natural_image
Line drawing of a mechanical device with no visible text or symbols
natural_image
Line drawing of a handheld electronic device (no text or symbols)


natural_image
Technical line drawing of a mechanical device (no text or symbols)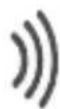
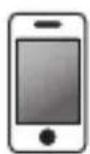

iOS-Gerät
natural_image
Line drawing of a handheld electronic device (no text or symbols)
natural_image
Line drawing of a hand holding a digital camera next to a flat surface, with no text or symbols present.natural_image
Technical line drawing of a mechanical device (no text or symbols)

natural_image
Line drawing of a handheld electronic device (no text or symbols)
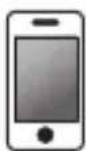

Dispositivo iOS
Connessione Wi-Fi ©
natural_image
Line drawing of a handheld electronic device (no text or symbols)
Cavo LAN
natural_image
Line drawing of a hand holding a flat-screen digital camera, with no text or symbols presentnatural_image
Line drawing of a handheld electronic device (no text or symbols)

Punto di accesso
Requisiti generali
natural_image
Line drawing of a mechanical device with no visible text or symbols


natural_image
Line drawing of a handheld electronic device (no text or symbols)

Dispositivo iOS
natural_image
Technical line drawing of a mechanical device (no text or symbols)
natural_image
Line drawing of a hand inserting a card into a digital camera module (no text or symbols)natural_image
Technical line drawing of a mechanical component or housing (no text or symbols)
Punto de acceso
natural_image
Line drawing of a mechanical device with no visible text or symbols

natural_image
Technical line drawing of a mechanical device (no text or symbols)


Устройство iOS
Подключение Wi-Fi

natural_image
Line drawing of a handheld electronic device (no text or symbols)

Точка доступа
natural_image
Line drawing of a hand inserting a digital camera into a rectangular device (no text or symbols)natural_image
Line drawing of a handheld electronic device (no text or symbols)
接入点
计算机

natural_image
Line drawing of a hand holding a flat-screen digital camera, with no text or symbols presentnatural_image
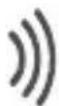
Abstract diagram of four curved lines with a circle at the bottom, resembling signal waves or waveforms (no text or symbols)For the contact information of your local Canon office, refer to the back cover of the camcorder's Instruction Manual.

- 本機の無線LAN 規格について
- Trademark Acknowledgements
- Getting Started
- Introduction to Wi-Fi
- Wi-Fi connection B
- Wi-Fi connection ©
- About the camcorder's Wi-Fi standard
- Connecting to a Wi-Fi Network (Wi-Fi Protected Setup)
- General requirements
- POINTS TO CHECK
- Operating modes:
- Requirements for Wi-Fi Functions
- Transferring Files to a Computer or FTP Server
- Uploading Videos Using an iOS Device
- Glossary
- Access Point
- Ad hoc mode
- DLNA
- FTP server
- Infrastructure mode
- IP Address
- WPS
- Troubleshooting
- Cannot connect with the wireless router.
- List of Messages (in alphabetical order)
- Multiple access points detected. Try the operation again.
- Unable to complete WPS.
- Unable to complete WPS. Try the operation again.
- Wi-Fi connection terminated
- Wireless communication is not working correctly
- Table des matières
- Connexion Wi-Fi B
- Connexion Wi-Fi ©
- Connessione Wi-Fi ©
- Requisiti generali
- Подключение Wi-Fi
Brand : CANON
Model : Legria HF M56
Category : Camcorder