
VL-2 - Camcorder CANON - Free user manual and instructions
Find the device manual for free VL-2 CANON in PDF.


| Product Type | Camcorder |
| Brand | Canon |
| Model | VL-2 |
| Recording Format | VHS-C |
| Sensor | 1/4-inch CCD |
| Lens | f/1.6, 6-60mm zoom |
| Zoom | 10x optical |
| Viewfinder | 0.55-inch B&W electronic |
| LCD Screen | 2.5-inch color |
| Dimensions | 120 x 100 x 200 mm |
| Weight | 700 g (without battery) |
| Power Supply | 7.2V rechargeable battery (Li-Ion) |
| Power Consumption | 5.5 W |
| Battery Life | Approx. 90 minutes |
| Recording Time | Up to 120 minutes with standard VHS-C tape |
| Input/Output | AV out, S-Video out, microphone in |
| Cleaning | Use a soft, dry cloth to clean the exterior; clean lens with lens tissue |
| Safety Precautions | Do not expose to moisture; use only specified batteries and charger |
| Spare Parts | Battery pack, charger, remote control, carrying case |
| Repairability | Limited; service by authorized Canon centers recommended |
| General Information | Camcorder for home video recording; supports playback on TV |
Frequently Asked Questions - VL-2 CANON
User questions about VL-2 CANON
0 question about this device. Answer the ones you know or ask your own.
Ask a new question about this device
Download the instructions for your Camcorder in PDF format for free! Find your manual VL-2 - CANON and take your electronic device back in hand. On this page are published all the documents necessary for the use of your device. VL-2 by CANON.
USER MANUAL VL-2 CANON
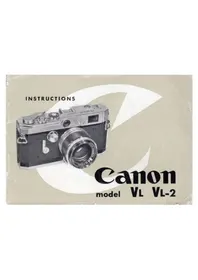
Canon
model VL VL-2
The New Canon VL and Canon VL-2
1. Canon's Metal Shutter Curtain
Your new Canon VL or the Canon VL-2 is the first Japanese made camera to feature an all-metal focal plane shutter. This innovation is made of the finest plastic-coated stainless steel ribbon and offers such advantages as durability coupled with greater accuracy and flexibility in operation. It offers further advantages of being impervious to heat, cold, and moisture, and it eliminates the troublesome pin-holing usually associated with cloth shutters. As such it is virtually free from the necessity of maintenance.
2. Canon's Silver Coated Viewfinder
Canon's chemical engineers have succeeded in solving the difficult problem of silver coating a half mirror prism. This technical achievement for the first time, now makes it possible to overcome the natural corrosive action of silver on glass and to successfully silver-coat a prism. Practically this produces a decrease in light absorption to the extent that the Canon viewfinder is approximately 20% brighter than the conventional gold-coated viewfinders usually built into quality cameras. From the standpoint of picture taking the Canon silver coated viewfinder offers greater natural viewing fidelity which is ideal for color photography
Note:
The Instruction Manual of the New Canon VL and Canon VL-2 is identical to the contents of this booklet except Canon VL or VL-2 has built in Self-timer

Canon VL VL-2
① Range-Viewfinder Window ② Lens Depth-of-Field Scale ③ Lens Distance Scale ④ Canon Lens ⑤ Lens Aperture Scale ⑥ Rangefinder Window ⑦ Slow Speed Shutter Dial ⑧ Self-timer ⑨ Film Rewind Ring ⑩ Shutter Release Button ⑪ Film Frame Counting Dial ⑫ Film Frame Counting Dial Setting Wheel
⑬ Film Type Indicator ⑭ Flash Unit Connector Socket ⑯ Film Rewind Crank (Only VL-2 has rewinding knob) ⑱ Viewfinder Dial ⑰ Film Plane Mark ⑱ Accessory Clip ⑲ Automatic Parallax Adjustment Pin ⑳ Flash Synchronization Selector ②1 High Speed Shutter Dial ② Flash Synchronization Dial ②3 Film Winding Lever ⑳ Film Transport Indicator
(Continued on the last page)
CONTENTS
FILM LOADING 6
FILM AND FRAME DIAL ... 8
FILM TYPE INDICATOR ... 8
SETTING SHUTTER SPEED ... 9
SETTING LENS APERTURE ... 10
FOCUSING AND COMPOSING ... 11
DEPTH-OF-FIELD ... 12
VIEWFINDER SELECTOR ... 13
INFRARED PHOTOGRAPHY ... 14
EXPOSING ... 15
FILM WINDING ... 16
DOUBLE EXPOSURES ... 17
UNLOADING ... 18
FLASH PHOTOGRAPHY ... 19
CHANGING LENSES ... 20
LOADING FILM INTO MAGAZINE ... 22
DEPTH-OF-FIELD TABLES ..24
CAMERA CARE.....26
The Canon L1 accepts any standard 35 mm film cartridge as well as the Canon Film Magazine. Lift up the Rewind Crank (14) and draw it up fully to facilitate turning.
To open the camera, turn the Magazine Opening Key (28) counter-clockwise and pull down the Lock for Hinged Back (27).
The camera will then swing open.

Rotate the Take-up Spool (31) until the groove on the spool permits you to slide the end of the film leader into the groove. Then, engage the second perforated hole of the leader with a small hook inside the groove. Adjust the film so that the film perforations fit the teeth of the Film Sprocket (30).
Pull the film cartridge to the recess directly beneath the Rewind Crank. Depress the Film Rewind Crank (14) again to lock the film cartridge in place. Be sure the dull (emulsion) side of the film faces the lens.
With your thumb on the knurled lower end of the Take-Up Spool (31), turn the spool clockwise half a turn until the film is taut.
(Be sure the index line of the Film Rewind Ring (8) points to the "A" position.)
The camera back will lock shut automatically when you close it. Next, wind film one turn and press the Shutter Release Button (9). By doing this you will have cleared the two frames already exposed to light while you were loading.
The film dot on the Film Transport Indicator (23) will make one complete turn each time you advance the film one frame. You will know you
have loaded correctly if the indicator line on the Crank Shaft turns in a counter-clockwise direction each time you cock the shutter mechanism.

The Film Frame Counting Dial (10) on the Canon L1 shows you the number of frames you have not yet exposed. It should be set at the number corresponding to the number of exposures possible on the film you have just loaded (normally 20 or 36). To do this rotate the Film Frame Counting Dial Setting Wheel (11) until the correct number appears on the dial. Note that only even numbers are engraved. Intermediate dots represent the odd numbers.
Thereafter, the Dial will operate automatically. When the last picture has been exposed, the Dial will register "O"

Film Type Indicator
As a reminder, set the Film Type Indicator (12) to the ASA speed of the film you are using, and to show whether you are using black-and-white or color (Blue dot can indicate daylight, red can indicate tungsten.)
This indicator is adjusted by twisting the top of the Film Winding Lever (22) with your finger.
Setting Shutter Speed
This may be done before or after cocking the shutter. There are two speed dials on the Canon Li. The High Speed Dial (20) is for shutter speeds of 1/30, 1/60, 1/125, 1/250, 1/500, and 1/1000 of a second. Also "B" (Bulb) and "X" (electronic flash contact). The Slow Speed Dial (7) is for shutter speeds of 1/30, 1/15, 1/8, 1/4, 1/2, 1 second, plus "T" (Time Exposure).
High Speed Dial
Raise the dial with your thumb and index finger and rotate it until the required speed is opposite the center index line; release the dial which will drop into the correct setting. (Note that in the case of 1/1000 sec. the dial drops only half way back). Be sure that the Slow Speed Shutter Dial is set at 1/30 sec. when using high speeds.


Slow Speed Dial
Set the High Speed Shutter Dial to 1/30 sec. Rotate the Slow Speed Shutter Dial until the speed you want is on top, opposite the indicator line.
To take a picture at 1/30 sec. both Speed Dials should be set at 1/30 sec.
Exposures Longer Than 1 Second
Set the High Speed Shutter Dial to "B" and Slow Speed Shutter Dial to 1/30. The shutter will remain open from the time you press the Shutter Release Button (9) until you release it again.
For "Time," set the High Speed Shutter Dial at 1/30 sec. and the Slow Speed Shutter Dial to "T". The shutter will open when you press the Shutter Release Button. You do not have to maintain pressure on the Shutter Release Button. To close the shutter, turn the Slow Speed Shutter Dial to 1 sec.

Position of Center Index Line When Shutter is Cocked When Shutter is Not Cocked
SETTING LENS APERTURE
(F : STOP)
Set the Lens Aperture Scale (5) by turning the milled ring at the top of your lens until the required f stop is opposite the index dot.
For correct aperture opening, consult an exposure data card or use a reliable exposure meter.

The following table shows the relation between aperture value and exposure time.
| Lens aperture | 1.2 | 1.5 | 1.8 | 2.0 | 2.8 | (3.5) | 4.0 | 5.6 | 8.0 | 11 | 16 |
| Relative exposure time | .36 | .56 | .8 | 1 | 2 | (3) | 4 | 8 | 16 | 32 | 64 |
On the Canon Li, focusing and composing can be done at the same time. When you look through the Range-Viewfinder Eyepiece (24), you will see two images. By releasing the Lens Focusing Lever and rotating the lens barrel, the two images of the object you are focusing upon will coincide. At this point of coincidence your camera is in focus for the object you are about to photograph.
All Canon Lenses couple with the camera's Range-Viewfinder mechanism.

FOCUSING & COMPOSING
The Depth-of-Field Scale (2) shows you the range of objects which will also be in focus on the film. This range will vary with the f:stop you have chosen. The larger the lens aperture, the smaller will be your depth-of-field. For example with an f stop of f 4 and with the object you have focused on at 25ft. (*) your camera will give you a sharp focus picture from approximately 18 feet away from the camera to 70 feet. At f·11 you will get a sharp picture from 12 feet to infinity ( ∞ ).
*(Illustration shows 25ft. on Lens Distance Scale (3) opposite Distance Indicator Mark.)


| For 50mm | For 35mm | 85mm or more |
Adjustment of the Viewfinder Dial (15) is made by turning the Viewfinder Selector (25).
Position "35" shows you the view which any Canon 35mm lens will record.
Position "50" gives you what any Canon 50mm lens will record.
You can focus the Rangefinder at any of the three positions.
VIEWFINDER DIAL & SELECTOR
For long focal length lenses (i.e. greater than 50mm) or when a larger image is desired for focusing, set the selector at "RF". For lens other than 35 mm and 50mm an accessory Viewfinder is necessary to give you correct composition. Alternatively a Canon Zoomfinder Special Viewfinder V or Lumifield Finder V may be used. In all cases, the Automatic Parallax Adjustment Pin (18) built into the Accessory Clip (17) will elevate or depress the viewer to correspond to focus of your lens from 3.5 feet to infinity.

On the Depth-of-Field Scale (2) of some Canon Lenses is the letter "R" This is for infrared film. When using this type of film, focus in the normal way Read off the distance of the object you are photographing as shown opposite the Distance Indicator Mark on the Lens Distance Scale (3). Turn the lens barrel until the distance read off is opposite the "R" mark. Your lens is now focused for infrared photograph.
Be sure you always use a proper filter for infrared photography.
Film Plane Mark (16)
This line gives you the exact position of the film plane in your camera. This information is needed for very accurate close-distance photography where film-to-subject measurement must be taken.
INFRARED PHOTOGRAPHY
You have now completed the following steps:
- Wound your shutter ready for your first exposure.
- Set both speed dials.
- Adjusted the Lens Aperture Scale.
- Focused your lens.
- Composed your picture through the correct Viewfinder setting.
You are now ready to expose your picture. Hold the camera in a vertical or horizontal position, firmly but gently. The camera should be cradled in both palms and the index finger of your right hand should rest over the Shutter Release Button. Check your breath and press the Shutter Release Button in a smooth, steady action. Do not jerk the camera.
For exposures longer than 1/15 sec., you should use a tripod and Cable Release to eliminate movement.
EXPOSING

The Canon Li features the rapid wind lever.
Pull the lever the full length of its run and the film will be wound to the next exposure, the shutter recocked and the Film Frame Dial (10) advanced to the next number all at once. Be sure to check that the Film Rewind Ring (8) is set to the "A" position. Otherwise, you will not be able to make complete winding.
The lever will automatically return when released. It will not return as far as to original folded position but you can pull the next stroke from where it stops. When the camera is not in use, keep the lever folded at the original position.
You can also pull the lever in several short strokes instead of one full stroke. The lever will not move further when winding is complete. You can check this by seeing the High Speed Shutter Dial (20) (See Page 9).


An accidental Double Exposure is prevented on the Canon L1. For deliberate Double Exposures, the following procedure should be adopted
1 Turn the Film Rewind Ring (8) from its normal "A" position to the Film Rewind Mark (▲). 2. Rotate High Speed Shutter Dial counter-clockwise, without lifting dial until you hear a click and the Dial will turn no further 3. Hold the High Speed Shutter Dial in that position with your left hand. Then turn the Film Rewind Ring back to the "A" position with your right hand. 4. You may now reset either Speed Dial to any required position.

DOUBLE EXPOSURE PROCEDURE
UNLOADING
1 Turn the Film Rewind Ring (8) from "A" to the Film Rewind Mark (▲). 2. Raise the Rewind Crank (14) into operating position as illustrated. Turn it in
a clockwise direction until all the film has been wound back into its original cartridge. Tension on the Film Rewind Crank will cease as soon as this has been done and the Film Transport Indicator (23) will also stop rotating. As long as Film Transport Indicator rotates clockwise, film is being rewound in the camera. One complete turn indicates one frame rewound.
- Open the camera back.
- Lift up the Rewind Crank and take out the film cartridge.


Set the Flash Synchronization Selector (19) to show FP for: FP (Focal Plane) Bulbs for all speeds from 1/1000—1 sec. M Bulbs for speeds from 1/125—1 sec.
Set the Flash Synchronization Selector to show X for F or M-2 Bulbs for speeds from 1/30—1 sec. Electronic Flash (shutter speed 1/50 sec.)
NOTE 1 For Electronic Flash, turn High Speed Shutter Dial, as shown, to "X" Slow Speed Shutter Dial should be set at 1/30 sec. 2. When using "F" type bulbs, be sure High Speed Shutter is at 1/30 sec.
Electrical contact is perfectly made for flash bulbs when the Canon Flash Unit Model V is attached to the Flash Unit Connector Socket (13). No external wiring is necessary and all synchronization is done automatically in the camera itself
To extend the Flash Unit away from the Camera or to connect a Speed Light Unit, use Canon Extension Cord Va (15 ft.) or Vb (3 ft.).

CHANGING LENSES
All Canon cameras and lenses feature standard flanges and threads. The screw-in lens mount has been proven the most accurate and durable, with the greatest area of lens-to-camera contact of any type of camera connection.
To change your lens, place the lens cap over the top of the lens. Grip the lens barrel at its base and apply gentle pressure until the lens is loose. Continue turning until the lens is completely unscrewed. Be sure that the camera (when loaded with film) is in shade and be sure to cover the lens base with a dust cap as soon as possible. Any Canon lens will couple with the L1.
To replace a lens, keep the lens cap on the lens but remove the base cap. Turn the lens first in a counter-clockwise direction for half a turn. This makes sure that the lens threads and the camera mount flange do not
cross. Next, turn it in a clockwise direction until the lens is securely in place. Do not force the lens any further.
Always tighten a lens by its base, not by the top. If the lens has a lens focusing lever, be sure this is in the locked (∞) position.
Note: When mounting or dismounting any lens of 85 mm or greater focal length, be certain you have it set at the nearest footage setting to protect the camera's rangefinder and its actuating mechanism.

- To disassemble the magazine, put your finger on the button and turn the inner shell clockwise until both the inner and outer shell slots are superimposed and the safety lock disengaged. Draw out the inner shell.
- Insert the tapered end of your film into the slit of the center spool, facing the emulsion (dull) side towards the spindle of the spool.
- Wind 5¼ feet of film around the center spool moderately tight for 36 exposures, 3½ ft. for 20 exposures, 3

ft. for 18 exposures and 2 ft. for 10 exposures.
- To assemble the magazine, first insert the center spool into the inner shell, letting the beginning of the film lie out from the slot.
- Introduce the inner shell together with the center spool into the outer shell with both inner and outer shell slots superimposed. Turn the inner shell counter-clockwise until it clicks into locked position.
This procedure must be done in a dark room with proper safe light or in complete darkness depending upon film manufacturer's instructions.
- When the film magazine is properly loaded and positively locked, draw out the film and trim it as illustrated.
Depth-of-Field Table
for Canon 35 mm f:1.8, f:2.8
In Feet
Minimum Circle of Confusion: 0.035 mm
| Distance focused on (ft) | Depth of Field Table. | |||||||||||||||||
| f 1.8 | f:2 | f 2.8 | f 4 | f 5.6 | f 8 | f 11 | f 16 | f 22 | ||||||||||
| ft-in | ft-in | ft-in | ft-in | ft-in | ft-in | ft-in | ft-in | ft-in | ft-in | ft-in | ft-in | ft-in | ft-in | ft-in | ft-in | ft-in | ft-in | |
| ∞ | 65-101/4 | ∞ | 59-31/2 | ∞ | 43- | ∞ | 29-9 | ∞ | 21-3 3 /4 | ∞ | 15- | ∞ | 10-111/2 | ∞ | 7-7 1 /4 | ∞ | 5-7 1 /8 | ∞ |
| 50 | 28-53/4 | ∞ | 27-21/8 | ∞ | 23- | ∞ | 18-81/4 | ∞ | 14-111/4 | ∞ | 11-61/4 | ∞ | 8-111/2 | ∞ | 6-6 5 /8 | ∞ | 4-11 5 /8 | ∞ |
| 25 | 18-21/8 | 40-15/8 | 17-73/4 | 42-117/8 | 15-91/2 | 60- | 13-73/4 | 155- | 10-41/2 | ∞ | 9-4 7 /8 | ∞ | 7-7 5 /8 | ∞ | 5-9 7 /8 | ∞ | 4-6 1 /2 | ∞ |
| 15 | 12-31/8 | 19-4 | 11-117/8 | 19-115/8 | 11-2 | 23-1/4 | 10-3/8 | 29-11 | 8-103/8 | 49-10 | 7-6 5 /8 | ∞ | 6-4 5 /8 | ∞ | 5-7 7/8 | ∞ | 4-1 | ∞ |
| 10 | 8-8 5 /8 | 12-37/8 | 8-7 1/8 | 11-114/8 | 8-1 5 /8 | 12-113/4 | 7-6 1/2 | 14-105/8 | 6-10 1/2 | 18-63/8 | 6-3 3/4 | 29-4 | 5-3 1/2 | 110- | 4-4 1/2 | ∞ | 3-7 1/2 | ∞ |
| 8 | 7-2 | 9-3 3/4 | 7-1 | 9-2 5/8 | 6-9 1/4 | 9-9 3/8 | 6-4 1/4 | 10-93/4 | 5-10 1/2 | 12-71/8 | 5-3 3/8 | 16-91/4 | 4-8 1/4 | 28-71/2 | 3-11 1/2 | ∞ | 3-4 | ∞ |
| 6 | 5-6 1/4 | 6-6 7/8 | 5-5 6/8 | 6-7 5/8 | 5-3 1/2 | 6-11 1/8 | 5-1 1/2 | 7-5 1/4 | 4-8 7/8 | 8-2 5/8 | 4-4 1/8 | 9-9 1/4 | 3-11 3/8 | 12-10 | 3-5 | 27-1 1/2 | 2-11 1/2 | ∞ |
| 5 | 4-8 | 5-4 5/8 | 4-7 5/8 | 5-5 1/8 | 4-6 1/8 | 5-7 5/2 | 4-3 7/8 | 5-11 1/4 | 4-1 1/4 | 6-5 1/8 | 3-9 3/4 | 7-4 | 3-6 | 8-10 3/4 | 3-1 | 13-103/4 | 2-8 1/2 | 43-9 |
| 4 | 3-9 1/2 | 4-2 7/8 | 3-9 1/4 | 4-3 1/4 | 3-8 1/8 | 4-4 5/8 | 3-6 3/4 | 4-6 3/4 | 3-5 | 4-10 1/8 | 3-17 6/8 | 5-3 7/3 | 2-11 7/8 | 6-1 1/8 | 2-8 1/4 | 8-1 1/2 | 2-4 1/2 | 13-1 5/8 |
| 3.5 | 3-4 1/8 | 3-8 1/8 | 3-3 7/8 | 3-8 3/8 | 3-3 1/8 | 3-9 3/8 | 3-2 | 3-11 | 3-5 3/8 | 4-1 1/2 | 2-10 5/8 | 4-5 1/2 | 2-8 1/2 | 4-11 3/4 | 2-5 1/2 | 6-2 3/4 | 2-2 3/4 | 8-9 |
Depth-of-Field Table
for Canon 50mm f:1.2, f:1.5, f:1.8, f:2.8
In Feet
Minimum Circle of Confusion: 0.035 mm
| Distance Required on (ft) | Depth of Field Table. | |||||||||||||||||||||||
| 1.2 | f 1.4 | f 1.5 | f 1.8 | f 2 | 2.8 | f 4 | f 5.6 | f 8 | f 11 | f 16 | f 22 | |||||||||||||
| ft-in | ft-in | ft-in | ft-in | ft-in | ft-in | ft-in | ft-in | ft-in | ft-in | ft-in | ft-in | ft-in | ft-in | ft-in | ft-in | ft-in | ft-in | ft-in | ft-in | ft-in | ft-in | ft-in | ft-in | |
| ∞ | 209~ | ∞ | 179~ | ∞ | 167~ | ∞ | 139~ | ∞ | 125~ | ∞ | 39~ | ∞ | 63~ | ∞ | 44~9 | ∞ | 31~4 | ∞ | 22~11 | ∞ | 15~9 | ∞ | 11~ | ∞ |
| 50 | 40~4 | 65~9 | 39~ | 69~5 | 38~7 | 71~ | 36~10 | 78~ | 35~10 | 83~ | 32~2 | 113~ | 27~11 | 245~ | 23~9 | ∞ | 19~3 | ∞ | 16~9 | ∞ | 12~ | ∞ | 9~3 | ∞ |
| 25 | 22~4 | 28~5 | 21~11 | 29~ | 21~10 | 29~4 | 21~3 | 30~4 | 20~11 | 31~ | 19~7 | 34~6 | 18~ | 41~3 | 16~2 | 56~ | 14~ | 119~ | 12~ | ∞ | 9~9 | ∞ | 7~10 | ∞ |
| 15 | 14~0 | 16~2 | 13~10 | 16~4 | 13~10 | 16~5 | 13~7 | 16~7 | 13~5 | 16~11 | 12~11 | 17~11 | 12~2 | 19~7 | 11~4 | 22~3 | 10~3 | 28~2 | 9~2 | 42~ | 7~91/2 | 247~ | 6~6 | ∞ |
| 10 | 9~61/2 | 10~6 | 9~53/2 | 10~7 | 9~51/2 | 10~7 | 9~43/2 | 10~9 | 9~31/2 | 10~10 | 9~1/2 | 11~2 | 8~8 | 11~10 | 8~3 | 12~10 | 7~8 | 14~5 | 7~ | 17~ | 6~3 | 26~ | 3~41/2 | 74~111/2 |
| 8 | 7~87/2 | 8~34/2 | 7~8 | 8~41/2 | 7~77/2 | 8~1/2 | 7~7 | 8~51/2 | 7~61/2 | 8~67/2 | 7~47/2 | 8~87/2 | 7~13/2 | 9~ | 6~101/2 | 9~73/2 | 6~51/2 | 10~7 | 6~1/2 | 12~ | 5~5 | 15~7 | 4~87/2 | 25~97/2 |
| 6 | 5~10 | 6~21/2 | 5~93/2 | 6~25/2 | 5~93/2 | 6~21/2 | 5~91/2 | 6~3 | 5~9 | 6~31/2 | 5~71/2 | 6~43/2 | 5~61/2 | 6~ | 5~41/2 | 6~101/2 | 5~11/2 | 7~31/2 | 4~10 | 7~111/2 | 4~57/2 | 9~4 | 3~111/2 | 13~41/2 |
| 5 | 4~101/2 | 5~11/2 | 4~107/2 | 5~15/2 | 4~107/2 | 5~15/2 | 4~101/2 | 5~2 | 4~97/2 | 5~21/2 | 4~97/2 | 5~31/2 | 4~8 | 5~47/2 | 4~61/2 | 5~67/2 | 4~47/2 | 5~101/2 | 4~21/2 | 6~3 | 3~105/2 | 7~7/2 | 3~6 | 8~81/2 |
| 4 | 3~111/2 | 4~ | 3~11 | 4~ | 3~11 | 4 | 3~107/2 | 4~11/2 | 3~107/2 | 4~13/2 | 3~107/2 | 4~2 | 3~91/2 | 4~27/2 | 3~87/2 | 4~41/2 | 3~77/2 | 4~61/2 | 3~55/2 | 4~87/2 | 3~31/2 | 5~21/2 | 2~117/2 | 6~101/2 |
| 3.5 | 3~53/2 | 3~65/2 | 3~51/2 | 3~63/2 | 3~61/2 | 3~65/2 | 3~51/2 | 3~67/2 | 3~8 | 8~7 | 3~43/2 | 3~71/2 | 3~4 | 3~87/2 | 3~35/2 | 3~9 | 3~27/2 | 3~101/2 | 3~11/2 | 4~41/2 | 2~111/2 | 4~47/2 | 2~87/2 | 4~111/2 |
CARE OF YOUR
DO read this instruction book carefully.
DO consult your dealer if you have any problem about using your Camera or Lenses.
DO keep the Lens Cap on at all times except when you are actually going to take a picture. Your Canon Lens is the fastest lens available. If exposed to direct light it may burn a hole in your shutter curtain in a second.
DO
Canon L1
DON'T keep your camera in the glove compartment of your car where it will be subject to shaking.
DON'T keep your camera in a damp room or where corrosive fumes exist.
DON'T clean your Canon Lens with anything but special lens tissue, with possibly a little pure alcohol or ether, if available. Wrap tissue around a wooden matchstick and wipe in a circular motion, lightly and systematically.
DON'T
ACCESSORIES

Couples to the built-in rangefinder of Canon L1 for automatic parallax compensation. Available for 25 mm, 28 mm and 35mm lenses.
LUMI-FIELD VIEWFINDERS
Gives a clear, sharp field-of-view by a brilliant white-line frame, while at the same time permitting observation of an outer margin which will not appear in the photograph. Couples to the built-in rangefinder mechanism of the Canon Camera L1 for automatic parallax compensation.
Separate viewfinders are available for 50mm, 85mm, 100mm and 135mm lenses.

UNIVERSAL ZOOMFINDER
"S" and "L"
Shows the exact field-of-view recorded by the lens itself. Parallax is compensated automatically as you focus your lens on Canon L1. The eye-piece is adjustable to compensate for individual differences in eye-sight.
Two types are available, "S" and "L". The first (model S) is for wide-angle lenses with focal length between 35mm and 50mm. For any of the ultra wide-angle lenses such as 21mm, 25mm or 28mm lens the Front Attachment Lens is adapted. The second (model L) is for long lenses with focal length between 85mm and 135mm.
FLASH UNIT MODEL V
Pocket size flash gun; fits directly on Canon's bayonet-type outlet, without the use of any external cables. 5 inch folding reflector, sturdy plastic housing, B.C. circuit, built-in test lamp.


INTERCHANGEABLE CANON LENSES
The Canon lenses are widely used by professional cameramen the world over because of their high resolving power and color fidelity which is a result of Canon's constant research in the fields of glass development, lens design and lens coating compounds.
25mm f:3.5 50mm f 1.2 100mm f:3.5
28mm f:2.8 50mm f 1.8 II 135mm f 3.5
28mm f:3.5 II 50mm f:2.8 II 400mm f:4.5
35mm f:1.8 85mm f:1.5 800mm f 8
35mm f 2.8 II 85mm f 1.9

CANON CAMERA CO., INC.
312 SHIMO-MARUKO-CHO, OHTA-KU, TOKYO
U.S. FACTORY BRANCH
550 FIFTH AVENUE, NEW YORK 36, N.Y

PUB. NO. 365A 6T-3-58 PRINTED IN JAPAN BY DAITO
- CANON
- MODEL VL VL
- THE NEW CANON VL AND CANON VL
- CANON'S METAL SHUTTER CURTAIN
- CANON'S SILVER COATED VIEWFINDER
- NOTE
- CANON VL VL
- CONTENTS
- FILM TYPE INDICATOR
- SETTING SHUTTER SPEED
- HIGH SPEED DIAL
- SLOW SPEED DIAL
- EXPOSURES LONGER THAN 1 SECOND
- SETTING LENS APERTURE
- (F : STOP)
- FOCUSING & COMPOSING
- VIEWFINDER DIAL & SELECTOR
- FILM PLANE MARK (16)
- INFRARED PHOTOGRAPHY
- EXPOSING
- DOUBLE EXPOSURE PROCEDURE
- UNLOADING
- CHANGING LENSES
- DEPTH-OF-FIELD TABLE
- CARE OF YOUR
- DO
- CANON L
- ACCESSORIES
- LUMI-FIELD VIEWFINDERS
- UNIVERSAL ZOOMFINDER
- FLASH UNIT MODEL V
- INTERCHANGEABLE CANON LENSES
Brand : CANON
Model : VL-2
Category : Camcorder