
ML-105 EF - Camcorder CANON - Free user manual and instructions
Find the device manual for free ML-105 EF CANON in PDF.


| Product Type | Camcorder |
| Brand | Canon |
| Model | ML-105 EF |
| Dimensions | Approx. 100 x 100 x 200 mm |
| Weight | Approx. 800 g (without battery and tape) |
| Power Supply | Rechargeable battery pack (7.2V, Li-Ion or NiMH) |
| Recording Media | MiniDV tape |
| Lens | Canon EF mount (compatible with EF lenses) |
| Image Sensor | 1/4-inch CCD, approx. 800,000 pixels |
| Zoom | Optical 10x, Digital 200x |
| Viewfinder | 0.5-inch color LCD |
| LCD Screen | 2.5-inch TFT color, approx. 112,000 pixels |
| Main Functions | Video recording, playback, still image capture, digital effects (e.g., fader, memory mix) |
| Connectors | IEEE 1394 (FireWire), S-Video, Composite AV, Microphone, Headphone |
| Battery Life | Approx. 90 minutes continuous recording |
| Maintenance | Clean lens with soft cloth; avoid humidity; store in dry place |
| Safety | Use only specified power adapters; do not disassemble; avoid magnetic fields |
| Spare Parts Availability | Batteries, chargers, remote control, carrying case, lens caps |
| Reparability | Serviceable by authorized Canon centers; some user-replaceable parts (battery, tape) |
| General Information | Released in early 2000s; supports PAL or NTSC depending on region |
Frequently Asked Questions - ML-105 EF CANON
User questions about ML-105 EF CANON
0 question about this device. Answer the ones you know or ask your own.
Ask a new question about this device
Download the instructions for your Camcorder in PDF format for free! Find your manual ML-105 EF - CANON and take your electronic device back in hand. On this page are published all the documents necessary for the use of your device. ML-105 EF by CANON.
USER MANUAL ML-105 EF CANON
Multi-Purpose Camera
Table of Contents
1 Introduction 3
Safety Precautions ...... 3
Handling Precautions ...... 4
Read This Before Use .... 5
Product Configuration....5
Conventions Used in This Manual.... 5
Overview 6
Names of Parts....7
2 Preparations 10
System Configuration ...... 10
Preparing the Power Supply ..... 11
Using the RC-V100 Remote
Controller 12
Connecting to an External
Monitor/Recorder 13
Preparing the Camera 16
3 Shooting Video 19
Shooting video 19
Onscreen Displays 20
Video Configuration: System Frequency, Frame Rate and Resolution 21
Setting the Camera Mode 22
Direct Setting Mode 23
Adjusting the Aperture (ML-105 EF only)....24
Adjusting the Exposure....26
Gain 27
Shutter Speed 28
White Balance 29
Adjusting the Focus 31
Aspect Markers 34
4 Customization.... 35
Assignable Buttons.... 35
Custom Picture Settings 36
Customizing Onscreen Displays .... 40
5 Menu Options ......41
6 Specifications....46
Compatible Lens and Functions..... 47
Optional Accessories.... 47
Dimensional Drawings (ML-105 EF) 48
Dimensional Drawings (ML-105 M58) 49
7 Additional Information ....50
Onscreen Warning Displays and Messages.... 50
Troubleshooting 50
Index 51
1 Introduction
Safety Precautions
Be sure to read these precautions in order to operate the product safely. Observe them to prevent injury or harm to the operator of the product and other persons.

WARNING Denotes the risk of serious injury or death.
- Stop using the product in any case of unusual circumstances such as the presence of smoke or a strange smell.
- Do not touch any exposed internal parts.
- Do not insert foreign objects or liquids into the product.
- Do not disassemble or modify the product.
- Do not expose the product to strong shocks or vibration.
- During lightning storms, do not touch the connected device's power cord or the connection cable. This may cause electric shock.
- Be sure to use the correct voltage. Using a power source with a voltage other than that specified can cause fire or electric shock.
- Do not use organic solvents such as alcohol, benzine, or paint thinner to clean the product.
- Do not use the product where flammable gases may be present. This may cause electric shock, explosion, or fire.
- Do not shoot the sun directly or point a camera/camcorder at the sun.
Even when the sun does not appear on the screen or is behind the subject, the lens may concentrate the sunlight and cause a malfunction or fire.
- Do not wrap the product in cloth or other materials when in use or shortly after use when the product is still warm in temperature.
- Do not allow the product to maintain contact with the same area of skin for extended periods of time during use. This may result in low-temperature contact burns, including skin redness and blistering, even if the product does not feel hot.
- Keep the product out of the reach of young children.
- Follow any indications to turn off the product in places where its use is forbidden. Not doing so may cause other equipment to malfunction due to the effect of electromagnetic waves and even result in accidents.
- Before installing, be sure the surface is capable of supporting the total weight of the camera and connected devices, and sufficiently reinforce the surface if necessary.
- Do not place the product on an unstable surface. This can cause the camera to fall or tip over and cause injury.

CAUTION Follow the cautions below. Otherwise physical injury or property damage may result.
- Do not leave the product in places exposed to extremely high or low temperatures. The product may become extremely hot/cold and cause burns or injury when touched.
Handling Precautions
- Do not store the camera in places where there is a lot of dust, sand, water, mud, and salt. A failure may occur if such substances get inside the camera. After using the camera, prevent dust and sand getting on the lens by removing the lens in a place where there is not much dust, etc. Also, be sure to attach the body cap.
- For details on connecting and disconnecting the connection cable, be sure to refer to the instruction manual of the device to be connected to the camera.
- Do not use the camera near strong electromagnetic fields such as near powerful magnets and motors, MRI machines or high-voltage power lines. Using the camera in such places may cause anomalies in the video, or audio/video noise.
- Do not point the camera towards a strong light source, such as the sun on a sunny day or an intense artificial light source. Doing so may damage the image sensor or the camera's internal components. Be especially careful not to allow direct sunlight, etc. to enter inside due to changes in the camera angle while carrying the camera. When you will not use the camera, remove the lens and attach the body cap.
- Do not touch the lens contacts on the lens mount. Dirty contacts may cause a poor contact between the camera and the lens resulting in incorrect operation of the camera. ● After removing the lens, make sure to attach the body cap to the lens mount and the lens cap and
dust cap to the lens. Dirt, scratches, fingerprints, etc. on the contacts may result in poor contact or corrosion, which may cause the camera or lens to not operate accurately.
- If the camera is brought into a warm room while it is cold, or if the room is heated quickly, condensation may form on the camera's external or internal surfaces. Using the camera in such a state may cause a failure.
- Before cleaning the camera, be sure to disconnect the connection cable from the camera.
- Use a soft, dry cloth to clean the camera's body. Never use chemically treated cloths or volatile solvents such as paint thinner.
About the CMOS Sensor
The CMOS sensor is produced using high-precision manufacturing techniques. However, if a pixel does not operate to specification, the effect might appear as a white or black dot on a monitor. This is the nature of CMOS image sensors and does not represent a malfunction.
Disposal
- Do not dispose with normal waste. Do not include the camera in waste that will be taken to a landfill.
- Observe the rules and regulations of your local authorities when disposing.
Only for the United Kingdom

This symbol indicates that this product is not to be disposed of with your household waste, according to the UK Waste Electrical and Electronic Equipment Regulations. This product should be handed over to a designated collection point, e.g., on an authorized one-for-one basis when you buy a new similar product or to an authorized collection site for recycling waste electrical and electronic equipment (EEE). Improper handling of this type of waste could have a possible negative impact on the environment and human health due to potentially hazardous substances that are generally associated with EEE. At the same time, your cooperation in the correct disposal of this product will contribute to the effective usage of natural resources. For more information about where you can drop off your waste equipment for recycling, please contact your local city office, waste authority, approved WEEE scheme or your household waste disposal service. For more information regarding return and recycling of WEEE products, please visit www.canon-europe.com/sustainability/approach/.
Read This Before Use
- Be Sure to Check Video
Before using the camera, check that video is output normally to the connected device. In the event that the camera does not operate normally, consult a Canon Service Center.
● Canon Cannot Compensate for Recording Data
Please note that Canon will not compensate for recording data even if recording or playback was not possible due to a malfunction of the camera, connected device, etc.
● Notes on Privacy and Publicity Rights
Regarding the Use of Video
When using the camera, it is the full responsibility of the user to protect privacy and avoid any violation of publicity rights. For example, obtain consent to install the camera in advance when certain buildings or rooms are to be monitored. Canon shall have no liability whatsoever in this regard.
- Legal Notice
In some cases, camera monitoring may be prohibited by law or regulation, the details of which differ by country or region. Before using the camera,
check the laws and regulations of the country or region where the camera is to be used.
- Copyrights
Please note that using and publishing your recorded videos and images without the consent of the copyright holder is a violation of copyright law.
- Do not disconnect the connection cable during operation of the camera. The data may be damaged.
- Canon is not liable for any damage to the camera due to how the connection cable is connected.
- Do not use the camera with medical devices or other life-sustaining systems.
Highly accurate video transmission cannot be guaranteed because video may be delayed or experience dropped frames depending on the computer and network being used.
Canon shall have no liability whatsoever for any accident or damage arising from use of the camera in such cases.
Product Configuration
Before using the camera, check that all of the following items are included.
- Camera • Body cap (attached to the camera)
Conventions Used in This Manual
This manual uses the following conventions.

IMPORTANT
Precaution that must be observed

NOTES
Point to know

Reference page
Select MENU > [Camera Setup] > [Light Metering]
Refers to displaying the menu, navigating the menu to select the desired option, then confirming your selection.
- The explanations in this manual contain illustrations and diagrams of a prototype. They may therefore differ from the actual product. • Some screenshots have been altered to make them easier to read.
- The company and product names in this manual are either registered trademarks or trademarks of their respective companies.
Overview
This product is a multi-purpose camera capable of high-sensitivity color shooting.
ML-105 EF
You can use a variety of Canon lenses (EF Lens or EF Cinema Lens series). For more details on compatible lenses, visit your local Canon website.
ML-105 M58
You can use an M58 mount lens, or a lens such as an F mount lens or C mount lens via a converter adapter.
- Regarding lenses that can be attached to the ML-105 M58:
Use a lens with a protrusion from the lens mount surface that does not exceed 7.2 mm.
Features
- The camera is equipped with a high-sensitivity full HD-compatible 35mm full-frame equivalent CMOS sensor that features improved noise reduction circuitry and pixels measuring a relatively large 19 μm square in size.
- The camera is capable of shooting color video in dim environments without infrared light (minimum subject illumination: 0.0005 lux) with little video noise.
- The combination of the full HD-compatible 35mm full-frame equivalent CMOS sensor and the DIGIC DV 4 image processor allows you to shoot high quality, low noise video images even in low light settings.
- The exposure can be controlled automatically (automatic exposure) through the linked settings of the aperture, gain, and shutter speed (ML-105 M58: gain and shutter speed) in addition to manually. • You can select the Canon Log and Wide DR gamma settings found on Canon Cinema EOS cameras. • You can connect the optional RC-V100 Remote Controller to the camera to control it from a distance.
- You can use functions like one-shot AF (to have the camera focus automatically) or push auto iris (to adjust the aperture automatically) by setting them to one of the assignable buttons on the optional RC-V100 Remote Controller (ML-105 EF only).
1 Micrometer. Also referred to as a micron, it is one millionth of a meter. 2 Under the following conditions: color, no light accumulation, f/1.2, shutter speed 1/30, 50 IRE, maximum gain 75 dB.
Names of Parts
Front view
ML-105 EF ML-105 M58

ML-105 EF
① EF mount: You can attach a Canon EF Lens or EF Cinema Lens. ② EF lens mount index (red) ③ Lock ring ④ EF lens contacts
Used to supply power to a Canon EF lens or COMPACT-SERVO lens and control the lens from the camera.
ML-105 M58
① M58 mount
You can attach an M58 mount lens or a mount converter adapter.
Side View (top/bottom and left/right are common)
ML-105 EF
ML-105 M58
① Screw holes
Screw holes to secure the camera when installing it.
Top/bottom: 4-M4, depth 5 mm Left/right: 2-M4, depth 5 mm
Rear View

① REMOTE terminal
Used to control the camera via the RS-422/485/232 serial communication standards. You can connect the RC-V100 Remote Controller or a system equipped with NU Protocol. It is also used to update the camera's firmware via RS-422/485 (it is not possible to perform a firmware update via RS-232). You will need to prepare a compatible cable for the update. For details on the NU Protocol and the firmware update, consult a Canon Service Center.
- Connector (camera)
Manufacturer: ODU GmbH & Co. KG, Model No.: 756.271.081.108.111
• Compatible plug (cable)
Manufacturer: ODU GmbH & Co. KG, Model No.: 756.271.081.208.120

RC-V100
| Pin No. | Signal Name | Input/Output |
| 1 Cont Output | ||
| 2 | GND | - |
| 3 | RS-422 TX - | Output |
| 4 | RS-422 TX + | Output |
| 5 | GND | - |
| 6 | RS-422 RX - | Input |
| 7 | RS-422 RX + | Input |
| 8* | Power | Output |
* Pin number 8 is used exclusively to power the RC-V100 Remote Controller.
NU Protocol (RS-422/485/232)
| NU Protocol (RS-422) | NU Protocol (RS-485) | NU Protocol (RS-232) | ||||
| Pin No. | Signal Name | Input/Output | Signal Name | Input/Output | Signal Name | Input/Output |
| 1 | NC | - | NC | - | NC | - |
| 2 | GND | - | NC | - | GND | - |
| 3 | RS-422 TX - | Output | RS-485 Data -* | Input / Output | NC | - |
| 4 | RS-422 TX + | Output | RS-485 Data +* | Input / Output | RS-232 TX | Output |
| 5 | GND | - | GND | - | GND | - |
| 6 | RS-422 RX - | Input | NC | - | GND | - |
| 7 | RS-422 RX + | Input | NC | - | RS-232 RX | Input |
| 8 | NC | - | NC | - | NC | - |
^ Indicates whether there is a terminating resistor or not.
② GENLOCK terminal
This terminal is used to connect external devices (sync generator).
③ DC IN terminal
This terminal is for external power supply input.
- Connector (camera)
Manufacturer: ODU GmbH & Co. KG, Model No.: 756.271.081.108.211
• Compatible plug (cable)
Manufacturer: ODU GmbH & Co. KG, Model No.: 756.271.081.208.220

| Pin No. | Signal Name | Input/Output |
| 1 NC | - | |
| 2 GND | - | |
| 3 NC | - | |
| 4 | DC IN (10 V to 29 V DC) | Input |
| 5 to 8 | - | - |
④ Power Indicator
LED lamp to indicate the camera status (illuminates in green when the camera is powered on, and goes off when it is powered off). You can also deactivate this lamp (44). The lamp flashes on and off while the camera's firmware is being updated.
⑤ 3G/HD-SDI terminal
This terminal is used to connect an external monitor / recorder.
⑥ DIP switch protective cover
DIP Switches
Each DIP switch operates as explained below. Leave the unused switches set to OFF.

1: To change the system frequency.
[OFF]: To change the system frequency to 59.94Hz.
[ON]: To change the system frequency to 50.00Hz.
2, 3: To change the serial communication method (settings are defined through a combination of both switches):
| 2 | 3 | Description |
| OFF | OFF | RS-422 full duplex communication (utilize this setting when using the RC-V100). |
| OFF | ON | RS-232 communication. |
| ON | OFF | RS-485 half-duplex communication, no terminating resistor. |
| ON | ON | RS-485 half-duplex communication, with terminating resistor. |
4, 5: To change the serial communication protocol (settings are defined through a combination of both switches):
| 4 | 5 | Description |
| OFF | OFF | Connection to the RC-V100. |
| OFF | ON | Spare. |
| ON | OFF | Connection to NU Protocol. |
| ON | ON | Spare. |
6 to 8: Spare switches. Leave the unused switches set to OFF.
2 Preparations
System Configuration
![graph LR A["Optional RC-V100 Remote Controller or system equipped with NU Protocol"] -->|Camera control| B["BNC cable (commercially available)"] B -->|Sync signal| C["External device (such as a sync signal generator)"] B -->|External DC power supply| D["DC power supply"] B -->|BNC cable (commerciall…](/content/2026/06/1379119/images/3f63ac556e82ac6dbaad099fc69764306cab3a19689ad6cb3615ce9f910f6418.jpg)
Preparing the Power Supply
Use the DC IN terminal to supply power from the connected external power adapter. The camera is not equipped with a power switch and is powered on/off through an external power supply. Refer also to the instruction manual of the device to be connected.
IMPORTANT
• Use an insulated power supply for commercial use. • Use a device with a double-insulated construction for the external power supply. - Use products that meet the safety standards in the country or region of use for the external power adapter and power cable. - In case the camera does not boot up, power off the camera and wait at least 3 seconds before powering it on again.
Preparation (* Commercially available)
- External power adapter * Output voltage: 10 V to 29 V DC Output current: 3 A or higher
- Power cable * Rated voltage: At least double the input voltage Current-carrying capacity: 3 A or higher Use an ODU connector (male) *. Refer to the pin assignment of the DC IN terminal of the camera (9).

- Connect a power cable with ODU connector to the DC IN terminal of the camera.
- Connect the power cable to the external power adapter.
• The power indicator illuminates when power is supplied.
Using the RC-V100 Remote Controller
You can connect the optional RC-V100 Remote Controller to control the camera from a distance. For details regarding the remote controller, refer to its instruction manual. It is required to use a commercially available ODU connector (male) when connecting the RC-V100 to the camera using the optional RR-10/RR-100 8-pin Remote Cable. Refer to the REMOTE terminal's pin configuration (☐8).


IMPORTANT
- Check the serial number of the RC-V100 beforehand. If the serial number starts with "01 xxxx" (where xxxx represents other digits), you will need to update the remote controller's firmware. Contact a Canon Customer Support Center for details. • Make sure the camera is powered off when connecting or disconnecting the RC-V100.
- Remove the DIP switch protective cover and set switches 2 to 5 to OFF.
- Connect the RC-V100 to the camera's REMOTE terminal using the RR-10/RR-100 8-pin Remote Cable.
• The cable must be connected to the RC-V100's REMOTE B terminal.
- Set the terminal selection switch on the back of the RC-V100 to REMOTE B.
- When the remote controller is powered on, the CAMERA POWER button illuminates in green.

NOTES
- The CAMERA POWER button will flash quickly until the RC-V100 is completely connected to the camera. In case the connection cannot be completed, it will keep flashing.
- The following controls on the remote controller will not operate on the camera: CAMERA POWER button, ONSCREEN button, SHUTTER SELECT button, AUTO KNEE button, AUTO IRIS button, (review recording) button, AGC button, AF button, ND (change ND filter) button and ND filter indicators.
_ The ZOOM dial can operate the camera only when a compatible EF Cinema lens is attached to the camera.
_ When adjusting the zoom with the RC-V100, set the lens's zoom operation change-over knob to SERVO.
Connecting to an External Monitor/Recorder
You can connect the camera to an external monitor/recorder using the 3G/HD-SDI terminal. For details on supported external monitors/recorders, contact a Canon Customer Support Center.

NOTES
- If the camera's video output does not appear on the external monitor's screen: The [System Frequency], [Frame Rate], or [3G-SDI Mapping] settings may not be set correctly. Change the system frequency and frame rate (50) and check the settings.
Selecting a mapping level for the video output signal of the SDI terminal
You can output a recording command as well as onscreen displays on the SDI terminal's video signal.
- Open the menu (16).
- Select [Video Setup] > [3G-SDI Mapping] > [Level A] or [Level B].
• Mapping levels as defined by the SMPTE ST 425-1 standard.
NOTES
- [3G-SDI Mapping] will appear grayed out while recording to an external device and MENU > [Video Setup] > [Rec Command] > [Activate] is set to [On].
Outputting a recording command
When the camera is connected to an external recorder, you can output a recording command to start or stop recording.
- Outputting a recording command to start recording.
- Press the START/STOP button on the RC-V100 to start recording. • [Rec] will appear on the screen.
- Outputting a recording command to stop recording.
- Press the START/STOP button on the RC-V100 to stop recording. • [Rec] will disappear.

NOTES
• Depending on the external recorder, [Rec] may not appear on the screen when recording starts. - Verify that MENU > [Video Setup] > [Rec Command] > [Activate] is set to [On] to be able to output a recording command to an external recorder to start or stop recording. - By setting MENU > [Video Setup] > [Rec Command] > [Remove OSD] to [On], the camera's onscreen displays will be turned off automatically while a recording command is being output. - While a recording command is being output, the following settings are not available to be changed: [ABB], [3G-SDI Mapping], [Rec Command], [Reset], [Assignable Buttons], [Frame Rate], [Resolution], [Genlock Adjustment], [Camera Name].
Synchronizing with an External Device
Using Genlock synchronization, you can synchronize this camera's video signal to that of an external video device. When a reference sync signal (analog blackburst or tri-level HD signal) is input through the GENLOCK terminal, the phases of the camera's V and H sync will automatically be synchronized to it. The phase difference between the external Genlock signal and the camera is initially set to 0. The H phase can be adjusted within the range of approximately ±0.4 H (-1023 to 1023).
![graph LR A["External device (such as a sync signal generator)"] -->|BNC cable (commercially available)| B["DC power supply"] B --> C["Computer monitor"]](/content/2026/06/1379119/images/7a418ffbdb8ec9e521d3d7ec5b9e9462ec5b14fe7b1a9086731240ee3f6bc199.jpg)
Adjusting the H Phase
- Open the menu (16).
- Select [Other Functions] > [Genlock Adjustment].
- Change the digits in the fields to match the desired adjustment level.
• (Example) 1023: 10 2 3
- Select [Set].

NOTES
- When a suitable Genlock signal is input, the Genlock synchronization stabilizes within approximately 10 seconds.
- When a suitable Genlock signal is detected, [Gen.] will flash on the upper right of the screen. When the camera locks on the external Genlock signal, [Gen.] will stop flashing and stay on. • If the external Genlock signal is incorrect, the synchronization may not be stable.
Preparing the Camera
Using the menu to change the settings
Many of the camera's functions can be adjusted from the menu. This section explains how to operate the menu to adjust diverse settings using the RC-V100 Remote Controller, when the menu screen is displayed on an external monitor connected to the camera.

Menu Shooting screen

RC-V100 buttons used to operate the menu:
- MENU button: Opens the menu.
- Up / Down / Left / Right / SET buttons: Press the navigation buttons to move the selection frame in the various menu screens. Press the SET button to select a menu setting.
- CANCEL button: Press the button to return to the previous submenu or to interrupt some operations while they are in progress.
1. Opening the menu.
- Press the MENU button to enter the menu operation mode and display the menu screen. • Every time the MENU button is pressed, the menu screen and shooting screen are switched.
- The menu opens with the selection frame indicating the menu item that was selected the previous time the menu was closed (unless the camera was powered off).
2. Selecting a menu.
- Press the up/down buttons to select the desired menu.
- Press the SET button to display the desired submenu.
- If a submenu contains many items, press the navigation buttons to scroll up/down and see other menu items.
3. Selecting a menu item.
- Press the up/down buttons to select the desired menu item.
- Press the SET button to display the available setting options for the desired menu item. • A [>] next to a menu item indicates another submenu.
- If a submenu contains many items, press the navigation buttons to scroll up/down and see other menu items.
- Press the CANCEL button to return to the previous menu/submenu level.
4. Selecting a setting option.
- Press the up/down buttons to select the desired setting option.
- Press the SET button to confirm your selection and go back to the previous submenu level.
5. Closing the menu.
- Select [CLOSE] and press the SET button to close the menu. The menu will disappear.
NOTES
- You can select [<] on the menu screen and press the SET button to return to the previous submenu. • Unavailable items may appear grayed out.
- Pressing the MENU button on the RC-V100 at any time closes the menu (except for the [Camera Name] setting screen). • References to menu settings are abbreviated as follows: Select MENU > [Camera Setup] > [Light Metering] > Desired option. "MENU" refers to pressing the MENU button on the RC-V100 to display the menu. "Select" refers to pressing the navigation buttons on the RC-V100 to select the desired option, then pressing the SET button to confirm your selection.
Adjusting the Black Balance
The first time you use the camera or if there is a noticeable change in the blacks of the video signal (such as when ambient temperature changes considerably), you can have the camera adjust the black balance automatically.
- Attach the body cap to the lens mount, and power on the camera.
- Remove the lens if one is attached to the camera, and attach the body cap to the lens mount.
- When using a compatible EF Cinema lens, black balance can be adjusted even with the lens attached.
- Select MENU > [Camera Setup] > [ABB].
- When a confirmation message appears, select [OK].
• The automatic black balance procedure will start.
- When the message indicating the process completed successfully appears, select [OK].
- If the sensor is not completely shielded from light, [ABB error] will appear on the screen. Repeat the procedure from the beginning.
i NOTES
• Adjusting the black balance is necessary in the following cases: - After a long period of not using the camera. - After sudden or extreme changes in ambient temperature. - After resetting the camera's settings using either option in the [Other Functions] > [Reset] setting.
- During the adjustment of the black balance, you may notice some irregular displays appear on the screen. This is not a malfunction.
- After adjusting the black balance with an EF Cinema lens attached to the camera, you will need to readjust the aperture.
Preparing the Lens
As much as possible, attach and remove the lens quickly and in a clean environment free of dust. Refer also to the instruction manual of the lens used.
IMPORTANT
- When attaching/removing a lens, avoid direct sunlight or strong light sources. Also, be careful not to drop the camera or lens. • Power off the camera when attaching/removing a lens.
- The camera is not equipped with a UV-IR cut filter. Use a commercially available UV-IR cut filter when color shooting in visible light. For more details on compatible UV-IR cut filters, visit your local Canon website.
i NOTES
• After removing a lens or when a lens is not attached to the camera:
- Do not touch the lens's surfaces, the lens mount, or any components inside the lens mount area.
- Place the body cap on the lens mount and the dust caps back on the lens. Clean any dust or dirt from the body cap and dust caps before using them.
Attaching a Lens (EF Lens)
For the lens for which operation has been verified, visit your local Canon website.
- Power off the camera.
- Remove the body cap from the EF mount and the dust cap from the lens.
- Align the index (①) on the camera with the mount index (red) on the lens.
- Lock the lens by turning the lock ring (②) counterclockwise while holding the lens.
- To remove the lens, power off the camera and turn the lock ring clockwise while holding the lens.

IMPORTANT
- When removing an EF lens equipped with Image Stabilizer, set the lens's Image Stabilizer switch to OFF.
i NOTES
- About using a compatible EF Cinema lens: This camera's sensor is larger than the sensor size for which these lenses are designed (Super 35mm). When using these lenses with the camera, you may notice peripheral illumination fall-off or vignetting. To prevent this, you can use the [Camera Setup] > [EF-S Lens] setting to change the sensor area that is used for producing the image. This setting digitally enlarges the image by a factor of approx. 1.55 so the image quality will deteriorate.
- Depending on the lens's characteristics, the corners of the picture may seem darker due to light falloff or illumination drop. You can use the peripheral illumination correction setting to have the camera compensate if it has the correction data available for the lens (43).
- If you are using a compatible lens*, you can use the zoom-iris correction setting to have the camera adjust the aperture while zooming (42).
Some EF lenses and EF Cinema lenses are not compatible with this function.
3 Shooting Video
This chapter explains the basics of shooting video. The camera's settings are adjusted using the menu (☐16) or the direct setting mode (☐23). This section covers how to adjust the camera's settings using the RC-V100 Remote Controller.
Shooting video
- Power on the camera.
- Adjust shooting-related settings (such as system frequency or aperture) as necessary.
- Shoot video.
• You can output a recording command to an external recorder to start/stop recording (14).
i NOTES
- Set MENU > [Camera Setup] > [Color Bars] > [Activate] to [On] to output color bars. You can also use the BARS button on the RC-V100. • You can select the type of color bars using the MENU > [Camera Setup] > [Color Bars] > [Type] setting.
- You can invert the image horizontally and/or vertically using the MENU > [Other Functions] > [Scan Reverse] setting.
Onscreen Displays
The screen display layout will differ depending on the camera mode. You can use the [Custom Display] setting to turn off individual onscreen displays if they are not required.

(1) Upper side of the screen
| Display | Description | |
| ABCDEFG012345678 | Camera name | 45 |
| AF | Autofocus operation (one-shot AF) | 31 |
| CP1 to CP7, WDR,C.Log | Custom picture file | 36 |
| Temp. | Temperature warning | 50 |
| Lens | Lens error warning | |
| Gen. | Genlock | 14 |
| Rec | Recording command being output to an external recorder. | 14 |
(2) Lower side of the screen (direct setting mode)
| Display | Description | |
| AWB, WB-A, WB-B, Dylt ±0, Tung ±0 | White balance 29 | |
| Auto, Tv, Av, AGC, Manual | Camera mode 22 | |
| F0.0, Clsd | Aperture value• Grayed out when the camera mode is set to [Tv]; not displayed when it is set to [Auto]. | 24 |
| 00.0dB | Gain value• Grayed out when the camera mode is set to [Tv], [Av] or [AGC]; not displayed when it is set to [Auto]. | 27 |
| 1/0000, 0", 0"00 | Shutter speed | 28 |
NOTES
- Press the CANCEL button on the RC-V100 to stop showing the camera's onscreen displays on the shooting screen; press the button again to show all onscreen displays again. • The screen displays will be superimposed on the video signal output from the 3G/HD-SDI terminal. • Depending on the external recorder, some onscreen displays might not be displayed on the shooting screen.
Video Configuration: System Frequency, Frame Rate and Resolution
You can set the video configuration by selecting the resolution and frame rate. Available frame rate options will depend on the selected system frequency and resolution.
Available video configuration settings
| Resolution | System frequency / Frame rate | |||||||
| 59.94 Hz | 50.00 Hz | |||||||
| 59.94P | 59.94i | 29.97P | 23.98P | 50.00P | 50.00i | 25.00P | 25.00PsF | |
| 1920x1080 | ● | ● | ● | ● | ● | ● | ● | ● |
| 1280x720 | ● | - | ● | ● | ● | - | ● | - |
1. Selecting the System Frequency.
- Remove the DIP switch protective cover and adjust the switches as necessary. For 59.94 Hz: set switch number 1 to OFF. For 50.00 Hz: set switch number 1 to ON.
- If you changed the system frequency from the current setting, the camera will restart in the selected system frequency.
• If nothing is displayed on the external monitor, refer to the Troubleshooting section (50).
2. Selecting the Frame Rate.
- Select MENU > [Other Functions] > [Frame Rate] > Desired option.
3. Selecting the Resolution.
- Select MENU > [Other Functions] > [Resolution] > Desired option.
Setting the Camera Mode
[Auto]: The camera controls the exposure by automatically adjusting the aperture*, gain, and shutter speed.
[Tv] (shutter priority AE)*: Set the shutter speed manually to match low light conditions or fast moving subjects. The camera will then automatically set the appropriate aperture and gain to obtain the best exposure.
[Av] (aperture priority AE)*: Set the aperture manually to control the depth of field. The camera will then automatically set the appropriate gain and shutter speed to obtain the best exposure.
[AGC] (automatic gain control): You can set the shutter speed and aperture manually. The camera will then automatically adjust the gain (the sensor's sensitivity) depending on the brightness of the subject.
[Manual]: You can adjust the aperture, gain, shutter speed, and white balance manually.
* ML-105 EF only.
- Display the selection frame on the shooting screen.
- Press the SET button on the RC-V100 to display the selection frame.
- Select the camera mode.
- Press the left/right button on the RC-V100 to highlight the camera mode.
- Select the desired camera mode.
- Press the up/down button on the RC-V100 to select the desired camera mode.
- Press the SET button to confirm your selection.

NOTES
- You can use the MENU > [Camera Setup] > [AE Response] setting to change how quickly the aperture changes during automatic exposure (camera modes other than [Manual], or while using push auto iris).
- You can use the MENU > [Camera Setup] > [Auto Slow Shutter] setting to select whether the camera will use shutter speeds slower than the current frame rate when the camera mode is set to [Auto] or [Av].
- When the camera mode is set to a mode other than [Manual] and the brightness changes, exposure adjustment may not be smooth.
- The camera mode will be set to [Auto] the first time you use the camera or after you reset the camera's settings using the MENU > [Other Functions] > [Reset] > [All Settings] or [Camera Settings] function.
- With camera modes other than [Manual], the white balance is adjusted automatically by default, but can also be controlled manually.
Direct Setting Mode
On the screen, you can adjust main camera functions—camera mode, aperture, gain, shutter speed, and white balance—using the direct setting mode. For details about each function, refer to the respective section in the manual.
1. Enter direct setting mode.
- On the shooting screen, press the SET button on the RC-V100 to display the selection frame.
2. Set the camera mode to a mode other than [Auto] (☐22).
3. Select the desired function.
- Press the left/right button on the RC-V100 to highlight the function you wish to adjust.
Select the desired setting/value.
- Press the up/down button on the RC-V100 to select the desired setting/value.
- Press the SET button to confirm your selection. Direct setting mode will end.

NOTES
- If you set an assignable button on the RC-V100 to [Camera Mode], you can press the button to switch between camera modes.
- When using an EF lens, one-shot AF and push auto iris cannot be used simultaneously.
- When using the FOCUS dial on the RC-V100, push auto iris (set to an assignable button) cannot be used. The camera will automatically end the direct setting mode in the following cases:
- If no operation was performed for more than 6 seconds.
- If the MENU button or CANCEL button on the RC-V100 was pressed.
Adjusting the Aperture (ML-105 EF only)
The camera offers the following two ways to adjust the aperture but available aperture values will vary depending on the lens attached.
Manual aperture: Adjust the aperture value manually. Available when the camera mode is set to [Av], [AGC] or [Manual].
Push Auto Iris: Momentary automatic aperture. Press an assignable button set to this function to temporarily adjust the aperture automatically. Available only when the camera mode is set to [Manual].
Selecting the lens's aperture mode
To adjust the aperture from the camera, you will need to enable automatic adjustment using the controls on a compatible lens. Operation controls might be named differently depending on the lens. Refer to the instruction manual of the lens used.
Manual Aperture
- Set the camera mode to [Av], [AGC] or [Manual].
- Select the desired [Iris Increment] option.
① Select MENU > [Camera Setup] > [Iris Increment] > [1/2 stop], [1/3 stop] or [Fine] (fine adjustment, smaller than [1/3 stop]). ② Close the menu.
- Adjust the aperture.
① Select the aperture value using direct setting mode. ② Select the desired value.
- Press the left/right buttons on the RC-V100 to select the current aperture value, and the up/down buttons to select the desired value.
- When [Iris Increment] is set to [Fine], the actual increments will be smaller than 1/3 stop but the onscreen display will show the closest 1/3 stop aperture value. • Turn the IRIS dial on the RC-V100 right to open up the aperture and left to close the aperture.
i NOTES
- When using a compatible EF Cinema lens
- As you close down the aperture, the aperture value will be displayed in gray (when the iris is almost fully closed) and then will change to [Clsd] (in white). Still, the iris may not be fully closed even when the onscreen display appears as [Clsd].
- When you change the aperture value from a position of fully open or fully closed iris, multiple adjustment operations may be required to change the iris.
- When using an EF lens that can correct the aperture value according to the position of the zoom*, you can use the zoom-iris correction setting to activate this correction (42).
* Some EF lenses and EF Cinema lenses are not compatible with this function.
- When adjusting the aperture using the IRIS dial, you can change the rotation direction setting. Refer to the instruction manual of the RC-V100 for details. • The aperture values set in the camera and displayed on the screen are approximate. Use them only as a reference.
Momentary Automatic Aperture - Push Auto Iris
You can have the camera temporarily take control and automatically adjust the aperture for an optimal exposure while you keep an assignable button on the RC-V100 Remote Controller (set to [Push Auto Iris]) held down.
- Set an assignable button on the RC-V100 to [Push Auto Iris] (35).
- Set the camera mode to [Manual].
- Press and hold the assignable button.
• The camera will automatically adjust the aperture to obtain optimal exposure.
- Release the assignable button.
• Automatic aperture mode will end and the aperture value that was last set with push auto iris will be maintained in manual aperture.
i NOTES
- You can use the MENU > [Camera Setup] > [AE Response] setting to change how quickly the aperture changes during automatic exposure (camera modes other than [Manual], or while using push auto iris). • You cannot use push auto iris while using the FOCUS dial on the RC-V100.
Adjusting the Exposure
Exposure Compensation - AE Shift
You can compensate the exposure obtained during automatic exposure (camera modes other than [Manual], or while using push auto iris with the camera mode set to [Manual]), in order to darken or lighten the image. You can select a level from -2.0 EV to 2.0 EV (in 0.25-EV increments).
- Select MENU > [Camera Setup] > [AE Shift] > Desired value.
i NOTES
- If you set an assignable button on the RC-V100 to [AE Shift +] or [AE Shift -], you can press the button to adjust the AE shift level. • You cannot use push auto iris and adjust the AE shift level at the same time.
Light Metering Mode
Select the light metering mode to match the shooting conditions. Using the appropriate setting will produce a suitable exposure level during automatic exposure (camera modes other than [Manual], or while using push auto iris).
[Backlight]: Suitable when shooting backlit scenes.
[Standard]: Averages the light metered from the entire screen, giving more weight to the subject in the center.
[Spotlight]: Use this option when shooting a scene in which only a certain part of the picture is lit, for example, when the subject is lit by a spotlight.
- Select MENU > [Camera Setup] > [Light Metering] > Desired option.
i NOTES
- When the camera mode is set to [Manual], changing the light metering mode will not affect the exposure. Adjust the exposure manually to a suitable level.
Gain
Manual Adjustment
You can select a value in the following range: 0.0 to 75.0 dB (in 3.0-dB increments).
- Set the camera mode to [Manual].
- Adjust the gain using direct setting mode.
- Press the left/right buttons on the RC-V100 to highlight the current gain value, and the up/down buttons to select the desired value.
- Press the ISO/GAIN up button on the RC-V100 to increase the gain value, and the ISO/GAIN down button to reduce it.

IMPORTANT
- When the gain setting is high, image deterioration may occur due to light from a strong light source entering the image sensor.

NOTES
- When high gain levels are set, the picture may flicker slightly.
- When high gain levels are set, bright red, green or blue dots may appear on the screen. In such case, use a faster shutter speed or select a lower gain value.
Auto Gain Control (AGC) Limit
When the camera mode is set to a mode other than [Manual], you can set an automatic gain control (AGC) limit to prevent the camera from using gain values above the preset limit, controlling the appearance of noise. You can select [Off (75dB)] for no limit (maximum gain as given in the parentheses), or a maximum gain level from 24dB to 72dB, in 3-dB increments.
- Select MENU > [Camera Setup] > [AGC Limit] > Desired option.
Shutter Speed
Set the shutter speed based on shooting conditions. For example, you may want to set slower shutter speeds for darker environments. You can choose from a total of 67 shutter speed settings, ranging from 9.51 to 1/24000 seconds.
- Set the camera mode to [Manual], [Tv] or [AGC].
- Use direct setting mode to select the desired shutter speed.
- Press the left/right buttons on the RC-V100 to highlight the current shutter speed, and the up/down buttons to select the desired value.
- Press the SHUTTER up button on the RC-V100 to increase the shutter speed, and the SHUTTER down button to reduce it.
NOTES
• About reducing flicker due to shooting under artificial light sources:
- When shooting under artificial light sources such as fluorescent, mercury or halogen lamps, the image may flicker depending on the shutter speed. In such case, you can use the MENU > [Camera Setup] > [Flicker Reduction] > [Automatic] setting to have the camera automatically detect and correct flicker. Depending on the shooting conditions, the camera may not be able to reduce the flicker.
- Alternatively, you may be able to avoid flicker by setting the shutter speed to a value matching the frequency of the local electrical system: 1/50* or 1/100 for 50 Hz systems, 1/60 or 1/120 for 60 Hz systems.
* May not be available depending on the frame rate.
- When the camera mode is set to [Tv], the available shutter speeds range from 1/4 to 1/24000 seconds (or from 1/3.36 to 1/24000 when the frame rate is 23.98P) when the system frequency is [59.94Hz], and from 1/3.36 to 1/24000 seconds when the system frequency is [50.00Hz].
- When the shutter speed is 1 second or more, changing the following settings may take longer than usual (an approximate maximum of 30 seconds): color bars, frame rate, system frequency. In the same way, it may take longer for the camera to output image data after being powered on.
- Shutter speeds slower than 1 second are represented with the (") symbol. For example, [9"51] for 9.51 seconds, and [8"] for 8 seconds.
White Balance
The camera uses an electronic white balance process to calibrate the picture and produce accurate colors under different lighting conditions.
Auto white balance (AWB): The camera automatically adjusts the white balance to the optimal level.
Custom white balance: You can use a gray card or white object with no pattern to establish the white balance and save it to one of two custom white balance settings, [WB-A] or [WB-B].
Preset white balance: Set the white balance to [Tung] (tungsten lighting) or [Dylt] (daylight).

NOTES
- The [Custom Picture] > [Fine Tuning] > [Color Matrix] and [White Balance] settings in the custom picture file take precedence over the white balance set with these procedures.
- You can use the [Camera Setup] > [Shockless WB] setting to make the transition look smoother when you change the white balance settings.
- Some color casting may occur in the highlights (saturated areas) when adjusting the white balance. You can use the [Camera Setup] > [WB Limit] setting to reduce the color casting (for example when shooting under halogen lights) (42).
- You can adjust the white balance with the AWB button, A button, B button, PRESET button and 📋 button on the RC-V100.
- The camera is not equipped with a UV-IR cut filter. Use a commercially available UV-IR cut filter when color shooting in visible light. For more details on compatible UV-IR cut filters, visit your local Canon website.
Auto White Balance (AWB)
The camera constantly adjusts the white balance automatically to achieve an optimal level. The camera will adjust the white balance if the light source changes.
- Use direct setting mode to select auto white balance.
- Press the left/right buttons on the RC-V100 to highlight the current white balance setting, and the up/down buttons to select [AWB].

NOTES
- Custom white balance may provide better results in the following cases:
- Changing lighting conditions
- Close-ups
- Subjects in a single color (sky, sea or forest)
- Under mercury lamps and certain types of fluorescent and LED lights
Custom White Balance
Establish the white balance based on the current lighting conditions and save it to one of two custom white balance settings, [WB-A] or [WB-B].
- Use direct setting mode to select the custom white balance.
- Press the left/right buttons on the RC-V100 to highlight the current white balance setting, and the up/down buttons to select [WB-A] or [WB-B]. • If a custom white balance has not yet been stored, the custom white balance display [WB-A] or [WB-B]
and default value will flash.
- If you select a previously stored custom white balance, you do not need to perform the rest of the procedure. [WB-A]/[WB-B] will not flash.
- Point the camera at a gray card or white object so that it fills the whole screen. Use the same lighting conditions you plan to use when shooting.
- Save the white balance to one of the two custom white balance settings.
- Press the 📋 button on the RC-V100. • [WB-A] or [WB-B] will flash quickly. • Make sure the gray card or white object fills the screen until the procedure is completed.
- Once [WB-A] or [WB-B] stops flashing, the procedure is completed. The setting is retained even if you power off the camera.
NOTES
- Readjust the custom white balance if the light source changes.
- Very rarely and depending on the light source, [WB-A] or [WB-B] may keep flashing (it will change to a slow flashing). The result will still be better than with the auto white balance.
Preset White Balances
Set the white balance to [Tung] (tungsten lighting) or [Dylt] (daylight). Preset white balance settings can be further fine-tuned within a range of -9 to 9.
- Use direct setting mode to select a preset setting.
- Press the left/right buttons on the RC-V100 to highlight the current white balance setting, and the up/down buttons to select [Dylt] or [Tung].
- Adjust the preset white balance settings.
- Press the left/right buttons on the RC-V100 to highlight the adjustment value, and the up/down buttons to set it.
NOTES
• [Tung] cannot be used when [Camera Setup] > [WB Limit] is set to [On].
Adjusting the Focus
The camera offers the following ways to focus.
Manual focus: Turn the focus ring on the lens to adjust the focus.
One-shot AF: Press an assignable button set to [One-Shot AF] to let the camera focus automatically once (not available when a manual focus lens is attached to the camera. ML-105 EF only).
Focusing methods and required settings
Available methods will depend on the lens being used (47).
| Focusing method | Focus mode switch on a lens (SERVO / change-over knob) | |
| Manual focus | Focus ring | MF / MANU. |
| FOCUS dial (RC-V100) | AF / SERVO | |
| One-shot AF | Assignable button set to [One-Shot AF] (RC-V100) | AF / SERVO |
Selecting the lens's focus mode
To adjust the focus from the camera, you will need to change the focus mode (automatic or manual) using the controls on a compatible lens. Operation controls might be named differently depending on the lens. Refer to the instruction manual of the lens used.
Manual Focus
- Set the focus mode switch on the lens to MF.
- Turn the lens's focus ring to adjust the focus.
- Using the FOCUS dial on the RC-V100, turn the dial right to focus farther and left to focus nearer (this operation can be changed by adjusting the RC-V100 settings).
One-Shot AF (ML-105 EF only)
With one-shot AF, you will focus manually in most situations but still have the option to press a button to have the camera focus automatically only one time.
- Set the focus mode switch on the lens to AF.
- Set an assignable button (1 to 4) to [One-Shot AF] (35).
- Set the camera mode to [Manual].
- Press and hold the assignable button.
- While the camera is trying to focus on a subject, [AF] will flash quickly on the left of the screen. When the correct focus has been achieved, it will stop flashing and stay on.
- When one-shot AF is not available or the camera cannot focus on a subject, [AF] will flash in red on the screen.
- Release the assignable button to end one-shot AF.
• [AF] will disappear.
i NOTES
• If you operate the zoom after focusing, the focus on the subject may be lost. - When adjusting the focus, be careful not to touch the front of the lens or moving parts on the lens except for the focus ring. - About manual focus:
- With some EF lenses, you may be able to operate the focus ring even when the focus mode switch is set to AF.
- When using the optional RC-V100 to adjust the focus, set the focus mode switch to AF (or the focus operation change-over knob to SERVO).
- Refer to the instruction manual of the RC-V100 for details on changing the FOCUS dial direction settings.
• About the autofocus (AF) functions:
- Autofocus may not work well when high gain levels are set.
- Autofocus may not work well when [Custom Picture] > [Fine Tuning] > [Gamma] is set to [Wide DR] or [Canon Log].
- The point where the camera focuses may change slightly depending on shooting conditions, such as subject, brightness and zoom position. Check the focus before resuming shooting.
• Autofocus may take longer in the following cases.
- When the frame rate is set to 29.97P, 25.00P, 25.00PsF or 23.98P.
- With some EF lenses, the camera may take longer to focus automatically or may not be able to focus correctly. Visit your local Canon website for the latest information.
- One-shot AF is not available when the shutter speed is slower than 1/6.73 seconds (or slower than 1/5.66 seconds when the frame rate is 23.98P / 50.00P / 50.00i / 25.00P / 25.00PsF). • Autofocus may not work well on the following subjects or in the following cases. In such case, focus manually.
- Reflective surfaces
- Subjects with low contrast on the center of the screen
- Fast moving subjects
- Through dirty or wet windows
- Low-light scenes
Focus Limit
You can set a "focus limit" range for the attached lens, which will cause the camera to try to autofocus (with one-shot AF) on subjects only within that range.
Setting the distance range for autofocus
- Set the focus mode switch on the lens to AF.
- Select MENU > [Camera Setup] > [Focus Limit] > [Activate] > [On].
- The focus limit will be enabled.
- Adjust the focus to the desired position for the far or near end of the range.
- Far end: Select MENU > [Camera Setup] > [Focus Limit] > [Far]
Near end: Select MENU > [Camera Setup] > [Focus Limit] > [Near]
- When a focus limit has not been set, [Limit Off] will appear on the [Focus Limit] submenu screen. When it has been set, [Limit On] will appear.
- Select [Set].
- Select [Reset] instead to clear the focus position currently set for the far end.
i NOTES
- Focus limit settings will be lost when you power off the camera or replace the lens. In such case, set the focus limit again.
- If the limits for the near end and far end conflict, the one most recently set will take precedence and the other will be cleared. For example, if you set a limit for the far end and then you set one for the near end that is farther, the limit for the far end will be cleared.
- When you activate one-shot AF after setting a focus limit, if no subject can be focused on within the range, the focus will return close to the position where it was prior to activating one-shot AF.
- If you operate the zoom after setting a focus limit, the position of the focus limit will change. Set the focus limit again.
- When using a lens equipped with a focusing distance range selection switch, the camera's focus limit function cannot be used simultaneously with the physical switch.
Aspect Markers
The camera offers the following onscreen markers that indicate commonly-used aspect ratios: 4:3, 4:3 Super 35mm, 1.66:1, 1.85:1 and 2.39:1. The aspect markers can be displayed in black, gray or white.

4:3


1.66:1 4:3 Super 35mm

1.85:1 2.39:1

Activating the aspect markers
- Select MENU > [Other Functions] > [Aspect Marker] > [Activate] > [On].
- To check the aspect marker on the shooting screen, press the MENU button on the RC-V100 to close the menu. If necessary, press the MENU button again to return to the menu and change the aspect marker's settings.
- Select the aspect marker's color.
Select MENU > [Other Functions] > [Aspect Marker] > [Color] > Desired option.
- Select the aspect ratio.
Select MENU > [Other Functions] > [Aspect Marker] > [Ratio] > Desired option.
i NOTES
- If you set an assignable button on the RC-V100 to [Aspect Marker], you can press the button to turn the aspect marker on and off.
4 Customization
Assignable Buttons
The RC-V100 Remote Controller offers four assignable buttons to which you can assign various functions. Assign often-used functions to personalize the camera to your needs and preferences.
After you assign a function to one of the buttons, press the button to activate the function. In the case of some functions, a submenu might appear on the shooting screen. Press the up/down buttons to select the desired item, and confirm by pressing SET.
Assignable Functions
| Function name | Description | |
| [(NONE)] | No assigned function. | - |
| [One-Shot AF]* | The camera focuses automatically one time only (one-shot AF function) while the button is held pressed down (ML-105 EF only). | 31 |
| [Push Auto Iris] The camera automatically adjusts the aperture only while the button is held pressed down (ML-105 EF only). | 25 | |
| [ABB] | Starts the procedure for automatic black balance adjustment. | 17 |
| [AE Shift +] | Compensates the exposure making the image brighter. | 26 |
| [AE Shift -] | Compensates the exposure making the image darker. | |
| [Color Bars] | Turns color bars on/off. | 43 |
| [Aspect Marker] | Turns the onscreen aspect marker on/off. | 34 |
| [Set WB]* Registers a custom white balance setting or selects the adjustment value for a preset white balance setting/color temperature setting. | 29 | |
| [Tele-converter] | Activates the digital tele-converter in the following sequence: 2x, 3x, 4x, Off | 42 |
| [Monochrome] | Switches the display to monochrome. | 43 |
| [External Rec]* | Outputs a recording command to an external recorder to start or stop recording. | - |
| [Custom Picture] | Opens the [Custom Picture] submenu. | 36 |
| [Camera Mode] | Changes the camera mode. | 22 |
* Function can be used only by assigning it to a button.
Changing the Assigned Function
- Select MENU > [Other Functions] > [Assignable Buttons] > Desired assignable button.
- Select the desired function.
• The selected function will be assigned to the selected button.
Custom Picture Settings
The camera lets you change several settings that control various aspects of the image produced. After adjusting the desired settings to your preference, you can save up to 4 custom picture files in the camera and load them later to apply exactly the same settings.
| Functional classification | Function/Setting item |
| Group related to light gradation | Gamma, Black, Black Gamma, Knee |
| Group related to outline and noise | Sharpness, Noise Reduction |
| Group related to direction, strength, and conversion of colors. | Color Matrix, Color Matrix - Gain, Color Matrix - Phase, White Balance, Color Correction |
Selecting Custom Picture Files
Select a custom picture file to apply its settings while shooting or to edit it.
- Select MENU > [Custom Picture] > [Select File].
• This setting allows you to select a custom picture file.
- Select one of the custom picture files saved in the camera ([CP1] to [CP7]).
- The selected custom picture file's settings will be applied.
Preset Custom Picture Files
[Wide DR]: Applies a gamma curve with a very wide dynamic range and an appropriate color matrix that nevertheless do not require post-production processing.
[Canon Log]: Uses the Canon Log gamma and color matrix for an outstanding dynamic range and an image suitable for processing in post-production.

NOTES
• You can set an assignable button on the RC-V100 to [Custom Picture]. • You can press the CUSTOM PICT. button on the RC-V100 to open the [Custom Picture] submenu. - Adjusting custom picture related settings using the remote controller will change the settings registered under the currently selected custom picture file. • If a preset custom picture file is selected, custom picture settings cannot be changed using the remote controller.
Editing a Custom Picture File's Settings
Adjust the desired image settings to your preference and save them as custom picture files to load and apply them when necessary, simply by selecting them from the list of saved configurations.
- Select MENU > [Custom Picture] > [Select File] > Desired option ([CP1] to [CP7]).
- Select the setting you wish to adjust. MENU > [Custom Picture] > [Fine Tuning] > Desired option.
- Change the setting to the desired level.
Resetting the Current File's Settings to Default Values
- Select MENU > [Custom Picture] > [Fine Tuning] > [Reset].
- Select the desired default value ([Neutral], [Wide DR], [Canon Log] or [Linear]).
- Select [OK].
Available Custom Picture Settings
Setting options in boldface indicate default values.
| Menu items | Options / Additional information | |
| [Gamma] | [Normal 1], [Normal 2], [Normal 3], [Normal 4], [Wide DR], [Canon Log], [Linear]The gamma curve changes the overall look of the image.[Normal 1]: Standard picture for playback on TV monitors.[Normal 2]: Setting suitable for playback on TV monitors. Produces brighter highlights (bright areas of the image) than with the [Normal 1] setting.[Normal 3]: Setting suitable for playback on TV monitors. Produces a more faithful black gradation in the shadows (dark areas of the image) than with the [Normal 2] setting.[Normal 4]: Setting suitable for playback on TV monitors. Produces even better black gradation in the shadows (dark areas of the image) than with the [Normal 3] setting.[Wide DR]: Gamma curve with a very wide dynamic range. Optimized for playback on TV monitors.[Canon Log]: Logarithmic gamma curve that obtains an impressive dynamic range and makes the most of the image sensor characteristics. Requires image processing in postproduction.[Linear]: Does not apply a gamma curve. Creates a linear relationship between the luminance input and output. Used when processing the input and output data for research and other purposes. | |
 |  | |
[Black]
[Master Pedestal], [Master Black Red], [Master Black Blue]
-50 to +50 (±0)
[Master Pedestal]: The master pedestal increases or decreases the black level. Higher settings will make dark areas brighter but decrease contrast.
[Master Black Red], [Master Black Blue]: These settings correct the color cast in blacks.
| [Black Gamma] | -50 to +50 (±0) | ||
| Raises or lowers the lower part of the gamma curve (dark areas of the image). When [Gamma] is set to [Wide DR], [Canon Log] or [Linear], this setting has no effect on the picture. Raises or lowers the lower part of the gamma curve (Level). |  | ||
| [Knee] | |||
| [Active] | [On], [Off] | ||
| [Slop] | -35 to +50 (±0) | ||
| [Point] | 50 to 109 (95) | ||
| Controls the upper part of the gamma curve (highlights of the image). By compressing the highlights, you can prevent parts of the image from being overexposed. When [Gamma] is set to [Wide DR], [Canon Log] or [Linear], this setting has no effect on the picture. [Activate]: Activates/deactivates the setting. [Slope]: Determines the slope of the gamma curve above the knee point. [Point]: Sets the knee point of the gamma curve. | |||
| [Sharpness] | -10 to +50 (±0) | ||
| Sets the sharpness level. | |||
| [Noise Reduction] | [Off], 1 to 12 | ||
| Reduces the amount of noise that appears in the image. Select a level from 1 (lowest level) to 12 (highest level), or select [Off] to turn the noise reduction off. | |||
| [Color Matrix] | |||
| [Gain] | ±50 (±0) | ||
| [Phase] | ±18 (±0) | ||
| [R-G], [R-B], [G-R], [G-B], [B-R], [B-G] | ±50 (±0) | ||
| Color matrix affects the color tones throughout the whole image. [Gain]: Adjusts the color intensity. [Phase]: Adjusts the color phase. [R-G]: The R-G matrix changes the tint of the picture along the cyan/green and red/magenta gradations. | |||
| [R-B]: The R-B matrix changes the tint of the picture along the cyan/blue and red/yellow gradations.[G-R]: The G-R matrix changes the tint of the picture along the magenta/red and green/cyan gradations.[G-B]: The G-B matrix changes the tint of the picture along the magenta/blue and green/yellow gradations.[B-R]: The B-R matrix changes the tint of the picture along the yellow/red and blue/cyan gradations.[B-G]: The B-G matrix changes the tint of the picture along the yellow/green and blue/magenta gradations. | |||
| [White Balance] | |||
| [R Gain], [B Gain] | -50 to +50 (±0)Adjusts the amount of white balance throughout the whole image.[R Gain]: Adjust the intensity of red tones.[B Gain]: Adjust the intensity of blue tones. | ||
| [Color Correction] | |||
| [Select Area] | [Off], [Area A], [Area B], [Area A&B] | ||
| [Area A Setting] | |||
| [Phase] | 0 to 31 | ||
| [Chroma],[Area], [Y Level] | 0 to 31 (16) | ||
| [Area A Revision] | |||
| [Level] | ±50 (±0) | ||
| [Phase] | ±18 (±0) | ||
| [Area B Setting] | |||
| [Phase] | 0 to 31 | ||
| [Chroma],[Area], [Y Level] | 0 to 31 (16) | ||
| [Area B Revision] | |||
| [Level] | ±50 (±0) | ||
| [Phase] | ±18 (±0) | ||
| The camera detects the characteristics of a certain color and corrects them when recording.[Select Area]: Selects the area or areas to correct. Available options are [Area A], [Area B] and [Area A&B].[Area A Setting], [Area B Setting]:Determines the area in which colors will be corrected ([Phase] (color phase), [Chroma] (saturation), [Area] (range), and [Y Level] (brightness)).[Area A Revision], [Area B Revision]:Sets the amount of correction ([Level] (saturation), [Phase] (color phase)) for area A/area B. | |||
NOTES
• The following custom picture settings can be changed using the dials on the RC-V100. - [Black] > [Master Pedestal], [Master Black Red], [Master Black Blue] - [Black Gamma] - [Knee] > [Slope], [Point] - [Sharpness] - [White Balance] > [R Gain], [B Gain]
Customizing Onscreen Displays
Custom displays allow you to choose whether individual onscreen displays will appear on the shooting screen. For details on which onscreen displays can be customized, refer to Menu Options (☐44).
- Select MENU > [Other Functions] > [Custom Display] > Desired option.
- Turn the selected onscreen display on/off as necessary.
5 Menu Options
For details about how to select an item, refer to Using the Menu (16). Setting options in boldface indicate default values. Depending on the camera's settings, some menu items may not be available. Such menu items do not appear or appear grayed out in menu screens.
[Camera Setup] menu
| Menu item | Submenu / Setting options | |
| [Light Metering] | [Backlight], [Standard], [Spotlight] | |
| Selects the light metering mode (26). | ||
| [Backlight]: Suitable when shooting backlit scenes. | ||
| [Standard]: Averages the light metered from the entire screen, giving more weight to the subject in the center. | ||
| [Spotlight]: Use this option when shooting a scene in which only a certain part of the picture is lit, for example, when the subject is lit by a spotlight. | ||
| [AE Shift] | [+2.0] to [-2.0] ([±0]) (in 0.25-EV increments) | |
| You can compensate the exposure obtained automatically (camera modes other than [Manual], or while using push auto iris with the camera mode set to [Manual]), in order to darken or lighten the image (26). | ||
| [AE Response] | [High], [Normal], [Low] | |
| Determines how quickly the aperture changes during auto exposure (camera modes other than [Manual], or while using push auto iris with the camera mode set to [Manual]). | ||
| [AGC Limit] | [Off (75dB)], [24dB] to [72dB] (in 3-dB increments) | |
| You can set an automatic gain control (AGC) limit to prevent the camera from using gain values higher than the preset limit when the camera mode is set to a mode other than [Manual] (27). | ||
| [Auto Slow Shutter] | [On], [Off] | |
| Determines the shutter speed used when the camera mode is set to [Auto] or [Av]. When this setting is set to [Off], the camera will not use shutter speeds slower than the frame rate currently used. | ||
| [Flicker Reduction] | [Automatic], [Off] | |
| Allows the camera to automatically detect and correct flicker caused by artificial light sources. | ||
| [Shockless WB] | [On], [Off] | |
| When this setting is set to [On], makes the transition look smoother when the white balance is changed. | ||
| [WB Limit]Using the [On] setting reduces the color casting that may occur in the highlights (saturated areas) when adjusting the white balance (for example when shooting under halogen lights). This setting cannot be used when the preset white balance is set to [Tung]. | [On], [Off] | |
| [Iris Increment](ML-105 EF only) | [1/2 stop], [1/3 stop], [Fine]Determines the aperture value increment used when adjusting the aperture. When this setting is set to [Fine], the increments will be smaller than 1/3 stop. | |
| [Zoom-Iris Correct.](ML-105 EF only) | [On], [Off]If you are using a compatible lens*, when this setting is set to [On], the camera will adjust the aperture as needed to keep the selected aperture value while zooming. Because of this adjustment, the brightness of the image might change slightly or you may hear the operation sound. When this setting is set to [Off], the aperture will close gradually (the image will turn darker) as you zoom but you will not hear the aperture's operation sound.* Some EF lenses and EF Cinema lenses are not compatible with this function. | |
| [Focus Limit](ML-105 EF only) | [Activate] | [On], [Off]Turns the focus limit on/off (32). |
| [Far] | [Set], [Reset], [Cancel]Allows you to set the far end of the focus limit for the attached lens (32). When a focus limit has not been set, [Limit Off] will appear on the submenu screen. After it has been set, [Limit On] will appear instead.[Set]: Saves the current focus position for the far end of the focus limit.[Reset]: Clears the currently set focus position.[Cancel]: Cancels the operation. | |
| [Near] | [Set], [Reset], [Cancel]Allows you to set the near end of the focus limit for the attached lens (32). When a focus limit has not been set, [Limit Off] will appear on the submenu screen. After it has been set, [Limit On] will appear instead.[Set]: Saves the current focus position for the near end of the focus limit.[Reset]: Clears the currently set focus position.[Cancel]: Cancels the operation. | |
| [Tele-converter] | [4x], [3x], [2x], [Off]Allows you to digitally increase the focal length of the camera by approximately the selected factor. Note that the image is digitally processed so the image will deteriorate throughout the zoom range. | |
| [EF-S Lens](ML-105 EF only) | [On], [Off]When this setting is set to [On], reduces the peripheral illumination fall-off or vignetting that may occur when using an EF Cinema lens with this camera. However, the image is digitally enlarged by a factor of approx. 1.55 so the image will deteriorate. | |
| [ABB] | [Cancel], [OK]Starts the procedure to adjust the black balance automatically (17). | |
| [Color Bars] | [Activate] | [On], [Off] |
| Turns color bars on/off. | ||
| [Type] | [SMPTE], [ARIB] (when the system frequency is 59.94 Hz)[EBU], [SMPTE] (when the system frequency is 50.00 Hz) | |
| Selects the type of color bars. The default setting depends on the country/region of purchase. | ||
| [Monochrome] | [On], [Off] | |
| When this setting is set to [On], the screen is displayed in monochrome. This setting is unavailable when using the [One-Shot AF], [ABB] (Auto Black Balance) or [Color Bars] settings. | ||
| [Periph. Illum. Corr.](ML-105 EF only) | [On], [Off] | |
| When this setting is set to [On] and the camera has correction data for the attached lens, it compensates for the darkening of the image's corners (peripheral illumination drop) due to the lens's characteristics. If correction data for the lens is not available, the setting will appear grayed out.Note that depending on the shooting conditions, noise may appear in the periphery of the image as a result of the correction. Also, the level of correction will be lower the higher the gain level used.To apply the peripheral illumination correction when using an EF Cinema lens, be sure to set both this setting and also the [Camera Setup] > [EF-S Lens] setting to [On]. | ||
[Custom Picture] menu
| Menu item | Submenu / Setting options |
| [Select File] | [Off], [CP1] to [CP7], [Wide DR], [Canon Log] |
| Selects a custom picture file to apply its settings while shooting or to edit it. (36). | |
| [Fine Tuning] | Allows you to adjust various custom picture settings (36). |
[Video Setup] menu
| Menu item | Submenu / Setting options | |
| [3G-SDI Mapping] | [Level A], [Level B] | |
| Allows you to select a 3G-SDI mapping level, as defined by the SMPTE ST 425-1 standard, for the video output signal of the 3G/HD-SDI terminals. | ||
| [Rec Command] | [Active] | [On], [Off] |
| When this setting is set to [On], you can use the START/STOP button or an assignable button on the RC-V100 set to [External Rec] to output a recording command to an external recorder connected to the camera to start or stop recording. | ||
| [Remove OSD] | [On], [Off] | |
| When this setting is set to [On], the camera's onscreen displays will be turned off automatically while a recording command is being output. | ||
[Other Functions] menu
| Menu item | Submenu / Setting options | |
| [Reset] | [All Settings] | [Cancel], [OK] |
| Resets all the camera's settings to default settings. | ||
| [Camera Settings] | [Cancel], [OK] | |
| Resets the white balance, iris, gain, shutter speed, custom picture, focus limit and other shooting-related settings to default settings. | ||
| [Device Number] | Allows you to set the device number on the camera (necessary when using the NU Protocol). Contact a Customer Support Center for details. | |
| [Assignable Buttons] | [1] to [4 (Remote)] | [(NONE)], [One-Shot AF]*, [Push Auto Iris]*, [ABB] ([3]), [AE Shift +], [AE Shift -], [Color Bars] ([1]), [Aspect Marker], [Set WB] ([2]), [Tele-converter], [Monochrome] ([4]), [External Rec], [Custom Picture], [Camera Mode] |
| Allows you to assign a function to an assignable button on the RC-V100 (☐35). The number in parentheses above indicates the assignable button to which the default setting in bold next to it is assigned.* ML-105 EF only. | ||
| [Power LED] | [On], [Off] | |
| Allows you to set whether the POWER indicator illuminates while the camera is on. | ||
| [Frame Rate] | [59.94P], [59.94i]*, [29.97P], [23.98P] (when the system frequency is 59.94 Hz)[50.00P], [50.00i]*, [25.00P], [25.00PsF]* (when the system frequency is 50.00 Hz)Sets the camera's frame rate (☐21). Available options depend on the system frequency and resolution. When connecting using 3G-SDI, select either [59.94P] or [50.00P].* Only when the resolution is 1920×1080. | |
| [Resolution] | [1920x1080], [1280x720]Sets the camera's resolution (☐21). | |
| [Genlock Adjustment] | [-1023] to [1023] ([000]) | |
| Allows you to adjust the H phase of an external Genlock signal (☐15). | ||
| [Scan Reverse] | [Both], [Vertical], [Horizontal], [Off] | |
| Inverts the image horizontally and/or vertically. | ||
| [Aspect Marker] | [Activate] | [On], [Off] |
| Turns the onscreen aspect marker on/off. | ||
| [Color] | [Black], [Gray], [White] | |
| Determines the color of the aspect marker. | ||
| [Ratio] | [4:3], [4:3 S35mm], [1.66:1], [1.85:1], [2.39:1] | |
| Determines the ratio indicated by the aspect marker. | ||
| [Custom Display] | [Camera Name] | [On], [Off] |
| [White Balance] | [On], [Off] | |
| [Camera Mode] | [On], [Off] | |
| [Iris] | [On], [Off] | |
| [Gain] | [On], [Off] | |
| [Shutter Speed] | [On], [Off] | |
| [Custom Picture] | [On], [Off] | |
| [Lens Error](ML-105 EF only) | [On], [Off] | |
| [Temperature Warning] | [On], [Off]These settings allow you to customize the shooting screen by turning on/off individual onscreen displays. | |
| [Camera Name] | Allows you to enter a name (up to 16 characters) to identify the camera.Allowed characters: [A] to [Z], [a] to [z], numbers, special characters,[space].Press the up/down buttons on the RC-V100 to select the desired character and then press SET to move to the next field (alternatively, you can move between fields with the left/right buttons). You can press MENU to delete a character. | |
| [Firmware] | You can verify the current version of the camera's firmware. | |
6 Specifications
| System | |
| Image sensor | 35 mm full-frame equivalent CMOS sensorEffective pixels: Approx. 2,070,000 pixels (1920 x 1080)Pixel size: 19 x 19 μmEffective screen area: Approx. 36.5 x 20.5 mm (diagonal 41.9 mm) |
| Minimum subject illumination | 0.0005 lx or lower* (ISO 4,000,000 equivalent)* Under the following conditions: color, no light accumulation, f/1.2, shutter speed 1/30, 50 IRE, maximum gain 75 dB. |
| Lens mount | ML-105 EF: Canon EF mount (Cinema Lock type)ML-105 M58: M58 mount (flange focal length: 15 mm) |
| System frequency | 59.94 Hz, 50.00 Hz |
| Frame rate | 1920 x 1080: 59.94P, 59.94i, 50.00P, 50.00i, 29.97P, 25.00P, 25.00PsF, 23.98P1280 x 720: 59.94P, 50.00P, 29.97P, 25.00P, 23.98P |
| Exposure | AE shift, light metering modes (standard, spotlight, backlight) |
| White balance | Automatic white balance; custom white balance (two sets, [WB-A] and [WB-B]); two preset settings (daylight and tungsten lighting) |
| Iris1 | Manual (1/2-stop increments, 1/3-stop increments, fine adjustment), push auto iris, automatic aperture (linked with gain, shutter speed) |
| Gain | 0 to 75 dB (3-dB increments) |
| Shutter speed | 9.51 to 1/24000 |
| Optical filters | Low pass filter (no ND filter and UV-IR cut filter) |
| Focus | Manual focus, one-shot AF1 |
| Lens correction1 | Peripheral illumination correction is available for Canon EF lenses (some Canon EF lenses are not compatible). |
| Gamma | Normal (4 types), Wide DR, Canon Log, Linear |
| Input/Output Terminals | |
| 3G/HD-SDI terminal | BNC connector, output only, 0.8 Vp-p / 75 Ω, unbalanced; onscreen displays can be output3G-SDI: SMPTE 424, SMPTE 425, SMPTE ST 299-2HD-SDI: SMPTE 292, SMPTE ST 299-1 |
| GENLOCK terminal | BNC connector, input only, 1.0 Vp-p / 75 Ω |
| REMOTE terminal | 8-pin connector (for RS-422/485/232) |
| DC IN terminal | 8-pin connector |
| Power and Other Specifications | |
| Power voltage | Input range of 10 to 29 V DC |
| Power consumption (camera body only) | Approx. 10.5 W (when 1920 x 1080 / 59.94P)Approx. 10.2 W (when 1920 x 1080 / 50.00P) |
| Operating environment | Temperature: -20 to +50 °C (-4 to +122 °F)Humidity: 5 to 85% RH (non-condensing) |
| Dimensions (W x H x D) | ML-105 EF: Approx. 76 x 76 x 112 mm (3.0 x 3.0 x 4.4 in.) (excluding protrusions)ML-105 M58: Approx. 76 x 76 x 83 mm (3.0 x 3.0 x 3.3 in.) (excluding protrusions) |
| Weight | ML-105 EF: Approx. 775 g (1.7 lb.) (camera body only)ML-105 M58: Approx. 555 g (1.2 lb.) (camera body only) |
1 ML-105 EF only.
Compatible Lens and Functions
The firmware of the lens may need to be updated depending on when the lens was purchased. For details, consult a Canon Service Center.
For the lens for which operation has been verified, visit your local Canon website.
| Lens | Functions adjustable from camera | |||
| Iris | Focus | Zoom | ||
| EF Lens | ● | ● | — | |
| EF Cinema Lens | CN-E70-200mm T4.4 L IS KAS S | ● ● ● | ||
Optional Accessories
Use of genuine Canon accessories is recommended. This product is designed to achieve excellent performance when used with genuine Canon accessories.
RC-V100 Remote Controller
RR-10 8-pin Remote Cable (10 m, 32.8 ft.), RR-100 8-pin Remote Cable (100 m, 328 ft.)

This mark identifies genuine Canon video accessories.

IMPORTANT
• The cable supplied with the RC-V100 cannot be used. - When connecting a RR-10 / RR-100 8-pin Remote Cable to the camera, it is necessary to use a compatible plug (8).
Dimensional Drawings (ML-105 EF) Unit: mm
Dimensional Drawings (ML-105 M58)
Rear View


Unit: mm
7 Additional Information
Onscreen Warning Displays and Messages
Refer to this section if a warning display or message appears on the screen. Should the camera fail to operate correctly, consult a Canon Service Center.
[Temp.]
The camera's internal temperature has risen to a predetermined level. If [Temp.] continues to appear on the screen after a period of time, power off the camera and wait until the temperature has decreased. If that does not solve the problem, consult a Canon Service Center.
[Lens]
There was a communication error between the camera and the lens. Turn the camera off and then on again. Alternatively, power off the camera, remove the lens, and clean the lens's contact. Next, reattach the lens. If that does not solve the problem, consult a Canon Service Center.
[ABB error]
An error occurred while the camera was automatically adjusting the black balance. Make sure that the body cap or a compatible EF Cinema lens is firmly attached to the camera blocking light from entering the camera. Next, perform the operation again. If that does not solve the problem, consult a Canon Service Center.
[Firmware update error. Please do it again]
The firmware update could not be completed normally. Perform the firmware update again.
Troubleshooting
If you have a problem with your camera, refer to this section. Consult your dealer or a Canon Service Center if the problem persists.
While changing the system frequency / frame rate, the image from the camera stopped being displayed on the external monitor.
You may have set a system frequency or frame rate not supported by the external monitor. Follow the instructions below.
- If you had set a frame rate other than 59.94i or 50.00i before the image disappeared: Remove the DIP switch cover and set DIP switch number 1 to ON and then back to OFF (or if it was set to ON, set it to OFF and then back to ON). Alternatively, when using the RC-V100, press and hold simultaneously assignable buttons 1 and 3 until the power indicator goes off*, then release the buttons. The camera will restart with the frame rate set to the default setting for the current system frequency (59.94i or 50.00i). * Even when [Other Functions] > [Power LED] is set to [Off], the power indicator will illuminate when the two assignable buttons are pressed and held at the same time. When the power indicator goes off, release the buttons.
- If you had changed the system frequency before the image disappeared: Remove the DIP switch cover and set DIP switch number 1 to ON or OFF. The camera will restart with the system frequency changed back to its original setting (output at the default frame rate of 59.94i or 50.00i).
The optional RC-V100 Remote Controller does not work.
Remove the DIP switch cover and set DIP switches 2 to 5 to OFF.
Index
3G/HD-SDI terminal....9
3G-SDI mapping....43
A
ABB....17
AE response....41
AE shift....26
AGC limit....27
Aspect markers 34
Assignable buttons 35
Auto slow shutter....41
Auto white balance (AWB) 29
B
Black 37
Black balance 17
Black gamma 38
C
Camera mode 22
Camera name 45
Color bars....43
Color correction 39
Color matrix....38
Custom display 40, 44
Custom picture 36
Custom white balance 29
D
DC IN terminal....9
Device number 44
DIP switches 9
Direct setting mode....23
E
EF-S lens 42
External monitor / recorder....13
F
Fine tuning....43
Firmware 45
Flicker reduction....41
Focus 31
Focus limit....32
Frame rate....44
G
Gain....27
Gamma 37
Genlock adjustment....44
GENLOCK terminal 9
|
Iris....24
Iris increment....42
K
Knee 38
L
Light metering....26, 41
M
Menu 16,41
Monochrome....43
N
Noise reduction 38
0
One-shot AF....31
Onscreen displays....20
Onscreen warning displays and messages....50
P
Peripheral illumination correction. 43
Power indicator....9
Power LED 44
Power supply 11
Push auto iris 25
R
RC-V100 Remote Controller....12
Rec command....43
REMOTE terminal 8
Reset....44
Resolution 44
S
Scan reverse 44
Selecting custom picture files....36
Sharpness 38
Shockless WB....41
Shooting video....19
Shutter speed 28
T
Tele-converter 42
Troubleshooting....50
W
White balance....29
White balance limit (WB Limit)....42
Zoom-iris correction....42
Canon
Canon Inc. 30-2, Shimomaruko 3-chome, Ohta-ku, Tokyo 146-8501, Japan
Canon Europa N.V. Bovenkerkerweg 59, 1185 XB Amstelveen, The Netherlands http://www.canon-europe.com
The information in this document is verified as of July 2021. Subject to change without notice.
Visit your local Canon website to download the latest version.
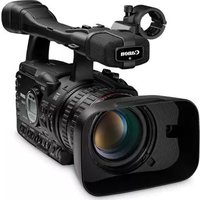
- TABLE OF CONTENTS
- INTRODUCTION
- PREPARATIONS
- SHOOTING VIDEO
- CUSTOMIZATION
- MENU OPTIONS
- SPECIFICATIONS
- ADDITIONAL INFORMATION
- SAFETY PRECAUTIONS
- WARNING DENOTES THE RISK OF SERIOUS INJURY OR DEATH
- CAUTION FOLLOW THE CAUTIONS BELOW. OTHERWISE PHYSICAL INJURY OR PROPERTY DAMAGE MAY RESULT
- HANDLING PRECAUTIONS
- ABOUT THE CMOS SENSOR
- DISPOSAL
- ONLY FOR THE UNITED KINGDOM
- READ THIS BEFORE USE
- BE SURE TO CHECK VIDEO
- ● CANON CANNOT COMPENSATE FOR RECORDING DATA
- ● NOTES ON PRIVACY AND PUBLICITY RIGHTS
- REGARDING THE USE OF VIDEO
- LEGAL NOTICE
- COPYRIGHTS
- PRODUCT CONFIGURATION
- CONVENTIONS USED IN THIS MANUAL
- OVERVIEW
- ML-105 EF
- ML-105 M
- FEATURES
- NAMES OF PARTS
- FRONT VIEW
- SIDE VIEW (TOP/BOTTOM AND LEFT/RIGHT ARE COMMON)
- REAR VIEW
- ① REMOTE TERMINAL
- DIP SWITCHES
- SYSTEM CONFIGURATION
- PREPARING THE POWER SUPPLY
- IMPORTANT
- PREPARATION (* COMMERCIALLY AVAILABLE)
- USING THE RC-V100 REMOTE CONTROLLER
- NOTES
- CONNECTING TO AN EXTERNAL MONITOR/RECORDER
- SELECTING A MAPPING LEVEL FOR THE VIDEO OUTPUT SIGNAL OF THE SDI TERMINAL
- OUTPUTTING A RECORDING COMMAND
- SYNCHRONIZING WITH AN EXTERNAL DEVICE
- ADJUSTING THE H PHASE
- PREPARING THE CAMERA
- RC-V100 BUTTONS USED TO OPERATE THE MENU
- OPENING THE MENU
- SELECTING A MENU
- SELECTING A MENU ITEM
- SELECTING A SETTING OPTION
- CLOSING THE MENU
- ADJUSTING THE BLACK BALANCE
- I NOTES
- PREPARING THE LENS
- ATTACHING A LENS (EF LENS)
- ONSCREEN DISPLAYS
- VIDEO CONFIGURATION: SYSTEM FREQUENCY, FRAME RATE AND RESOLUTION
- SELECTING THE SYSTEM FREQUENCY
- SELECTING THE FRAME RATE
- SELECTING THE RESOLUTION
- SETTING THE CAMERA MODE
- DIRECT SETTING MODE
- ENTER DIRECT SETTING MODE
- SET THE CAMERA MODE TO A MODE OTHER THAN [AUTO] (☐22)
- SELECT THE DESIRED FUNCTION
- ADJUSTING THE APERTURE (ML-105 EF ONLY)
- SELECTING THE LENS'S APERTURE MODE
- MANUAL APERTURE
- MOMENTARY AUTOMATIC APERTURE - PUSH AUTO IRIS
- ADJUSTING THE EXPOSURE
- EXPOSURE COMPENSATION - AE SHIFT
- LIGHT METERING MODE
- GAIN
- MANUAL ADJUSTMENT
- AUTO GAIN CONTROL (AGC) LIMIT
- SHUTTER SPEED
- WHITE BALANCE
- AUTO WHITE BALANCE (AWB)
- CUSTOM WHITE BALANCE
- PRESET WHITE BALANCES
- ADJUSTING THE FOCUS
- FOCUSING METHODS AND REQUIRED SETTINGS
- SELECTING THE LENS'S FOCUS MODE
- MANUAL FOCUS
- ONE-SHOT AF (ML-105 EF ONLY)
- FOCUS LIMIT
- SETTING THE DISTANCE RANGE FOR AUTOFOCUS
- ASPECT MARKERS
- ACTIVATING THE ASPECT MARKERS
- ASSIGNABLE BUTTONS
- CHANGING THE ASSIGNED FUNCTION
- CUSTOM PICTURE SETTINGS
- SELECTING CUSTOM PICTURE FILES
- PRESET CUSTOM PICTURE FILES
- EDITING A CUSTOM PICTURE FILE'S SETTINGS
- AVAILABLE CUSTOM PICTURE SETTINGS
- CUSTOMIZING ONSCREEN DISPLAYS
- COMPATIBLE LENS AND FUNCTIONS
- OPTIONAL ACCESSORIES
- ONSCREEN WARNING DISPLAYS AND MESSAGES
- [TEMP.]
- [LENS]
- [ABB ERROR]
- [FIRMWARE UPDATE ERROR. PLEASE DO IT AGAIN]
- TROUBLESHOOTING
- WHILE CHANGING THE SYSTEM FREQUENCY / FRAME RATE, THE IMAGE FROM THE CAMERA STOPPED BEING DISPLAYED ON THE EXTERNAL MONITOR
- INDEX
- A
- B
- C
- D
- E
- F
- G
- K
- L
- M
- N
- P
- R
- S
- T
- W
- CANON
Brand : CANON
Model : ML-105 EF
Category : Camcorder