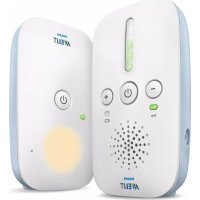
SCD487 - Baby monitors PHILIPS - Free user manual and instructions
Find the device manual for free SCD487 PHILIPS in PDF.
| Product type | Baby monitor (babyphone) |
| Brand | Philips |
| Model | SCD487 |
| Technology | DECT (Digital Enhanced Cordless Telecommunication) |
| Baby unit power supply | 9 V / 300 mA DC mains adapter or 4 AA 1.5 V batteries (not included) |
| Parent unit power supply | 3.6 V / 200 mA DC mains adapter or 2 AAA 1.5 V batteries (not included) |
| Outdoor range | Up to 300 meters (ideal conditions) |
| Indoor range | Up to 50 meters (depending on obstacles) |
| Main functions | Audio monitoring, Talk function (two-way communication), microphone sensitivity adjustment, volume adjustment, nightlight, Page function (parent unit search) |
| Visual indicators | LINK indicator (solid green = connection established), sound level indicators (5 levels), battery level indicator |
| Alarms | Audible beep on parent unit in case of connection loss or low battery |
| Buttons and controls | On/off, volume +/-, sensitivity, Talk, nightlight, Page |
| Battery operation | Automatic switch to batteries in case of power failure (automatic relay) |
| Safety distance | Baby unit at least 1 meter from the baby; do not place in the crib or playpen |
| Maintenance and cleaning | Clean with a damp cloth. Check batteries every 6 months if used on mains power |
| Operating temperature | 0 °C to 40 °C |
| Warranty and service | Philips worldwide warranty, customer support center (number on warranty leaflet) |
| Environmental information | Recyclable product, do not dispose with household waste (compliant with directive 2002/96/EC) |
Frequently Asked Questions - SCD487 PHILIPS
User questions about SCD487 PHILIPS
0 question about this device. Answer the ones you know or ask your own.
Ask a new question about this device
Download the instructions for your Baby monitors in PDF format for free! Find your manual SCD487 - PHILIPS and take your electronic device back in hand. On this page are published all the documents necessary for the use of your device. SCD487 by PHILIPS.
USER MANUAL SCD487 PHILIPS
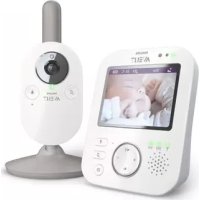
A-I On/Off button (
A-2 LINK light
A-3 Night light
A-4 Volume - / + buttons
A-5 Microphone
A-6 PAGE button
A-7 Night light button ()
A-8 Battery check light ( ) 100
A-9 Battery compartment cover
A-10 DC 9V / 300mA power supply jack
A-II AC power adapter
B. Parent unit
B-1 TALK button
B-2 SENSITIVITY button
B-3 DC3.6V / 200mA power supply jack
B-4 Loudspeaker
B-5 Microphone
B-6 On/Off button (O)
B-7 Battery check light ( ) 100
B-8 LINK light
B-9 Sound-level lights
B-10 Volume - / + buttons
B-1 I Recess for the belt clip
B-12 Battery compartment cover
B-13 Belt clip
B-14 AC power adapter
C.What else you need
Both units can be mains or battery operated.
For battery-operated use you will need:
- 4 × 1.5 V,AA batteries for baby unit (not supplied)
-2 × 1.5V , AAA batteries for parent unit (not supplied)
3 Illustrations
4 Legend of functions
4 Baby unit
4 Parent unit
4 What else you need
5 Contents
6 Welcome
6 Safety information
6 Getting your baby monitor ready for use
6 Baby unit
7 Parent unit
8 Using your baby monitor
9 Other features
9 Adjusting loudspeaker volume
10 Talking to your baby
10 Adjusting microphone sensitivity
Monitoring baby silently
I Switching night light on / off
12 Connecting / disconnecting belt clip
12 Paging parent unit
13 Troubleshooting
15 Frequently asked questions
16 Important information
16 Technical specifications
16 Maintenance
17 Environmental information
17 Factory initialization mode
18 Guarantee and service
Philips is dedicated to producing caring, reliable products to give parents the reassurance they need. You can trust this Philips baby monitor to provide round-the-clock support by ensuring you can always hear your baby clearly without any distracting noise.
Your SCD487 uses DECT technology which guarantees zero interference from other wireless appliances and a clear signal between the parent unit and baby unit.
Philips Baby Care, taking care together
Safety information
Please read this user manual carefully before using your baby monitor and keep it for future reference. This baby monitor is intended as an aid. It is not a substitute for responsible and proper adult supervision and should not be used as such.
- Make sure the baby unit and adapter cable are always out of reach of the baby (at least 1 meter / 3 feet away).
- Never place the baby unit inside the baby's bed or playpen.
- Never cover the baby monitor (with a towel, blanket, etc.).
- Never use the baby monitor in moist places or close to water.
- Check if the voltage indicated on the type plate of the adapters (A-11, B14) corresponds to the local power voltage before connecting to the AC power supply.
- Do not expose the baby monitor to extreme cold, heat or light (e.g. direct sunlight).
- To prevent electric shock, do not open the case of the baby unit and parent unit (except battery compartment covers).
Getting your baby monitor ready for use
Baby unit
The baby unit can be mains or battery operated.
When batteries are inserted, you will have an automatic back-up in case of mains failure.
Mains operated use
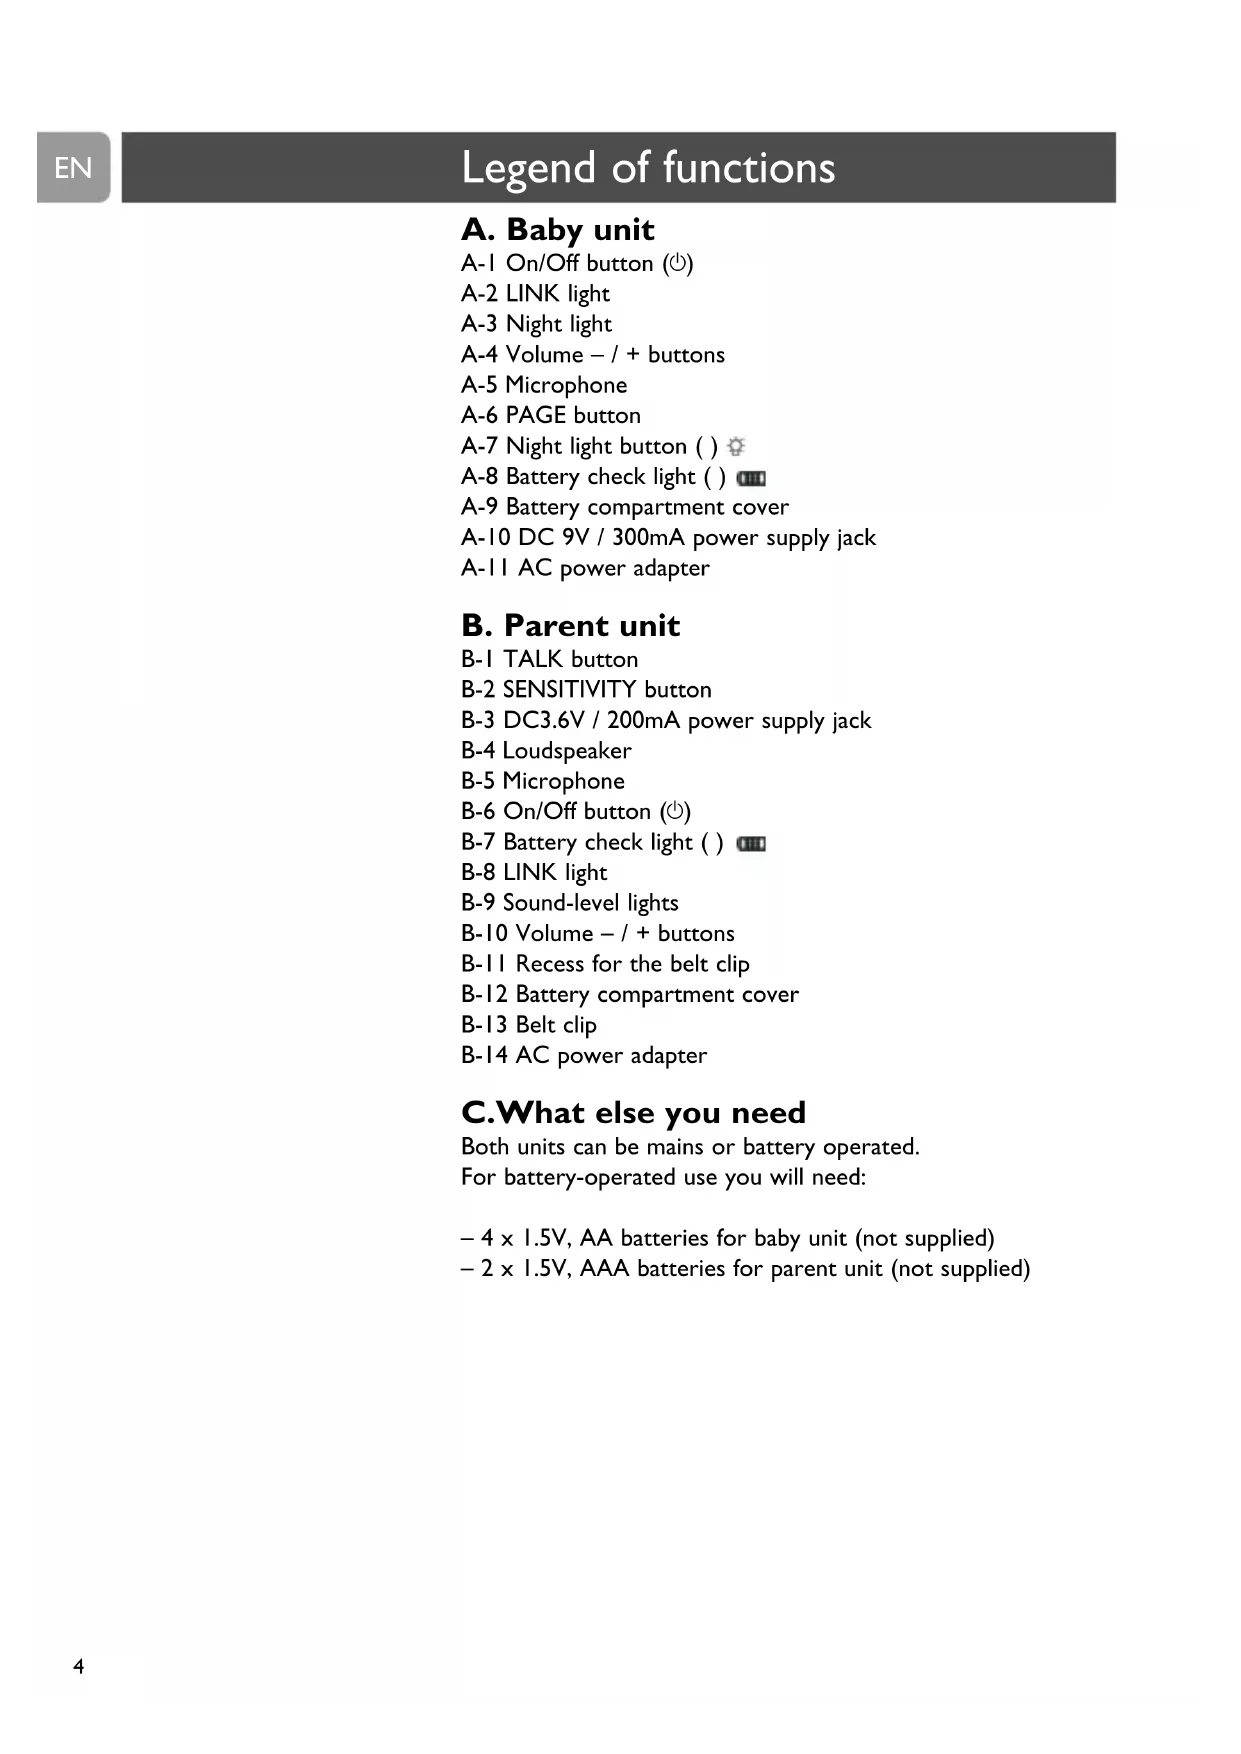
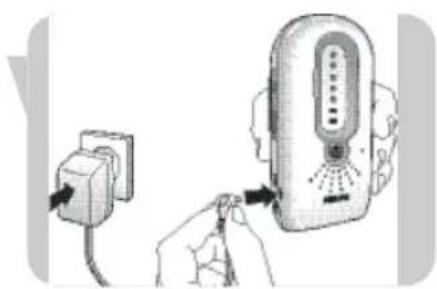
1 Connect the power adapter cord (A-11) to the power supply jack (DC 9V / 300mA - A-10) of the baby unit.
2 Connect the AC power adapter (A-11) to a wall outlet.
The baby unit is now ready for mains operated use!
Getting your baby monitor ready for use
EN
Battery operated use
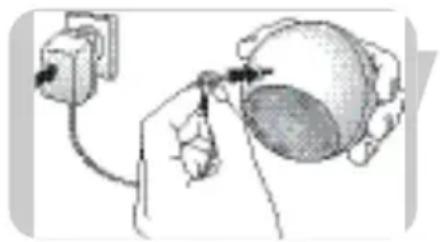
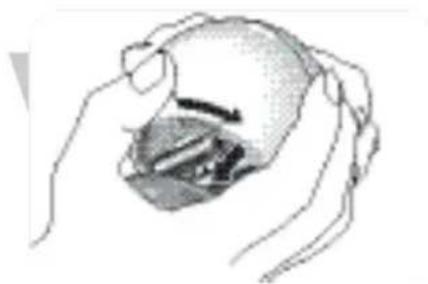
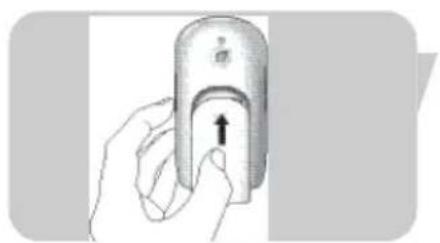
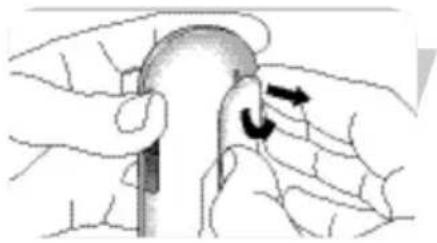
Open the battery compartment by turning the cover (A-9) to the left (OPEN), using the palm of your hand. Take off the cover.
2 Insert four 1.5V, AA batteries, noting the + and - configuration inside the battery compartment (batteries are not supplied; we recommend Philips Alkaline batteries).

3 Put the battery compartment cover (A-9) back in place. Close the compartment by turning the cover (A-9) to the right (CLOSE), using the palm of your hand.
The baby unit is now ready for battery operated use!
Parent unit
The parent unit can be mains or battery operated. When batteries are inserted, you will have an automatic back-up in case of mains failure and you can carry the unit in and around the house.
Mains operated use
I Connect the the power adapter cord (B-14) to the power supply jack (DC 3.6V / 200mA - B-3) of the parent unit.
2 Connect the AC power adapter (B-14) to a wall outlet.
The parent unit is now ready for mains operated use!
Battery operated use
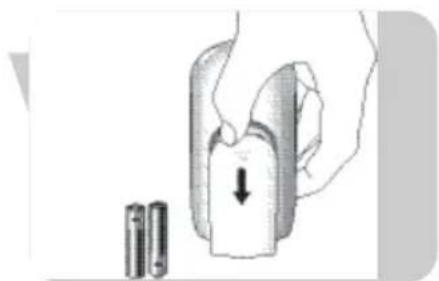
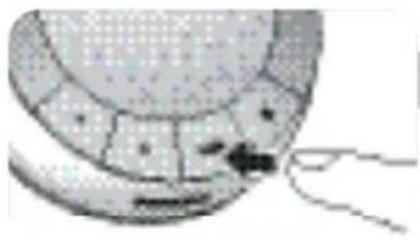
Open the battery compartment by sliding the cover (B-12) downwards.
EN
Getting your baby monitor ready for use
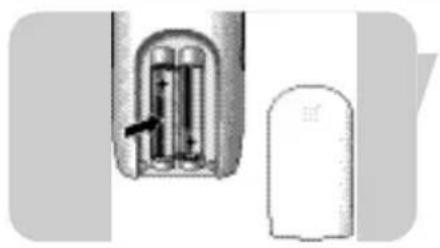
2 Insert two 1,5V,AAA size batteries (batteries are not supplied; we recommend Philips Alkaline batteries), noting the + and - configuration inside the battery compartment.
3 Put the battery compartment cover (B-12) back in place. Close the compartment by sliding the cover (B-12) upwards until it clicks in position.
The parent unit is now ready for battery operated use!
Notes:
- When the units are switched off, in case of battery operated use, the batteries still discharge slowly.
- When the batteries are almost empty, the battery check light of the parent unit (B-7) starts blinking red; the battery check light of the baby unit (A-8) lights up red continuously.
Using your baby monitor
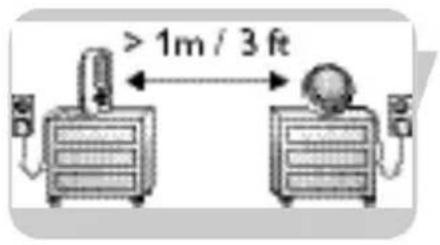
I Place both units in the same room to test the connection. Make sure the baby unit is at least 1 meter / 3 feet away from the parent unit.
2 Press and hold the On/Off (O) button (A-I) on the baby unit for 2 seconds.
The night light (A-3) lights up briefly.
The LINK light (A-2) lights up red briefly then starts blinking green, searching connection with the parent unit.
3 Press and hold the On/Off button (O) (B-6) on the parent unit for 2 seconds.
The sound level lights (B-9) light up orange briefly.
The battery check light (B-7) lights up red briefly.
The LINK light (B-8) lights up red briefly then starts blinking green, searching connection with the baby unit.The LINK lights (A-2, B-8) on both units blink green until connection has been established. This will take up to approximately 30 seconds. Both LINK lights (A-2, B-8) will then light green continuously.
If, after 30 seconds, no link is established both LINK lights (A-2, B-8) will light up red and the parent unit will emit a beep from time to time.
4 Position the baby unit at least 1 meter / 3 feet away from your baby.
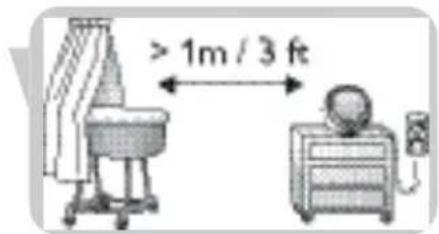
5 Position the parent unit at the desired place within the operating range of the baby unit but at least 1 meter / 3 feet away from the baby unit. For more information on the operating range see 'Technical specifications'.
You can now monitor your baby!
Other features
Adjusting loudspeaker volume
- Briefly press the Volume + and - buttons (A-4) on the baby unit to increase/decrease the loudspeaker volume of the baby unit.

- Briefly press the Volume + and - buttons (B-10) on the parent unit to increase/decrease the loudspeaker volume of the parent unit.
Notes:
If you press the Volume + and - buttons (A-4, B-10) too long, the volume will not be adjusted.
- If the volume is set to a high level, the units consume more power.
Talking to your baby (Talk function)
While using the TALK button (B-1) on the parent unit you can talk to your baby (e.g to comfort your baby).
- Press and hold the TALK button (B-1) and talk clearly into the microphone (B-5).
- Release TALK button (B-1) when finished talking.
Note: When the TALK button (B-1) is pressed, you can no longer hear your baby.
Adjusting microphone sensitivity
With the SENSITIVITY (B-2) and Volume + and - (B-10) buttons on the parent unit, you can set the sound from the baby unit to the desired level. When set to the maximum level, the baby unit monitors continuously. All sounds (including your baby's breathing, when loud enough) can be heard on the parent unit. You can only change the microphone sensitivity if the connection between the baby unit and the parent unit is established (when LINK lights (A-2, B-8) light continuously green).
I Briefly press the SENSITIVITY button (B-2) on the parent unit.
The sound-level lights (B-9) give visual feedback on the current sensitivity level for approximately 2 seconds.
2 Briefly press the Volume + and - buttons (B-10) on the parent unit to increase/decrease the microphone sensitivity of the baby unit.
Note: If you press the SENSITIVITY button (B-2) and/or the Volume + and - buttons (B-10) too long, the microphone sensitivity will not be adjusted.
The sound-level lights (B-9) give visual feedback on the new setting for approximately 2 seconds:
- I light (I x orange) = minimum level / lowest sensitivity;
- all lights (5 x orange) = maximum level (continuous transmission) / highest sensitivity
Note: When the sensitivity level of the baby unit is set to a high level, the unit will consume more power because it is in continuous transmission mode.
Monitoring baby silently
- Briefly press the Volume - button (B-10) on the parent unit until the volume is completely switched off.
All sound-level lights (B-9) will now be off.
When no sound is detected, all sound-level lights (B-9) will be off.
When a sound is detected the sound-level lights (B-9) light up orange.
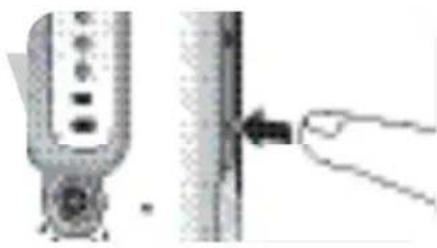

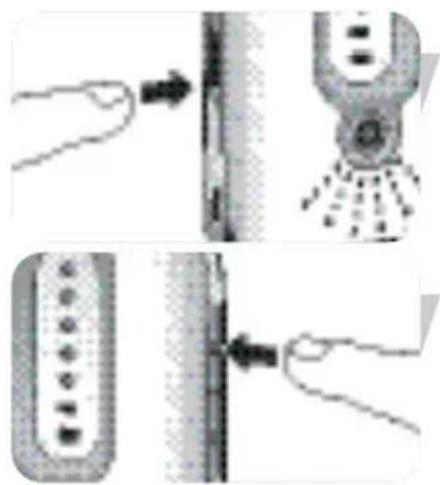
Switching night light on/off
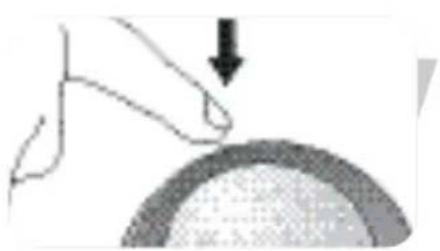
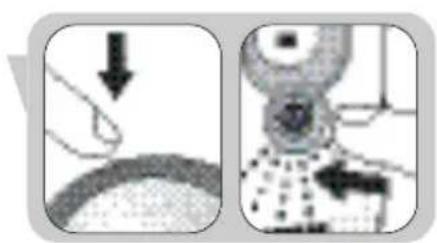
1 Briefly press the night light button (A-7) on the baby unit to switch on the night light (A-3).
2 Briefly press the night light button (A-7) again to switch off the night light (A-3).
The night light dims and gradually switches off.
- Switch off the night light when operating the baby unit on batteries. This saves power!
Note: If you press the night light button (A-7) too long, the night light (A-3) will not switch on/off.

Connecting / disconnecting belt clip
If the parent unit is operating on batteries, you can carry it in and around your house, giving you freedom of movement while still monitoring your baby.

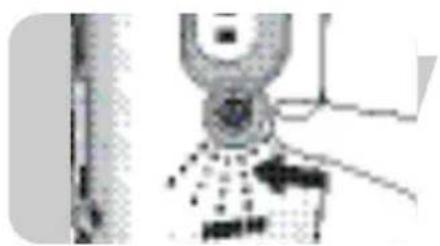
Connect
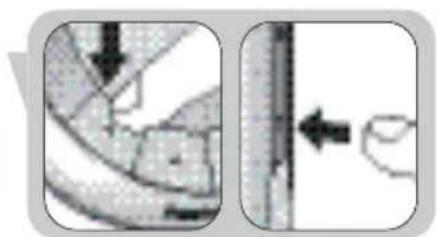
- Insert the little spindle on the rear of the belt clip into the recess (B-11) on the rear of the parent unit. Turn the belt clip to the left until it clicks in position.
Disconnect
- Turn the belt clip to the right (TURN) and take it off.
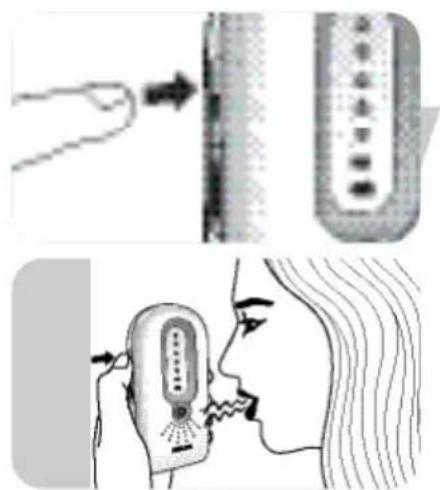
Paging parent unit
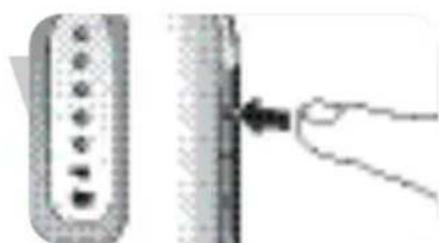
When the parent unit is misplaced and the volume is switched off, you can use the PAGE button (A-6) on the baby unit to locate the parent unit.
I Briefly press the PAGE button (A-6) on the baby unit. > A paging alert will sound on the parent unit.
2 To stop the paging alert, briefly press the page button (A-6) again or any button on the parent unit.
Note: If you press the PAGE button (A-6) too long, the paging alert will not sound.
Problem Possible cause Solution
LINK light (A-2, B-8) Parent unit:
does not light at all. Power adapter (B-14) not Connect power adapter (B-14)
plugged in. to parent unit.
Connect power adapter (B-14)
to wall outlet.
Unit not turned on. Press and hold On/Off button (
(B-6) for two seconds.
Batteries are low. Replace batteries (B-12).
Baby unit:
Power adapter (A-11) not Connect power adapter (A-11) to
plugged in. baby unit.
Connect power adapter (A-III) to
wall outlet.
Batteries incorrectly inserted. Insert batteries correctly.
Unit not turned on. Press and hold On/Off button (
(A-I) for two seconds.
Batteries are low. Replace batteries (A-9).
LINK light (A2, B-8) Units out of range. Decrease distance between units
flashing red/alarm
(see 'Technical specifications').
beeping on parent unit.
Batteries are low. Replace batteries (A-9, B-12).
Units cannot establish
Try solving the problem by using the factory initialization mode.
connection, even when close
See chapter 'Factory initialization mode'.
to each other.
No power on one of the units.
Press On/Off button (A-I, B-6)
for two seconds.
Problem Possible cause Solution
High pitched noise. Units are too close to each Move parent unit away from baby other. unit (at least 1 meter / 3 feet).
Volume on parent unit set Decrease volume (B-10) on too high. parent unit.
No sound/baby's crying Volume on parent unit is Increase volume on parent unit cannot be heard. set too low or switched off. (B-10).
Microphone sensitivity level Adjust microphone sensitivity set too low on parent unit. level (B-2) on parent unit to a higher level.
| Units are out of range. | Move parent unit closer to baby unit. | |
| Parent unit reacts too fast to other ambient sounds. | Ambient sounds trigger transmission. | Move baby unit closer to baby (keep minimal distance of 1 meter / 3 feet). |
| Microphone sensitivity set too high. | Decrease microphone sensitivity level (B-2) on parent unit. | |
| Parent unit reacts slow/ late to baby's crying. | Microphone sensitivity is set too low. | Increase microphone sensitivity level (B-2) on parent unit and/or move baby unit closer to baby (keep minimal distance of 1 meter / 3 feet). |
| Battery check light (●) is lit. | Batteries are low or almost empty. | Replace batteries (A-9, B-12). |
| Baby unit battery power diminishes rapidly. | Microphone sensitivity is set too high. lower level (B-2). | Set microphone sensitivity to a |
| Volume setting too high. | Set volume to a lower level (A-4). | |
| Parent unit battery power diminishes rapidly. | Volume setting too high. | Set volume to a lower level (B-10). |
Frequently asked questions
EN
Question
The technical specifications show an operating range of 300 meters / 900 feet outdoors. How come my baby monitor manages much less than that?
The link is lost every now and then, sound interruptions etc.
What happens during a mains failure?
Is my DECT baby monitor secure from eavesdropping and interference?
Some buttons do not seem to work when I press them. What do I do wrong?
Answer
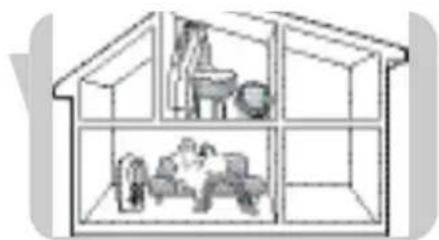
The specified range is only valid outdoors in open air. Inside your house the workable range is limited by the amount and type of walls and/or ceilings in between. Inside the house the operating range will be up to 50 meters / 150 feet.
You are probably approaching the outer limits of the practical range. Try a different location or decrease the distance slightly. Please note that it takes about 30 seconds each time before a new link between the units is established.
When batteries are installed in the both units, the units will automatically switch over to battery use in case of mains failure.
The 120 channels guarantee no interference from other equipment.
Except for the On/Off buttons (A-1, B-6), only press the buttons briefly.
Power supply
Technical specifications
- I x AC power adapter DC 9V / 300 mA for baby unit (supplied)
- I x AC power adapter DC 3.6V / 200 mA for parent unit (supplied)
- 4 × AA 1,5 ~V alkaline batteries for baby unit (not supplied)
2× AAA1,5V alkaline batteries for parent unit (not supplied)
Operating range
Up to 300 meters / 900 feet in ideal condition.
Walls, doors, etc will affect range. Indoors the range is up to 50 meters / 150 feet.
Dry materials Material thickness Loss of range
Wood, plaster, < 30cm / 12^ 0 - 10%
plastercardboard,
glass (without metal
or wires, no lead)
Brick, plywood < 30cm / 12^ 5 - 35%
Reinforced concrete < 30cm / 12^ 30 - 100%
Metal grids, bars < 1cm / 0.4^ 90 - 100%
Metal, aluminium < 1cm / 0.4" 100%
sheets
Operating temperature
0^ - 40^
Standard
Digital Enhanced Cordless Telecommunication (DECT)
The DECT standard makes use of advanced digital radio techniques to achieve efficient use of the radio spectrum. It delivers high speech quality and security and low power technology. It makes it possible to hear your baby at a range of up to 300 meters / 900 feet in open air.
Maintenance
- Clean the baby monitor with a damp cloth.
- Dispose of used batteries in an environmentally friendly manner.
- If the batteries are left in the unit when it is powered from the mains, check them for leakage every six months.
Environmental information
Disposal of your old product
Your product is designed and manufactured with high quality materials and components, which can be recycled and reused.
When this crossed-out wheeled bin symbol is attached to a product it means the product is covered by the European Directive 2002/96/EC
Please inform yourself about the local separate collection system for electrical and electronic products.
Please act according to your local rules and do not dispose of your old products with your normal household waste. The correct disposal of your old product will help prevent potential negative consequences for the environment and human health.
Factory initialization mode
In this mode both units can be reset to the default factory settings. Factory initialization can be used if problems occur which can not be solved by following the suggestions in chapter 'Troubleshooting'. Resetting must be done separately for each unit.
Press and hold the On/Off (O) button (A-I, B-6) for 2 seconds to switch on the units.
2 When the LINK lights (A-2, B-8) on the units light up, immediately press and hold the volume - button (A-4, B-10) for 1 second.
The units have now been reset to the default factory settings.
Default factory settings
Parent unit
-
Loudspeaker volume: I
-
Microphone sensitivity: 3
Baby unit
- Loudspeaker volume: 3
Night light: off

If you need information or if you have a problem, please visit the Philips website at www.philips.com or contact the Philips Customer Care Centre in your country (you will find its phone number in the worldwide guarantee leaflet). If there is no Customer Care Centre in your country, turn to your local Philips dealer or contact the Service Department of Philips Domestic Appliances and Personal Care BV.
A. Unité bébé
Philips Baby Care, taking care together
Philips Baby Care, taking care together
B. Ouder-unit (ontvanger)
Philips Baby Care, taking care together
Ouder-unit (ontvanger)
Digital Enhanced Cordless Telecommunication (DECT)
Ouder-unit (ontvanger)
Luidsprekervolume: I
Philips Baby Care, taking care together
Digital Enhanced Cordless Telecommunication (DECT).
Philips Baby Care, taking care together
Substitua as pilhas (A-9, B-12).
I NaTnOTe OToIymuia To Koupi PAGE (A-6) OTo movada μwpou.

m = 311 ;
Philips Baby Care, taking care together
Sakerhetsinformation
Sattinatadaptern (B-14)
i vagguttaget.
Metall, aluminium- < 1cm 100% plat
(A-4, B-10) i I sekund.
Philips Baby Care, taking care together
A-7 Knapp for nattlys
A-8 Kontrollys for batteri
A-9 Deksel for batterirom
A-10 DC 9V / 300mA jack til strømledning
A-11 AC stromadapter, vekselstrøm
B. Foreldreenhet
B-1 TALK taleknapp
B-2 SENSITIVITY folsomhetsknapp
B-3 Likestrom 3,6V / 200mA jack til strømledning
B-4 Hoyttaler
B-5 Mikrofon
B-6 Av/Pa knapp
B-7 Kontrollys for batteri
B-8 LINK lampe
B-9 Lamper for lydniva
B-10 Volum - / + knapper
B-1 Plass til belteklemme
B-12 Deksel til batterirom
B-13 Belteklemme
B-14 AC strømadapter, vekselstrøm
C.Anette du trenger
Kople strömadapter (B-14)
til veggkontakt.
(A-1) i to sekunder.
Batteriene nesten utladet. Bytt batterier (A-9).
Kan min DECT babymonitor bli utsatt for tyvlyting ell interferens (radiostoy)?
Specifications are subject to change without notice.
Trademarks are the property of Koninklijke Philips Electronics N.V. or their respective owners.
2005 © Koninklijke Philips Electronics N.V. All rights reserved.
www.philips.com