
BHT 5615 - Beard trimmer AEG - Free user manual and instructions
Find the device manual for free BHT 5615 AEG in PDF.
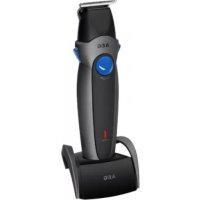


| Brand | AEG |
| Model | BHT 5615 |
| Product type | Beard trimmer and multi-purpose shaver |
| Net weight (with adapter) | Approximately 0.239 kg |
| Power supply | AC mains adapter 100-240 V, 50/60 Hz, output DC 3.4 V, 1000 mA |
| Battery type | NiMH 2 x 1.2 V, 900 mAh |
| Charging time | 13 hours |
| Operating time | 60 minutes maximum |
| Main functions | Beard trimming, body hair trimming, close shaving, nose and ear hair trimming, neck contouring |
| Included accessories | Shaver attachment, beard trimmer attachment 30 mm, hair trimmer attachment 38 mm, 2 adjustable combs (2/4/6/8 mm and 10/12/14/16 mm), nose/ear trimmer attachment, body hair trimmer attachment, body comb (3/6/10 mm), cutting comb, cleaning brush, mustache comb, pair of scissors, mains adapter, charging stand |
| Adjustable cutting lengths | From 2 to 16 mm via adjustable combs |
| Charge indicator | Indicator light during charging |
| Use | Dry hair only; do not use in water |
| Cleaning | Brush provided; remove the shaver blade; apply 1-2 drops of resin-free/acid-free oil on the trimmer heads |
| Storage | Charging stand; store in a dry place |
| Safety | Do not use near water; do not immerse; unplug before cleaning; adapter must only be used in a dry environment |
| Warranty | Compliant with EU directives; long-life rechargeable battery |
| Repairability | Removable battery (removable with screwdriver); spare parts available via customer service |
Frequently Asked Questions - BHT 5615 AEG
User questions about BHT 5615 AEG
0 question about this device. Answer the ones you know or ask your own.
Ask a new question about this device
Download the instructions for your Beard trimmer in PDF format for free! Find your manual BHT 5615 - AEG and take your electronic device back in hand. On this page are published all the documents necessary for the use of your device. BHT 5615 by AEG.
USER MANUAL BHT 5615 AEG
Body Groomer / Hair Trimmer Set
Body Groomer / Hair Trimmer Set
Body Groomer / Hair Trimmer Set
Location of Controls
Thank you for choosing our product. We hope you will enjoy using the appliance.
Symbols in this user manual
Important notes for your safety are marked distinctively. Pay absolute attention to them to avoid accidents and damage to the device:

WARNING:
Warns of dangers for your health and indicates potential risks of injury.

CAUTION:
Indicates potential dangers for the device or other objects.

NOTE:
Highlights tips and information for you.
General Safety Guidelines
Before using this device, carefully read this user manual and keep it together with the Warranty Certificate, cashier receipt and if possible, the original package inclusive its interior packing. If you hand on the device to any third person, include the user manual as well.
- Use the device for private and intended purposes only. The device is not intended for commercial use.
- The power adaptor is only intended for use in dry environments.
- Ensure that the output voltage, current, and polarity of the power adaptor correspond to the nameplate specifications!
- Do not touch the power adaptor with wet hands!
- Disconnect from mains power supply if not in use, when attaching accessories, during cleaning, and when malfunctioning.
- Regularly check the device and cable for signs of damage. Do not continue to operate the device in case of damage.
- Do not repair the device by yourself. Please contact our customer service or any other qualified specialist. The mains cable must be replaced with an equivalent cable by the manufacturer, our customer service, or any other qualified specialist. Only use original parts. Please observe the following "Special safety instructions".
Children and disabled persons
- For the safety of your children, keep any packing parts (plastic bags, cardboard, Styrofoam, etc.) out of their reach.

WARNING!
Don't let small children play with foils for danger of suffocation!
- This device is not intended for use by persons (including children) with reduced physical, sensory, or mental capabilities, or lack of experience and/or knowledge unless they have been given supervision or instructions concerning the use of the device by a person responsible for their safety. Supervise children to ensure they do not play with the device.
Special Safety Precautions

WARNING: Risk of electric shock!
Do not use this unit in close proximity to water if the power adaptor is connected (e.g., bath tub, wash basin, or other containers filled with water).

WARNING: Risk of injury!
Do not press the shaver heads too hard on the surface of the skin.
Never use the device with damp hands.
Only cut dry hair with this unit.
Only use the device to trim hair on the head, facial hair and body hair.
Charge the unit in a cool and dry location. Only use the supplied power adapter.
Location of Controls
Shaver attachment, Buttons to remove the foil, Buttons to release the attachments
4 On/off button ON/OFF, 5 Charging indicator light, 6 Stand / Charging station, 7 Beard trimmer attachment, 30 mm, 8 Hair trimmer attachment, 38 mm, 9 Adjustable comb attachment (approx. 2/4/6/8 mm), 10 Adjustable comb attachment (approx. 10/12/14/16 mm), 11 Nasal hair / Ear hair trimmer attachment, 12 Body hair trimmer attachment, 13 Comb attachment for the body hair trimmer attachment (approx. 3/6/10 mm), 14 Styling comb, 15 Cleaning brush, 16 Moustache comb, 17 Scissors, 18 Mains adapter
26 English Charging the Unit
In order to use the stand as a charging station, connect the mains adapter to the station as follows:
- Open the locking device on the underside of the station.
- From the underside, insert the mains adapter plug through the opening on the station.
- Lock the plug into position by closing the locking device.
- Insert the mains adapter cable through the cable opening at the back of the station.
- Place the station in a dry room.
If you do not connect the mains adapter plug to the station, you can alternatively charge the device horizontally.
WARNING Risk of electric shock!
Do not charge the device in a bathroom or in the vicinity of water!
- Turn the unit off.
- Place the device into the station once you have connected the mains adapter plug to it. Alternatively, insert the mains adapter plug directly into the socket on the bottom end of the device.
- Plug the power adaptor into a wall outlet.
NOTE:
The charge indicator turns on during charging. The charge indicator does not indicate the state of charge of the rechargeable battery.
- Charge the unit before first use for 13 hours.
Later charges take 13 hours as well.
CAUTION:
After 13 hours always disconnect from mains power supply.
Note Lifetime Rechargeable Battery
You can extend the lifetime of the rechargeable battery by following these steps:
Only charge after the battery is nearly exhausted. - Do not charge for more than 13 hours. - Charge the unit at temperatures between 0° and +40°C.
Usage
Switching on and off
Press the ON/OFF button in order to switch the device on and/or off.
Putting on and taking off the attachments
WARNING:
Always switch the device off before you fit attachments or accessories!
- Push an attachment onto the device. You must hear it click into place.
- In order to release the attachment from the device, press the buttons on the side of the device (3) and pull the attachment off.
- Push a comb attachment onto the mounted attachment. It must click into place at the side.
In order to remove a comb attachment from the trimmer, push the small catch on the back of the comb upwards with your thumb.
Practical tips for optimum trimmer results
The hair must be dry. Before using the device, do not use any skin care products.
Comb the hair in the direction that it grows. - If too much hair remains in the comb attachment when trimming, switch the device off. If necessary, remove the comb attachment. Brush off the hair with the cleaning brush provided.
Cutting hair
- Attach the hair trimmer (8) to the device.
- Select a comb attachment (9 or 10). Press it onto the hair trimmer.
- To adjust the desired cutting length, press and slide the button on the comb attachment at the same time. The length is shown on the right-hand side next to the button.
- Switch the device on.
- Begin with the longest cutting setting and cut your hair in stages to the desired length.
NOTE:
The cutting lengths can vary, depending on the cutting technique.
- Switch the device off before you remove the comb attachment from the trimmer.
Clip and Cut Beard
- Attach the beard trimmer (7) to the device.
- Select a comb attachment (9 or 10). Push it onto the beard trimmer.
- To adjust the desired cutting length, press and slide the button on the comb attachment at the same time. The length is shown on the right-hand side next to the button.
- Switch the device on.
- Start with the longest cutting stage and clip goatee, sideburns, or full beard step by step to the desired length.
NOTE:
The cutting lengths can vary, depending on the cutting technique.
- Switch the device off before you remove the comb attachment from the trimmer.
Outlining and Shaving the Neck
Use the beard trimmer without a comb attachment. - The clipper head allows precise outlining of the shape of the beard, even in difficult to reach places, as well as a clean shaving of the hairline at the neck.
Using the shaver attachment
The shaver attachment has been specifically designed for close shaving on the beard, moustache and sideburns.
- Attach the shaver attachment (1) to the device.
- Switch the device on.
- Hold the device in such a way that the shaver attachment makes light contact with the face at a 45 degree angle.
Removing nasal hair / ear hair

WARNING: Risk of injury!
- Only remove hair protruding from the nostril / ear lobe.
- Never push the device into the nostril / ear lobe using force.
- Never insert the device into the nostril / ear lobe further than the narrow tip of the shaver head.
- Attach the nasal hair / ear hair trimmer (11) to the device.
- Switch the device on.
- Carefully insert the tip of the shaver head into the nostril or ear lobe and remove it again.
Trimming body hair

WARNING: Risk of injury!
- Be particularly careful when trimming around moles! In the case of eczema, inflamed skin reactions or wounds, we recommend that you refrain from shaving body hair until the symptoms have faded away.
- Only lightly press the blade of the body hair trimmer onto the skin!
- Place the body hair trimmer (12) on the device.
- Using the comb attachment (13), select a cutting length approx. 3 / 6 / 10 mm. Slide the comb attachment into one of the three tracks on the trimmer.
- Switch the device on.
- Lightly press the flat side of the comb attachment onto the skin.
- Slowly move the trimmer through the hair in the direction of growth.
- Switch the device off before you remove the comb attachment from the trimmer.
- To shorten the hair fully, use the body hair trimmer without a comb attachment.
Finish Operation
Switch the device off using the ON / OFF button.
Cleaning and Maintenance

WARNING:
- Do not submerge the unit in water.

CAUTION:
- Do not use a wire brush or other abrasives.
- Do not use sharp or abrasive cleaning agents.
- Regular cleaning and maintenance ensures optimum results and long lifetime.
- Turn the unit off and disconnect from mains power supply, if necessary. If necessary, remove the comb attachment from the trimmer. In order to remove the foil of the shaver attachment, jointly press the buttons (2).
Use the cleaning brush to remove remaining hair after use. - Replace the foil of the shaver on the shaver head. You must hear it click into place.
Regularly apply 1-2 drops of non-resinous / acid-free oil to the shaver heads of the trimmer (7, 8, 12).
Clean the casing with a slightly damp cloth, if necessary.
Noise emission
The workplace-related emission value is less than 70 dB(A).
Technical Specifications
Model: BHT 5615 Net weight incl. mains adapter: approx. 0.239 kg
Mains adapter
Protection class:
Voltage supply: AC 100 - 240 V, 50/60 Hz
Output: DC 3.4 V, 1000 mA
Battery: 2 x 1.2 V, 900 mAh, NiMH
Running time: 60 mins. max
Charging time: 13 hours
The right to make technical and design modifications in the course of continuous product development remains reserved.
This device complies with all current CE directives, such as electromagnetic compatibility and low voltage directive and is manufactured according to the latest safety regulations.
English
Remove / Dispose of Rechargeable Batteries
Disposal
This unit is equipped with a rechargeable Ni-MH battery. Remove the battery before disposing of the unit. As a consumer you are legally bound to return exhausted batteries/rechargeable batteries.
WARNING:
Disconnect from mains power supply before removing the battery!
- Use a small Phillips screwdriver to loosen the screw on the back of the device. Open the housing.
- Remove the rechargeable battery. Cut the wires to the battery with a pair of scissors.
Return the battery at a collection point for batteries and/or hazardous waste. Ask your municipality for further information.
Meaning of the "Wheelie Bin" Symbol
Take care of our environment, do not dispose of electrical appliances via the household waste.
Dispose of obsolete or defective electrical appliances via municipal collection points.
Please help to avoid potential environmental and health impacts through improper waste disposal.
You contribute to recycling and other forms of utilization of old electric and electronic appliances.
Your municipality provides you with information about collecting points.
CTeKTe, 06D iTn He 6abinncb npncTpoem.
Special safety instructions
WARNING
Risk of electric shock!
Do not use the device near water, especially near bathtubs, washbasins, or other containers filled with water.
WARNING. Risk of injury!
Do not let the machine come into close contact with the skin.
Forbidden to take near open flames. - Dry your hair only with a hairdryer. Use the attachments for drying hair on the head and body. Charge the device in a dry and clean place. Use only the charger supplied.
Control parts description
1 Switch 2 Buttons for removing the metal comb 3 Buttons for removing attachments 4 ON/OFF button 5 Charging indicator 6 Stand/charging device 7 Attachment for cutting hair, 30 mm length 8 Attachment for cutting hair, 38 mm length 9 Adjustable comb (approx. 2/4/6/8 mm) 10 Adjustable comb (approx. 10/12/14/16 mm) 11 Attachment for trimming nose and ear hair 12 Attachment for cutting hair on the body
38
Ukrainian
13 Adjustable comb for cutting hair on the body (approx. 3/6/10 mm) 14 Comb for long hair 15 Oil for lubrication 16 Comb for mustache and beard 17 Blades 18 Charger
0
Battery life indicator
The battery charger can be continued by performing the following steps:
Charge the device only when the battery is completely discharged. Do not charge the device more than once. Charge the device at a temperature of 0°C to +40°C.
Charging the device
To use the battery as a charging device, connect the power adapter to it in the following way:
- Open the cover located in the lower part of the charger.
- Insert the power adapter plug into the socket on the charger from below.
- Secure the plug in place by closing the cover.
- Insert the power adapter cable into the socket on the charger.
- Place the charger on a dry surface.
When the power adapter is connected to the charger, the charger can be charged in a horizontal position.

WARNING.
Risk of electric shock!
Do not charge the device in a bathroom or near water!
- Turn off the device.
- After the power adapter is connected to the charger, place the machine on the charger. Alternatively, you can insert the power adapter plug directly into the socket in the lower part of the device. 8. Connect the adapter to the power outlet.
The charge indicator does not indicate the state of charge of the battery.
Before first use, charge the device for 13 hours.
Subsequent charging should last no longer than 13 hours.

WARNING.
After 13 hours of charging, disconnect the device from the mains.
Use
Turning on and off
To turn the device on or off, press the ON/OFF button.
Installing and removing attachments

CAUTION.
Before installing or removing attachments, turn off the device!
Install the attachment on the device. It should click into place. - To remove the attachment from the device, press the button on the side of the device (3) and remove the attachment. Install the comb attachment onto the installed attachment. It should click into place on the sides. To remove the comb attachment from the device, press the small button at the back of the comb with your thumb.
Practical tips for optimal device operation
The hair must be dry. - Before use, do not apply any creams or lotions to the skin. - Comb the hair in the direction of growth. - If a lot of hair is cut during trimming, turn off the device. If necessary, remove the comb attachment. Remove the hair with the brush from the set.
Trim the mustache.
- Install the mustache trimmer attachment (8) onto the device.
- Select a comb attachment (9 or 10). Install it onto the mustache trimmer attachment.
- To set the desired hair length, press and slide the comb on the comb attachment. The length will be shown opposite the comb.
- Turn on the device.
- Starting from the maximum length, gradually trim the mustache to the desired length.
Note.
The hair length may vary depending on the technique used.
- Before removing the comb attachment from the mustache trimmer, turn off the device.
Trimming the beard
- Install the beard trimmer attachment (7) onto the device.
- Select a comb attachment (9 or 10). Install it onto the beard trimmer attachment.
- To set the desired hair length, press and slide the comb on the comb attachment. The length will be shown opposite the comb.
- Turn on the device.
- Starting from the maximum length, trim the beard gradually, step by step, to the desired length.
IMPORTANT.
Hair may grow differently, depending on the technique used.
- Before trimming the nozzle for nose/ear hair, attach the nozzle.
Attaching the combs and the head
Use the comb for beard trimming without the nozzle for nose/ear hair. The head allows you to perform precise contouring with the ON/OFF button. Hold the device in accessible places, and carefully guide the hair on the skin. Turn the device on/off with the ON/OFF button.
Using the beard trimmer
The beard trimmer is specially designed for trimming beards, mustaches, and sideburns.
- Attach the beard trimmer (1) to the device.
- Turn on the device.
- Hold the device so that the beard trimmer is slightly angled at 45 degrees.
Trimming nose/ear hair
WARNING. Risk of injury!
Trim only the hair that protrudes from the nose/ear. Do not insert the device into the nose/ear. Do not insert the device into the nose/ear with the narrow edge of the beard trimmer.
- Attach the nose/ear hair trimmer head (11) to the device.
- Turn on the device.
- ObepeXHO BCTaTe KpaI 6pNTBn y Hic a6o Byxo, a noTIM BnIMITb NOrO.
Trim the hair on the body
Do not immerse the device in water.

ATTENTION.
Do not use the device with a damaged blade or other parts, as they may damage the device. Do not use sharp or abrasive tools for cleaning.
- Regular cleaning and maintenance guarantee optimal results and long service life of the device. Turn off the device and disconnect it from the power supply if necessary. If needed, remove the attachment from the device for cleaning.
- To remove the metal grid from the trimmer, press the button (2). Use the cleaning brush to remove hair after use. Then reattach the metal grid to the trimmer. It will click into place.
40 Ukrainian
- Regularly apply 1-2 drops of oil, which does not contain resin and acids, to the trimmer attachment (7,8,12).
- Clean the housing slightly with a damp cloth if necessary.
Technical specifications
Model: BHT 5615
Weight: approx. 0.239 kg
Protection class: II
Input voltage: 100-240 V AC, 50/60 Hz
Output: 3.4 V DC, 1000 mA
Battery: 2x 1.2 V, 900 mAh Ni-MH
Operating time: up to 60 hours
Charging time: 13 hours
We reserve the right to make technical changes and changes in design.
During the product development process.
This device complies with the requirements
of the EMC Directive, as well as with the latest safety
standards and is designed in accordance with the latest
safety engineering.
Operating instructions
Thank you for choosing our product. We hope you will be satisfied with it.
Important instructions concerning safety are marked with special symbols. To avoid accidents and damage to the device, pay special attention to them.
WARNING:
Warning about danger of electric shock, indicates the possibility of damage.
CAUTION:
Potential danger to the device or other objects.
NOTE:
Advice and information for you.
Follow the safety measures described below and additional safety measures.
Devices with limited capabilities
- For child safety, keep all
- packaging elements (plastic bags, cardboard
- insulation materials, etc.) out of reach of
- children.
WARNING!
He is too small for children to play with the film.
Danger!
This device should not be used by persons (including children) with reduced physical, sensory or mental capabilities, or lack of experience and knowledge, unless they have been given supervision or instruction concerning use of the appliance by a person responsible for their safety. Children should be supervised to ensure that they do not play with the appliance.
Safety precautions
Before using the appliance, read this manual carefully. Keep it, as well as the warranty card, cash receipt and, if possible, the original packaging, including its internal elements. If the appliance is transferred to third parties, this manual must be attached.
The appliance may only be used for domestic purposes as intended. The device is not intended for commercial use. The power adapter is intended for use only in dry rooms. - Check that the output voltage, current and polarity of the power adapter match the characteristics on the nameplate! Do not touch the power adapter with wet hands! Disconnect the appliance from the mains when you are not using it, when installing additional accessories, during cleaning, and in case of malfunctions. - Regularly check the device and cable for signs of damage. Stop using the device if damage is present. Do not attempt to repair the device yourself. Contact an authorized service center. To avoid danger, replace damaged cables with equivalent ones from the manufacturer, its service department, or other qualified specialists. - Use only original accessories.
Danger of electric shock!
Do not use this appliance near water if the power adapter is connected (e.g., bathtub, sink, or other containers filled with water).
WARNING: Risk of injury!
Do not press the cutting head too firmly against the skin surface.
Do not handle the appliance with wet hands. This appliance is intended for trimming dry hair only. Use the appliance only for trimming hair on the head, face, and body. Store the appliance in a cool, dry place. Use only the power adapter included in the package.
Layout of elements
Trimmer head (blade for trimming hair) (blade for trimming nose hair) (ON/OFF switch)
Charging indicator
Package contents / charging stand Trimmer head for beard, 30 mm Trimmer head for hair, 38 mm Adjustable comb attachment (2/4/6/8 mm)
Power adapter (approx. 10/12/14/16 mm)
42 Russian
11 Nose hair trimmer / ears 12 Nose hair trimmer 13 Body hair trimmer (approx. 3/6/10 mm) 14 Trimmer for styling 15 Cleaning brush 16 Trimmer for ears 17 Scissors 18 Power adapter
Charging device
USE AND SUPPLY The charging station is supplied with a power adapter. Connect it to the charging station as follows:
- Open the locking device at the bottom of the charging station.
- Insert the plug of the power adapter from below through the opening in the charging station.
- Secure the plug in place by closing the locking device.
- Route the power adapter cable through the cable opening on the back of the charging station.
- Place the charging station in a dry place.
If the power adapter is not connected to the charging station, the device can be charged in an alternative way in a horizontal position.
Danger of electric shock!
Do not charge the device in a bathroom or near water!
- Disconnect the device.
- After connecting the power adapter to the charging station, insert the device into it. Alternatively, insert the plug of the power adapter directly into the socket on the bottom of the device.
- Connect the power adapter to a wall outlet.
APPLICATION:
During charging, the charging indicator lights up. - The charging indicator does not indicate the state of charge of the battery.
- Charge the device for 13 hours before first use.
Subsequent charging will also take 13 hours.
ATTENTION:
After 13 hours, always disconnect the device from the mains.
Battery service life
You can extend the battery service life by following the steps listed below:
Charge the battery only after it has been almost completely discharged. Do not charge the battery for more than 13 hours. Charge the device at a temperature between 0°C and +40°C.
Application
Switching on and off
Press the ON / OFF button to switch the device on or off.
Installing and removing attachments
WARNING:
Before turning on the device, install the attachments on the accessories!
Insert the attachment into the device. When fixing in place, a click will be heard. - To remove the attachment from the device, press the button on the side of the device (3) and pull out the attachment. Insert the comb attachment before inserting the attachment into the device. When fixing in place, a click will be heard. - To remove the comb attachment from the trimmer attachment, press upward with the thumb and forefinger on the small latch.
Practical tips for best results in hair removal on the body
Hair should be dry. - Before using the device, do not use cosmetics for skin care. - Comb the hair in the direction of growth. - If too much hair remains on the comb attachment during removal from the body, turn off the device. If necessary, remove the comb attachment. Remove the hair with the cleaning brush from the delivery set.
Trimmer attachment
- Insert the trimmer attachment (8) into the device.
- Select the comb attachment (9 or 10). Insert it into the trimmer attachment.
- To adjust the cutting length, press and simultaneously slide the button on the comb attachment. The length is shown next to the button on the right.
- Turn on the device. 5. For longer hair to be trimmed, guide the trimmer slowly, each time adjusting the cutting length.
NOTE:
The cutting length may vary depending on the technique.
- Turn off the device before removing the comb attachment from the trimmer attachment.
Beard trimmer
1. Insert the beard trimmer attachment (7) into the device. 2. Select the comb attachment (9 or 10). Insert it into the beard trimmer attachment. 3. To adjust the cutting length, press and simultaneously slide the button on the comb attachment. The length is shown next to the button on the right. 4. Turn on the device. 5. Start trimming the longest areas and trim the beard gradually, step by step, until the desired length is achieved.
NOTE:
Set the cutting length according to the attachment.
- Turn off the device before changing the comb or cutting attachment.
Removing hair on the body
WARNING: Risk of injury!
- Be careful when removing hair around
- birthmarks! In case of eczema, inflammation or skin irritation, we recommend refraining from removing body hair until fully healed.
- Ensure light contact of the skin with the attachment when removing body hair!
- Attach the body hair removal attachment (12) to the device.
- Using the comb attachment (13), set the cutting length (e.g., 3/6/10 mm). Slide the comb attachment into one of the three grooves on the attachment.
- Turn on the device.
- Gently press the flat side of the comb attachment against the skin.
- Slowly move the trimmer against the direction of hair growth.
- Turn off the device before changing the trimming head. For precise trimming of hair, use the trimming head without the comb attachment.
Shaping the beard
Finishing the work
- Use the trimming head for beard shaping without the comb attachment. Turn off the device with the ON/OFF button.
- The head of the device allows for precise shaping of the beard, even in hard-to-reach places, and also allows for accurate trimming of the hairline on the neck.
Using the trimming head for shaving
The trimming head for shaving is specially designed for close shaving of the beard, mustache, and sideburns.
1. Attach the trimming head (1) to the device. 2. Turn on the device. 3. Hold the device so that the trimming head lightly touches the skin at a 45-degree angle.
Removing hair from the nose and ears
WARNING: Risk of injury!
- Remove only the hair that protrudes from the nose or ear cavity. Do not insert the device into the nose or ear cavity with force. Do not insert the device into the nose or ear cavity beyond the narrow marking on the shaving head.
1. Attach the trimming head for nose and ear hair (11) to the device. 2. Turn on the device. 3. Carefully insert and remove the tip of the shaving head into the nose or ear cavity.
WARNING:
Do not immerse the device in water.
WARNING:
Do not use a wire brush or other abrasive accessories. Do not use sharp or abrasive cleaning agents.
Regular cleaning and maintenance ensure optimal results and a long service life. Turn off the device and disconnect it from the mains power supply if necessary. - If necessary, remove the comb from the shaver head. - To remove hair from the shaver head, press the button (2) simultaneously. - Use a soft brush to clean the shaver head of any hair left after use. Replace the shaver head attachment. When shaving in place, the result will be better. - Lubricate the shaver head with 1-2 drops of oil (without silicone) on the shaver head and the attachment (7,8,12).
44 Russian
- If necessary, wipe the housing with a slightly damp cloth.
Technical specifications
Model: BHT 5615 Net weight with power adapter: approx. 0.239 kg
Power adapter
Protection class: II Input voltage: ... AC, 100 - 240 V, 50/60 Hz Output: ... DC, 3.4 V, 1000 mA
Battery: 2x1.2V, 900mAh, NiMH Operating time: max. 60 minutes Charging time: 13 hours
The right to make technical and design changes during product development is reserved.
This device complies with all current EU directives, such as electromagnetic compatibility and low voltage; it has been manufactured in accordance with the latest safety regulations.
| BHT 5615 | |
| 0.239 | |
| II | |
The denominator minimum value of ai a ai is k.
| jǎo | jǎi | jǎu | jǎu | jǎi | jǎi |
| yǒgài | jǎi | jǎi | jǎi | jǎu | jǎi |
| jǎu | jǎi | jǎi | jǎi | jǎu | jǎi |
| jizaiji | .2 |
| jiayi | .3 |
| jiuyi | .3 |
| jiuyi | .3 |
- SYMBOLS IN THIS USER MANUAL
- WARNING
- CAUTION
- NOTE
- GENERAL SAFETY GUIDELINES
- CHILDREN AND DISABLED PERSONS
- SPECIAL SAFETY PRECAUTIONS
- WARNING: RISK OF ELECTRIC SHOCK
- WARNING: RISK OF INJURY
- LOCATION OF CONTROLS
- ENGLISH CHARGING THE UNIT
- WARNING RISK OF ELECTRIC SHOCK
- NOTE LIFETIME RECHARGEABLE BATTERY
- USAGE
- SWITCHING ON AND OFF
- PUTTING ON AND TAKING OFF THE ATTACHMENTS
- PRACTICAL TIPS FOR OPTIMUM TRIMMER RESULTS
- CUTTING HAIR
- CLIP AND CUT BEARD
- OUTLINING AND SHAVING THE NECK
- USING THE SHAVER ATTACHMENT
- REMOVING NASAL HAIR / EAR HAIR
- TRIMMING BODY HAIR
- FINISH OPERATION
- CLEANING AND MAINTENANCE
- NOISE EMISSION
- TECHNICAL SPECIFICATIONS
- MAINS ADAPTER
- ENGLISH
- REMOVE / DISPOSE OF RECHARGEABLE BATTERIES
- DISPOSAL
- MEANING OF THE "WHEELIE BIN" SYMBOL
- SPECIAL SAFETY INSTRUCTIONS
- WARNING. RISK OF INJURY
- CONTROL PARTS DESCRIPTION
- UKRAINIAN
- BATTERY LIFE INDICATOR
- CHARGING THE DEVICE
- RISK OF ELECTRIC SHOCK
- USE
- TURNING ON AND OFF
- INSTALLING AND REMOVING ATTACHMENTS
- PRACTICAL TIPS FOR OPTIMAL DEVICE OPERATION
- TRIM THE MUSTACHE
- TRIMMING THE BEARD
- IMPORTANT
- ATTACHING THE COMBS AND THE HEAD
- USING THE BEARD TRIMMER
- TRIMMING NOSE/EAR HAIR
- TRIM THE HAIR ON THE BODY
- ATTENTION
- OPERATING INSTRUCTIONS
- DEVICES WITH LIMITED CAPABILITIES
- SAFETY PRECAUTIONS
- DANGER OF ELECTRIC SHOCK
- LAYOUT OF ELEMENTS
- RUSSIAN
- CHARGING DEVICE
- APPLICATION
- BATTERY SERVICE LIFE
- PRACTICAL TIPS FOR BEST RESULTS IN HAIR REMOVAL ON THE BODY
- TRIMMER ATTACHMENT
- BEARD TRIMMER
- REMOVING HAIR ON THE BODY
- SHAPING THE BEARD
- FINISHING THE WORK
- USING THE TRIMMING HEAD FOR SHAVING
- REMOVING HAIR FROM THE NOSE AND EARS
- POWER ADAPTER
- THE DENOMINATOR MINIMUM VALUE OF AI A AI IS K
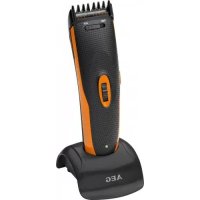
Brand : AEG
Model : BHT 5615
Category : Beard trimmer