
IMS 4452 - Docking station AEG - Free user manual and instructions
Find the device manual for free IMS 4452 AEG in PDF.
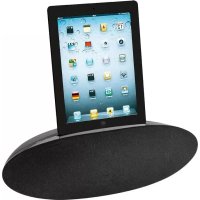


| Product type | Docking station |
| Brand | AEG |
| Model | IMS 4452 |
| Power consumption | 45 W |
| Net weight | Approximately 2.2 kg |
| Power adapter | Input AC 100-240 V ~ 50/60 Hz, output DC 12 V, 4 A |
| Adapter polarity | ⏚ (center positive) |
| Compatibility | iPod, iPhone, iPad (via docking station) |
| Main functions | Audio playback, Internet radio, weather, alarm, photo slideshow, equalizer (via app) |
| Connectivity | AUX IN (3.5 mm stereo jack), VIDEO OUT (RCA), DC 12 V |
| Remote control | Infrared, CR2032 battery included, range up to 5 m |
| Indicator light | Red in standby, blue in operation / AUX |
| Cleaning | Soft damp cloth without detergent, unplug before |
| Safety | Do not expose to water or moisture; use in dry indoor environment |
| Standards | Compliant with EU directives (EMC, low voltage) |
| Supplied accessories | Power cord, AC adapter, remote control with battery |
Frequently Asked Questions - IMS 4452 AEG
User questions about IMS 4452 AEG
0 question about this device. Answer the ones you know or ask your own.
Ask a new question about this device
Download the instructions for your Docking station in PDF format for free! Find your manual IMS 4452 - AEG and take your electronic device back in hand. On this page are published all the documents necessary for the use of your device. IMS 4452 by AEG.
USER MANUAL IMS 4452 AEG
iPad, iPhone and iPod are trademarks of Apple Inc., registered in the USA and other countries.
2 Contents
German
Contents
Location of Controls . Page 3
Instruction Manual.. Page 30
Technical Specifications . Page 34
Disposal . Page 34
Polish
Table of Contents
Location of Controls 3
User Manual. ..page 46
Technical Specifications page 50
Russian
Contents
Location of Components, p. 3
Operating Instructions, p. 51
Technical Specifications, p. 55
Location of Controls
iPod/iPhone/iPad Loading Function
30 English Instruction Manual
Thank you for choosing our product. We hope you will enjoy using the appliance.
General Safety Guidelines
Before using this device, carefully read this user manual and keep it together with the Warranty Certificate, cashier receipt and if possible, the original package inclusive its interior packing. If you hand on the device to any third person, include the user manual as well.
- To avoid the risk of fire or electric shock, you should not expose the device to rain or humidity. Do not use the device near water (e.g. bathroom, swimming pool, humid cellars). The unit is designed solely for private use and its intended purpose. This unit is not designed for commercial use. Make sure that the power cable is not bent, pinched, or comes into contact with heat sources. Make sure that the power cable is not a tripping hazard. The AC adapter is only suitable for use in dry rooms.
- Connect the AC adapter only to a properly installed outlet. Be sure the device voltage corresponds to the grid voltage. Also check that the output current and the polarity of the power supply match the information on the connected device.
- Do not touch the AC adapter with wet hands! Always install batteries in the correct direction.
- Avoid covering the device's vent openings.
- Never open the device's case. Improper repairs can cause severe danger to the user. If the device or particularly the power cord is damaged, don't use the device any further and have it repaired by a qualified specialist. Check the power cord regularly for damages.
- To avoid any danger, a damaged power cord must be replaced only by the producer, its customer service or a similarly qualified person with an equal cord.
- If the device won't be used over an extended period of time, disconnect the power cord and remove the batteries.
These symbols may be found on the device and shall indicate the following:
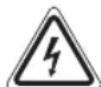
The lightning symbol warns the user of dangerously high voltages inside the case.

The exclamation mark symbol points to important instruction or maintenance remarks in the accompanying guidelines.
Symbols in this user manual
Important notes for your safety are marked distinctively. Pay absolute attention to them to avoid accidents and damage to the device:
WARNING:
Warns of dangers for your health and indicates potential risks of injury.
CAUTION:
Indicates potential dangers for the device or other objects.
NOTE:
Highlights tips and information for you.
Children and disabled persons
- For the safety of your children, keep any packing parts (plastic bags, cartilage, Styrofoam etc.) out of their reach.
WARNING!
Don't let small children play with foils for danger of suffocation!
- This device is not intended for use by persons (including children) with reduced physical, sensory or mental capabilities, or lack of experience and/or knowledge unless they have been given supervision or instructions concerning the use of the device by a person responsible for their safety. Supervise children to ensure they do not play with the device.
Location of Controls
Top
1 Dock 2 button (volume up/next title) 3 button (play/pause) 4 button (previous title/volume down)
Front
5 Pilot lamp / IR receiver for remote control
Back Side (not shown)
DC 12 V Mains power input
AUX IN connectors (3.5 mm stereo jack)
VIDEO OUT jack (RCA)
Remote Control
1 button (On/Off) 2 MENU button 3 MODE button 4 / Authors (iPod/iPhone/iPad music selection)
//buttons auto tune up/down)
5 V-OUT ON/OFF button
6 VOL+ / VOL- buttons (volume) 7 RPT (repeat) button 8 OK button 9 MUTE button 10 play/pause button
Accessories (no image)
Mains power cord
AC adapter
Information about the application
Through the Apple Store we provide you with a free application with the following features.
| A | Internet Radio This will give you access to a variety of radio sta- tions that are distributed over the Internet. |
| Weather Display/Prediction Let you view the latest weather data. | |
| Alarm To set up to four individual alarms. | |
| Audio Media Player Let you create a music playlist. | |
| Photo & Album Function Here you can view a slideshow of your images. | |
| Equalizer Let you set an individual sound. |
NOTE:
Depending on the provider, downloading the app may require payment. For details concerning the application, go to the download portal on our website "www.sli24.de".
First Use of the Device/Introduction
NOTE:
- The device is operated primarily with the remote control. Thus the descriptions refer to the buttons on the remote control. Some buttons are also on the device. Buttons with the same name have the same function.
- The buttons on the device are touch buttons. Touch the keys lightly with a finger to perform the function.
- Select a proper place for the device. A dry, level and slipproof surface is suitable. Make sure the device is vented sufficiently!
- Remove the protective film from the device, if present.
Power supply
- Connect the power cord to the AC adapter. Connect the AC adapter to the DC 12 V jack on the rear of the device.
- Insert the grid plug into a properly installed three-prong socket with 230 V, 50 Hz. Make sure the grid voltage corresponds to the figures on the rating plate.
CAUTION:
The included AC adapter may only be used with this device. Do not use it for other devices. Use only an AC adapter with 12 V (+ → - ⊖). A different AC adapter may damage the unit.
NOTE:
Disconnect from mains power supply during longer periods of non-use.
Pilot lamp (5 on the device)
The flashing or lighting of the pilot lamp depends on the function of the device.
| Pilot lamp Function of the device | |
| Lit red Standby mode | |
| Flashes blue Operation mode without an attached iPod/iPhone/iPad | |
| AUX-IN mode | |
| Lit blue Operation mode with an attached iPod/ iPhone/iPad. |
Insert/Replace Battery in Remote Control
NOTE:
The lithium cell in the battery compartment of the remote control may have been safeguarded for transport with a piece of foil. This extends the life of the battery. Please remove this foil before the first use to make the remote control ready for operation.
- Open the battery compartment on the underside of the remote.
- Replace the cell by a battery of the same type (CR 2032). Check that the polarity is correct (see battery compartment).
- Close the battery compartment.
If the remote is not in use for a lengthy period of time, please remove the battery to prevent the battery acid from "leaking".
WARNING:
- Do not expose batteries to intense heat or direct sunlight. Never throw batteries onto a fire. Danger of explosion!
- Keep batteries out of the reach of children. They are not toys.
- Do not force batteries open.

WARNING:
- Avoid contact with metallic objects. (Rings, nails, screws etc.) Danger of short circuits!
- Short circuits may overheat or even ignite batteries. This may lead to combustion.
- When transporting the batteries, cover the terminals for your safety with an adhesive strip. If a battery leaks, do not rub the fluid into the eyes or the skin. If acid comes into contact with the eyes, rinse with purified water and seek medical advice if symptoms persist.

CAUTION:
Batteries must not be disposed of in the garbage. Please bring used batteries to competent collection centers or back to the dealer.
iPod/iPhone/iPad Compatibility
Due to the large variety of iPod and iPhone/iPad models and generations on the market, full compatibility cannot be guaranteed. Before connecting your iPod/iPhone/iPad, ensure that it has a compatible interface.
Full compatibility of the remote functions also cannot be guaranteed. Operate your iPod/iPhone/iPad as normal, while it sits in the docking station.

NOTE:
Depending on the software version of your iPhone the following error message may be displayed:
"This accessory was not developed for iPhone use. It is possible that noise occurs and signal strength is reduced." In this case press "OK".
General Operation
Switch device on/off
- With the button (1), you can switch the unit between standby and operating mode. In standby, the pilot lamp (5 on the device) lights red.
Volume
By pressing the VOL+VOL- buttons (6) you can adjust the desired volume.

NOTE:
Infrared Remote Control
For wireless control within a distance of 5m If the distance decreases you should change the batteries. For proper operation mind a clear view between the remote control and the sensor on the device.
Sound Settings
Change the EQ setting on your iPod/iPhone/iPad to produce the best sound.
MUTE (9)
For immediate muting of the volume. Press MUTE again to cancel the function.

NOTE:
The activated function cannot be displayed for technical reasons.
Music Playback from iPod/iPhone/iPad
(iPod/iPhone/iPad not supplied)

CAUTION:
Switch off your iPod/iPhone/iPad before you connect it. Refer to the instruction manual of your iPod/iPhone/iPad.
- Insert your iPod/iPhone/iPad into the dock. The device automatically switches to iPod mode.

CAUTION:
Make sure that your iPod/iPhone/iPad is plugged upright into the port. Do not bend or tilt the iPod/iPhone/iPad whilst it is plugged into the port. This may cause damage to the dock or the iPod/iPhone/iPad.
- Playback starts after a short time.
Please be aware that playback can only start if the battery on the unit connected to the socket has been charged to a minimum level.

NOTE:
If you have not yet installed the application, the message "This accessory requires an application you do not have installed. Would you like to install it from the App store?" appears on your iPod/iPhone/iPad. Depending on the provider, downloading the app may require payment. For details in regard to the application, refer to the download portal of our web page → "www.sli24.de".
- Depending on the iPod/iPhone/iPad model, first release the button lock and start playing music if necessary with the play button (10).
- Follow your iPod/iPhone/iPad manual for further use of the controls.

CAUTION:
Switch off the device before you remove the iPod/iPhone/iPad, as otherwise the iPod/iPhone/iPad could be damaged.

NOTE:
If you have an incoming call when playing back music with the iPhone docked, then playback stops and you can hear the ring tone.
Description of iPod/iPhone/iPad Controls
II(10)
You can pause and continue music playback. Press again to continue playback.
(4)
Press 1x = Restart of the song from the beginning.
Press 2x = Skip to the previous song.
Press 3x = Skip to the song before the previous song, etc. Press and hold during playback to search in reverse through the song.

NOTE:
On the device, press the back button (4) momentarily.
(4)
Press to skip to the next song and the following songs. Press and hold during playback to search forward through the song.

NOTE:
On the device, press the + button (3) momentarily.
RPT (7)
Activates the Repeat function.
MENU (2)
Press this button to bring up the iPod/iPhone/iPad Menu or to return to the previous menu.

NOTE:
To do this, the music app must already have been started.
OK (4)
Press this button to activate a function or to display the next menu.
A/V(4)
Press these buttons to scroll up/down the iPod/iPhone/iPad Menu.
iPod/iPhone/iPad Charging
Your iPod/iPhone/iPad battery is charged as soon as the iPod/iPhone/iPad is docked. To do this, the unit must be connected to the mains.
NOTE:
- Not all iPod/iPhone/iPad generations support the charge mode. The duration of the charging process depends on the iPod/iPhone/iPad which is used and its operating condition.
Connect External Devices
The AUX-IN connection is used to connect analog playback devices. You can hear the sound of other playback devices like an MP3 player, a CD player, etc. from the speakers via this jack.
- Connect the external unit with a 3.5 mm stereo plug to the AUX-IN jack on the rear of the device.
- Now select AUX out mode with the MODE button (3). The pilot lamp (5 on the device) flashes blue.
- You will find further instructions in the manual of your external sound source.
- Listen to music playback from external playback devices via the speakers. Press the VOL+/VOL- buttons (6) to set the volume level.
NOTE:
Set the volume of the external device to a reasonable level.
VIDEO OUT jack (rear of the device)
If you have videos stored on your iPod, iPhone, or iPad, you can play them also via this device.
- Connect the video jack of your playback device via cinch cable (RCA) to the VIDEO OUT jack on the rear of the device.
- Turn on your playback device and select the corresponding input. Refer to the operation instructions for your playback device.
During playback of a video, the video picture on the iPod/iPhone/iPad is stopped and is shown on the playback device. The sound comes from the device speakers.
V-OUT ON/OFF (5)
To turn the VIDEO OUT jack on the rear of the device on and off.
On = The Video signal is output to the jack.
Off = The Video signal is only shown on the connected iPod/iPhone/iPad.
Cleaning
Before cleaning disconnect from mains power supply. - Clean the device with a soft damp cloth without detergents. - Do not submerge the device in water.
English
Troubleshooting
| Fault Cause Solution | ||
| Unit cannot be operated. | Unit crashes and “hangs”. | Disconnect from the mains for around 5 seconds. Then switch the unit on again. |
| No sound can be heard. | The device is muted. | Press the MUTE button (9) or the VOL+/- buttons (6) to cancel the function. |
Technical Specifications
Model: IMS 4452
Power Consumption: 45 W
Net weight: approx. 2.2 kg
AC adapter
Protection class: Input: AC 100-240 V~50/60 Hz Output: DC 12 V, 4 A Polarity:
Technical modifications reserved!
This device has been tested according to all relevant current CE guidelines, such as electromagnetic compatibility and low voltage directives, and has been constructed in accordance with the latest safety regulations.
"Made for iPod", "Made for iPhone" and "Made for iPad" mean that an electronic accessory has been designed to connect specifically to iPod, iPhone or iPad and has been certified by the developer to meet Apple performance standards. Apple is not responsible for the operation of this device or its compliance with safety and regulators standards. Please note that the use of this accessory with iPod, iPhone or iPad may affect wireless performance.
Disposal
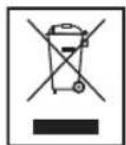
Meaning of the "Wheelie Bin" Symbol
Take care of our environment, do not dispose of electrical appliances via the household waste.
Dispose of obsolete or defective electrical appliances via municipal collection points.
Please help to avoid potential environmental and health impacts through improper waste disposal.
You contribute to recycling and other forms of utilization of old electric and electronic appliances.
Your municipality provides you with information about collecting points.
User manual
Technical modifications reserved!
5 Control lamp / indicator of remote control signal receiver
Power button (not shown)
DC 12 V power input connector
AUX IN connector (stereo 3.5 mm), VIDEO OUT connector (RCA)
Remote control
1 Power button (ON/OFF), 2 MENU button, 3 MODE button, 4 Music selection buttons (iPod/iPhone/iPad), 5 V-OUT ON/OFF button, 6 VOL+ and VOL- buttons (volume), 7 RPT button (repeat), 8 OK button, 9 MUTE button (silence), 10 Play/Pause button
Accessories (not shown)
Power cord
AC adapter
Information about use
We recommend using the device with the original software only.
If you do not intend to use the device for a long time, remove the battery to prevent "leakage" of the battery.

WARNINGS
Do not leave the battery in a hot place or under direct sunlight. Never put the battery in water. There is a risk of explosion! Keep the battery out of reach of children. Do not disassemble the battery. Do not short-circuit the battery contacts with metal objects (such as keys, coins, screws, etc.). There is a risk of short circuit! A short circuit can cause the battery to overheat or even catch fire. This may cause damage. - When transporting the battery, for safety, cover the contacts with insulating tape. - If the battery leaks, wipe it so that the liquid does not get into your eyes or onto your skin. If acid gets into your eyes, rinse them with clean water and, if symptoms persist, see a doctor immediately.

Remove the batteries from the device before cleaning. When inserting batteries, follow the polarity indicated in the battery compartment or return them to the point of purchase.
Compatibility with iPod/iPhone/iPad
Due to the wide variety of models and versions of iPod and iPhone/iPad available on the market, full compatibility is not guaranteed. Before using your iPod/iPhone/iPad, check its compatibility with this device.
Full compatibility of the remote control functions can also be guaranteed. If necessary, for the iPod/iPhone/iPad to work properly, connect it to the docking station.

NOTE.
Depending on the version of the software installed on the iPhone, the following messages about errors may appear.
These accessories are intended for use with the iPhone. Use may lead to signal loss or weakening.
In this case, press the "OK" button.
General information about the device operation
Turning the device on/off
Using the buttons, you can switch between standby mode and operating mode. In standby mode, the control lamp (on the device) lights up in red.
Volume
The volume can be adjusted using the VOL+/VOL- buttons (6).

NOTE.
The device automatically adjusts the volume.
Remote control operation
The remote control uses a CR2032 battery. The operating distance is up to 5 m. If the distance has changed, replace the battery. For normal operation of the remote control, it is necessary that there is no obstacle between it and the device.
Playback of sound
Playback of music from iPod/iPhone/iPad
(iPod/iPhone/iPad are not included in the delivery)

ATTENTION.
Before connecting, turn off the iPod/iPhone/iPad. Read the manual for the iPod/iPhone/iPad.
1. Connect the iPod/iPhone/iPad to the dock. The device will automatically switch to iPod mode.
ATTENTION.
Make sure that the iPod/iPhone/iPad is placed vertically in the dock. Do not press or push the iPod/iPhone/iPad while it is connected to the dock. This may damage the dock or the iPod/iPhone/iPad.
- After a short time, the music will start playing. Note that the music will start only if the battery of the device is sufficiently charged, or if it is connected to the power supply.
NOTE.
If the program is not installed, a message will appear on your iPod/iPhone/iPad: "The device requires a program that is not installed. Install it from the App Store?". Depending on the provider, a fee may be charged for downloading the program. More details about the program can be found on the download portal of our website at "www.sli24.de".
- Depending on the model of the iPod/iPhone/iPad, first unlock the lock and start playing music, if necessary, by pressing the button (10).
- READ THE CONTROL ELEMENTS SECTION FOR iPod/iPhone/iPad. Refer to the user manual for iPod/iPhone/iPad.
ATTENTION.
To connect your iPod/iPhone/iPad, turn on the device, otherwise the iPod/iPhone/iPad may be damaged.
NOTE.
If the iPhone is connected to the dock and during playback an incoming call arrives, playback is interrupted and a ringtone sounds.
Description of the control elements for iPod/iPhone/iPad
(10)
Pause and resume playback. Press once to resume playback.
(4)
1 press = starts playback from the beginning. 1 press = skips to the previous track. 1 press = skips to the track before the previous one, etc. Press and hold during playback to rewind.
NOTE.
Briefly press button (4) on the device.
(4)
Press to skip to the next and subsequent tracks. Press and hold during playback to fast forward.
NOTE.
Press the button (3) on the device.
RPT (7)
Allows you to edit the repeat function.
MENU (2)
Press the button to open the iPod/iPhone/iPad menu or return to the previous menu.
NOTE.
To perform 10, DIO, the program must be started.
OK (4)
Allows you to confirm a function or select the next menu.
A/V (4)
This button is used for scrolling up/down in the iPod/iPhone/iPad menu.
Charging the iPod/iPhone/iPad
The iPod/iPhone/iPad battery is charged when the iPod/iPhone/iPad is connected to the socket. To do this, the device must be connected to the power outlet.
NOTE.
Not all iPod/iPhone/iPad models support the charging mode. The charging time depends on the iPod/iPhone/iPad model and the conditions of use.
External devices
The AUX-IN jack is used to connect external devices for playback. Through this section, you can listen to audio from other devices, such as MP3 players, CD players, etc., using the speakers.
1. Connect the external device with a 3.5 mm stereo plug to the AUX-IN jack on the rear panel of the device. 2. Select the AUX input mode using the MODE button (3). The indicator lamp (5 on the device) will light up. 3. For detailed instructions, refer to the user manual of the external signal source. 4. To listen to music from external devices through the speakers, press the VOL+/VOL- buttons (6) to adjust the volume.

NOTE.
Set the volume of the external device to a reasonable level.
VIDEO OUT jack (rear panel of the device)
If your iPod, iPhone, or iPad has saved video, you can play it through this device.
Using a Cinch (RCA) cable, connect the video output of the playback device to the VIDEO OUT jack on the rear panel of the speaker. - Turn on the playback device and the speaker. See the user manual of the playback device.
The video image from the iPod/iPhone/iPad will be displayed on the playback device's screen. The sound will come from the speaker.
Cleaning
- Before cleaning the device, disconnect it from the power supply.
- Clean the device with a soft, dry cloth, without cleaning agents. Do not immerse the device in water.
Troubleshooting
Indicates a possible danger to persons or surrounding objects.

CAUTION:
Provides information.
Please read the manual carefully.
- For safety reasons, do not leave the packaging (plastic bags, cardboard, polystyrene, etc.) unattended.

WARNINGS!
Do not allow children to play with the plastic film. Danger of suffocation!
This device is not intended for use by persons (including children) with reduced physical, sensory or mental capabilities, or lack of experience and knowledge, unless they have been given supervision or instruction concerning use of the appliance by a person responsible for their safety. Children should be supervised to ensure that they do not play with the appliance.
Layout of elements
Top view
1 Audio input jack 2 Volume increase/Next track button 3 Play/Pause button 4 Previous track/Volume decrease button
52 Russian
Front view
5 Control indicator / IR receiver for remote control (I, IV)
Rear view (not shown)
DC 12 V power input
AUX IN connector (stereo jack 3.5 mm)
VIDEO OUT (RCA)
Remote control
1 Power button (On/Off) 2 MENU button 3 MODE button 4 Buttons for music selection (in iPod/iPhone/iPad) Buttons (tuning up/down) 5 V-OUT ON/OFF button 6 VOL+ and VOL- buttons (volume) 7 RPT button (repeat) 8 OK button 9 MUTE button (mute) 10 Play/Pause button
Accessories (without picture)
Mains power cord
Batteries
Information about the application
Through the Apple Store, a free application is provided with the following components:
Disconnect the device from the mains power if it is not planned to be used for a long period.
Control indicator (on the device)
Depending on the device function, the control indicator flashes or lights continuously.
If you do not plan to use it for a long period, please remove the batteries to prevent acid leakage.
WARNING:
Do not expose batteries to intense heat or direct sunlight. Do not throw batteries into fire. Explosion hazard! Keep batteries out of reach of children. Batteries are not toys. Do not attempt to open a battery. Avoid contact with metal objects (rings, nails, screws, etc.). Short circuit hazard! - In case of a short circuit, overheating and even ignition of batteries is possible. This can lead to an explosion. - When transporting, insulate the battery terminals with adhesive tape to ensure safety. - If battery leakage occurs, do not allow the liquid to get into eyes or onto skin. If acid contacts the eyes, rinse with plenty of water and seek medical help in case of injury symptoms.
CAUTION:
Do not dispose of batteries with household waste. Please take used batteries to a collection center or return them to the retailer.
Compatibility with iPod/iPhone/iPad
Due to the wide variety of iPod and iPhone/iPad models on the market, full compatibility is not guaranteed. Before connecting your iPod/iPhone/iPad, check for a compatible interface.
Full compatibility with docking stations or remote controls is also not ensured. Use your iPod/iPhone/iPad as a remote control when this device is placed in the docking station.
NOTE:
Depending on the version of the iPhone software, the following error message may be displayed:
"This accessory is not designed for use with iPhone. Noise may occur and signal strength may be reduced."
In this case, press "OK".
General operating instructions
Turning the device on/off
- The button (1) switches the device between standby and operating mode. In standby mode, the control indicator (5 on the device) lights up red.
Volume level
Pressing the VOL+ and VOL- buttons (6) allows you to set the desired volume level.
NOTE:
To group the volume on the device, press and hold the button
Remote control
Operate the device from a distance of 5 m. If the working distance decreases, replace the batteries. For proper operation, ensure direct line of sight between the remote control and the sensor on the device.
Sound settings
For the best sound, use the equalizer on iPod/Phone/iPad.
MUTE (9)
Press MUTE to instantly mute the sound. Press MUTE again to cancel the mute and restore the volume.
NOTE:
The active function may not be displayed due to technical reasons.
Playing music from iPod/iPhone/iPad
(iPod/iPhone/iPad not included)
CAUTION:
Before connecting, turn off the iPod/iPhone/iPad. See the iPod/iPhone/iPad user manual.
54
Russian
- Insert the iPod/iPhone/iPad into the dock. The device turns on automatically and plays the iPod.

ATTENTION:
Ensure that the iPod/iPhone/iPad is connected to the port in a vertical position. Do not bend or tilt the iPod/iPhone/iPad after inserting it into the port. This could damage the docking station for the iPod/iPhone/iPad. 2. Playback starts immediately. Please note that playback can only start when the battery is at least minimally charged, with the device connected to the mains socket.
NOTE:
If the app is not yet installed on the iPod/iPhone/iPad, a message will appear: "This accessory requires an app that is not installed. Install the app from the App Store?". Depending on the provider, downloading the app may require payment. Additional information about the app can be found on the download portal of our website at "www.sli24.de".
3. Depending on the iPod/iPhone/iPad model, first unlock the buttons, then, if necessary, start music playback and the remote control (10). 4. Follow the instructions in the manual for the iPod/iPhone/iPad for further configuration of the control unit.
ATTENTION:
Turn off the device before connecting the iPod/iPhone/iPad; otherwise, you could damage the iPod/iPhone/iPad.
NOTE:
When an incoming phone call is received during music playback from an iPhone connected to the docking station, playback will stop and the call signal (ringtone) will be heard.
Description of the controls for iPod/iPhone/iPad (10)
You can pause and resume music playback. Press again to resume playback.
(4)
1 press = repeat playback of the current music track from the beginning. 2 presses = skip to the previous music track.
3 presses = skip to the previous music track, and so on. Press and hold during playback to search backwards through the music tracks.
NOTE:
Briefly press the button (4) on the device.
(4)
Press to go to the next music track. Press and hold during playback to fast-forward through the music tracks.
NOTE:
Briefly press the button (3) on the device.
RPT (7)
Activates the repeat playback function.
MENU (2)
Press this button to enter the iPod/Phone/iPad menu or return to the previous menu.
NOTE:
For this, the application for working with music tracks must be launched.
OK (4)
Press this button to activate the function or display the next menu.
A/V (4)
Press these buttons to scroll up/down in the iPod/iPhone/iPad menu.
Charger iPod/iPhone/iPad
The iPod/iPhone/iPad charger charges the device when the iPod/iPhone/iPad is connected to the mains. For this, the device must be connected to the mains power supply.
NOTE:
Not all generations of iPod/iPhone/iPad support this charging mode. - The charging time depends on the specific iPod/iPhone/iPad model and its condition.
Connecting external devices
The AUX-IN input connection is used for connecting audio players. Through this jack, you can listen to other audio players, such as MP3 players, CD players, etc., through the device's speakers.
- Connect the external device using a 3.5 mm stereo cable to the AUX-IN jack on the back of the device.
- Then select the AUX input mode with the MODE button (3). The control indicator (5 on the device) lights up blue. 3. See the additional instructions in the manual for the external audio device. 4. Listen to music playback from the external device through the speakers. Press the VOL+/VOL- buttons (6) to adjust the volume level.
NOTE:
Set the volume of the external device to an acceptable level.
VIDEO OUT jack (on the back of the device)
If you have video files stored on your iPod, iPhone, or iPad, you can play them on this device.
- Connect the video output of your player device with the supplied cable (RCA) to the VIDEO OUT jack on the back of the device. Turn on the player device and select the corresponding input. Refer to the manual of your player device.
During video playback, the video image on the iPod/iPhone/iPad remains displayed on the player device. The sound is played through the device's speakers.
Cleaning
- Before cleaning, disconnect the device from the mains power supply. Clean the device with a soft, dry cloth without using any cleaning agents. Do not immerse the device in water.
- CONTENTS
- GERMAN
- POLISH
- TABLE OF CONTENTS
- RUSSIAN
- IPOD/IPHONE/IPAD LOADING FUNCTION
- ENGLISH INSTRUCTION MANUAL
- GENERAL SAFETY GUIDELINES
- SYMBOLS IN THIS USER MANUAL
- WARNING
- CAUTION
- NOTE
- CHILDREN AND DISABLED PERSONS
- LOCATION OF CONTROLS
- TOP
- FRONT
- BACK SIDE (NOT SHOWN)
- REMOTE CONTROL
- INFORMATION ABOUT THE APPLICATION
- FIRST USE OF THE DEVICE/INTRODUCTION
- POWER SUPPLY
- PILOT LAMP (5 ON THE DEVICE)
- INSERT/REPLACE BATTERY IN REMOTE CONTROL
- IPOD/IPHONE/IPAD COMPATIBILITY
- GENERAL OPERATION
- SWITCH DEVICE ON/OFF
- VOLUME
- INFRARED REMOTE CONTROL
- SOUND SETTINGS
- MUTE (9)
- MUSIC PLAYBACK FROM IPOD/IPHONE/IPAD
- DESCRIPTION OF IPOD/IPHONE/IPAD CONTROLS
- II(10)
- (4)
- RPT (7)
- MENU (2)
- OK (4)
- A/V(4)
- IPOD/IPHONE/IPAD CHARGING
- CONNECT EXTERNAL DEVICES
- VIDEO OUT JACK (REAR OF THE DEVICE)
- V-OUT ON/OFF (5)
- CLEANING
- ENGLISH
- TECHNICAL SPECIFICATIONS
- AC ADAPTER
- DISPOSAL
- MEANING OF THE "WHEELIE BIN" SYMBOL
- USER MANUAL
- POWER BUTTON (NOT SHOWN)
- ACCESSORIES (NOT SHOWN)
- INFORMATION ABOUT USE
- WARNINGS
- COMPATIBILITY WITH IPOD/IPHONE/IPAD
- GENERAL INFORMATION ABOUT THE DEVICE OPERATION
- TURNING THE DEVICE ON/OFF
- REMOTE CONTROL OPERATION
- PLAYBACK OF SOUND
- PLAYBACK OF MUSIC FROM IPOD/IPHONE/IPAD
- ATTENTION
- DESCRIPTION OF THE CONTROL ELEMENTS FOR IPOD/IPHONE/IPAD
- (10)
- A/V (4)
- CHARGING THE IPOD/IPHONE/IPAD
- EXTERNAL DEVICES
- VIDEO OUT JACK (REAR PANEL OF THE DEVICE)
- TROUBLESHOOTING
- PLEASE READ THE MANUAL CAREFULLY
- LAYOUT OF ELEMENTS
- TOP VIEW
- FRONT VIEW
- CONTROL INDICATOR (ON THE DEVICE)
- GENERAL OPERATING INSTRUCTIONS
- VOLUME LEVEL
- PLAYING MUSIC FROM IPOD/IPHONE/IPAD
- DESCRIPTION OF THE CONTROLS FOR IPOD/IPHONE/IPAD (10)
- CHARGER IPOD/IPHONE/IPAD
- CONNECTING EXTERNAL DEVICES
- VIDEO OUT JACK (ON THE BACK OF THE DEVICE)
Brand : AEG
Model : IMS 4452
Category : Docking station