
BSS 4800 - Docking station AEG - Free user manual and instructions
Find the device manual for free BSS 4800 AEG in PDF.
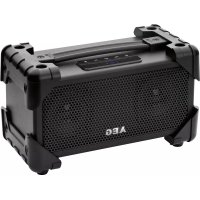


| Product type | Docking station / portable hi-fi system with Bluetooth |
| Brand | AEG |
| Model | BSS 4800 |
| Net weight | Approx. 1.86 kg |
| Mains power supply | AC 100-240V~ 50/60Hz adapter, DC 5V output, 2.5A |
| Battery power supply | 6 AA/R6 1.5V batteries (not included) |
| Power consumption | 12.5W |
| Output power | 75W PMPO |
| Protection class | III |
| Wireless technology | Bluetooth V2.0 + EDR, range 10-15 meters |
| Supported Bluetooth profiles | A2DP 1.2, AVRCP |
| Bluetooth transmission frequency | 2.4 GHz |
| Audio inputs | AUX IN jack (3.5 mm stereo) |
| Controls | On/off, play/pause, next/previous track, volume +/-, standby |
| Indicator lights | Bluetooth indicator, power indicator |
| Automatic standby function | After approximately 5 minutes without signal |
| Cleaning | Soft damp cloth without detergent; do not immerse |
| Important safety instructions | Do not expose to water, moisture, heat sources; do not open the casing; use only the supplied adapter |
| Repairability | Have repaired by a qualified technician; damaged cord must be replaced by the manufacturer or an authorized service |
| Supplied accessories | Mains adapter, audio cable not included |
| Instructions available in | French, English, German, Spanish, Dutch, Polish, Russian, Ukrainian, etc. |
Frequently Asked Questions - BSS 4800 AEG
User questions about BSS 4800 AEG
0 question about this device. Answer the ones you know or ask your own.
Ask a new question about this device
Download the instructions for your Docking station in PDF format for free! Find your manual BSS 4800 - AEG and take your electronic device back in hand. On this page are published all the documents necessary for the use of your device. BSS 4800 by AEG.
USER MANUAL BSS 4800 AEG
D Bluetooth Sound System
NL Bluetooth sound system
Disposal. Page 16
Spanish
Contents
Location of Controls . Page 3
Instruction Manual.. Page 25
Technical Specifications . Page 28
Disposal. Page 28
Polish
Table of contents
Location of controls 3
Instruction manual.. page 38
Technical specifications page 41
Russian
Location of Elements, page 3
Operating Manual, page 42
Technical Specifications, page 45
Location of Controls
Cordless via Bluetooth
Thank you for choosing our product. We hope you will enjoy using the appliance.
Symbols in these Instructions for Use

WARNING:
Warns of dangers for your health and indicates potential risks of injury.

CAUTION:
Indicates potential dangers for the device or other objects.

NOTE:
Highlights tips and information for you.
General Safety Guidelines
Before using this device, carefully read this user manual and keep it together with the Warranty Certificate, cashier receipt and if possible, the original package inclusive its interior packing. If you hand on the device to any third person, include the user manual as well.
- To avoid the risk of fire or electric shock, you should not expose the device to rain or humidity. Do not use the device near water (e.g. bathroom, swimming pool, humid cellars).
- Do not use the unit in extremely hot, cold, dusty, or damp places. The unit is designed solely for private use and its intended purpose. This unit is not designed for commercial use. Make sure that the power cable is not bent, pinched, or comes into contact with heat sources. Make sure that the power cable is not a tripping hazard. The power supply is only suitable for use in dry rooms.
- Only connect the power supply to a properly installed socket. Ensure that the specified voltage matches the voltage of the socket. Also check to make sure that the output current and the polarity of the power supply match the information on the connected device.
- Do not touch the power supply with wet hands! The mains plug must always be easily accessible. Always install batteries in the correct direction.
- Avoid covering the device's vent openings.
- Never cover the vent holes with objects, such as magazines, tablecloths, curtains etc.
- This appliance shall not be exposed to dripping or splashing water and that no object filled with liquids such as vases shall be placed on apparatus.
- Open sources of fire, such as e.g. burning candles may not be placed onto the unit.
- Never open the device's case. Improper repairs can cause severe danger to the user. If the device or particularly the power cord is damaged, don't use the device any further and have it repaired by a qualified specialist. Check the power cord regularly for damages.
- To avoid any danger, a damaged power cord must be replaced only by the producer, its customer service or a similarly qualified person with an equal cord.
- If the device won't be used over an extended period of time, disconnect the power cord and remove the batteries.
These symbols may be found on the device and shall indicate the following:
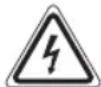
The lightning symbol warns the user of dangerously high voltages inside the case.

The exclamation mark symbol points to important instruction or maintenance remarks in the accompanying guidelines.
Children and disabled persons
- For the safety of your children, keep any packing parts (plastic bags, cartilage, Styrofoam etc.) out of their reach.

WARNING!
Don't let small children play with foils for danger of suffocation!
- This device is not intended for use by persons (including children) with reduced physical, sensory or mental capabilities, or lack of experience and/or knowledge unless they have been given supervision or instructions concerning the use of the device by a person responsible for their safety. Supervise children to ensure they do not play with the device.
Location of Controls
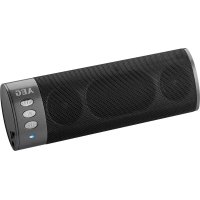
1 button (play/pause / On/Off) 2 Battery compartment 3 buttons (next/previous track) 4 DCIN socket 5 +/- buttons (increase/decrease volume) 6 AUX IN socket 7 ON/OFF switch 8 Flexible carrying handle 9 Bluetooth indicator lamp 10 Power indicator lamp
First Use of the Device/Introduction
- Select a proper place for the device. A dry, level and slip proof surface is suitable. Make sure the device is vented sufficiently!
- Remove the protective film from the device, if present.
Power supply
- Insert the grid plug into a properly installed three prong socket with 230V, 50Hz. Connect the device with the plug connector by inserting its plug into the DC IN 5V jack of the device.
- Make sure the grid voltage corresponds to the figures on the rating plate.
CAUTION:
The included AC adapter may only be used with this device. Do not use it for other devices. Use only an AC adapter with 5V (⊕ → -⊖). A different AC adapter may damage the unit.
NOTE:
Disconnect from mains power supply during longer periods of non-use.
Battery Operation (Batteries not supplied)
- Open the lid of the battery compartment on the rear side.
- Insert the 6 batteries type AA/R6 1.5 V. Observe the correct polarity (see bottom of battery compartment)!
- Close the battery compartment.
Should the device not be used for a long periods, remove the batteries, to prevent any "leakage".
WARNING:
Do not expose the batteries to intense heat, such as sunlight, fire or similar. Danger of explosion!
CAUTION:
- Different battery types or new and used batteries may not be used together.
- Batteries must not be disposed of in the garbage. Please bring used batteries to competent collection centers or back to the dealer.
General Operation
Turning the device on/off (7)
- Turn the device on by setting the ON/OFF switch to the "ON" position on the rear side of the device.
- To turn off the device, set the ON/OFF switch to the "OFF" position. Then, disconnect the device from the mains.
NOTE:
After about 5 minutes without signal, the device will automatically switch to standby.
Standby-/Operating mode
After you have turned on the device with the ON/OFF switch (7), press the button (1) to switch the device into the operating mode. The indicator lamp (10) will light up in operating mode. To switch the device into standby mode, you need to keep the button pressed down.
Volume
By pressing the +/ buttons (5) you can adjust the desired volume.
Sound Settings
If necessary, change the EQ setting in your playback unit to create the best sound.
Playing back music files
You have two options to playback your own music data with the device: Wired or wireless via Bluetooth.
By cable (Cable not included)
- Connect the 3.5 mm stereo RCA cable to an external audio source. If required, use a suitable adapter (not included).
- Insert the other end of the cable into the AUX-IN jack (6) on the unit. The device switches automatically into AUX mode.
- Start the playback of your audio source. Listen to the sound playback via the speaker. You can adjust the volume using the +/− buttons (5).
- For the further procedure, please refer to the user manual of the external audio source.
NOTE:
If possible, adjust the volume of the external unit to a comfortable level.
Cordless via Bluetooth
Bluetooth involves a technology for wireless radio connection of devices over a short distance. Devices with Bluetooth standard are transmitting between 2.402 and 2.480GHz in the ISM band (Industrial, Scientific and Medical). Interference can be caused for example by WLAN-networks, DAB radios, cordless phones, or microwave ovens which work on the same frequency band.
This device offers you the possibility to use a Bluetooth-enabled device. The functional radius is limited to approx. 15 metres depending on the surroundings and the unit used. If your playing device supports the A2DP profile (Advanced Audio Distribution Profile) and has a music-player function, then you can also wirelessly transfer music to the device. The A2DP profile involves a multi-vendor Bluetooth profile. By streaming, stereo-audio signals are wirelessly transferred between the playing device (source) and the receiving device. To be able to remotely control the source, the playback device must support the AVRCP profile (Audio Video Remote Control Profile).
Due to the different device manufacturers, models, and software versions, a full functionality cannot be guaranteed.
- Logging on devices (Pairing)
Before you listen to music via the unit, you must pair the devices.
- Ensure, that the Bluetooth function is activated in your player (e.g. mobile phone). For this, refer to the operation manual of your player.
- After turning it on, the indicator lamp (9) will flash to show that the device is in pairing mode.
- Chose the Bluetooth menu in your player and register the device in your player. For this, refer to the operation manual of your player. The device "AEG BSS 4800" will show in your player as a selection.
NOTE:
Only one playback unit can be connected to the speaker. If the speaker is already connected to another playback unit, the speaker will not appear in the BT selection menu.
- Now enter the password "0000" in your player, depending on the device manufacturer, model, and software version.
If pairing was done successfully, you will hear a beep and the indicator lamp (9) will light up.
For the further procedure, please refer to the user manual of the playback unit. If possible, adjust the volume of the external unit to a comfortable level.
NOTE:
Depending on the device manufacturer, you may need to perform the registration (PAIRING) again to connect the devices. Bluetooth compatibility cannot be ensured for devices (e.g., mobile phones) released in the future. To ensure an optimal connection, make sure that the battery of your player is completely charged. Some mobile phone brands have an energy-saving mode. Deactivate the energy-saving mode as it can otherwise result in problems during data transfer through Bluetooth.
NOTE:
To be able to transfer audio data, Bluetooth needs to stay activated in your player. Observe the operation manual of your player. If a mobile phone on which you are playing music receives a call, the music will be interrupted. The sound, however, is not played back via the speaker. After you have ended the call, the devices are connected to each other again and playback continues. The volume increases slowly.
Description of the controls
(1)
You can pause and continue music playback. Press again to continue playback.
NOTE:
Your playback device must support this function. Depending on the device, the music app must be started in your playback device in advance.
(3)
Press 1x = The current track will restart from the beginning.
Press 2x = Skip to the previous song.
Press 3x = Skip to the song before the previous song.
If you keep the button pressed down, a music scan will start. The sound will be muted in the process.
(3)
Press to skip to the next song and the following songs.
If you keep the button pressed down, a music scan will start. The sound will be muted in the process.
Cleaning

CAUTION:
Do not submerge the device in water.
Before cleaning disconnect from mains power supply. - Clean the device with a soft damp cloth without detergents.
Troubleshooting
| Fault Cause Solution | ||
| Unit cannot be operated. | Unit crashes and “hangs”. | Disconnect from the mains for around 5 seconds. Then switch the unit on again. |
28 English
| Fault Cause Solution | ||
| No audio signal via the Bluetooth connection | Speaker is not paired to the audio source. | Check whether a connection exists. If necessary, pair the speaker again to the audio source. |
| Volume too low | Increase the volume on the speaker | |
| Increase the volume on the audio source. | ||
| Audio cable is connected | Remove the cable from the AUX IN socket (6). | |
| Speaker cannot be connected | Pairing does not work | Check whether the audio source supports the A2DP protocol. |
| Audio source is switched off | Switch on the audio source | |
| Bluetooth is switched off at the audio source. | Switch on the Bluetooth function in the audio source. | |
| Bluetooth version is not supported. | Use a different playback unit. | |
Technical Specifications
Model: BSS 4800
Power supply (AC adapter): DC 5V, 2.5A-0-
Battery operation: 6x 1.5 V, Type AA/R6
Power output: 75 W PMPO
Power consumption: 12.5 W
Protection class: III
Net weight: approx. 1.86 kg
AC adapter
Protection class:
Input: AC 100-240 V~50/60 Hz
Output: DC 5V, 2.5A
Polarity:
Bluetooth
Bluetooth support: V2.0 + EDR
Range: approx. 10-15 metres
Transmission frequency: 2.4 GHz
Protocols: A2DP 1.2
The right to make technical and design modifications in the course of continuous product development remains reserved.
This device has been tested according to all relevant current CE guidelines, such as electromagnetic compatibility and low voltage directives, and has been constructed in accordance with the latest safety regulations.
Disposal
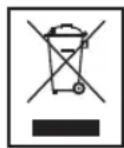
Meaning of the "Wheelie Bin" Symbol
Take care of our environment, do not dispose of electrical appliances via the household waste.
Dispose of obsolete or defective electrical appliances via municipal collection points.
Please help to avoid potential environmental and health impacts through improper waste disposal.
You contribute to recycling and other forms of utilization of old electric and electronic appliances.
Your municipality provides you with information about collecting points.
Power source (AC adapter): DC 5 V, 2.5 A
CTC Clatronic Sp. z o.o


Do not use the device near water or other objects.

ATTENTION.
External markings and information for the user.
General safety instructions.
Before using the device, carefully read this user manual and keep it together with the device, its warranty card, and, if possible, the original packaging including the contents. If you pass the device on to someone else, also pass on the user manual.
To avoid hazards from electric current, do not place the device under water or in a wet place. Do not use this device near water (for example, in a bathroom, shower, or damp rooms). Do not use the device in places where the ambient temperature is very high or low, or in dusty or humid places. - The device is intended for household use only. Use the device only as intended. It is not intended for commercial use. - Make sure that the power cord is not bent, pinched, or in contact with heat sources. - Ensure that the power cord can be easily unplugged in case of danger. - The power source should only be used in a dry place. Plug the power source into a properly installed outlet. Pay attention that the specified voltage matches the outlet voltage. Also check that the current type and the power source polarity match the information on the device. Do not touch the power source with wet hands! Keep the power cord accessible. Insert the batteries with the correct polarity. Do not cover the ventilation openings of the device. Do not cover the ventilation openings with any objects, such as newspapers, tablecloths, or curtains.
Avoid contact of the device with water, drops, or splashes, and do not place containers with water on it, such as vases with flowers. Do not place the device near open flames, such as lit candles. Never disassemble the device housing. Improper repair of the device poses a risk to the user. If the device or the power cord is damaged, stop using the device and have it repaired by a qualified specialist. Regularly check the power cord for damage. If the power cord is damaged, it must be replaced with an equivalent cord at a service center or by a qualified specialist. If the device will not be used for a long time, unplug the power cord and remove the batteries.
The device may have symbols that warn about the following.
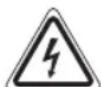
The lightning symbol warns of dangerous voltage inside the housing.

The exclamation mark symbol indicates important instructions or rules for the technical maintenance of the device, which are included with the device.
Special requirements for disposal.
To avoid danger to children, keep packaging materials (plastic boxes, polyethylene, foil, etc.) out of their reach.

WARNING.
Do not allow small children to play with the foil, as there is a risk of suffocation!
Intended for use by persons (including children) with reduced physical, sensory or mental capabilities, or lack of experience and/or knowledge, unless they have been given supervision or instruction concerning use of the appliance by a person responsible for their safety. Children should be supervised to ensure that they do not play with the appliance.
CONTROL ELEMENTS
1 Button (ON/OFF) 2 Battery compartment 3 Buttons (play/pause) 4 LED indicator 5 Buttons +/- (volume up/down) 6 AUX IN jack
7 Switch ON/OFF
8 Handle for carrying
9 Bluetooth indicator
10 Power indicator
Using the device for the first time
Choose a suitable place for the device. It should be a flat, dry, non-slip surface. - Make sure the ventilation openings are not blocked! Remove the protective film from the device, if present.
POWER SUPPLY
Plug the power adapter into a properly installed 230V, 50Hz socket. Connect the adapter to the DC IN 5V jack on the device. Make sure the mains voltage matches the value in the technical data table.
WARNING.
Only use the AC adapter supplied with this device. Do not use it with other devices. Use only a 5V DC adapter (⊕ → -⊖). An unsuitable adapter may damage the device.
NOTE.
Disconnect the device from the power supply if you do not use it for a long period of time.
Operation of the battery (battery not included)
On the back side of the device, open the battery cover. Insert a 1.5 V AA/R6 battery. Observe the correct polarity (the positive terminal should be at the bottom of the battery compartment)! Close the battery cover.
If the device is not used for a long time, remove the battery to prevent it from leaking.
WARNING.
Avoid exposure to high temperatures, such as near a stove, fire, or direct sunlight, as there is a risk of explosion.
ATTENTION.
Do not mix different types of batteries or new batteries with old ones. Do not dispose of batteries with household waste. Dispose of used batteries at designated collection points or return them to the point of sale.
General information about the device operation
TURNING ON/OFF the device
- To turn on the device, set the ON/OFF switch on the side of the device to the "ON" position. To turn off the device, set the ON/OFF switch to the "OFF" position. The device will be disconnected from the mains.
NOTE.
After 5 minutes of inactivity, the device switches to standby mode.
Standby mode/Operating mode
After turning on the device with the ON/OFF switch (7), press the button (1) to activate the operating mode. The indicator (10) will light up in operating mode. To switch the device to standby mode, press and hold the button
Frequency
The volume can be adjusted using the +/-(5) buttons.
Sound adjustment
Press the button to turn on the device with the best sound quality.
Playback of music files
There are two ways to play music files using the device: wired or wireless via Bluetooth.
Wired method (cable not included)
1. Connect the 3.5 mm stereo cable RCA to the external audio source. If necessary, use the appropriate adapter (not included). 2. Insert the other end of the cable into the AUX-IN (6) jack on the device. The device will automatically switch to AUX mode. 3. Start playback on the audio source. The sound will be played through the speakers. The volume can be adjusted using the +/-(5) buttons. 4. For detailed instructions, refer to the manual of the external audio source.
NOTE.
If necessary, adjust the volume level on the external device.
Wireless method via Bluetooth
Bluetooth uses wireless radio technology for short-range communication with devices. Devices with Bluetooth function use the frequency 2.402 to 2.480 GHz in the ISM (Industrial, Scientific and Medical) band. Interference may be caused by signals from WLAN networks, DAB radio, wireless telephones, microwave ovens, and other devices operating in the same frequency range.
The device ensures compatibility with other Bluetooth devices. The range is limited to approximately 15 meters depending on the environment and the device used.
If your device supports the A2DP profile (Advanced Audio Distribution Profile) and has a music playback function, you can also transmit music files wirelessly to the device. The A2DP profile is used by many brands. For stereo audio transmission via wireless method between the playback device (source) and the receiving device, the playback device must support the AVRCP profile (Audio Video Remote Control Profile) to control the source signal.
We cannot guarantee full functionality because there are many manufacturers of devices, models, and software versions.
Device registration (pairing)
If the device is to be used for listening to music on a trial basis, it is recommended to pair it first.
- Make sure that the Bluetooth function is enabled on the player (e.g., on a mobile phone). Refer to the player's user manual. 2. The indicator (9) will blink according to the pairing mode.
- Select Bluetooth on the player and search for the device on the player. Refer to the device's user manual. The device "AEG BSS 4800" will be displayed on the player and selected.
NOTE.
You can connect only one device at a time. If a device is already connected, it will be disconnected when a new device is connected.
- Enter the PIN "0000" on the player, taking into account the device manufacturer and the software version.
After a successful connection, a sound signal will be emitted and the indicator (9) will light up.
For correct operation, refer to the device's user manual. If possible, set the required volume on the external device.
NOTE.
Depending on the device manufacturer, the device may need to be re-registered (paired) again. We cannot guarantee compatibility with Bluetooth devices (e.g., mobile phones) that will be released in the future. To ensure an optimal connection, make sure that the player's software is up to date. Some mobile phones have an energy-saving function. Disable this function, as it may cause problems with data transmission via Bluetooth. - To play audio, enable Bluetooth on the player. Refer to the player's user manual. If the device on which the music is played receives a call, playback will be interrupted. The sound will not be played through the speaker. After the call ends, the devices will reconnect, and playback will continue. The volume level will be gradually restored.
Description of control elements
(1)
Pause and resume music playback. Press once to pause, press again to resume playback.
NOTE.
The playback device can control this function. Depending on the device and the playback program, playback may be started or paused on the device.
(3)
PRESS AND HOLD = TURN ON THE DEVICE FROM THE BEGINNING. PRESS = SKIP TO THE PREVIOUS TRACK. PRESS = SKIP TO THE NEXT TRACK. PRESS AND HOLD THE BUTTON, RELEASE TO PLAY MUSIC. THE SOUND WILL BE TURNED OFF.
(3)
PRESS TO SKIP TO THE NEXT TRACK AND THE FOLLOWING TRACKS.
- PRESS AND HOLD THE BUTTON, RELEASE TO PLAY MUSIC. THE SOUND WILL BE TURNED OFF.
TURNING OFF

CAUTION.
DO NOT IMMERSE THE DEVICE IN WATER.
BEFORE CLEANING THE DEVICE, DISCONNECT IT FROM THE POWER SUPPLY. CLEAN THE DEVICE WITH A SOFT, DRY CLOTH WITHOUT SOLVENTS FOR CLEANING.
TROUBLESHOOTING
AC/DC adapter: 2.5A- C-
Battery operation: 6x1.5V, type AA/R6
Output power: 75 W PMPO
Frequency: 12.5 W
Protection class: III
Bara hETTO: npn61.1,86Kr
AadTep 3miHHoro CTpyM
Klac 6e3ne:
KINBHeHHHa BxOJI:……3MiHHH CTpyM 100-240 B~50/60 T
KINBHeHnHa BxO:IOCTiHm CTpyM 5B,2,5A
PonpaHicTB:
Bluetooth
Пдтпмьанва ВерсьBluetooth: V2.0 + EDR
JaIbHicTb Ii: npn6n.10-15 metpiB
Yactota nepeaabaHna: 2,4T
IpoToKoJI: A2DP 1.2
IpaBOHaTexHnHi3MInTu 3MiHNyDn3aHi 36epiraetbca npoDBK npouecy p03pO6Kn npOkykTy.
Ley npctpi BIDOBiAe BCIM DIOHMM INpeKTnBam PaN CBpO, 3OKpema LDO eIEKTPomarHITHOI cyMICHOCTI i INpeKTIbI ODO Hn3bKOi Hanpyr, Ta Bnpo6neHm BiDNOBIDHO DO OCTAHIX BIMOR 6e3neKn.
PykoBoDcTBo nO 3KcnIyatauIN
Cnacnbo 3a BbIbOp HaWero npOyKta. Haneemcra, OH Bam noHpabNTca.
Symbols used in this user manual

WARNING:
Warns of danger to health and possible risk of injury.

CAUTION:
Indicates a possible danger to the device or other objects.

NOTE:
Provides advice or information.
General safety instructions
Before starting to use the device, carefully read the attached operating instructions. Keep them in a safe place, together with the warranty card, cash receipt, and, if possible, the cardboard packaging material. If you give the device to someone else to use, be sure to give them these operating instructions.
To prevent fire or electric shock, do not expose the device to rain or moisture. Do not use the device near water (e.g., in a bathroom, pool, or on a wet surface). Do not use the device in extremely hot, cold, dusty, or humid places. Use the device only as intended. The device is not intended for commercial use. Make sure the power cord is not bent, damaged, or in contact with heat sources. Make sure the power cord is not pinched. Connect the device to the mains only in dry rooms. Connect the plug only to a properly installed socket. Make sure the mains voltage matches that indicated on the device's rating plate. Also check that the output current and polarity match the information indicated on the device. Do not touch the power cord with wet hands! The power plug must be accessible. When installing batteries, observe polarity.
Do not allow the ventilation openings of the device to be blocked. Do not cover the ventilation openings with foreign objects, such as newspapers, tablecloths, curtains, etc. Do not expose the device to dripping or splashing water, and do not place containers with liquids on the device. Sources of open flame, such as candles, should not be placed on the device. Do not open the device's housing. Incorrect repair may lead to serious danger to the user. If the device or its power cord is damaged (in particular), stop using the device and have it repaired by a qualified specialist. Regularly check the power cord for damage. To eliminate any danger, a damaged power cord must be replaced by the manufacturer, its service department, or a similarly qualified person with an identical power cord. If the device will not be used for an extended period, disconnect the power cord and remove the batteries.
The following symbols may be indicated on the device and in the designations:

The lightning symbol warns the user of dangerous high voltage inside the housing.

The exclamation mark symbol highlights important instructions or notes on technical maintenance in the supplied documentation.
The device requires inspection
- For safety reasons, do not leave the device packaging (plastic bags, cardboard, foam, etc.) unattended.

WARNINGS
Do not allow children to play with the polyethylene film. Danger of suffocation!
This device is not intended for use by persons (including children) with reduced physical, sensory, or mental capabilities, or lack of experience and knowledge, unless they are supervised by a person responsible for their safety or have received instructions on how to use the device. It is necessary to supervise children to ensure they do not play with the device.
Layout of components
1 Button (Play/Pause)/On/Off 2 Battery compartment 3 Buttons (Next/Previous track) 4 DC IN connector 5 Buttons +/-(Increase/Decrease volume) 6 AUX IN connector 7 Power switch ON/OFF 8 Roller for track selection 9 Bluetooth indicator lamp 10 Power indicator lamp
First use of the device / Introduction
Choose a suitable location for the device. The surface should be dry and non-slip. - Make sure there is enough space for the device! Remove the protective film from the device, if any.
Power supply
Insert the mains plug into a properly installed three-pin mains socket 230 V, 50 Hz. Connect the power cable to the mains adapter. Plug the mains adapter into the DC IN 5V socket on the device. - Make sure the mains voltage matches the value indicated on the rating plate.

ATTENTION:
- The mains adapter may only be used with this device. Do not use it with other devices. Plug the mains adapter only into the 5V socket (→ -). Connecting another mains adapter may damage the device.

NOTE:
Disconnect the device from the mains power supply if it is not used for an extended period.
Battery operation (batteries not included)
- Open the battery compartment cover on the back of the device. Insert 1.5 V AA/LR6 batteries. When inserting batteries, observe the correct polarity (see the mark inside the battery compartment)! Close the battery compartment.
If the device is not used for an extended period, remove the batteries from it, as they may leak.

WARNING:
Do not expose batteries to strong heat sources, such as direct sunlight, fire, or similar. Danger of explosion!

CAUTION:
Do not use batteries of a different type, and do not mix old and new batteries. Do not dispose of batteries with household waste. Please take used batteries to a collection point or return them to the retailer.
General operating instructions
Turning the device on/off (7)
Turn on the device by setting the ON/OFF switch on the back of the device to the "ON" position. To turn off the device, set the ON/OFF switch to the "OFF" position. Then disconnect the device from the mains.

NOTE:
After about 5 minutes of operation without receiving a signal, the device automatically switches to standby mode.
Operating mode / Standby mode
After turning on the device with the ON/OFF switch (7), press the button (1) to switch the device to operating mode. The indicator lamp (10) will light up in operating mode. - To switch the device to standby mode, press and hold the button
Volume level
Pressing the +/5 buttons allows you to set the desired volume level.
Sound settings
If necessary, change the equalizer setting on the playback device to obtain the desired sound.
Playback of audio sources
You can choose one of two options for listening to your own music concert: via a wired connection or via Bluetooth.
Wired connection (cable not included)
- Connect the cable with a 3.5 mm stereo RCA plug to the external audio source. If necessary, use a RCA adapter (not included in the delivery).
44
Russian
- Insert the other end of the cable into the AUX-IN jack (6). The device automatically switches to AUX mode.
- Start playback on the audio source. Listen to the playback through the speaker. You can adjust the volume level with the buttons 4 (5). 4. Further instructions, if necessary, see the operating manual for the external audio source.

NOTE:
If possible, set the volume of the external device to a comfortable level.
Bluetooth wireless connection
Bluetooth operates on the basis of wireless radio communication between devices over a short distance. Devices with the Bluetooth standard transmit data at frequencies from 2.402 to 2.480 GHz, in the ISM band (Industrial, Scientific and Medical). Interference may be caused by, for example, wireless local area networks (WLAN), radio stations, wireless telephones, and microwave ovens operating in a similar frequency range. This device allows you to connect with devices that support Bluetooth. The range of action is limited to approx. 15 meters, depending on external conditions and the block used.
If the playback device supports the A2DP profile (Advanced Audio Distribution Profile, an enhanced audio distribution profile) and has the functions of a music player, then you can transmit music to the speaker wirelessly. The A2DP profile ensures coordination of Bluetooth devices from different manufacturers. Due to the streaming of data, stereo audio signals are transmitted wirelessly between the playback device (source) and the receiving device. In order to remotely control the source, the playback device must support the AVRCP profile (Audio Video Remote Control Profile).
Due to differences in device designs from various manufacturers, models, and software versions, the operation of all functions is not guaranteed.
Pairing the device with the system (creating a pair)
Before using the music player, it is necessary to ensure the pairing mode between the devices.
- Check that the Bluetooth function is activated on the player (for example, on a mobile phone). For this, see the operating instructions for this player.
- After switching on, the indicator lamp (9) will start flashing, indicating that the device is in pairing mode.
- Select the Bluetooth menu on the player and register the device there. For this, see the operating instructions for the player. The device "AEG BSS 4800" will be shown on the player as a selected device for pairing.

NOTE:
Only one playback unit can be connected to the dynamic. If the dynamic is already connected to another playback unit, the dynamic will not appear in the selection menu for the audio source.
- Then enter the password "0000" on the player, depending on the manufacturer, model, and software version.
If the connection is established successfully, a sound signal will be emitted and the indicator lamp (9) will light up. For further instructions, please refer to the operating instructions of the playback device. If possible, adjust the volume of the external device to a comfortable level.

NOTE:
Depending on the manufacturer, repeated registration (pairing) may be required when connecting the device. Compatibility with Bluetooth is not guaranteed for devices (for example, mobile phones) that may be released in the future. - To ensure optimal connection, make sure that the batteries in the player are fully charged. Some mobile phone models have an energy-saving mode. It must be disabled, otherwise it may cause problems when sending data via the Bluetooth connection. The audio transmission function via Bluetooth must remain activated on the player. See the operating instructions for this player. If a mobile phone that plays music receives a phone call, the music transmission will be interrupted. However, the call will not be transmitted to the dynamic. After the call ends, the devices will reconnect and playback will continue. The volume level increases slowly.
Description of the controls
(1)
Press pause and then press play again to resume playback. Press again to resume playback.
NOTE:
Your playback device must support this function. Depending on the device, your music program may need to be started beforehand.
(3)
1st press = Current track restarts from the beginning. 2nd press = Jumps to the previous music track. 3rd press = Jumps to the track before the previous one, etc.
If you hold down the button, fast search of music will be activated. Mute mode will be enabled.
(3)
Press the skip button to go to the next music track, etc.
If you hold down the button, fast search of music will be activated. Mute mode will be enabled.
Cleaning
CAUTION:
Do not immerse the device in water.
- Disconnect the device from the power outlet before cleaning. Clean the device with a soft dry cloth without using cleaning agents.
Diagnostics
- SPANISH
- CONTENTS
- POLISH
- TABLE OF CONTENTS
- RUSSIAN
- CORDLESS VIA BLUETOOTH
- SYMBOLS IN THESE INSTRUCTIONS FOR USE
- WARNING
- CAUTION
- NOTE
- GENERAL SAFETY GUIDELINES
- CHILDREN AND DISABLED PERSONS
- LOCATION OF CONTROLS
- FIRST USE OF THE DEVICE/INTRODUCTION
- POWER SUPPLY
- BATTERY OPERATION (BATTERIES NOT SUPPLIED)
- GENERAL OPERATION
- TURNING THE DEVICE ON/OFF (7)
- STANDBY-/OPERATING MODE
- VOLUME
- SOUND SETTINGS
- PLAYING BACK MUSIC FILES
- BY CABLE (CABLE NOT INCLUDED)
- LOGGING ON DEVICES (PAIRING)
- DESCRIPTION OF THE CONTROLS
- (1)
- (3)
- CLEANING
- TROUBLESHOOTING
- ENGLISH
- TECHNICAL SPECIFICATIONS
- AC ADAPTER
- BLUETOOTH
- DISPOSAL
- MEANING OF THE "WHEELIE BIN" SYMBOL
- ATTENTION
- GENERAL SAFETY INSTRUCTIONS
- SPECIAL REQUIREMENTS FOR DISPOSAL
- CONTROL ELEMENTS
- USING THE DEVICE FOR THE FIRST TIME
- OPERATION OF THE BATTERY (BATTERY NOT INCLUDED)
- GENERAL INFORMATION ABOUT THE DEVICE OPERATION
- TURNING ON/OFF THE DEVICE
- STANDBY MODE/OPERATING MODE
- FREQUENCY
- SOUND ADJUSTMENT
- PLAYBACK OF MUSIC FILES
- WIRED METHOD (CABLE NOT INCLUDED)
- WIRELESS METHOD VIA BLUETOOTH
- DEVICE REGISTRATION (PAIRING)
- DESCRIPTION OF CONTROL ELEMENTS
- TURNING OFF
- AADTEP 3MIHHORO CTPYM
- PYKOBODCTBO NO 3KCNIYATAUIN
- SYMBOLS USED IN THIS USER MANUAL
- THE DEVICE REQUIRES INSPECTION
- WARNINGS
- LAYOUT OF COMPONENTS
- FIRST USE OF THE DEVICE / INTRODUCTION
- GENERAL OPERATING INSTRUCTIONS
- OPERATING MODE / STANDBY MODE
- VOLUME LEVEL
- PLAYBACK OF AUDIO SOURCES
- WIRED CONNECTION (CABLE NOT INCLUDED)
- BLUETOOTH WIRELESS CONNECTION
- PAIRING THE DEVICE WITH THE SYSTEM (CREATING A PAIR)
- DIAGNOSTICS
Brand : AEG
Model : BSS 4800
Category : Docking station