ASPI-ROBOTW10 - Robot vacuum DREAME - Free user manual and instructions
Find the device manual for free ASPI-ROBOTW10 DREAME in PDF.

Download the instructions for your Robot vacuum in PDF format for free! Find your manual ASPI-ROBOTW10 - DREAME and take your electronic device back in hand. On this page are published all the documents necessary for the use of your device. ASPI-ROBOTW10 by DREAME.
USER MANUAL ASPI-ROBOTW10 DREAME
- The word "dreame" is the abbreviation of Dreame Technology Co., Ltd. and its subsidiaries in China. It is the transliteration of the company's Chinese name " 追觅 ", which means striving for excellence in every endeavor and reflects the company's vision of continuous pursuit, exploration and search in technology.
To avoid electric shock, fire or injury caused by improper use of the appliance, please read the user manual carefully before using the appliance and keep it for future reference. Usage Restrictions
- This appliance can be used by children aged from 8 years and above and persons with reduced physical, sensory or mental capabilities or lack of experience and knowledge if they have been given supervision or instruction concerning use of the appliance in a safe way and understand the hazards involved.
- Clear the area to be cleaned. Children shall not play with this product. Ensure children and pets are kept at a safe distance from the robot while it is operating.
- This product is for floor cleaning in a home environment only. Do not use it outdoors, on non-floor surfaces, or in a commercial or industrial setting.
- Ensure that the appliance operates correctly in a proper environment. Otherwise, do not use the appliance.
- If the power cord is damaged, it must be replaced by a special cord or assembly available from the manufacturer or its service agent.
- Do not use the robot in an area suspended above ground level without a protective barrier.
- Do not place the robot upside down. Do not use the LDS cover, robot cover, or bumper as a handle for the robot.
- Do not use the robot at an ambient temperature above 40℃ or below 0℃ or on a floor with liquids or sticky substances.
- Pick up any cables from the floor before using the robot to prevent it from dragging them while cleaning.
Usage Restrictions Safety Information
- Remove fragile or small items from the floor to prevent the robot from bumping into and damaging them.
- Keep hair, fingers, and other body parts away from the suction opening of the robots.
- Keep the cleaning tool out of reach of children.
- Do not operate the appliance in a room where an infant or child is sleeping.
- Do not place children, pets, or any item on top of the robot regardless of whether it is stationary or moving.
- Do not use the robot to clean any burning objects. Do not use the robot to pick up flammable or combustible liquids, corrosive gases, or undiluted acids or solvents.
- Do not vacuum hard or sharp objects. Do not use the appliance to pick up objects such as stones, large pieces of paper or any item that may clog the appliance.
- Please turn off and unplug the appliance before cleaning and maintenance.
- Do not use a wet cloth to wipe or any liquid to rinse the robot and base. Washable parts must be dried completely before installing and using them.
- Please use this product in accordance with the instructions in the User Manual. Users are responsible for any loss or damage that arise from improper use of this product. Batteries and Charging Laser Distance Sensor
- Do not use any third-party battery or self-wash base. Use only with RCS3 supply unit.
- Do not attempt to disassemble, repair, or modify the battery or self-wash base on your own.
- Do not place the self-wash base near a heat source.
- Do not use a wet cloth or wet hands to wipe or clean the base's charging contacts.
- Do not improperly dispose of old batteries. Unneeded batteries should be discarded at an appropriate recycling facility.
- If the power cord becomes damaged or broken, stop using it immediately and contact after-sales service.
- Make sure the robot is turned off when being transported and kept in its original packaging if possible.
- If the robot will not be used for an extended period of time, fully charge it, then turn it off and store it in a cool, dry place. Recharge the robot at least once every 3 months to avoid over-discharging the battery.
- The laser distance sensor complies with the IEC 60825-1:2014 standard for Class 1 laser products and does not generate dangerous laser radiation. We Dreame Trading (Tianjin) Co.,Ltd. , hereby, declares that this equipment is in compliance with the applicable Directives and European Norms, and amendments. The full text of the EU declaration of conformity is available at the following internet address: https://global.dreametech.com For detailed e-manual, please go to https://global.dreametech.com/pages/user-manuals-and-faqs
Spot Cleaning Button
- Press briefly to start spot cleaning
- Press and hold for 3 seconds to disable Child Lock Side Brush Power Cord Power/Clean Button
- Press and hold for 3 seconds to turn on or off
- Press briefly to start cleaning after the robot is turned on Mop Pad (×2) Return-to-Base Button
- Press briefly to send the robot back to the base Status Indicator
- On White: Cleaning or cleaned
- Breathing White: Charging
- On Orange: Low battery
- Blinking Orange: Error W10 Self-Cleaning Robot Vacuum and Mop User Manual The illustrations in this manual are for reference only. Please refer to the actual product. Cleaning Tool User Manual Robot Self-Wash Base (Including a fresh tank, waste tank, and washboard)
Note: Illustrations of product, accessories, and user interface in the user manual are for reference purposes only. Actual product and functions may vary due to product enhancements. Note: Press any button to pause while the robot is cleaning, returning to charge, returning to self-clean, or in Spot Cleaning mode.
Product Overview Product Overview Robot and Sensors Self-Wash Base
- Press and hold for 3 Return-to-Base Sensor Air Outlet / Speaker Return-to-Base / Exit Button Main Brush Reset Button seconds to restore to factory settings Upper Cover Main Wheel Brush Guard Clips Main Wheel Cliff Sensors Cliff Sensors Magnetic Mounts Auxiliary Wheel Bumper Display Screen Water Tank Plug Control Panel Washboard Clips Mop Pad Washboard Clip Clip LDS Upper Cover Clean Button Floating Ball Filter Media Return-to-Base / Exit Button When the robot is on the base:
- Press briefly to make the robot exit the base.
- Press and hold for 3 seconds to clean and dry the mop pad. When the robot is out of the base:
- Press briefly to send the robot back to the base. The robot resumes cleaning after the mop pad is cleaned.
- Press and hold for 3 seconds to stop cleaning and send the robot back to the base to have the mop pad cleaned and dried. Clean Button Laser Distance Sensor (LDS) Press briefly to start or pause cleaning. Edge Sensor Charging Contacts Child Lock Waste Tank
Fresh Tank Press and hold the and buttons for 3 seconds to activate or deactivate Child Lock. After Child Lock is activated, all buttons on the robot and the base are locked.
Clearing Home Environment Self-Wash Base Power Port
Dust Bin Signaling Area Bin Clip Bin Cover
- Push gently in the direction indicated by the arrow to open the cover Filter Self-Wash Base Back Tidy up items such as power cords, slippers, and hard objects to prevent the robot from getting entangled or trapped. Before cleaning, place a physical barrier at the edge of the stairs and sofa to ensure the secure and smooth operations of the robot. Open the door of the room to be cleaned, and put the furniture in its proper place to leave more space. To prevent the robot from not recognizing areas that need to be cleaned, do not stand in front of the robot, threshold, hallway, or narrow places. Charging Contacts Washboard Bracket Overflow Sensors
Overflow Sensors Note: When operating the robot for the first time, follow it around while cleaning to remove any potential obstacles in time.
Preparations Before Use
1. Remove the protective strips
Connecting with Mi Home/Xiaomi Home App
3. Place the base against the wall and charge the robot
- Install the base in as open a location as possible with a good Wi-Fi signal.
- Insert the power cord into the base and plug it into the socket.
- Place the robot onto the base, and the robot will trun on automatically and start charging.
- It is recommended to fully charge the robot before the first use. After the robot is fully charged, the status indicator illuminates white for 10 minutes and then lights down.
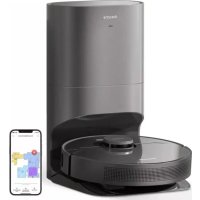
The appliance works with the Mi Home/Xiaomi Home app, which can be used to control the appliance and make it interact with other smart devices.
Scan the QR code on the robot to download and install the Mi Home/Xiaomi Home app. Simultaneously press and hold the and buttons until you hear a voice prompt saying, "Waiting for the network configuration." Once the Wi-Fi indicator is blinking slowly, the Wi-Fi has been reset. Wi-Fi Indicator Under the Cover Within the Best Wi-Fi Range
> 5 cm > 1.5 m Install the side brush until it clicks into place. Open the Mi Home/Xiaomi Home, tap " " in the upper right, and then scan the QR code above again to add "Dreame Bot W10". Please follow the prompts to finish the Wi-Fi connection. xxxxxx' s home No home environment info Devices Click
- Blinking slowly: To be connected
- Blinking quickly: Connecting
- Remove any objects that are closer than 1.5 m from the front and 5 cm from either side of the base.
- Make sure that no objects might block the signaling area.
- To prevent water stains from wetting wood floors or carpets, the self-wash base is recommended to be placed on tile floors or marble floors. Add a device Scan Note: If the robot cannot connect to your phone, Reset the Wi-Fi network and try again. Rooms Note:
- Only 2.4 GHz Wi-Fi is supported.
- The app software is upgrading, and the actual operations may be different from the statements in this manual. Please follow the instructions based on the current app version.
How to Use Turn On/Off Spot Cleaning Sweeping Function Mopping Function Press and hold the button for 3 seconds to turn on the robot, and the power indicator is permanently on. Place the robot onto the base, and the robot turns on automatically and starts charging. To turn off the robot, move the robot away from the base, and press and hold the button for 3 seconds. When the robot is not placed on the base and is on standby, press briefly the button to enable the spot cleaning mode. In this mode, the robot cleans a square-shaped area of 1.5 × 1.5 meters around it and returns to its starting point once the spot cleaning is completed. Note: Do not attach the mop pad while using the sweeping function. Note: Do not use the mopping function on the carpet. Method 1: Press briefly the sweeping. button on the base, and the robot starts
1. Attach the mop pad
Method 2: Press briefly the button on the robot, and the robot starts sweeping. Fast Mapping
Remove the mop pad before fast mapping. After you connect the robot to the app, create a map as instructed in the app. The robot moves around to scan the environment and creates a map without cleaning. After the robot returns to the base, a map is created and saved automatically. Pause / Sleep Note:
- The robot will turn off automatically if it is left in the sleep mode for more than 12 hours.
- If the robot is paused and placed onto the base, the current cleaning process will end.
2. Take out the fresh tank, fill it with clean water, and then place the fresh
When the robot is cleaning, press briefly any buttons on the robot or the button on the base to pause the robot. If the robot pauses for more than 10 minutes, it automatically enters the sleep mode, and the power indicator and charging indicator stop glowing. Press any buttons on the robot or base, or tap on the app to wake up the robot.
Restoring Factory Settings If the robot does not function properly and the buttons do not respond after being restarted, use a pin to press the reset button for 3 seconds until you hear a voice saying "Restoring factory settings". It will take about 5 minutes to reset the robot to its original factory settings. After resetting the robot, you must recreate maps and no-go zones. Note:
- Make sure that the robot is fully charged before using it. Do not manually move the robot when it is cleaning.
- If the battery gets low while cleaning, the robot returns to the base and resumes cleaning after charging its battery.(The Resume Cleaning function must be enabled on the app in advance.) Cleaning Mode After the robot is turned on, it cleans each room by cleaning along the edges and walls first and then cleaning in an S-shaped pattern. The robot automatically returns to the base to charge its battery after cleaning. MAX To the MAX Line Note:
- Do not fill in hot water, otherwise the fresh tank may be deformed.
- Use only the Dreame-brand multi-surface floor cleaner. Otherwise, the functions of the base may be affected.
3. Place the robot onto the base
5. Return to self-clean
While mopping, the robot will return to the base to have the mop pad cleaned as cleaning conditions set in the app. The robot resumes cleaning after the mop pad is cleaned. Functions in APP
The homepage of the app displays the current map. On this page, No-Go Zone allows you to set zones to be avoided, and Map Management allows you to modify the current map .
2. Cleaning mode settings
Cleaning Mode on the homepage allows you to change the cleaning mode, the suction power, as well as the humidity of the mop pad.
6. Clean the mop pad
Press briefly the button. The robot starts from the base and mops the house based on the optimal cleaning plan scheduled by the map. After the robot completes cleaning and returns to charge, the base starts cleaning and drying the mop pad.
3. Self-cleaning settings
Self-Cleaning Settings on the homepage allows you to change the frequency for self-cleaning and manually start a mop pad cleaning task or manually start or end a mop pad drying task.
The Settings page allows you to enable or disable device functions, configure scheduled cleanup, or view cleaning history and device information.
- If the robot is not on the base, please put it back before starting it.
- The robot will clean the mop pad before cleaning, please wait patiently until the mop pad is cleaned.
- Do not manually move the base, fresh tank, waste tank, or washboard while mopping. Note:
- To clean the mop pad at any time, press and hold the button on the base for 3 seconds to start cleaning.
- While cleaning the mop pad, if the water in the fresh tank is insufficient or the waste tank is full, the robot will send a voice prompt, or the app will send a notification.
- After the robot completes mopping, clean the waste tank in time to avoid mold or odor. It is recommended to change the mop pad every 1 to 3 months. Note:
- A map must be created before you use the room- or zone-based cleaning, and manage maps.
- For more information about functions, check the corresponding interfaces or guides in the app.
- The version of the app might have been updated, please follow the instructions based on the current app version. Routine Maintenance
Parts For optimal performance, follow the instructions below to clean and maintain the robot and base. Part Maintenance Frequency Replacement Frequency Dust Bin Clean it as needed
Dust Bin Filter Once every 2 weeks Every 3 to 6 months Fresh Tank Once every 2 weeks
Fresh Tank Filter Media Once every 2 weeks
Waste Tank After each use
Washboard Once every 2 weeks
Main Brush Once every 2 weeks Every 6 to 12 months Side Brush Once every 2 weeks Every 3 to 6 months Mop Pad Once every month Every 1 to 3 months Universal Wheel Once every month
Auxiliary Wheel Once every month
Signaling Area on Base Once every month
Overflow Sensors on Base Once every month
Charging Contacts on Robot Once every month
Charging Contacts on Base Once every month
Bottom of the Robot Once every month
Body of the Base Once every month
Note: The replacement frequency will depend on your usage of the robot. If an exception occurs due to special circumstances, the parts should be replaced.
Dust Bin * Clean it as needed Filter * Clean it once every 2 weeks (fully dry after cleaning) and change it every 3 months Fresh Tank
1. Open the robot cover and press the dust bin clip to remove the dust bin.
1. Remove the filter and tap its basket gently.
1. Open the fresh tank cover, move the hose to the side to remove and clean
the filter media as shown in the diagram.
1. Take out the waste tank, open the waste tank cover, and then dump the
2. Put the filter meida and hose back.
2. Clean the waste tank with water and put it back to the base.
- Clean the filter media once every 3 months Waste Tank
- Clean after each use Note: Do not attempt to clean the filter with a brush, finger, or sharp object.
2. Open the bin cover and empty the bin as shown in the diagram.
Note: The cleaning tool can be used to empty the dust bin.
2. If necessary, rinse the dust bin under the running water and dry them
completely before re-installing. Note:
- Rinse the dust bin and filter with clean water only. Do not use any detergent.
- Use the dust bin and filter only when whey are completely dry. Note: The floating ball in the waste tank is a moving part. Do not clean the floating ball excessively in case of affecting its functions.
Washboard Routine Maintenance
- Clean once every 2 weeks
1. Press the clips on both sides of the bottom of the base to remove the
3. Wipe the bottom of the base with a dry cloth.
Cleaning the Main Brush Cleaning the Side Brush Press the brush guard clips inwards to remove the brush guard and lift the brush out of the robot. Remove and clean the side brush. Click Cleaning the Universal Wheel/Auxiliary Wheel
4. Insert the washboard into the base as shown in the diagram, making sure
that both clips are in place.
2. Use the provided cleaning tool to clean the washboard completely.
Pull out the brush covers as shown in the diagram. Use the provided cleaning tool to remove the hair tangled in the brush. Click Note: Make sure that the washboard brackets are in place. Note: Do not pull out the hair tangled in the brush excessively. Otherwise, the main brush may be damaged. Note:
- Use a tool such as a small screwdriver to separate the axle and tire of the universal wheel. Do not use excessive force.
- Rinse the universal wheel under the running water and put it back after drying it completely.
Errors Robot Sensors and Charging Contacts Wipe sensors and charging contacts of the robot by using a soft, dry cloth:
- Cliff sensors at the bottom of the robot
- Charging contacts at the back of the robot
- Return-to-base sensor at the front of the robot
- Bumper at the front of the robot
- LDS on the top of the robot Bumper Self-Wash Base Charging Contacts and Overflow Sensor If the base does not work properly, an error icon and message will be displayed on the display screen. Read the message and handle the issue based on the following table. Error Icon Cliff Sensors Charging Contacts Return-to-Base Sensor
Error Message Solution Insufficient Water in Fresh Tank Add a sufficient amount of water to the fresh tank. Fresh Tank Not Installed Put the fresh tank in place. Waste Tank Malfunction Put the waste tank in place. Empty the wastewater. Washboard Not Installed Check whether the washboard is installed and whether the clips on both sides of the washboard are in place. Abnormal Washboard Water Level Check whether the waste port is clogged. If yes, clean it. Robot Malfunction Check whether an exception occurs to the robot. Please refer to the "FAQ" section in this manual for troubleshooting. Overflow Sensor LDS Charging Contacts Note: Wet cloth can damage sensitive elements within the robot and base. Please use dry cloth for cleaning.
Robot Restarting If the robot stops responding or cannot be turned off, press and hold down the button for 10 seconds to forcefully turn it off. Then, press and hold the button for 3 seconds to turn the robot on. Battery The robot contains a high-performance lithium-ion battery pack. Make sure that the battery remains well-charged for daily use to maintain optimal battery performance. If the robot is not used for an extended period of time, turn it off and put it away. To prevent damages from over-discharging, charge the robot at least once every three months.
Problem Possible Cause and Solution Problem Possible Cause and Solution The robot will not turn on.
1. The battery is low. Recharge the robot on the base and try again.
2. The temperature of the battery is too low or too high. It is recommended to operate the appliance at a
temperature between 32 ℉ (0℃ ) and 104 ℉ (40℃ ). The charging speed is slow. The robot will not charge.
1. The base is unplugged. Make sure that both ends of the power cord are plugged in.
2. Poor contact. Wipe the charging contacts on both the base and the robot.
It takes about 6 hours to fully charge the robot when its battery is low.
1. If you operate the robot at temperatures outside of the specified range, the charging speed will automatically
slow down to extend the battery life.
2. The charging contacts on both the robot and the base may be dirty, please wipe them with a soft cloth.
Turn off the robot and then restart it. The robot fails to connect to Wi-Fi.
1. The Wi-Fi network password is incorrect. Make sure the password used to connect to your Wi-Fi network is correct.
2. The robot does not support a 5 GHz Wi-Fi connection. Make sure the robot is connected to a 2.4 GHz Wi-Fi connection.
3. The Wi-Fi signal is weak. Make sure the robot is in an area with good Wi-Fi coverage.
4. The robot may not be ready to be configured. Please exit and re-enter the app, and then try again as instructed.
The robot is malfunctioning. The side brush falls off.
1. Re-install the side brush until it clicks into place.
2. The side brush is entangled by power cords. Remove the power cords from the floor before cleaning.
A room-based map cannot be created in the app.
1. The robot must start from the base to create a map. It is recommended to use the fast mapping function.
2. Do not move the robot when the robot creates a map for the first time, otherwise positioning failure may occur.
3. After the robot creates a map for the first time, check whether it fails to return to the base and remove any obstacles around it. The mop pad falls off. The mop pad is entangled by power cords. Remove the power cords from the floor before cleaning. The cleaning performance is poor.
1. The dust bin is full. Empty it.
2. The filter needs cleaning. Check and clean it.
3. The filter is not fully dried after being washed. Dry the filter before use.
The robot cannot find the base or will not return to the base.
1. The base is unplugged or is moved when the robot is not placed onto the base.
2. The robot can not return to the base since its path is blocked. For example, a door is closed.
3. There are too many obstacles around the base. Place the base in an area without any obstacles around it.
4. Moving the robot may cause it to re-position itself or re-map its surroundings. If the robot is too far from the base, it might not be able to automatically return to the base, in which case you need to manually place the robot onto the base.
5. Wipe the signaling area on the base to prevent dust or dirt.
The robot leaks dust while cleaning. Take out the main brush and the dust bin, and remove any debris that may have become trapped around spaces that hold the main brush and the dust bin. The noise increases while the robot is operating. The robot is stuck in front of the base and cannot return to the base. 1. Check whether there is enough space around the base. keep the immediate area 1.5 m in front of the base and 5 cm on both side of the base clear of objects. 2. The robot may slip. Check whether there is water in front of the base, if so, wipe it and try to send the robot back again.
3. It is recommended to change the place where you put the base and try again.
1. The dust bin is full. Empty it.
2. Hard objects are trapped around the main brush and the dust bin. Check and clean them up.
3. The main brush and the side brush may be entangled with hair or debris. Check and clean them up.
4. Switch the suction mode to Standard or Quiet.
The robot makes a strange noise while operating. Please turn and press the main wheel to check if there is any object entangled or stuck, if so, clean them in time. If the problem persists, please contact the after-sales service. The robot will not turn off.
1. The robot can be turned off only when it is not charging. To turn off the robot, move the robot away from the
base and press and hold the button for 3 seconds.
2. If the robot cannot be turned off by performing step 1, press and hold the
button for 10 seconds to forcibly turn off the robot. If the problem persists, please contact after-sales service. The robot is stuck and stops operating.
1. Check the corresponding area to make sure whether there are obstacles such as power cords, curtains, or carpet
tassels around the robot. It is recommended to remove them so that the robot can continue to work.
2. The robot may be stuck by furniture. It is recommended to elevate the furniture, place a physical barrier to block
off the problem areas, or set no-go zones by using the app.
Problem Possible Cause and Solution Problem Possible Cause and Solution The robot moves without following the set route.
1. Objects such as power cords and slippers should be organized before using the robot.
2. Working on wet slippery surfaces causes the main wheel to slip. It is recommended to dry the wet places before
using the robot. The robot does not respond to the base. The robot is too far away from the base and they cannot communicate with each other. It is recommended to use the app to control the robot. The robot misses the rooms to be cleaned.
1. Make sure that the doors of the rooms to be cleaned are open.
2. Check whether there is a threshold higher than 1.8 cm at the door of the room. The robot cannot climb over high
thresholds or steps.
3. The place in front of the room to be cleaned is wet and slippery, causing the robot to slip and work abnormally.
It is recommended to dry the floor before using the robot.
4. Check whether there is a small door mat or carpet at the door of the room. The carpet will be avoided while the
robot is mopping. Please turn off the carpet recognition function on the Setting page of the app. The robot often strays into no-go zones or areas with virtual walls.
1. View the homepage of the app to check whether an error occurs to the current map, if so, restore the map in the
Map Management settings.
2. When you set virtual walls or no-go zones, it is recommended to adjust boundaries based on the home
environment and include all areas that are prone to getting the robot stuck, such as sinking steps and bottoms of furniture. The robot gets into trouble while working and stops.
1. The robot automatically powers off when its battery is depleted to 0%.
2. The robot fails to charge, which causes its battery to run out and the robot to shut down. The possible cause is
that the base is not connected to the power supply, or the robot and the base are in poor contact. Please check the connection. If the problem persists, please contact the after-sales service. The robot will not resume cleaning after charging.
1. Make sure that the robot is not set to the Do Not Disturb (DND) mode, which will prevent it from resuming
2. The robot does not resume cleaning when it is manually recharged or placed onto the base.
The robot will not clean automatically at the scheduled time. The robot has low battery. The scheduled cleaning will not start unless the battery level is over 15%. Water in the fresh tank is insufficient.
1. Replenish clean water in time.
2. Unplug the power cord of the base, take out the fresh tank and put it back, and then power on the base and try again.
3. Pour out the remaining water in the fresh tank, rinse the bottom of the fresh tank and filter media, and then try
again after adding water into it. 4. Check the metal filter at the water inlet of the base to see if there are foreign objects, if any, please take out the foreign objects. If the problem persists, please contact the after-sales service. The water level in the washboard is abnormal.
1. Remove the washboard and check whether the sewage drain is blocked and clean it.
2. Wipe the metal elastic pieces of the overflow sensor within the washboard with a dry cloth.
3. Gently press down on the waste tank to ensure that the waste tank is installed in place.
4. Check if the sealing ring of the waste tank is loose or not installed properly, if so, reset it manually. If the problem persists, please contact the after-sales service. The washboard is not installed. Check whether the washboard is installed in place or whether the clips on both sides of the washboard are in place.
OS Compatibility Android 4.4 or iOS 10.0 and later
SRD Wireless Operation Frequency Rated Power 55 W Maximum Output Power < 10 dBm Wi-Fi Wireless Connectivity Wi-Fi IEEE 802.11b/g/n 2.4 GHz Operation Frequency 2400-2483.5 MHz Maximum Output Power < 20 dBm SRD Wireless Operation Frequency
Under normal use of condition, this equipment should be kept a separation distance of at least 20 cm between the antenna and the body of the user. All products bearing this symbol are waste electrical and electronic equipment (WEEE as in directive 2012/19/EU) which should not be mixed with unsorted household waste. Instead, you should protect human health and the environment by handing over your waste equipment to a designated collection point for the recycling of waste electrical and electronic equipment, appointed by the government or local authorities. Correct disposal and recycling will help prevent potential negative consequences to the environment and human health. Please contact the installer or local authorities for more information about the location as well as terms and conditions of such collection points. Nutzungseinschränkungen
- Оранжевый (мигающий): сбой W10 Self-Cleaning Robot Vacuum and Mop User Manual The illustrations in this manual are for reference only. Please refer to the actual product.