
DVT 685 - DVT 785 - DVT 78660 TBS - DVT 985 - Range hood TEKA - Free user manual and instructions
Find the device manual for free DVT 685 - DVT 785 - DVT 78660 TBS - DVT 985 TEKA in PDF.
| Product type | Range hood |
| Brand | TEKA |
| Models | DVT 685, DVT 785, DVT 78660 TBS, DVT 985 |
| Power supply | 220-240 V ~ 50 Hz (check rating plate) |
| Number of speeds | 3 speeds + intensive speed (H) |
| Timer function | Yes, adjustable from 1 to 99 minutes |
| Refresh function (FRESH) | Yes, can be activated when hood is off (1 hour out of 10) |
| Lighting | Yes, bulb code 89220139 |
| Filter saturation indicator | Yes (displays "F") |
| Metal filters | Washable (hot water + detergent or dishwasher) |
| Activated charcoal filter | Optional, replaceable |
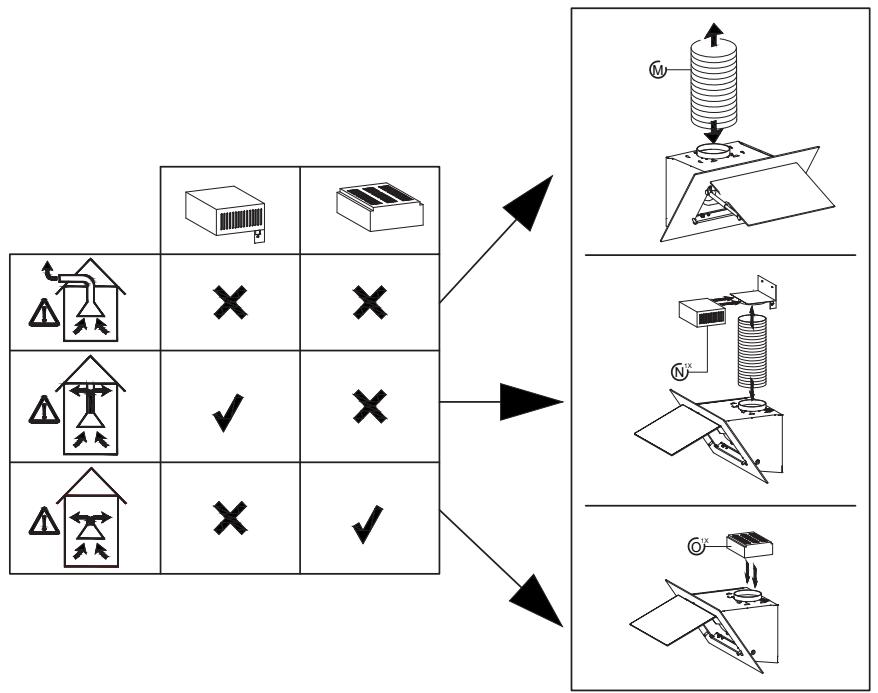
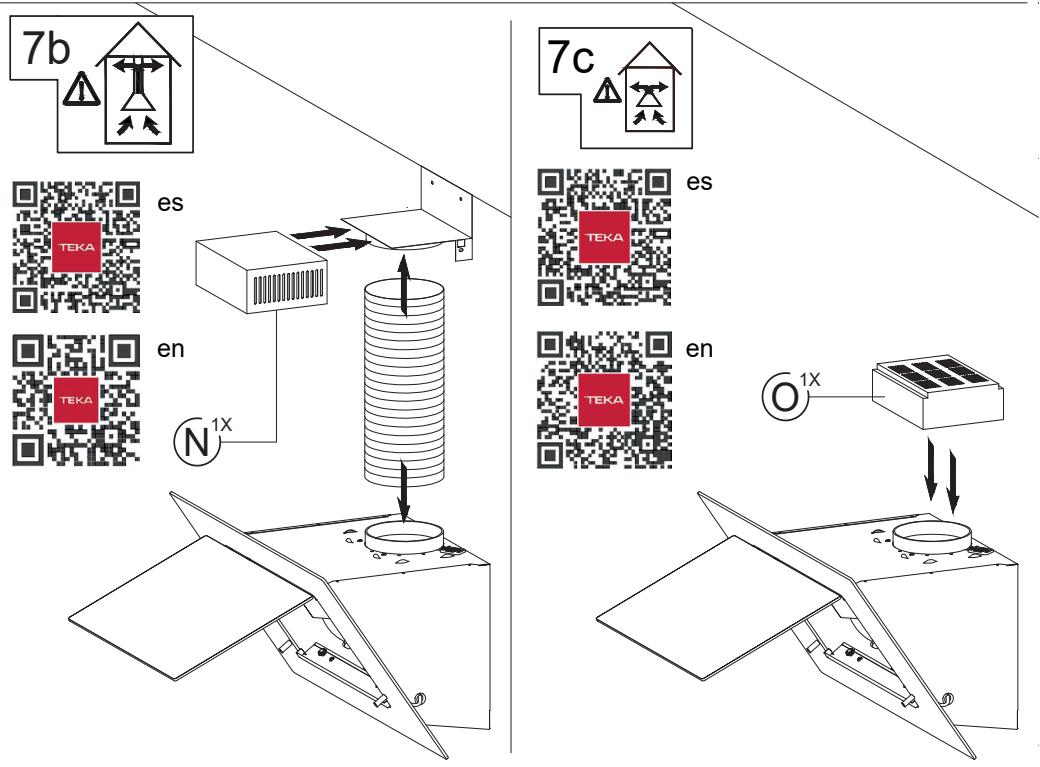
| Evacuation mode | Extraction or recirculation (with charcoal filter) |
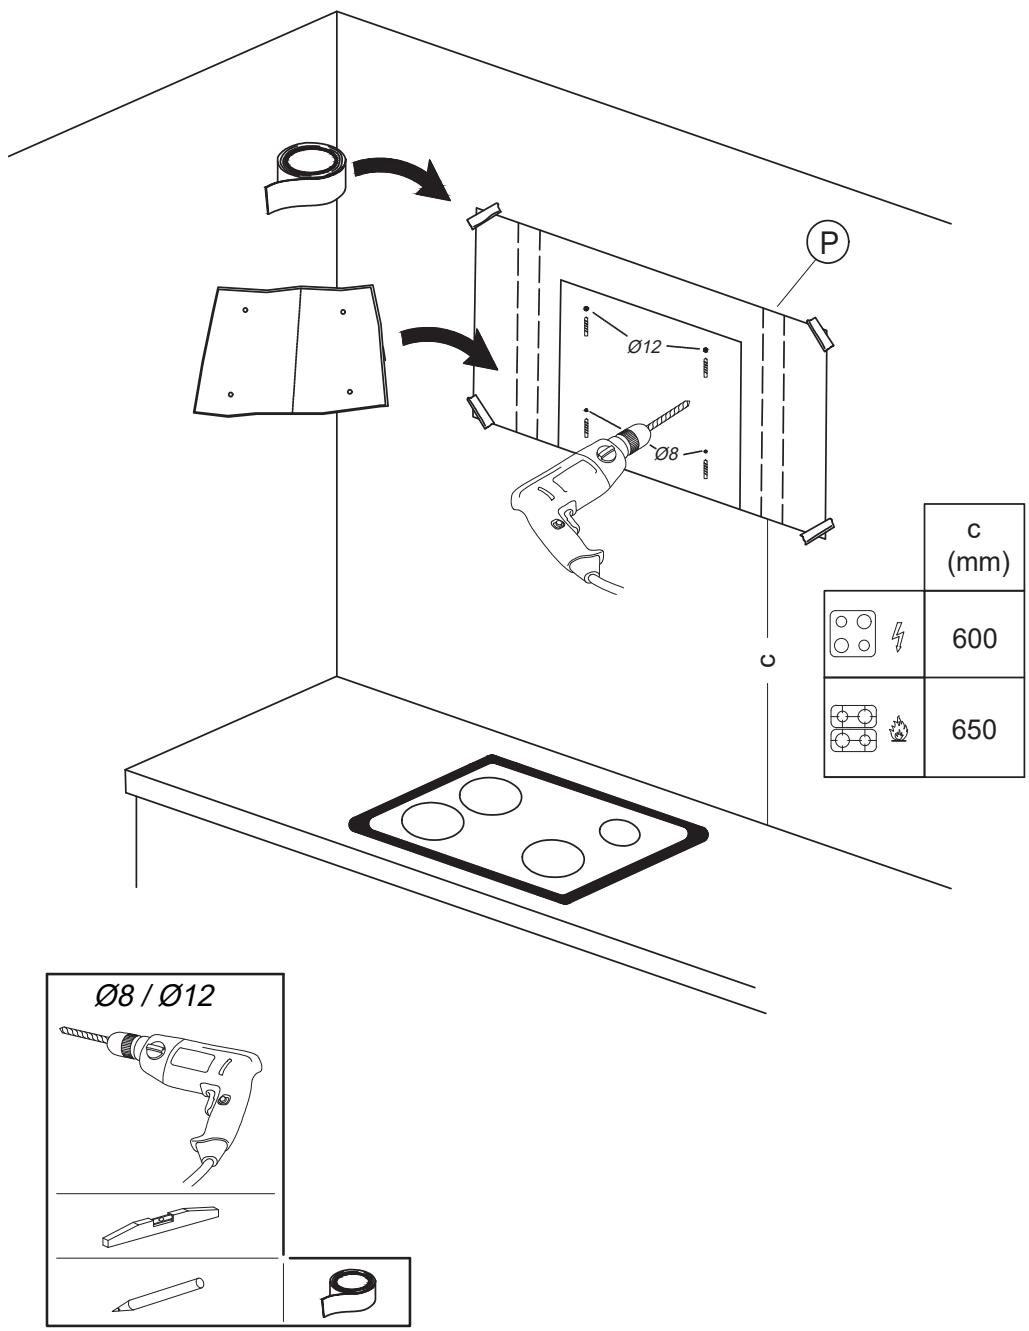
| Minimum distance above cooking surface | 65 cm (gas or mixed) |
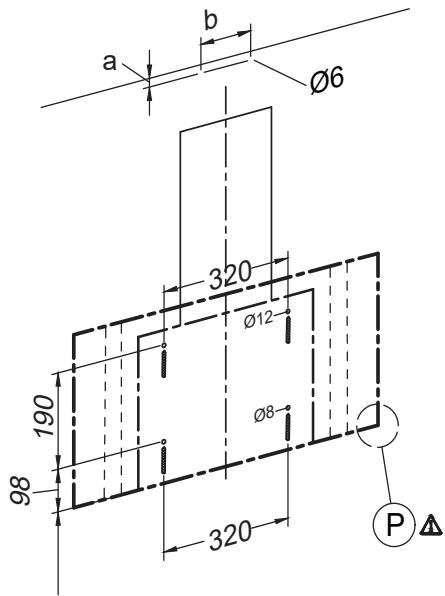
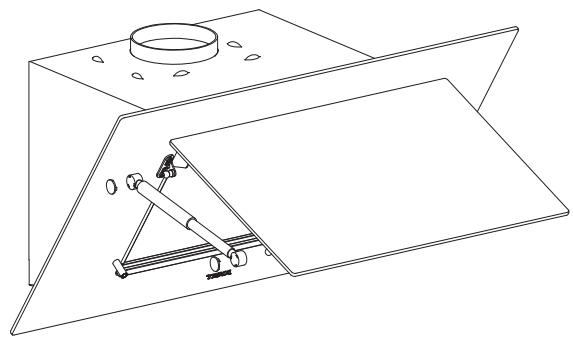
| Evacuation duct diameter | At least ∅120 mm |
| Maximum duct length | 4 meters, with maximum 2 bends at 90° |
| Monthly maintenance | Clean interior and metal filters at least once a month |
| Body cleaning | Stainless steel: specific product; painted: warm water + mild soap |
| Safety instructions | Disconnect before cleaning; do not flambé under the hood |
| Repairs | Contact authorized service, use original parts |
| Domestic use | Yes, only for extraction and purification of cooking fumes |
Frequently Asked Questions - DVT 685 - DVT 785 - DVT 78660 TBS - DVT 985 TEKA
User questions about DVT 685 - DVT 785 - DVT 78660 TBS - DVT 985 TEKA
0 question about this device. Answer the ones you know or ask your own.
Ask a new question about this device
Download the instructions for your Range hood in PDF format for free! Find your manual DVT 685 - DVT 785 - DVT 78660 TBS - DVT 985 - TEKA and take your electronic device back in hand. On this page are published all the documents necessary for the use of your device. DVT 685 - DVT 785 - DVT 78660 TBS - DVT 985 by TEKA.
USER MANUAL DVT 685 - DVT 785 - DVT 78660 TBS - DVT 985 TEKA
natural_image
Modern kitchen interior with black wood-paneled cabinets and ovens, featuring a 'TEKA' logo in the top right corner (no other text or symbols visible)User Manual
DVT PRO SERIES
ES DE GB FR PT NL GR TR PL HU RU UA SK CZ RO BG AR
Estimado cliente:
Congratulations on your choice. We are certain that this modern, functional and practical device made with first rate quality materials will fully satisfy your requirements.
Please read all the sections in this INSTRUCTION MANUAL before using the hood for the first time in order to obtain maximum performance from the device and avoid faults which may arise from incorrect use as well as minor problem solving.
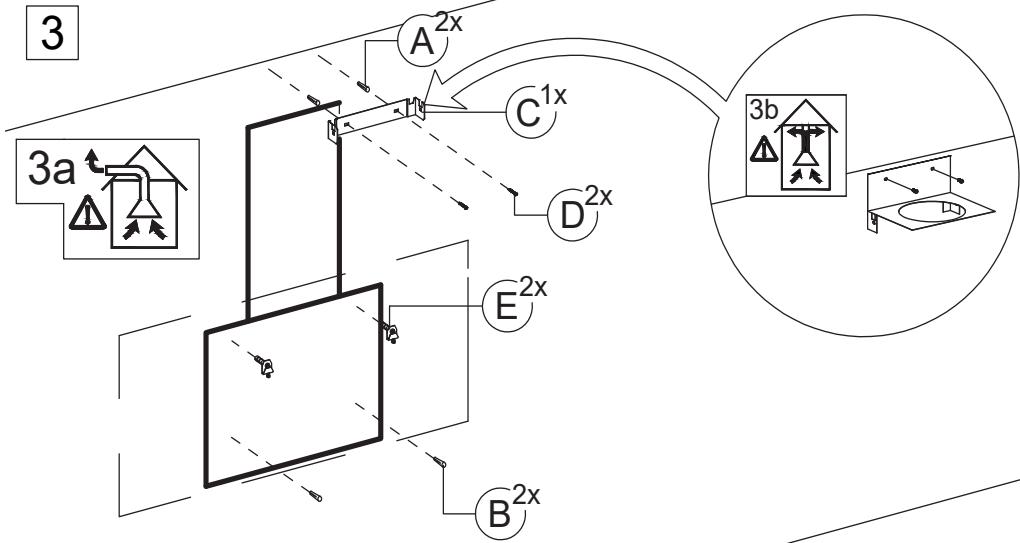
For optimal performance, the external duct should not exceed FOUR METRES, have more than two 90° angles and its diameter should be at least ∅120.
Safety Instructions
- Disconnect the device before performing any work on the interior, e.g. during cleaning or maintenance.
•The excessive accumulation of grease in the hood and metal filters may cause dripping and fire risks, therefore it is necessary to wash the inside of the hood and the metal filters at least once a month. - This device can be used by children aged 8 and over and persons with reduced physical, sensory or mental capabilities or lack of experience and knowledge, if they have been given supervision or proper training in the safe use of the device and if they understand the dangers involved. Children should not play with the device. Cleaning and maintenance should be performed by the user and not by unsupervised children.
-
The regulations for electrical installations must be complied with.
-
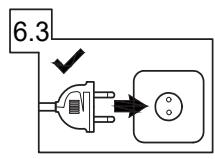
Check that the power voltage and frequency match those indicated on the label located on the inside of the hood. A suitable earth must be connected (except for Class II devices, marked with ☐ on the technical data plate).
- For installation, a connection method isolated from the fixed installation should be incorporated, in accordance with installation regulations (adjusted to the strength to be endured and with a minimum opening between the contacts of 3mm) under overvoltage category III conditions, for the emergency shutdown, cleaning or light replacement. In no event should the earth pass through this switch. This switch can be replaced with a plug if it is accessible in normal use.
- If the power lead is damaged it must be replaced by the manufacturer, its after-sales service or by qualified personnel in order to avoid potential danger.
- Ventilation regulations must be complied with.
• Air should not be extracted by ducts used to expel fumes from equipment powered by gas or other fuels.
- The room must be adequately ventilated when the hood will be used simultaneously with equipment powered by energy other than electricity e.g. gas cookers.
- Do not produce flames under the hood.
- The bottom of the hood must be fitted at least 65cm above gas or combination hobs. Observe the minimum limits set by worktop manufacturer's. This distance may be reduced if mentioned in the hood installation instructions.
- Accessible parts can be heated when used with cooking appliances.
- Never leave gas burning without a pan above it. The grease accumulated in the filters may drip or catch fire when the temperature is increased.
- Avoid cooking under the hood if the metal filters are not fitted e.g. while they are being cleaned in the dishwasher.
- We recommend you wear gloves and use extra caution when cleaning the inside of the hood.
- Your hood is designed for domestic use and only for the extraction and purification of gases from food preparation. Use for other purposes is at your own risk and may be dangerous. The manufacturer is not
responsible for damage caused by improper use of the device.
- For repairs please contact the manufacturer's nearest Technical Assistance Department which will always use genuine parts. Repairs or modifications by unauthorized personnel may result in damage to equipment or malfunction, endangering safety.
- This device complies with the European Directive 2012/19/EU on electrical and electronic devices entitled “Electrical and Electronic Equipment Waste”. The directive provides the framework applicable throughout the European Union for the return and recycling of electrical and electronic equipment waste [symbol] responsible for his/her safety. Keep children away from the device and never let them play with it ☒.
- Replace any cracked shield.
Instructions for use
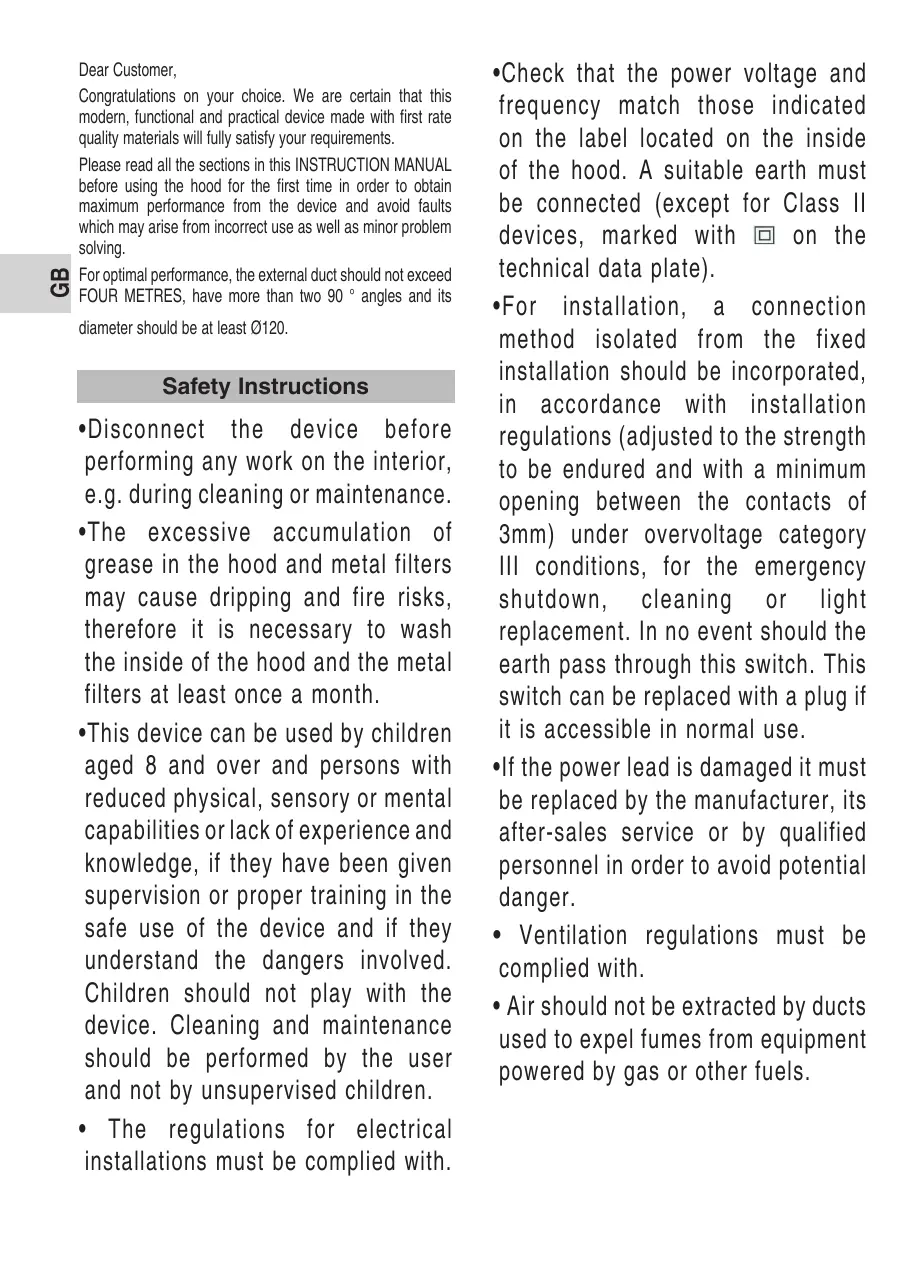
By pressing the button shown in the figure 1, you will be able to control the functions of the extractor.
To achieve better extraction, we recommend switching on the extractor a few minutes before starting to cook (3 - 5 minutes) so that the air flow is continuous and stable when extracting the fumes.
Likewise, keep the extractor switched on for a few minutes when cooking is complete to allow all fumes and odours to be expelled.
1- Display
2- Timer
3- Light
4- Reduce fan speed
5- Increase fan speed
Program the working time
1) Switch on the cooker hood and choose the required aspiration speed.
2) Push 'Timer'.
3) Select the required programming time from 1 to 99 minutes by using the buttons '+' and '-'
4) The display will show the remaining programming time. The maximum speed 'H' can only be selected manually and will be changed automatically to the second speed level after 7 minutes.
Filter saturation indicator "F"
- When the sign ‘Saturation of the filters’ is on, the filters should be cleaned.
- After cleaning the filters, simultaneously push "Timer" and "Light" keys for at least 3 seconds whereupon the sign will be switched off.
Fresh Function
- The fresh function consists on activating the motor at speed 1 for ten minutos each hour. This function will stay active for 24h or until it is manually turned off.
- To activate/ deactivate this function, simultaneously push “-” and “+” keys.
- This function is only available with the hood off.
Lights
For changing the light bulbs please contact the manufacturer's nearest Technical Service.
Lamp code:
89220139
Cleaning and maintenance
During cleaning and maintenance work, make sure the safety instructions are complied with.
Cleaning the hood body
- If your kitchen hood is made of stainless steel, use proprietary cleaners mentioned in the product instructions.
- If your kitchen hood is painted, use lukewarm water and a neutral soap.
- Never use metallic scourers, nor abrasive or corrosive products.
- Dry the kitchen hood using a cloth that does not produce fibres.
- Do not use vapour cleaners
Cleaning the metal filter
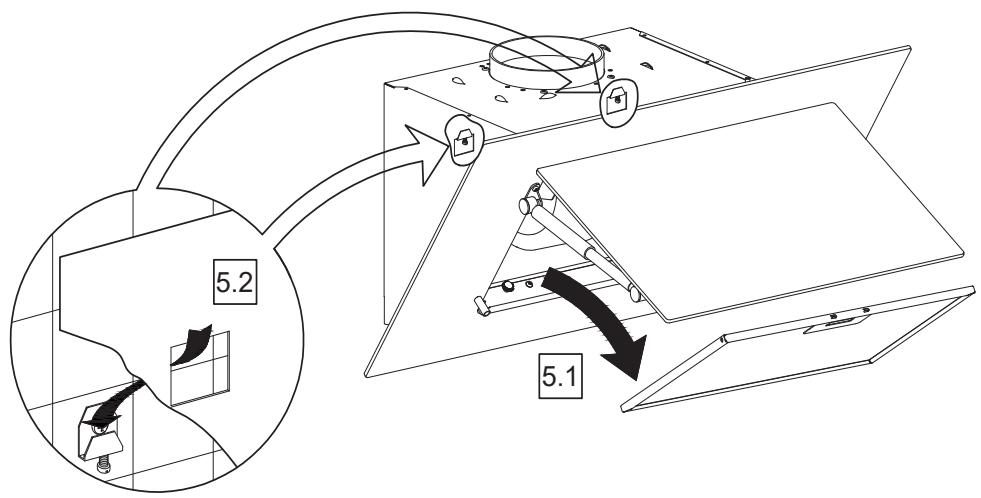
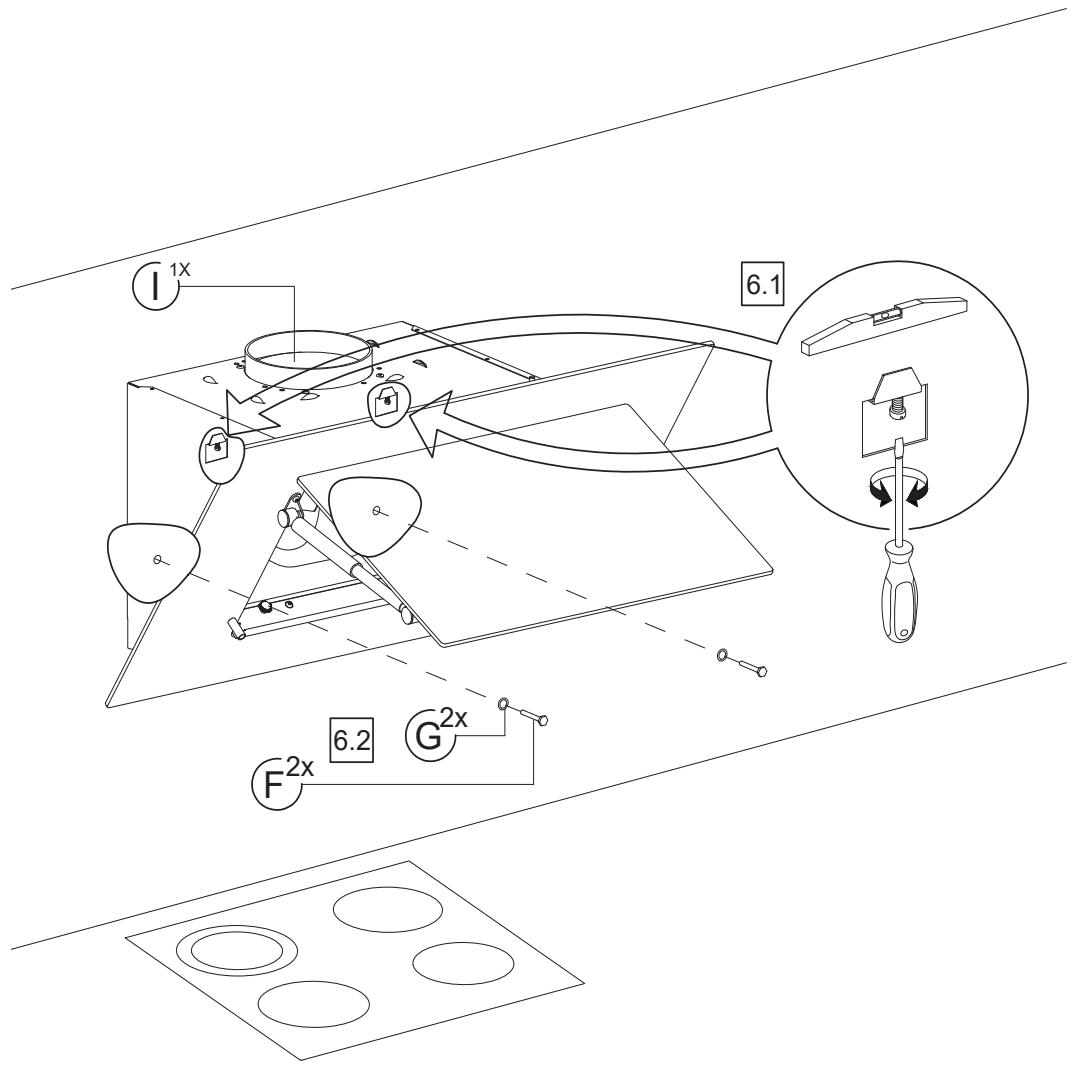
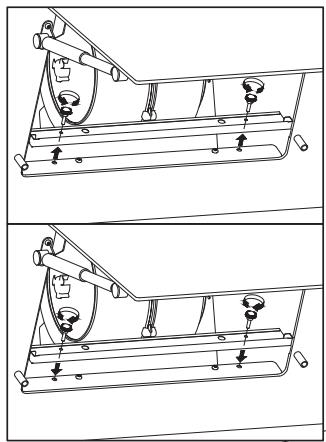
- To remove the filters from their fittings, press lightly on the locks and then pull them off.
•The metal filters can be cleaned by soaking them in hot water with neutral detergent until the fat dissolves and then rinsing them under the tap or using special anti-grease products. They can also be washed in a dishwasher. In this case, it is advisable to stack them vertically to avoid food residues to stick to them. - Cleaning in a dishwasher may damage the metallic surface (blackening it), although this will not affect its fat retention capacity.
- Once clean, leave them to dry off and then fit them onto the kitchen hood.
- Remove the grease collector as described at the end of this manual. Clean it in the same way that filter.
Activated charcoal filter
- To install the active carbon filter follow the instructions supplied with it.
- The manufacturer reserves the right to make any corrections it deems necessary to its devices without damaging its essential characteristics.
- It is possible that with the installation of carbon filters, a reduction in the extraction flow can be observed in the hood.
Problem solving
Proceed with the following checks before calling the Technical Service:
| Problem | Possible cause | Solution |
| The kitchen hood does not work. | The mains cable is not connected to the network.There is no current in the network. | Connect the mains cable to the network.Provide current to the network. |
| The kitchen hood does not extract sufficiently or vibrates. | Filters are saturated with fat.Obstruction in the air outlet. | Change or clean the active charcoal and/or metal filters.Remove the obstruction. |
Cher client:
Indicator "F" filterverzadiging
natural_image
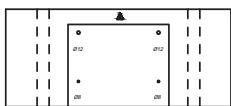
Two hand icons: one with open palm and another with warning triangle (no text or symbols)∅6, ∅8, ∅12
natural_image
Line drawing of a drill bit with screwdriver and handle (no text or symbols)
natural_image
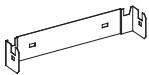
Technical line drawing of a mechanical component with a flanged end and central slot (no text or symbols)

natural_image
Line drawing of a screwdriver with a circular head and shaft (no text or symbols)
natural_image
Line drawing of a screwdriver with a plus symbol nearby (no text or labels)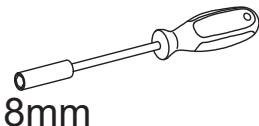
natural_image
Line drawing of a screwdriver with 8mm thickness label (no other text or symbols)
 |  | ∅6x30 | 2x |  |
 |  | ∅8x40 | 2x |  |
 |  | 1x |  | |
 |  | ∅4x30 | 2x |  |
 |  | ∅12x50 | 2x |  |
 |  | ∅5x40 | 2x |  |
 |  | ∅6.4x18 | 2x |  |
 |  | ∅150-125 | 1x |  |
∅6x30
2x
∅8x40
2x
1x
∅4x30
2x
∅12x50
2x
∅5x40
2x
∅6.4x18
2x
∅150-125
1x


∅150
1x


2x


∅3.9x19
2x


1x


∅150 / ∅120
1x


1x


1x
TRL

1x

flowchart
graph TD
    A["Grid with icons: building, valve, cross"] --> B{Decision}
    B -->|Yes| C["Arrow to 'M'"]
    B -->|No| D["Arrow to 'N'"]
    C --> E["Arrow to 'A'"]
    D --> F["Arrow to 'C'"]
    style A fill:#f9f,stroke:#333
    style B fill:#ccf,stroke:#333
    style C fill:#cfc,stroke:#333
    style D fill:#fcc,stroke:#333
    style E fill:#ffc,stroke:#333
    style F fill:#fcc,stroke:#333
1
2
| a(mm) | b(mm) | ||
| 2a | 20 | 130 | |
| 2b | |||
| 2c | × | ||
| c(mm) | |
| 600 | |
| 650 |
flowchart
graph TD
    A["A²ˣ"] --> B["C¹ˣ"]
    B --> C["D²ˣ"]
    C --> D["E²ˣ"]
    D --> E["B²ˣ"]
    style A fill:#f9f,stroke:#333
    style B fill:#ccf,stroke:#333
    style C fill:#cfc,stroke:#333
    style D fill:#fcc,stroke:#333
    style E fill:#cff,stroke:#333
    subgraph View1
        F["3a ↑"]
        G["3b ↑"]
    end
    subgraph View2
        H["10x 10x"]
        I["10x 10x"]
    end
natural_image
Line drawing of a screwdriver with a plus symbol nearby (no text or labels)4
natural_image
Technical line drawing of a mechanical assembly with a cylindrical component and support structure (no text or symbols)
5
6
natural_image
Technical line drawing of two screwdriver tools with a 8mm specification label (no text or symbols on the tools themselves)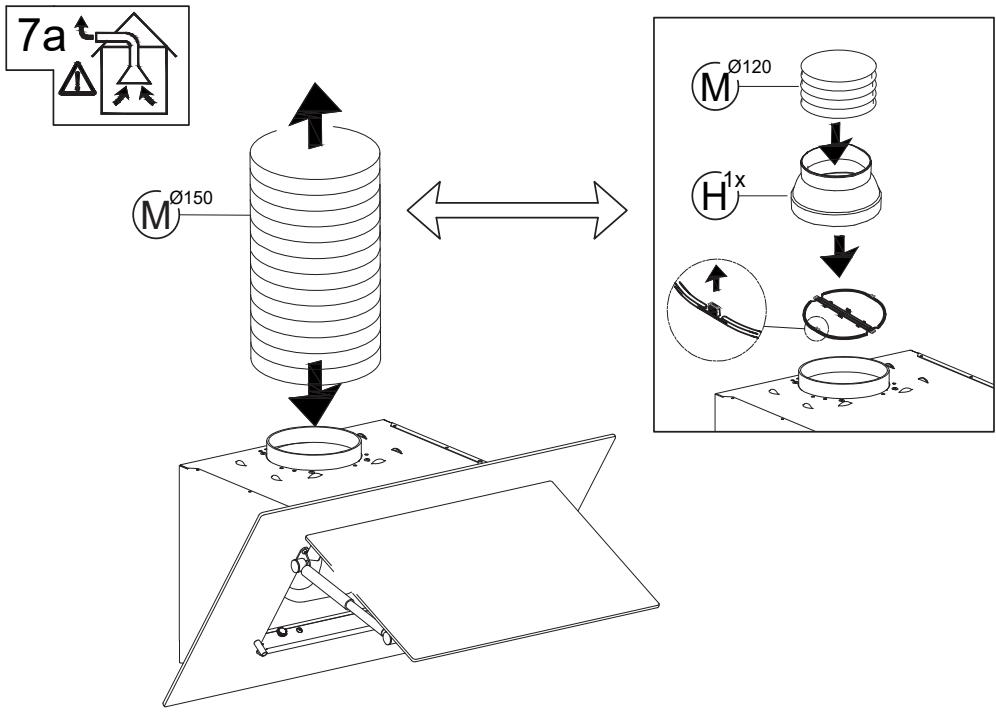
flowchart
graph TD
    A["MØ150"] --> B["Cylinder"]
    B --> C["Hybrid Component"]
    C --> D["H¹x"]
    D --> E["Final Assembly"]
    style A fill:#f9f,stroke:#333
    style B fill:#ccf,stroke:#333
    style C fill:#cfc,stroke:#333
    style D fill:#fcc,stroke:#333
    style E fill:#cff,stroke:#333
flowchart
graph TD
    subgraph_7b["7b"]
        A["TEKA"] --> B["es"]
        C["TEKA"] --> D["en"]
        E["N^1X"] --> F["Data Flow"]
    end
    subgraph_7c["7c"]
        G["TEKA"] --> H["es"]
        I["TEKA"] --> J["en"]
        K["O^1X"] --> L["Signal Flow"]
    end
    style 7b fill:#f9f,stroke:#333
    style 7c fill:#f9f,stroke:#333
    style 7b fill:#ccf,stroke:#333
    style 7c fill:#ccf,stroke:#333
    style 7b fill:#dfd,stroke:#333
    style 7c fill:#dfd,stroke:#333
    style 7b fill:#dfd,stroke:#333
    style 7c fill:#dfd,stroke:#333
8
9
natural_image
Simple line drawing of a tray with four circular cutouts (no text or symbols)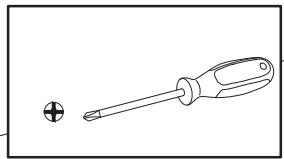
natural_image
Line drawing of a screwdriver and a screwdriver with a plus symbol (no text or labels)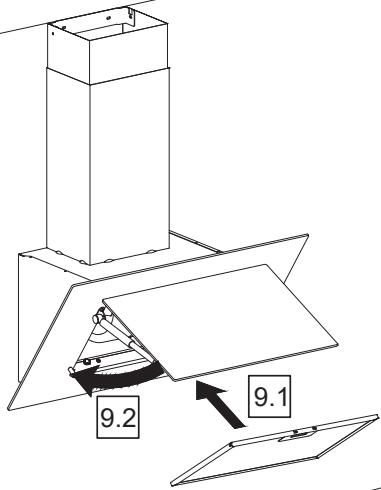
natural_image
Technical line drawing of a mechanical assembly with two views (top and side), showing no text, numbers, or symbols.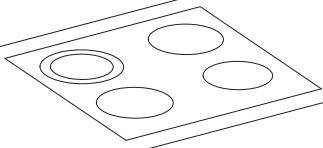
natural_image
Simple line drawing of a tray with four circular indentations (no text or symbols)natural_image
World map silhouette showing continents and countries without any text or labelswww.teka.com
X0309757
REV.00