FG273 - Food Processor MOULINEX - Free user manual and instructions
Find the device manual for free FG273 MOULINEX in PDF.
| Product type | Programmable filter coffee maker |
| Brand | Moulinex |
| Model | FG273 |
| Color | Not specified (usually white or black) |
| Carafe capacity | Approximately 1.2 L (10 cups) |
| Filter type | Paper filter #4 |
| Drip-stop function | Yes |
| Programming function | Yes, with hour and minute setting |
| Keep warm function | Yes, up to 30 minutes after the cycle |
| Auto shut-off | Yes, approximately 30 minutes after the end of the cycle |
| Display | LCD with time display |
| Indicator lights | Red indicator (power), green indicator (programming) |
| Time setting | H (hour) and Min (minutes) buttons |
| Power supply | 220-240 V, 50 Hz (standard estimate) |
| Power | Approximately 1000 W (estimate) |
| Dimensions (W x D x H) | Approximately 25 x 20 x 35 cm |
| Weight | Approximately 2 kg |
| Materials | Plastic, glass (carafe) |
| Included accessories | Glass carafe, filter holder, measuring spoon |
| Maintenance | Cleaning with damp cloth, descaling monthly or every 40 cycles |
| Safety | Auto shut-off, overheat protection (not specified) |
| Recommended use | Household, indoor, altitude < 2000 m |
Frequently Asked Questions - FG273 MOULINEX
User questions about FG273 MOULINEX
0 question about this device. Answer the ones you know or ask your own.
Ask a new question about this device
Download the instructions for your Food Processor in PDF format for free! Find your manual FG273 - MOULINEX and take your electronic device back in hand. On this page are published all the documents necessary for the use of your device. FG273 by MOULINEX.
USER MANUAL FG273 MOULINEX
natural_image
Line drawing of a coffee maker with control panel and water level indicator (no text or symbols)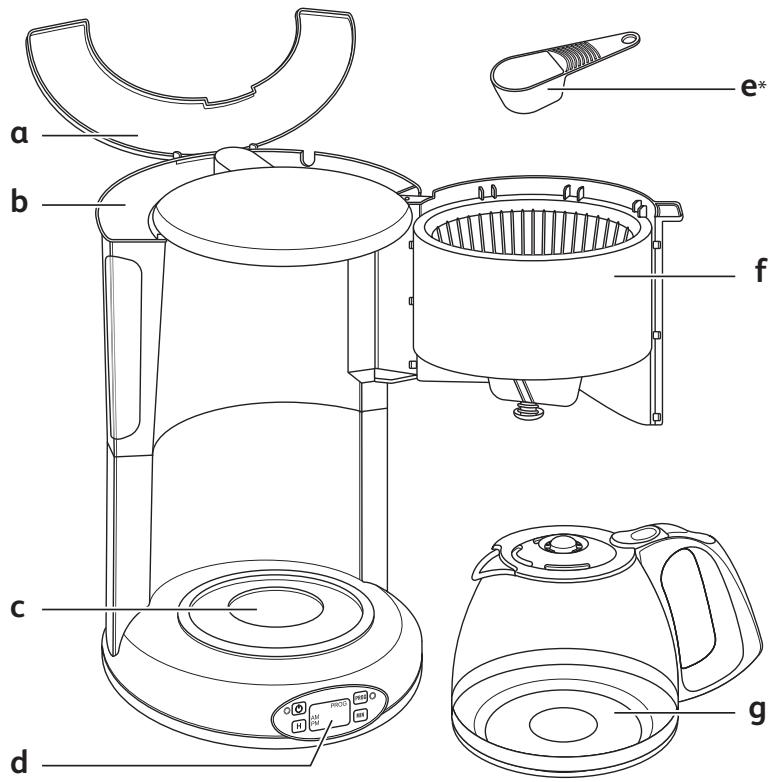
text_image
a b c d e* f g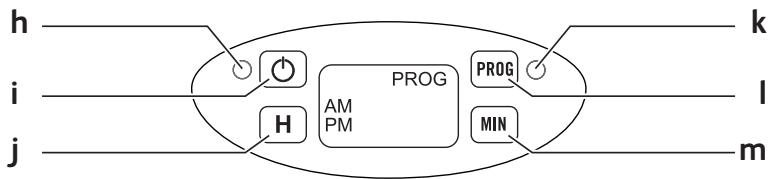
flowchart
graph LR
    h --> A["Power Source"]
    i --> B["Amplifier"]
    j --> C["Ground"]
    A --> D["PROG AM PM"]
    B --> E["PROG MIN"]
    C --> F["MIN"]
    style A fill:#f9f,stroke:#333
    style B fill:#f9f,stroke:#333
    style C fill:#f9f,stroke:#333
    style D fill:#ccf,stroke:#333
    style E fill:#ccf,stroke:#333
    style F fill:#ccf,stroke:#333
(*) : selon modèle - depending on model - afhankelijk van het model - je nach Modell - a seconda del modello - en función del modelo - consoante o modelo - Aváloya to μοντέλο - modele bağlı olarak - afhænger af model - avhengig av modell - Beroende på modell - mallista riippuen - بسته به مدل - حسب الموديل
natural_image
Illustration of a hand turning a container with an arrow indicating rotation (no text or symbols)fig.1
natural_image
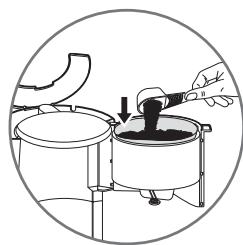
Illustration of a hand pouring liquid from a container into a bowl, enclosed in a circular frame (no text or symbols)fig.2
natural_image
Diagram of a mechanical component with an arrow indicating direction (no text or symbols present)fig.3
natural_image
Diagram of a kitchen appliance with a fan and side panel, showing directional arrows (no text or symbols)fig.4

natural_image
Diagram of a portable stove with a funnel pouring liquid into a cooler (no text or symbols)fig.5
natural_image
Illustration of a hand pouring liquid into a container using a stand mixer (no text or symbols)fig.6

natural_image
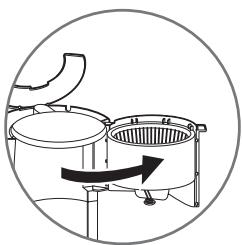
Diagram of a circular setup with two circular tanks and a central container, showing internal components and a curved arrow indicating rotation (no text or symbols)fig.7
text_image
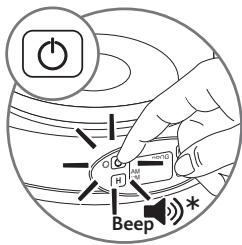
Power H Beepfig.8
(*) : selon modèle - depending on model - afhankelijk van het model - je nach Modell - a seconda del modelo - en función del modelo - consoante o modelo - Aváloya to μοντέλο - modele bağlı olarak - afhænger af model - avhengig av modell - Beroende på modell - mallista riippuen - بسته به مدل - حسب الموديل
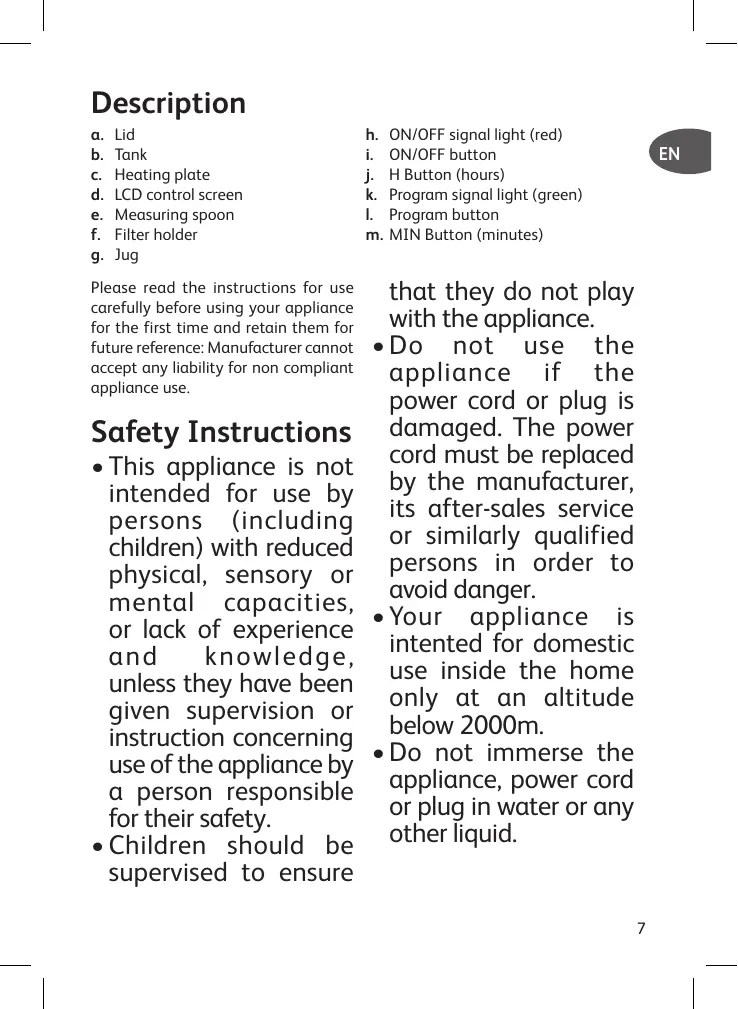
Description
a. Couvercle
b. Reservoir
c. Plaque chauffante
d. Ecran de contrôle LCD
e. Cuillere doseuse
f. Porte-filtre
g. Verseuse
Please read the instructions for use carefully before using your appliance for the first time and retain them for future reference: Manufacturer cannot accept any liability for non compliant appliance use.
Safety Instructions
- This appliance is not intended for use by persons (including children) with reduced physical, sensory or mental capacities, or lack of experience and knowledge, unless they have been given supervision or instruction concerning use of the appliance by a person responsible for their safety.
• Children should be supervised to ensure
h. ON/OFF signal light (red)
i. ON/OFF button
j. H Button (hours)
k. Program signal light (green)
I. Program button
m. MIN Button (minutes)
that they do not play with the appliance.
- Do not use the appliance if the power cord or plug is damaged. The power cord must be replaced by the manufacturer, its after-sales service or similarly qualified persons in order to avoid danger.
- Your appliance is intended for domestic use inside the home only at an altitude below 2000m.
-
Do not immerse the appliance, power cord or plug in water or any other liquid.
-
Your appliance is designed for domestic use only.
- It is not intended to be used in the following applications, and the guarantee will not apply for:
- staff kitchen areas in shops, offices and other working environments;
- farm houses;
- by clients in hotels, motels and other residential type environments;
- bed and breakfast type environments.
• Always follow the cleaning instruction to clean your appliance;
- Unplug the appliance.
- Do not clean the appliance while hot.
- Clean with a damp cloth or sponge.
- Never immerse the appliance in water or
put it under running water.
- WARNING: Risks of injuries if you don’t use this appliance correctly.
- WARNING: After using, do not to touch the keep warm plate, subjected to residual heat. Be sure to manipulate only the handle of glass jar during heating until cooling down.
- This appliance may be used by children of at least 8 years of age, as long as they are supervised and have been given instructions about using the appliance safely and are fully aware of the dangers involved. Cleaning and user maintenance shall not be made by children unless they are older than 8 and they are supervised by an adult.
- Keep the appliance and its cord out of reach of children under 8 years of age.
- This appliance may be used by persons with reduced physical, sensory or mental capabilities, or whose experience or knowledge is not sufficient, provided they are supervised or have received instruction to use the device safely and understand the dangers.
• Children should not use the device as a toy. - The coffee-maker shall not be placed in a cabinet when in use.
- Before plugging the appliance in, make sure that the power it uses corresponds to your electrical supply system and that the outlet is earthed.
- Any error in the electrical connection will negate your guarantee.
-
Unplug the appliance when you have finished using it and when you clean it.
-
Do not use the appliance if it is not working properly or if it has been damaged. If this occurs, contact an authorised service centre.
- All interventions other than cleaning and everyday maintenance by the customer must be performed by an authorised service centre.
- The power cord must never be close to or in contact with the hot parts of your appliance, near a source of heat or over a sharp edge.
- For your safety, only use the manufacturer's accessories and spare parts designed for your appliance.
- Do not pull on the cord to unplug the appliance.
- Never put your coffee jug in a microwave oven, on a flame or a electric cooking plates.
- Do not fill the appliance with water if it is still hot.
- All appliances are subject to strict quality control procedures. These include actual usage tests on randomly selected appliances, which would explain any traces of use.
- Always close the lid when running the coffee maker.
- Do not use the jug without the lid.
- Do not pour hot water in the tanks.
USE
Before using for the first time
- Use your filter coffee maker without coffee the first time using the
equivalent of a jug of water to rinse the circuits.
Making coffee
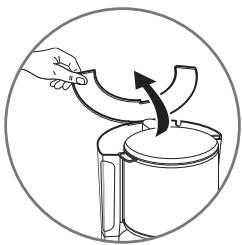
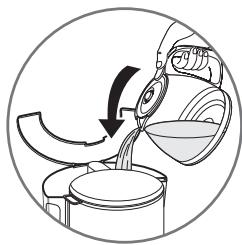
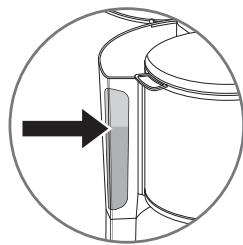
(Follow figures 1 to 8)
- Use only cold water and a n°4 paper filter.
- Do not exceed the maximum water level indicated on the tank.
- This coffee maker is equipped with a drip stop so that you can serve coffee before the cycle ends. Replace the jug immediately in order to avoid overflowing.
- Wait a few minutes before you make coffee a second time.
Programming
Setting the time
- Plug in the coffee maker. The LCD screen (d) will display 12.00 and flashes for a few seconds.
- Press the H Button in order to set the hour. You may do this repeatedly, or continually for faster hour progression.
- AM indicates morning hours and PM, afternoon and evening hours.
- Once you have set the hour, press the MINI button for minutes and follow the same procedure.
- Once the minutes are set, wait for the flashing to stop and the set time will be validated. Otherwise, press the ⏻ (i) button once.
- The programming will have to be repeated in case of a blackout or if the coffee maker is unplugged.
- PLEASE NOTE :You can set or adjust the time at any moment. Hold the button down for a minimum of 3 seconds ⏻. Once the time flashes on
the screen, you may adjust the time using the H and Min buttons.
Program mode functioning
- In order to program your coffee maker, press the PROG button once.
- Set the hour and minutes according to the time you wish your coffee maker to start (please refer to "Programming", above).
- Validate the set time by pressing the PROG button once more.
- The screen will display the set time and the green light signal (k) will turn on.
- In order to display the current time again, briefly press the ⏻ button.
- At the set time, the red light signal will turn on and the coffee maker will start.
WARNING: The set program is automatically deactivated at the end of the coffee cycle; however, the set time is saved. Reactivate the set program every day by pressing on the PROG button. In order to set a different time, please refer to paragraph "Using the appliance in the Program Mode".
It is possible at all times:
- Turn your coffee maker ON or OFF by pressing the ⏻ button.
- Cancel the programming by pressing the PROG button for 3 seconds. When you do so, the green light signal (k) will turn off.
- In order to reactivate the program on your coffee maker, press the PROG button once.
- To change the set time, press the PROG button for 2 seconds.
Manual functioning
Follow figures 1 to 8.
- Press the ⏻ button. The red light signal will turn on and the coffee maker will start functioning.
- Press the ⏻ button once more to stop functioning.
PLEASE NOTE
- Whether you use your coffee maker manually or in the program mode, it will turn off automatically about 30 minutes after the end of each cycle.
- During those 30 minutes, your coffee will be kept warm, at the right temperature.
- When your coffee maker is switched on, it produces a single “beep” and produces two “beeps” when it is switched off (depending on model).
Cleaning
- To dispose of the used coffee grounds, remove the used paper filter.
- Unplug the coffee maker and let it cool down.
- Clean with a damp cloth or sponge.
- Do not clean the appliance while it is still hot.
- Never immerse the appliance in water or any other liquid.
- None of the coffee maker parts should be put in the dishwasher.
Descaling
- Descale your coffee maker every month or every 40 cycles.
You can use:
- a packet of descaling agent diluted in two large cups of water.
- or two large cups of commercially
available white vinegar which can be purchased in hardware stores.
- Pour into the tank (b) and turn on the coffee maker (without coffee).
- Let the equivalent of one cup pour into the jug, then turn the coffee maker off.
- Allow the liquid to stand for one hour.
- Restart the coffee maker and let the rest of the liquid pass through to the jug.
- To rinse, run the coffee maker 2 or 3 more times with the equivalent of one glass jug of water.
The guarantee does not cover coffee makers that malfunction or cease to operate because they have not been regularly descaled.
Think of the environment!

① Your appliance contains valuable materials which can be recovered or recycled.
Leave it at a local civic waste collection point or at an approved service centre, where it will be disposed of properly.
European directive 2012/19/UE on Waste Electrical and Electronic Equipment (WEEE), requires that old household electrical appliances are not thrown into the normal flow of municipal waste. Old appliances must be collected separately in order to optimize the recovery and recycling of materials they contain and reduce the impact on human health and the environment.
Beschrijving
a. Deksel
b. Reservoir
c. Verwarmingsplaat
d. LCD-controlescherm
e. Doseringslepel
f. Filterhouder
g. Schenkkan
- Bed and breakfast.