
PLM4621N2 - Lawn mower MAKITA - Free user manual and instructions
Find the device manual for free PLM4621N2 MAKITA in PDF.
| Product type | Petrol lawn mower |
| Brand | Makita |
| Model | PLM4621N2 |
| Cutting width | 460 mm |
| Cutting height | 25 - 70 mm, 5 settings |
| Grass bag capacity | 60 L |
| Net weight | 31.1 kg |
| Engine type | B&S 625E series |
| Rated power | 2.4 kW |
| Displacement | 190 cm³ |
| Fuel tank capacity | 1.0 L |
| Oil tank capacity | 0.6 L |
| Self-propelled | No |
| Available functions | Cutting with collection, mulching |
| Foldable handle | Yes, 3 adjustable heights |
| Guaranteed sound power level | 96 dB(A) |
| Vibrations (EN ISO 5395) | 5.738 m/s² (K=1.5 m/s²) |
| Air filter maintenance | Every 25 hours of mowing |
| Spark plug replacement | Every 100 hours |
| Blade tightening torque | 35 - 45 Nm |
| Off-season storage | Drain fuel, clean, lubricate |
Frequently Asked Questions - PLM4621N2 MAKITA
User questions about PLM4621N2 MAKITA
0 question about this device. Answer the ones you know or ask your own.
Ask a new question about this device
Download the instructions for your Lawn mower in PDF format for free! Find your manual PLM4621N2 - MAKITA and take your electronic device back in hand. On this page are published all the documents necessary for the use of your device. PLM4621N2 by MAKITA.
USER MANUAL PLM4621N2 MAKITA
Explanation of general view
-
Upper handle
-
Grass catcher
-
Oil cap
-
Stop control handle
-
Height adjusting lever
-
Cable clamp
-
Throttle choke lever
-
Deck
-
Locking knob
-
Starter handle
-
Spark Plug
-
Fast speed
-
Rope guide
-
Fuel cap
-
Slow speed


WARNING
For your own safety please read this manual before attempting to operate your new unit. Failure to follow instructions can result in serious personal injury. Spend a few moments to familiarize yourself with your mower before each use. Keep this manual in a safe place, so that the information is available at all times. If you give the equipment to any other person, hand over these operating instructions and safety regulations as well.
Intended use
The equipment may only be used for the tasks it is designed to handle. Any other use is deemed to be a case of misuse. The user/operator and not the manufacturer will be liable for any damage or injuries of any kind caused as a result of this.
The petrol lawn mower is intended for private use i.e. for use in home and gardening environments.
Private use of the lawn mower refers an annual operating time generally not exceeding that of 50 hours, during which time the machine is primarily used to maintain small-scale, residential lawns and home/hobby gardens.
Public facilities, sporting halls, and agricultural/forestry applications are excluded.
Please note that our equipment has not been designed for use in commercial, trade or industrial applications. Our warranty will be voided if the machine is used in commercial, trade or industrial businesses or for equivalent purposes.
The operating instructions as supplied by the manufacturer must be kept and referred to in order to ensure that the lawn mower is properly used and maintained. The instructions contain valuable information on operating, maintenance and servicing conditions. Important! Due to the high risk of bodily injury to the user, the lawn mower may not be used to trim bushes, hedges or shrubs, to cut scaling vegetation, planted roofs, or balcony-grown grass, to clean (suck up) dirt and debris off walkways, or to chop up tree or hedge clippings.
Moreover, the lawn mower may not be used as a power cultivator to level out high areas such as molehills.
For safety reasons, the lawn mower may not be used as a drive unit for other work tools or tool kits of any kind.
1. SYMBOLS MARKED ON THE PRODUCT (on the rear cover)

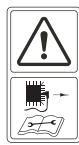
Read operator's manual.
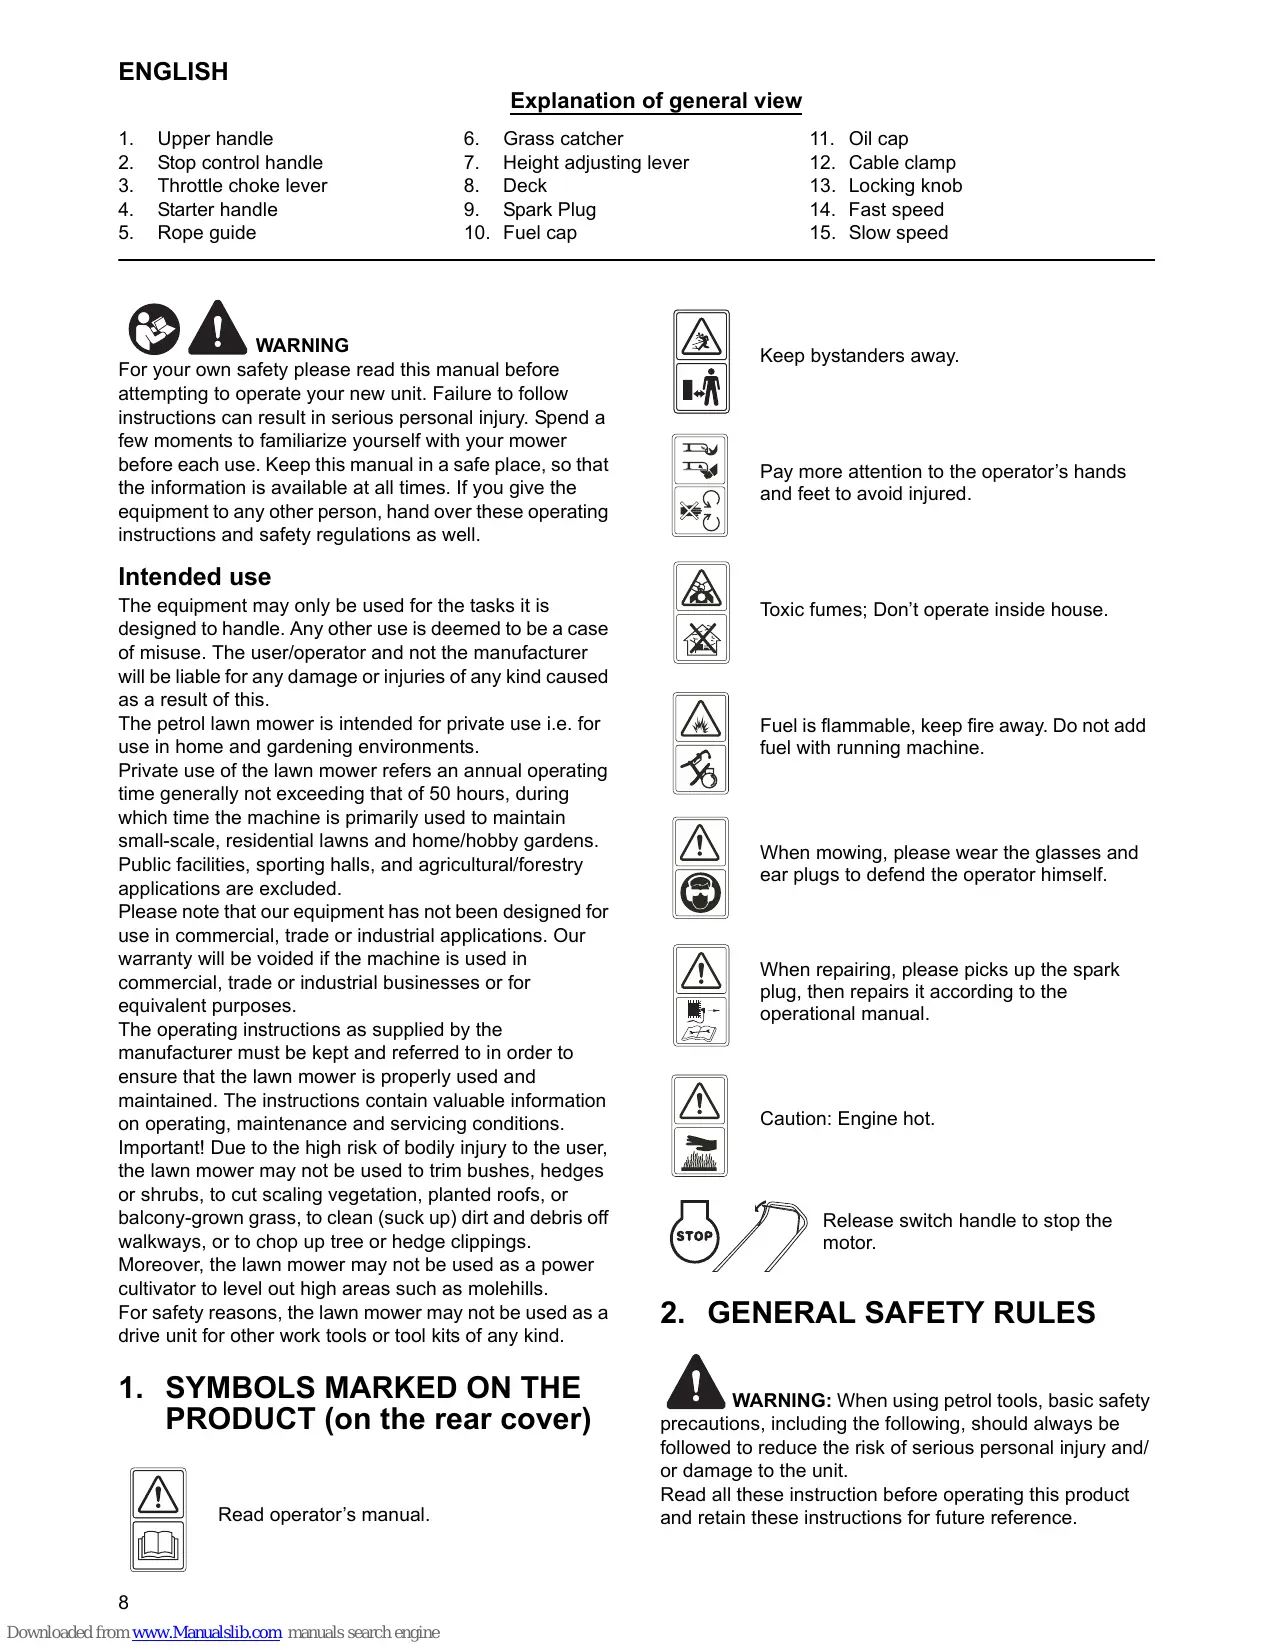
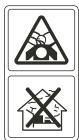
Keep bystanders away.

Pay more attention to the operator's hands and feet to avoid injured.
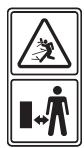
Toxic fumes; Don't operate inside house.
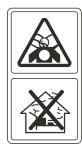
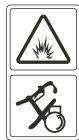
Fuel is flammable, keep fire away. Do not add fuel with running machine.

When mowing, please wear the glasses and ear plugs to defend the operator himself.
When repairing, please picks up the spark plug, then repairs it according to the operational manual.
Caution: Engine hot.

Release switch handle to stop the motor.
2. GENERAL SAFETY RULES

WARNING: When using petrol tools, basic safety
precautions, including the following, should always be followed to reduce the risk of serious personal injury and/ or damage to the unit.
Read all these instruction before operating this product and retain these instructions for future reference.

WARNING: This machine produces an
electromagnetic field during operation. Under some circumstances this field may interfere with active or passive medical implants. To reduce the risk of serious or fatal injury, we recommend persons with medical implants to consult their physician and the medical implant manufacturer before operating this machine.
Training
- Read the instructions carefully. Be familiar with the controls and the proper use of the equipment. Learn how to stop the engine quickly.
-
Only use the lawn mower for the purpose for which it was designed, i.e. for cutting and collecting grass. Any other use can be hazardous, causing damage to the machine. Examples of improper use may include, but are not limited to:
-
transport of people, children or animals on the machine;
- being transported by the machine;
- using the machine to tow or push loads;
- using the machine for leaf or debris collection;
- using the machine to trim hedges, or for cutting vegetation other than grass;
- use of the machine by more than one person;
-
using the blade on surfaces other than grass.
-
Never allow children or people unfamiliar with these instructions to use the lawn mower. Local regulations can restrict the age of the operator.
-
Never use the lawn mower:
-
when people, especially children, or pets are nearby;
-
if the operator has taken medicine or substances that can affect his ability to react and concentrate.
-
Keep in mind that the operator or user is responsible for accidents or hazards occurring to other people or their property.
- The operators must receive proper training in the use, adjustment and operation of the machine, including prohibited operations.
Preparation
- While mowing, always wear substantial footwear and long trousers. Do not operate the equipment when barefoot or wearing open sandals.
-
Thoroughly inspect the area where the equipment is to be used and remove all objects, such as stones, toys, sticks and wires, which can be thrown by the machine.
WARNING-Petrol is highly flammable. -
store fuel in containers specifically designed for this purpose;
- refuel outdoors only and do not smoke while refueling;
- add fuel before starting the engine. Never remove the cap of the fuel tank or add petrol while the engine is running or when the engine is hot;
- if petrol is spilled, do not attempt to start the engine but move the machine away from the area of spillage and avoid creating any source of ignition until petrol vapors have dissipated;
-
replace all fuel tank and container caps securely.
-
Replace faulty silencers.
- Before using, always visually inspect to see that the blades, blade bolts and cutter assembly are not worn or damaged. Replace worn or damaged blades and bolts in sets to preserve balance.
- Check regularly to ensure that all starting interlocks and operator presence controls are properly functioning.
Operation
- Do not operate the engine in a confined space where dangerous carbon monoxide fumes can collect.
- Do not use the machine while being tired, ill or under influence of alcohol or other drugs.
- Warning! Do not use the lawn mower when there is a risk for lighting.
- It is recommended to limit the duration of operation, in order to minimize the risks from noise and vibration.
- Be careful when using the lawn mower in slopes and near drop-offs, ditches or embankments.
- Mow only in daylight or in good artificial light.
- Avoid operating the equipment in wet grass, where feasible.
Always be sure of your footing on slopes. - Walk, never run.
- For wheeled rotary machines, mow across the face of slopes, never up and down.
Exercise extreme caution when changing direction on slopes. - Do not mow excessively steep slopes.
- Use extreme caution when reversing or pulling the lawn mower towards you.
- Stop the blade(s) if the lawn mower has to be tilted for transportation when crossing surfaces other than grass, and when transporting the lawn mower to and from the area to be mowed.
- Never operate the lawn mower with defective guards, or without safety devices, for example deflectors and/or grass catchers, in place.
- Caution: The lawn mower shall not be operated without either the entire grass catcher or self-closing discharge opening guard in place.
- Do not change the engine governor settings or overspend the engine.
- Do not alter or tamper with any sealed adjustment for the engine speed control.
- The lawn mower safety systems or features shall not be tampered with or disabled.
- Disengage all blade and drive clutches before starting the engine.
- Start the engine carefully according to instructions and with feet well away from the blade(s).
- Do not tilt the lawn mower when starting the engine.
- Do not start the engine when standing in front of the discharge chute.
- Do not put hands or feet near or under rotating parts. Keep clear of the discharge opening at all times.
- Never pick up or carry a lawn mower while the engine is running.
- Stop the engine and disconnect the spark plug wire, make sure that all moving parts have come to a complete stop and, where a key is fitted remove the key:
-
before clearing blockages or unclogging chute;
-
before checking, cleaning or working on the lawn mower;
- after striking a foreign object. Inspect the lawn mower for damage and make repairs before restarting and operating the lawn mower;
-
if lawn mower starts to vibrate abnormally (check immediately).
-
Stop the engine and disconnect the spark plug wire, make sure that all moving parts have come to a complete stop and, where a key is fitted remove the key:
-
whenever you leave the lawn mower;
-
before refueling.
-
Reduce the throttle setting during engine shut down and, if the engine is provided with a shut-off valve, turn the fuel off at the conclusion of mowing.
- Only use the lawn mower for the purpose for which it is designed, for cutting and collecting grass. Any other use can be hazardous, causing damage to the machine.
Maintenance and storage
- Keep all nuts, bolts and screws tight to be sure the equipment is in safe working condition.
- Never store the equipment with petrol in the tank inside a building where fumes can reach an open flame or spark.
- Allow the engine to cool before storing in any enclosure; Clean and maintain the lawn mower before storage.
- To reduce the fire hazard, keep the engine, silencer, battery compartment and petrol storage area free of grass, leaves, or excessive grease.
- Check the grass catcher frequently for wear or deterioration.
- Replace worn or damaged parts for safety.
-
If the fuel tank has to be drained, this should be done outdoors.
-
Improper maintenance, use of non-conforming replacement components, or the removal or modification of safety components can damage the lawn mower and injure the operators seriously.
- Only use the recommended blades and spare parts by the manufacturer. The use of non-genuine parts can damage the machine and injure the operators. Keep the lawn mower in good working condition.
- If the blade stopping device doesn't work, please contact service center for help.
Transportation and handling
-
Whenever the machine is to be handled, raised, transported or tilted you must:
-
wear strong working gloves;
- grasp the machine at the points that offer a safe grip, taking account of the weight and its distribution;
-
use an appropriate number of people for the weight of the machine and the characteristics of the vehicle or the place where it has to be placed or collected.
-
During transport, fasten the machine securely with ropes or chains.

WARNING: Do not touch rotating blade.

WARNING: Refuel in a well ventilated area with
the engine stopped.
3. PARTS DESCRIPTION (Fig. 1 & 2)
Including
A: Spark plug wrench
B: Mulching wedge
4. TECHNICAL DATA
| Model | PLM4120N | PLM4620N |
| Engine type | B&S 500E Series | B&S 625E Series |
| Self Propel | No | No |
| Engine Displacement | 140 cm³ | 190 cm³ |
| Nominal Power | 1.9 kW | 2.4 kW |
| Blade Width | 410 mm | 460 mm |
| Idle Speed | 2,800/min | 2,800/min |
| Fuel Tank Capacity | 0.8L | 1.0L |
| Oil tank capacity | 0.47L | 0.6L |
| Grass catch bag capacity | 50L | 60L |
| Net Weight | 26.0 kg | 31.1 kg |
| Height adjustment | 25 – 70 mm, 5 adjustment | 25 – 70 mm, 5 adjustment |
| Guaranteed sound power level at the operator's position (According to EN ISO 5395-1 Annex F & EN ISO 5395-2, EN ISO 4871) | 84.6dB(A) (K=3dB(A)) | 83.5dB(A) (K = 3dB(A)) |
| Measured sound power level | 93.4dB(A) K=1.93dB(A) | 93.6dB(A) K=2.47dB(A) |
| Guaranteed sound power level (According to 2000/14/EC) | 96dB(A) | 96dB(A) |
| Vibration (According to EN ISO 5395-1 Annex G & EN ISO 5395-2) | 5.27 m/s² K=1.5 m/s² | 5.738 m/s² K=1.5 m/s² |
5. ASSEMBLY
5-1 ASSEMBLING THE FOLDING HANDLE
A) Fix the lower handlebars into the unit body with two sets of bolt, washer and locking knob as shown. (Fig. 3, Fig. 4, Fig. 5, Fig. 6)
B) Release the upper handlebars for folding. Connect the upper handle and the lower handle with the two sets of bolt, washer and locking knob. (Fig. 7, Fig. 8, Fig. 9)
C) Position all cables over the handle shafts. Clamp them around the middle of lower handles by the cable clamps so that the cables are fixed on the outside of the machine. Otherwise the cables may be pinched by opening/closing the rear cover or forced by folding the upper handle. (Fig. 10)
5-2 ASSEMBLING THE GRASS CATCHER
- To fit: Lift the rear cover and hang the grass catcher on the shaft of rear of mower. (Fig. 11, Fig. 12)
- To remove: Grasp and lift the rear cover, remove grass catcher.
5-3 STARTER HANDLE
Move the starter handle from the engine to the rope guide. (Fig. 13, Fig. 14)
5-4 HEIGHT OF CUT
Apply outward pressure to disengage lever from rack. Move lever forward or back to adjust height. (Fig. 15 and see clause 8-8)
6. ADJUSTMENT FOR AN APPROPRIATE HEIGHT
1) Back out the locking knob which fixed the lower handle. (Fig. 16)
2) Refer to Fig. 17, move the lower handle up and down, adjust it to the proper height. There is 3 adjusting height to be chosen on this type lawn mower; at 1 height, lower handle to the ground is highest., 3 height is the lowest.
3) Adjusting to the proper height, then fix the lower handle by the locking knobs.

WARNING: The left side and right side of lower
handle must adjust to the same height.
7. 2 IN 1
These lawn mowers can be retrofitted from its normal function, based on the application purpose:
From lawn mower with rear discharge and mulching mower.
What is mulching?
When mulching, the grass is cut in one working step, then finely chopped and returned to the grass strip as natural fertilizer.
Hints for mulch-mowing:
- Regular cut-back by max. 2 cm from 6 cm to 4 cm grass height.
- Use a sharp cutting knife.
- Do not mow wet grass.
- Set max. Motor speed.
- Only move at working pace.
- Regularly clean mulching wedge, housing inner side and mowing blade.
ONE: Retrofitting for mulching mower

WARNING: Only with a stopped motor and
standstill cutter.
- Raise the rear cover and remove the grass catcher.
- Push the mulching wedge into the deck. Lock the mulching wedge with the button into the opening on the deck. (Fig. 18, Fig. 19)
- Lower the rear cover again.
TWO: Mowing with the grass catcher
- For mowing with the grass catcher, remove the mulching wedge and mount the grass catcher.
- Removing the mulching wedge.
- Lift rear cover and remove the mulching wedge.

WARNING: Only with a stopped motor and
standstill cutter.
8. OPERATING INSTRUCTIONS
8-1 BEFORE STARTING
Service the engine with gasoline and oil as instructed in the separate engine manual packed in your mower. Read instructions carefully.

WARNING: Petrol is highly flammable.
Store fuel in containers specifically designed for this purpose.
Refuel outdoors only, before starting the engine and do not smoke while refueling or handling fuel.
Never remove the cap of the fuel tank or add petrol while the engine is running or when the engine is hot.
If petrol is spilled, do not attempt to start the engine but move the machine away from the area of spillage and avoid creating any source of ignition until petrol vapors have dissipated.
Replace all fuel tanks and container caps securely.
Before tipping the lawn mower to maintain the blade or drain oil, remove fuel from tank.
8-2 TO START ENGINE AND ENGAGE BLADE
- The unit is equipped with a rubber boot over the end of the spark plug, make certain the metal loop on the end of the spark plug wire (inside the rubber boot) is fastened securely over the metal tip on the spark plug.
- Press the primer bulb 3-5 times before starting the engine. (Fig. 20)
- When starting cool engine, turn throttle choke lever to "O" position. When starting warm engine and Operating, turn throttle choke lever to "O" position. (Fig. 21)
- Standing behind the unit, grasp the stop control handle and hold it against the upper handle as shown in Fig. 22.
- Grasp the starter handle as shown Fig. 22 and pull it up rapidly. Return it slowly to the rope guide bolt after engine starts. Release the stop control handle to stop the engine and blade.

Start the engine carefully according to instructions and with feet well away from the blade.

Do not tilt the lawn mower when starting the engine. Start the mower on a level surface, free of high grass or obstacles.

Keep hands and feet away from the rotating parts. Do not start the engine when standing in front of the discharge opening.
During operation, tightly hold the stop control handle with both hands.

Note: During operation, when the stop control
handle is released, the engine will stop and thus stopping the lawn mower from operating.

WARNING! In order to avoid any unintentional
start-ups of the lawn mower, it comes equipped with an engine brake which must be pulled back before the engine can be started. When the engine control lever is released it must return to its initial position, at which point the engine automatically switches off.

Note: Engine brake (brake handle): Use the lever
to stop the engine. When you release the lever the engine and the blade stop automatically. To mow, hold the lever in the working position. Before you start to mow, check the start/stop lever several times to be sure that it is working properly. Ensure that the tension cable can be smoothly operated (i.e. is not catching or kinking in any way).
8-4 TO STOP ENGINE

CAUTION: The blade continues to rotate for a seconds after the engine is shut off.
- Release the stop control handle to stop the engine and blade.
- Disconnect and ground the spark plug wire as instructed in the separate engine manual to prevent accidental starting while equipment is unattended.
8-5 FOR THE BEST RESULTS WHEN MOWING
Clear lawn of debris. Be sure that the lawn is clear of stones, sticks, wire or other foreign objects which could be accidentally thrown out by the mower in any direction and cause serious personal injury to the operator and others as well as damage to property and surrounding objects. Do not cut wet grass. For effective mowing do not cut wet grass because it tends to stick to the underside of the deck preventing proper mowing of the grass clippings. Cut no more than 1/3 the length of the grass.
The recommended cut for mowing is 1/3 the length of the grass. Ground speed will need to be adjusted so the clippings can be dispersed evenly into the lawn. For especially heavy cutting in thick grass it may be necessary to use one of the slowest speeds in order to get a clean well mowed cut. When mowing long grass you may have to cut the lawn in two passes, lowering the blade another 1/3 of the length for the second cut and perhaps cutting in a different pattern than was used the first time.
Overlapping the cut a little on each pass will also help to clean up any stray clippings left on the lawn. The mower should always be operated at full throttle to get the best cut and allow it to do the most effective job of mowing. Clean underside of deck.
Be certain to clean the underside of the cutting deck after each use to avoid a build-up of grass, which would prevent proper mulching.
Mowing leaves: The mowing of leaves can also be beneficial to your lawn. When mowing leaves make sure they are dry and are not laying too thick on the lawn. Do not wait for all the leaves to be off the trees before you mow.

WARNING: If you strike a foreign object, stop the Remove wire from spark plug, thoroughly inspect over for any damage and repair the damage before ing and operating the mower. Extensive vibration of lever during operation is an indication of damage. It should be promptly inspected and repaired.
8-6 GRASS CATCHER
Empty and clean the bag, make sure it is clean and ensure its meshwork is ventilated. (Fig. 23)
8-7 DECK
The underside of the mower deck should be cleaned after each use to prevent a buildup of grass clippings, leaves, dirt or other matter. If this debris is allowed to accumulate, it will invite rust and corrosion, and may prevent proper
mulching. The deck may be cleaned by tilting the mower and scraping clean with a suitable tool (make certain the spark plug wire is disconnected).
8-8 HEIGHT ADJUSTMENT INSTRUCTIONS

CAUTION: Do not at any time make any
adjustment to lawn mower without first stopping the engine and disconnecting the spark plug wire.

CAUTION: Before changing mowing height, stop
mower and disconnect spark plug cable. Your mower is equipped with a central height adjustment lever offering 5 height positions.
- Stop mower and disconnect spark plug cable before changing mower cutting height.
- The central height adjustment lever offers you 5 different height positions.
- To change the height of cut, squeeze adjuster lever toward the wheel, moving up or down to selected height (Fig. 24). All wheels will be in the same height of cut.
9. MAINTENANCE INSTRUCTIONS
SPARK PLUG
Use only original replacement spark plug. For best results, replace the spark plug every 100 hours of use. (refer to ENGINE OWNER'S MANUAL)
BRAKE PADS
Check and/or replace the engine brake pads in service agent regularly, only original parts can be used as replacement.
10. LUBRICATION INSTRUCTIONS

CAUTION: DISCONNECT SPARK PLUG
BEFORE SERVICING.
- WHEELS-Lubricate the ball bearings in each wheel at least once a season with a light oil.
- ENGINE-Follow engine manual for lubrication instructions.
- STOP CONTROL-Lubricate the pivot points on the stop control handle and its cable at least once a season with light oil. The stop control must operate freely in both directions.
11. CLEANING

CAUTION: Do not hose engine. Water can
damage engine or contaminate the fuel system.
- Wipe deck with dry cloth.
- Hose under deck by tilting the mower so that the spark plug is up.
11-1 ENGINE AIR CLEANER

CAUTION: Do not allow dirt or dust to clog the air
filter foam element.
The engine air cleaner element must be serviced (cleaned) after 25 hours normal mowing. The foam element must be serviced regularly if the mower is used in dry dusty conditions. (refer to ENGINE OWNER'S MANUAL)
To CLEAN AIR FILTER
- For PLM4120N: Lift the tabs on top of the filter cover. For PLM4620N: Remove screw.
- Remove cover.
- Wash filter element in soap water. DO NOT USE GASOLINE!
- Air dry filter element.
- Place a few drops of SAE30 oil on the foam filter and squeeze tightly to remove any excess oil.
- Reinstall filter.
- Close the filter cover.

NOTE: Replace filter if frayed, torn, damaged or
unable to be cleaned. (Fig. 25 for PLM4120N)
11-2 CUTTING BLADE

CAUTION: Be sure to disconnect and ground the ug wire before working on the cutting blade to accidental engine starting. Protect hands by using loves or a rag to grasp the cutting blades.
Tip mower as specified in separate engine manual.
Remove the hex bolt and washer which hold the blade and blade adapter to the engine crankshaft. Remove the blade and adapter from the crankshaft.

WARNING: Periodically inspect the blade
adapter for cracks, especially if you strike a foreign object. Replace when necessary.
For best results your blade should be sharp. The blade may be resharpened by removing it and either grinding or filing the cutting edge keeping as close to the original bevel as possible. It is extremely important that each cutting edge receives an equal amount of grinding to prevent an unbalanced blade. Improper blade balance will result in excessive vibration causing eventual damage to the engine and mower. Be sure to carefully balance blade after sharpening. The blade can be tested for balance by balancing it on a round shaft screwdriver. Remove metal from the heavy side until it balances evenly. (Fig. 26) Before reassembling the blade and the blade adapter to the unit, lubricate the engine crankshaft and the inner surface of the blade adapter with light oil. Install the blade adapter on the crankshaft. Refer to Fig. 26. Place the blade with the part number facing away from the adapter. Align the washer over the blade and insert the hex bolt. Tighten the hex bolt to the torque listed below.
11-3 BLADE MOUNTING TORQUE
Center Bolt must be tightened to 35 - 45 Nm torque. To insure safe operation of your unit. ALL nuts and bolts must be checked periodically for correct tightness. After prolonged use, especially in sandy soil conditions, the blade will become worn and lose some of the original shape. Cutting efficiency will be reduced and the blade should be replaced.
Replace with an approved factory replacement blade only. Possible damage resulting from blade unbalance condition is not the responsibility of the manufacturer. When you change the blade, must use the original type marked on the blade (MAKITA 263001433 for PLM4120N; MAKITA 263001451 for PLM4620N) (for order the blade, contact your local dealer or call our company).

WARNING: Do not touch rotating blade.
11-4 ENGINE
Refer to the separate engine manual for engine maintenance instructions.
Maintain engine oil as instructed in the separate engine manual packed with your unit.
Read and follow instructions carefully.
Service air cleaner as per separate engine manual under normal conditions. Clean every few hours under extremely dusty conditions. Poor engine performance and flooding usually indicates that the air cleaner should be serviced.
To service the air cleaner, refer to the separate engine manual packed with your unit.
The spark plug should be cleaned and the gap reset once a season. Spark plug replacement is recommended at the start of each mowing season; check engine manual for correct plug type and gap specifications.
Clean the engine regularly with a cloth or brush. Keep the cooling system (blower housing area) clean to permit proper air circulation which is essential to engine performance and life. Be certain to remove all grass, dirt and combustible debris from muffler area.
12. STORAGE INSTRUCTIONS (OFF SEASON)
The following steps should be taken to prepare lawn mower for storage.
- Empty the tank after the last mowing of the season.
a) Empty the petrol tank with a suction pump.

CAUTION: Do not drain the petrol in closed
rooms, in close proximity of open fire, etc. Do not smoke! Petrol fumes can cause explosion or fire.
b) Start the engine and let it run until it has used up all remaining petrol and stalls.
c) Remove the spark plug. Use an oilcan to fill approx. 20ml oil into the combustion chamber. Operate the starter to evenly distribute the oil in the combustion chamber. Replace the spark plug.
- Clean and grease the lawn mower carefully as described above under "LUBRICATION INSTRUCTIONS".
-
Slightly grease the cutter to avoid corrosion.
-
Store the lawn mower in a dry, clean and frost-protected place, out of reach of unauthorized persons.

CAUTION: The engine must have completely
cooled down before storing the lawn mower.

NOTE:
When storing any type of power equipment in an unventilated or material storage shed;
- Care should be taken to rust-proof the equipment. Using a light oil or silicone, coat the equipment, especially cables and all moving parts.
- Be careful not to bend or kink cables.
- If the starter rope becomes disconnected from rope guide on handle, disconnect and ground the spark plug wire, depress the blade control handle and pull the starter rope out from engine slowly. Slip the starter rope into the rope guide bolt on handle.
Transport
Turn the engine off and allow the engine to cool down. Then disconnect the spark plug wire and empty the fuel tank according to the instructions in the engine manual. Ensure not to bend or damage the cutter when pushing the lawn mower over obstacles.
13. TROUBLE SHOOTING
| PROBLEM | PROBABLE CAUSE | CORRECTIVE ACTION |
| Engine does not start. | Throttle choke not in the correct position for the prevailing conditions. | Move throttle choke to correct position. |
| Fuel tank is empty. | Fill tank with fuel: refer to ENGINE OWNER'S MANUAL. | |
| Air cleaner element is dirty. | Clean air cleaner element: refer to ENGINE OWNER'S MANUAL. | |
| Spark plug loose. | Tighten spark plug to 25 - 30 Nm. | |
| Spark plug wire loose or disconnected from plug. | Install spark plug wire on spark plug. | |
| Spark plug gap is incorrect. | Set gap between electrodes at 0.7 to 0.8 mm. | |
| Spark plug is defective. | Install new, correctly gapped plug: refer to ENGINE OWNER'S MANUAL. | |
| Carburetor is flooded with fuel. | Remove air cleaner element and pull starter rope continuously until carburetor clears itself and install air cleaner element. | |
| Faulty ignition module. | Contact Makita authorised service centre. | |
| Engine difficult to start or loses power. | Dirt, water, or stale fuel tank. | Drain fuel and clean tank. Fill tank with clean, fresh fuel. |
| Vent hole in fuel tank cap is plugged. | Clean or replace fuel tank cap. | |
| Air cleaner element is duty. | Clean air cleaner element. | |
| Engine operates erratically. | Spark plug is detective. | Install new, correctly gapped plug: refer to ENGINE OWNER'S MANUAL. |
| Spark plug gap is incorrect. | Set gap between electrodes at 0.7 to 0.8 mm. | |
| Air cleaner element is dirty. | Clean air cleaner element: refer to ENGINE OWNER'S MANUAL. | |
| Engine idles poorly. | Air cleaner element is dirty. | Clean air cleaner element: refer to ENGINE OWNER'S MANUAL. |
| Air slots in engine shroud are blocked. | Remove debris from slots. | |
| Cooling fins and air passages under engine blower housing are blocked. | Remove debris from cooling fins and air passages. | |
| Engine skips at high speed. | Gap between electrodes of spark plug is too close. | Set gap between electrodes at 0.7 to 0.8 mm. |
| Engine overheats. | Cooling air flow is restricted. | Remove any debris from slots in shroud, blower housing, air passages. |
| Incorrect spark plug. | For PLM4120N, install RC12YC or QC12YC spark plug and cooling fins on engine. For PLM4620N, install RJ19LMC spark plug and cooling fins on engine. | |
| Mower vibrates abnormally. | Cutting assembly is loose. | Tighten blade. |
| Cutting assembly is unbalanced. | Balance blade. |
14. ENVIRONMENT
Should your machine need replacement after extended use, do not put it in the domestic waste but dispose of it in an environmentally safe way.
For European countries only
EC Declaration of Conformity
Makita declares that the following machine(s):
Designation of Machine:
Petrol Lawn Mower
Model No./ Type: PLM4120N, PLM4620N
Specifications: See "4. TECHNICAL DATA"
Conforms to the following European Directives:
2004/108/EC, 2006/42/EC, 2000/14/EC & 2005/88/EC
They are manufactured in accordance with the following standard or standardized documents:
EN ISO 5395-1, EN ISO 5395-2, EN ISO 14982
The technical file in accordance with 2006/42/EC is available from:
Makita, Jan-Baptist Vinkstraat 2, 3070, Belgium
The conformity assessment procedure required by
Directive 2000/14/EC was in Accordance with annex VI.
Notified Body:
Measured Sound Power Level: 93.4 dB
Guaranteed Sound Power Level: 96 dB
PLM4620N
Measured Sound Power Level: 93.6 dB
Guaranteed Sound Power Level: 96 dB
22.8.2014

Yasushi Fukaya
Director
Makita, Jan-Baptist Vinkstraat 2, 3070, Belgium
Descriptif
Transport et manutention
5-1 MONTIEREN DES KLAPPBAREN GRIFFS
Let op: Motor is heet.
WAARSCHUWING: Benzine is bijzonder
brandbaar.
8-5 VOOR HET BEST MAAIRESULTAAT
Richtlijn 2000/14/EU was is Overeenstemming met annex VI.
Officèle instantie:
PRECAUCION: DESCONECTE LA BUJIA
Corpo notifications:
8-2 START AF MOTOR OG AKTIVERING AF KNIV
11-3 KNIVMONTERINGSMOMENT
5-3 XEPOYAI EKKINHTHPA
Metakivnote To xepoula Ekkivntnpa aTo tov kivntnpa TpoCtov oOhy Tou Oxoiiou. (Eik. 13, Eik. 14)
5-4 YPOES KONH
AoknoTe mia Tneon Ppoc ta eEw yia va aTouovdeoTe Tov
moXlo aTIO tv OovOTn Bao n OTnpiEgNs. MetakivnoTe Tov
moXlo TPOCS TA EPTPOs n Tiow yia va puOmuoTe To uoos.
THN ENAPH THS EPTAIAZ SYNTHPHZH.
-
TPOXOI-AIITAVETa pouAeMav oKαθεTpoxo TouλáxioTov μia φopá avá EToxHμε λEITTOppeuOTo λδi.
-
KINHTHPA -AkoouθnóTe TIC oBnyieç λɪtavonç Tou Εγχερίδοι tou KIVŋTnρa.
- EAEXOSI AXONHSAITAVETa Oneia TEPIOPONSIavwOTo XepouIeYxou DIAKOTNC KA TO KALOIO TOU LAxioTov MIpOa avEIOxN ME LEITOPPEuTO Aoi.To xipotnpio DIAKOTNC PpETIE VA LEITOUpyei EeuOepa TPOc oAe TIC DIEUUVoEIG.
11. KAOAPI\SMO\S

IPOEOXH: Mny KataβpexETOV kivntnpa με
Model Numarasi / Tipi: PLM4120N, PLM4620N
8-2 STARTA MOTORN OCH KOPPLA IN KNIVEN
8-5 FÖR BÄSTA RESULTATEN VID KLIPPNING
FORSIKTIG: KOLE PFA TENNPLUGGEN
FØR VEDLIKEHOLD.
5-2 MONTAZ KOSZA NA TRAWE
2004/108/ES, 2006/42/ES, 2000/14/ES a 2005/88/
ES
Transport a manipulation
8-8 POKNY K NASTAVENI VŠKY

2000/14/ES by v souladu s prilohou VI.
Notifikovana organization:
3. OPIS DELOV (SI. 1 in 2)
Vključno
A: Kliguč za vžigalno svečko
B: Nastavek za mulčenje
4. TEHNICNI PODATKI
| Model | PLM4120N | PLM4620N |
| Vrsta motorja | Serija B&S 500E | Serija B&S 625E |
| Samohodna | Št. | Št. |
| Delovna prostornina motorja | 140 ccm | 190 ccm |
| Nazivna moč | 1,9 kW | 2,4 kW |
| Širina rezila | 410 mm | 460 mm |
| Prosti tek | 2.800/min | 2.800/min |
| Kapaciteta rezervaarja za gorivo | 0,8 I | 1,0 I |
| Prostornina oljega rezervaarja | 0,47 I | 0,6 I |
| Kapaciteta koša za travo | 50 I | 60 I |
| Neto teža | 26,0 kg | 31,1 kg |
| Nastavitev višine | 25 – 70 mm, 5 nastavitev | 25 – 70 mm, 5 nastavitev |
| Zagotovljena raven zvočne moči na položaju uporabnika(V skladu z EN ISO 5395-1 Priloga F in EN ISO 5395-2, EN ISO 4871) | 84,6dB(A)(K=3dB(A)) | 83,5dB(A)(K = 3dB(A)) |
| Izmerjena raven zvočnegha hrupa | 93,4dB(A)K=1,93dB(A) | 93,6dB(A)K=2,47dB(A) |
| Zagotovljena raven zvočnegha hrupa(v skladu z 2000/14/ES) | 96dB(A) | 96dB(A) |
| Vibracije (v skladu z EN ISO 5395-1 Priloga G in EN ISO 5395-2) | 5,27 m/s2 K=1,5 m/s2 | 5,738 m/s2 K=1,5 m/s2 |
5. MONTAZA
5-1 MONTAZLOZLJIVEGAROCAJA
2004/108/ES, 2006/42/ES, 2000/14/ES in 2005/88/ES
2. RREGULLA TÉ PERGJITHSHME TÉ SIGURISE

VINI RE: Kur pērdorni vegla me naftè, duhet tè
merrni masat paraprake te sigurise, duke perfshire te mēposhtmet, pēr tē zvogeluar rrezikun e lendimeve tē renda personale apo demtimin e pajisjes.
Lexojini keto udhezime perpara se ta vini ne pune produktin dhe ruajini udhezimet per reference tě mevonshme.

VINI RE: Kjo pajisje prodhon fushë
11-1 PASTRUESI I AJRIT TÉ MOTORIT

KUJDES: Mos lejoni mbledhjen e papastertive
8-3 PA6OTHNI PPOUeDUPN
IIO BpeMe Ha pa6oTa dpbKTe 3dpaBO pkoXBaTKaTa 3a ynpabNeHHe Ha cnIPAHeTo C dBete Cn pbce.

3a6eIekka: Ako no BpeMe Ha pa6oTa
pbkoxbatkata 3a ynpablenhe Ha cnnpaHTo 6bde OTnycHaT, DniratEnr Tcne cpe nIpeKpatn pa6oTaHa Kocaykata 3a TpeBa.

PNEyPExKHeHIE 3a da ce npdeTbpaTu
HeBONHOTO CTapTnpaHe Ha KocauKaTa, TRe e ObopyDbHa CbC cnpaKa Ha DnRaTeJIa, KOrTo Tp6Ba Da ce OCBO6oDi, KaTo Ce n3dIbPna Ha3aJ, 3a Da MOKe DnRaTeJIaT Da CTapTnpa. Korato IocTbT 3a ynpabLeHne Ha DnRaTeJIa 6bJe OCBO6oDeH, Toi Tp6Ba Da CE BbPHe B NpBBOHaUaJIHO NOLOXeHne, KaTO B TO3N MOMENT DnRaTeJIaT Ce n3KlIOuBa ABTOMATNUHO.

3a6eJexka: CnipaKa Ha DnBraTeJia
(pbkoxbatka 3a cnipahe) N3noJ3BaIte JocTa, 3a da cnpeTe DbrarateT. Korato ocbo6oJnte JocTa, DbrarateTn HOKbT Cnipat ABTomAtuHNo. 3a Da KOCnte, 3aDpXTe JocTa B noJoxKeHne 3a pa6ota. Ipei Da 3aOChTe Da KOCnte, npOBepTe HAKOKN PbTn JocTa 3a CTaptnpaHe/CnipaHe, 3a Da ce yBepTe, ye DeiCTBa npabInHO. YBepTe Ce, ye XINlOTo Ce DvIXN PnabHTo, T.e. He e 3aKaueHo INI INpeYbHaTO HkBJe.
8-4 3A CПИРАЕ HA DBИГATEЛЯ

BHIMAHNE: HoxbT npOdbJIkaBa Da ce BbpTuB
IpoDbIxKeHne Ha HЯKoJIKO cekyHdN Cpei, CnIPAHe Ha DBuRatEn.
- 3a da cnpeTe DnurTaTeI NHOx, OtnycheTe pkoBAtkata 3a ynpabJeHne Ha cnnpaHeTo.
- П配电сөгүмөдөдөдөдөдөдөдөдөдөдөдөдөдөдөдөдөдөдөдөдөдөдөдөдөдөдөдөдөдөдөдөдөдөдөдөдөдөдөдөдөдөдөдөдөдөдөдөдөдөдөл. 3a 3aаитэнэ Сбш, Сыласо Инсчукипгь OTДeЛHOTO рБКОВODCTBO 3a DBИralteя, 3a Да празOTВрате СлУЧАйно CamONрОЗВОЛНо СтарТиране на оБоруДванeto.
8-5 3A NOCTUFAHE HA HAI-IOBPNPE3YJTTATN INP N KOCHE HA TPEBA
IOnuHCTe TpeBHaTApLOUOT OTNOMKn.YbpeTe Ce,Ye NOpTpeBHaTa PLOUHЯMa KaMbHn, IpbUKN, XNuN IIN DpyuN CyJDN OBeKTN, KOINTo MOrAT INCuNDeHTHO Da 6bDaT3XBbPJIeHN OT KOCaUKaTA B PON3BOJNa NOCOKa KATO pInuHnTcepNo3Hn TpaBMn Ha ONepaTopa n CTpaHnHn
NlUa, UeTn Bbpyx NmUyIeCTBO HAMIPAuN CE Ha6JIH3O oBeKTH. He KocTe MOKpa TpeBa. 3a eFPeKTNBHO KOCHe He KocTe MOKpa TpeBa, 3aIoTO TЯ npoRBA CKJIOHooCT Da Ce IOnenBa NO DoJHaT aCt Ha OCHOBaTa, Bb3PpeTnCTBaIKN IpabINHOTO OTP3BaHe Ha TpeBnHTe CtpbkObe. Cpra3BaIe He NoBue ot 1/3 OT BnCOunHaT ha TpeBaTa.
Прелорьчтелниот OTКС Кпн Косе He 1/3 OT ВИСОЧИНАТа HA TpeВАТа. СКОРOCТТа HA ПИДВИЖВаHe ТрЯБа DA ce NOДбepe ТаKa, Ye OTPЯЗИТа TpeВа DA ce pa3пр徳я paBHomeрно ВьрХу TpeВaTA. 3a Doбpe OKОсЕн ПLOUп Пп TЕЖи YСЛВИВЯ B ГСТА TpeВа мОж DA e HeОБхODIMO DA ce ПОЛЗВа EdHа OT Ha-NИСКИТe СКОРOSTN Ha DBИЖЕнe. Пп КОсЕн Ha BИСОКA TpeВа, МОж分解 He HANOЖ NOKОСЯВaHe Ha ДВa NpEXOДa, Пп СпУСКaнe Ha HOЖa CdoПьЛНТeПНо 1/3 OT ВИСОЧИНАТа HA ВТОПЯ OTKС ИЕВENTУАЛнЯ ПпOMЯн Ha NOCOKaTaN КОсЕн Рп BТОПЯ ПпoxOД.
PpeNOKpNBaHTo HA OTKOCnTe C MaIKO pRn BCEKn IpexOcDcbUo CnOMara 3a YnCTO OKoCBAHe 6e3 OCTaHaNI HeOKoCeHn yuactbU. 3a NoCTnraHe Ha Hau-Dobpr pe3yJNTaTn n eFKeTnBHOCT pRn KocHeTo C KocaKaTa BnHaRn Tp8Ba Da ce pa60TN pRn HaNbLnHO OTBopeHa dPoCeNoBa KlaNa (PbLnHa ra3). POnuCTBaIte DoJHaT a CTpaHa Ha OCHObata.
Почистваши Клната страна Н осноьат Спед BCякуnotpeba,зда п dedOTВразиТе натупва themselves Tpeba,koetoп dedOTВразиПрабинно Myнчиранe.
MylnupaHe Ha IncTa: MynupaHeto Ha IncTa cBIO MoKe Da 6bDe NOle3Ho 3a TpeBHOTo NOKPITne. PnMylnupaHe Ha IncTa ce yBepTe, Ye Te ca cyxN He ca HATpyNaHn B TBbpDe De6eI CNoi Bbpxy TpeBaT. He YakaIte BCnKIn IncTa da NaHAt OT DbPBeTata npEn da 3aOnuHHe MynupaHe.

ПРЕДУПЕЖДEHNE: Аку усети Te ydap c ChждпpeTe DBVrgaTeЯ. Пркьснete npobODnka KbMTeJIHaTа CBeU, BHIMATEHNO npOBepTe KocayKaTaTуаЛНИ NOВрEDи ГИ OTCTpaHete, прдИ OTHOBOcHete B XoI NaПрИСТьNTe KbM pa6ToA.
Ipekomepnata Bn6paunna H KocaukaTn no BpeMe Ha pa6ota e INdnkaunna 3a NOBpeJa. HNCTpymEnbT Tpr6Ba da 6bnde BNImateJIHO npoBepeH n peMOHTnpaH.
BHIMAHHE: 3a npedotbpaTbaHe Ha
camonpon3BOJNO CTapTnpaHe Ha dBiratTeIe cy yBepTe, ye CTE pKeBcHaN I 3a3EmNl npOBODnka Ha 3anaJIteJIHaTa CBeU npEi npoBaOta No pExeIu HOK. PnI Heo6XoDmOCT OT XBaUaHEn Ha pExeIu HOK, 3aIHTePbUeTe CN CbC 3dPaBn PbKaBUNI NII TbKaH. HAKNoHete Kocaykata, KaKTo e NocOeHO B OTJeIHOTOp pbKOBOCTBO 3a DBratJI. Pa3BNIte WeCTORpaMnH 6oNT N Wai6bata , KOtO npIKpeBAT HOxA n aAnTepa KbM KOJHOBnBAJ Ha dBiratJIe. CBaIeTe HOxA n aAnTepa OT KOJHOBnBAJ.

PNEUINPEXJEHNE:IepnoDnHO
IpoBepaBaiTe aanTepa Ha HOxa 3a NyKHaTNHN, OcObeHO B clyauH ha ydap Bbpxy BbHsE H oBeKT. Ipn HeoXoIMOCCT rno NDMeHeTe.
3a nocturahe Ha ha-Do6pn pe3yntatn HOxbl Tpr6Ba da e octbp.CneI kaTO 6bde DEMoHTnpaH HOXbT MOKe da ce 3aTOUba C WMIPREI IINI INLA, 3a Da CE PnIDae Ha pexeIoTO OCTPne bIbI HA 3aoCTpRe, Bb3MOxHO HAn6bn3bk DO nbpBOHaauHnra. 3a Da CE npedeOTBpaTu pa36balaHCipaHe e N3KIIIOHTENHO BaxHO BCEKnpeXu HOx Da 6bDe eNDaHko 3aToueH. HenpabInHoto 6balaHCipaHe Ha HOXOBTe BOiD IO ppeKOMepHN Bn6paunu M0Ke Da npdi3Bnka NOBpeXdaHe Ha DBnraTeN a Kocaykata. He 3a6paBraIte BnIMATENo DA 6balaHCipaTe HOxCa CleD 3aTOUBAHe. BaIaNcBt Ha HOxA MoKe Da 6bDe npOBepen Bbpxy Obnna CTBoJ Ha OTBePTKa, I3NON3BAH KaTo OC. OTCpaHE Te MetaI OT NoTeKKATA cTpaHa, DOKATO 6balaHCBt Ce N3pABHN. (Φnr.26) IpeDi o6patHOTo CrIO6BaHe Ha HOxA uAdanTepa KbMaShnHaTA, CMAxe TE KONHOBNBaI Ha DNBraTeJIu VBtpeShnata NOBbPxHOCT Ha adanTepa 3a HOxCA JeKO MacNo. MoNTpaIte adanTepa 3a HOxKa KbM KOJHOBNBaI. BIXΦr.26. NocTabepepeXuHc HOx C Homepa Ha YactTa, OBpHAT KbM IpOTIBONIOXHaTcPaHa Ha adanTepa. IOprabHete Wa6bata NaH Do HOxu BVMBKHeTe WeectOrpAMHH 6OIT. PrnterHete WeectOrpAMHH 6OJT C NOCOueHnno-DOny MOMENT Ha 3aTgRaHe.
11-3 MOMENT HA 3ATRAHE HA HOKA
LcHtpaJIHHT 60NT Tp8Ba Da 6bDe 3aTeHAT C MOMENT 35-45 Nm. TOBa ige rapaHTnpa 6e3oNaCHaTa pa8ota Ha MaunHata. Heo6xOIMo e nepnoDnUHO da ce npOBepraBa 3atraHaTo Ha BCNUKn raiKn i 6oTObE. CneI npOdbJNknteJHa yNoTppe6a, oO6eHO B ycIOBnca PecbYnBn NOHN, HOXbT ige Ce n3Hocn u 3aYbN qact OT nbPBOHaayanHata cn fOpMa. EfKeTINBHOCTTA Ha cpr3BaHe ige HAmalee IN HOXbT ige Tp8Ba Da 6bDe 3aMeHen.
3a 3amraHa n3noI3BaIte eDInHCTBeHO ODo6peHn,
fapbnuHo npOn3BeDeHn HOXOBe. Ipn3BOIDTeJrT He
HOcN OTROBOPHOCT 3a NOBpeHn, Ipedn3BVKaHn OT
n3noI3BaHe Ha HOXOBe C HnpaBnJIeH 6aHaHC.
Ppi 3amraHa Ha HOx e Heo6xoIMo Da n3noI3BaTe
OpunHaJIHHa TnI, MapKnpaH Bbpxy HOxa (MAKITA
263001433 3a PLM4120N; MAKITA 263001451 3a
PLM4620N) (3a npyrn HOXOBe ce KOHCyTTnpaYe c
MeCTHna DnIbpr NIIe Ce OObpHete KbM HaawataΦnpMa).

ПЕДУПЕЖDEHNE: He ДOKОВаTe
BbPTaUNCe HOK.
11-4 DBNΓATEJI
3a INHCTpyKUIN NO O6cIyKBAHe Ha DBNrAteJIY BIX
OTDeJHOTO pBKOBOCTBO 3a EKCNIOaTACnHa DBNrAteJIY.
IOpDlbPkaIe MacNOTO B DBNrAteJIY B CbOTBeTCTBVE C
INHCTpyKUINTE, NOCoEHN B OTDeJHOTO pBKOBOCTBO 3a
DBnRATeJIY, ONAKOBaHO C MaUNHaTA.
IpOyete IN c7a3BaIe INHCTpyKUINTE BHNMaTeJIHO.
O6cIyXBAIne Bb3dUwHnE qnNTbp CbrrNaCHO yKa3AHnraTa
3a HOPMaJIHN YCNOBn, NOCoEHN B OTDeJHOTO
pBKOBOCTBO 3a DBNrAteJIY. Pn iN3KlNoHTeJIHO
3a npahe H yCIOBn oOHTBaIte fHbNtbpHa Ha BCEKn
HraKOJIco Yaca.BNoSeHATA pa6ota Ha DBInrAteJn I "3aDABREto"OBNIKHOBeHO Ca INDNkauN 3a
Heo6XODIMOCOT NOUcTBAHe Ha Bb3dyuHnE FNTbp.
3a O6cnyKBaHe Ha Bb3duyHnE FNTbp BVx OTDeHNOT0
pKoBOIDCTBO 3a DVBrAteJn, ONAKOBaHO C MaunHaTa.
3aAnlnteHnata CBeue Tpr8Ba Da ce NoUcTBA n
pa3CToHneto MExdy eNEKToPOnTe Da ce perylnpa
BEdhBx B Ce3OHa.IpenOpbUnTeHnEO e 3anlnteHnAta
CBeue Da ce 3aMeHn B NaJIoTO Ha BCEKn Ce3OH Ha
KoCEHe; 3a PrabvHnH N TIN 3aAnlnteHnA CBeue N
pa3CToHnne MeKdy eNEKToPOnTe, IpOBepTe B
pbKoBOIDCTBOTO 3a DVBrAteJn.
PeDOBHO NOUcHbAte DnBraTeJI C TbKaH INIIN YeTka.3a OCNpyRpaBaHe Ha cNpKyIaCnHa H Bb3dYxHa, KOrTO e OT CbUeCTBeHO 3NaueHHe 3a eΦeKTNBHOCTTa n EKcPiOaTAtauOnHHn JXbOT Ha DnBraTeJI, NODlbPjKaIte YnCTa OXlaIaNTeHnHa TcStema (yuaCTbKa Ha KOpNyCa Ha BeHTnIaTopa). He dOnyckaIte HATpynBaHe Ha TpeBa, 3AmbpcRABaHn I 3aIaNIMN OTlOMKn OT yuAcTbKa Ha Shymo3aIryuWnteJI.
12.ИHCTPyKlIIM 3ACbXPAHEHNE (N3BbHCE3OHA)
3a noIroTobKa Ha KocauKaTa 3a cbxpaHHe Tp6Ba da ce n3BbPm CneHOTo:
- Изпраэне ретервога след посядною косе неа ce30на.
a)ИзпраЗнete pe3epBoapa 3a ropиВОТо CBС CMykaTeHHa NOMna.

BHIMAHHE: He m3ToBaTe 6eH3nB
3aTbopeHo NOMEUeHne, 6IIN3O Do OTKpNT OrBn np. He nyuweTe! BeH3NHOBInTe napn MORAT da npedeN3BVkaT ekCnJIO3Nn IIN NOkap.
b) CtaptnpaIte DnBraTeTЯ n ro ocTaBeTe da pa6oTn, DOKaTO n3pa3XoDBA ueJIA oCtBaAù 6eH3IN n cnpe.
c)ИЗваде с蜱цета.Изпольваит macьонka,3a da cnokinte okono 20 mл macnoВ roриВнata kaMepa. 3abpTe cTapTepe,3a da pa3npedenite paBHomepHO macIoTO B roPbHata KaMepa. BbpHete cBeeuTa.
- Почистец CBMaTeBнIMaTeJIHо KocaKaTа, KaKTo e onucaHo B "ИHCTPYKlIIN 3A CMA3BAHE".
- Ленистору. Ленистору Короза. Ленистору Короза Ленистору Короза Ленистору Короза Ленистору Короза Ленистору Короза Ленистору Короза Ленистору Короза Ленистору Короза Ленистору Короза Ленистору Короза Короза Ленистору Короза Ленистору Короза Ленистору Короза Ленистору Короза Ленистору Короза Ленистору Короза Ленистору Короза Ленистору Короза Ленистору
- CbXpaHЯBaIte KocaKaTa B cyXo, YIcTo N 3aIHTeHO OT N3MpB3BaHe MAcTo, 6e3 IocTbI Na BbHUnH Xopa.

BHIMAHHE:ДвигателяТгябва дe e HanblHo
I3CTnHaJI, npeDn da CbXpaHInTe KocaKaTa.

3A6EJIEXKA:
PnCbXpaHЯBaHe Ha obOpyDbaHe C DnBraTeJ B HEnpOBeTprBaHO NOMEseHne IJI NKlaIaI:
- Heo6xOДIMо e da ce B3eMaT Меркn 3a 3aUnTa Ha obopydBaHepTo cpeu y pBJka. ПokрИTe
obopydbaheTo n Han-Behe Ka6eIte N DBNXeIte Ce. Yactn CbC cIoi OT TbHKo MacJIO nn CNIKOH.
BnHmAbaIte Da He nperebBaTe IJI IN ppeynBaTe Ka6eIInTe.
- B cnlyua,ye BxjKeTo Ha cTapTepa ce ocbo6oJn ot BODaHa 3a BxjKeTo, npeKbChTe N 3a3eMeTe npOBdHnKa Ha 3anaJIntelHaTa CBeU, HATNCHeTe pBkoXBaTKaTa 3a ynpabIneHne Ha HOxa N 6abHO n3TerIeTe BxjKeTo Ha cTapTepa OT DBNrataJI.
IpekapaTe BbXeTo Ha cTapTepa B 6oNTa Ha BoJaHa 3a BbXeTo.
TpaHcnpTupaHe
N3KNUOyTe DnBraTeIa IIO OCTaBeTe Da ce OXnaI. CneI TOBa OTkauTe Ka6ena Ha 3anaIINTeHATA CBEu N3npa3HeTe pe3epBoapara 3a rOpINBO cNopeI INCTpyKUnTe B pBKOoDCTBOTO 3a DnBraTeJI. BHIMaBaIte Da He DeΦopMnPaTe IIN NOBpeIte HOka, KOrato 6bTaTe KocAchKaTaNAD npeIaTCTBIA.
13. OTCTPAHЯBAHE HA HEN3ПРABHOCTN
HaimeHOBaHHe Ha MaShuHaTa:
Model br./ Vrsta: PLM4120N, PLM4620N
5-3 PAUKA HA CTAPTEPOT
PnDnBnKte ja paKaTa Ha cTapTePOt OJ MOTOPOT KOH dpKaUOT Ha jaxeTo. (Cn. 13, Cn. 14)
5-4 BUCINHA HA KOCEHETO
PnITnCHeTe HaHaBOp 3a da ja oJrnaBnTe paKaTa OJ KOMnIeTOT. IomeCTe ja paKaTa Happe nHn Ha3aD 3a da ja HaMeCTnTe BucnHaT. (CJI. 15 n BuJeTe ycNoB 8-8)
6. MECTEHe HA COOdBETHA BUNH
1)ПовачеTe roТркалцeto 3a 6лokираьe ШTO ja джи долнота дшka. (Cn. 16)
2) BnndeHa Cn.17, nOmeCTe ja DOJHaTa paUka Harope N HaOny, npNnaRoTe Ha COoDbetHaTa BNCnHa.
Ima 3 BucnHn 3a npnilarOyBaHe oKoIHTO MOKe Da ce n36pe 3a OBOJ TIN KocnJa; Ha BucnHa 1, DOnHaTa paKa e HajBnCOKO oD TlOTO, Ha 3e HajNcKO.
3)ПилагодenteHa cakahata BucnHa,п пцьрстete jadoJHATA paUka co Tpkalata 3a 6bokupahe.

PNEyPENyBAHcE:JeBaTa n deChata
CTpaHa Ha DoIHaTa paUka Tpe6a Da ce CTaBAt Ha NCTa BNCiHa.
7. 2 BO 1
OBne KocnKMOKe da ja 3aMeHaT cyHKunjata, Bp3 OCHOBA Ha HameHaTa:
OД Косилka CO 3aДно Исфрльbe BO KOSЛka co MaJIpaHbE.
LTo e mAnHpaBe?
PnMaJnHpaIe TpeBaTa Ce Kocn Bo npBnOt pa6oTeH YeKOp, nToa Ce CInTHn I ce BpaKa Ha TpeBHNKOT KaKO npinpoJHO r6pNBO.
Cobetn 3a Kocebe co MaJIuPapahe:
-Boo6nuaeHNOKoeHeOJHajMHOry2cmHa6cmdo 4cmBucnHaHaTpeBaTa.
- Kopnctete octap HOX.
- He kocete MOKpa Tpeba.
- NocTabete Ha MaKcImaJIHa 6p3nHa Ha MOTopoT.
-Движete ce caMo noJeKa.
- PeiOBHO YIcTeTe rN KJIInOT 3a MaJIYpaHBe, BHaTpeUHATA CTPaHa Ha KyKlMtETo N CeuINoTO 3a KOceHBe.
EDEH:ПрпраВаьe BO косикa 3a MaJIчираьe

PNEyPENEYBAHbE: Camo co cOpEn MToT O
CEkau BO MnpyBaHbE.
- KpeheTe ro 3aHnOT kaak n 3BaJeTe ro c6npaot Ha TpeBa.
- Ппчсhte Г Клинот 3a Малчираь Bo Глары. 3aГларыг Клинот 3a Малчираь co KОПЧЕТо BO OTВOPOT Ha Глары. (Cn.18,Cn.19)
- CnyuTeTe ro 3aHnOt KanaK.
ДВА: Косенье со собиразут Ha Тревa
- 3a KoceHe co cObnpaHOT Ha TpeBa, m3BaJeTe ro KJIInHot 3a MaJIChpAHe n MOHTnpajTe ro cObnpaHOT Ha TpeBa.
- BaedeHe Ha KInHot 3a MaJUnpaHae.
- KpeHete ro 3aJHnot Kaapan n 3BaTe ro KJIHOT 3a MaJnIpaHe.

PNEyPENEYBAHbE: Camo co cOpEn MToT O
cekaB O MnpyBaHbE.
8. YNATCTBA 3A PAKYBAHbE
8-1 PPEД ПАЛЕБЕ
HanoHete ro MOTOPOT CO 6eH3n H MacJIO KAKO ITO e HaBeJeHO BO NOCeBHNO T npuPAHNK 3a MOTOPOT cNaKyBaH CO KocNJkata. IpOHTajTe rN yNaTCTBaTa BHIMaTeJIHO.

PNEyPENyBAHbE:BeH3nHOTeMHOry
3aIIJIINB.
UyBaJTe ro rOpNBOTo BO caOBo cneuJaHNO KOHCTpyuPaHn 3a Taa HameHa.
ПонhoeТе ripиВО само NaДВОр,праз Да Г по палITE MOTOPOT И He Пушete ДODEka полпite ripиВО Ип рakуВate co Hero.
HeBaTeToKaNaUeToHape3epBoaOpTu He DOnOJIHyBajTe6eH3nIdoKeaMOTOpTa60TNnn IdoKeaMOTOpTeJekok.
Ako ce nctypn 6eH3nH, He oBnyBaJte ce da ro 3aapanTe MOTOPOT, Tky TprHeTe ja MaunHaTa IoJaNeKy od IoDpaJteTo Ha nCTypaBeTo n ObndTe ce da He CO3daJeTe N3BOp Ha naPeIbe DoJeKa He ce pa3Beat 6eH3nHcknte napen.
3aTbOpTe rKanauHbata Ha pe3epBoapOT n Ha caIOT UBPCTO.
Ipei da ja Habanite KocnilkaTa 3a OndjyBaHe Ha CeuHIOTo IIN 3a Ipa3HeBe Ha MacIIOTo, Icnpa3HeTe ro pe3epBOapoT OJ rOpIBO.

PNEyPENEYBAHe: He nonheTe ro
pe3epBoaPot BO 3aTBopeHo, CO 3anaJIeH MOTOp nIINdoIeKa MOTopOT He ce n3JIaIJI 6apeM 15 MInHyTuNo pa6oTaTa.
8-2 ПАЛЕНБЕ HA MOTOPOTИ
AKTINBUNPAHbE HA CEUYJOTO
- YpeJOT e ONpeMeH co rymeHa YIm3Ma npEky KpajOT Ha CBeKuKaTAt, nPoBepTe DaJI MEtAnHaTa jaMka Ha KpajOT Ha Ka6eIOT 3a CBeKuKaTAt (BO rymeHaTa YIm3Ma) e npiUbPCTeHa Do6po npEky MeTaJIHnOT BpBa HA CBeKuKaTAt.
- Пи捜ис Hedge ja tymma差别а за рорубо 3-5 пати пedingдаю палITE MOTOPOT. (Cn. 20)
- Kora пал nt e ctyden MOTOp, cTabe te ja paqkata Ha racot BO nolok6a , .Kora paniTe TOnoJ MToTOp npabOTnte, cTabe te ja paqkata Ha racot BO nolok6a .Cn.21)
- Ctoejkn 3aJypeJoT, fapeTe ja paKaTa Ha conInpaKata n dpKeTe ja 6bIm3y do rohpHaTa paKa KaKO wTO e npKkaKaHO Ha Cn.22.
- Φатete ja paчкata Ha CTapTepot kako wTo e npikakkaHo Ha Cn. 22 И NOBJIeueTe HArNo. BpaTeTe nOJIeKaДо 3aBpTkata HaДржauOT Ha jaJKeTO OTkako Ke ce 3aapanM MOTOpOT. O'TnyuTete ja paчkata Ha coNIPAchkaTa 3a da rI cOnpeTe MOTOpT IN CeHInOTO.

3anaTe ro MOTOPOT BHIMaTeHNO, cNopeI yNaTCTBOTO n CO HO3eTe daNeKy oD ceuHaTa.

He Habanybajte ja KocnilkaTa Kora ro NaInte MOTOPOT. PanaTe ja Kocnilkata Ha pamHa NOBpUnHa, 6e3 BnCoka TpeBa NnnpueKn.

Држete Г рацete И hozelete подалеку OДВртлNBITE DeLOBи. He naileTe ro MOTOPOT KORACTOINTE nped OTBOPOT 3a nCpPnyBaHbe.
8-3 PA6OTHNIIOCTAPIKI
3a Bpeme Ha pa6oTaTata, UbpCTO dpKTe ja paKaTa Ha coInpaKaTc oDbete paue.

Hanomeha: 3a Bpeme Ha pa6oTaT, Kora
paKaTa Ha cOnnpaKaTa e OTnyUteHa, MOTOpOT Ke cOnpe I CO ToA KocuKATA Ke pIeCTaHe da pa6OtN.

PNEyPENEYBAHbE! 3a da ce n36erHaT KaBn
Бино HeNaMePNi BkIyBaHa Na KocnIkaTa, Taa e OnpemHe Na CO KoUHnca Ha MOTOp KOja Mopa Da Ce BpaTn Ha3aD npE Da MoKe Da ce BkIyuMOTOp. Kora paKaTa 3a KOHTpOHa HOMOpOT Ke Ce OTnyuTn, Taa Mopa Da Ce BpaTu Ha CBOjTa NOeTHa N03uJia, PnN To MOTOp ABTomATcKn Ke Ce NCKLyuN.

HanomeHa: KouHnla Ha MOTopoT (paKa Ha
KoCHNua): YnoTpe6eTe ja paKaTa 3a da ro 3anpeTe MOTOPOT. Kora ke ja otnyuHTnTe paKaTa, MOTOPOT n ceuHIOTo 3aIInpaAT aBTOMaTcKn. 3a da Kocnte, dPrKeTe ja paKaTa BO pa6OtHa no3uIJa. IpeД naNoHTe da Kocnte, npOBepTe ja paKaTa 3a BkJyUbAbe/3aIInpaHe HeKoJIky NaTn 3a da ce ocInrpyate Deka pa6Otn npabINHO.OcnrypeTe ce Deka 3aterHaTata cajna pa6Otn JecHo (T.e. He e 3arNaBeHa HHTy NaK CBNTKaHa).
8-4 FACEHbE HA MOTOPOT


BHIMAHNE: CeuJIoTo ce
BPTN yUTe HeKoJIky CeKuHdN OTKaKO Ke ce n3raCn MOTOPOT.
- OtnyuSTeTe ja paKaTaHa conNuPaKata 3a da rN cOnpeTe MOTOPOT n CeuNlOTO.
- Otkaute ro n B3emjete ro ka6eIOT 3a CbeKnKaTa KaKO uTo e HabeJeHO BO Noc6HOTO yNaTCTBO 3a MOTOPOT 3a Da ce cnpeu HecakHo NaIeHBe DoNeKa He Ce BHNMaBa Ha ONpeMaTa.
8-5 3A HAJIOBPN PE3YJTTATN IPN KOCEHbETO
IcHCTeTe ro TpeBHKOT od OTnAoOn. BHNMaBajTe TpeBHKOT Da Hema KaMeBa, CTaPnHbA, KInzI NJIpyrN IpeDMETn wTO KocuPkata MoKe cnyaJHo Da rN uCpRn BO KoJa 6nlo Hacoka n Da npEdu3BnKa TeuKn NOBpeDn Ha ONEpaTOpOT n Ha Dpyrnte, KaKO uSteTa h NMOtO n OKoJHnTe Objektn. He Kocete MOKpa TpeBa. 3a eFNIkacHO KOCeHe, He Kocete MOKpa TpeBa 6ndejKn Taa ce JenN 3a DOJHnOT DeN Ha rnaBata n CnpceUyBa npabINHO KOCeHe Ha napuNbata TpeBa. He Kocete nobEke od 1/3 od DOJXnHaT a Na TpeBaT a.
IpnopauHcceHe 3a KocHe e 1/3 oddoJxHaTa Ha TpeBaT. BpHnHata Ha DnJXeHe PO TlTO Tpe6a Da ce npnlaOu 3a Da MOKe NCKoCeHOT Da ce pacnpedenn pAMHomepHO NO TpeBnKoT. 3a OcobEno TeuKO KoCeHe Ha rCyta TpeBa, MoKe Da bnde NtpebHO Da ce KopnCTn EHa Od HajMaNTe 6p3HN 3a Da Ce DoBne YnCTO Do6po KocHe. Kora CE KOs CBnOka TpeBa, MoKe Ke Tpe6a Da ro NCKoCInTe TpeBnKoT BO DBe NOMHyBaHb, CnyUstajKn ro CeunIoTO yUte 1/3 od doJxHnHata prn BVtOpTo KocHe He MoKe6n KoCejKn No Dpyra NaTeKa OTKoNky npBnOt nat.
Ipeknonybajte ja natekata no manky npn cekoe NOMHyBaHbe 3a da ce nCnCTat npeocTaHaTITe napYeHca Ha TpeBnKOT. Co KocnilKaTa Tpe6a Da ce paobTo C oNoIH rac 3a da ce doBne Hajdo6po CeueHe i 3a da MoKe da nCKoCn HajePnKaCHO. NcNCTeTe ja DOnHaTcPaHa Ha rJaBaTa.
BHMabajTe da ja uicntte doJnHaTa cTpaHa ha rnaBaTa 3a KOceHe no cekoja ynoTpe6a 3a da cnpeuHte HataJIOxJyBaHe TpeBa, ITO Ke cnpeu npabunHO MaJnipaHe.
KocheJeIncja:KocbeToIncjaNcToMoKe Da6nDe Kopncho 3a TpeBnKOT.Kora KocTe Incja,BHmAbajTe Da ce cyBn Da He Ce BO MHOy De6en CNoj Ha TpeBnKOT. He yeKaJTe CnTe JncJaDa NaHaT Od DpBjata nped da Kocite.

8-8 YIATCTBA 3A MECTEHe HA BUNHATA

BHIMAHHE: HnKoraw He BpweTe
PpINaRoIyBaHa Ha KocNlKaTa aKO npTeXoJHo He cTe ro COIpeJe MOTOpOT n He cTe rO OTKaUHne Ka6eNoT Ha CBeKuKata.

BHIMAHHE: IpeI da ja MeHyBaTe BnCnHaTa 3a
KoceHe, cOpTe ja KocnIkaTaNOTKaueTe ro Ka6eNt 3a CBeKnKata. KocnIkaTae onpeMeHa co paKa 3a ZeHTpAnHO npJaarOyBaHbE Ha BnCnHaTa UTo NMa 5 noJox6n.
- COnpete ja KocnIkata n OTkaHete ro Ka6eIOT 3a cBeKnIkata nped da ja MeHyBaTe BnCnHaTa 3a KOceHe Ha KocnIkata.
- PaKaTa 3a ceHtpaJHo npuJaRoDyBaHe Ha BucnHaTa nMa 5 pIoOx6n 3a BucnHaT.
- 3a Да ja смене виснату на Косецу, пишисте ja paчkaту за месенье кон Тркалото, движей jo на harope пою до Ибранatura висна (Сл. 24). Спт Тркалу ke бидат на Иста висна на Косецу.
9. YIATCTBA 3A ODPKXYBAHbE
CBEKNUKA
KopncTe cAmo opnHaJIHa CBeKnUka 3a 3aMeHa. 3a Hajdo6pn pe3yIeTn, 3aMeHyBaJTe ja CBeKnUkTa Ha ceKo1 100 yaca ynoTpE6a. (BnDeTe Bo PnPpAHNKOT 3A MOTOPOT).
ГУPTHи HA KOUнцATA
PeIOBHO npOBepyBajTe rN/IIIM MeHyBajTe rN rypTHnTE Ha KOUHnIaTa HA MOTOPOT Kaj cepBnCEH areHT, a 3a 3aMeHa, CMee Da ce yINotpe6yBaat cAmO opINHaJIHN pe3epBnI deIOBn.
10.уПАТСТВА 3A ПОДМАЧКУBAИБЕ

BHIMAHNE:OTKAUYETEGKABEJIOT3A
CBEKNUKATA INPEI CEPBUNCUPAHe.
- TPKANA - Пдмачкурагу ги лжшитата на ceкoe Трkaю с leсно macno барем edнш BO ce3oha.
- MOTOP - Постануральные сноaped уразсвата за воримачкувае од прирачнокот за моторот.
- COПИРАЧКА - ПОДмачКУВajTe ГToчКITE Ha BpTe№ Ha paЧКаТа Ha coПИрЧКATAи Ka6eNot co JIecHо MacJIo 6apem eJHaU Bo ce3OHa. KoHTpOJaTа Ha coПИрЧКATA mopa Да сдвЖи сLo6oJHo BO obete HacOKN.
11. UNCTEHB

BHIMAHNE:He YnCTeTe rO MOTOPOT CO UpeBO.
Bodata moxe da ro owtetn MOTOPOT nIN da ro 3aradn ropubHnot cNCTem.
- Бишete ja Гльава со сува крna.
- Ynctete co cpeBO nOI rnaBaTa HabanyBajn ja KocnJIkata Taka ITO CBeKuHcTa Ke 6nde rope.
11-1 ПЕЧИСТУВАЧ HA BOЗДУХOT HA MOTOPOT

BHIMAHNE: He do3bonybaiTe 3emja nn
IpaunHa Da ro 3aTHaT cyHrepectnoT enMeHT Ha cnItepot 3a BO3dyx.
ElenemTHa npeuNCTyBaUOT 3a Bo3dUx Ha MOTOPOT Tpe6a Da ce cepBncnpa (NuCTn) no 25 qaca HOpMaIHO KOceHe. CyHrepectnOT eIeMeNT Mopa Da ce cepBncnpa peoBHO aKO KocuKkata Ce KopnCTn BO cyBn npabINBV ycNoBn. (BvndeTo BO PIPPAuHKnOT 3A MOTOPOT).
3A YNCTE H A ΦNJI TEPOT 3A BO3ДУX
- 3a PLM4120N: KpeHeTe rnaJaznHbata od ropHnoT deHa kanaKoT Ha qntepot. 3a PLM4620N: N3BaTe ja 3aBpTkata.
- ⅢBaTe ro KaNaKoT.
3.Измітіе ro eніміentot Ha Фиnteport BO canyHnca. HE KOPNUCTETE BEH3nH!
4.Исушete ro eIeMeHToT haФиЛТeрOT ha BOЗdUx. - Ctabete HeKoIky KaIKn MacNo SAE30 Ha cyHfepeCTnoT fNtep n npNTncHeTe 6naRo 3a da ce OTCTpaHN BNIJOKOT MacNo.
- BpaTeTe ro fInTepoHa MeTo.
- 3aTbopeTe ro KaNAKOT HaФNTepOT.

HANOMEHA: 3amHeTe ro qnJItepoT aKO e
pacnapYeH, NCKHaT, OwTeTeH IIN He MOKe da ce nCnCTn. (Cn. 253a PLM4120N)
11-2 CEUJIO

BHIMAHHE: BHIMabajTe da ro OTKaUnTe N
B3ejmnte Ka6eJIoTH a CBeKmUkaT a nped da pa6oTnte Ha CeuJIoTO 3a da He doJde Do clyuajHo naneHe Ha MOTOPOT. 3austntete rna paTe co TeuKn pakabuNn IJI Kpna 3a da r foatne ceunata.
Habane ja kocnilkata kaoko sto e odpeJeHO BO
noce6hnot npupaunuk 3a MOTOPOT. N3BaTe rN m6yc
3aBPTkata n uaj6hata wTO rN dpXaT ceHnOTo n
aAnTepOT 3a norOHCKATA OCKa HAMOTOT. N3BaTe rN
ceHnOTo n aanTepOT oD OCKATA.

PNEyPENEYBAHBe: NObpeMeHo
npoBepyBaJte ro aanTepOT 3a ceuHIOTo da He e HanyKHaT, Ooc6eHO aKO yDpIte BO Hekoj npEdMeT. 3ameHeTe aKO e nOtpe6Ho.
3a Hajdoepn pezyltaTn,ceuIIOTo Tpe6a dae ocTro. Ceunloto MoKe Da ce HAOCTPN OTkako Ke ce N3BaDNi Ke ce n3bpycn iINN ICTyprnJa paBoT 3a CEueHe KOJky To e MOxHNO IOBnCKy Do opRInHaHNata CoCtOj6a.MHOry e BaxHo Cekoj pa6 3a CEueHe Da ce n3bpycn IOnEHaKBO 3a Da He DoJde Do HeBpAMHOTExeHO CEUINO. HenpaBnHa pAmHOTexKa Ha CEuIIOTo Ke DOBeDe Do npEkeMepn BV6paCm, WTO MOKe Da rN OwTeTI MOTOP IN KocNIkATA.BHIMATEJIHO BpAMHOTExeTe Ro ceuIIOTo NO OCTpeHBeTo.CeuIIOTo MOKe Da ce Icnpo6a dAn E BpAMHOTExeHO CO CTaBAHe Ha BPBOT HA 3aBPtKa. OtCTpaHyBajTe Metan OD NOTeWKaTa CTPAHa DOneKa He ce BpAMHOTExn pAMHomepHo.(Cn.26) Ppe Da rN CoCtABnTE CEuNtOTo n aDaNTepOT co ypeDTo, POdMauchkaje rN OCKata Ha MOTOP IN BHaTpeShHaTA NobPshHa Ha aDaNTepOT co JecHO MacNo.HameCTeTo r aDaNTepOT 3a CEuNtOTo Ha Ockata.BiJeTe Ha Cn.26. CtabeTe ro CEuNlOTo CO 6poJOT Ha DeIOT CBPTEN o adantEPOT. IopamHete ja waj6hata npeky CEuIIOTo IN BMeTHeTe ja NMByc-3aBPtKaTa. 3aTeHete Ja IM6ysc-3aBPtKaTa DO MOMENT OHabeDen IODOny.
11-3 BPTJIINB MOMENT 3AMOHTIpaIbe HA CEUYIOTO
CpeiunHaTa 3aBrtKa Tpe6a Da ce 3aTeHne Do MOMeHT oD 35-45 Nm. 3a da ocInrgypaTe 6e36eHa pa6oTa Ha ypeoT. CNTE HABRTKn 3aBrtKn Tpe6a Da ce npOBepyBaat NOBpEmHo DaJInc Ce 3aTeHnat. Po IIOJOnra yNoTpe6a, OcOBeHO Ha nonecOKnBa NoUBA, CeuIIOTo Ke Ce n3a6n I Ke ro n3ry6n OpnHnAhnHnot oBnIK. CeueHeTo Ke 6nIe NOMaIKy eFNIkacHO n CeuNIOTo Tpe6a Da ce 3aMeHN.
3aMeHyBaJTe ro camo co fapnKo oOobpeHo ceHIO. Ipon3BOAnTeJOT He e OndroBOpEn 3a eBEHTyaJIHN OHTyBaHa IopAIN HeBpAMHOteXeHOCT Ha ceHIOTo. Kora ro MeHyBaTe ceHIOTo, Tpe6a Da ro KopncTne OpunHaiHNOt TnO3NaueH Na CEHIOTo (MAKITA 263001433 3a PLM4120N, MAKITA 263001451 3a PLM4620N) (3a da hapaate ceHIO, KOHTaKtnpaJTe CO JOKaHNOI pOdaBau nIi jaBeTe ce Kaj Hac).

PNEyPENEYBAHbE: He donipajte ceHHno
UToCeBPTN.
11-4 MOTOP
BnTe Bo nOce6HnOT npIpaunHK 3a MOTOPOT 3a yNaTCTBa 3a OJpxkyBaHe Ha MOTOPOT.
Ondpybajte ro MOTOPHO t Macno kako uTo e HabeJeHO BO noc6HnOT npupaHnK 3a MOTOp cnaKyBaH CO BaHnOT ypeI.
IpountaTe rynyataTbTaN npocJeTe rBnHmataJIHO.
CepBncpajTe ro npueHcTByBaUOT 3a Bo3dyX kaKo ITo e HabeJeHO BO npipauHnKOT 3a MOTOP NOd HOpMaHnYcNoB. Ppi KpajHo npabnBn ycNoB, YcTeTe Ha HeKOJIky Uaca. Cna6n nepΦopMaHcN Ha MOTOP IN npenlabyBaBe o6uHNo yKaJyBaat DeKa npueHcTByBaUOT Ha Bo3dyx Tpe6a Da ce cepBncupa.
3a da ro cepBnCnpaTe npeHcTyBaOT Ha BOzDyXOT, BnDeTe BO npiPaunHKOT 3a MOTOPOT cNaKyBaH CO BaShNtypeI.
CbeKnKaTAtpe6a da ce NCTN n 3a3OpOT da ce peceTnpa edHaaw Bo ce3oHa. Ce npenopayBa 3ameHa ha CbeKnKaTHa noyeTOkOT Ha cekoja ce3OHa Ha KocHe; BInTe BO npnPauHKnOT 3a MOTOP 3a npabuHnOT TnCbeKnKa n CneuФnKaunTe Ha 3a3OpOT.
UcTeTe ro MOTOp peoBHO co Kpna nn YeTa.
OdpxuybajTe ro cntemOT 3a JadaHe (kykunTeTo Ha duBaHT) uCT 3a Da OBO3MOKInTe npabINHO kpyKeHe Ha BO3dyXOT KOeHTo e MHORY BaxHO 3a paB0TaTaN BeKOT Ha TpaEHe Ha MOTOpOT. BHIMATEJNO OTcTpaHyBaJIte rN TpeBata, 3emjata N 3anaJINBITE OTnadoOn OD nOdpaJJeTO Ha npDyUByaHT.
12. YIATCTBA 3A UYBAHbE (BOH CE3OHA)
CneHnBe Yekopu Tpe6a Da ce npe3emat 3a da ce NOIroTbN KocNJkata 3a YuBaHe.
- Истору Спраэно симахов.
- Доступа в послеснистору Спраэно.
- Доступа в послеснистору Спраэно.
- Достotypicalities of the author's work on the history of the author's life and his life.
a)ИспраЗнete ro peзервоарOT 3a 6eH3ин co nymna 3a zuuzahe.

BHIMAHNE:HE ueTeTo ro 6eH3nHOT BO
3aTBopeHn pOcToPmN, 6bI3y Do OTBopeH nJaMeH n Cn. He nywete! Papeata OJ 6eH3InHot MoKe da npedn3BnKa ekpIIO3nja nn nojap.
b) 3anaIeTe ro MOTOpOT n OCTaBeTe ro da pa60tNdoKeKa He ro IOTpoShn ppeOCTaHaTnOt 6eH3nH n3actane.
c)ИЗваде TE ja cbeкчka.TaCo KaHTuKa 3a MacNo CTabete OKoly 20 Ml MacNo BO KOMopata 3a corOpyuBaJIe. Pa6oTeTe CO CTapTePOT 3a Da ro paCnOpeДиTe MacNoTo pamHOMepHO BO KOMopata 3a corOpyuBaJIe. BpaTeTe ja cbeкчkaTHa MeCTO.
- Ичире差别и поимаочь差别я косилката Внимастно, Касошто e опшаго в. ПОДМАЧКУBAHBЕ".
- Помачкajte ro manky cekahot 3aда n36eHete kopo3nja.
- OДLOжerte ja KocINKaTa Ha cyBo, YIcTo MeCTO 3aHTInTeHo OJ Mpa3, POnaJIeKy OJ DoCErOT Ha HeOBNaCTeHи LIIca.

BHIMAHNE: Motopot Tpe6a da e ueNocho
I3JaDeH nped Da ce OndOxKocnKaTa.

HANIOMEHA:
Kora odnokybate kaKaBa 6nIO MoTOpHa onpeMa BO He npOBeTpena nnuyna 3a yUbaHe MaTePnJaJI;
- Tpe6a da ce npe3emat Mepkn 3a 3austnTa od 'pocybahe Ha onpemata. Ppemauchaje ja onpemata co JeecHO MacNo HnCnIKoH, OcObeHo KaBnTe n NOdBnKHNte DeJIOBn.
BmabajTe da He rN n3BNTKaTe uN ppeKpUnTe Ka6nTe. - Ako jaxeTo 3a cTapTuBaHe ce otKaun OJ dPrkaOT Ha jaxeTo Ha paKata, OTkaute Te rN B3emjete rO Ka6enot Ha cBeKnUkata. PnITnCHete ja paKata 3a KOHTpOHa CeuJIto N I3BLeueTe rO nOleka jaxeTo 3a cTapTuBaHe oD MOTOpOT. PInkHeTe ro jaxeTo 3a cTapTuBaHe BO 3aBPTKaTa Ha dPrkaOT 3a jaxeTo Ha paKata.
TpaHcnpT
NCKnyute ro MOTOPOT ndo3BOJeTe MOTOPOT da ce
n3naI. ITOOA NCKnyute ro Ka6enot 3a CBeKnUka n
ncnpa3HeTe ro pe3epBOapOT 3a rOpINBO cNopeD
yNaTCTBaTA BO npRuPAuHKnOT 3a MOTOPOT. BHIMAbajTe da
He ro CBNTkATE INNI OwTeTInTE CeuNlOTO KORA MInHyBaTe
CO KocNJkATA Na npeuKN.
13. PEWSABAHé HA ПОБЛЕМTE
| ПЮБЛЕМ | BEPOJATHA ПИПИИHA | SUTO TPE6A DA CE ПЕ3EME |
| MOTOPOT He пали. | Рачкata на ragot He e Bo npавинна палочьа 3a MOMentalnite ус��ов. | Ставete ja рачкata на ragot Bo npавинна палочьа. |
| Ресервоар 3a поюв e пазен. | Налочnéte ro peserboapot co ropиво: вдeтete bo ПРИРАЧИКOT 3A MOTOPOT. | |
| Еlementот на пechисувачота 3a ВOSTДУX e bailkan. | Ис捜стete ro лементот на пechисувачота 3a ВOSTДУX: вдeтete bo ПРИРАCHIKOT 3A MOTOPOT. | |
| С党支部а e радлбавен. | Затогнete ja с党支部а до 25 - 30 Nm. | |
| Кабелot 3a с党支部а e радлбавен пли OTКален und Hea. | Намецтete ro кабелot 3a с党支部а на Hea. | |
| Залорот на с党支部а e нелравлиen. | Поставete ro залорот MEу éльковдente ha 0,7 do 0,8 mm. | |
| С党支部а e 힘правна. | Ставete Нова, павлино п��лагдана с党支部а: Вдeтete bo ПРИРАCHIKOT 3A MOTOPOT. | |
| Карыразорот e паллавен co rogив. | Изваде ту лементот на пechисувачота ВOSTДУX и Валочete ro щжето заструва; повскиеати дodeka karбуразорот ha ce Ис捜ся и вдeтete ro лемentsуambaуот ha ВOSTДУX. | |
| Наспразов морун 3a пале. Heicntpavchen MOdUn 3a пале. Heicntpavchen MOdUn 3a пале. Heicntpavchen MOdUn 3a пале. Heicntpavchen MOdUn 3a пале. Heicntpavchen MOdUn 3a пале. Heicntpavchen MOdUn 3a пале. Heicntpavchen MOdUn 3a palt. Heicntpavchen MOdUn 3a palt. Heicntpavchen MOdUn 3a palt. Heicntpavchen MOdUn 3a palt. Heicntpavchen MOdUn 3a palt. Heicntpavchen MOdUn 3a palt. Heicntpavchen MOdUn 3a palt. Heicntpavchen MOd Un 3a palt. Heicntpavchen MOdUn 3a palt. Heicntpavchen MOdUn 3a palt. Heicntpavchen MOdUn 3a palt. Heicntpavchen MOdUn 3a palt. Heicntpavchen MOdUn 3a palt. Heicntpavchen MOdUn 3a palt. HeicntPavchen MOdUn 3a palt. HeicntPavchen MOdUn 3a palt. HeicntPavchen MOdUn 3a palt. HeicntPavchen MOdUn 3a palt. HeicntPavchen MOdUn 3a palt. HeicntPavchen MOdUn 3a palt. HeicntPavchen MOdUn 3a pALT. HeicntPavchen MOdUn 3a pALT. HeicntPavchen MOdUn 3a pALT. HeicntPavchen MOdUn 3a pALT. HeicntPavchen MOdUn 3a pALT. HeicntPavchen MOdUn 3a pALT. HeicntPavchen MOdUn 3a pALT. HeicntPavchen MOd Un 3a pALT. HeicntPavchen MOdUn 3a pALT. HeicntPavchen MOdUn 3a pALT. HeicntPavchen MOdUn 3a pALT. HeicntPavchen MOdUn 3a pALT. HeicntPavchen MOdUn 3a pALT. HeicntPavchen MOdUn 3a pALT. Heicntpavchen MOdUn 3a pALT. HeicntPavchen MOdUn 3a pALT. HeicntPavchen MOdUn 3a pALT. HeicntPavchen MOdUn 3a pALT. HeicntPavchen MOdUn 3a pALT. HeicntPavchen MOdUn 3a pALT. HeicntPavchen MOdUn 3a p ALT. HeicntPavchen MOdUn 3a pALT. HeicntPavchen MOdUn 3a pALT. HeicntPavchen MOdUn 3a pALT. HeicntPavchen MOdUn 3a pALT. HeicntPavchen MOdUn 3a pALT. HeicntPavchen MOdUn 3a pALT. HeicntPavchen MOdUN 3a pALT. HeicntPavchen MOdUn 3a pALT. HeicntPavchen MOdUn 3a pALT. HeicntPavchen MOdUn 3a pALT. HeicntPavchen MOdUn 3a pALT. HeicntPavchen MOdUn 3a pALT. HeicntPavchen MOdUn 3a pALT. HeicntOuTOMe 3a palt. HeicntOuTOMe 3a palt. HeicntOuTOMe 3a palt. HeicntOuTOMe 3a palt. HeicntOuTOMe 3a palt. HeicntOuTOMe 3a palt. HeicntOuTOMe 3a palt. HeicntOuTOMe 3a palt. HOLIN. HOLIN. HOLIN. HOLIN. HOLIN. HOLIN. HOLIN. HOLIN. HOLIN. HOLIN. HOLIN. HOLIN. HOLIN. HOLIN. HOLIN. HOLIN. HOLIN. HOLIN. HOLIN. HOLIN. HOLIN. HOLIN. HOLIN. HOLIN. HOLIN. HOLIM. HOLIM. HOLIM. HOLIM. HOLIM. HOLIM. HOLIM. HOLIM. HOLIM. HOLIM. HOLIM. HOLIM. HOLIM. HOLIM. HOLIM. HOLIM. HOLIM. HOLIM. HOLIM. HOLIM. HOLIM. HOLIM. HOLIM. HOLIM. HOLIM. HOLIN. HOLIN. HOLIN. HOLIN. HOLIN. HOLIN. HOLIN. HOLIN. HOLIN. HOLIN. HOLIN. HOLIN. HOLIN. HOLIN. HOLIN. HOLIN. HOLIN HOLIN HOLIN HOLIN HOLIN HOLIN HOLIN HOLIN HOLIN HOLIN HOLIN HOLIN HOLIN HOLIN HOLIN HOLIN HOLIN HOLIN HOLIN HOLIN HOLIN HOLIN HOLIN HOLIN HOLIN HOLIN |
14. EKOLIOΓNJA
Ako Baawata MaunHa Tpe6a Da ce 3ameHn no DOnra ynoTpe6a, He pnpajte ja co DomauHTo fY6pe, Tyky pacxOyBajTe ja Ha ekONoWKn 6e36eDen HauHn.
Camo 3a 3emjnte Bo EBpona
Deknapaunja 3a coo6pa3noct 3a EC
Makita n3jabyBa deKa cJeHaBa MaunHa(n):
O3Haka Ha MaunHaTa:
BeH3nHcKa KocnIka
Mодел ьр./Тин: PLM4120N, PLM4620N
CneuФикauиn:Budete,4.TEXHUYKNIPODAToLI"
Ce ycorlaceHn co cIeHnBe eBpOncn InpKeTnBn: 2004/108/EC, 2006/42/EC, 2000/14/EC n 2005/88/ EC
Tne ce npoun3BeHn BO cornaCHOCT CO cJeHNOB CTaHapd nIIN CTaHapDn3npaHn DOKymENTN:
EN ISO 5395-1, EN ISO 5395-2, EN ISO 14982
TexHnUkata daToTeKa BO corJaacHoCT co 2006/42/EC e doctanHa oI:
Makita, Jan-Baptist Vinkstraat 2, 3070, Bérlnja
IocTaNkata 3a npoceHka Ha ycorIaceHoCTa 7to ce 6apa co DnpeKTHbTa 2000/14/EC 6eWe n3BpSeHa Bo corIacHOCT co AHeKc VI.
OnolHOMoIteH opraH:
YI03OPEHbE:JIeBaNdechaCTpHaNoHe
pyuKe Mopaj Da 6yDu NoDeUeHe Ha NCTy BnCInHy.
7. 2 y 1
OBe KocJInuCe MOry 6nTu IooaTHo ONpeMbHe y OndHocU Ha HopMaJIHy FyHKnjuy, y 3aBnCHOCrO nCbPx e npImeHe: KocJInuCa ca npaxKbeHem Ha 3aIbEm KpaJy nocTaje KocJInuCa 3a MaJInuPaHBe.
IHa je MaJIpaHBe?
Ppnilnkom MaJnupaHa TpaBa Ce Kocn y jeHOM paHOM Kopaky, a 3aTmC ce fInHO ycNTHaBn BpaHa Ha TpaBbKa KaO npnpoNo hY6pNo.
CabeTn 3a MaJIyIpaIbe:
- PeioBHO cMaHBeHe BnCIne TpaBe 3a MaKc. 2 cm ca 6 cm Ha 4 cm.
- Kopnctte ootap HOK 3a cehe.
- Hemojte da kocnte BnaXHy TpaBy.
- Побеситу макс.брзину мотopa.
- Kpehnte ce nckJbuynBO 6p3nHOM KopaKa.
- PeDobHNo YnCTnTe DoaTaK 3a MaJnUpaHe, yHyTpaShbY CtpaHy KynuSta N HOx 3a KoUeHe.
JEDAH:ДоаТноОпрema№КOCNJIицеЗamлчирьe

YNO3OPEHbE: Camo ca 3ayctaBJIbeHIM
MOTOPOM I HENOKPeTHHIM HOXeM.
- ПодигнITE зади рokлonaц и укюнITE врehу за пухват траве.
- Гене ддатак 3a малчирьу onnatay. 3abpavite doatak 3a maJchipahe nomohy duymeta y OTbopy Ha onnatau. (clnka 18, clnka 19)
- Cnyctnte 3aIbI noKJIoNaU.
ДВА: Кошеные са Вpeном 3a пухват ТраВe
- 3a Koostebe ca Bpehom 3a npuxBaT TpaBe yKIOHnTe DoIaTaK 3a MaJUpaBe I MOHTnpajTe Bpehy 3a npuxBaT TpaBe.
- YknaBaHbe DoaTaKa 3a MaHnHaBe.
-ПодигнITEЗадипokлonaци укюнITEdoatak 3a mалчupahe.

YNO3OPEHbE: Camo ca 3ayctaBJIbeHIM
MOTOPOM I HENOKPETHIM HOKEM.
8. уптCTBA 3A PAД
8-1 IPE NOKPETAH
CepBnCnpajTe MToP 6eH3nHOM uYbem Kao ITO je yKa3aHO y NocE6HOM pnpuynKy 3a MToP, KoJi je Hana3N y npKOBaHy ca BaWOM KOcNJinCtOM. NaKJBnBO npOHTajTe ynyTCTBa.

8-4 3AYCTABJbAHbEMOTOPA

PAXbA:Hox hactaBba da potnpa jow
HEKOLIKO CeKHyDN HaKOH NCKbYuINBaHaMoTopa.
- Otnyctnte pyky 3a KOHTPOJy 3aycTaBbaHa da 6nCTe 3ayCTaBnIM MOTOp HOK.
2.Иckbuynteи y3emblte Ka6n 3a cbeHny kao sto je yka3aHO y noc6bHOM npnpuyHky 3a MOTop da bncTe cnpeuHn HexOTNUHO NOKpTaHbe DOK ONPema Hnje POD Ha3OpOM.
8-5 3A HAJBOJE PE3YJTATE IPN KOWEBy
OuNCTnTe OTnATke ca TpaBbaka. YBepnte ce da Ha TpaBbaky Hema KameBa, rpaHa, XNuCa Nn CTpaHnx PpeMeta KOJ MOry Da 6yDu HxOTnUHO O6aueHN KocnIInoum y pa3HIM CMEPOBIma n Da n3a3OBy O3bNtHe IINHe NOBpeDe ONepaTePa n OCTaJInx, Kao n OwTeHebe IMOBnHe n OKoINHX Objekata. HEmoJTe Da KocnTE BnAxxHy TpaBy. PaDi eFNIkacHor KoSeBa HEmoJTe Da pexKeTe BnAIXy TpaBy jep Ce OHa Ienn 3a yHyTpaShy CTpaHy ONlATE n Cnpceaba npabUNHO KoWeHe TpaBe. HEmoJTe Da KocnTE BnIe OD 1/3 duXnHe TpaBe.
IpenopyeNo pe3ahe npi KoSeHy je 1/3 duJxHne TpaBe. Bp3nHy Tpe6a npinarOHaBaTn TaKo Da nceuMory da 6dy NODjeNako paCnoDeBEnn NO TpaBbaky. 3a NocEbo TeuKa pe3aHa De6ene TpaBe MoKe Da 6yde HeonXoJHa yNtpe6a jeDHe OD HajMaHnx 6p3nHa Da 6n ce NoCTnraO uNCT, Do6po NOKoUeH pe3. KaDa KOCnte BnCOky TpaBy MoJda Hete Mopatn Da pexKeTe y Dba npOna3a, cnYTuJyHn HOK 3a DoDAthy 1/3 BnCInHe 3a dpyro pe3aHe n peKyHn Ha dpyrAunn Naunn Od OHora KoJn Cte KOpNCTIIN npBn PNT.
MaIIO npEknanaHpe pe3OBA pRn CBAKOM npOJa3y TakoHe nomaxe da ce do6NjU YnCTn N npABn NceuN Ha TpaBbaky. Kocnilua Tpe6a yBeK da paN nyHom 6p3HOM da 6n ce do6No haj6oBn pe3 n da 6n joj ce OMoryHNO hajeFikacnju pad npri KoWeHy. Ouncntte yHyTpaShbY cTpaHy onlate.
Ouictnte yHytpaHbY cTpaHy onIaTe nocNe cBAKe yNoTppe6 Da 6nCTe N36eIIN HArOMnIaBaHaBe TpaBe, Koja MOKe Da CnpeuN PpaBUNHO MaJUnpaHe.
PAXHbA:CKHHITE KABJI CA CBETHIe IPE
CEPBNCNPAHbA.
- TOUKOBI-ПоДмжITE ЛаКИ m yЛьем Куглуне Лжajebe Ha CBaKOM TOnkY HajMaJIbe jeДHOM Y TOKy ce3OHe.
- MOTOP-Придржавajte ce ynyтста 3a noДмаЗИВаье ИЗ пиPyнka 3a MOTOP.
- KOHTPOJIA 3AYCTABJbAHbA-ПоДмжITE JЯКIM yIbeM OCSIOHe TaUKe Ha ryUKN KOHTPOJIe 3ayCTaBbIbIa I bEN Ka6n HajMaIe jeIHOM y TOKy ce3OHe. KoHTpOJa 3ayCTaBbIbIa Mopa Da rIaNtko paIu y o6a cMepa.
11. YIWIeHbE

PAXHbA: HemojTe da nepeTe MOTop BODOM u3
UpeBa.Boa MoKe Da OwTeTn MOTOp IIN Da 3aAin CnCTeM 3a roPnBO.
- Ппебришто onлару cyвом Крnom.
- BODOM n3 upeBa nepiTe nCpO onPate HaHbYn KocNJuCy tako da CbeHua 6yJe rope.
11-1 YIIOJAK 3A ΦИЛТЕР BA3ДУХAMOTOPA

PAXHB:A: HemojTe da O3BOJNTe da 3emba n
npaunHa 3aueene nehaTneIeMeNT qnlTepe 3a Ba3dyx.
YIIOJAKФИNTepa 3a Ba3dUx MOTopa Mopa da ce cepBncupa (NcCTn) hakoH 25 catn HopMaIIHOKoIeHa. IeHaCTn enEmeHT MOPa Da ca peIobHo cepBncupa aKOce KocNIuca KopIcTn npu cyBm npaHbAM ycNoBIMa (norIeJaTe KOPICHNUCKN PIPPYHk 3A MOTOP)
CHIshHeΦJIteP 3A BA3dYX
- 3a PLM4120N: ПодигнITE утbpиьаче на врухпоклонца силтepа. 3a PLM4620N:УклонITE завръe.
- YKJIOHInTe NOKJIONaI.
3.Оперпгуложакфитepавдом ca canyнцом. HEMOJTE DA KOPNCTNTE BEH3MH! - OcyuHTe Ha Ba3dyx yIoxa K pfIntepa.
- CTaBnTe HeKoNko KaIIN yIba SAE30 Ha yIooKaK ΦHnTepa I YBpCTO CTuCHnTe Da 6nCTe yKnOHNn BnUaK yIba.
- Nohobo noctabnTe qntep.
- 3aTbOpTe noklonaФnItepa.

HANOMEHA: 3aMeHnTe qnJtep ako je
noxaan, noeana, oTeHn nAko He MoKe da ce OcHCTN. (Cnka 253a PLM4120N)
11-2 HOX3A PE3AHbE

PAXHB: Pnpoepte da Jn cte CkHyni n
y3embui Ka6n 3a CbeHnuy npe pa da ca HOxem 3a pe3ahe da 6nCTe cnpeuHn HEXOTNUHO NOKpeTaHe MOTopa. 3aHTnte pyke YBPCtMpykABUcaMa INI KPNOM da 6nCTe yXBaTnHn HOKeBe 3a pe3aHe.
HaHnIte KocnInuy kao ITo je HabeJeHO y nOce6Hom npnpUHHky 3a MOTOp. YKNoHInTe UeCTOyraOHe 3aBpTHe
I NOIIOUKE KOJn DpXe HOXn aIaIaTep HOXa 3a IoroHcKO BpaTIno MOtOpa. YKIoHnTe HOXn aIaIaTep ca IoroHcKOr BpaTIna.

YNO3OPEHbE: IepnoDnHOpnpoBepnte da Jn HnTepy Hoxa nocToje npKOTHe, a norOtBO aKO ne cTpaHn ppeDMet. 3aMeHnTe ra aKO je dHO.
3a Hajbope 3yntate BaH HOK Tpe6a da 6yde oHTap. Hox MOxTe Da nHOBO HAOuTpIte Tako uTo hTe ra yKnIOHNi N HeOBy pe3Hy INuCy INn CTpyrATn INn TyprjNaTn NOd HArbOM KoJN uTO np6bnXnnjOpunHaHOM. Beoma je BaxHo Da Cbaka pe3Ha INuCa 6yde noJeHako OctpyraHa KaKo 6n Ce cnpeuHa noJaBa HeypabHOTeXeHOr HOxa. HenpaBUNHa paBHotexa HOxa DOBeWehde NoJaAHnx BVbpaCunja KoJE npoy3pOkyj OwTeHebe MoTopa n KocInuie. BodTe paUHa da naKlbNBO ypaBHTeXeTE HOX NaKOH OwTpeHa.
PabHOTeka HOka MoKe Da ce IcNITa 6aIaNcHpaBem Ha OdbuJaCy ca OKpyTlOM OCOBINHom. YknaHajTe MeTaJ Ca TeKce CtpaHe CBe DOK He 6yJe ypaBHOTekEn. (Cnka 26)
Ipe noHOBHe MOHTaKe HOxHa aDAnTepa HOxHa Ha jeDInHnUy, NOdMaKInTe NOrOHcKO BpaTnIO MOTopa IN yHyTpaShbY NOBpShHy aDAnTepa HOxJaKIM yJbEM.
MOnTIpajTe aAnTpEroHa Na IporHcKo BpaTnIo.
IornejaTe (cInka 26).IocTabte HOK Tako da 6poj Dea 6yde OKpeHyT od aadntepa. IopabHajTe noJIOwky n3HaD Hoka n ybaunTe WectOyraOHn 3aBpTaHb.
ПиТeгнiteшecToyraOHn3aBpTaHobObPTHM MOMeHTOM Kojn HnKe HabeDeH.
11-3 OBPTHN MOMEHT 3A MOHTAXKY HOKA
LcHTpaJIHn 3aBPTaH MOpa Da 6bYe npITeRHyT o6pTHM MOMENTOM OJ 35 - 45 Nm. Da 6n ce 0636eIIO 6e36eIah pad BaIe jeIINHnIe. IepNoIynchO MOpA da CE npOBepn Da IIN cy CBN 3aBPTbN mATnue IpabInHO npITeRHyTu. HakoN pOdyKeHe ynoTpe6e, a Noce6Ho Ha neCKOBNTOM Tny, HOX he Ce nCTPOuINTu IN DeIIMNUHO n3ry6bTuOpIRHaHAn ObIIK. EΦnKaCHoCT pe3aHa b6nE cMaJIbHeNa 3aTO HOX Tpe6a 3aMeHITn.
3aMeHnte ra nckbIyUHBO pe3epBHM HOxEM KOJn je OOnobpna 4abpka. Moryhe OwTeHeBe n3a3BaHo HeypaBHOteKeHm HOxEM Hnje OndROBOPHOCT npOn3BOhaua.
KaJa MeBaTe Hox, Mopate Da KOpNCTnTe OpuHaHaH TnO3NaueH Ha HoXy. (MAKITA 263001433 3a PLM4120N; MAKITA 263001451 3a PLM4620N) (da 6nCTe HapuJIn Hox ObaTne Ce CBOM JOKaJHom npoDaBcy nJIN N03OBnTe HaSy KOMnaHny).

YNO3OPEHbE: HemojTe da doDnpyjete
POTnpajyn HOK.
11-4 MOTOP
YnyTCTBa 3a oJpxKaBaHbe MOTopa nOTpaXnTe y nOce6Hom npnpuyHNky 3a MOTOp.
YIbe y MOTOpy OndpKaBajTe Kao ITo je HabeJeHO y INoce6HOM npnpUHyNkU 3a MOTop KoJn je Hana3n y NaKOBaBy ca BaWOM KocuINcOm.
PaxKbNBO npOuNTajTe n npIaPkaBajTe ce yNyTCTaba.
Пи Нормалним OKОЛностima сервисрajte пешиста ваздуху у складу с посяним пирupyнkom 3a MOTOP. Oчіstnte ra наков CBakин Hekonikko catn пи Вебма прашьавим усLOBIMa. Слобпегфорmaнец моторua вишak рогива у karбypатуру обично уka3ужда Треба сервисрати пpeшиста ваздуха.
Kako da cepBncnPate npueHnCTaBa3dyxa, noTpaxnTe y nOce6HOM npnpuyHnky 3a MOTOP KoJn je Hana3n y naKOBaBy ca BaWOM KocnIuOom. JeHOM y Toky ce3OHe Tpe6a OunchTn CBeHnUy I NODECHTN 3a3Op N3MeJy HeHnx eJeKTPOda. 3aMeHa CBeHnUe ce npenopuyje Ha NoCtKY CBaKe ce3OHe KOweBa; TnP CBeHnUe n CneuznФkaunje 3a3Opa nOTpaxnTe y npnpuyHnky 3a MOTOP. PeoBHO uNCTInTe MOTOP KpON MIn YetKom. OdpXabajTe CNCTem 3a XnaHeJbe (Obnact KyHnSta BeHTnNaTopa) UcTm Da 6nCTe OMOryHnI npAunlNo CTpyjaBe BA3dyxa KoJe je cyuTnHcKn BaxHo 3a nepFopMaHnce n padHn BEK MOTopa. YBepnte Ce da Cte yKNOHnC BY TpaBy, 3eMbY nIi 3anaJBnBE OTnATke n3 Obnactn npriyuNbBaaya.
12.уNTCTBA3A CKJIaIINITeHbE (BAH CE3OHE)
Да бисте ппиремллкосилцу 3a ckладиштөг e trpeba да спеснite спес徴е корake.
He donyckaIte noctopohnK MeCTy pa6oT.

UTo6bI n36eKaTb TpaBM, onepaTop dOnJxeh O6paTaB oc0oBe BnImaHne Ha pyKn HOrn.
TOKCNUHbIe napbl; He 3KcPnIyATnpyTe B NOMeueHIN.
TOnJIbO JERKO BOCNJMaHeJAreTc, He nOAnocTe K Hemy orOhb. He DoJIbAaTe TOnJIbO Ha pa6oTaIOUeM aUHHe.

Bo Bpemr o6pa60Tk r3oHa nCnOJIb3yIte 3aIHTbIe OChN I ppeOxpaHITbHbIe HayuHNK.
Bo Bpemr peMOHTa n3BVeKeHTE CBeuy 3aKnraHn I 3aTeM BbIIOJHnTe peMOHT B COOTBcTCTBnC pyKOBOdCTBOM NO 3KcNpyatau.

IpeynpexkdeHne:DbirateJIb ropnyi.
OTnyCTnte pykyc BbIKHouaTeIeM, T06blBbIKJIOHTb MOTOp.
2.ОБSUNEПAPBILATEXHINBE3OPACHOCTN

PNEOCTEPEXEHNE: Pn nCNoB3OBAHm
6eH3INHOBbIX INHCTpyMeHTOB CO6JIIOdaIte OCHOBhIe npaBnla TexNkN 6e3OpanchoCTN, BKNIouyanepeuNCJIeHHbIe HxKe, yTO6bl CHN3NTb pNCK IOnyuHeHn TReKJIbIX TpaBM N/INPi NOBpeKJDeHnY cTpoiCtBa. IpOcHTnte BCE INHCTpyKcNn Do NaHaja EKcNpyatauNi n3JeNn i COXpAHnTe INx dJa NocLeDyUoJero NCNoJIb3OBAHnI.

PPEIOCTEPEXHENE:BoBpempa6oTbI
daHHoe yCTPOINCTBO CO3daet 3NEKTPOMaHTHOe noJe. B HEKOtOpbIX CnyaX 3TO NOJE MOKeT CO3dAbaTb NOMExn DIIA KTHBbIX INI NACCINBHbIX MeDINCHCKIX IMNlaHTaTOB. YTO6bl YMeHbWntb PnCK TjXKeJIoN IINI CMErTeNbHOI TpaBMbl, IpeE Haayalom 3KcNpyaTcuIN UcTPOINCTBA JIOJAM C MeDINCHKIMM IMNlaHTaTM PeKOMeHdyETcN pOKOHcyNbTIpOBAbTcR C BpaQOM IN IPOIN3BOIDNTeJEM IMNlaHTaTa.
OboyuHeNe
BHHMaTeIbHo IpoUHTaIe TnHCTpyKuIMn O3HaKOMbTecb Co BCeMn OprHaAMn ynpaBLeHnna n npaBnAmn npaBnIbHOJ 3KcNpyaTaunn N3JeINNA. CobTebl no 6bICTpOMy ocTaHOBy dBVaTeJIa.
- IcnoIb3yIte ra3oHOKOciIky TOfIbKO no Ha3HaueHIO,ДЯ STpIXKn I NOIb6opa TpaBbl. JIObIe dpyrIe cNoCo6bl npIMeHEnMy MOYt 6bITb ONaChbIMN IN pINBeCTN K NOBpeXdEHHo MaunHbl. IprIMepbl HeHaIJIeKaIeero IcNOJIb3OBAHnRA BKIIouaOT, HO He OrpaHnUHbAOTc CNeDyUOuIMM cNoCobam:
- napebo3kaJIIOdeI,JeTei JINJXNBOTbIX Ha yCTpOInCTBe;
- TpaHcnpOpTnPoBkA yCTpoiCTBa Ha MaIInHe;
- INCNoIb3OBAHne yCTpoiCTBa IJIA 6yKcnpOBKn IIN TOJIkaHn rpy3OB;
- INCNoB3OBAHnE yCTpOiCTBa IJIa C6Opa JInCTbeB INJIM Mycopa;
- INCN0JIb3OBAHHe yCTpoIcTBa dIЯ CTpIXKk KycTApHnKa nJIpe3Kn paCTInTeJbHOCTN,OTJIINuHOM OT TpaBbl;
- INCIOJIb3OBAHHe yCTPOJCTBa HECKOJIbKIMN IHOJbMn;
- INCINBJ3OBAHNE HOXHa HAOBepXHOCTx, OTJINUHbIXOT TpaBbl.
He pa3pe7aIte DeTm I NlUcAm, He 3HaKOMbIM C DaHHbIMN INHCTpykUmaMn, NOJIb3OBaTbcra3OHOKOcNIJKoB. B MeCTHom 3aKOHOdaTeJIbCTBe MOrYT CyuSceTBoBAbTB Bo3paCTHbIE ORpaHNUeHnA dIЯ OIepaTopOB;
3aπpeuaetcnaonb30BaTb ra3OHOKocnky B cnényuux cnyuayx:
- ecn n IO6JIIN3OCTn HaxoJrTcIJIoN (B OCO6eHHOCtI DeTn) IIN JXIBOTHbIe.
-
ecnOnepaTOp npHmMaJI MeuIcHckMe npenapaTbI INI NBeIecCTBa, KOtOpbIe MOryT NOBnIaTb Ha erO peakCIO H KOHcHTpaCIO.
-
POMHHTe, yTO onepaTOp/NoJb3ObaTeIb HeceT OTBeTCTBENHOCTb 3a IponCSeCTBnI IN ONaChbIe CNTyaUcN C DpyrIMM JIOdbM NIN INX Co6CTBeHNHOCTbIO.
- Onepatop Должень пожи COOTBETCTBYUоee obyuehne по Исплььзованю, Habстpoшке улравлению Инструментом, Вклочая зашиение операци.
IoproTOBka
Ha BpeMcTpNkKn Ra3oHa o6raTeIbHo HaeBaIte npOHyIO OByBn IaHHbIe 6pOKn. He nOp3yITeCb obOpyDoBaHHe M6ocNKOM INB BOTKpbITbIX CaHdaJIInx.
TtataIbHn npOBepbTe yuactok, rde doJIxHO 6ydet HcnoIb3OBAbC8yCTpOiCTBO, u y6epnte BCE npedMetbl, HanpIMep, KamHN, irpyuKn, naIKn n npoBOLOKy, KOToPbIe MOrYr OT6paCbIBaTbcr INHCTpyMeHTOM.
- ПЕДОCTEPEXGEHNE - Бeнзин ЛегкOBСПЛаменяETС.
- XpaHNTe TOnJIINBO B IpeJHa3HaueHHbIX JIJI 3TOrO KaHnCTpax;
- 3anpaBnIe 6ak TOnbKO BHe NOMEueHn, He KypTe BO BpeM 3anpaBKn;
-ДоливаiteToPЛИВОДOЗaнуСkaДВИraTeЯ. 3anpeuaetcA CHIMaTb KpbIuKy ToPЛИBHorOбaka IINIdoJIvBaTb6eH3nI npu paobTaIOUeMДВИraTeJe IINIecNIDVBIRaTeIb rOpaYn; - ecnBcH3nH 6bl npOIIT, He 3aynyckaIte DBnIraTeJIb; IpeEbnHbTe ra3OHOKOcNIky B cTOpOHy OT MeCTa pa3nBa n He CO3dAbaIte KaKnx-JINBO NCTOChNKOB INCKp Do nCnpaepHna;
- HAdeJxHO 3aKpbIbAaiTe KpbIiIKN TOJIINBHOro 6aka N KaHnCTpbl.
3aMeHnTe HeNCnpBHeIe rnyuInTeJI.
- ПарацьзоваимеобяразьносмOTпглесви,бОЛты крpenпенялесви и ржуши y3eJHa nppeMetИЗнocaи NOBpexdeHni.ЗаменTe ИЗношений Или NOBpexдeHHbie JezBsri 和БОЛтki KOMПКТAMN,чTOбI He ДОпуCTиТь НарУшЕня Балансирobkn.
- Peryulapno npoBepnTe npabnIbHocTb
- yHKUHOHPOBaHnB BCex pKCaTOPOB 3aNycka nCnCTem npncTyCTBn OnpaTopa.
3Kcnpnyataunia
- He BклочаиTe ДВигатель В орразиЧHOM npoctpaHCTBe, Гд Bo3MOЖHo CКОПЛeнHe OnaСыХ napOB yrapHOro ra3a.
He nCnoJb3yIte nHCTpyMeHT, ecn Bbl yctaII, 6oJIeTe nJIH hXODInTEcB pOД BO3dEiCTBnEM aJIKOrOJI nJI NekapCTBeHHbIX npenapaTOB. - Празостешип! He И сюльтугу ra30нokосику, ecn ec'tb BepoTHOCTb MOnHn.
- PeKOMeHdyETcA orpaHnUHbTa DInTeNbHOCTb pa6Otbl, UTObI MNHMn3npoBaTb ONaCHOCTb BO3dEiCTBnA IyMoB N Bu6paCnn.
БудьтЕВИМаTeЛьнБиIпи ИСПОЛьЗOBAHIN ra3OHOKOcNlKN Ha OTKOCax, a TaKKe B6JIIn3n CКЛIOHOB, pBOB nII NaCbIeN.
- Ctpnxkky ra30HOB BbIOnHnYe ToJbKO BdHeBHOe Bpemr nn npx XopoWem NCKycCTBeHHOM OCBeUeHN.
- ПО ВЗМоЖноCTи He ИСпОЛьзУтЕ оБоруДоване на мokроI Травe.
- Co6JIIOdaIte octOpOxHOCt b Ha cKlOHaX.
- IpeeBnraTecb 7aROM, He 6eraIte.
- Пи ИСПОЛБЗОВАнИ KОЛECHых рOTацИОНHBых MaшINH CTРЖКУ CКЛОНов ВьЮЛНЯТе ТОЛБКО NONepeK, HO HN B KOEM CЛУЧАЕ He BВЕРХ I He BHN3 NO CКЛОHу.
- C6bIyTe Oc6byO octopoxHocTb, MeHЯ HappaBHeHne DvIXeHnHa cKJIoHax.
He BbIOnHraTe CtpnKky UpeCyp KpyTbIX CKJIOHOB.
CobnIaTe Oc6yIO OCTOPOXHOCb Ipr INBxHn3aHNM XoDM NIN NOTARNBaRa30HOKocNky K ce6e.
- 063aTeIbHo BbIKJIOuAte Jle3BVe, ecnIra3OHOKOcNlKy Heo6XODmO HaKIOHNTbДЯTpaHCnOpTnOpOBKn IO NOBepxHOCTN, OTNIuHOIOTpAbbl, IIN6O pRn TpaHCnOpTnOpOBKe ra3OHOKOcNlKn KMeCTy 3KcJIpyaTaUIMn I O6paTHO.
3anpeaaetc 3KcnnyaTnpoBaTb ra3ohokocnIky C HeNCnPabHBIMN ORpaxDeHnA M N IIN 6e3 3aunTHbIX npncnocobJeHn, HapnpMeP, DeΦJekTopOB nIN 6yHKepa dna c6op a TpaBbl.
- Ппсдунгждени: Гаонокосику Ньзя Исторьаты бe3 пikpenileHORO buHkepa Дял cбopa Травы Или самозakpbibaIoцeroя Кожуха pa3rgy3oCHoro OTBepCTnЯ.
He meHnTe hAcTpoKn peRyIaTOPa o6OpOTOB dBVaTeJIaN He 3KcPJIyaTnpuYte DvRaTeNb CInuKOM dOnro.
He n3MeHЯTe Hn He BMeUWBaTecb B pa6Oty 3aФИKcPObaHHbIXpeRyJIrTOpOB ynpaBNeHnCKOpOCTbI DnBuTaTeJIA.
3anpeuaetcBMeunBaTbC B pa60Tu cnCTeM nIuФyHKUH 6e3OpaCHOCTn ra3OHOKOcUNK, a TaKKeOTKJIHOuATb IX.
- Парад заунckом ДВИгател OTOСЕДИНITE ВСЕ ЛБИЙ И муфъл пивoda.
BkIIOuAaTe DbIraTeIb OcTOPOXHO, B COOTBeTCTBn C HNCTpyKUmaM, HOrn Pnp 3TOM DOJXHb I HAXOINTbc KaK MOxHO DaJIbWe OT Je3Bn.
- Пи заунcke Двигатуг He NaKIOHЯтЯ ra3OHOKOcNIky.
- He BkIIOuaiTe DvIraTeJIb, CToI nepei pa3rpy3OHybIM XeIIO6OM.
He nomeuIte pykn nn Hnnp Bpaauounec daTaNnnBbni3n Hx. BIO6O cnTuaynne He cTaHOBNTec nped pa3rpy30HbIM OTBepCTnEM.
He npHmMaTe n He nepeHocTe ra3OHOKocnky c pa6oTaUcIM DBrarateJeM.
- Bbiknouhnte Dnuratelb n OTCOeHNHte npoBOD CBeu3aJnrAHHy, y6eHTecb, YTO BCE DnKxUneCeY aCTINONHOCTbIO OCTaHOBNLNCb, eCNI BCTaBJIeH KInOH -N3BJIeKHTeERO:
-пегд устараонием 3acopobи удаileнemпpeДмETOB,Зakурпвшuxжелоб;
-пегд поверков, очирков илл обслужваиме ra30HOKOCSЛКИ;
- nocne ydapa o noctopOHn npeImTe. Ocmotnte ra30HOKOcNIky Ha npeIMTe NOBpeKDeHn I
yctpaHnte HeNCnpaBHOCTb, npexKde Yem BkIIOaTb N 3KcPnyaTnPOBaTb r3OHOKOCNIky;
-
Ecni nauaIacb HeHopMaJIbHaB WbpaIra30HOKOcNIkN (HeMeJLeHNo npoBepbTe!).
-
BbiknHouHTe DnBraTeIb N OTCOeINHITe npBOoD CBeuN 3aXnRHaHry, y6eIHTeCb, YTO BCE DnBXkyUneCeAactN NOJIHOCTbIO OCTaHOBUNICb, eCNI BCTaBJIeH KJIQUH - n3BJeKInTe erO:
-
OCTABNЯ rα3OHOKOcNIky 6e3 npICMOtpa;
-пегд заравков. -
Пи Вьклочендвигателя уменишто стениот кръпгя дросселов 3асLOHК; ecндвигателб осанцен OTceчныIM КлаланOM, NO OKOHuaHIN CTpIXKKI ra3OHa Вьклочente NOdau TOnJIbBa.
IcnoB3yTe ra3OHOKOCNIky TOnbKO nHa3NaYeHIO, Inra cTpNkKn nNoD6opa TpaBbl. IIO6bIe dpyrne cnOco6bl npIMeHeHnMOryt 6bITb ONaChbIMn, npINBeCTN K NOBpeKdEHNIO MaUNHbl.
O6cIyXnBaHne I xpaHeHne
Bce raikn, 60ntbI n BnHTbI DOnxHbI 6bITb HaJeXHO 3aTMytbl - 3TO o6ecneuHt 6e3oNaCHOCTb I pa6oToCnOc6HoCTb.
He xpaHnTe obOpdyoBaHnE C 6eH3nHOM B 6aKe B nOMEuEHNJx, Ie npbl MOyT IOCTNHy OTKpbIHorO ORHn NnNCKp.
ДаиTe DBiRaTeJINo OxIaIuNTbCЯпepeI TeM, KaK y6npaTbeeroB3akpbItoe MeCTO;OuNCTnte ra30HOKoCInKy I BbIOnHnTe TExHnueckoe obcIyKnbAHne npepeXpaHeHnem.
- UTo6bl yMeHbIuNTb ONaCHOCt b NOkapa, xpaHnte DBrIaTeJIb, rIyUInTeJIb, OTdJeHne HdЯ 6aTapeN I 6eH3nBdAJIbOT MeCT C TpaBOJ, JIcTBaMn IJIb B6JIIN3n C 6OJIbShIM KOnIYeCTBOM Cma3Kn.
- Пернодочески поворяпгунке сбога Травьни п dedmetизноа и снжени зационьх качсан.
- UTo6bI o6ecneuNTb 6e30nacHocTb, 3aMeHraTe n3HOseHHbI e NOBpeXdEHHbI deTaII.
- Ecnn Tpe6byTcCnITb TOnJIInBO n3 6aKa, 3TO CJIeNyET DeNaTb BHe NOMeUeHnI.
- HenpaBnIbHoe TeXnUeCKoe 6cIyKuBaHne, IcNoIb3OBAHnE HeNIOxOJaIcx 3aIaChbIX YacTei, a TaKKe ydaJIeHnE IIN MoIINФkaIg KOMNoHErTOB, OTBeuaIOUx 3a 6e3OanCHOCTb, MOKeT IOBpeIITb Ra3OHOKoCnIKy I npIBecTI K cepBe3HbIM TpaBMam OepaTopa.
IcnoIb3yIte ToIbKO peKOMeHIOBaHHbIe npOn3BODnTeIeM Je3BnI n 3aNaChbIe qaCTN. IcNoIb3OBAHne HeOpuHaJIbHbIX qaCTe MoKeT IOBpeDnT b INHCTpyMeHT n PpNBecT N TpaBMam OepaTopa. CoedePxITe ra3OHOKoCInKy B XopoWe m pa6Ouyem COCTOAHIN.
- Ecπu yctpoiCTBO OCTaHOBKn Μe3BnI He pa6oTaET, NOXaIyIcTα, ObpaITeCb 3a NOMOιbU B ΚeHTp TexHnueCKOrO O6cJIyKmBaHnI.
TpaHcNoptNtpoBka N IcNoJIb3OBAHne
B Cnyuayx, KOrda yctpoiCTBO nCNoIb3yeTc, NODHnMaeTc, nepemeuaeTc IIN HAKIOHReTc Heo6xoImo:
- HadeBaTb npOuHbIe paOoNe nepaTkn;
-Держать устpoиCTBOТAKIMобра3OM,чTOбbl obecneHTb 6e3OanChbI 3axBaT C yyeToM maccbl ySTpoiCTBa n ee paCnpedeHnra;
- KOLIynchETBO NOMOUHKOB DOJIJXHO COOTBECTCBOBaTb Macce yCTpOiCTBa n XapakTeprnCTNKam aBTOMoBnIy IIN MeCTa, Kyda nepemeuzaeTcra IIN OTKya3abnpaetcyaYCTpOiCTBO.
4. TEXHnueCKne DAHHbIE
5-1 CBOPKA CKJIADHOI PYKOKTKN
A) 3aKpeHnTe HnKHe pyKoTKn B KOpnyce yCtpoiCTBa DByMЯ KOMnJIeKTAmN 6OJTOB, ShaIb N pyKoTkAmN 6JOKuPoBKn KaK nOKa3aHo Ha pncyHKe. (Pnc. 3, Pnc. 4, Pnc. 5, Pnc. 6)
B)ДЯСКЛаДьВанИЯ OСБОБODиTe BepxHne pyKoRTKN.ПОДСоЕДИНиTe BepxHIOи HINKHIOуPyKoRTKNДБуMЯ KOMЛЯKeTAMn 6OЛТов,шaIбиpyKoRTkAmN 6JOKuPOBKn.(Pnc.7,Pnc.8,Pnc.9)
C)ПроложиTe Ka6eJIn NO OcAm pyKo8rToK. 3aФИКсИрУTe INx BOKpyr CpeIHNe YacTn HIXKHeI pyKo8rTKN C NOMOuBIO XOMyTOB, YTO6bI Ka6eJIn
pacnonarajnncb B ctopohe OT MaunHbl. B npotnbHom cnuyae Ka6eIIMoYT 6blT 3aUeMJIeHbl npi OTKpbITIN/3akpbITIN 3aJHeN KpbIuKN IIN HaTaNyTBI npi CKlaIbIBAHIN BEPxHne pyKoRTKn. (Pnc.10)
5-2 CБОРКА БУнKEРА ДЛЯ СБОРAPTPABbl
- UctaHOBka: IIOdHMnTe 3aDnHO KoBbIKy I NOBeCbTe 6bHKeP dIpa C6op a TpaBbI Ha OcB B 3aDHeY cactn Ra3OHOKocNIKn. (Pnc. 11, Pnc. 12)
- ChTne: Bo3bMNTecb 3a 3aHIOU KpbIiKky I NOdHMnITE ee, 3aTeM OTcOeDINHtE 6yHkep.
5-3 PYKÖRTKA CTAPTEPA
IpebeDnte pyKoTky cTapTepa C DnBraTeJHa HanaPabNiaHou TpOca. (Pnc. 13, Pnc. 14)
5-4 BbICOTA CPE3AHNIA
Haxmnte no HanpabneneHn HapyK, YTObbl BbICBOODntb pbuar n3 peKn. NpeMeCTnte pbuar Bnepei nn Ha3aI dnn peYnnpOBKn BbcOTbl. (Pnc. 15, cm. TaKke nyHKT 8-8)
6. PEGYUNPOBKA BbICOTbl
1) BbIiBnHbTe pyKoTky 6IOKuPoBKn, KOTopar
ФИКСИРуET HIXHIOpyKoTky. (Pnc. 16)
2) Cm. Pnc. 17, nepemecntte HnKHOIO pykoTky BBepx-BHn3, yTO6bI yCTaHOBnTB HxKHyIO BbICOTy. Ha daHHoI ra3OHOKOcNke NMeETcra 3 noJIOKeHHa BbICOTbl: 1 - MaKcIMaJIbHaA BbICota HnKHei pyKOaTKn OT 3eMJI, 3 - MHNMaJIbHaB BbICOTA.
3) YctaHOBnTe HxKHyO BbICOTy, 3aTem 3aΦNKcnpyTe HxKHIO pyKOaTKy pyKOaTKaMn 6IOKnPOBKn.

PPEIOCTEPEXEHNE:JIeBaI npBaIa
CTOPONbI HIXKHeI pyKOaTKn IOnXHbI HaXoDntbcraHa OINHaKOBOB BbICOTE.
7. “2B1”
IpeDyucMOTpeHa BO3MOXHOCTb MOdePHN3aUNn DaHHbIX ra3OHOKOcNIK B 3aBNCIMOCTN OT O6NaCTn IprMeHeHn: N3 ra3OHOKOcNIKN C 3aJNe pa3rpy3KOi n Ra3OHOKOcNIKn DnA MyJIbHnPOBaHn.
CObTeblIgobap60Kra3OHOBcMylbHInpOBaHHeM:
- 06bHoe cpe3aHne TpaBbIMakcMym Ha 2 cm: c 6 do 4 cm.
- IcnoIb3yIte OCTpbI HOK.
- He KocHTe MOKpyTO TpaBy.
- YctaHaBnBaIe MaKcImMaJIbHbIe O6OpOTb IDbIraTeJIa.
-Перемаитесь тольков рабочem Temne. - PeryIpaHNo OunuAaTe KInn DnIa MyIbIpyObaHna, BHyTpEnHHe NOBepxHOCTn KopnyCa n Je3BVe.
Haexho 3aKpbBaIte KpbIuKN TOnJIbHOrO 6aka I KaHnCTpbl.
IpepeTcKnKaHKnHOHTbRa3OHOKOcNkUdIyOBcLyXnBaHnHaHXaNnCnBaMaCnA, CJIeTeTOpNlBOu36aka.

O63aTeIbHO OuIuaIte DnIue OCHOBaHnI NOcIe KaJDoTO IcNoIb3OBAHnI, YTObI He IOnyCTNtB CKOpJIeHnI TpaBbl. OHa CHINKaET KauEcTBO MyJbHiPOBaHnI.
IpeMaJIbIbAHne IINCTbeB: IpeMaJIbIbAHne IINCTBeB TaKKe IOne3HO dJa ra3OHOB. Iprn IpeMaJIbIbAHmI IInCTbeB y6eDInTEcb, YTO OHn cyxHne nIX cNoi Ha ra3OHe He CnIuKOM TOnCTbI. He DoXuDaIteCb, Noka C DepeBbeB OAndYr BCE IInCTbBy, YTObI NaHaTaB IpeMaJIbIbAHne.

ПЕДОCTEPEXEHNE:HaTKhYbUncsBa
NOCTOPOHNNI pEaMeT, BbIKHNoHTe DnBraTeJIb.
OTCOeINHInTe npOBoD OT CBeu 3aXnIraHnY, TuaTeIbHO OCMOTpIte ra3OHOKOcNlKU Ha IpeDMET NOBpeXJdeHn, IN YcTpaHInTe IOBpeXJdeHn IpeE IOBTOPbIM 3aNyCkOM IN EKcJIyatauNeI RA3OHOKOcNlKn. CInbHaR BInbpaLna RA3OHOKOcNlKn BO BpeM pa60TbI Ra7IeTcI pIn3HaKOM IOBpeXJdeHn. YcTpoIcTBO CneDuYe THe3aMeIITeNbHO OCMOTpeT b NTpeMOHTnpOBaTb.
8-6 BSYHKEPДЛЯ CBOPA TPABbl
Onopokhnte n ouctne Mewok, ybeintecb, YTO OH qnctbI, a erO CETka BEHTnnpyetc. (Pnc. 23)
8-7 OCHOBAHNE
HnKHHIO NOBepxHOCTb OCHOBaHnra3OHOKOcNkCneNyET OuNcaTb NocLe KaXdOro NcNOJb3OBaHnY, YTO6blIpeDOTbPaTtB cKOpJIeHHe 06pe3KOB TpaBbl,
JIncTbeB, rpr3n n T.I. Ecnn TaKoMycOp 6yDeTCKaPnINBaTbcra, 3TO npuBeTe K NOBHeHIO pXaBHyNbI NKopp03nn, n MOxet CHn3ntb KaueCTBO MylbHnPOBaHnA.ДЯ OuchTkn OCHOBaHnHaKlONHTe RaOHOKOCnKy uCockpe6nte rpr3b NOxDxOJaUIM INHCTpyMeHTOM(ybEaNTecb, yTo npoBOD 3axnRaHnO TCOeDInHeH).
8-8 YKA3AHNЯ NO PEGYUNPOBKE BblCOTbl

PENyPKeXDEHHe: Hn B Koem CJIyuae He
BbIOpHЯTe KaKne-Jn6o peryInpObKn ra3OHOKocnKn, He BbIKJIOuN IpeDvapnteNbHO dBINrAteNb N He OTcoEiINHB npOBOD 3axnraHna.

PNEyPExKHeHne: Npei n3MeHeHnem
BbICOTbl CkAsnBaHnB BbIKHOnHTe Ra3OHOKOJIky N OTCoEiINHInTe npOBoD 3aKnHaHn. Ra3OHOKOJIka OChaSeHa ZeHTpaIbHbIM pbUaROM peRyIInpOBKn BbICOTbl, IMeIOUIm5NoJoxKeHn.
- ПраздуемиMeHЯТь ВсICOTу СрЗАнИ, ВБКЛIOчNTe ra3OHOKOcNILKУ И OTCоЕДИНTE ПЮВОД 3жИraHIN.
- LcHTpaIbHbI pbIar peryIINpOBKn BbICOTbI IMeET 5 pa3NIuHbIX NOIOXeHn.
- YTO6bI IN3MeHnITb BbICOTy Cpe3aHnIa, OTOXMMte pbUar peRyIINPOBKN B CTOPOHy KOJeca N nepemecHTe BBepx IIN BHN3 B NOJoxHeHne Tpe6yEmoB BbICOTbl (Pnc. 24). BCE KOJeca npi cKaunBaHnN Okaxytca Ha oDInHaKOBoi BbICOTE.
9. INHCTPyKcIN IO YXOy
CBEA 3AXIIGAHNIA
IcnoB3yIe TOJIbKO opINHaJIbHbIe CBeu 3aXnraHna.
IJa MaKcMaJIbHO 3oΦΦeKTNbHOb pa60TbI 3aMeHЯTe
CBeU 3axnRaHnuepe3 KaJdbIe 100 YacOB
3KcPnYatauN.(CM.PYKOBODCTBO IIO
3KcPnYATAUIN DBNΓATEJIa)
TOPMO3HbIEДиCKN
PeryIpaHNo npOBepaIte n/Unn 3aMeHЯTe TOPMo3HbIe DnCKN DBnIgAteJI B CepBnCHOM cEHTpe,ДЯ 3aMeHbI MoKHO NcNOJb3OBAtB TOJbKO OpRnHaJIbHbIe YaCTN.
10.ИHCTPyKlI NIO CMA3KE

PNEyPExKDeHne: IEPEN HauJIoM
OBCJUYKINBAHNAOTCOEINHNTECBEUY 3AKUNAHNIA.
- KOJECA - Cma3bIbaiTe nOdiuHnIKn KaJdOro KOJIeCa CBETJIbIM MacIOM He pexe OJHOr o pa3a B Ce3OH.
2.ДВИГATEЛь -Следуte yka3aHЯm no cma3ke,приваDEнHBIM BpyKOBOdCTBe NO 3KcNpyaTaUIN DBVIRATEJIa. - PYKOKTKA OCTAHOBA - Cma3bIbaiTe 7apHnIpbI Ha pyKoRTke octaHOBa I TpOC CBETbIM MacIOM He peKe OdHoro pa3a B ce3OH. PyKoRTka OCTaHOBa DoJxHa cBo6ONo nepemeuTaBcR B o6Ox HapPaBHeHnx.
11. OYNCCTKA

PNEyPExKDEHHe: He Moite DvIaTeJIb n3
IshaHa. Boda moKeT noBpeiNt bDnRaTeJIb IINI npOHKnHyTb TOnnInBHyO CnCTeMy.
PENyPExKHeHHe: He donyckaTe
3acopeHnCMeHHOrO 3JIeMeHTa BO3dUshoro QnJIbTpapr3bIO N PbIJbIO.
CmeHHbI 3JIeMeH T B03dyuSHoro FINbTpa DnBraTeJRA CNe dyET O6cnyKuBaTb (npOuyuTaTb) Upe3 KaJDbIe 25 YacOB HopMaIbHO NkCnIyatauN. 3JIeMeHT n3 IeHOMaTePnaIa Heo6xOIMo peYIrpHO 6cNyKuBaTb, ECNI rA3OHOKoCNka NcONb3yETcR B CyXNX PbIbHbIX YcNoBnx. (Cm. PYKOBODCTBO IO 3KCIpyATAUIN DBNIGATEJIa)
OuNTKA BO3dUshHOro ΦNJIbTPA
1.ДЯ PLM4120N:ПОДнIMITEФИКСАТОРБИHAВЕХЕЧASTNКрblшкФильстра.ДЯ PLM4620N:ИЗВЛЕКИТВИNT.
2. CHIMNTE KpbIiKy.
3. Помоimitsе лем ent BOЗдушого Фильты BODО CMылOM. HE ИСПОЛьЗВОВТБ БEH3ИH!
4.Порocушte BO3dUshHy 的ФильтсЖаТьМВОЗdYxOM.
5. KanHnTe HeckoIbKO KaIeJIb MaCna SAE30 Ha 3JIeMeHT n3 BCNeHeHHO MaTePnaJa I cJeRka COXMMTe, YTObI yDaNITb N3NIuWeK MacJa.
6. YctaHOBInTe dHJIbTp Ha MeCTO.
7. 3akpoTe KpbIkuФиltbtra.

ПРIMEЧАНЕ:ЕспнФильтИЗHOшЕN,
NopBaH, NOBpeKdEn HJI He NpDJaETcY ChCTKe, eO CJIeIyEeT 3aMeHHTb. (Pnc.25 JnPLM4120N)
11-2 HOX

PNEyPExEHEN:YtO6bI He OJOnycTnTb
Clyuahno Rycka DnurataTe, O63aTeIbHo OTcoeHnIte N 3a3emJrTe IpoBOD 3axnraHn, npexJe CEm npCTynatb K o6cnykBaHnIO HOxa. EcIn HxKHO B3rTbC3a HOK, NaDeBaIte TOnCTbIe nepUaTKn INN INcNoJIb3yIte O6pe3Kn TkaHN.
HaKJIOHInTe raoHOKOcNlky, KaK yKa3aHO B OTdJIbHOM pyKOBODCTBe NO 3KcNJyatauIN DBnraTeIe. N3BNeKeInTe WecTnRpaHHbI 6oNT C 7aH6oN, KOtOpIe yJepXnBaHT HOK C aadantepom Ha KOJIeHBAJe DnIRateJIe.
OTcoeHnHTe HOK n aanTep OT KOJIeHbJIa.

ПЕДОCTEPEXFENHE: Перioдуески
OCMaTpNBaIte aIaITp HoxHa Na IpeIme TpeUINH, OcO6eHHo B cIyae yIapa o IocToPOHHn IpeIme. Ppr HeoXoDmOCTn 3aMeHInTe.
Длг obecneueHЯ MaKcIMaJIbHo 3ФΦeKTHBHO pa6Otbl HOxdoJIXeH 6bITb OCTpbIM.ДЯ 3aTOUKN HOxA eRO Heo6XODIMO CHaTb N ICSNoIb3OBaTb UINΦOBaJIbHbI Kpyr JIn6o HAnIIbHnK DЯ npiDaHnY HOx FOpMb, KaK MoXHO 6OJee 6bN3KO K nepBOHaCuJIbHO. OYeH baxKnO, YTO6bI pexKyUne Kpa8 6bIIN 3aTOUHebl OdINHaKOBO, YTO6bI PpeD0TBpaTNTb HApUSeHne 6aJahCnPOBKn HOxA. HenpavJIbHna 6aJAHCnPOBka npuBeDET K NOBIIeHHO Bn6paUHN, YTO cTAHeT npuHnHO NOBpeXdeHnA DBIrTaTeN I ra3OHOKOcNIKn. O6ra3aTeJIbHO BbINOJIHnTe 6aJAHCnPOBky HOxA NOcJIe 3aTOUKn. BaJAHCnPOBky HOxA MOxHO nPoBepntb C NOMoUbIO OTBepTKN, INCOJIb3yEmO B KaueCTBe OcN. ChImaIte MeTaN C 6OJee TjXeNoI CTOpOHb HOxA, IOKa He Do6BeTcB paBHomePHO 6aJAHCnPOBKn.
(Pnc. 26)
Ipeed yctaHOBKOHOxHa aanTepa Ha ra3oHOKOJIky CmaXbTe KOENBaI DBNrAteTn I BHyTpEHnE IOBepxHOCTNaantepa CBETlbIM MacJOM. YcTaHOBtE aanTep HOxHa KOENBaI. Cm.Pnc.26.YcTaHOBtE HOK CTOpOHc HOMePOM DetALN OT aanTepa.
YcTaHOBnTe 7aHbHa HOK N BCTaBbTe 8eCTnrgpaHHbI 6oNT.3aTHe 6oNT yCnInem, yKa3aHHbIM HIXe.
11-3 MOMENT 3ATJKKH HOXA
LcHtpaIbHbI 6oNT cIeIyET 3aTgINBaTb ycIInem 35-45 Hm. 3To oBeCneHT 6e3OanachYIO kCNpyatauHO yCTpoIcTBa.Heo6xOdIMo nepNoDnueckn npOBepaTB naExHoCTb 3aTJkN BCEX raeK u BoTob. IocNe dIITeJIbHOrO nCIOB30BaHn,OCo6EHNO B MeCTHOCTx C neCuaHOI NOUBOH, HOX N3HaUNBaETcN TepaET nepBOHaUaJIbHyIO φOpMy. ΕΦΦeKTINBHOCTb pe3KN CHNXaETcN, INHOK cIeDyET 3aMeHNb.
В КачесТve 3amEны ИСпОЛьзУITE TOЛБКО HOЖИ 3aBOДСКОТЮПИЗВODICTBAИpeKOMeHДОВАHHbIX MAPOK. ИЗROTOВИТЕЛь He HecET OTBETCTBeHNOCTb 3a NOВрждЕнЯ, Вbl3BaHнBLE ИСпОЛьЗОВАнEM HOЖЕС C HeNPaВиьНоIб 6aJIaHcNUpOBKOJ.
PENyPExKDEHHe: He cInBaTe 6eH3nB
3aKpbIbIX NOMeUeHnX, B6JIIn3N OT OKpbITOrO OrHn T.I. He KypuTb! Napbl 6eH3nHa MoYr Bbl3BaTb B3pbIB nIN Bo3ropaHne.
b) 3aynctnte DnBiratJIb I daIte Emy npabotb Do Tex nop, noka OH He Bbypa6oTaet OCTaTKN TOnnBa H He 3arloxHET.
c) CHIMITE cBey 3aXnraHn. 3aJeIe npImepHO 20 mI macla B kamepy crotpany. IopabotaiTe CTapTepOM, yTObI paBHomepHO paCnPpeJIITb MacNo IO Kamepe crotpany. YCTaHOBInTe Ha MeCTO CBeCy 3aXnraHn.
- TsqatelbHO ONUCTnTe IN CMAKbTe 6eH3Ora3OHOKUky KaK OINCAHO BblSe B pa3dJe "MHCTPYKLUNI NIO CMA3KE".
- CnErkca cMaKbTe HOK, YTo6bI npeIoTbpaTb ero Koppo3nIO.
- XpaHnTe 6eH3Ora3OHOKoNkU B cyXOM, YNCTOM, 3aIuIeHHOM OT MOpO3OB McTe, BHe IDOcraEMOCTN NOCTOPOHnX JnU.

PNEyNPEXKDEHNE:Ipeed nomeeHneHem
6eH3Ora3OHOKOcNIKn Ha xpaHeHne DBrIaTeJIb DOJXeH NOJIHOCTbIO OCTblTb.
B cnlyuae xpaheHnIIO6Oro o6OpyDObAHnIc cnIOBOY yCTaHOBkoB HnIPOBeTpUbaEMOM NOMEUeHNI nn HaCKJaDe MaTePnaJIOB;
- Heo6xOJIMO npHnTb Mepbl IJIpIpeIoTbpaueHnKoppo3nn pXaBnHbI. HaHeCnte Ha o6OpUoBaHneCBETIOe MacNo nIN CNIIKNHOBOe MacNo,OC6eHNOHa Ka6eJI IN BCE IOdBnKhbIe YactN.
- He neperu6aIte n He nepekpyuBaIte ka6eJI.
- Ecπn Tpoc cTapTepa OTOcEduHntcσ OTHaπpaBraHoueη Ha pykoTke, OTOcEduHnte n 3a3emlnte npoBod
3aJnraHna, HaxMITE Ha pyKoTky ynpaBJeHnHOxKom
m MeIpeHHo BbITAHTE Tpoc cTapTepa N3 DBrAteJIa.
HaDeHbTe Tpoc cTapTepa Ha 6oNT hAnpabJnoSei
TPOca Ha pyKoTke.
TpaHcNoptnOboBka
BbKluHnTe DBratEn b DaIte Emy OxlaNTbcra. 3aTeM OTcoeHNHTe npoBOD CBeu 3axnHaHn I ONyCTOUnTe TOnJIbHbI 6ak CoIaCHO yka3aHnM B INCHpKcNn NO 3KcnJyaTaun DBratEn. PpoBepTe, YTO pexyuN n HnCTpyMeHr He COrHyT N He NOBpeXdEh B pe3yNbTaTe UdapOB r30HOKocnKn O npenrTCTBn.
13. ПОИСК И YYSTPAHEHNE HENCSРABHOCTEД
Tolbko Д reasonablyCtpaH
OtpuHi ra3n. He BnKOpncToBvIe npucTpiy npimiueHHI.
PanbHe BOrHeNe6e3neueHHe, TOMy TpImaIteCnpoJani BiD BORHIO. He 3aJIbAaTe naJIbHe y npauzUOuHn pncTpi.

Ipeed BnKOpncTaNHm ra3OHOKocapKn HndraaTe OkyIpaN i BcTaBJIte bepuSi.
Ipeed npoBeeHHm pemOHTHnx po6iT, 6ydb Iacka, 3HimaTe CBiKy 3anaJIIOBaHHa, a NOTIM 3diINCHIOte peMOHT 3riIDHO 3 IHCTpyKciEHO.
3actepekeHHa:DbunrH rapaHn.
OndaKoBO BiDpeRyIbObaHa npaBOpyu IJIbOpuy.
7. 2B1
3aIeXHo BiD MeTn BnKOpNCTaHHa ZI rA3OHOKOCAPKn MoKyTB 6yTN MoiNΦiKOBaHi y NopiBHHi 3 iXHIMn CTaHdapTHHMn ΦyHKcijMn:
3ra3oHOKocapKn i3 3aDiHIM BnKnIOM y MyIbUyBaJIbHy ra3oHOKocapKy.
Toke MybhyBaHHa?
NONOTHO NOBHICTHO 3yINHeHi.
8. IHCTPyKlIi 3 EKCJIyATAIi
8-1 IPEPeI 3AnyCKOM
3anpaBTe DnBryH 6eH3nHOM i MaCTnIOM, YK BkA3aHO B OKpemii nhtpyKuii 3 ekCnnyatauii DnBryHa, IIO BXOAnTb Do KOMnJIeKTu BaIoI ra3oHokocapKn. YBaJHo npouHTaIIte IIO nhtpyKuio 3 ekCnnyatauii.

YBAGA: BeH3nE JIeRKOaMmCToIO peOBOHOIO.
36epiraTe naIbHe y cneuaIbHO npn3HaueHnx KOHTeHepax.
3aIbAeTne naIbHe tiIbKn no3a npMiiEHHaT a nepei 3aynckom DnBHyHa; He naJIiTb NiD Yac 3anpaBnaHHa Ta niD Yac pOboTN 3 naIbHnM.
Hikon He 3HimaiTe KpnuKy naunBHoro 6aky i He dOnnBaIte 6eH3nH niD yac po60Tu nDbnryHa a6o KoNn DnurHyrnapuYi.
Y pa3i npoINBaHHa 6eH3nHy He HamaRaItec 3aNyCTHTn DBNrHy, a nepemictiB npncpti nOdaJI BID cBOrO Micz i 3aYeKaHTe, pOKn Bnnapu 6eH3nHy He po3BiOTbcra, 0o6 yHNKHyTn CTBOpENHa DKepeNa 3aMaHHa.
HaiznHO 3aKpyuYte KpUshky paIbHoro 6aky i KpUshky KOHTeHepa dIy paIbHoro.
Ipeed TmJ knepeBepHytn ra3oHokocapky, 0o6 nouchntnpijkye nolotno a6o 3JNTn MaCTnlo, 3JNAite naIbHe 3 6aKy.

YBAGA: Hikon He 3aIbaiTe paJIbHe B6ak y
npMiuHnhi, nIac po6oTn DnHyHa, a TaKoX ynpOdoBx 10haImeHwe 15 xBnInn nicJzakihuenyno p6oToN.
8-2 3АпунчК ДВИГУHA I POБОТAPIXКУЧОТПОЛOTHA
- Ha kiHci CBiCk 3aapanIOBaHHe rymoBa qactnHa; nepeKoHaItecra, 0 MeTaeBa pTeTna Ha KiHci IpoTy CBiCK 3aapanIOBaHHa (ycepeDnHi rymoBOi qactnHi) NaDiHNo 3YeepHeHa i3 MeTaJIeBm KInHcKOM CBiCK 3aapanIOBaHHa.
- Перш 키зарустпдвигун, Натишить на Кногкунистocу 3-5 разов. (Man. 20)
3.Пид quac 3anycky oxolodkeHoro DBnHyHa nepecyhbTe BaxiNbДрocelIOBaHnY y noLoXeHHa "Q".Y pazi TeNlOrO 3anycky i BnKOpNCtAHnY DBnHyHa nepecyhbTe BaxiNbДрocelIOBaHnY y noLoXeHHa "Q" (Man.21) - CtaHbTe no3aDy npncTpoI, Bi3bMItbcra 3a pyky KepyBaHHa 3y\PnHeHHa m I npNTuCHiTb II Do BepXHboI pyKn,Ян pOKa3aHo Ha Man.22.
- Bi3bMiTbc8a pyKu cTApTepa, kN oKa3aHo Ha MaJIIOHky Man. 22, Ta pi3ko notarHitb ii. Iicna 3anycky DnBHyHa nobIbHO nobepHITb ii Do φikcatopa nycKObero shHpya. Uo6 3ynHHTn DnBryH i pIXyu neNoJTOHO, BiDnyCtITb pyKu kepyBaHHra 3ynHHeHHaM.

ObepeKHo 3aNyctIb DnBryH 3riJHO 3 HabeHeHMi iHCTpyKziamu, TpImaUoH HOn Ioani BiD pixyoro noJOTHa.

He haxnijIte ra3oHOKocapky nID quc 3anycky DBNrhya. 3anyckaIte ra3oHOKocapky Ha pIBniNIOBepxHi 6e3 BnCOKoi TpaBn Ta 6yDb-IAKnx nepeuKOiD.

TpmaIte pykn i HOrn B CTOpOHi BiD pyxOMnx YacTIN. IiD Yac 3anyCKy DBNryHa He CTiTe HABnpOTN OTBOPY BNkIy.
8-3 ПОцЕДУРЕКСПЛУATAЦI
36npuHnJNCTa: MoKJInBO, y BAc TaKoX 3'ABNTbcJ Heo6xIaHicTb 3i6paTn JNCTa Ha ra3oHi. Ipeep 36npuHnJm JNCTa CIId nepekoHaTncs, 10 BOHO cyXe Ta JexHTb He 3aHaTo TOBCTMm 7apom. He yeKaITe, DOKn ONaDe BCE JNCTa 3 DepeB.

YBAGA:Якло ra3oHokocapka 3aueNITb
CTOPOHHnI pEmET, 3ynHITb DvBHyN. BiE'edHaTe dpit BiD CbiKu 3anaJIIOBaHHy, yBaXHo O6ctExTe ra3OHOKOCapKy Ha HABHICTb NOsKOJKeHb Ta noLaOdbTe II nepeH aCTUHNM BkOpNCtAHNm. CnIbHa Bi6paCiai NiJ uac po6OTn r3oHOKOCAPKn e O3HaKoH oII NOsKOJKeHn. Ii cPi HeraiHo 06CTeKHTn Ta nOlaOdNTn.
8-6 TPABO3BIPHNK
CnpoJHItb Ta peTeJIbHO BnUcIITb TpaBO36ipHnK, a
TakOx NpeKoHaIteCra, IIO NOrO CIuAcTa CtpyKTypa
BeHTnHoeTbcr. (Man. 23)
8-7 KOPNYC
YnCTbTe DnHO Kopnyca nCJIЯ KOKHOrO BnKOpNCTaHHra3OHOKOCAPKn, 3o6 3aNo6iTn HaNInaHHIO TpaBn, NtCTy, 6pydy ToTo. HakOnuChHnTaKnx 3aInuKIB npu3BeDe do PONBn ipxI Ta Kopo3ii, a TAKoX 3aBaNDtB HaNExKHOMy MyNbUByAHnHO.KopNc MoXHa NouchTn, nepeBepHyBwn Ra3OHOKOCAPky i BiDcKo6bNbUn dHO npuDaTHm DnA ZbOro IHCTpyMeHToM (peBipTe, 3o6 dpit CbUkn 3anAnBOAHn8b VB BiD'EDHaHn).
8-8 IHCTPyKUII UOIO
HAJIAWTYBAHHB BNCOTN

3ACTEPEXKEHH:KateropnHo
3abopohreTbc8 BIKOHyBaTn 6ydb-ki HanaHTyBaHHra30HOKOCapKn, He 3ynHNBuN DvRyH Ta He BiD'edHaBUn dpit CBiUKN3aJIIOBAHH.

3ACTEPEXEHH: Ipeed TmJk 3MiHHTN
BnCOTy CkOswyBaHHa, cIiD 3ynHHTn ra3oHOKocapky Ta BID'cHATN dpIT CBiKn 3aapanIOBaHHa. Ba7a ra3OHOKocapka OchaueHa ceHTpaHbHM BaxKeIem perynIOBaHHa BnCOTn, 3a DOnOMOIO JKOBO Mn MoXeTe o6pTaN 6yDb-jaKe i3 5 noJoxHeB.
- Перед 3мінок ВисOTи CСошУВаHHЯ 3упініть ra3оHOKOCapKy Ta BiД'ЕнайTe ДpiT CBИКИЗаразліваHHЯ.
- 3a donomoroIu ceHtpaIbHoro BaKeJIpeRyIIOBaHHBAcoTn Bm MoKeTe o6paTn 6yIb-kae i3 5 noLoKeHb.
- ⅢOБ 3MiHnTи BnCOTy CkOswyBaHHa,HaTnCHiTB Ha BaXiNb peRyIIOBAAHH y HAnpRmKy Koneca Ta o6epiB nOTpiOHy BnCOTy, nepeCyBaUOn Ioro Bropy a60 BHN3
(Man. 24). Yci koneca 6ydybHa napaTobaH Ha odHy BnCOTy CKOuYBaHHa.
9. IHCTPYKlI ΣOIO TEXHIyHOrO OBCJIyROByBAHHa
CBIyKA 3AIIABAHH
BnKOpNCToByTe DnI 3aMInH TINbKn OpurHaJIbHi CbiUKn 3aNaJIIOBaHN. DnI OTPmAHN HaIKpaunx pe3yNbTaTIB 3aMIIOte CBiKy 3aNAIOBaHN Hepe3 KOxHi 100 roDIn pOboTI. (3BepHITbcrdo IHCTPYKLII 3 EKCPIYATAUII DBNIGHA)
TAlbMOBI HAKJaIKN
PeryIpaHNo nepeBipJrTe Ta/afo 3aMInOte raJIbMOBi NaKlaDn Yu cepBicHOMy ceHTpi Ta BnKOpNCTOBuTe JINUe opurirHaJIbHi YaCTNIH.
10.IHCTPYKlI lOIO 3MAUyBAHHa

3ACTEPEXEHH: IEPEDIPOBEDEHHYM
POBIT I3 TEXHUYHO OBCJYROBYAHNBAID'EDHYIETCBIky 3AIIAOBAHH.
- KOJECA - 3maúyüte shapNKoŋiДшиŋHnKу KOKHOMy KOJIeCi JERKIM MaCTINOM XOa 6 OdɪN pa3 Ha ce3OH.
- DBNΓUH -ДоТримутеся iHCTpyкцi 3 ekCnIyataцi DBNΓUHa CTOCOBHO INoTO 3MaúCyBaHHJ.
- KEPYBAHHY 3UПИНЕHHЯ -ТочknObepтаннHa pyuCi kepyBaHHy 3уПинEHнЯ 3MaUyTe JERKIM MaCTnIOM xOua 6ОДи Na Ha ce3oH. PPyka kepyBaHHY 3уПинEHнЯ Mae BiЛbHo IpaцЮВaTи B oBox HaprAmkax.
11. YIUSEHHY

3ACTEPEXEHH: He noJIbAte DnRyH 3i
UHaHa.Boa MoKe NOsKOiHTn DnRyH a6o 3a6pydHHTn paINBHy CnCTeMy.
- BuntpaIte Kopnyc cyxio raHcyipkoIO.
- МиTe 3i shaHra dNo kOpnyca, nepeBepHyBwn ra3OHOKocapKy TaKIM YINHom, ilo6 CBiUka 3anaJIbOBAHHr 3haxOuJIacr Bropi.
11-1 NOBITPOOUCHNK DBNIGYHA

3ACTEPEXEHH: CliikyIte 3a Tm, 0o6
fIbtpuyn enemnt nobitpno fIbtpa He 3acmitbcB6pydom Ta nnom.
3ACTEPEXEHH: He 3nBaTe 6eH3n y
3aunHeHnX npMlueHnHx, no6Ii3y BiKpntoro BOrHIO Too. He naiTb! BUnapn 6eH3nHy moKyTb cnpuHnHTn Bn6yx a6o noJexky.
b) 3anycitb DBNyH i 3aNlWte NOro npauOBaTn, DOKn He 6yde BnKOpNCtAHn yBecb 6eH3nH, 10 3aNNuINBCr, i DnRyH He 3ynHHTbcr.
c) 3HimiTb cbiKy 3aapanIOBaHHa. 3a donomoroIO pyuHOi MacnIHKn HaNIITe npu6nI3Ho 20 mI maCTnla y kamepy 3ropanHna. 3anycTiB CTapTeR, 1o6 pIBHomipno pO3nOdiNtMuCTnlo no kamepi 3ropanHna. YctahOBiTB cbiKy 3aapanIOBaHHa.
- PeTeJIbHoNoNoCTiTbTa3MaCTiTbra3oHOKocapKy,RAK Bka3aHO Bpo3dini "IHCTPYKLII LIOO 3MAUyBAHHJ".
- 3Jerka 3majTe piKyupe noJIoTHo, IIO6 yHnKHyTu Kopo3ii.
- 36epiraTe ra3oHokocapky y cyxomy, uCTOMy, 3axiueHomy BiD MOpO3y npMiuieHHI noJaI BiD CTOPOHHix oc6.

3ACTEPEXEHHЯ:Гаэонокор capу CTaBtTu Ha
36epirahnna CIId TiIbKn NiCJIa TORO, JK DBNyH NOBHiCTIO OXJIOHe.

ПРИМITKA:
Плд淘汰збериганьбудь-якогооблнаньу HebeHTINJbOBAHOMy npIMiueHHi abo y npIMiueHHI, npn3haueHomy dny 36epiraHnMaTepiajIIB:
- BЖИВаΙТе BiДПОВIДнИЗ 3axOДIB, IxOБ 3axINCTnTиобладнаннЯ BiД Kopo3iI. ПokрИВaΙTe OБlaДнання,oc6blNBO Ka6eni Ta yci pyxOMIЧаCTnHи,JIeKIMMaCTnIOM a60 CUNIKOHOM.
- He 3rHnaiTe Ta He nepekpyuYte Ka6eJI.
-Якшо пуckobишнур BiD'EDHABCBiD φikcatopa nycbooro shhura ha puyu, BiD'EDHaIe i NOKnadItb Ha 3emllo dpit cbiuK 3anaJIOBAAHH, nocla6Te pyky KepybaHH pIXyHM nOLOTHOM i NOBInbHO BNTTHiTb nycobni shhup i3 DBNHyha.3acyHbTe pUCOBni shhpy φikcatop nyckoboro shhupa ha puyu.
TpaHcnpTyBaHHa
BIMKHIb DIBIyH i daIte IOMy OXOJohTyN. NOTiM BiEJaHaiTe dpiT CbiUKn 3aIaJIIOBaHNHa i cIopOxHiTB NaINBnBn 6ak BiIIOBIAHDo IHCTpyKcii 3 ekCnIyatacii DIBIyHa. He nOrHt b I ne PoIkoDbTe pIXyue noIOTHO iD ac nepecsyBaHNHa ra3oHOKocApKn Uepe3 nepeXKOaN.
13.усунец HeCnPABHOCTeN
2004/108/EC, 2006/42/EC, 2000/14/EC Ta 2005/88/EC
Ta BnroTOBJIeHe BiINOBiDIO TaNIX CTaHdApTiB a6O CTaNpTIn3OBAHnx DOKyMeHTiB:
EN ISO 5395-1, EN ISO 5395-2, EN ISO 14982
TexhuiHa DOKyMeHtaui BIDNoBiae 2006/42/EC Ta 36epiraetbca 3a aDpecoI:
Makita, Jan-Baptist Vinkstraat 2, 3070, Bělbrí
Ipoueypa OuiHOBaHH BIDNOBIDHOCTi, kOi BIMarae
Директува 2000/14/EC, Biбулась BiinobiДно DoДодату ВI.
YIOBHOBaKeHnOprAH:
j j jjj jjj jjj jjj jjj jjj
1J 451 J 1J 1J 1J 1J 1J 1J
1
0 3
.
j4Si gilso jai ai
1 1
2j - 1 = 0 2j + 1 = 0
:blil

S ACD = S COD + S BDO - S CDO
4

a 1
oaii i 1
Lililil 1r Sia gla aai plai g LIL
i j 0j 0j 0j 0j 0j 0j 0j 0j
a laia jlaaayrj aaii k g jlaa r
J 1 J j iS aW d 1 g b 1 J e W p w
Jauu Jauu Jauu Jauu Jauu Jauu Jauu Jauu
J 1 J 1 J 1 J 1 J 1 J 1 J 1 J 1 J 1 J 1
J 1
jui jai jai jai jai jai
6-8
J 1 J 1 J 1 J 1 J 1 J 1 J 1 J 1
7-8
j j j j j j j j j j j j j j j j j j j j j j j j j j j j j j j j j j j j j j j j j j j j j j j j j j j j j j j j j j j j j j j j j j j j j j j j j j j j j j j j j j j j j
()
8-8

JgA
-
-
-
-
-
-
-
-
-
-
-
-
-
-
-
-
- 18.
-
-
-
-
-
-
-
-
-
-
-
-
-
-
-

i 1
J 1 J
. iS 5 A S
1
- iS 2.
4ii 1i0r jgsjg j gai

AD = AQ A( 1,0) B( -32,34)
1J 1
S OBC = S COD + S_ BOC
jSg
42 jia j 45 jg bilaa 1 gai (jai j
025 636 111 025 025 0j gol jgi gai slalr
S OBC = S COD + S_ BOC
5-8
J 45 J iab a. 115 S Ly j g S lz j 1 r jn j 4 111j G 45 12 pluaj y Lw y g j 4 111j 4 111j j j j j j j j j j j j j j j j j j j j j j j j
j 1
m = 311
1 1
aalal lglgag ylll 15
m = 311
15 45
i j 1
iiS G J 1
j 1 j
S OBC = S COD + S_ BOC
y00000000000000000000000000000000000000
i 1

jL jJ 1
Sis
15 15
2-8
1
aaii i 15 jia
()
a1 = 2,a2 = - 4
(20)
41r 42
gga aee
"1 111111111111111111
(21) AD = BD = 12AB,AB = AC
gai 1 jai gui iis aiiu 12i gui jiu liu
22 45 j
1 = 2
22 45 j0jilao 5
j j jla J 1 J a J J J
- ai a ai 7. 求证: 1 + u1 - 1 = ( 1 + u) u1 > 1
1,2
4y y Jaaal jss Lb 1
ii 100
211
1 1 j j j j j j j j j j j j j j j j j j j j j j
i
j 1 j 1
oolliuai jia jia jia jia jia jia 45 gao
.


yj yj yj Aww Jaw Jw

2 IN 1 .7
iSlaaljlaaayyaggo j1r2ii
AED = 120^
(14.13)
4-5
y 1 y
AED = 120^
(8-8 15
.6
1000000000000000000000000000000
(16 S)
2
ii 1
3
1 1
s 3 3
Jai Juiy 4auiu uuiuuiuiuuiuui (3
S ACD = S COD + S BDO - S CDO
.5
gai d i s s j 1-5
由知 X1 < X2 使 X1 · X2 = 1
44 12
(6J5.5J4J3J)
a1^2 + a2^2 + a_3^2 = 8b^2
iiS j 201 1
(9J8.7J)
C
aJzj 1
Joo Joo Joo Joo Joo Joo Joo Joo
yJ 1
J 1
(10)
2-5
1
(11)
(12
- ( a + b) ( a^2 + ab + b^2) = a^3 + 32a^2 + b^3 .
.
4.21.21.2020 3.21.2020
S BCD = S COD + S BDO - S BOC
S BCA = S COD + S BDO - S BOC
S OBC = S COD + S BDO - S BOC
J 1
J 1 J 1
y1 1 1 + y2 2 2 + y3 3 _3 = 1
S OBC = S COD + S BOC - S BOC
S_ OBC = 12 · CO · BC = 12 × CD × 5
S OBC = S COD + S BOC - S BOC
ii = · = 0
( 0,12) ( 0,34) ( 0,14)
ii
ii

L 1

2^3 + 1 = 5
(291) 3
Jal
A
SulloB:B
j 1 j 1 j j j j j j j j
i j j 1 1 1 1 1 1 1 1 1 1 1 1
- (1a) 0. 2. (2a) 3. 4. (3a) 5.
15
jdy jy y 1y y j j j j j
j 1
S OBC = S OBC
blia li jao oiiis coo cuiwai js 45 glu:blial
ii jj jg gglg jd jda jld jds ojj
S_ BCD = 12 · CD · BC = 12 × 2t × 5
jg jj jjj jjj jjj jjj
.
jggo 1 jjS 1 j0
- S ACD = S COD + S BDO - S CDO
G
S BOC = S COD + S BOC - S COD
- 1.2.3.4.5.6.7.8.9.10.11.12.13.14.15.
< 0
- S = a1,a2,a3 , b1,b2,b3 , c1,c2,c3 , d1,d2,d_3
ii 1000000000000000000000000000000000
i 1
- 与会人员食宿及交通费用自理。
.
jies
ii 4i jai aiai 1j ai iia .
j 1 j j g a 45 j j j j j j j j j j j
yki jLoo ly oJy jil
jia 1 jao
J 10
必须单调性,且 x_0 L 对称轴必经过 y = - 12x + 1
1
1 1
j
Eg j 1
j j j j j j j j j j j j j j j j j j j
( 1 + u) + ·s + ( 1 - 1) + 1 = 1 + 2 + ·s + 1 + 1 + 1 + 1 + 1 + 1 + ·s + 1 + 1 + 1 + 1 + ·s + 1 + 1 + 1 + ·s + 1 + 1 + ·s + 1 + 1 + ·s + 1 + 1 + ·s + 1 + 1 + ·s + 0 + 0 + ·s + 0 + 0 + ·s + 0 + 0 + ·s + 0 + 0 + ·s + 0 + 0 + ·s + 1
4g 4
()
jia jiaaba 1
J 10
S C = S C + S_ D
S OBC = S BOC + S_ CDF
.5
( \downarrow \left( {0,1}\right) \rightarrow \left( {0,\frac{1}{2}}\right) \rightarrow \left( {0,\frac{1}{4}}\right) \rightarrow \left( {0,\frac{1}{8}}\right) \rightarrow \left( {0,\frac{1}{16}}\right) \rightarrow \left( {0,\frac{1}{32}}\right) \rightarrow \left( {0,\frac{1}{64}}\right) \rightarrow \left( {0,\frac{1}{168}}\right) \rightarrow \left( {0,\frac{1}{328}}\right) \rightarrow \left( {0,\frac{1}{648}}\right) \rightarrow \left( {0,\frac{1}{1688}}\right) \rightarrow \left( {0,\frac{1}{328}}\right) \rightarrow \left( {0,\frac{1}{648}}\right) \rightarrow \left( {0,\frac{1}{1688}}\right) \rightarrow \left( {0,\frac{1}{328}}\right) \rightarrow \left( {0,{16}}\right) \rightarrow \left( {0,{168}}\right) \rightarrow \left( {0,{168} - 1}\right) \rightarrow \left( {0,{168} - 2}\right) \rightarrow \left( {0,{168} - 3}\right) \rightarrow \left( {0,{168} - 4}\right) \rightarrow \left( {0,{168} - 5}\right) \rightarrow \left( {0,{168} - 6}\right) \rightarrow \left( {0,{168} - 7}\right) \rightarrow \left( {0,{168} - 8}\right) \rightarrow \left( {0,{168} - {9}}\right) \rightarrow \left( {0,{168} - {10}}\right) \rightarrow \left( {0,{168} - {11}}\right) \rightarrow \left( {0,{168} - {12}}\right) \rightarrow \left( {0,{168} - {13}}\right) \rightarrow \left( {0,{168} - {14}}\right) \rightarrow \left( {0,{168} - {15}}\right) \rightarrow \left( {0,{168} - {16}}\right) \rightarrow \left( {0,{168} - {17}}\right) \rightarrow \left( {0,{168} - {18}}\right) \rightarrow \left( {0,{168} - {19}}\right) \rightarrow \left( {0,{168} - {20}}\right) \rightarrow \left( {0,{168} - {21}}\right) \rightarrow \left( {0,{168} - {22}}\right) \rightarrow \left( {0,{168} - {23}}\right) \rightarrow \left( {0,{168} - {24}}\right) \rightarrow \left( {0,{168} - {25}}\right) \rightarrow \left( {0,{168} - {26}}\right) \rightarrow \left( {0,{168} - {27}}\right) \rightarrow \left( {0,{168} - {28}}\right) \rightarrow \left( {0,{168} - {29}}\right) \rightarrow \left( {0,{168} - {30}}\right) \rightarrow \left( {0,{168} - {31}}\right) \rightarrow \left( {0,{168} - {32}}\right) \rightarrow \left( {0,{168} - {33}}\right) \rightarrow \left( {0,{168} - {34}}\right) \rightarrow \left( {0,{168} - {35}}\right) \rightarrow \left( {0,{168} - {36}}\right) \rightarrow \left( {0,{168} - {37}}\right) \rightarrow \left( {0,{168} - {38}}\right) \rightarrow \left( {0,{168} - {39}}\right) \rightarrow \left( {0,{168} - {40}}\right) \rightarrow \left( {0,{168} - {41}}\right) \rightarrow \left( {0,{168} - {42}}\right) \rightarrow \left( {0,{168} - {43}}\right) \rightarrow \left( {0,{168} - {44}}\right) \rightarrow \left( {0,{168} - {45}}\right) \rightarrow \left( {0,{168} - {46}}\right) \rightarrow \left( {0,{168} - {47}}\right) \rightarrow \left( {0,{168} - {48}}\right) \rightarrow \left( {0,{168} - {49}}\right) \rightarrow \left( {0,{168} - {50}}\right) \rightarrow \left( {0,{168} - {51}}\right) \rightarrow \left( {0,{168} - {52}}\right) \rightarrow \left( {0,{168} - {53}}\right) \rightarrow \left( {0,{168} - {54}}\right) \rightarrow \left( {0,{168} - {55}}\right) \rightarrow \left( {0,{168} - {56}}\right) \rightarrow \left( {0,{168} - {57}}\right) \rightarrow \left( {0,{168} - {58}}\right) \rightarrow \left( {0,{168} - {59}}\right) \rightarrow \left( {0,{168} - {60}}\right) \rightarrow {\varepsilon }_{i}^{j}.
100 100
1
a 1
4.5
J 1
J 1
Bji 1 J 1000000000000000000000000000000
.
a1 = 2,a2 = - 4
s jy jyj yj yj yj yj yj yj yj yj yj yj yj yj yj yj yj yj yj yj
ii 10000000000000000000000000000000000000
J 1
a1 = 12,a2 = 38,b1 = 48,b2 = 58
i 1
s s I, s J
S_ OBC = 12 · CO · BC = 12 × CD × 5
S ACD = S COD + S BDO - S CDO
J 1 J
1 1
yikai
- 451.2
joo 1 j00
G
S OBC = S COD + S_ BOC
1 1
S BCD = S COD + S BDO - S BOC
S ACD = S COD + S BDO - S CDA
0joo g 45 1
山
y00g 1000000000000000000000000000000
- S ACD = S COD + S_ DCE
sla y jai plai 2 slae j n jn jna 5
jolol jol jol jol jol jol jol
1
S
y sill sls yi jiy jiy jiy jiy jiy dya
ii 10aiolaii jia iis ggs
m = 311
.
jus 1s
bi = c1d1 + c2d2 + c3d3 + c4d4 + ·s + c201d
15 × 1 = 21
m = 311
a_i = 70%
i
1
1
Aolululululululululululululululululululululululululululululululululululululululul

jus juii
jS oaiiui jw g Sic j [ab] ij
- jj www.aaaii 1. jao ai
Jusai jilalac slaljdi jldy
.
- 2.
( 2x - 2 ) = 23

山


J5 j 1 Jai 4 j d 1ab 2 g jai b 3g j y L a Jaoj G u C 1e . 11k 4a 10o ooo 1y
j j j j j j j j j j j j j j j j j j j j j j j j j j j j j j j j j j j j j j j j j j j j j j j j j j j j j j j j j j j j j j j j j j j j j j j j j j j j j j j j j j
2( t) = 2( 1 - 2)
aJalaiul 2Jgao
aai 45 20000000000000000000000000000000000000000000000000000000000000
.02j1wai 6y
j 1
la 4cI y bI g I r g Jai oJai Jia
jLaj45 Cui j 10
al gai jil jia ci elw 50 jj gao ool
1
ii
sJ 1 J 1
. 1
SgRdS Oo laaol gl rlo aod 4
j1 jsl. cwl oui gai jbi gia i a i jgi
y 与 yieina yieina yieina yieina yieina yieina yieina
JbIy Iaia 100
.
j 1 j0jj jw wgi oai j s g jg j
125
J 1
.
1