
18517-56 - Electric coffee maker RUSSELL HOBBS - Free user manual and instructions
Find the device manual for free 18517-56 RUSSELL HOBBS in PDF.
| Brand | RUSSELL HOBBS |
| Model | 18517-56 |
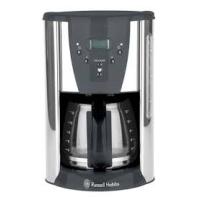
| Product type | Programmable electric coffee maker |
| Capacity | 12 cups (approx. 1.2 L) |
| Power | 1000 W |
| Power supply | 220-240 V, 50-60 Hz |
| Dimensions (W x D x H) | 26 x 20 x 35 cm |
| Weight | 2.5 kg |
| Filter type | Paper filter No. 4 (not included) |
| Carafe | Glass with removable lid |
| Main functions | Delay programming, keep warm (2 h), strength selector for small batches, automatic shut-off |
| Display | Digital display with AM/PM clock |
| Safety | Stable heat-resistant base, automatic shut-off after 2 h |
| Care and cleaning | Clean the exterior with a damp cloth; descale regularly; do not wash in the dishwasher |
| Spare parts and repairability | Carafe, filter basket, lid insert; cable replaceable by an approved professional |
| Included accessories | Carafe, filter basket, insert |
| General information | Manual available in multiple languages on the manufacturer's website; indoor use only |
Frequently Asked Questions - 18517-56 RUSSELL HOBBS
User questions about 18517-56 RUSSELL HOBBS
0 question about this device. Answer the ones you know or ask your own.
Ask a new question about this device
Download the instructions for your Electric coffee maker in PDF format for free! Find your manual 18517-56 - RUSSELL HOBBS and take your electronic device back in hand. On this page are published all the documents necessary for the use of your device. 18517-56 by RUSSELL HOBBS.
USER MANUAL 18517-56 RUSSELL HOBBS
BEHANDLING OG VEDLIKEHOLD
ToBapb, Bo3BpaueHHbIe IIO rapaHTn C NOLOMKaMn BCJeCTBHe HaKUnn, 6yDyT NoJLeJkaTb peMOHTy.
3AUHTA OKPYKAIOUcEIN CPEbl
ДяТOrO yTo6bI n36eKaTb yrpo3 ДЯЗдорOBь n OkpykaIoош e CpeDbI n3-3aВpeHbIX BeueCTB B 3JeKTPnueCkNx N 3JeKTPoHHbIX TOBaPax, npi6Opbl, OTmeuHhbI DaHhbIM CmBOJLOM,ДОЛЖБИ yTuJIIN3IpOBaTbCЯ He KaK He OTCOPTpOBAHHBIe 6blTOBbI OTXOdbI, a KaK BOCCTaHOBJIeHHbIe INI NOBTOPHO INCNoJIb3OBAHHbIe.
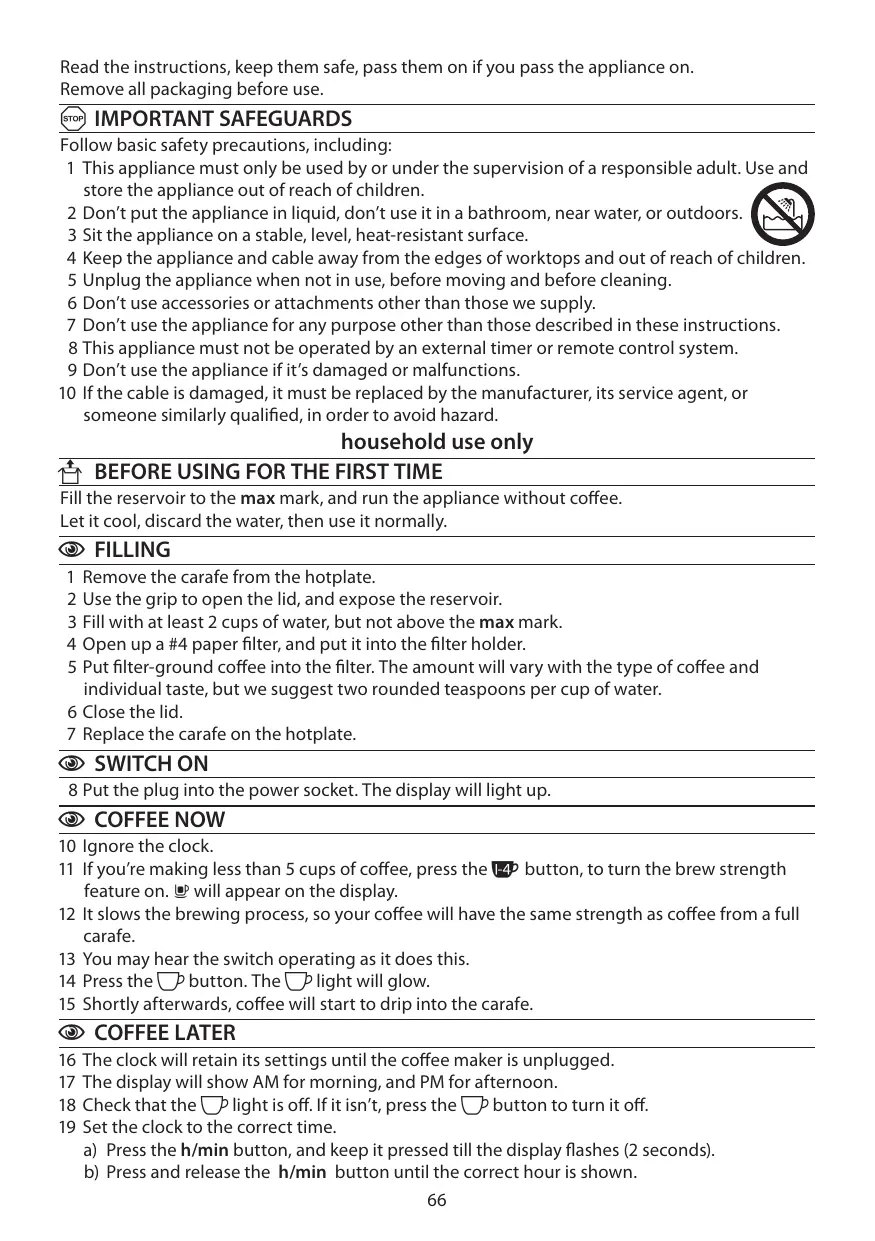
Read the instructions, keep them safe, pass them on if you pass the appliance on. Remove all packaging before use.

IMPORTANT SAFEGUARDS
Follow basic safety precautions, including:
1 This appliance must only be used by or under the supervision of a responsible adult. Use and store the appliance out of reach of children.
2 Don't put the appliance in liquid, don't use it in a bathroom, near water, or outdoors.
3 Sit the appliance on a stable, level, heat-resistant surface.
4 Keep the appliance and cable away from the edges of worktops and out of reach of children.
5 Unplug the appliance when not in use, before moving and before cleaning.
6 Don't use accessories or attachments other than those we supply.
7 Don't use the appliance for any purpose other than those described in these instructions.
8 This appliance must not be operated by an external timer or remote control system.
9 Don't use the appliance if it's damaged or malfunctions.
10 If the cable is damaged, it must be replaced by the manufacturer, its service agent, or someone similarly qualified, in order to avoid hazard.
household use only

BEFORE USING FOR THE FIRST TIME
Fill the reservoir to the max mark, and run the appliance without coffee.
Let it cool, discard the water, then use it normally.

FILLING
1 Remove the carafe from the hotplate.
2 Use the grip to open the lid, and expose the reservoir.
3 Fill with at least 2 cups of water, but not above the max mark.
4 Open up a #4 paper filter, and put it into the filter holder.
5 Put filter-ground coffee into the filter. The amount will vary with the type of coffee and individual taste, but we suggest two rounded teaspoons per cup of water.
6 Close the lid.
7 Replace the carafe on the hotplate.

SWITCH ON
8 Put the plug into the power socket. The display will light up.

COFFEE NOW
10 Ignore the clock.
11 If you're making less than 5 cups of coffee, press the 4 button, to turn the brew strength feature on. will appear on the display.
12 It slows the brewing process, so your coffee will have the same strength as coffee from a full carafe.
13 You may hear the switch operating as it does this.
14 Press the button. The light will glow.
15 Shortly afterwards, coffee will start to drip into the carafe.

COFFEE LATER
16 The clock will retain its settings until the coffee maker is unplugged.
17 The display will show AM for morning, and PM for afternoon.
18 Check that the light is off. If it isn't, press the button to turn it off.
19 Set the clock to the correct time.
a) Press the h/min button, and keep it pressed till the display flashes (2 seconds).
b) Press and release the h/min button until the correct hour is shown.
| diagrams | 5 grip | 10 lid |
| 1 paper filter #4 (not supplied) | 6 lid | 11 press |
| 2 tab | 7 water | 12 handle |
| 3 handle | 8 slot | 13 carafe |
| 4 filter holder | 9 hotplate | |
| c) Press and release the ① button – the minutes side of the display will flash. d) Press and release the h/min button until the correct minute is shown. e) Leave the controls for 5 seconds to confirm the time. | ||
| 20 Set the timer to the time you want to start brewing. a) Press and release the ① button. The display will show -- -- b) Press and release the h/min button until the correct hour is shown. c) Press and release the ① button – the minutes side of the display will flash. d) Press and release the h/min button until the correct minute is shown. e) Leave the controls for 5 seconds to confirm the time. | ||
| If you don't press the h/min button within 5 seconds, the display will revert to “normal”, and the time will show. Press the ① button, and start again. | ||
| ACTIVATION | ||
| 21 If you're making less than 5 cups of coffee, press the ④ button, to turn the brew strength feature on. ⑤ will appear on the display. | ||
| 22 Press and release the ② button. | ||
| 23 The ⑧ light will come on, and ⑥ will show on the display. | ||
| 24 When the set time is reached, the ③ light will go off, the ⑦ light will come on, ⑧ will disappear from the display, and brewing will start. | ||
| 25 If you want to cancel the timer before brewing has started, press the ② button. | ||
| 26 If you want to stop the coffee maker while it's brewing, press the ⑨ button. | ||
| HOTPLATE | ||
| 27 The hotplate will keep the coffee hot for two hours. | ||
| 28 During this time, the ① on the display will flash. | ||
| 29 After two hours, it'll turn all heating off. | ||
| 30 To switch the appliance off manually, press the ⑩ button. | ||
| 31 If left for much more than an hour, chemical changes in the coffee liquor start to affect the flavour. It's best to pour it away and make a fresh pot. | ||
| A QUICK CUP | ||
| 32 You can remove the carafe at any time. | ||
| 33 To prevent the filter holder overflowing, replace the carafe on the hotplate within about 20 seconds. | ||
| CARE AND MAINTENANCE | ||
| 34 Unplug the appliance and let it cool down before cleaning or storing away. | ||
| 35 Use the grip to open the lid. | ||
| 36 Use the handles on the sides of the filter holder to lift it out. | ||
| 37 Tip the contents of the filter holder into the bin. | ||
| 38 You may clean the carafe and filter holder in warm soapy water. Rinse thoroughly afterwards, to remove all traces of soap. | ||
| 39 Press the lever at the rear of the carafe lid, above the handle, to open the carafe lid. | ||
| 40 Clean the outside surfaces of the appliance with a damp cloth. | ||
| 41 Align the tab at the back of the filter holder with the slot at the back of the coffee maker, and lower the filter holder back into the coffee maker. | ||
42 Close the lid.
43 Don't put any part of the appliance in a dishwasher.

DESCALING
44 Descale regularly. Use a proprietary brand of descaler suitable for use in plastic-bodied products. Follow the instructions on the package of descaler.
Products returned under guarantee with faults due to scale will be subject to a repair charge.

ENVIRONMENTAL PROTECTION
To avoid environmental and health problems due to hazardous substances in electrical and electronic goods, appliances marked with this symbol mustn't be disposed of with unsorted municipal waste, but recovered, reused, or recycled.
instructions - more detailed instructions are available on our website:
http://www.russellhobbs.com/ifu/18118

G
32
20
aillg
33
above 34
AaJ jlll Jol a gila le jaiell 35
a 35
36
37
A. 38
jilll Jol jil g oagll Ayslo als odgall aiaell 0 jilll Jol cals gall jlll 40
S四边形 AOBC = S ABC + S_ AOB
141
.1000 42
pLilai aalai 1wj1 j
AaJ Jn Jn Jn Jn Jn Jn Jn Jn Jn Jn Jn Jn Jn Jn Jn Jn Jn Jn Jn Jn Jn Jn Jn Jn Jn Jn Jn Jn Jn Jn Jn Jn Jn Jn Jn Jn Jn Jn Jn Jn Jn Jn Jn Jn Jn Jn Jn Jn Jn Jn J
1.2jLbLgJuaLaeJla
| العربية 10 | العربية 5 | العربية |
| العربية 11 | العربية 6 | (العربية) 4pqrsjrlall 1 |
| مإستعمال 12 | العربية 7 | العربية 2 |
| العربية 13 | العربية 8 | العربية 3 |
| العربية 9 | العربية 4 |
aill j i .i aill 400 jai jai jai jai jai jai jai jai jai jai jai jai jai jai jai jai jai jai jai jai jai jai jai jai jai jai jai jai jai jai jai jai jai jai jai jai
Jia xiyj Jia xiey j
i 1
ailllll aalssll lal 1
JalabJI JgluaeJe Iyaiy alalai jalalaii. Jgwsaggsj 1

J 2
.0jllp 3
Jl 1 J 1 1 1 1 1 1 1 1 1 1 1 1 1 1 1 1 1 1 1 1 4
Jauaiuui 1ie juiiie jusai Juae 5
6
7
8 8
9
1 10
Saa
bi jia jieiu
gj 0yll Jaaanl j
Jall
1
2
max 120 2 2 2 2 2 2 2 2 2 2 2 2 2 2 2 2 2 2 2 2 2 2
aill 4
在 Rt ABD 和 Rt ADC 中
6
7
8
S OBC = S ABC + S_ AOB
aclll Jalzj9
g j 140 j j j j j j j j j j j j j j j j j j j j j j j j j j j j j j j j j j j j j j j j j j j j j j j

Brand : RUSSELL HOBBS
Model : 18517-56
Category : Electric coffee maker