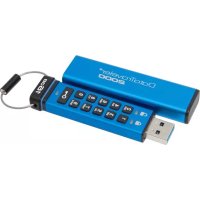
SH100S3B - SSD KINGSTON - Free user manual and instructions
Find the device manual for free SH100S3B KINGSTON in PDF.
User questions about SH100S3B KINGSTON
0 question about this device. Answer the ones you know or ask your own.
Ask a new question about this device
Download the instructions for your SSD in PDF format for free! Find your manual SH100S3B - KINGSTON and take your electronic device back in hand. On this page are published all the documents necessary for the use of your device. SH100S3B by KINGSTON.
USER MANUAL SH100S3B KINGSTON
Find the language and latest documentation for your Kingston® HyperX SSD here.
SSDNow Installation Guide


............ For instructions in English

Your purchase of the SSD with Accessory Kit will allow you to enjoy the benefits of increased system performance and reliability. All hardware and software necessary to replace your internal hard drive with the SSD Solid State Drive (SSD) is included. The Acronis® True Image HD software, an imaging program that copies the contents of one computer hard disk and loads those contents to another system drive, will take you through the cloning process. This software allows you to move your Operating System and your personal data from your current system hard drive to your new SSD. Once the Acronis® True Image HD cloning process is complete and the data is successfully transferred to your SSD, your hard drive can then be used as a secondary drive for data storage.
- The software provided in this kit does not support imaging/cloning of RAID or Spanned disk arrays. There are tools and features included in the Acronis software that are not applicable to this product bundle. This manual provides instructions for the Cloning feature only. Please refer to the Acronis "Help" menu, located within the software application, for instructions on the use of any other software features.
This device complies with Part 15 FCC Rules. Operation is subject to the following two conditions: (1) This device may not cause harmful interference. (2) This device must accept any interference received, including interference that may cause undesired operations.
This Equipment has been tested and found to comply with the limits for a Class B digital device, pursuant to Part 15 of the FCC rules. These limits are designed to provide reasonable protection against harmful interference in a residential installation. This equipment generates, uses and can radiate radio frequency energy and, if not installed and used in accordance with the instructions, may cause harmful interference to radio communications.
However, there is no guarantee that interference will not occur in a particular installation. If this equipment does cause harmful interference to radio or television reception, which can be determined by turning the equipment off and on, the user is encouraged to try and correct the interference by one or more of the following:
Reorient or relocate the receiving antenna.
- Increase the separation between the equipment and receiver.
- Connect the equipment into an outlet on a circuit, different from that to which the receiver is connected.
- Consult the dealer or an experienced radio/TV technician for help.
TABLE OF CONTENTS
Kit Includes: 4
Tools Needed: 4
System Requirements. 5
Handling Precautions 6
Desktop Instructions 7
Hardware Installation 7
Setup and Use Acronis® True Image HD 8
Set "Hard Drive Boot Priority" 13
Notebook Instructions 14
Hardware Installation 14
Setup and Use Acronis® True Image HD 15
Kit Includes:
SSD drive (x1)
- 2.5" to 3.5" desktop mounting bracket
- 6/32" pan head screws (x4)
M3 flat head screws (x4)
- SATA power adapter (x1)
- SATA data cable (x1)
external drive enclosure (x1)
- USB cable (x1)
- Cloning software CD (x1)
Tools Needed:
Phillips head screw driver
Computer system manual (optional)
System Requirements
Operating System: Windows® 7, Windows Vista (SP1), Windows XP (SP3) and Windows 2000 (SP4)
Pentium processor or higher
128MB RAM
CD drive for bootable media creation
Available SATA Connector for desktop installation
Available 3.5 inch drive bay for desktop installation
ATTENTION: PLEASE READ BEFORE BEGINNING INSTALLATION.
- If the SSD provided in this kit is larger in capacity than the hard drive currently in your system, proceed to Handling Precautions.
- If the SSD provided in this kit is smaller in capacity than the hard drive currently in your system, please confirm that the used capacity on the system hard drive is not larger than the capacity of your new SSD. Perform the following steps to determine the Used Space on the system hard drive:
1) Boot your computer to your desktop.
2) Double-click on Computer (or My Computer) located on your desktop or via the Start Menu.
3) Right-click on the C: drive and select Properties. The Properties window for the C: drive will appear (Figure 1):

Figure 1: (C:) drive Properties
If the used capacity is greater than the capacity of the SSD, it is required that you move some of your data such as pictures, movies, music, etc. off of the drive to an alternative data source (e.g., external hard drive or USB drive) until the Used space is no more than 85% of your new SSD capacity. This will help to ensure that the imaging process is successful. The following chart may be useful as a guide:
| SSD capacity | Adjusted HDD Used Space |
| 32GB | 27GB or less |
| 40GB | 34GB or less |
| 64GB | 54GB or less |
| 80GB | 66GB or less |
| 128GB | 109GB or less |
| 160GB | 136GB or less |
| 256GB | 218GB or less |
| 512GB | 423GB or less |
Adjusted HDD Used space = SSD capacity X 85%
After the cloning process has been successfully completed, these files can be moved back to their original location on the hard drive.
Handling Precautions
To prevent damage from static electricity, observe the following precautions:
- Allow the drive to remain in the anti-static container until you are ready to install the SSD.
- Wear a wrist strap and connect the ground strap to the computer case to minimize static electricity.
- Use care in handling the drive. Do not touch the connectors.
Desktop Instructions
Hardware Installation
- Turn off the power to your computer and disconnect the power source.
- Remove the system chassis cover according to the system manufacturer's instructions.
- Attach the 2.5" to 3.5" mounting bracket (provided) to the SSD by aligning the mounting screw holes on the bracket with those on the SSD and inserting the M3 flat head screws provided.
- Locate an available 3.5 inch drive bay inside your computer and install the SSD using the 6/32" pan head screws (provided).
Note: Your system may require proprietary chassis screws, rails or a bracket system to be used with its drive bay(s). If this is the case, please attach that hardware to the 2.5" to 3.5" mounting bracket for compatibility with your computer chassis. Refer to your system manufacturer's documentation for instructions.
- Attach one end of the SATA data cable (provided) to the SATA interface connector on your computer's motherboard or SATA host adapter. (Figure 2) displays an example of what a SATA connector might look like on the motherboard.

Figure 2: Desktop PC motherboard with 4 SATA connectors. The number of connectors on each system will vary.
Note: SATA connectors are keyed to ensure correct orientation.
- Attach the other end of the SATA interface cable to the SSD.
- Attach the power cable or power adapter (provided) to the SSD.
- You are now ready to copy your data from the system hard drive to the SSD using the cloning software provided.
Setup and Use Acronis® True Image HD
IMPORTANT: Always uninstall Trial versions of Acronis software prior to installing a full version!
- Insert the Acronis True Image HD software into the system CD-ROM drive.
- Restart the system.
- The Acronis True Image HD CD is a bootable disk and will boot to the Acronis True Image HD screen.
Note: If the system does not boot to the Acronis True Image HD screen and instead boots to Windows, perform the following:
1) Restart the computer. While the system is restarting, run the system setup program (BIOS). The BIOS can be activated by pressing a special key such as ESC, F1, F12 or DELETE. (Refer to your system manufacturer's documentation for the correct key.)
2) While in the system BIOS, change the boot order so that CD-ROM is the first boot device.
3) Save the settings and exit BIOS. (For more detailed instructions on configuring the BIOS, consult your system manufacturer's documentation.)
4) Restart the computer. When the computer restarts, it should now boot to the Acronis True Image HD page.
- Select the Acronis True Image icon from the Acronis True Image HD screen (Figure 3).
Note: It may take a few minutes for the next screen to come into view.

Figure 3: Acronis True Image HD
- Select Clone Disk (Figure 4).

Figure 4: Select Clone Disk
Note: If you receive an error message stating "This program is designed to work with two or more drives," check all connections to both the hard drive and the SSD. Ensure that the SATA data and power cables are connected to the drives and motherboard. If all connections are in place, it is possible that your system BIOS does not have the spare SATA ports turned on or enabled.
If this is the case do the following:
1) Restart your computer. While the system is restarting, activate the system setup program (BIOS) by repeatedly pressing a special key such as ESC, F1, F12 or DELETE. (Consult your computer system's documentation for the correct key).
2) While in the system BIOS, look for an entry labeled "Drives or Hard Drives." Select this field using the arrow keys on your keyboard and press Enter. Here, the spare SATA ports can be enabled or turned on by selecting the SATA port and changing the value to "On" or "Enabled." For best results, it is recommended that you enable or turn on all SATA ports during this process. Doing so will not harm your system.
3) Exit the BIOS by pressing the ESC key. Save changes when prompted.
4) Restart the computer, boot to the software CD and try the cloning process again.
- Select Automatic from the cloning mode options (Figure 5). DO NOT select Manual mode. (Manual mode should be used by advanced users only!) Click Next.

Figure 5: Cloning mode options
- If prompted, select the Source and Destination Disk. Click Next to continue.
- The Hard Disk Drives Structure screen will appear (Figure 6). Click Proceed.
Note: The original partition size will be scaled according to the new drive capacity. If the new drive has less space than the original drive, the partitions will shrink accordingly. If the new drive is larger than the original drive, the partitions will be enlarged proportionately.

Figure 6: Hard Disk Drives Structure
- An operation progress bar will indicate the data is being copied (Figure 7). Once the cloning process is complete, a Disk Cloning was successful window will appear. Click OK.

Figure 7: Acronis Operation Progress
- Remove the Acronis True Image HD software CD and close the program.
Set "Hard Drive Boot Priority"
Your system is now configured with two bootable drives. In order to boot from your new SSD drive, you must enter the system BIOS to set "Hard Drive Boot Priority" so that your new SSD drive is set to boot first. Perform the following:
- Restart your computer. While the system is restarting, activate the system setup program (BIOS) by repeatedly pressing a special key such as ESC, F1, F12 or DELETE. (Consult your computer system's documentation for the correct key.)
- While in the BIOS, change the "Hard Drive Boot Priority" so that the disk labeled "SSDxxxx" is in the first position.
- Exit BIOS by pressing the ESC key. Save changes when prompted.
- Restart the computer. When the computer restarts, it should now boot to your new SSD drive.
Note: Your original system hard drive can now be used as a secondary data disk for data storage and should be viewable via My Computer (Computer in Vista).
Notebook Instructions
Hardware Installation
Note: Do not install the SSD into the external drive enclosure.
- Transfer your System Hard Drive to the External Drive Enclosure:
1) Turn off the power to your computer, disconnect the power source and remove the battery pack from your notebook.
2) Remove the system hard drive from your notebook and disassemble the system drive bracket. (The system drive bracket will be used later to install the SSD in your notebook.) Refer to your system manufacturer's documentation for further instructions.
3) Insert the external system hard drive into the external drive enclosure.
- Install the SSD into your Notebook and attach the External Drive Enclosure:
1) Assemble the SSD with the system's drive bracket and insert it into the drive bay of your notebook. Refer to your system manufacturer's documentation for instructions.
2) Using the USB cable provided, attach the system hard drive (installed in the provided external drive enclosure) to your notebook via any USB port.
3) You are now ready to copy your data from the system hard drive to the SSD using the cloning software provided.
Setup and Use Acronis® True Image HD
IMPORTANT: It is strongly recommended that you uninstall any Trial versions of Acronis software prior to installing a full version.
- Insert the Acronis True Image HD software into the system CD-ROM drive.
- Restart the system.
- The Acronis True Image HD CD is a bootable disk and will boot to the Acronis True Image HD screen.
Note: If the system does not boot to the Acronis True Image HD screen and instead boots to Windows or fails to boot at all, perform the following:
1) Restart the computer. While the system is restarting, run the system setup program (BIOS). The system BIOS can be activated by pressing a special key such as ESC, F1, F12 or DELETE. (Consult your computer system's documentation for the correct key.)
2) While in the system BIOS, change the boot order so that CD-ROM is the first boot device.
3) Save the settings and exit BIOS. (For more detailed instructions on configuring the BIOS, consult your computer system's documentation.)
4) Restart the computer. When the computer restarts, it should now boot to the Acronis True Image HD page.
- Select the Acronis True Image icon from the Acronis True Image HD screen (Figure 8).
Note: It may take a few minutes for the next screen to come into view.

Figure 8: Acronis True Image HD
5. Select Clone Disk (Figure 9).

Figure 9: Select Clone Disk
- Select Automatic from the cloning mode options (Figure 10). DO NOT select Manual mode. (Manual mode should be used by advanced users only.) Click Next.

Figure 10: Cloning mode options
- If prompted, select the Source and Target Disk. Click Next to continue.
- The Hard Disk Drives Structure screen will appear (Figure 11). Click Proceed.
Note: The original partition sizes will be scaled according to the new drive size. If the new drive is smaller in capacity than the original drive, the partitions will shrink accordingly. If the new drive is larger than the original drive, the partitions will be enlarged proportionately.

Figure 11: Hard Disk Drives Structure
- An operation progress bar will indicate data transfer (Figure 12). Once the cloning process is complete, a Disk Cloning was successful window will appear. Click OK.

Figure 12: Acronis Operation Progress
- Remove the Acronis True Image HD software CD and close the program. The system will automatically reboot to the new SSD drive.
Note: The drive in the external enclosure can now be used as secondary storage.
Guía de instalación
Hardwareinstallation
Hardwareinstallation
Heo6xodmblnHcTpyment:
Kpectoo6pa3Ha oTBeptKa
PyKOBODCTBO K KOMIIbIOTepHOH cHCTeMe (IO JKeJIaHHIO)
CnCTeMHbIe Tpe6oBaHnIa
Операционная систema:Windows7,WindowsVista (SP1),WindowsXP(SP3)и Windows2000(SP4)
Пюцeccop Pentium Или Вьшп.
128 MB RAM
CD-πρνΒΟД ΜΙΑ ΣΟΤΗΝΑγρυχαεΜβIx HOCHTΕJIeI
Cbo6oHbI pa3bEmsATA yctaHOBKn Ha HAcTOJIbHOM KOMIIbIOTepe
Cbo6oHbIM MOHTaKbI OtceK Ha 3,5 IOHMa IJIy yCTaHOBKn Ha HAcTOJIbHOM KOMIIbIOTepe
BHIMAHNE: IIOJKAJIYI'CTA, IIPOUTHTE IO HauJA YCTAHOBKN.
- EcJIN HaKoIInTeJIb SSD, IIpeIcTaBJIeHHbI B KOMIIJIeKTe 6olbue IIO O6bEMy Yem JkCTKN IINCK
B BaIIeI TeIepeIIHeI CNCTeMe, IepeITN K "IIpeIOcTOpOJKHOcTAm IIpn O6paIeHH".
- EcJIN HaKoIInTeJIb SSD, IIpeIcTaBJIeHHbI B KOMIIJIeKTe MeHbUe IIO ObEMy Yem Jck
B BaIIeI TeIIepeIIHei CnCTeMe, IIOKaJIyIcTa y6eIHTecb, YTO HcIIIOJIb3YeMbI OOBEM CnCTeMHOrO JxctKOrO IINcKa He IIpeBbIaAeT OobE Ma BaIIeRo HOBOrO SSD-HaKOIIHTeJI. YTo6bI OIIpeIeJIHTb 3aHraToe IIpOcTpaHCTBO Ha CnCTeMHOM JxecTKOM IINcKe, HUJHO BbIIIOJIHNtB CJIeIyIOIIne IINaIgN:
1)3aRpy3HTb KOMIIbIOTep,pa6OuHn cTOJI.
2) Двждь сълкнуь "КOMПьOTep" (ил "Моь KMПьOTep"), paIoJIOJOKeHHbIe Ha pa6Oчem cToJIe, ИЛи 3a'NTи chepe3 MeHIO "Пус".
3) IIeJIKNHyTb IpaBOI KHOIIKOI Ha IIpHBoIe C: I BbI6paTb "CBoIcTBA". IIOBHTcI OKOIIKO "CBoIcTBA" IIa C: IIpHBoIa (PucyHOK 1):

PucynoK 1: (C:) "C6oicma" npu6oada
EcJH HcIIOJIb3yEmbI O6bE M 60JIbIIe, Yem EMKoCTb SSD, IOTpe6yeTcI IpeHeCTn HeKOTOpbIe DaHHbIe, TaKHe KaK H3O6paJxehNHa, HJIbMbI, My3bIKy, N T.I. C 3TOrO IIpHBODa Ha aJIbTePHTBbHbI HAKONITeJI DaHHbIX (HaIP. BHeIHH N JecTkN DnCK NIIu USB-IPAIB), YTO6bI 3aHAYToE IPOCTpaHCTBO He IpeBbIIaJIO 85% EMKoCTn BaIIeRo HOBORo SSD-HaKOINTEJI. 3TO IO3BOJNT ObecIeHTb ycIIeIHHOe BblIOJIHeHne IpoUecca KOnIpOBaHnI o6pa3a. JJIa cPiPABKN MoJcET 6bITI POJIe3Ha cJIeDyIOUa Ta6JIuHa:
YcpeHHeHHoe HcnoJb30BaHHoe npocTpaHCTBO HDD = eMKoctb SSD X 85%
| Емковст SSD | Усpenнецно Искпльцованец Прострацьо HDD |
| 32 Г | 27 Г полимеонe |
| 40 Г | 34 Г полимеонe |
| 64 Г | 54 Г полимеонe |
| 80 Г | 66 Г полимеонe |
| 128 Г | 109 Г полимеонe |
| 160 Г | 136 Г полимеонe |
| 256 Г | 218 Г полимеонe |
| 512 Г | 423 Г полимеонe |
IpeodoctopoXhOCTn prn oBpaueHn
Для педOTврашени IOВпждени CTaTHчecKM 3JIeKtpчecTBOM co6JIHOДТь сIeДуJOПипpeДocTopОжнocтн:
He BbHMaTb IIpHbOJ n3 aHTnCTaTHuecko yIaKOBKn I0 HaayJa ycTaHOBKn SSD.
- HaJIeTb aHTnCTaTHUeCKn 6pacJET n coeINHHTb eRO c KOpIycom KOMIIbHOTepa IJIcBeJEHHra CTaTHUeCKOTo 3JIeKTpnueCTBa K MHNHMMy.
Co6JIIOaTb octOpOxHocTb B o6paIeHHc pINBOJOM. He npHKacTbcK KOHTaKTam
Yka3aHnJaДЯHaCTOJbHOroKOMNbHTepa
AnnapaTHa yCTaHOBKa
- BbIKJIIOUHTb 3JIeKTpOIIHTaHHe KOMIIbIOTepa I OTCOEINHHITb OT HCTOUYHKa.
- Chytb KpbHcKU cHCTeMHOrO 6JIOKA B COOTBeTCTBHN C HNCTpyKIIHe IPOH3BOIDTeJIa.
- Прнкрпntь 2,5-ДIOHMOBи HJIH 3,5-ДIOHMOBи MOHTaЖиКpoHITeH (В KOMПЛeKTe) K SSD HaKoIHTeJIHO, COBmecTnB OTBepCTnI IOД MOHTaЖиБе BnHTbI Ha KPOHITeHHe c OTBepCTnA MHa SSD, И BCtABHtB BnHTbI M3 c INotaHoi FOJIOBkoi H3 Na6opa.
- HanTHCBO6OHNbIMoHTaXHbIOTcEKHa3,5IOHMaHa CBOEKMOMIIbHOtepe,N UcTaHOBHTbIPNBOID SSD,HcIOJIb3yBaHHTbHa 6/32IOHMa cOKpyJIeHHOJrOIOBKOI (B KOMIIJEKTe).
ПиMuMaHHe:ВBaIeI cHcTeMe moYr loHaIO6HTbCЯфИрMuHbIe BnHTbI KOpIyCa, HAnpaBJIaIOUHne HJIn KpeIeKHaJc hCTeMa IJIa YcTaHOBKn B MoNTaJKBhIX OTeKeKax. B TaKOM cJIyAe, IOKaJIyIcTa IIpHKpeIITe 3TH DeTajN K 2.5-3.5-ДIOIMOBbIM KpoHHTeHHam IJIa COBMecTHMOcTn C KopIycom BaIeRo KOMIIbIOTepa. 3a HHCTpyKIIHmN o6paIaIteCb K IOKyMeHTaIHH INpOIN3B0dHTeJIa BaIeI cHcTeMbl.
- ПОДСоЕДИНТь OДИN KOHeI ИНтЕрфсEнOrO Ka6eJIЯ SATA (В КOMПЛeКTe) K INHTepфeIChOMy pa3bemy SATA Na сиСтЕМнОй ПЛaTe BaIIeTO кOMПьЮТepа ИЛH INДИВИДУАЛБНOMy KOHTpoJIлEpY SATA. (PucyHOK 2) - ПОka3aH ПprIMeR, КА мОжET BыIGЛЯДeТь pa3bEМ SATA Na сиСтЕМнОй ПЛaTe.

Pucyok 2: Cucmemhna nlaama hacmo1bho2o KOMnbIomepa c 4 pa3bEmaMu SATA. KoJIuecm60 pa3bEMO6 pa3NbIX cucemax oydem pa3HbIM.
Пиимechанec: Pa3bьмbl SATA chabkehbl KJIIOUamn ДлЯ obecneueHnЯ npaBnIbHoro IIOJIOKeHnY.
- IprncoeHNHTb npyroi KOHei HHTepfchHO Ka6eJRA SATA K SSD haKoHNTeJIIO.
7.ПинсоeДИHNTb Ka6eJIb ПИТаHЯ ИЛH aДaIITep ПИТаHЯ (В KOMПJIeKTe) K SSD NaKOIIHTeJIIO
8. TeIepb BbI rOTOBbl KOINpOBAt b DaHHbIe c cnCTeMHoro JecTKORO nNcKa Ha SSD NaKOIIHTeJIb C HcIOJIb3OBaHHeM IIprJIaRaEMO IPOrpaMMHO OBeCneHnra.
YcTaHOBka n NcNoJIb3OBAHne nporpaMMbl Acronis® True Image HD
BAJHO: Bcerda DeHHcTaJIInpoBaTb IIpO6HbIe Bepn IIporpaMMHOro o6ecneHnAcronis IpePd HnctaJIJaUHeN IOJIHOB Bepn!
- BCTaBHTb IINCK c IIpoIgpaMMHbIM o6ecIIeueHHem Acronis True Image HD B IIpHBoI CD-ROM.
- Ipe3aIyCTHTb cHCTeMy.
- CD-ДиСк Acronis True Image HD CD - это загузочьй дис, И с нею загузится Кран Acronis True Image HD.
Приимechanical:Есл сисма He Загружaitа на окран Acronis True Image HD,но handpoTHB,Загружaita Windows, cIeJIaTb cIeJyIoUee:
1) Перазсгов КOMПьOTep. РхупЕрзагуЗКИ KomПьOTepa, 3aIycgTb IIpoIpaMMy cHcTeMNoн HacTpOй KI (BIOS). BIOS можно BblBaTb HaJaTHem Ha cHeIIHaJIIN3HpOBaHHyIO KJIaBnIHy, TaKyo KaK ESC, F1, F12 ИЛN DELETE. (HyЖнЯ KJIaBnIHa yKa3aHa BДokymeHTaIIH INpoIbOHTeJIЯ BaIIe ChcTeMbI.)
2) KOrIa BbI haxoIHTeCb B cHCTeMHOM BIOS, cMeHHTe IopraIOK 3aIpy3Kn TaK, yTo6bI npHBOD CD-ROM cTaJI IepBbIM 3aIpy3OuHbIM ycTpoiCtBOM.
3) CoxpaHnTe HactpoRKn H BbIaHTe H3 BIOS. (BoJIee IIOpO6HbIe yka3aHnH IO KOHfHiypnpoBaHHIO BIOS cmoTpHe B DoKUMeHTaHHI npOn3BOaHTeJIy BaIIeI cHCTeMbI.)
4) Ipepe3aIyCTHTb KOMIIbIOTep. IocJIe Ipepe3aIpy3Kn, KOMIIbIOTep IoJIkeH 3aIpy3HTbcra Na cTpaHnUc Acronis True Image HD.
- Быбраь пиктогаму "Acronis True Image" на захале Acronis True Image HD (Pucyнok 3).
5. BbI6paTb Clone Disk (PucyHok 9).

PucyhoK 9: BbIopamb Clone Disk

Sekol 4: Disk Kopyalamayi Seçme
*I KITeJ 3.0156.0156.0156.0156.0156.0156.0156.0156.0156.0156.0156.0156.0156.0156.0156.0156.0156.0156.0156.0156.015 8
i i 15 FCC 1 (1) i g h e s h a h e o h h e h h h h h h h h h h h h h h h h h h h h h h h h h h h h h h h h h h h h h h h h h h h h h h h h h h h h h h h h h h h h h h h h h h h h h h h h h h h h h h h h h h h h h h h h h h h h h h h h h h h h
iJ FCC 15e TaTeStd eouy Bq Dzitg fge Aehan.
ch to xu h n o r tao yed. iR aH Jt Hn is uon j tsi yh aenr h
th hri ine bho to qoag h i h h n . I JtBn w anr uan s aon n tto st,
sucnhrbng hupahs u hig hounne g zimpe h caih f aohj t onm uanr thin e
hyh h kshn o h h h h h.
述。
詰詰専力或人中人山,以中中中中中中中中中中中中中中中中中中中中中中中中中中中中中中中

上 6: 3D3K3K3K3K3K3K3K3K3K3K3K3K3K3K3K3K3K3K3K3K3K3K3K3K3K3K3K3K3K3K3K3K3K3K3K3K3K3K3K3
- <|im_start|>assistant
- <|im_start|>assistant
- <|im_start|>assistant
- <|im_start|>assistant
- <|im_start|>assistant
- <|im_start|>assistant
- <|im_start|>assistant
- <|im_start|>assistant
- <|im_start|>assistant
- <|im_start|>assistant
- <|im_start|>assistant
- <|im_start|>assistant
- <|im_start|>assistant
- <|im_start|>assistant
- <|im_start|>assistant
- <|im_start|>assistant
- <|im_start|>assistant 9.

七:Acronis
10.Acronis True Image HD SsFTrEeHr CDt tntofofrohrgtoe hloh
“哈德迪拉伊布 起廷 乌斯的”
SDD 3
Bookmark not defined.
一ト朴の場合 Error! Bookmark not defined.
“Hahd 2a2v 2t prn 13
Jnootobuk Aunnd
14
Acronis® 15
KcT M 5
SSD aiev (x1)
2.5" 3.5" 25
6/32" 6/32"
M3 Pafotet hee 4
- 54 (SATA) पान्दर अधिकत्तर (x1)
- Sārāṭṭa (SATA) इटा केशबल (x1)
- 5abahd 2a2eov 01
- 乌亚斯
- kraloingg saapctveyar sio (x1)
Ahaivahayek OJar:
- kuyut t m n d r (vok
SisrtcTm Aavvaykntlae
əppeeepiWindows®7,Windows Vista (SP1),Windows XP (SP3) 2000 (SP4)
· 豪尼伊姆·普斯蒂夫·哈贝克
128EeMaboi (RAM)
忍 乌虎他去阿罗克玛莫多伊哈王
2017-2018 इस्थलान एति दिकान (SATA) कलोकर्व
念 23.5 1
Eyana: Aghayapn shuk kvrne s pehulk uppya Pd
- दिक्षि किते ूलो रत्थी वर्णमान् अपिको सिक्षटम् की तो को रत्थी वर्णमान् अपिको सिक्षटम् की तो को रत्थी वर्णमान् अपिको सिक्षटम् की तो को रत्थी वर्णमान् अपिको सिक्ष�न् पर जा.
- 伊達·伊斯卡克提夫蒂戈SSDの入世の日記:海事、海事、海事、海事、海事、海事、海事、海事、海事、海事、海事、海事、海事、海事、海事、海事、海事、海事、海事、海事、海事、海事、海事、海事、海事、海事、海事、海事、海事、海事、海事、海事、海事、海事、海水、海水、海水、海水、海水、海水、海水、海水、海水、海水、海水、海水、海水、海水、海水、海水、海水、海水、海水、海水、海水、海水、海水、海水、海水、海水、海水、海水、海水、海水、海水、海水、海水、海水、海水、海水、海水、海水、海水、海水、海水、海水、海水、海水、海水、海水、海水、海水、海水、海水、水水水水水水水水水水水水水水水水水水水水水水水水水水水水水水水水水水水水水水水水水水水水水水水水水水水水水水水水水水水水水水水水水水水水水水水水水水水水水水水水水水水水水水水水水水水水水水水水水水水水
1) 阿 伊泰卡哈普 毫 亚帕尼 克 乌塔 可
2) 3Aapke e 4eakotap parr Aabvshkath yaa ratae mneu ke Jereep kcpuyut (ya meraa kcpuyut) parr dohra
3) C: 242222222222222222222222222222222222222222222222222222222222222222222222222222222222222222222222222222. C: 1000000000000000000000000000000000000000000000000000000000000000000000000000000

Vivir 1: (C:) 2
Vahide prayuk kshamlata SSD ki kshamlata se Aichik h, leto Aapkco Aapn oku u Aakue jos e ke chit, Chalvchit, sngot, iltyaand, ko auiu ve kai kal k r krsia veokcikpck t (udahrpanh aah baha haid uai v y a uesabio uai) m, alanoe kai Aavveyakutla h, jzb tke prayuk k rthanaon Aapki nne SSD kshamlata 85% 9e Aichik nhi Ho Jaat. yeh suinivit karroln me sahayak k rehegga kie Umogijing Prkckyag Saphal rreh. lnnnaiklt talaikka maegadriikka ke rupm me uayoggi ho saeklti:
“Hahd 2a2v 2t prn 13
Jnootobuk Aunnd
14
Acronis® 15
KcT M 5
SSD aiev (x1)
2.5" 3.5" 25
6/32" 6/32"
M3 Pafleot hee 4
- Sāṭṭa (SATA) पान्वर अधिकत् (x1)
- 5ata (SATA) 5eTata kcbal (x1)
- 5abahd 2a2eov 01
- 乌亚斯
- kafaloojngar saapctveayr sio (x1)
Ahaivahayek OJar:
- kuyut t m n d r (vok
SisrtcTm Aavvaykntlae
əppeeepaeeepn Windows® 7,Windows Vista (SP1),Windows XP (SP3) 2000 (SP4)
· 豪尼伊姆·普斯蒂夫·哈贝克
128EeMnBoi (RAM)
忍 乌虎他去阿罗克玛莫多伊哈王
2017-2018 इस्थलान एति दिकान (SATA) कलोकर्व
念 23.5 1
Eeyan 1: Aghayapn 9uK Kevne s Pahel kuyyapaa Pd
JlaiyI Jia Laiy jie all 123 124 aai yj aay g ay yuyu y u yu yu yu yu yu yu yu yu yu yu yu yu yu yu yu yu yu yu yu yu yu yu yu yu yu yu yu yu yu yu yu yu yu yu yu yu yu yu yu yu yu yu yu yu yu yu yu yu yu yu
ailllll jll l 15
J1111 1
Jlaiy jIg jIg JIg JIg JIg JIg
Jg Jg Jg Jg Jg Jg Jg Jg Jg Jg Jg Jg Jg
aessssssssssssssssssssssssssssssssssssssssssssssssssssssssssssssssssssssssssssssss
i
- 4 1
5 1
6
7
7
8 .Acronis'True Image HD - (a) "Hard Drive Boot Priorit" 2
- 14
- Acronis® True Image HD
1
(SSD (× 1 2
(4×) wJzJyDgJyJyJyJyJyJyJyJyJyJyJyJyJyJy
(4x) M3
(SATA (× 1 #J#
(SATA (× 1 业山
(1x)
(1x) 1
(1×) 2008caljur
a0 = 2,a1 = 3,b0 = 35,b1 = - 35
1 1
()
pill ibio
Windows 2000 (Windows® 7, Windows Vista (SP1), Windows XP (SP3:山) ((SP4
128 1s i0
Jillll lIb Iw, dJy Jzdo 1j
iKall SATA
3.5 3
ylll l 1
all jiaai all aew no jyai ayew iiaai oai yaiyai aiai all aai
Jolal
lll jlll aew no jaw aew l sall ooy jyral all alll
a a a a a a a a a a a a a a a a a a a a a a a a a a a
Jlll Jlll lle aolllal alall paaalil ailllll gbbally .
1
a a a a a a a a a a a a a a a a a a a a a a a a a a a a a a a a a a a a a a a a a a a a a a a a a a a a a a a a a a a a a a a a a
.Start Menu
C Properties C jzj:3
:1

(:C) 1
a aal 1000000000000000000000000000000000000000000000000000000000000000
12g,14g
aill 1y jll jll jll jll jll jll jll jll jll
Jglg 1jz jwaiy .Jzjell g Jaleill jdl jdl j
aillll j 1
alill aaiall ai jll caij g aiill k jil 2
a 3.5 2.5 1000000000000000000000000000
a 3 3 3 3 3 3 3 3 3 3 3 3 3 3 3 3 3 3 3 3 3 3 3 3 3 3 3 3 3 3 3 3 3 3 3 3 3 3 3 3 3 3 3 3 3 3 3 3 3 3 0
(4a) " 32\6 wJy JwJy
j j 3.5 2.5 2.5 2.5 2.5 2.5 2.5 2.5 2.5
jSATA 5
SATA 2 (2 k) SATA
1

SATA
.SATA 4 45
jgl jgl jgl jgl jgl jgl jgl jgl jgl jgl jgl jgl jgl jgl jgl jgl jgl jgl jgl jgl jgl jgl jgl jgl jgl jgl jgl jgl jgl jgl jgl jgl jgl jgl jgl jgl jgl jgl jgl jgl jgl jgl jgl jgl jgl jgl jgl jgl jgl jgl jgl
SATA 1
SATA 6
aalllll (j) ailll l 100
1 8
.
Acronis® True Image HD
!Aclall Acronis 1
Acronis True Image HD 1
jglz11 jz002 2
Acronis True Image HD acronis True Image HD 3
Windows Acronis True Image HD
BIOs) jzal 1olj jzal Jzal 1e! 1
Ji"Drives or Hard Drives" 2
jSATA jia liu k. Enter 1e bai w jilal all a oJg 1e gai jai jai y
JgE J. "Enabled" g "On" gSATA ports
a j 1 1 1 1 1 1 1 1 1 1 1 1 1 1 1 1 1 1
Aeia 1aie laie cui aaii bai.ESC ciaie le biwally BIOS n C
Jz 4
Ae y. Manual . (5 J) Automatic 6
Next. (!b0e e)Jnnn nn nn nn nn nn nn nn nn nn nn nn nn nn nn nn nn nn nn nn nn nn nn nn nn nn nn nn nn nn nn nn nn nn nn nn nn nn nn nn nn nn nn nn nn nn nn nn nn nn nn nn nn nn nn nn nn nn nn nn nn nn nn nn nn nn nn nn nn nn nn nn nn nn nn nn nn nn nn nn nn nn nn nn nn nn nn nn nn nn nn nn nn nn nn nn nn nn nn nn nn

zill 5
Next 1g j g j j j j j j j j j j j j j j j j j j j j j j j j j j j j
. Proceed (6) (a) (b) Hard Disk Drives Structure 8
J 1
J 1

Hard Disk Drives Structure :6 5
Disk 9
OK. (C) Cloning was successful

Acronis 7
Acronis True Image HD 10
(山) "Hard Drive Boot Priorit"
J 1 J 1 1 1 1 1 1 1 1 1 1 1 1 1 1 1 1 1 1 1 1 1 1 1 1 1 1 1 1 1 1 1 1 1 1 1 1 1 1 1 1
C 1.1
C 1.1
J"Hard Drive Boot Priority"BIOS 2
SSDxxxx"
.3
aall all s j k j 1 j j j j j j j j j j j j j j j j j j j j j j j j j j j j j j j j j j j j j j j j
J 1 J 1
(Vista Computer My Computer
J 1
J 1
jgljg jn jyjblg E jglg Jg Jg Jg Jg Jg Jg Jg Jg Jg Jg Jg
pail jia aiai pial (w) pail lai iaia i 1j g jil jil jil jil
Jgaiiaaii aiee iie e 1. (Jaaal jyssll y ailll lal
J 3
J 2
Jgssssssssssssssssssssssssssssssssssssssssssssssssssssssssssssssssssssssssssssssssssssss
Jill (1) 2

Hard Disk Drives Structure :11
Disk 12 k. (12 k) Cloning was successful

Acronis 12
Acronis True Image HD 10
a 1