
CP7395 - Electric mower SOLAC - Free user manual and instructions
Find the device manual for free CP7395 SOLAC in PDF.
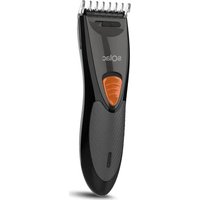
| Product type | Rechargeable men's grooming set |
| Brand | SOLAC |
| Model | CP7395 |
| Power supply | Rechargeable with mains adapter |
| Charging time | First charge: 24 h; subsequent charges: 7 h |
| Runtime | 75 minutes |
| Battery type | Ni-MH |
| Blades | Ceramic blade 25 mm (beard); finishing blade 14 mm (details) |
| Included accessories | Telescopic comb 5 levels (2-10 mm), reducer comb, shaver head, nose/ear head, self-cleaning and charging stand, brush, oil, travel pouch |
| Speeds | Normal and turbo (hold) |
| Cutting lengths | 2, 4, 6, 8, 10 mm with telescopic comb |
| Functions | Beard, mustache, sideburns, eyebrows, nose, ear trimming; shaving |
| Maintenance and cleaning | Automatic cleaning by roller on stand; monthly lubrication of ceramic blade, before/after use of finishing blade; lubricating sponge with oil every 3 months |
| Safety | Turn off before charging; do not use with damaged blades; keep out of reach of children; do not bring near eyes |
| Spare parts and repairability | Device designed for domestic use; repair by Authorized Service Center; Ni-MH battery to be recycled |
| Warranty | Not specified in the manual, refer to the retailer |
| Dimensions (approx.) | Not specified, approximately 20 cm (height) x 5 cm (width) |
| Weight (approx.) | Not specified, approximately 200 g (without accessories) |
Frequently Asked Questions - CP7395 SOLAC
User questions about CP7395 SOLAC
0 question about this device. Answer the ones you know or ask your own.
Ask a new question about this device
Download the instructions for your Electric mower in PDF format for free! Find your manual CP7395 - SOLAC and take your electronic device back in hand. On this page are published all the documents necessary for the use of your device. CP7395 by SOLAC.
USER MANUAL CP7395 SOLAC
SET DE ARREGLO MASCULINO
MALE GROOMING KIT
SET DE SOIN PERSONNEL MASCULIN
HERRENPFLEGESET:
The Ebony Complet male grooming kit contains all the accessories you need to look fantastic and fashionable at all times. A unique appliance you can use to fix your beard, goatee, sideburns, ear and nostril hair, eyebrows, etc.
Thanks to its self-cleaning base, the kit will always be ready for use, without needing any maintenance from you. Ebony Complet works without cables, to obtain an optimum result with complete freedom of movement. Our aim is to offer you maximum functionality and convenience in a single appliance.
We thank you for purchasing our product and hope you enjoy using your new Solac grooming kit.
IMPORTANT
- Read these instructions carefully before using the appliance.
- Keep these instructions in a safe place for future reference.
- Make sure that the mains supply coincides with the voltage shown on the adapter's specifications plate.
- Remove all elements from the inside or outside of the appliance used for protection during transport or for sales promotions, such as paper or plastic bags, plastic sheets, cardboard and stickers.
- Switch off the appliance when not in use, even if only for a moment.
- Check the condition of the cord from time to time. If it is damaged, take the appliance to an Authorized Service Shop.
- Do not use it if the guide combs (6) are damaged or broken or if any blade teeth are missing (4 and 5).
- Keep out of the reach of children.
- Never use any accessory not recommended by Solac, as they could damage the appliance.
- The grooming kit is designed for home use. It can not be used on a continuous, uninterrupted basis.
- If you decide not to use the grooming kit again, it is best to put it out of service. To do so, unplug the appliance and cut the power cord. In addition, it is best to disable the parts of the appliance that could be dangerous, especially for children, as they might use it improperly during play.
- Do not attempt to trim your eyelashes. Never use the appliance near your eyes.
CAUTION!: When you want to dispose of the appliance, NEVER throw it in the rubbish bin. Take it to your nearest CLEAN POINT or the waste collection centre closest to your home for processing. You will thus be helping to take care of the environment.
- Check the grooming kit frequently for signs of wear or damage. If these signs appear, or if the product has been used improperly, take it to an Authorised Service Centre.
- Electrodométricos Solac, S.A. hereby disclaims all liability for injuries or damage that could be caused to persons, animals or property due to the failure to heed these warnings.
MAIN COMPONENTS
1.- Rechargeable personal grooming appliance
2.- On/off switch
3.- Charging pilot light
4.- Maximum speed (Turbo)
5.- Ceramic barber's blade (25 mm)
6.- Detail blade (14 mm)
7.- Telescopic guide comb with 5 cutting levels
8.- Reducing guide comb
9.- Head for nostrils and ears
10.- Shaving head
11.- Self-cleaning and charging base
12.- Cleaning switch
13.- Cleaning roller
14.- Tray for collecting cut hair
15.- Lubricating sponge
16.- Facial hair comb (moustache, eyebrows, goatee, beard, etc.)
17.- Cleaning brush
18.- Lubricating oil
19.- Adapter
20.- Socket of the cleaning and charging base
21.- Travel bag
OPERATING INSTRUCTIONS
CHARGING BEFORE USE
- Plug the adapter (19) into the mains. Connect the adapter (19) to the socket in the base (20) (Fig.1)
- Place the personal grooming appliance (1) in the off position "0" and place it on its charging base (11). (Fig. 2)
- During the charging operation, the pilot light (3) lights up red, and changes to green when the appliance has finished charging.
12
- The first time you charge the personal grooming appliance (1), it will take approximately 24 hours.
- The appliance can only be charged when the switch is in the '0' position (Fig. 3)
- When charging or recharging the appliance, the room temperature should not be below 15^ or above 35^ , as this may affect battery life.
- Seven hours' charging time when recharging the appliance will give about 75 minutes' operating time.
- If the appliance is not used for a month, recharge it fully before use.
- For optimum battery life, use the appliance until the battery is completely run down and then recharge it fully.
HEADS
A) Blades
This appliance has two blades:
a) 25-mm ceramic blade for beards and goatees (5)
b) 14-mm blade (6) for details such as sideburns, eyebrows, etc.
Two accessories can be attached to these blades (Fig. 8):
- Guide comb (8) for reducing the density of the facial hair (beard, goatee, moustache).
- Telescopic guide comb with 5 cutting levels (7). This comb allows you to adapt the cutting length according to your needs.
- Level 2: 2mm
- Level 4: 4 mm
- Level 6: 6 mm
- Level 8: 8 mm
- Level 10: 10 mm
B) Shaving head (10): for comfortable shaving of facial areas, fixing the edge of the beard, goatee, etc. and for finishing touches at the back of the neck.
C) Head for nostrils and ears (9): for cutting ear and nostril hair.
BEFORE STARTING TO CUT
- Check that the appliance is clean and that there are no traces of hair between the blades, as this could prevent it from working properly.
- Use the comb to comb the hair to be cut (16)
SWITCHING ON
- Set the ON/OFF switch (5) in the "1" position (Fig. 6)
"I" position: normal speed
"Turbo" position: the fastest. Press the "turbo" button (4) on the rear of the appliance (1) and keep it pressed while you want to use this speed.
REMOVING THE BLADES
- To remove the blades (5 and 6) from the appliance (1), push the blades upwards with your thumb from the front (Fig. 4)
TRIMMING BEARDS, GOATEES AND MoustACHES
- Install the barber's blade (5) inserting the hook of the blade in the case of the appliance. Press until you hear a click (Fig. 5)
- Next, install the required guide comb according to the desired cutting length (Fig. 7). We recommend that you start off with one of the longest positions and change it as required.
- Begin under the chin and move upwards and outwards. (Fig. 12). To trim a moustache, comb it downwards using the comb accessory (16) and trim it. (Fig. 13)
SHAVING
- Install the shaving head (10), inserting the hook of the head in the case of the appliance. Press until you hear a click (Fig. 5)
- Next, switch on the appliance (Fig. 6) placing it in the "I" position, and shave the desired areas. You can use this accessory to go over the contour of the beard and achieve an even result and a well-defined beard.
TRIMMING SIDEBURNS AND EYEBROWS
- Install the detail blade (6) inserting the hook of the blade in the case of the appliance. Press until you hear a click (Fig. 5)
- Next, install the required guide comb according to the desired cutting length (Fig. 7). We recommend that you start off with one of the longest positions and change it as required.
- First, comb the sideburns downwards using the comb (16) and then trim them (Fig. 14)
- For the eyebrows, comb them upwards using the comb (16) and then trim them (Fig. 15)
NOSTRILS AND EARS
- Install the head for nostrils and ears (9), inserting the hook of the head in the case of the appliance. Press until you hear a click (Fig. 5)
- Next, switch on the appliance (Fig. 6) placing it in the "I" position, and cut the hair in these parts (Fig. 16).
- Do not insert the point more than 5 millimetres into the ear, since you might damage the eardrum.
CLEANING
REMOVE THE GUIDE COMB. .
- Wipe the outside with a dry cloth.
- When changing the head, clean it and the inside of the appliance using the cleaning brush (17)
CLEANING THE BLADES (FIG. 9)
- With the blades installed on the appliance, switch on the cleaning roller (13) on the base (11) by pressing the cleaning switch (12)
- Place the appliance and the blade head you want to clean (4 or 5) in the cleaning roller (13).
- The cut hair you clean with the roller will fall into the tray (14). Open the drawer and clean it by emptying its contents.
MAINTENANCE:
FREQUENCY
- The barber's blade (5) is made from ceramic and therefore does not require frequent maintenance. In any case, we recommend that you lubricate it at least once a month.
- We recommend that you lubricate the detail blade (6) before and after each use
LUBRICATING SPONGE (FIG. 10)
- To lubricate the blades, this complete kit has a lubricating sponge (15) in the charging base (11).
- Add 6 drops of lubricating oil (18) to the sponge (15) in the charging base (11). To do so, remove the sponge's protection and replace it afterwards. Perform this operation every three months.
USE
- When lubricating the blades, remove the guide combs (7) and the protector (8) if they are installed. Remove the sponge protector (15) and insert the blades in the sponge, pinching it softly (Fig. 11)
IMPORTANT INFORMATION FOR DISPOSING OF THE NI-MH BATTERY
- Used batteries should not be disposed of with the normal refuse. Put them in the appropriate bins.
PRECAUTIONS
- The batteries should only be removed when they no longer work.
- Make sure that the clipper is unplugged before taking it apart to remove the batteries.
- All repairs and battery replacements should be carried out by an Authorized Service Shop.
FRANÇAISE
LIMPEZA DAS LÁMINAS (FIG. 9)
VOORZORGSGMAATREGELEN
CISTENI CEPELI (OBR. 9)
3APEXDAHE PPEДи YNOTPEBA
BkJIoueTe aIantopa (19) B eIeKtpnueckaTAppeXa. CbbpXeTe aIantopa (19) KbM rHe3dOTo B OCHOBata (20) (Фur.1)
-Посtabete nepcohaJIHHa KOMPJIeK3a noIdpbXka (1)В положени n3Кю-уно "0"и ro по tabete Bbyx 3apejdaaata ro ochoba (11). (Фиr.2)
- Пов Врeme на заразжданeto, CBETINHHЯТ ИДИКaTop (3) CBETN BЧерВ�оce поменя в Зелно, KORATO ypeDbT e 3apedeH.
-ПипьрвотоЗарждане на nepcoHaHnЯ KMплкт 3a подрьжka (1),TOBa iche OTHEme np6Iu3nteHNo 24 yaca. - YpeBTo MoKe Da Ce 3apeKda CaMo, aKO npeBKnUoyBaTeJrT e B IonoJKeHne '0'. (Our. 3)
- Пи зарекдане пини рпесарекдане на урета, Temпература в стаятура за EMжду 15°C и 35°C, Инauthe ce ckьсая жИВOTьт Ha 6aTePryЯт.
- Cédem yaca Bpeme Ha 3apejdahe npn nobtopno 3apejdahe Ha ypeda ue BN daat OKOLO 75 MNHTN Bpeme 3a pa60ta Ha 6atepn.
Ako ypeBt He ce n3nOJ3Ba B npOdbJxKeHne Ha eIN Meceu, Tp86Ba da ro npEzapeDnte HAnbIHo npEn yNoTpe6a. - 3a ONTNMaJIHo yIbJIxKaBaHe Ha JxNbOta Ha 6aTePunTe, n3NoI3BaIte UpeDa Do NblHOTo IM I3TOUaBaHe H eDBA cIeT TOBa rO npEzapePeTe DOKpaI.
ПРИСТАВКИ
A) OctpneTa
To3n ypei nMa dBe octpneeta:
a) 25-MM KepaMnHOb octpne 3a 6paAn n 6paAnKn (5)
b) 14-MM octpne (6) 3a DeTaun KaTo 6aKeH6apn, Bexn np.
KbM Te3n octpnaTa MOraT da ce 3aKpeNBat DaBa akcecoapa (Dur. 8):
-Boideu rpe6eH (8) 3a peyuipaHe Ha nIbTHoCTTa Ha IInueBOTo OKOCMaBaHe (6paJa, 6paNuaKa, Myctau).
- Teileckonuhen Boede tspe6eh c 5 HnBa Ha noctprrBahe (7). To3n rpe6eh Bn n03BOLjBa Da aadntnpaTe DbJxHata Ha noctprirBahe cnopei HyxDIn-Te BN.
HnBO2:2MM
HIBO4:4MM
HnBO6MM
HnBO8:8MM
HnBO 10:10 MM
B)Пиставka 3a 6pbchene (10):3a KOMФopTHO 6pbcheneHa JINUeBVTE 3OHn,ФИКСИРане рбба Ha 6paJaTa,6paIuKKaTa nДр.,и 3a OΦOpMaH eHa BpTa.
C) Пиставka 3a Ноздри и уши (9): за поорязваши Косми в Ноча и ушипte.
ПЕДИ DA 3АОЧETЕ ДА ПОДСТРИВATE
1.- Ybepete ce, ye MaunHKata e ncta HnHMa OCTaTbUcN OT KOCMm Mekdy Hoxyeta, TbK aTOBa Moxe da nonpeuHa npabunHOTO yHKunoHupaHe Ha ypea.
2.- I3noI3BaIte rpe6eHa 3a cpcBaHe Ha KocMITE, KOITo ige npOdpra3BaTe (16)
74
BKJIIOUYBAHE
-Пос tabete npeBknIouBaTeTЯ ON/OFF (5)В полжени "I"(Фur.6)
NoloxeHne "I": HopMaJHa ckopoCT
"Typ6o" noJoxHne: Hn-6bp3a. HatncheTe "typ6o" 6yToHa (4) B 3aHaTa qact Ha ypeJa (1) n ro 3aDpBxTe HaTnCHaT, DOKaTO NCKaTe Da n3NON3BaTe Ta3N CKOpOCT.
CBAJIaHE HA OCTPnETATA
-3a cBaJIaHe Ha ocTpneTaTa (5 n 6) ot ypeJa (1),HaTnCHeTe ocTpneTaTa Ha-rope C npbCTa cn Bbpx npedHaTa cTpaHa (Our.4)
Aparatul are doua lame:


- IMPORTANT
- MAIN COMPONENTS
- OPERATING INSTRUCTIONS
- CHARGING BEFORE USE
- HEADS
- A) Blades
- BEFORE STARTING TO CUT
- SWITCHING ON
- REMOVING THE BLADES
- TRIMMING BEARDS, GOATEES AND MoustACHES
- SHAVING
- TRIMMING SIDEBURNS AND EYEBROWS
- NOSTRILS AND EARS
- CLEANING
- REMOVE THE GUIDE COMB. .
- CLEANING THE BLADES (FIG. 9)
- MAINTENANCE:
- FREQUENCY
- LUBRICATING SPONGE (FIG. 10)
- USE
- IMPORTANT INFORMATION FOR DISPOSING OF THE NI-MH BATTERY
- PRECAUTIONS
- FRANÇAISE
- LIMPEZA DAS LÁMINAS (FIG. 9)
- VOORZORGSGMAATREGELEN
- CISTENI CEPELI (OBR. 9)
- 3APEXDAHE PPEДи YNOTPEBA
- ПРИСТАВКИ
- A) OctpneTa
- ПЕДИ DA 3АОЧETЕ ДА ПОДСТРИВATE
- BKJIIOUYBAHE
- CBAJIaHE HA OCTPnETATA
Brand : SOLAC
Model : CP7395
Category : Electric mower