
NXC-8160 - Network switch ZYXEL - Free user manual and instructions
Find the device manual for free NXC-8160 ZYXEL in PDF.

| Product Type | PoE WLAN Controller (Power over Ethernet) |
| Brand | ZYXEL |
| Model | NXC-8160 |
| Number of WLAN Ports | 8 (to connect up to 8 access points) |
| Number of LAN Ports | 4 |
| Power Supply | External, power adapter included |
| Power over Ethernet (PoE) | Yes, powering APs via Ethernet cable |
| Supported Wireless Standard | IEEE 802.11a / 802.11b / 802.11g |
| Number of WLAN Interfaces | 2 |
| Maximum Number of SSIDs | 32 (16 per WLAN interface) |
| Wireless Security Mode | WEP, WPA, WPA2 (depending on configuration) |
| Configuration | Web interface via HTTPS |
| Default IP Address | 192.168.1.10 |
| Default Username | admin |
| Default Password | default |
| Main Features | Centralized management of APs, PoE power supply, wireless and security settings |
| LED Indicators | POWER, LINK/ACT, LINK |
| Installation | Simple connection: APs on WLAN ports, computer on LAN port |
| Certifications | Available on zyxel.com |
| Country of Origin | Not specified |
Frequently Asked Questions - NXC-8160 ZYXEL
User questions about NXC-8160 ZYXEL
0 question about this device. Answer the ones you know or ask your own.
Ask a new question about this device
Download the instructions for your Network switch in PDF format for free! Find your manual NXC-8160 - ZYXEL and take your electronic device back in hand. On this page are published all the documents necessary for the use of your device. NXC-8160 by ZYXEL.
USER MANUAL NXC-8160 ZYXEL
IP Address https://192.168.1.10
User Name admin
Password default
CONTENTS
ENGLISH 1
DEUTSCH 7
ESPANOL 15
FRANÇAIS 23
ITALIANO 31
PyCCKN 39
SVENSKA 47
简体中文 55
繁體中文 61
Overview
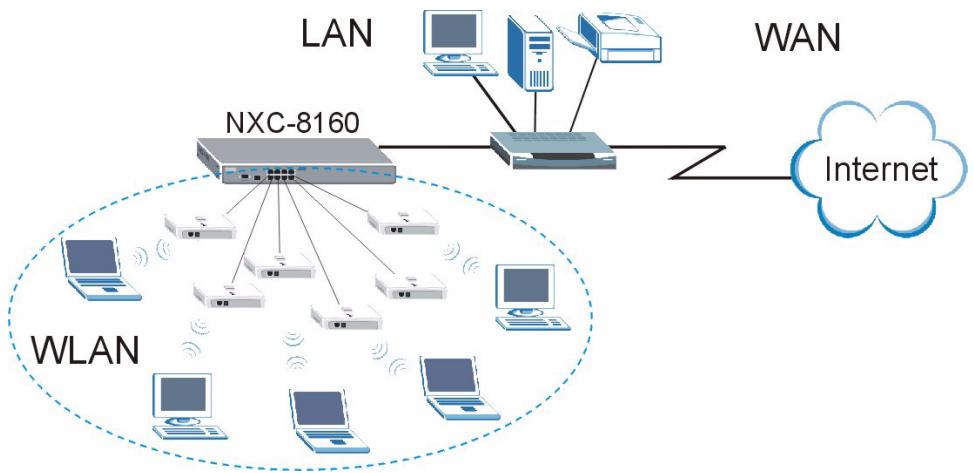
The NXC-8160 is a Power over Ethernet (PoE) WLAN controller that supplies power to the attached access points (APs) via an Ethernet cable. You can connect up to eight APs to extend your wireless network. You configure all wireless and wireless security settings on the NXC-8160. The NXC-8160 provides wireless connectivity to your wired network through the APs. The APs need no configuration and act as an antenna on the NXC-8160.
This guide shows you how to:
1 Make initial hardware connections
2 Access the web configurator
3 Configure the wireless and wireless security settings
4 Deploy the NXC-8160 in your network
1 Make Initial Hardware Connections
Follow the steps below to connect your NXC-8160 for initial configurations.
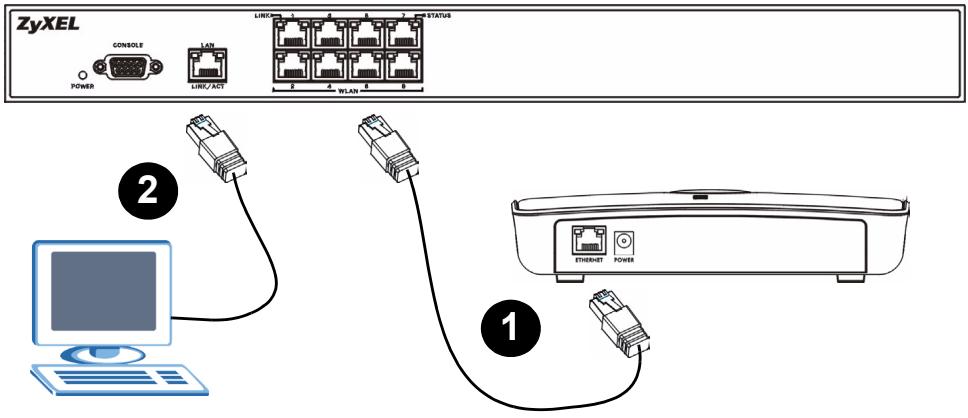
1 Connect an AP(s) to the WLAN port(s) using the included Ethernet cable. At the time of writing, you can connect only the NWA-8500 model to the WLAN port.
2 Connect your computer to the LAN port using an Ethernet cable.
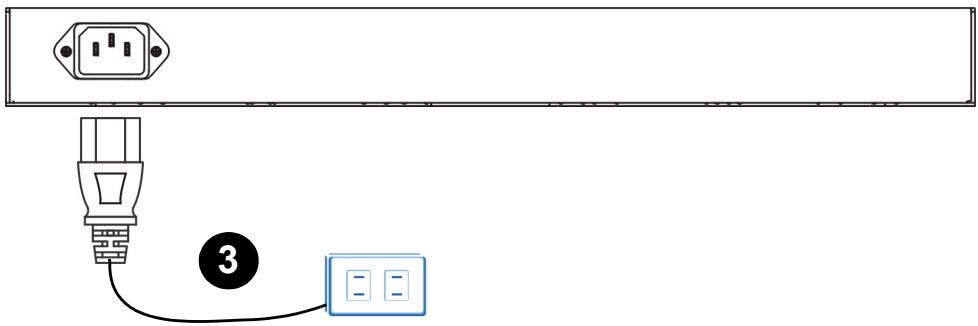
3 Connect the power socket on the rear panel to a power source using the included power cord.
After you have connected the power and turned on the power source, check the LEDs (lights) on the front panel. The POWER LED turns on. The LINK/ACT and LINK LEDs turn on when the corresponding ports are connected properly.

If none of the LEDs are on, check your connections, and inspect your cables for damage. Make sure that you have the power cord connected to the NXC-8160 and plugged in to an appropriate power source. Make sure the power source is turned on. If the LEDs are still off, contact your local vendor.
2 Accessing the Web Configurator
To configure your NXC-8160, you need to access it using the web configurator. Use Internet Explorer 6.0/Netscape 7.0 or a later version.
1 Make sure your computer is in the same subnet as the NXC-8160 and connected to the LAN port.

The NXC-8160's default IP address is 192.168.1.10.
2 Open your web browser. Enter https://192.168.1.10 as the address.
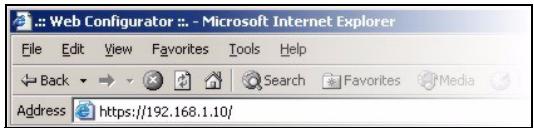
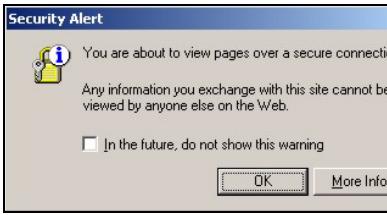
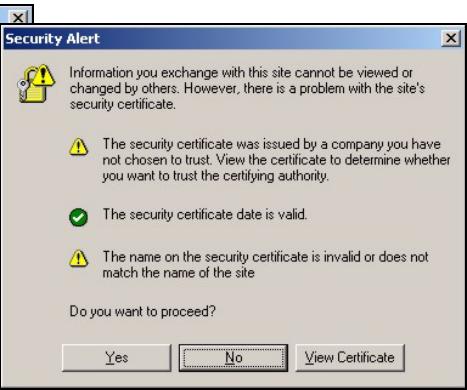
3 When you see the security screens, click OK or Yes to continue.
4 The login screen displays. Enter admin as the user name and default as the password and click OK.
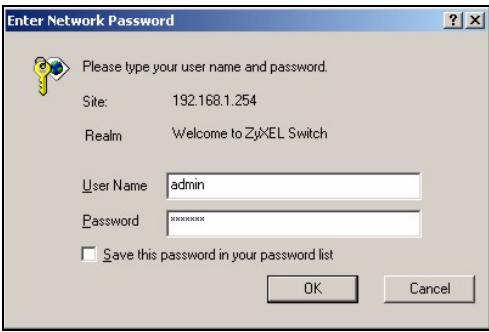

If you cannot access the web configurator, make sure your computer is in the same subnet as the NXC-8160 and the URL you entered in your web browser begins with "https".
You may also need to check your browser's security settings and make sure your computer's Ethernet card is installed and functioning properly
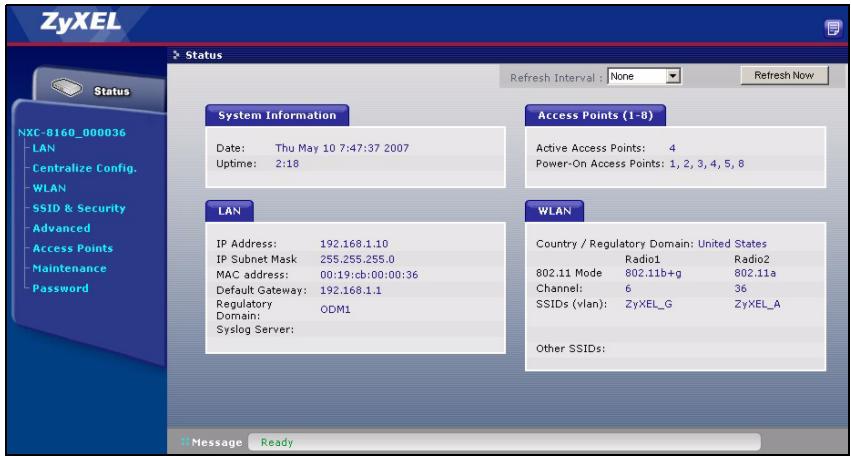
5 The initial main screen displays as shown.
3 Configure the Wireless and Wireless Security Settings
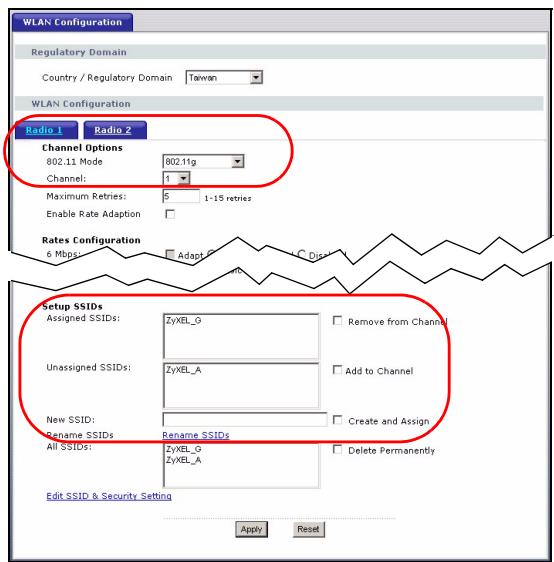
The NXC-8160 allows two radios (using separate channels and SSIDs). The two radios can be in either the same or different IEEE 802.11 mode. You can assign up to 16 SSIDs to each radio. By default, the wireless security is disabled.
If you want to change the SSID(s), allow either IEEE 802.11a and/or IEEE 802.11b/g compatible wireless clients to access the network behind the NXC-8160, or enable wireless security, follow the steps below.
1 Click WLAN on the navigation panel to open the WLAN Configuration screen.
2 Select the radio which you want to configure.
3 Specify the 802.11 mode and channel number.
4 Create and/or assign a SSID to the radio.
5 Click Rename SSIDs to change the SSID.
- You cannot assign the same SSID to different radios.
- If there is no SSID assigned to a radio, the radio will be deactivated.
6 Click SSID & Security at the bottom of the WLAN Configuration screen or on the navigation panel.
7 Select the SSID for which you want to configure wireless security settings.
8 Select a security mode and configure the related fields. The screen changes according to the security mode you selected. See the User's Guide for more information on wireless security.
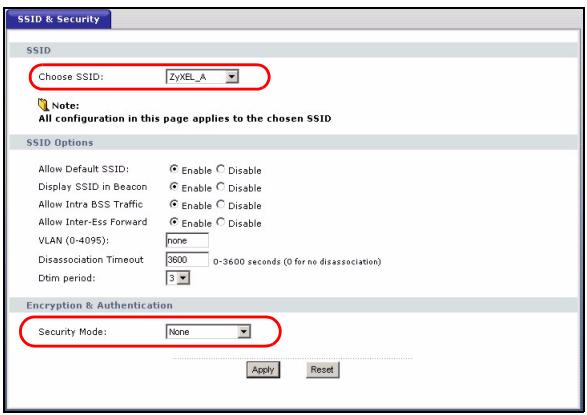

If a wireless client cannot access the network or the Internet wirelessly, make sure both the NXC-8160 and the client have the same wireless settings (such asSSID, channel and IEEE 802.11 standard) and wireless security settings.
4 Deploy the NXC-8160 in Your Network
After you finish the SSID and wireless security settings, use this section to configure the NXC-8160's IP address and connect it to your network.
The NXC-8160's default IP address is 192.168.1.10 and the subnet mask is 255.255.255.0. If your network is in another subnet or someone in your network is using this IP address, you need to set the NXC-8160 to another IP address.
1 Click LAN on the navigation panel of the web configurator.
2 Give the NXC-8160 an available static IP address which is in the same subnet as your network.
3 Enter the gateway's IP address.
4 Click Apply and log out of the web configurator.
5 Disconnect the NXC-8160 from the computer and connect the NXC-8160 to a modem, router or switch in your network.
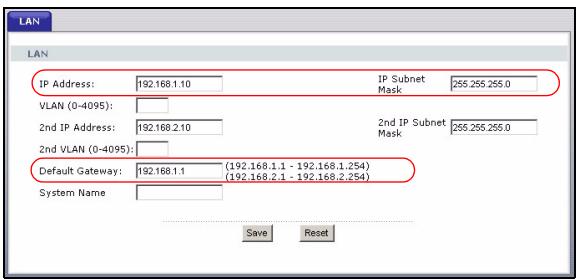

To configure the NXC-8160 again, you need to use the new IP address to access the web configurator.
Procedure to View a Product's Certification(s)
1 Go to www.zyxel.com.
2 Select your product from the drop-down list box on the ZyXEL home page to go to that product's page.
3 Select the certification you wish to view from this page.
Übersicht
Brand : ZYXEL
Model : NXC-8160
Category : Network switch