
URC 7781 - Universal remote ONE FOR ALL - Free user manual and instructions
Find the device manual for free URC 7781 ONE FOR ALL in PDF.
| Product type | Universal remote control |
| Brand | ONE FOR ALL |
| Model | URC 7781 |
| Power supply | 4 AAA/LR03 alkaline batteries |
| Number of controllable devices | Up to 12 devices |
| Compatible device types | TV, VCR, SAT, CBL, VAC, CD, PHO, MIS, HOM, AMP, RCV, CAS, LDP, DAT, DVD |
| Display | Liquid crystal display |
| Infrared range | Approximately 10 meters (estimate) |
| Dimensions (approx.) | 220 x 60 x 30 mm (estimate) |
| Weight (approx.) | 200 g with batteries (estimate) |
| Learning function | Yes, up to approximately 50 functions |
| Key Magic® | Yes, programming of advanced function codes |
| Macro (command sequence) | Yes, temporary macros (single, daily, weekly) and key macros |
| Home Theatre mode | Yes, combines functions from multiple modes into one mode |
| Volume lock | Yes, allows fixing the volume of a source mode for all modes |
| Code upgrade | Via telephone (built-in modem) or Internet (site www.oneforall.com) |
| Lighting control | Compatible with ONE FOR ALL accessories (kit HC-8300) |
| Backlight | Yes, LIGHT key to turn on the screen and keypad |
| Maintenance and cleaning | Wipe with a soft dry cloth. Do not use abrasive products. |
| Safety | Do not expose to moisture or heat sources. Use non-rechargeable batteries. |
| Precautions | Do not mix old and new batteries. Remove batteries if not used for a long time. |
| Warranty | 1 year (parts and labor) |
| Customer service | Tel: 0173036536 (France), Email: ofahelp@uebv.com, Website: www.oneforall.com |
Frequently Asked Questions - URC 7781 ONE FOR ALL
User questions about URC 7781 ONE FOR ALL
0 question about this device. Answer the ones you know or ask your own.
Ask a new question about this device
Download the instructions for your Universal remote in PDF format for free! Find your manual URC 7781 - ONE FOR ALL and take your electronic device back in hand. On this page are published all the documents necessary for the use of your device. URC 7781 by ONE FOR ALL.
USER MANUAL URC 7781 ONE FOR ALL
Instruction manual ......P. 1
Deutsch
PICTURE OF URC-7781 REMOTE 2
ABOUT YOUR URC-7781 2
THE KEYPAD ....3
INSTALLING THE BATTERIES ....5
SETTING THE LANGUAGE, DAY AND TIME ....5
SETTING UP THE URC-7781 6
(How to set up the URC-7781 to control your devices)
CODES
TV : Television / LCD / Plasma / Projector / Rear Projector .....301
VCR : Video Cassette Recorder / TV/VCR Combi / DVD/VCR Combi / PVR .....306
SAT : Satellite Receiver / Set-Top-Box / DVB-S / DVB-T / Freeview (UK) / TNT (F) / Digitenne (NL) / SAT/HDD .....308
CBL : Cable Converter / Set-Top-Box / DVB-C 310
VAC : Video Accessory like Media Centres / AV Accessories / AV Selectors . . . . .310
CD : CD Player / CD-R / MD 310
PHO : Phonograph 311
MIS : Audio / Miscellaneous Audio 311
HOM : Home Automation (e.g. IR controlled curtains / IR controlled light switches etc.) ....311
AMP : Audio / Amplifier / Active Speaker System ....311
RCV : Audio / Audio Receiver/Tuner/Amplifier / (DVD) Home Cinema .....311
CAS : Cassette Player (Tape Deck) 312
LDP : Laser Disc Player / Video CD 312
DAT : Digital Audio Tape / DCC 312
DVD : DVD Player / DVD-R / DVD Home Cinema / DVD Combi / DVD/HDD . . . . .312
VIEW THE CURRENT CODE 8
QUICK CODE REFERENCE....8
REPLACE A DEVICE....8
CHANGING A DEVICE CODE....9
MOVE A DEVICE....10
DELETE A DEVICE ....10
THE LEARNING FEATURE ....11
(How to copy functions from your original working remote onto the URC-7781)
OPERATIONAL RESET ....14
EXTRA FEATURES
- Colour, Brightness and Sleep 14
- Changing the device label ....15
• Volume Lock 16
- Macro (sequence of commands) .....18
• Home Theatre ....22
- Code upgrade technology ....24
• Key Magic® (How to program missing functions) .....25
- Delete Learning and Key Magic 27
- ONE FOR ALL Light Control ....30
TROUBLE-SHOOTING .....28
CUSTOMER SERVICE 29
About Your URC-7781
Your URC-7781 requires 4 new "AAA/LR03" alkaline batteries.
Your URC-7781 can operate 12 devices:
| TV | : Television / LCD / Plasma / Projector / Rear Projector |
| VCR | : Video Cassette Recorder / TV/VCR Combi / DVD/VCR Combi / PVR |
| SAT | : Satellite Receiver / Set-Top-Box / DVB-S / DVB-T / Freeview (UK) / TNT (F) / Digitenne (NL) / SAT/HDD |
| CBL | : Cable Converter / Set-Top-Box / DVB-C |
| VAC | : Video Accessory like Media Centres / AV Accessories / AV Selectors |
| CD | : CD Player / CD-R / MD |
| PHO | : Phonograph |
| MIS | : Audio / Miscellaneous Audio |
| HOM | : Home Automation (e.g. IR controlled curtains / IR controlled light switches etc.) |
| AMP | : Audio / Amplifier / Active Speaker System |
| RCV | : Audio / Audio Receiver/Tuner/Amplifier / (DVD) Home Cinema |
| CAS | : Cassette Player (Tape Deck) |
| LDP | : Laser Disc Player / Video CD |
| DAT | : Digital Audio Tape / DCC |
| DVD | : DVD Player / DVD-R / DVD Home Cinema / DVD Combi / DVD/HDD |
The URC-7781 universal remote comes with a built in modem which allows you to download codes that may not be pre-programmed in the memory. This means that the URC-7781 will never become obsolete. Also, what makes the URC-7781 even more unique is the „Learning“ feature, which allows you to customise any of the special functions of your original remote control onto the keypad of your new URC-7781. The following pages explain in simple steps how to customise the URC-7781 to your devices.
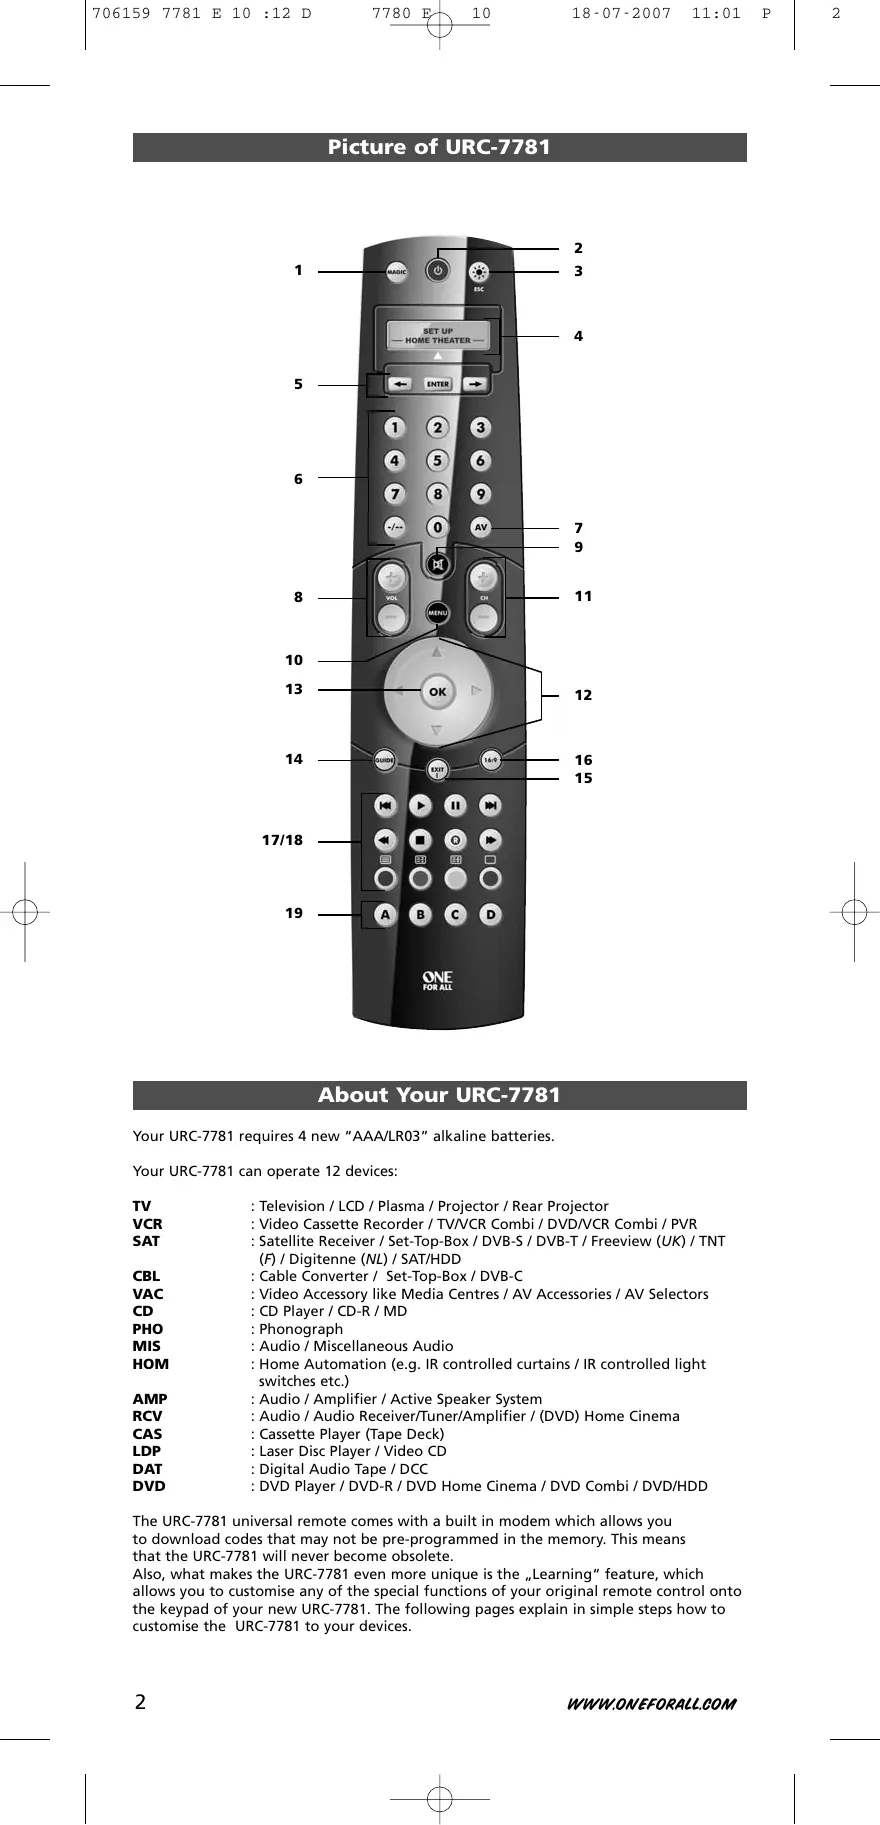
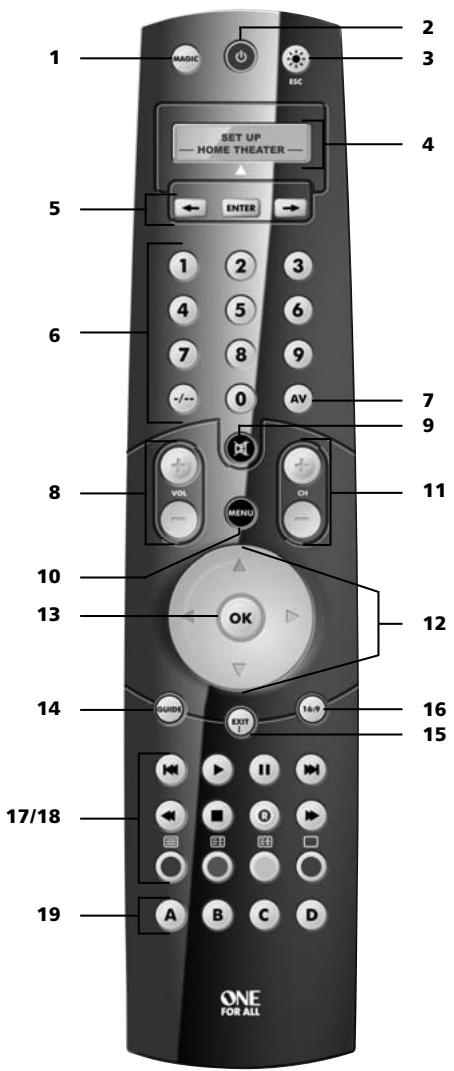
See picture of URC-7781 remote on page 2.
1

MAGIC Key
The MAGIC key is used to set up your URC-7781.
2

POWER (LED)
The POWER key operates the same function it did on your original remote control. When pressing MAGIC then POWER you will obtain the Sleep function. When you press and hold down the MAGIC key the LED underneath the POWER key will light up twice and you will enter programming mode.
3

LIGHT (ESC) Key
The LIGHT key lights up the LCD screen and keypad of the URC-7781. This key will also allow you to return (escape) to the previous screen within programming mode. If you want to exit programming mode and return to user mode simply press and hold down the LIGHT key.
4

LCD screen
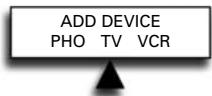
The URC-7781 can be simply programmed following the indications on the LCD screen. During set-up the URC-7781 will list the 12 possible device groups. The currently active device is shown in the middle of the screen – indicated by: ▲.
TV
VCR
SAT
: (T) - Television / LCD / Plasma / Projector / Rear Projector
: (V) - Video Cassette Recorder / TV/VCR Combi / DVD/VCR Combi / PVR
: (S) - Satellite Receiver / Set-Top-Box / DVB-S / DVB-T / Freeview (UK) / TNT (F) / Digitenne (NL) / SAT/HDD
: (C) - Cable Converter / Set-Top-Box / DVB-C
: (N) - Video Accessory like Media Centres / AV Accessories / AV Selectors
: (D) - CD Player / CD-R / MD
: (P) - Phonograph
: (M)- Audio / Miscellaneous Audio
: (H) - Home Automation (e.g. IR controlled curtains / IR controlled light switches etc.)
: (A) - Audio / Amplifier / Active Speaker System
: (R) - Audio / Audio Receiver/Tuner/Amplifier / (DVD) Home Cinema
: (K) - Cassette Player (Tape Deck)
: (L) - Laser Disc Player / Video CD
: (J) - Digital Audio Tape / DCC
: (Y) - DVD Player / DVD-R / DVD Home Cinema / DVD Combi / DVD/HDD
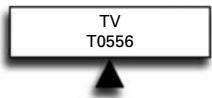
The type of code is indicated in brackets e.g. (T). When setting up your device a device code will be displayed as e.g. T0556.
T - indicates the device type (TV code)
0556 - indicates a four-digit-code found under Philips.
It is also possible to rename/change a device label using a max of 4 characters (see page 15).
5


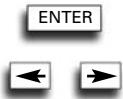
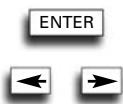
Left / ENTER / Right
These keys allow you to scroll through and confirm your choices in the remote's "Programming menu". When changing the device label you can scroll through the "alphabet", "digits" and "special symbols" (. _^<) pressing the ENTER key to select the desired letter, digit or symbol.
6


Number Keys (0-9, -/- -, AV)
The Number keys (0-9, -/—, AV) provide functions just like your original remote, such as direct access to channel selection. If your original remote uses one/two digit input switching (-/— symbol), this function can be obtained by pressing the -/— key. If your original remote has a 10 key, this function can also be found under the -/— key. If your original remote has a 20 key, this function can be found under the AV key. In Audio (RCV, AMP, MIS) mode the Number keys may provide source (input) selection.
7

AV key
In TV mode you will obtain the AV / Input function. In VCR mode you will obtain the "AV" function, if available on your original remote. In Audio (RCV, AMP, MIS) mode you will obtain the input/source function. In DVD mode you will obtain the "TV/DVD" function, if available on your original remote. In SAT mode you will obtain the "TV/SAT" or "TV/DTV" function, if available on your original remote.
8

Channel +/- Keys
These keys operate the same function it did on your original remote control. In TV mode these keys provide you the Brightness +/- when pressing MAGIC then CH+/-. In Audio (RCV, AMP, MIS) mode these keys will provide PRESET Up/Down.
9

MUTE Key
The Mute key operates the same function it did on your original remote control.
The Keypad
10

MENU Key
The MENU key controls the same function as it did on your original remote.
11

Volume +/- Keys
These keys operate the same function it did on your original remote control. In TV mode these keys provide you the Color +/- when pressing MAGIC then VOL+/-.
12

Directional Keys
If available on your original remote, these keys will allow you to navigate through the menu mode of your device.
13

OK
The OK key will confirm your choice in menu operation of your device.
14

Guide
In TV and/or SAT mode you will obtain the "Guide" or "Previous Program" function, if available on your original remote. In VCR mode you will obtain the "TV/VCR" or "Eject" function, if available on your original remote. In AMP, RCV or MIS mode you will obtain the "Tune Down" function, if available on your original remote. In CD mode you will obtain the "Eject" or "Open/Close" function, if available on your original remote.
15

Exit
In all modes you will obtain the "Menu Exit" function, if available on your original remote. In SAT menu mode you may obtain the "back" key to go to the previous menu screen.
16

16:9
In TV mode this key provides you the (16:9) wide screen view function, if available on your original remote. In SAT mode you will obtain the "Favorite" or "Info" function, if available on your original remote. In DVD mode you will obtain "Zoom" or "Random". In VCR mode you will obtain "SP/LP". In AMP, RCV or MIS mode you will obtain "Tune Up".
17


Transport keys
These keys operate the transport functions (PLAY, FF, REW etc.) of your device. To prevent accidental recording, the RECORD key must be pressed twice to start recording.
18


Teletext Keys
The transport keys (REW, STOP, REC, FF) are used to operate the main Teletext functions. The symbols below the keys are for Teletext. The text keys are used to access the Teletext functions of your device. Of course, your device must have Teletext capability.

TEXT ON: Puts the device (TV and/or SAT) in the Teletext mode.

HOLD/STOP: Stops changing pages.

EXPAND: Shows the top half of the Teletext page in larger letters. By pressing again, you can see the bottom half of the Teletext page enlarged. To return to regular Teletext viewing, press the EXPAND key again, or press the TEXT ON key, depending on your television.

TEXT OFF: Switches the device (TV and/or SAT) back to regular viewing mode. On some devices, this may be done by pressing the TEXT ON key several times.
In TV mode when in text mode, the keys marked red, green, yellow and blue, allow you to access the Fastext functions of your television. If on your original remote control these keys are used for Menu navigation, the URC-7781 Fastext keys may operate in the same way.
19


Custom keys (A, B, C, D)
The Custom Keys are spare keys which give you the possibility to customise the URC-7781 remote using the learning and Key Magic® features (page 11 and 25). These keys can also be used to program Macros (see page 18).
Installing the Batteries
Your URC-7781 requires 4 new "AAA/LR03" alkaline batteries.
1 Remove the battery cover from the back of your URC-7781.
2 Match the batteries to the + and - marks inside the battery case, then insert the batteries.
3 Press the battery cover back in place.
Important notes:
- Do not use rechargeable batteries.
- Upon changing the batteries, your set-up codes and advanced programming will be retained.
Setting the Language, Day and Time
- ENTER After inserting the batteries... will appear on the screen. Press ENTER to confirm.

- Set the language to ENGLISH, GERMAN (DEUTSCH) or FRENCH (FRANÇAIS) using the ARROW keys.


Press ENTER to confirm the language of your choice (e.g. ENGLISH).

The LED underneath the POWER Key will light up twice. From now on all programming features will be displayed in the selected language.
- ENTER "SET DAY" will appear on the screen. Press ENTER to confirm.

- ← → Select the corresponding day using the ARROW keys and confirm by pressing ENTER. The LED underneath the POWER key will light up twice.


- ENTER "SET TIME" will appear on the screen. Press "ENTER" to confirm.

- ① ② ③ Enter the corresponding time using the number keys and confirm by pressing "ENTER". The LED underneath the POWER key will light up twice.


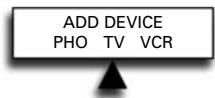
"ADD DEVICE" will appear on the screen.

Please continue on page 6 to set up the URC-7781 to control your devices.
Note: After the remote has been completely setup, to change the Language, Day or Time again you need to enter programming mode. To do so press and hold MAGIC until "INITIAL SETUP" appears on the screen. Next press ENTER, and "DEVICE" will appear on the screen. Next use the ARROW keys to scroll to "LANGUAGE" or "DAY/TIME" depending on what you require to change.
How to set up the URC-7781 to control your devices
→ When setting up the URC-7781 for the first time please follow steps 1 - 6.
→ If already in User Mode you need to follow steps a and b then 1 - 6.
a

Press and hold down MAGIC for about 3 sec. and... will appear on the screen.

b

Press ENTER twice... will appear on the screen.

Example: To set up the URC-7781 for your Television:
1 Find the code for your device in the Code list (page 301 - 315). Codes are listed by device type and brand name. The most popular code is listed first. Make sure your device is switched on (not on standby).
If your brand is not listed at all, the URC-7781 gives you the possibility to scan through all the codes contained in the memory for your specific device (in that case, as explained in see step 4, use the ARROW Left / Right keys instead of the digits).
2

The display will read... Press ENTER.

3

Select the device you wish to set up using the ARROW left/right keys and confirm pressing ENTER. Now you will see CODE SET UP. Press ENTER again.


4
Simply use the number keys to enter the first four-digit device code corresponding to your brand listed in the code list (pages 301 - 315). The LED underneath the POWER key will light up twice.

5

Aim the URC-7781 at your device and press POWER.
→ IF your device switches OFF, switch your device back ON (e.g. press CH+ to switch ON your TV) and try all the remote's functions to ensure they are working properly.
→ IF some functions do not work properly or if your device does not respond at all, please try the next four-digit device code listed under your brand (pages 301 - 315).
SEARCH METHOD: Each time you press the ARROW Left of Right key, this will display the previous or next code in the memory and send POWER of that code.
- Do not use the digits to test if the code works as this will change the current code.
- If your device does not respond to the URC-7781 after you have tried all the codes (page 301 - 315) listed for your brand......or......if your brand is not listed at all......simply press the "ARROW right" key to scroll to the next code contained in the memory (for your specific device).
6

As soon as all the remote's functions are working properly press ENTER to store this code.
Make sure to write down your code on page 8 for easy future reference.
Setting up the URC-7781
- Use the LIGHT (ESC) key to return to the previous screen.
- Press and hold down the LIGHT (ESC) key to exit programming mode and return to the user mode.
- If your device's original remote control does not have a POWER key, press PLAY instead of POWER when setting up your device.
- Remember to select the corresponding device mode before operating your device.
For your convenience it is possible to rename the Device Label (max 4 characters) see page 15.
| Device Label | Corresponding Devices | Device type indicator |
| TV | Television / LCD / Plasma / Projector / Rear Projector | T |
| VCR | Video Cassette Recorder / TV/VCR Combi / DVD/VCR Combi / PVR | V |
| SAT | Satellite Receiver / Set-Top-Box / DVB-S / DVB-T / Freeview (UK) / TNT (F) / Digitenne (NL) / SAT/HDD | S |
| CBL | Cable Converter / Set-Top-Box / DVB-C | C |
| VAC | Video Accessory like Media Centres / AV Accessories / AV Selectors | N |
| CD | CD Player / CD-R / MD | D |
| PHO | Phonograph | P |
| MIS | Audio / Miscellaneous Audio | M |
| HOM | Home Automation (e.g. IR controlled curtains / IR controlled light switches etc.) | H |
| AMP | Audio / Amplifier / Active Speaker System | A |
| RCV | Audio / Audio Receiver/Tuner/Amplifier / (DVD) Home Cinema | R |
| CAS | Cassette Player (Tape Deck) | K |
| LDP | Laser Disc Player / Video CD | L |
| DAT | Digital Audio Tape / DCC | J |
| DVD | DVD Player / DVD-R / DVD Home Cinema / DVD Combi / DVD/HDD | Y |
The URC-7781 will display a code as e.g. T0556.
T = Device Type Indicator
0556 = 4-digit-code
- Use the LIGHT key to return to the previous screen.
- Press and hold down the LIGHT key to return to user mode.
View the current code
Once you have Set-Up your URC-7781, you can view your SET-UP CODE for future reference.
Example: To view the code saved for your TV:
1

Press and hold down MAGIC for about 3 sec. and... will appear on the screen.
INITIAL SETUP
2

Press ENTER twice... will appear on the screen.
ADD DEVICE
3

Press the ARROW Left key twice... will appear on the screen.
VIEW CODE
4
Press ENTER and the code for your current device will be displayed. Press the ARROW LEFT/RIGHT keys to view the codes of your other devices. Please write down your codes in the boxes below.

Quick Code Reference
Device
Type
Code
Device
Type
Code
1.
—
□
□
7.
□ □
2.
—
□
□
8.
□□
3.
—
□
□
9.
□□
4.
-
□
□
10.
□ □
5.
—
□
□
11.
□□
6.
—
□
□
12.
□□
Replace a device
To prevent having a device programmed that you are not using anymore it is possible to replace this e.g. if you just bought a new TV and DVD player/recorder to replace your old TV and Video Recorder it is not necessary to have your old TV and Video Recorder still programmed on your URC-7781.
1

Press and hold down MAGIC for about 3 sec. and... will appear on the screen.
INITIAL SETUP
2

Press ENTER twice... will appear on the screen.
ADD DEVICE
3

Press ARROW Right... will appear on the screen.
REPLACE DEVICE
4

Press ENTER... will appear on the screen.
DEV TO REPLACE PHO TV VCR


Select the "Device you wish replace" using the ARROW left/right keys.
5

Press ENTER... will appear on the screen.
REPLACE WITH PHO TV VCR


Select the "Device you wish to replace it with" using the ARROW left/right keys and confirm pressing ENTER. Now you will see "CODE SETUP". Press ENTER.

From here enter the codes corresponding to "device type" and "brand" of your device as explained on page 6.
Changing the Device Code
The following example explains how to replace the old device code with a new device code without having to ADD a new device.
Example: You just bought a new TV for your living room. This TV may be using a different code than your current TV in your living room. Just follow the next steps to change the current programmed device code.
Note: When changing the device code, all settings of the currently setup device (Key Magic, Learning) will be retained.
1

Press and hold down MAGIC for about 3 sec. and... will appear on the screen.
INITIAL SETUP
2
ENTER
x2
Press ENTER twice... will appear on the screen.
ADD DEVICE
3

Press RIGHT ARROW key twice... will appear on the screen.
CHANGE DEVICE CODE
4
ENTER
Press ENTER... will appear on the screen.
CHANGE DEV CODE DVD TV SAT
5


ENTER
Select the mode for which you want to change the setup code using the ARROW left/right keys and confirm pressing ENTER.
CODE SETUP
... will appear on the screen. Press ENTER to confirm. Next go to page 6 and follow the instructions from step 4 onwards.
TV T0556
Move a device
Once you programmed several devices it is possible to determine the order of appearance of the device labels.
Example: If you programmed a Television, DVD-player, Video Recorder and Satellite Receiver the sequence of appearance may be TV, DVD, VCR, SAT. You may want to change the order of appearance into TV, VCR, DVD, SAT.
1

Press and hold down MAGIC for about 3 sec. and... will appear on the screen.
INITIAL SETUP
2

Press ENTER twice... will appear on the screen.
ADD DEVICE
3

Press ARROW Right three times... will appear on the screen.
MOVE DEVICE
4

Press ENTER... will appear on the screen.
DEV TO MOVE DVD VCR SAT
5


Select the Device you wish to move to a different location using the ARROW left/right keys and confirm pressing ENTER.
6


... will appear on the screen. Use the ARROW left/right keys to move the corresponding device and confirm pressing ENTER.

MOVE TO TV VCR DVD
The LED underneath the POWER key will light up twice and you will return to MOVE DEVICE.
Delete a device
To delete a certain device please follow the next steps.
1

Press and hold down MAGIC for about 3 sec. and... will appear on the screen.
INITIAL SETUP
2

Press ENTER twice... will appear on the screen.
ADD DEVICE
3

Press ARROW Left key once... will appear on the screen.
DELETE DEVICE
4

Press ENTER... will appear on the screen.
5


Select the Device you wish to delete using the ARROW left/right keys and confirm pressing ENTER.
DELETE DEVICE
The LED underneath the POWER key will light up twice and you will return to DELETE DEVICE.
Result: The selected device has been deleted.
The Learning Feature
The URC-7781 comes with a complete library of pre-programmed codes. After you have set up the URC-7781 for your device, you may find that there are one or more keys that you had on your original remote, which do not have a place on the URC-7781 keypad. As a convenience, the URC-7781 offers a special Learning feature that allows you to copy any function from your original remote control onto the keypad of the URC-7781.
Before you start:
- Make sure your original remote control is working correctly.
- Make sure neither your URC-7781, nor your original remote control is pointing at your device.
Learning
Example: To copy the "mono/stereo" function from your original TV remote onto the A-key of your URC-7781.
1 Place both remote controls (the URC-7781 and your original) on a flat surface. Make sure the ends which you normally point at your device are facing each other. Keep the remotes at a distance of 2 to 5 cm.
2 MAGIC Press and hold down MAGIC for about 3 sec. and... will appear on the screen.

3 Press ARROW Right... will appear on the screen.

4 ENTER Press ENTER 4 times... will appear on the screen. x4 Use the ARROW keys to scroll to the device mode in which you want to place the learned function (e.g. TV).
5 Press the key (on the URC-7781 remote) where you want to place the learned function (Example: A key). The LED underneath the POWER key will flash rapidly and... will appear on the screen.

6 Press the key (on your original remote) that you want to copy on the URC-7781. (Example: "mono/stereo" key). The LED underneath the POWER key will light up twice to confirm that the function mono/stereo has been learned successfully onto the A key.
NOTE: If you want to copy other functions within the same mode, simply repeat steps 5 and 6 pressing the next key you want to copy by learning.
NOTE: If you want to copy other functions in a different device mode, in step 4 select a different device mode by using the ARROW Left / Right keys and continue with steps 5 and 6.
NOTE: If the display reads LEARNING FAILED, press ENTER to start from "ADD LEARNING" and press ENTER to continue with step 4.
NOTE: If the display reads MEMORY FULL you need to prioritise the functions you want and delete the functions with the lowest priority
7 Press LIGHT once to go back to ADD LEARNING....or.... press and hold LIGHT to exit programming mode.
- Use the LIGHT key to return to the previous screen. - Press and hold down the LIGHT key to return to user mode.
The Learning Feature
- Learning is mode specific. To access your learned function, you need to scroll to the appropriate device first.
- A learned function can be assigned to any key except the ENTER, LIGHT (ESC), ARROW Left/Right keys and the MAGIC key.
- If no key is pressed, the URC-7781 will stay for 30 seconds in programming mode.
- After step 5 you have 15 seconds to press the corresponding key on your original remote.
- If you learn a function on another key than the „custom keys“, the original URC-7781 function automatically becomes shifted. You can press MAGIC then the key to access it (this excludes the POWER, Channel and Volume keys and Digits – Press MAGIC twice and then the digit to access it).
- If a Shifted Learned function is placed on the Power, Channel and Volume keys then Sleep and Colour/Brightness will be sacrificed.
- The Learning feature is mode specific. Therefore you can place one learned function per mode on the same key.
- The URC-7781 can learn approximately 50 functions (depending on the original remote).
- You can replace a learned function by placing another learned function on top or by using "Delete Learning from One Key", "Delete Learning from One Mode", "Delete Learning from All Modes".
- Learning should not be done in direct sunlight or under incandescent lights.
- Make sure you are using new batteries before following the learning instructions.
- Upon changing the batteries, your learned functions will be retained.
- It's not possible to program functions by learning in the Home Theatre mode. However, if a key has been programmed in the original device mode with learning then this function will be carried over to the Home Theatre mode.
Shifted Learning
You can also learn a function on a key of the URC-7781 without sacrificing the original URC-7781 function. The „custom keys“ are an ideal location for this. A Shifted Learning function can also be put on almost any other key except for the following: MAGIC key, ARROW Left / Right, Enter and LIGHT (ESC). To install a Shifted Learning function, simply follow steps 1-7 on the previous page. During step 5, press MAGIC once before you press the key where you are placing the learned function. To access the shifted function, press MAGIC and then the key you have learned on. To access the shifted function on a digit key press MAGIC twice and then the corresponding digit.
Delete Learning
It is possible to.....
- delete a learned function from a specific key within a specific device mode.
- delete all learned functions within a specific mode.
- delete all learned functions within all device modes.
Example: to delete the copied mono/stereo function from the A key in the TV mode:
9 If there is another key which you wish to delete, repeat steps 6 - 8.
Result: The original function on the A key in TV mode will now be present.
* To delete a Shifted Learned feature, press MAGIC before you press the learned key to be deleted.
- Use the LIGHT key to return to the previous screen.
- Press and hold down the LIGHT key to return to user mode.
Operational Reset
The Operational Reset will erase all learned functions across all modes and some other programmed functions like Language, Volume Lock, Key Magic, Timed Macro, Key Macro, Home Theatre and Device Labels.
1

Press and hold down MAGIC for about 3 sec. and... will appear on the screen.
INITIAL SETUP
2

Press ARROW Right ... will appear on the screen.
ADVANCED SETUP
3
ENTER
Press ENTER once... will appear on the screen.
FUNCTION
4

Press ARROW Left... will appear on the screen.
RESET
5
ENTER
Press ENTER... will appear on the screen.
USER RESET
6
ENTER
Press ENTER. The LED underneath the POWER key will light up 4 times... will appear on the screen.
RESET
All your devices are still setup, but all features like Language, Volume Lock, Key Magic, Timed Macro, Key Macro, Home Theatre and Device Label have either been reset to default or cleared. To only clear Learning and Key Magic use the feature “Delete Learning and Key Magic” as described on page 27.
Extra Features
Colour, Brightness and Sleep
Depending on the functions of your original remote control, the URC-7781 may operate following functions of your television and sleep for devices that have this function on the original remote.
Colour (+) = Press and release MAGIC then hold Volume (+) Colour (-) = Press and release MAGIC then hold Volume (-)
Brightness (+) = Press and release MAGIC then hold Channel (+) Brightness (-) = Press and release MAGIC then hold Channel (-)
Sleep ON/OFF = Press MAGIC then POWER repeatedly until the sleeptimer reaches the desired amount of minutes (or disappears from your device screen).
Note: depending on your original remote you may operate this function in a different way.
Changing the Device label
It is possible to change the label of the devices you have setup using a maximum of 4 characters (or digits) for each label.
1

Press and hold down MAGIC for about 3 sec. and... will appear on the screen.
INITIAL SETUP
2

Press ARROW Right... will appear on the screen.
ADVANCED SETUP
3
ENTER
Press ENTER... will appear on the screen.
FUNCTION
4

Press 'ARROW Left' twice... will appear on the screen.
DEVICE LABEL
5
ENTER
Press ENTER... will appear on the screen.
CHANGE DEVICE LABEL
6
ENTER


ENTER
Press ENTER. Select the corresponding device mode of which you want to change the label using ARROW left / right and confirm pressing ENTER.
SELECT MODE RCV TV
7


ENTER
You will see... The first character of the selected device label will start to blink. Use the ARROW
NEW LABEL RCV TV
LEFT/RIGHT keys to change the label to a max. of 4 characters and press ENTER to store each selected character. After entering the fourth character the display will return to "CHANGE DEVICE LABEL".
It is also possible to choose one of the symbols:
| _ | e.g. TV 1 (blank space between two characters/digits) |
| < | To return to the previous character and reset the previous character to A. |
| ^ | To store a label of less than 4 characters e.g. when you want to label the device as “T”. |
| . | (dot) e.g. TV.1 |
5
ENTER
You will see... Press ENTER.
RESET DEVICE LABEL

6


ENTER
Select the corresponding device label you wish to reset by using ARROW left / right and press ENTER. You will see the selected device label change back to the default label. The LED underneath twice and the display will return
SELECT MODE RCV TV

5
ENTER
You will see... To reset ALL DEVICE LABELS...
RESET ALL DEVICE LABELS
6
Press ENTER. The LED underneath the POWER key will light up twice. All device labels will now be reset to the original label and the display will return to "DEVICE LABEL".
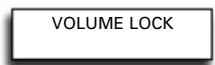
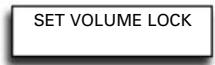
Volume Lock
Set Volume Lock
Example: It is possible to lock the volume to be from one particular mode e.g. TV. Doing this will result in the fact that independent in what mode you are the volume +/- and Mute keys will always send the volume from the TV mode.
1

Press and hold down MAGIC for about 3 sec. and... will appear on the screen.

2

Press ENTER... will appear on the screen.

3

Press "ARROW Right" twice... will appear on the screen.
4
Press ENTER twice... will appear on the screen. Use the ARROW left/right keys to select the device (e.g. TV) you want to lock the volume to.

5

Press ENTER to select the displayed device as the SRC (source). The LED underneath the POWER key will light up twice and the display will return to „VOLUME LOCK“.
Result: In the example above the TV mode will be the volume SRC (Source) for all other installed devices. In any device mode pressing volume +/- or mute this will give the volume functions of the TV mode.
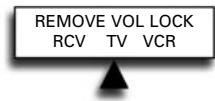
Remove Device from Volume Lock
Example: If you want you can remove 1 device from the Volume Lock, so that it will not send the volume of the SRC any longer but its own volume.
1

Press and hold down MAGIC for about 3 sec. and... will appear on the screen.

2

Press ENTER... will appear on the screen.

3

Press "ARROW Right" twice... will appear on the screen.

4

Press ENTER... will appear on the screen.
5

Press ARROW Right... will appear on the screen.

6
Press ENTER... will appear on the screen. Use the ARROW left / right keys to select the device (e.g. TV) you want to remove from the volume lock.
7

Press ENTER to remove the displayed device from the volume lock. The LED underneath the POWER key will light up 4 times. The display will return to „VOLUME LOCK“.
Result: the device you selected will now send its own volume +/-, mute (instead of the volume from the SRC device).
Add Device To Volume Lock
Example: It is possible to add a device to the installed volume lock (SRC). You may want to do this for devices you added after installing the volume lock, or if you removed a device from the volume lock.
1

Press and hold down MAGIC for about 3 sec. and... will appear on the screen.
INITIAL SETUP
2

Press ENTER... will appear on the screen.
DEVICE
3

Press "ARROW Right" twice... will appear on the screen.
VOLUME LOCK
x2
4

Press ENTER... will appear on the screen.
SET VOLUME LOCK
5

Press "ARROW Right" twice... will appear on the screen.
ADD DEVICE TO VOLUME LOCK
x2
6

Press ENTER... will appear on the screen.
ADD TO VOL LOCK RCV TV VCR


Select the device (e.g. TV) you want to add to the volume lock using the ARROW Left / Right keys.
7

Press ENTER to add the displayed device to the volume lock. The LED underneath the POWER key will light up twice and the display will return to VOLUME LOCK.
Result: The selected device will now send the volume +/-, mute of the SRC device.
Reset All Volume Controls
Example: You can reset all volume controls back to their original setting, so that all devices will send their own volume again.
1

Press and hold down MAGIC for about 3 sec. and... will appear on the screen.
INITIAL SETUP
2

Press ENTER... will appear on the screen.
DEVICE
3

Press "ARROW Right" twice... will appear on the screen.
VOLUME LOCK
4

Press ENTER... will appear on the screen.
SET VOLUME LOCK
5

Press ARROW Left... will appear on the screen.
RESET ALL VOLUME CONTROLS
6

Press ENTER to reset all volume controls. The LED underneath the POWER key will light up four times and the display will return to VOLUME LOCK.
Result: All devices will now send their own volume +/-, mute again.
Macros (Sequence of commands)
Add Timed Macro
The Macro feature allows you to define a sequence of commands that have to be executed at a certain time.
You can program 3 types of timed macros:
- once timed macro
- daily timed macro
- weekly timed macro
Example: To RECORD a football match using the URC-7781 with your video recorder.
1

Press and hold down MAGIC for about 3 sec. and... will appear on the screen.
INITIAL SETUP
2

Press ARROW Right... will appear on the screen.
ADVANCED SETUP
3

Press ENTER... will appear on the screen.
FUNCTION
4

Press ARROW Right... will appear on the screen.
MACRO
5

Press ENTER twice... will appear on the screen.
ADD TIMED MACRO
6

Press ENTER... will appear on the screen.
ONCE TIMED MACRO

It is also possible to set the macro to DAILY or WEEKLY. Use the ARROW keys to do so.
7
Press ENTER... will appear on the screen.
SEL MACRO DAY TUE WED THU
Select the corresponding day when you want to execute the Macro using the ARROW keys.
8
Press ENTER... will appear on the screen.
SEL MACRO TIME 20:45
Set the corresponding time when you want the macro to execute (to start the RECORDING) using the number keys.
9
Press ENTER... will appear on the screen. You now have to record key strokes in the device modes as you would do when recording from the Video Recorder manually.
PROG SEQ & ENTER TV VCR RCV
Select the corresponding device key (using the ARROW keys). In our example scroll to VCR mode.
10

Press the corresponding key(s) you want to be sent in the timed macro (in our example, press RECORD twice).
11

Press ENTER to save the macro... will appear on the screen.
ADD TIMED MACRO
Result: you have programmed a macro to start recording today Wednesday at 20:45. Now you need to program another macro to stop the recording on Wednesday at e.g. 22:35 so the signal that the URC-7781 will send to your video recorder at 22:35 will be STOP.
Note: Make sure to place the URC-7781 pointed towards the video recorder and make sure that there is a clean line of sight.
It is also possible to set the macro daily... (the step SEL MACRO DAY will be skipped)


It is also possible to set the macro weekly...
WEEKLY TIMED MACRO
Macros (Sequence of commands)
Notes:
- The amount of keystrokes in a timed macro and the number of timed macros is limited by the available memory space.
- A "ONCE TIMED MACRO" will only be executed once. After executing this macro it will automatically be erased from the remote's memory.
- A "DAILY TIMED MACRO" will be executed every day at the same time until its removed from the remote's memory.
- A "WEEKLY TIMED MACRO" will be executed every week on the same day and same time until the macro is removed from the remote's memory.
- To indicate that a Timed Macro has been programmed, the display will show a * at the left from the time in user mode.
- If you include the record function in the timed macro, you have to press the record key twice.
Delete Timed Macro
Example: To delete the Timed Macro from page 18:
1

Press and hold down MAGIC for about 3 sec. and... will appear on the screen.
INITIAL SETUP
2

Press ARROW Right... will appear on the screen.
ADVANCED SETUP
3
ENTER
Press ENTER... will appear on the screen.
FUNCTION
4

Press ARROW Right... will appear on the screen.
MACRO
5
ENTER
Press ENTER... will appear on the screen.
ADD MACRO
6

Press ARROW Right... will appear on the screen.
DELETE MACRO
7
ENTER
Press ENTER... will appear on the screen.
DELETE TIMED MACRO
8
ENTER
Press ENTER... You will now see the Timed Macros you programmed displayed on the screen. Next to O, D, or W you will see the macro day (in case of a once or weekly timed macro) displayed.
DEL TIMED MACRO O WED 20:45


Next to it the macro time will be displayed on the screen. You may use the ARROW LEFT / RIGHT keys to scroll through the programmed Timed Macros.
O : Once Timed Macro D : Daily Timed Macro W : Weekly Timed Macro
9
ENTER
Press ENTER to delete the displayed timed macro. The LED underneath the POWER key will light up twice and...will appear on the screen.
DELETE MED MACRO
10
ENTER
If you want to delete another Timed Macro press ENTER... will appear on the screen.
DEL TIMED MACRO O WED 22:35
11
ENTER
Press ENTER to delete this timed macro. The LED underneath the POWER key will light up twice and...will appear on the screen.
DELETE TIMED MACRO
Result: the Timed Macros programmed from page 18 have been deleted.
Macro (Sequence of commands)
Add Key Macro
You can program your URC-7781 to issue a sequence of commands at the press of one button. For example, you may want to switch OFF your TV, VCR and Satellite by only pressing one key. Any sequence of commands you regularly use can be reduced to one key stroke for your convenience. A key macro can contain up to 15 keystrokes in the sequence.
We recommend to program a macro on any of the Custom keys (A, B, C, D) as the macro will overwrite the original function on a key. The original function on the key will be pushed to the shifted level and will only be available by pressing MAGIC and the corresponding key.
Example: To set up the Macro to switch off your Television, Video Recorder and Satellite Receiver on the key labelled A on your URC-7781:
| 1 | MAGIC | Press and hold down MAGICfor about 3 sec. and...will appear on the screen. | INITIALSETUP |
| 2 | Press ARROW Right...will appear on the screen. | ADVANCEDSETUP | |
| 3 | ENTER | Press ENTER...will appear on the screen. | FUNCTION |
| 4 | Press ARROW Right...will appear on the screen. | MACRO | |
| 5 | ENTERx2 | Press ENTER twice...will appear on the screen. | ADDTIMED MACRO |
| 6 | Press ARROW Right...will appear on the screen. | ADDKEY MACRO | |
| 7 | ENTERA | Press ENTER...will appear on the screen.Next press the key on which youwant to set the macro (e.g. A key). | PRESSMACRO KEY |
| 8 | Now...will appear on the screen. Now pressthe keys from the modes using theARROW left / rightkeys as you woulddo when manually switching off your TV,VCR and SAT. Select TV mode by usingthe ARROW Left/Right keys, then pressPOWER, then select VCR, then press POWER,then press SAT, then press POWER. | PROG SEQ & ENTERVCR TV SAT | |
| 9 | ENTER | Press ENTERto store the Macro.The LED underneath the POWER keywill light up twice and the display willreturn to ADD KEY MACRO. | ADDKEY MACRO |
Result: Whenever you press the A key, the URC-7781 will switch OFF your TV, VCR and Satellite.
Macro (Sequence of commands)
Shifted Macro
It is also possible to program a Shifted Macro on any key, except for the following keys:
MAGIC, LIGHT (ESC), ARROW LEFT, ARROW RIGHT, ENTER and the number keys. If for example, you want to program a shifted Macro on the MUTE key, simply press the MAGIC and the Mute in step 7 on page 20.
NOTES:
- Each KEY MACRO can consist of a maximum of 15 key strokes.
- Make sure that you program a Macro on a spare key that you don't use in any mode.
- Once you program a Macro on a specific key, the sequence will work regardless of the mode you are using.
- To avoid accidental recordings with the URC-7781, you must press the Record key twice to begin recording. Because of this, we do not recommend to assign a Macro or Shifted Macro to the Record key.
- If you had to hold down a key for a few seconds on the original remote control to get a function, this function may not work in a macro on your URC-7781 remote.
- If you program a Macro on a key, the original function will become shifted (excluding POWER, CH+/- and VOL+/- keys). Press MAGIC then the key to access it. If you place a Macro shifted on a digit key, access the original function by pressing MAGIC twice and then the digit key.
- If a Shifted Macro is placed on the Power, Channel and Volume keys then Sleep and Colour/Brightness will be sacrificed.
- You cannot set the macro on the ARROW Left/Right, ENTER, MAGIC, and LIGHT (ESC) keys.
- If you include the record function in a Key Macro then you have to press the record key twice.
Delete Key Macro
Example: To delete the Key Macro on the A key from page 20.
| 1 | MAGIC | Press and hold down MAGIC for about 3 sec. and... will appear on the screen. | INITIAL SETUP |
| 2 | Press ARROW Right... will appear on the screen. | ADVANCED SETUP | |
| 3 | ENTER | Press ENTER... will appear on the screen. | FUNCTION |
| 4 | Press ARROW Right... will appear on the screen. | MACRO | |
| 5 | ENTER | Press ENTER... will appear on the screen. | ADD MACRO |
| 6 | Press ARROW Right... will appear on the screen. | DELETE MACRO | |
| 7 | ENTER | Press ENTER... will appear on the screen. | DELETE TIMED MACRO |
| 8 | Press ARROW Right... will appear on the screen. | DELETE KEY MACRO | |
| 9 | ENTER | Press ENTER... will appear on the screen. | PRESS MACRO KEY |
10 Press the A key (corresponding the Macro key you want to erase the Key Macro from). The LED underneath the POWER key will light up twice. You will see "DELETE KEY MACRO" on the screen again.
Result: the Key Macro on the A key programmed from page 20 has been deleted.
Home Theatre Setup
The Home Theatre feature allows you to combine key groups of several modes on the URC-7781 in one single mode.
Example: You want to configure the functions of your Television and Home Cinema Set (programmed on TV and RCV) onto the URC-7781 keypad as shown in the table below. This allows you mainly to control the TV functions and functions from the Home Cinema Set without having to select the corresponding device mode.
| Keys | Mode |
| POWER | TV |
| DIGITS(1-9, 0, -/--, AV) | TV |
| CHANNEL(channel +/-) | TV |
| VOLUME(volume +/-, mute) | RCV |
| MENUMenu, up, down, left, right, OK, Exit | TV |
| GUIDE | TV |
| 16 :9 | TV |
| TRANSPORT(skip-back, play, pause, skip-forward, rewind, stop, record, fast-forward | DVD |
| FASTEXT(red, green yellow, blue) | TV |
| A, B, C, D | RCV |
To set up or add the Home Theatre mode:
1

Press and hold down MAGIC for about 3 sec. and... will appear on the screen.
INITIAL SETUP
2

Press ARROW Right... will appear on the screen.
ADVANCED SETUP
3

Press ENTER... will appear on the screen.
FUNCTION
4

Press "ARROW Right" twice... will appear on the screen.
HOME THEATRE
5

Press ENTER twice... will appear on the screen.
HT POWER DVD HTNA RCV

Select TV mode using the ARROW Left / right key (corresponding to the example above).
6

Press ENTER... will appear on the screen.
HT DIGITS DVD HTNA RCV

Select TV mode using the ARROW Left / right key (corresponding to the example above).
7

Press ENTER... will appear on the screen.
HT CHANNEL DVD HTNA RCV

Select TV mode using the ARROW Left / right key (corresponding to the example above).

Home Theatre Setup
8

Press ENTER... will appear on the screen.
Select RCV mode using the ARROW Left / Right key (corresponding to the example above).

etc......
After selecting the device for the last keygroup (A, B, C, D) the LED underneath the POWER key will light up twice and the display will return to "HOME THEATRE".
Result: In Home Theatre mode the URC-7781 keypad in configured according to the table above.
- During Home Theatre setup you will see a device called HTNA. By selecting this fictitious device for a group of keys, then these keys will not sent IR in the Home Theatre mode.
- When pressing keys in Home Theatre mode you will see the mode from which IR is sent, displayed.
- Home Theatre mode can be moved by using the Move Device feature.
- Home Theatre mode can be renamed by using the Device Label Feature.
- Key Magic functions and learned functions are carried over to Home Theatre mode. It's not possible to learn to or program Key Magic functions in Home Theatre mode.
- Key Macros will not be available in Home Theatre mode.
- If a group of functions keys has been assigned to a device which gets deleted, then as a consequence this function group will not send IR in the Home Theatre any longer (this group is automatically assigned to HTNA).
Delete Home Theatre
To delete the Home Theatre Mode feature:
1

Press and hold down MAGIC for about 3 sec. and... will appear on the screen.
INITIAL SETUP
2

Press ARROW Right... will appear on the screen.
ADVANCED SETUP
3

Press ENTER... will appear on the screen.
FUNCTION
4

Press "ARROW Right" twice... will appear on the screen.
HOME THEATRE
5

Press ENTER... will appear on the screen.
SET UP HOME THEATRE
6

Press ARROW Right... will appear on the screen.
DELETE HOME THEATRE
7

Press ENTER to delete the Home Theatre mode. The LED underneath the POWER key will light up twice and the display will return to...
HOME THEATRE
The Home Theatre mode will no longer be present on the URC-7781. You can add the Home Theatre mode back by following the Home Theatre mode set up on page 22.
Code Upgrade Technology
Your URC-7781 remote contains a unique feature, which allows new codes to be added simply by holding it to your telephone. In a matter of seconds, our magnetic coupling technology quickly and reliably transfers information to the URC-7781 remote without complex plugs, adapters or attachments. This means, as you buy new products in the future, the URC-7781 remote will never become obsolete.
Internet download
(Upgrade your URC-7781 remote...via your PC)
- Visit our website "www.oneforall.com".
- Select your region.
- Select "Product support".
- Select "Universal Remote Controls".
- Select the ONE FOR ALL remote you want to upgrade: URC-7781.
- Select 'Internet Download'.
Now you have entered our special Online Download section. From this point just follow the instructions on the screen for easy upgrade of your remote.
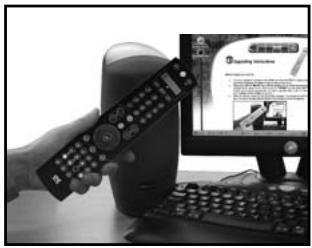
natural_image
Hand holding remote control next to a computer monitor displaying a webpage (no visible text on screen or background)Phone upgrade
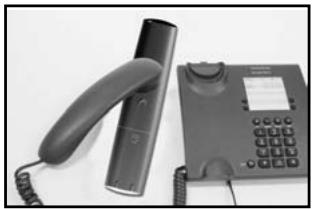
(Upgrade your URC-7781 remote...via your phone)
Alternatively ring our consumer help-line and one of our customer service representatives will assist you through the entire process of upgrading your URC-7781 Remote. To ensure the process goes smoothly, here are a few steps to follow:
natural_image
Black and white photo of a classic office telephone handset and a digital keypad (no visible text or symbols)- Write down the brand name(s) and model number(s) of your device(s) (see the table provided on the Consumer Service page) before you call.
- Ring our consumer help-line and explain which device(s) you would like to add to your URC-7781 Remote.
- After our customer service agent records the brand name(s) and model number(s) of your device(s), he/she will lead you through the set up procedure and then will ask you to hold the URC-7781 Remote to the speaker portion of your telephone (see diagram below). In doing this, the information needed for your device is transferred through the telephone on your URC-7781 remote in a matter of seconds.
IMPORTANT: cordless telephones, speaker telephones and mobile telephones are not recommended.
- After your URC-7781 remote has been upgraded by telephone, stay on the line. Our customer service agent will ensure that your URC-7781 remote is working properly with your device(s) and will answer any other questions you may have.
Key Magic®
Key Magic is an exclusive One For all feature. The design of the URC-7781 ensures that many functions of your original remote control can be operated - even those that do not have their own key on the URC-7781 keypad. Frequently used functions can be assigned to a key of your choice using the Key Magic feature of your URC-7781. In order to program a certain function with Key Magic you need to know the corresponding 5-digit function code. As the function codes vary with different types of devices, they cannot be found in the manual. You can request your function codes through our consumer service help-line or by letter, fax or e-mail. All we need to know is the 4-digit set-up code your device is working with and how the function was labelled on your original remote control.
You can also visit our website (www.oneforall.com) to find an answer to your questions.
Once you obtain(ed) your function code(s) from customer service, programming the code is easy (eg. programming the 16:9 function on the A key).
1

Press and hold down MAGIC for about 3 sec. and... will appear on the screen.
INITIAL SETUP
2

Press ARROW Right... will appear on the screen.
ADVANCED SETUP
3

Press ENTER twice... will appear on the screen.
ADD LEARNING
4

Press ARROW Right... will appear on the screen.
ADD KEY MAGIC
5


Press ENTER... will appear on the screen. Select the corresponding device mode using the ARROW keys in our example the 16:9 function is a TV function, so select the TV mode.
KM SOURCE DVD TV RCV
6

Press the MAGIC key once.
7


Enter the 5-digit function code (e.g. 00234) (provided by customer service).
8

The screen will change to... The mode in which the function will be assigned is TV so leave the device mode unchanged. Press the key (e.g. A key) to which the function will be assigned.
KM DESTINATION DVD TV RCV
The 16:9 function has now been programmed on the A key in the TV mode. The LED underneath the POWER key will light up twice and you will return to KM SOURCE to program a next function. To return to user mode press and hold LIGHT (ESC).
EXTENDED FUNCTION REFERENCE (first entry is an example):
| DEVICE | SET-UP CODE | FUNCTION | FUNCTION CODE |
| TV | T0556 | 16/9 format | 00234 |
- To access the function you have programmed, go to the corresponding device mode first.
- Key Magic can be assigned to any key EXCEPT the ARROW LEFT / RIGHT, ENTER, LIGHT (ESC) keys and the MAGIC key.
- Please note all the extended function codes you obtain from customer service above for easy future reference.
- It's not possible to program Key Magic functions in the Home Theatre Mode. However, if a key has been programmed in the original device mode with Key Magic then this function will be carried over to the Home Theatre Mode.
Delete Key Magic
It is possible to.....
- delete a Key Magic function from a specific key within a specific device mode.
- delete all Key Magic functions within a specific device mode.
- delete all Key Magic functions within all device modes.
Example: to delete the programmed Key Magic function (16:9) from the A Key in the TV mode
1

Press and hold down MAGIC for about 3 sec. and... will appear on the screen.
INITIAL SETUP
2

Press ARROW Right... will appear on the screen.
ADVANCED SETUP
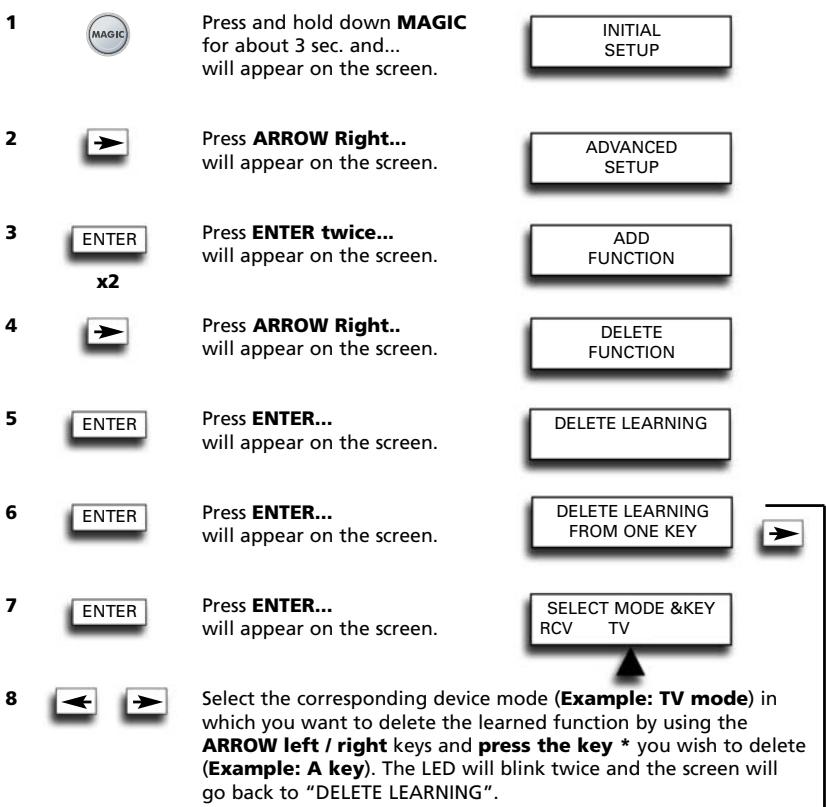
3

Press ENTER twice... will appear on the screen.
ADD FUNCTION
4

Press ARROW Right... will appear on the screen.
DELETE FUNCTION
5

Press ENTER... will appear on the screen.
DELETE LEARNING
6

Press ARROW Right... will appear on the screen.
DELETE KEY MAGIC
7

Press ENTER... will appear on the screen.
DELETE KEY MAGIC FROM ONE KEY

8

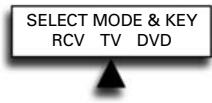
Press ENTER... will appear on the screen.
SELECT MODE &KEY RCV TV
9


Select the device mode (e.g. the TV mode) from which you want to delete the Key Magic function by using the ARROW LEFT/RIGHT keys and press the key you wish to delete (example: A key). The LED underneath the POWER key will blink twice and the screen will go back to "DELETE KEY MAGIC".
10 If there is another Key Magic function which you wish to delete, repeat steps 6 - 9.
Result: The original function on the "A" key in the TV mode of the URC-7781 will now be present.
* To delete a Shifted Key Magic function, press MAGIC before you press the key to be deleted in step 9.
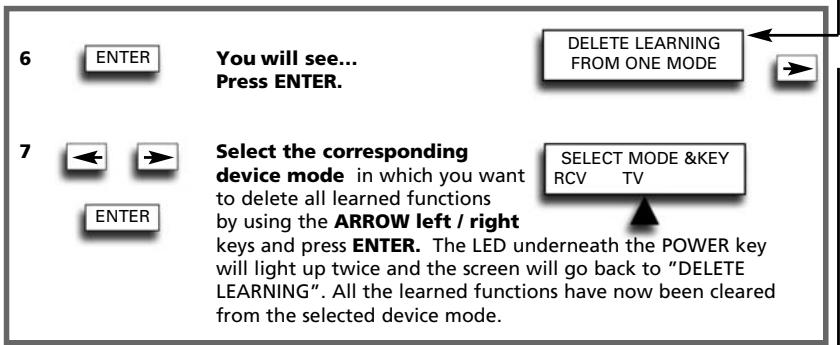
7

You will see... Press ENTER
DELETE KEY MAGIC FROM ONE MODE

8


Select the corresponding device mode from which you want to delete all Key Magic functions by using
SELECT MODE RCV TV

the ARROW LEFT/RIGHT keys and press ENTER. The LED underneath the POWER key will light up twice and the screen will go back to DELETE KEY MAGIC. All Key Magic functions from the selected mode are now cleared.
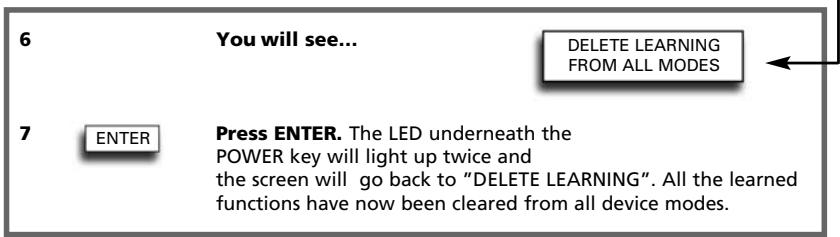
7

You will see...
DELETE KEY MAGIC FROM ALL MODES

8

Press ENTER The LED underneath the POWER key will light up twice and the display will go back to "DELETE KEY MAGIC". All Key Magic functions from all modes are now cleared.
- Use the LIGHT key to return to the previous screen.
- Press and hold down the LIGHT key to return to user mode.
Delete Learning and Key Magic
IF...... after some programming using both "Key Magic" and "Learning" you should not remember if you learned or used Key Magic to obtain a specific function or if you just would like to delete all functions obtained by Learning and Key Magic on one key, within one device mode, or within all device modes you can use the following feature.
It is possible to.....
- delete a Learning & Key Magic function from a specific key within a specific device mode.
- delete all Learning & Key Magic functions within a specific mode.
- delete all Learning & Key Magic functions within all device modes.
Example: to clear the A key in the TV mode from a Learned or Key Magic function:
1 Simply follow steps 1 - 5 as shown on page 26...
will appear on the screen.
DELETE LEARNING

Use the ARROW left key to scroll to...
will appear on the screen.
DELETE LEARN & KEYMAGIC

Press ENTER...
will appear on the screen.
DELETE LEARN &KM FROM ONE KEY


Press ENTER...
will appear on the screen.
SELECT MODE &KEY RCV TV

Select the corresponding device mode (e.g. TV mode) by using the ARROW left/right keys and press the key from which you want to delete the Key Magic / Learned function* (Example: A key). The LED underneath the Power key will blink twice and the screen will go back to "DELETE LEARN & KEY MAGIC".
6 If there is another key which you wish to delete, repeat steps 2 - 5.
Result: The original function on the A key in the TV mode of the URC-7781 will now be present.
* To delete a Shifted Learned or Key Magic feature, press MAGIC before you press the key to be deleted in step 5.
3 ENTER You will see... PRESS ENTER
DELETE LEARN &KM FROM ONE MODE

Select the corresponding device mode using ARROW
left/right keys and press ENTER.
The LED underneath the POWER
key will light up twice and the screen
will go back to DELETE LEARN & KEY MAGIC. All Key Magic and Learned functions from the selected device mode are cleared.

3 You will see...
DELETE LEARN &KM FROM ALL MODES

4 ENTER To delete all Key Magic and Learned functions within all device modes press ENTER. The LED underneath the POWER key will light up twice and the screen will go back to DELETE LEARN & KEY MAGIC. All Key Magic and Learned functions from all device modes are cleared.
- Use the LIGHT key to return to the previous screen.
- Press and hold down the LIGHT key to return to user mode.
Trouble-Shooting
Problem:
Solution:
| Your brand is not listed in the code section? | Just use the ARROW Left/Right keys to scroll through the codes contained in the memory (see Step 5 on page 6 - SEARCH METHOD). |
| The URC-7781 does not operate your device(s)? | A) Try all the codes listed for your brand see pages 301 - 315.B) Just use the ARROW Left/Right keys to scroll through the codes contained in the memory (see Step 5 on page 6 - SEARCH METHOD). |
| The URC-7781 is not performing commands properly? | You may be using the wrong code. Try repeating the Direct Set-Up using another code listed under your brand or start the search method over again to locate the proper code. |
| Problems changing channels? | Enter the programme number exactly as you would on your original remote. |
| Video not recording? | As a safety feature on your URC-7781, you must press the Record key twice. |
| The URC-7781 does not respond after pressing a key? | Make sure you are using new batteries and are aiming the URC-7781 at your device. |
| The LED does not blink when you press a key? | Replace batteries with 4 fresh, new “AAA/LR03” alkaline batteries. |
| The LED blinks 5 times every time you press a key and the LCD shows “BATTERY LOW”? | Replace batteries with 4 fresh, new “AAA/LR03” alkaline batteries. |
| You cannot enter programming mode by pressing and holding MAGIC? | Replace batteries with 4 fresh, new “AAA/LR03” alkaline batteries. |
If you still have questions about the operation of your URC-7781 universal remote and could not find the answer(s) in the Trouble-Shooting section, you may want to contact the customer service department for assistance.
You may care to visit our Internet-site: www.oneforall.com
Before contacting us, by Fax, E-mail or Phone, make sure you have the required information available by filling in the table below.
What do we need to know when you contact us:
1 That you have the ONE FOR ALL URC-7781 (*) universal remote.
2 The date of purchase (....../....../....).
3 A list of your equipment/models: (see example below).
| Device | Brand | Device model nr. | Remote model nr. | SET-UP code |
| TV | Sony | KV-25C5D | RM-883 | T1505 (example) |
Type/model numbers can often be found in your equipment owner's manual or on the factory plate behind the device.
- Then Fax, E-mail or Dial us:
In the UK
E-mail : ofahelp@uebv.com (*)
Fax : +31 53 432 9816
Tel. : 0901-5510010 (£ 0,50 per minute)
In Ireland
| E-mail : ofahelp@uebv.com (*** ) |
Fax : +31 53 432 9816
Tel. : 016015986
In Australia
| E-mail : ofahelp@uebv.com (*** ) |
Fax : 03 9672 2479
Tel. : 1 300 888 298
In South Africa
| E-mail : support@oneforall.co.za |
Fax : 011 298 2302
Tel. : 0860 100551
Tel. : 011 298 2300
In New Zealand
| E-mail : ofahelp@uebv.com (*** ) |
Fax : (06) 878 2760
Tel. : 0508 ONE 4 ALL (663 4 255)
(*) Just send a blank message, you'll get auto-reply.
ONE FOR ALL Light Control
Your ONE FOR ALL 12 Remote Control is compatible with ONE FOR ALL Light Control accessories, allowing you to control one or more of the lights in your house using the remote. To begin, you will need to purchase the ONE FOR ALL Light Control Starters Kit (HC-8300). The next step is to set up a code which will allow you to control up to 10 Light Control Receivers.
To setup a code, simply follow the normal procedure on page 6 and set up one of the following codes as a Home Automation device (HOM).:
ONE FOR ALL Light Control – 2200, 2201, 2202, 2203, 2204, 2205, 2206, 2207, 2208, 2209, 2210, 2211, 2212, 2213, 2214, 2215
It is recommended to use the first code listed. As the Light Control system works with Radio Frequency there is the possibility of interference. If your Light Control kit is not responding well, try one of the other codes listed.
Set up the HC Receiver
To set up your HC Receiver to work with your remote, you will need to assign a number to it. This is a one-time process that will allow you to control individual lights separately if you purchase additional HC Receivers in the future. To assign a number to the plug, follow these steps:
1
- Plug the lamp into the HC Receiver, and plug the HC Receiver into the wall outlet. If your lamp has a power switch it should be in the "ON" position.
- Plug the Command Centre in as close as possible to the HC Receiver, so that they are only 10-20 cm apart (the Command Centre can be moved after the initial setup).
2
- Set up a HOM code (see page 6 how to set up a code) and make sure that your remote control is in Light (HOM) Mode.
- Press the number you wish to assign to the HC Receiver. If this is your first Plug, number 1 is recommended, number 2 for the second etc. The LED (underneath the POWER key) should blink twice.
- Press and hold the button on the HC Receiver until the red light begins to blink.
3
- Point your remote control towards the Command Centre and press the Channel Up (+) key. The red light should stop flashing.
The remote should now operate the HC Receiver. To test it, check if the Channel Up (+) and Channel Down (-) keys work to turn your light on and off respectively, or if you have the HC8010 Dimmer unit, see if the Volume up key begins to brighten or darken the light (press again to stop).
Once set up with the Starters Kit, the following keys will perform the following functions on your ONE FOR ALL 12 Remote:
| Key Name | Function |
| Digit 1 | Select Receiver 1 |
| Digit 2 | Select Receiver 2 |
| Digit 3 | Select Receiver 3 |
| Digit 4 | Select Receiver 4 |
| Digit 5 | Select Receiver 5 |
| Digit 6 | Select Receiver 6 |
| Digit 7 | Select Receiver 7 |
| Digit 8 | Select Receiver 8 |
| Digit 9 | Select Receiver 9 |
| Digit 0 | Select Receiver 10 |
| Channel Up | Turn Selected Receiver On |
| Channel Down | Turn Selected Receiver Off |
| Volume Up | Begin Dimming – Press Again To Stop* |
Dimming feature is only available with the Light Control Dimmer unit (HC8010).

GERÄT HINZUFÜGEN PHO TV VCR
ENTER


4


natural_image
Grid of empty squares arranged in 4x4 pattern (no text or symbols)7.
8.
9.
10.
11.
12.

natural_image
Grid of empty squares arranged in 4x4 pattern (no text or symbols)Gerät ersetzen
ZU ERSETZ. GERÄT PHO TV VCR


ERSETZEN DURCH PHO TV VCR


BEWEGEN NACH TV VCR DVD
Heimkino (Home Theatre)
Heimkino (Home Theatre)
8
natural_image
Black-and-white photo of a hand holding a remote control next to a computer monitor displaying a webpage (no readable text or symbols on the main subject)natural_image
Close-up of a black telephone handset and a gray digital phone with keypad (no visible text or symbols)REMPLACEMENT D'UN APPAREIL 68
MODIFIER LE CODE D'UN APPAREIL ....69
DÉPLACER UN APPAREIL ....70
SUPPRIMER UN APPAREIL ....70
LA FONCTION D'APPRENTISSAGE ....71
AJOUTER APPAREIL PHO TV VCR

ENTER

4
natural_image
Grid of empty squares arranged in 4x4 pattern (no text or symbols)Device
7.
8.
9.
10.
11.
12.
Type

Code
natural_image
Grid of empty squares arranged in 4 rows and 5 columns (no text or symbols)APP. À REMPLACER PHO TV VCR


REEMPLACER PAR PHO TV VCR


Press ENTER... will appear on the screen.
CHOIX APP. & TOUCHE RCV TV
8


DÉVERROU. VOLUME RCV TV VCR
7

PROG SÉQ & ENTER TV VCR RCV


EFF. MACRO TEMPOR. U MER 22:35
11
ENTER
HT CHIFFRES DVD HTNA RCV


etc......
Effacer le Home Theatre
Pour effacer la mode Home Theatre:
1

natural_image
Black-and-white photo of a hand holding a remote on a computer keyboard, with a monitor displaying a webpage (no readable text or symbols)natural_image
Close-up of a black telephone handset and a gray office phone with keypad (no visible text or symbols)SOURCE KM DVD TV RCV
6

ADD DEVICE PHO TV VCR

ENTER

4


DEV TO REPLACE PHO TV VCR


REPLACE WITH PHO TV VCR


REMOVE DEVICE FROM VOLUME LOCK
6

REMOVE VOL LOCK RCV TV VCR


7

ADD DEVICE TO VOLUME LOCK
x2
6

ADD TO VOL LOCK RCV TV VCR


RESET ALL VOLUME CONTROLS
6

PROG SEQ & ENTER TV VCR RCV


HT CHANNEL DVD HTNA RCV

natural_image
Black-and-white photo of a hand holding a remote on a computer monitor, with no visible text or symbols.natural_image
Black office phone setup with a remote control and keypad (no visible text or symbols)DEV TO REPLACE PHO TV VCR


REPLACE WITH PHO TV VCR


REMOVE DEVICE FROM VOLUME LOCK
6


REMOVE VOL LOCK RCV TV VCR

PROG SEQ & ENTER TV VCR RCV

PROG SEQ & ENTER VCR TV SAT
9

natural_image
Black-and-white photo of a hand holding a remote on a computer monitor, with no visible text or symbols.natural_image
Black and white photo of a classic office telephone with a hand strap and keypad (no visible text or symbols)KM SOURCE DVD TV RCV


6

MIS : Audio / Miscellaneous Audio ....311
HOM : Home Automation (per es. tende con controllo IR / interruttori
luci a controllo IR / ecc. ) 311
: (M)- Audio / Miscellaneous Audio
HOM
natural_image
Grid of empty squares arranged in 4x4 pattern (no text or symbols)
natural_image
Grid of empty squares arranged in 4 rows and 5 columns (no text or symbols)DEV TO REPLACE PHO TV VCR


REPLACE WITH PHO TV VCR


REMOVE DEVICE FROM VOLUME LOCK
6

REMOVE VOL LOCK RCV TV VCR


7

ADD DEVICE TO VOLUME LOCK
x2
6

ADD TO VOL LOCK RCV TV VCR


RESET ALL VOLUME CONTROLS
6

PROG SEQ & ENTER TV VCR RCV
HT DIGITS DVD HTNA RCV


HT CHANNEL DVD HTNA RCV


ecc......
Come cancellare Home Theatre
natural_image
Hand holding remote control next to a computer monitor displaying a webpage (no readable text or symbols on screen)natural_image
Close-up of a black telephone handset and a gray digital phone with keypad (no visible text or symbols)KM SOURCE DVD TV RCV
6

DIT WILT U WETEN OVER UW URC-7781 .....182
DE TOETSEN ....183
DE BATTERIJEN INSTALLEREN ....185
DE TAAL, DATUM EN TIJD INSTELLEN ....185
DE URC-7781 INSTELLEN 186
TV : Televisie / LCD / Plasma / Projector / Rear-projector .....301
VCR : Videorecorder / TV/VCR-combinatie / DVD/VCR-combinatie / PVR .....306
SAT : Satellietontvanger / Set-top-box / DVB-S / DVB-T / Freeview (GB) / TNT (F) / Digitenne (NL) / SAT/HDD .....308
CBL : Kabeldecoder / set-top-box / DVB-C 310
VAC : Videoaccessoires zoals Media Center / AV-accessoires / AV-selector . . . . .310
CD : CD-speler / CD-R / MD 310
PHO : Platenspeler ....311
EEN APPARAAT VERPLAATSEN 190
SET LANGUAGE ENGLISH
ENTER

ENTER

PIJLTOETS NAAR RECHTS...
UL: Unlock, SRC: Source
5
ENTER
PIJLTOETS NAAR RECHTS...
REMOVE VOL LOCK RCV TV VCR

7
ENTER
ADD DEVICE TO VOLUME LOCK
6
ENTER

ADD TO VOL LOCK RCV TV VCR

RESET ALL VOLUME CONTROLS
6
ENTER
PROG SEQ & ENTER TV VCR RCV


PROG SEQ & ENTER VCR TV SAT
9

natural_image
Black-and-white photo of a hand holding a remote control next to a computer monitor displaying a webpage (no visible text or symbols on the main subject)natural_image
Black-and-white photo of a classic office phone with a handset and keypad (no visible text or symbols)6

natural_image
Grid of empty squares arranged in 4x4 pattern (no text or symbols)- 12.


REMOVE DEVICE FROM VOLUME LOCK
6
ENTER


REMOVE VOL LOCK RCV TV VCR
7
ENTER
ADD DEVICE TO VOLUME LOCK
6

ADD TO VOL LOCK RCV TV VCR


RESET ALL VOLUME CONTROLS
6

PROG SEQ & ENTER TV VCR RCV

HT CHANNEL DVD HTNA RCV

natural_image
Black-and-white photo of a hand holding a remote control next to a computer monitor displaying a webpage (no visible text or symbols on the main subject)Telefonos frissítés
natural_image
Black and white photo of a classic telephone handset and a digital keypad on a plain surface (no visible text or symbols)KM SOURCE DVD TV RCV
6

DEV TO REPLACE PHO TV VCR


REPLACE WITH PHO TV VCR


REMOVE DEVICE FROM VOLUME LOCK
6

REMOVE VOL LOCK RCV TV VCR


7

ADD DEVICE TO VOLUME LOCK
6

ADD TO VOL LOCK RCV TV VCR


RESET ALL VOLUME CONTROLS
6

PROG SEQ & ENTER TV VCR RCV


HT DIGITS D HTNA RCV

HT CHANNEL DVD HTNA RCV

natural_image
Black-and-white photo of a hand holding a remote on a computer monitor, with a computer screen displaying a webpage (no readable text or symbols)natural_image
Black office phone with handset and keypad on white background (no visible text or symbols)3 Zobaczysz...

DEV TO REPLACE PHO TV VCR


REPLACE WITH PHO TV VCR


L: Lock, UL: Unlock, SRC: Source
5

REMOVE DEVICE FROM VOLUME LOCK
6

REMOVE VOL LOCK RCV TV VCR

7

PROG SEQ & ENTER TV VCR RCV
HT DIGITS DVD HTNA RCV
HT CHANNEL DVD HTNA RCV
atd...
natural_image
Hand holding remote control next to a computer monitor displaying a webpage (no visible text or symbols on the main subject)Upgrade pomocí telefonu
natural_image
Black office phone with a hand strap and keypad on a plain background (no visible text or symbols)KM SOURCE DVD TV RCV
6

UNIVERSAL ELECTRONICS INC./ONE FOR ALL warrants to the original purchaser that this product will be free from defects in materials and workmanship under normal and correct use for a period of one (1) year from the date of original purchase. This product will be replaced free of charge if it has been proven to be defective within the one (1) year warranty period. This warranty does not cover cartons, carrying cases, batteries, broken or marred cabinets or any other item used in connection with the product. Any further obligation than listed above is excluded. To obtain warranty service during the warranty period, please call us at the number mentioned on the Customer Service page. Please notice that we need your purchase receipt so that we may establish your eligibility for service.
If you have bought this product for purposes which are not related to your trade, business or profession, please remind that you may have legal rights under your national legislation governing the sale of consumer goods. This guarantee does not affect those rights.
Deutsch
Universal Electronics BV
Europe & International
P.O. Box 3332
7500 DH, Enschede
The Netherlands
CE
URC-7781
706159
RDN-1160707
- Deutsch
- CODES
- EXTRA FEATURES
- About Your URC-7781
- See picture of URC-7781 remote on page 2.
- 1
- MAGIC Key
- 2
- POWER (LED)
- 3
- LIGHT (ESC) Key
- 4
- LCD screen
- TV
- VCR
- SAT
- 5
- Left / ENTER / Right
- 6
- Number Keys (0-9, -/- -, AV)
- 7
- AV key
- 8
- Channel +/- Keys
- 9
- MUTE Key
- The Keypad
- 10
- MENU Key
- 11
- Volume +/- Keys
- 12
- Directional Keys
- 13
- OK
- 14
- Guide
- 15
- Exit
- 16
- 16:9
- 17
- Transport keys
- 18
- Teletext Keys
- 19
- Custom keys (A, B, C, D)
- Installing the Batteries
- Important notes:
- Setting the Language, Day and Time
- Please continue on page 6 to set up the URC-7781 to control your devices.
- How to set up the URC-7781 to control your devices
- Example: To set up the URC-7781 for your Television:
- Setting up the URC-7781
- View the current code
- Quick Code Reference
- Replace a device
- Changing the Device Code
- Move a device
- Delete a device
- The Learning Feature
- Before you start:
- Learning
- Shifted Learning
- Delete Learning
- Operational Reset
- Colour, Brightness and Sleep
- Changing the Device label
- Volume Lock
- Set Volume Lock
- Remove Device from Volume Lock
- Add Device To Volume Lock
- Reset All Volume Controls
- Macros (Sequence of commands)
- Add Timed Macro
- Notes:
- Delete Timed Macro
- Macro (Sequence of commands)
- Add Key Macro
- Example: To set up the Macro to switch off your Television, Video Recorder and Satellite Receiver on the key labelled A on your URC-7781:
- Shifted Macro
- Delete Key Macro
- Home Theatre Setup
- To set up or add the Home Theatre mode:
- Delete Home Theatre
- To delete the Home Theatre Mode feature:
- Code Upgrade Technology
- Internet download
- Phone upgrade
- Key Magic®
- You can also visit our website (www.oneforall.com) to find an answer to your questions.
- Delete Key Magic
- Delete Learning and Key Magic
- Simply follow steps 1 - 5 as shown on page 26...
- Use the ARROW left key to scroll to...
- Press ENTER...
- Select the corresponding device mode using ARROW
- Trouble-Shooting
- Before contacting us, by Fax, E-mail or Phone, make sure you have the required information available by filling in the table below.
- Type/model numbers can often be found in your equipment owner's manual or on the factory plate behind the device.
- In the UK
- ONE FOR ALL Light Control
- Set up the HC Receiver
- Gerät ersetzen
- Heimkino (Home Theatre)
- Effacer le Home Theatre
- Pour effacer la mode Home Theatre:
- HOM
- Come cancellare Home Theatre
- Telefonos frissítés
- Upgrade pomocí telefonu
Brand : ONE FOR ALL
Model : URC 7781
Category : Universal remote