
GRANDE SPECCHIO - Digital photo frame PARROT - Free user manual and instructions
Find the device manual for free GRANDE SPECCHIO PARROT in PDF.
| Product type | Digital photo frame |
| Brand | Parrot |
| Model | Grande Specchio |
| Wi-Fi connectivity | Yes, with WPS support |
| Bluetooth | Yes, unspecified version |
| NFC | Yes, for image transfer |
| USB ports | Yes, for USB drives |
| Card reader | SD, SDHC, MMC, micro SD (with adapter) |
| Supported image formats | JPEG (JPG) |
| Power supply | AC adapter (included), 3 plugs |
| Wall mount | Yes, with wall mount included |
| Removable stand | Yes, for flat surface placement |
| Auto rotation | Yes, images rotate based on frame orientation |
| Navigation | Trackball and context buttons |
| Web interface | Yes, for remote configuration |
| Receiving images via email | Yes, after linking an account |
| RSS feeds | Yes, to display online albums |
| PC sharing | Yes, via shared folders on the network |
| Web browser | Yes, built-in |
| Slideshow | Yes, with settings for duration, transition, playback mode |
| Firmware update | Via Parrot website |
| Maintenance | Cleaning cloth included, clean with a dry cloth |
| Safety | Do not expose to moisture, do not block vents |
| Warranty | 1 year parts and labor |
| Manual languages | French, English, German, Spanish, Italian, etc. |
| Maximum operating temperature | 40°C |
Frequently Asked Questions - GRANDE SPECCHIO PARROT
User questions about GRANDE SPECCHIO PARROT
0 question about this device. Answer the ones you know or ask your own.
Ask a new question about this device
Download the instructions for your Digital photo frame in PDF format for free! Find your manual GRANDE SPECCHIO - PARROT and take your electronic device back in hand. On this page are published all the documents necessary for the use of your device. GRANDE SPECCHIO by PARROT.
USER MANUAL GRANDE SPECCHIO PARROT
Before Getting Started
http://www.parrot.com/uk/support
Complete user guide, tutorials, software updates

About This Guide

In order to limit our paper consumption, and as part of our environmentally friendly and responsible approach, Parrot prefers to put user documents online rather than print them out.
This simplified guide to the Grande Specchio picture frame is therefore limited to providing you with the main instructions that will make it easy for you to use the device. More information can be found on the Support and Downloads section of our website, http://www.parrot.com: the full manual, FAQs, tutorials, and more.
Updating the Frame
Download the latest frame update for free (and check the update procedure) on our website, http://www.parrot.com, in the Support and Downloads section. These updates will enable you to receive new features and improve the frame's compatibility.
Contents
First-Time Use . p.10
Wi-Fi p.11
Bluetooth . p.13
USB/SD .p.14
Managing Pictures . p.15
First-Time Use
Installation

If you change the frame's orientation, the images will automatically rotate to match the new orientation.
- If you want to place the frame on a flat surface, insert the power cable into the provided stand, then insert the stand into the frame (figures B1-B2 p.6).
-
If you want to hang the frame on a wall:
-
Install the wall mount (figures C1-C3 p.7).
- Slide the power cable through the hooks (top, then bottom).
- Insert the frame onto the wall mount. Make sure that you have enough room
- by the power cable to make it possible to change orientation (landscape/
- portrait mode). Lift up the frame a little before rotating (figures D1-D4 p.8).
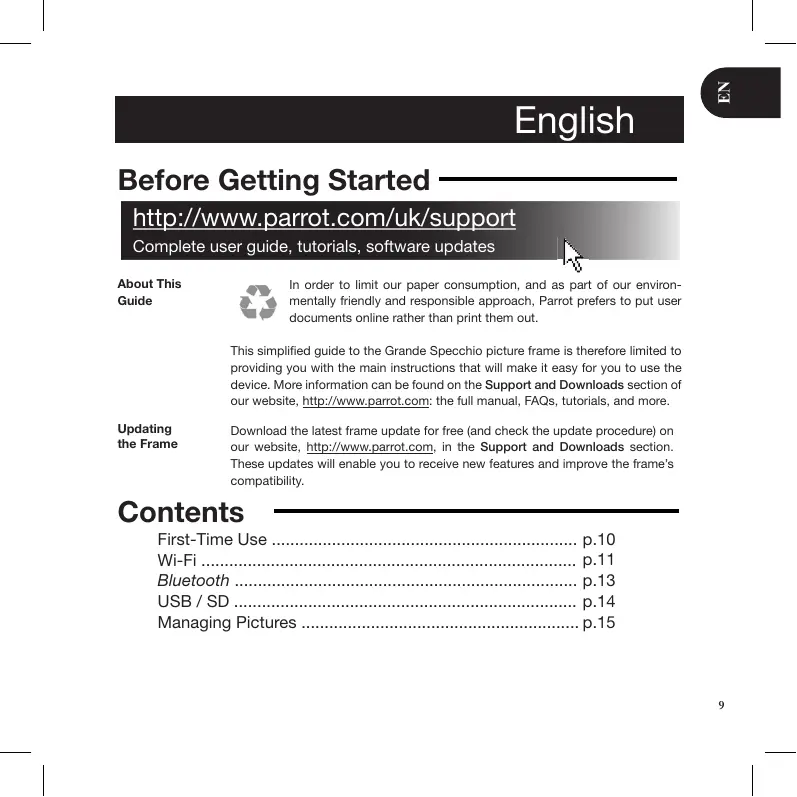
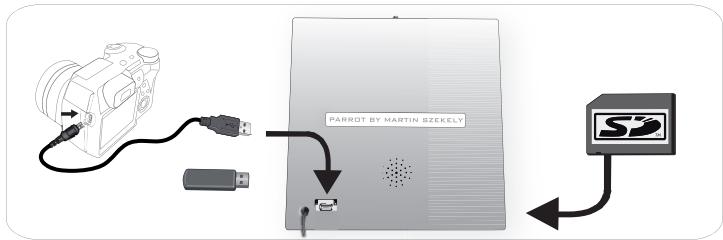
Turning On the Frame
- Connect the power cable to the adapter, then plug it into the power outlet (figures A p.6).
- Press the button to turn the frame on / off.
Browsing the Menu
- Use the trackball to browse the menus. Press the trackball to confirm a selection.
- The button is used to access the context menu.
- The button is used to return to the previous menu.
- The button is used to return to the main menu.
Selecting the Language
The first time you use the frame, you are asked to choose a language. If you want to change this setting afterwards, select Settings > Language.
Setting the Date and Time
- The date and time are automatically set when the frame is connected to a Wi-Fi network.
- If you would rather set them manually, select Settings > Date/Time, then Adjustment > Manual.
Wi-Fi
Connecting Wirelessly
- If your wireless modem/rodter does not support WPS technology:
Depending on your modem/router's model, pressing the synchronization button may be necessary in order to establish the connection. Check your device's documentation for more information.
- Select Settings > Wi-Fi.
- Select Configure.
The frame begins searching for Wi-Fi networks.
- Select your network from the list of results, or select Manual to configure your network manually.
- Enter your network's WEP or WPA key using the virtual keyboard, then select OK.
Once the connection has been established, a window appears containing all the information about your frame's Wi-Fi connection.
-
If your wireless modem/rodger supports WPS technology:
-
Press the WPS button on your wireless modem or router.
- Select Settings > Wi-Fi.
- Select Configure > Auto.
Once the connection has been established, you can disable/re-enable it. To do so, select Settings > Wi-Fi > Connection > Disable / Enable.
Disabling the Connection

The Web interface enables you to easily assign an e-mail address, RSS feed, or computer to your frame, but you can also assign them directly from the frame.
Accessing the Web Interface

In order to access the frame's web interface, your PC and the frame must be connected to the same Wi-Fi network.
- Take down the IP address assigned to your frame. To find it, select Settings > Information.
- Open your web browser and enter the IP address in the address bar.
Getting Images Received by E-Mail

We recommend that you create an e-mail address just for the frame.
- On the web interface, click on
- In the Email account field, click on New to assign an e-mail address to the frame.
- Enter your login and password in the corresponding fields. Check your
- e-mail service's documentation for information on the server and protocol. >All images that you receive in this e-mail account will then be accessible
- on the frame. To access them, select Browse > Directory > E-mail.
Viewing Photo Albums Online
- In the web interface, click on
- In the Registered feeds field, click on New to assign an RSS feed to the frame.
- Select your photo server, enter the login associated with the selected album, then the password if any, or enter the URL of the RSS feed.
- Click on Save.
The images contained in the associated album are now accessible on the frame. To access them, select Browse > Directory > RSS feeds.
Viewing PhotosStored on a PC
- On your computer, activate folder sharing for the photos that you wish to view on the frame.
- On the web interface, click on
- Click on Add a share and select your computer, then the shared folder.
The images contained in the shared folder are now accessible on the frame.
- To access them, select Browse > Directory > PC shares.
Browsing the Internet
You can browse the Internet using the frame. To do so, select Browser, then use the trackball to browse.
Bluetooth
Sending Images from a PC Via Bluetooth
- Check that the Bluetooth® feature is enabled. To do so, select Settings > Bluetooth > Status > Enabled.
- Activate your computer's Bluetooth feature.
- Right click on the image that you want to send, and select "Send by Bluetooth".
- Select Grande_Specchio from the list of available Bluetooth devices.
- Enter the code 0000 if asked for one.
Sending Images from a Phone Via Bluetooth
- Check that the Bluetooth feature is enabled on the frame. To do so, select Settings > Bluetooth > Status > Enabled.
- From your phone, select an image and choose "Send by Bluetooth". > Your phone will begin searching for Bluetooth devices.
- Select Grande_Specchio from the list of available Bluetooth devices.
- Enter the code 0000 if asked for one.
Sending Images using an NFC Phone
If your phone supports NFC technology:
- On your phone, select the image that you want to transfer.
- Touch the frame with your telephone on the upper-right corner if it is in landscape mode, or on the lower-right corner if it is in portrait mode. > A confirmation message appears on your phone.
- Select Yes.
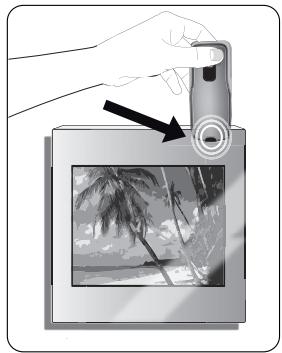
USB / SD
Compatibility
You can display images stored on the following devices:
- SD, micro SD (with adapter), mini SD (with adapter), SDHC (class 2, 4, and 6), mini SDHC (with adapter), MMC, MMC plus, MMC mobile (with adapter), MMC micro (with adapter), and RS-MMC (with adapter) cards
- USB keys
- Cameras (if your camera is recognized as a mass storage unit).
Using the Frame with a Storage Device
- Insert your device into the appropriate slot.
The images stored on your device will appear.
- Press the trackball.
You can now browse the contents of your device and select an image by pressing the trackball.

Managing Pictures
Copying/ Moving an Image
- Select Browse > Directory then select the folder that contains the images to be copied or moved.
- Select the image and press the button.
- Select Copy or Move, then select the destination folder.

You can also copy/move multiple images by using the Select option.
Deleting an Image
- Select Browse > Directory, then select the folder containing the images to be deleted.
- Select the image then press the button.
- Select Delete.

You can also delete multiple images by using the Select option.
Rotating Images
Press the: button and select Rotate.
Programming a Slideshow
Press the button and select Slideshow to modify the settings below:
- Browsing mode: view your images by folder, by date, at random, or based on the Customize folder.
- Timer: select how long the slideshow's images are displayed for.
- Transition: select the transition that you have between each image.
- Fit to screen: define whether or not the images whose format does not fit the screen must be adjusted.

An image can only be adjusted if its dimensions are greater than or equal to 800x600.
François
Avant de commencer
http://www.parrot.com/rl/support
Complete documentation, educatieve software, updates

Overdeze gids

http://www.parrot.com/uk/support
http://www.parrot.com/uk/support
Fullständig bruksanvisning, programvara for Produkten, upddateringan

http://www.parrot.com/uk/support
改訂版ルフロー一ガイド、チローリアル

本二一伊一吉个

http://www.parrot.com/uk/support
完全使用手册、教程、更新内容

关于本指南

http://www.parrot.com/uk/support
完全使用手册、教程、更新内容

關於本指南

. Select jilh jiaowu jao zai liu

Rotate jzj 1
Diaporama
Browsing mode
.Customize
Julallll jlll lrrr:Timer -
:Transition -
A. A. A. A. A. A. A. A. A. A. A. A. A. A. A. A. A. A. A. A. A. A. A. A. A. A. A. A. A. A. A. A. A. A. A. A. A. A. A. A. A. A. A. A. A. A. A. A. A. A. A. B. B. B. B. B. B. B. B. B. B. B. B. B. B. B. B. B. B. B. B. B. B. B. B. B. B. B. B. B. B. B. B. B. B. B. B. B. B. B. B. B. B. B. B. B. B. B. B. B. B.
800x600 gai 95 glauw Lgaiu wL 121, Lo aao

SD / USB
aaii iiaaii aiee iieae iieae iieae
g
"Bluetooth 32400000000000000000000000000000000000000000000000000
GraTeSpechio 4
0000 5
jlll lal. jblbl klae Bluetooth aag jn s 1
- Settings > Bluetooth > Status > Enabled
"Bluetooth 2
Bluetooth 1
Bluetooth 3JGrande_Specchio 3
0000 4
:NFC aagglgai dale giala j5 1 Jauuul yall
1
12
NFC
a1 = 23,a2 = - 43,b1 = 58,b2 = - 34
.3
y

中
1
Jb J 1
Jusssssssssssssssssssssssssssssssssssssssssssssssssssssssssssssssssssssssssssssssss
a
jia! dlll. lal. y a 1a 11 11 11 11 11 11 11
- Browse > Directory > E-mail
J
上
J 1
Jblyl cldy bNew jjRegistered feeds
gaiiui jie jie jie jie jie jie jie jie jie jie jie jie jie jie jie jie jie jie jie jie jie jie jie jie jie jie jie jie jie jie jie jie jie jie jie jie jie jie jie jie jie jie jie
法全纯
.Save
j:di#i#.jblj.1e j#a#lll#i#y#y#y#y#y#y#y#y#y
.Browse > Directory > RSS feeds
y
a jai all y
中
A Add a share
j1 jlll l 11111111111111111111
.Browse > Directory > PC shares
Caaill sall 1s Jauai j,Browser jia! bllj jiljui juiiui i
Wi-Fi
WPS 4gglgglgglgglgglgglgglgglgglgglg
Juaiaolaiyiaolalgyjucalll jucalalc yaua duiyogaaagall gaiu
logall no ayjdl jlg 100
Jai
SLY
Settings Wi-Fi 1
Configure 2.2
.Wi-Fi gaiy
- 3
OK jai aiai jai jai WPA wEP 4
yglgllg 1jlll lalilllllllllllllllllllllllllllllllllllllllllll
.Wi-Fi
WPS 4yjg kdi ydi ydi ydi
slll 4gall j gall WPS j j bniol .1
Settings Wi-Fi 2
. Configure > Auto
jiallalil alaii 1alai iai kaiy
.Settings >Wi-Fi >Connection >Disable / Enable
J
jIjIyIgWggl 100000000000000000000000000000000000000
.0j0j0j0j0j0j0j0j0j0j0j0j0j0j0j0j0j0j0j0j0j0j0j0j0j0j0j0j0j0j0j0j0j0

1
1
Wi-Fi g1s all s, mnnn nn nnnn 10g 10g 10g 10g 10g 10g 10g

jlll l jlll jlll jll
.()aalll aaiill gallgag
Aasjzll aalllg jll jll
J 1
1 1
. Settings > Language j! 1111111111111111111111
. Wi-Fi gi gll kkiy kui jn kui y lki dai ealw g h jilh bia
- Settings > Manuel Settings > Date/time j! j! j! j! j!
http://www.parrot.com/uk/support
UsuSulUulJouL Jolso LusssosoLuscsu

Jus Jus Jus Jus Jus Jus Jus Jus Jus Jus Jus Jus Jus Jus Jus Jus Jus Jus Jus Jus Jus Jus Jus Jus Jus Jus Jus Jus Jus Jus Jus Jus Jus Jus Jus Jus Jus Jus Jus Jus Jus Jus Jus Jus Jus Jus Jus Jus Jus Jus

Jdall Jd
ell jlll lalil 1j 1j 1j 1j 1j 1j 1j 1j 1j 1j 1j 1j 1j 1j 1j 1j 1j 1j 1j 1j 1j 1j 1j 1j 1j 1j 1j 1j 1j 1j 1j 1j 1j 1j
cui jy i 1i 1i (i) 1i (i) 1i (i) 1i (i) 1i (i) 1i (i) 1i (i) 1i (i) 1i (i) 1i (i) 1i (i) 1i (i) 1i (i) 1i (i) 1i (i) 1i (i) 1i (i) 1i
jbl
91 9
90 Wi-Fi
88 88
88 88 88 SD - USB
88 2
General Information
Warranty
Without prejudice of legal warranty, Parrot products are warranted during 1 year from the date of purchase for defects in materials and workmanship, provided that no deterioration to the product has been made, and upon presentation of proof of purchase (date of purchase, location of sale and product serial number) to the retailer or Parrot directly.
Warranty does not cover: data recovery, deterioration of the external aspect due to normal use of the product, any damage caused by accident, misuse, misapplication, or non-Parrot products. Parrot is not responsible for storage, loss or damaged to data during transit or repair.
Any product wrongfully declared to be defective will be returned to sender and inspection, process and carriage costs will be invoiced to him.
Correct disposal of This Product
(Waste Electrical & Electronic Equipment)
(Applicable in the European Union and other European countries with separate collection systems).
This marking shown on the product or its literature, indicates that it should not be disposed with other household wastes at the end of its working life. To prevent possible harm to the environment or human health from uncontrolled waste disposal, please separate this from other types of wastes
and recycle it responsibly to promote the sustainable reuse of material resources.
Household users should contact either the retailer where they purchased this product, or their local government office, for details of where and how they can take this item for environmentally safe recycling. Business users should contract their supplier and the terms and conditions of the purchase contract. This product should not be mixed with other commercial wastes for disposal.
Modifications
The explanations and specifications in this guide are given for information purposes only and may be modified without prior notice. They are deemed to be correct at time of going to press. The utmost care has been taken when writing this guide, as part of the aim to provide you with accurate information.
However, Parrot shall not be held responsible for any consequences arising from any errors or omissions in the guide, nor for any damage or accidental loss of data resulting directly or indirectly from the use of the information herein. Parrot reserves the right to amend or improve the product design or user guide without any restrictions and without any obligation to notify users. As part of our ongoing concern to upgrade and improve our products, the product that you have purchased may differ slightly from
the model described in this guide.
If so, a later version of this guide might be available in electronic format at Parrot's website at www.parroct.com.
FCC Compliance Statement
This device complies with part 15 of a FCC rules. Operation is subject to the following two conditions:
(1) This device may not cause interference, and (2) This device must accept any interference, including interference that may cause undesired operation of this device.
This equipment has been tested and found to comply with the limits for a Class B digital device, pursuant to part 15 of the FCC Rules. These limits are designed to provide reasonable protection against harmful interference in a residential installation.
This equipment generates, uses and can radiate radio frequency energy and, if not installed and used in accordance with the instructions, may cause harmful interference to radio communications. However, there is no guarantee that interference will not occur in a particular installation. If this equipment does cause harmful interference to radio or television reception, which can be determined by turning the equipment off and on, the user is encouraged to try to correct the interference by one or more of the following measures:
-Reorient or relocate the receiving antenna.
-Increase the separation between the equip
ment and receiver.
-Connect the equipment into an outlet on a circuit different from that to which the receiver is connected.
-Consult the dealer or an experienced radio/TV technician for help.
"Changes or modifications not expressly approved by the party responsible for compliance could void the user's authority to operate the equipment"
"This Class B digital apparatus complies with Canadian ICES-003"
Caution: Exposure to Radio Frequency Radiation
To comply with RF exposure compliance requirements, a separation distance of at least 20~cm must be maintained between the antenna of this device and all persons.
This device must not be co-located or operating in conjunction with any other antenna or transmitter.
To prevent radio interference to the licensed service, this device is intended to be operated indoors and away from windows to provide maximum shielding. Equipment (or its transmit antenna) that is installed outdoors is subject to licensing.
Declaration of Conformity
We, Parrot S.A. of 174 quai de Jemmapes, 75010 Paris, France, declare under our sole
responsibility that our product, the Parrot Grande Specchio by Martin Szekely to which this declaration relates, is in conformity with appropriate standards EN 300328, EN 301489-17, EN60065 following the provision of 1999/5/EC Radio Equipment and Telecommunication Equipment directive. Identification N. 394 149 496 R.C.S. PARIS Parrot S.A.
Protection and personal safety
Carefully read the user guide and follow the indicated procedure when setting up the device. Do not dismantle or open the device and do not touch the electronic components or the drivers. Do not attempt to dismantle or modify either of the speakers.
Never introduce any metal object to avoid the risks of electric shocks, fire, short circuits or dangerous emissions. If your device shows signs of faulty operation, call the approved Parrot technical support centre or an approved retailer. Never leave the frame exposed to rain or chemical products; do not place them in a damp area or where they are likely to be splashed with water. Never place your device on a recipient containing any type of liquid, which might seep inside the device. Doing so will reduce the risks of electric shocks, short circuits, fire and injury.
Caution: Exposure to Radio Frequency Radiation
The installer of this radio equipment must ensure that the antenna is located or pointed such that
it does not emit RF field in excess of Health Canada limits for the general population; consult Safety Code 6, obtainable from Health Canada's website at www.hc-sc.gc.ca/rpb.
Copyrights
Copyright © 2009 Parrot. All rights reserved. The total or even partial reproduction, transmission or storage of this guide in any form or by any process whatsoever (electronic, mechanical, photocopy, recording or otherwise) is strictly prohibited without prior consent from Parrot.
Important safety instructions

The exclamation point within an equilateral triangle is intended to alert the user to the presence of important ope
rating and maintenance (servicing) instructions in the literature accompanying the product.

An equilateral triangle, is intended to alert the user to the presence of uninsulated "dangerous voltage"
within the product's enclosure that may be of sufficient magnitude to constitute a risk of electric shock to persons.
- This apparatus shall not be exposed to dripping or splashing and no object filled with liquid, such as vases, shall be placed on the apparatus.
- The AC/DC adaptor which provides disconnection from mains supply shall remain readily operable. Unplug this apparatus when
unused for long periods of time.
- Read these instructions.
- Keep these instructions.
- Heed all warnings.
- Follow all instructions.
- Do not use this apparatus near water.
- Clean only with dry cloth.
- Do not block any ventilation openings. Install in accordance with the manufacturer's instructions.
- Do not install near any heat as radiators. Heat registers, stoves or other apparatus (including amplifiers) that produce heat.
- Do not defeat the safety purpose of the polarized or grounding type plug. A polarized plug has two blades with one wider than the other. A grounding type plug has two blades and a third grounding prong. The wide blade or the third prong are provided for your safety. If the provided plug does not fit into your outlet, consult an electrician for replacement of the obsolete outlet.
- Only use attachments/accessories specified by the manufacturer.
- Unplug this apparatus during lightning storms or when unused for long periods of time.
- WARNING: To reduce the risk of fire or electric shock, do not expose this apparatus to rain or moisture and objects filled with liquids, such as vases, should not be placed on this apparatus..
This apparatus is designed for indoor use only. Do not expose the frame to outside temperatures below 5^ or above 40^ . The system
could be damaged or the cabinet warped. Avoid placing the system near a source of heat or exposing it to sunlight (even through a window). Similarly, excessively low temperatures and humidity could damage the device.
Licences
Parrot logo and trademarks are the property of PARROT SA.
The Bluetooth ® word mark and logos are owned by the Bluetooth SIG, Inc. and any use of such marks by Parrot S.A. is under license. Bluetooth QD: B015990, B013839, B013838
Wi-Fi is a registered mark of the Wi-Fi Alliance. Wi-Fi CERTIFIED is a mark of the Wi-Fi Alliance. The Wi-Fi CERTIFIED logo is a certification mark of the Wi-Fi Alliance.
Additional typefaces for this product can be obtained at www.linotype.com.
All trademarks and trade names are those of their respective owners.
Informations generales
Garantie
Copyright © 2009 Parrot.
Marques déposées
Copyright © 2009 Parrot.
Our hotline is at your disposal from Monday to Friday between 9 am and 6 pm (GMT + 1)
Hot-line@parrot.com
Italy: [+39] 259901597
Spain: [+34] 902 404 202
UK: [+44] (0)844 472 2360
Germany: [+49] 900 1727768
USA: [+1] (877) 9 Parrot (toll free)
China: [+86] 755 8203 3307
Hong Kong: [+852] 2736 1169
France: [+33] 148036069
Europe: [+33] 148036069 (Spoken languages: French, English and Spanish)

CERTIFIED


Federal
Communications
Commission


FCC ID: RKXPARELIA
CONTAINS FCC ID: EW4DWMW014
IC ID:5119APARELIA
CONTAINS IC ID: 4250ADWMW014 US ONLY