 — Mode d'emploi PDF")
NSA-220 PLUS - Network Attached Storage (NAS) ZYXEL - Free user manual and instructions
Find the device manual for free NSA-220 PLUS ZYXEL in PDF.
| Product Type | Network Storage Server (NAS) |
| Brand | ZYXEL |
| Model | NSA-220 PLUS |
| Main Functions | File sharing, automatic backup, media streaming via media client, RAID 0/1/JBOD |
| Storage Capacity | Up to 2 SATA I or SATA II hard drives (3.0 Gbit/s), not included |
| Network Interfaces | 1 Ethernet port (RJ-45) |
| USB Interfaces | 1 USB 2.0 port |
| Power Supply | External, included (100-240V) |
| Security | Firewall / IDP recommended, administrator password (default: admin/1234) |
| Supported Operating Systems | Windows (2000/XP), Mac, Linux |
| Maintenance and Cleaning | Clean with a soft dry cloth. Unplug before cleaning. |
| Spare Parts and Repairability | SATA hard drives, external power supply, Ethernet cable, resource CD. Repair by an authorized professional. |
| Package Contents | NSA-220 PLUS, Ethernet cable, power adapter with cord, CD (utility, Memeo Autobackup, guide), quick start guide |
Frequently Asked Questions - NSA-220 PLUS ZYXEL
User questions about NSA-220 PLUS ZYXEL
0 question about this device. Answer the ones you know or ask your own.
Ask a new question about this device
Download the instructions for your Network Attached Storage (NAS) in PDF format for free! Find your manual NSA-220 PLUS - ZYXEL and take your electronic device back in hand. On this page are published all the documents necessary for the use of your device. NSA-220 PLUS by ZYXEL.
USER MANUAL NSA-220 PLUS ZYXEL
| Web Address: | nsa220plus |
| Username: | admin |
| Password: | 1234 |
CONTENTS
| ENGLISH | 3 |
| DEUTSCH | 27 |
| ESPÁÑOL | 51 |
| FRANÇAIS | 75 |
| ITALIANO | 99 |
| 日本語 | 123 |
| NEDERLANDS | 147 |
| SVENSKA | 169 |
| 繁體中文 | 193 |
ZyXEL
Introduction
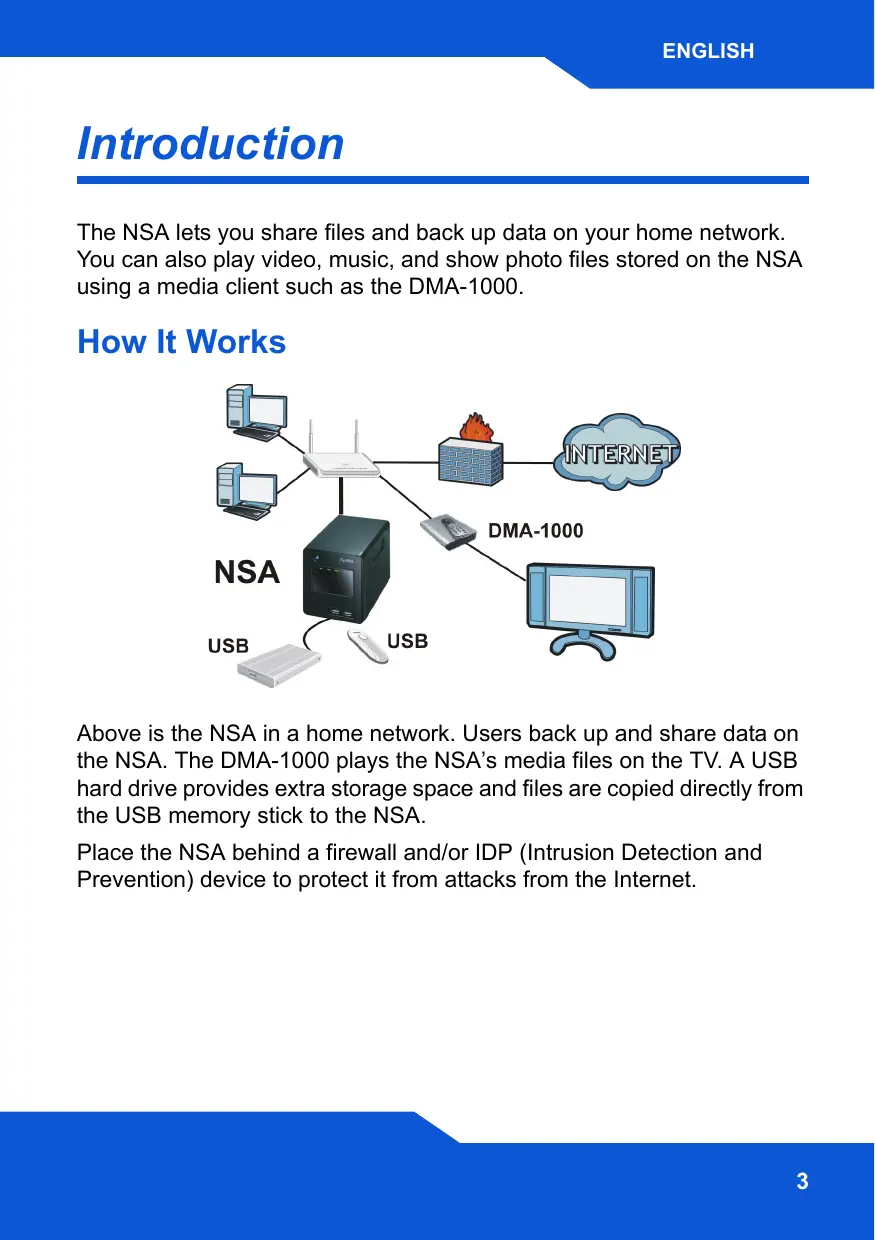
The NSA lets you share files and back up data on your home network. You can also play video, music, and show photo files stored on the NSA using a media client such as the DMA-1000.
How It Works
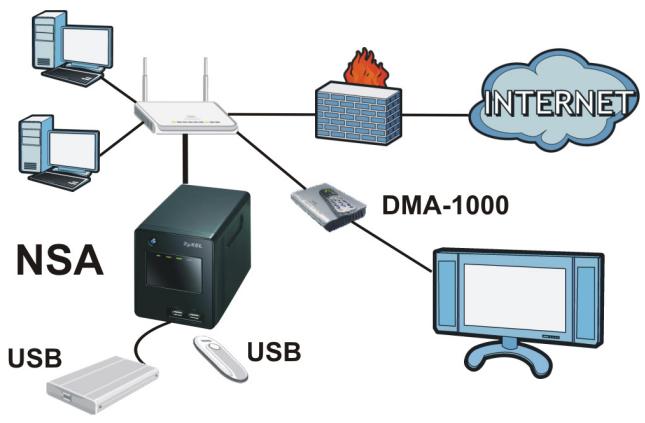
Above is the NSA in a home network. Users back up and share data on the NSA. The DMA-1000 plays the NSA's media files on the TV. A USB hard drive provides extra storage space and files are copied directly from the USB memory stick to the NSA.
Place the NSA behind a firewall and/or IDP (Intrusion Detection and Prevention) device to protect it from attacks from the Internet.
Getting Started
Install Hard Drives, 6
- Connect the NSA, 9
- Access the NSA, 11
- NSA Login, 14
Create a Volume, 15
Map the NSA to Your Computer Network Drive, 18
- Backing up Files Using Memeo Autobackup, 20
See the User's Guide on the included CD for details on configuring all of the NSA's features.
Before You Begin
You need the following before you start:
- NSA
- Included CD containing the NSA Discovery Utility, Memeo Autobackup program, Media Client software, and User's Guide
- Power cord and power supply (external)
- Included Ethernet cable
- One or two SATA I or SATA II (3.0 Gbit/s) (Serial Advanced Technology Attachment) compatible hard disk(s) with 15-pin SATA power connectors
- Philips screwdriver to install hard disks in the disk trays
- USB cable (optional: you only need this if you want to expand storage capacity by connecting compatible USB (version 2) drives). It is recommended that the USB device use it's own external power adaptor if it has one.
- Computer with Network Interface Card (NIC) and TCP/IP installed
Network device such as a switch, router, or hub
Install Hard Drives
Once you install a hard drive on the NSA and create a volume, all existing data on the disk will be erased. If you want to install two hard drives and configure them as RAID volumes (see page 15), it is recommended to use the same disk size and model for best performance.

Hard drives are NOT hot swappable. The NSA must be turned off before you remove or install hard drive(s).

Creating a volume formats the hard drives. All data will be lost. Back up any files on the disk to another location before you install the disk in the NSA.
- Make sure the power and Ethernet cords are disconnected from the NSA.
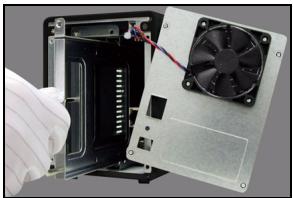
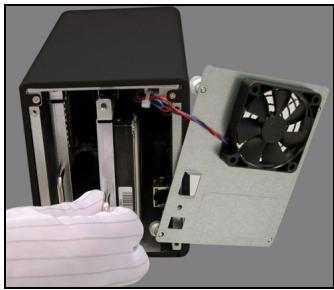
- Loosen the thumbscrews on the rear panel and open it.
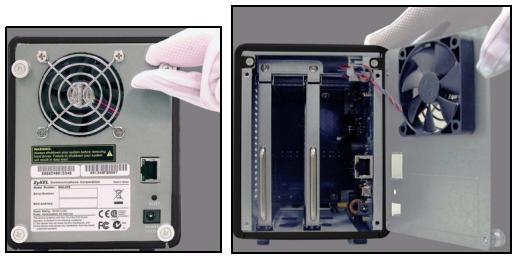
- Use a screwdriver to remove the retaining screw from a disk tray.

- Slide the disk tray out.
- Place the disk on a flat surface with the screw holes facing up. Place the disk tray on top of it and secure it with the screws as shown.

- Slide the tray back into the disk bay. Make sure the screw hole is at the top. Push the tray in all the way so the screw hole at the top is flush with the internal frame.

- Put the disk tray retaining screw back in.
- Repeat steps 3 to 7 for a second hard drive if you have one.
- Put the rear panel back on and tighten the thumbscrews.
Connect the NSA
- Use the included Ethernet cable to connect the LAN port on the rear of the NSA to a computer, switch, or router on your network.
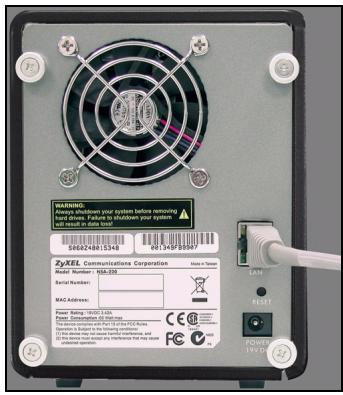
- Connect one end of the power cord to the POWER socket on the rear of the NSA and the other end to the external power supply. Connect the external power supply to a power outlet.
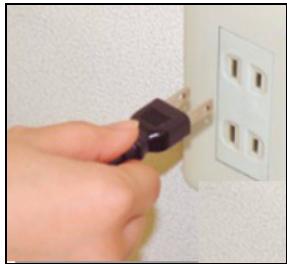
Use ONLY the included power supply.
- Press the power button on the front of the NSA to turn it on. Look at the front panel lights.
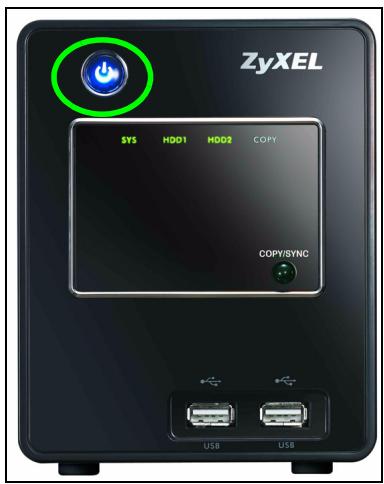

If no lights turn on, make sure the power cord is not loose and that the power source is turned on.
- The power button light turns steady blue.
- The SYS light turns steady green after a successful startup (it takes about 50 seconds).
- The HDD lights come on if the NSA detects hard drives in the disk bays.
- The rear panel LAN port has a light that turns on if the Ethernet port is properly connected to your network. It blinks while sending or receiving traffic.
To turn off the NSA, press the power button in and hold it until you hear a beep. Then release the button.
Access the NSA
For a Windows computer, use the Discovery Utility (see page 11).
For another type of computer (like Mac or Linux), use Direct Access (see page 13).
Using the Discovery Utility to Access the NSA
- Insert the included CD into your CD-ROM drive. Click Setup in the screen that displays. Then click the NSA Discovery Utility link.
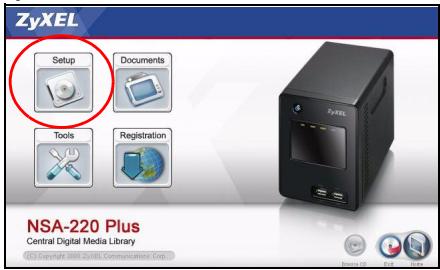

If this screen does not display, use Windows Explorer (My Computer) to go to the CD-ROM (commonly drive D). Double-click setup.exe.
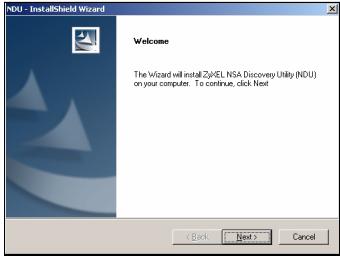
- The installation wizard begins. Follow the installer instructions. Click Finish to complete the installation.
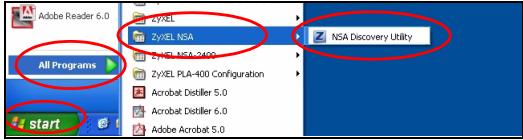
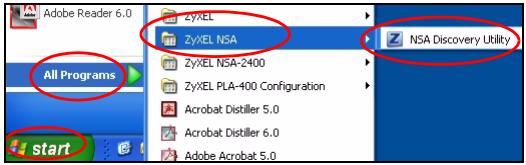
- In Windows, click Start > All Programs > ZyXEL NSA > NSA Discovery Utility to run the discovery utility. If your computer has more than one network card, then you will be prompted to select one.
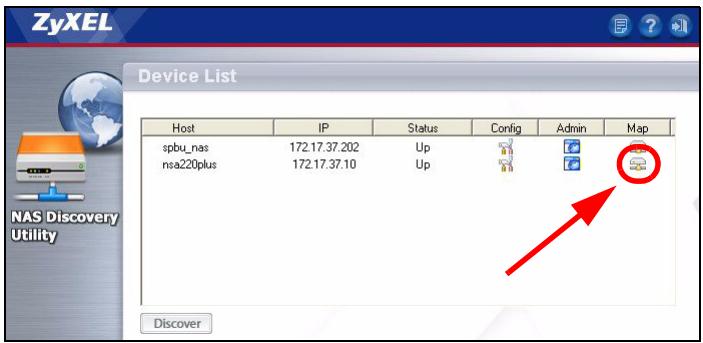
- The utility lists the NSAs in your network.
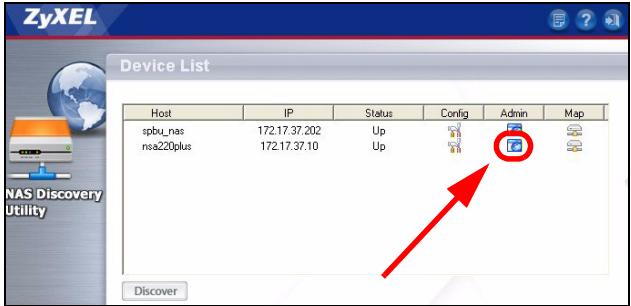
-
Click the Admin icon to see the web configurator login screen (see page 14).
-
If you need to change the NSA IP address, click the icon under Config.
- To map the NSA to a Windows network drive, click the icon under Map (see page 18).
To refresh the screen, click Discover.
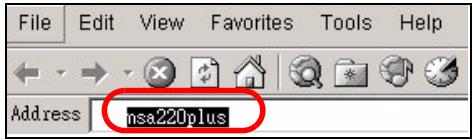
Direct Access
Open Internet Explorer (or another web browser like Firefox). Type 'nsa220plus' as the website address and press [Enter] or click Go.
This section shows you how to log into the NSA and change the administrator's password.

If you cannot get to the login screen, see the troubleshooting section at the end of this guide.
- Enter the default username 'admin' and password '1234' and click Login.
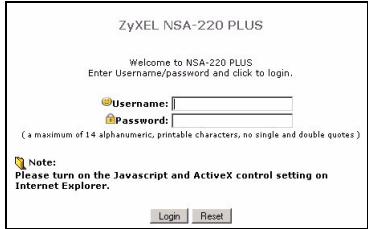

The username and password are case sensitive. You may need to make sure you don't have the caps lock on.
- It is recommended that you change to a new password (and write it down). Click Apply to save your changes and go to the next screen.
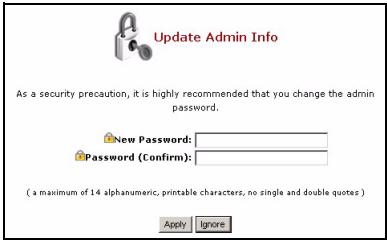
- The My NSA screen displays.
Create a Volume
This section shows you how to create an internal volume in the NSA. A volume is a storage area on one or more hard drives.
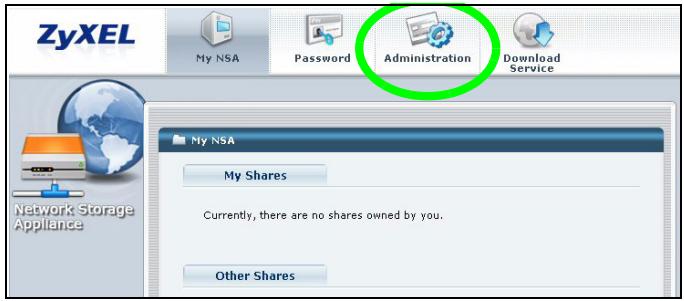
1. Click Administration.
- If there is not already an internal volume (storage area), click Storage from the navigation panel, and then click Create an Internal Volume. If your hard drive already has a volume that you want to use, skip to section 6. If you want to delete an existing volume, see the Storage Screens chapter in the User's Guide.
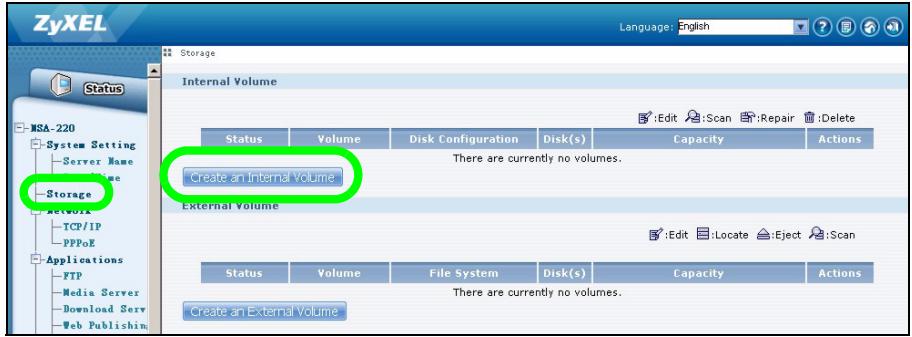

Creating a volume formats the hard drives. All data will be lost.
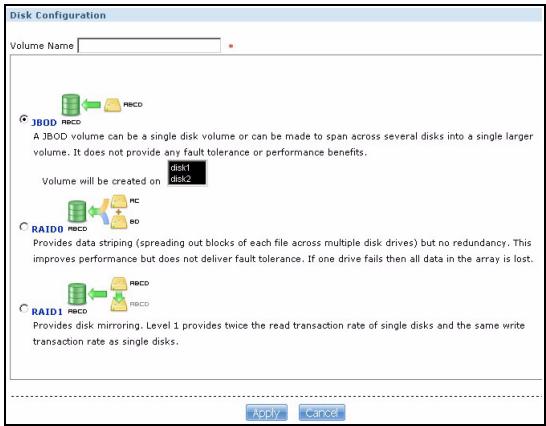
- If you have two hard disks installed, select a disk configuration.
JBOD (maximum data storage space)
Uses the whole storage capacity of each disk, even if there are two hard disks with different storage capacities. With two hard disks, you can create two volumes (one for each disk) so a failure of one hard disk should not affect the other. With two hard disks in a single JBOD volume, you lose all the data on both disks if one disk fails.
- RAID 0 (not recommended)
Has the highest write speeds but if one disk fails, you lose all the data on both disks. Only use RAID 0 for non-critical data requiring high write speeds (like video, graphics, and games). Total data storage space is limited to twice the capacity of the smallest disk.
- RAID 1 (recommended)
Mirrors one disk's data on the second disk for data security. RAID 1 is slower than RAID 0, but you can recover all of your data if a disk fails. Total data storage space is limited to the capacity of the smallest disk.
- Enter a name in the Volume Name field. Click Apply to begin volume creation.
- Wait while the volume is being created.
- You can use the volume after the status is Healthy. For a RAID volume, the status is Resync until the volume is ready.
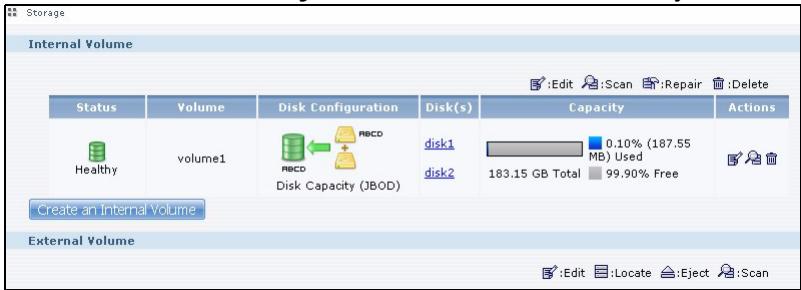
- If two disks are installed and you created a single-disk JBOD volume, repeat the steps to create a second volume on the other disk.
Map the NSA to Your Computer Network Drive
You store files on the NSA in shares (these are like shared Windows folders). Map a NSA share to a Windows network drive to be able to use Windows Explorer to transfer files to and from the NSA. After mapping a share, you can drag and drop files between your computer and the NSA.
- In Windows, click Start > All Programs > ZyXEL NSA > NSA Discovery Utility to run the discovery utility. If your computer has more than one network card, then you will be prompted to select one.
- The utility lists the NSAs in your network. Click the MAP icon in the discovery utility.
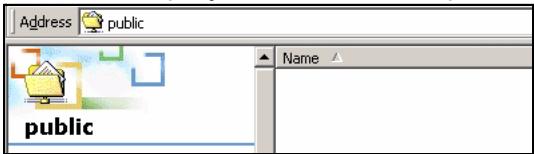
- The NSA public folder displays in Windows Explorer.
- Click Tools > Map Network Drive. In the Drive field, select a drive letter to use for the NSA. In the Folder field, select the NSA (you may need to browse to find it).
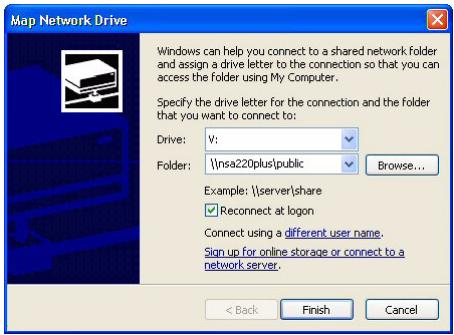
- If your computer does not have the discovery utility installed, you can open Windows Explorer and type two back slashes followed by the NSA server name (nsa220plus by default) or IP address.

Backing up Files Using Memeo Autobackup
Use the Memeo Autobackup software included on the CD to automatically back up selected files from your computer to the NSA whenever you modify the files.
Requirements
Memeo Autobackup works with Windows 2000 Workstation with Service Pack 6, Windows XP Pro, or Windows XP Home Edition.
Memeo Autobackup Installation and Setup

The Memeo Autobackup program uses the same network port as the discovery utility to discover the NSA. To avoid a port conflict, turn off the discovery utility before using Memeo Autobackup.
-
Since a computer restart is required, close your other files and programs before installing the Memeo Autobackup software.
-
Insert the included CD into your CD-ROM drive. Click the Tools icon in the screen that displays. Then click Memeo Instant Backup Software.
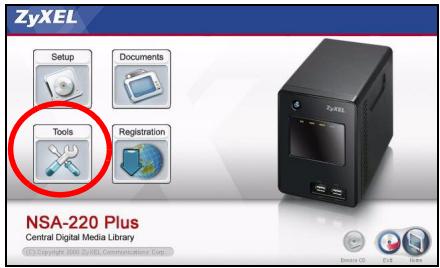

If this screen does not display, use Windows Explorer (My Computer) to go to the CD-ROM (commonly drive D). Double-click setup.exe.
- Follow the instructions to install the software.
Memeo Autobackup requires Microsoft.NET version 1.1. The wizard installs it for you if it is not already on your computer.
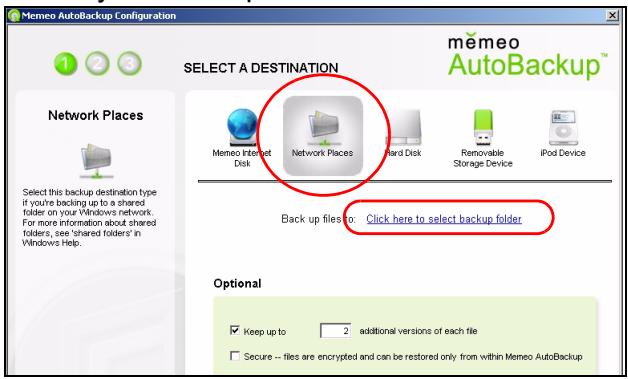
- When you see the following screen, select Network Places and click the link to select your backup folder.
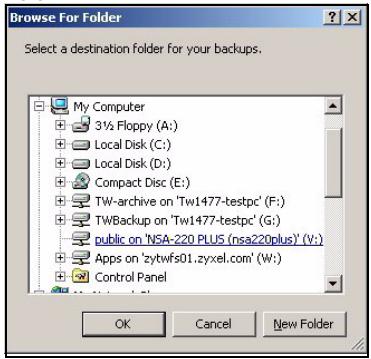
5. Select the NSA's mapped drive and click OK.
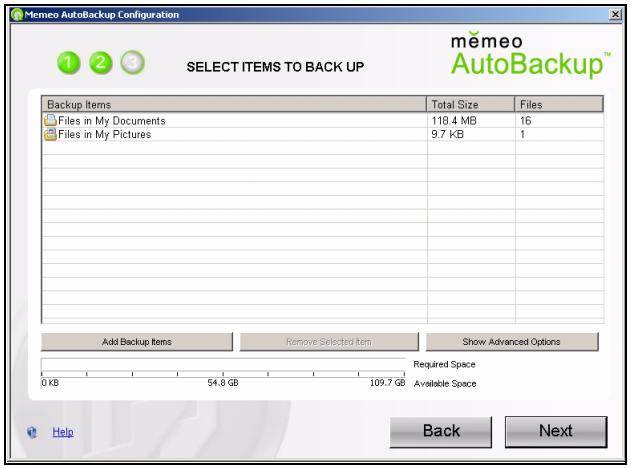
6. In this screen, select the items that you want to back up.
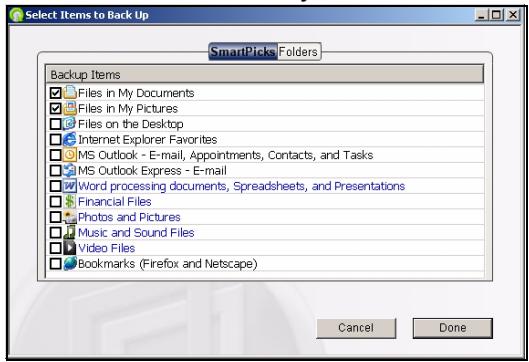
- This screen lists the items you selected for backup. Confirm your selections and click Next.
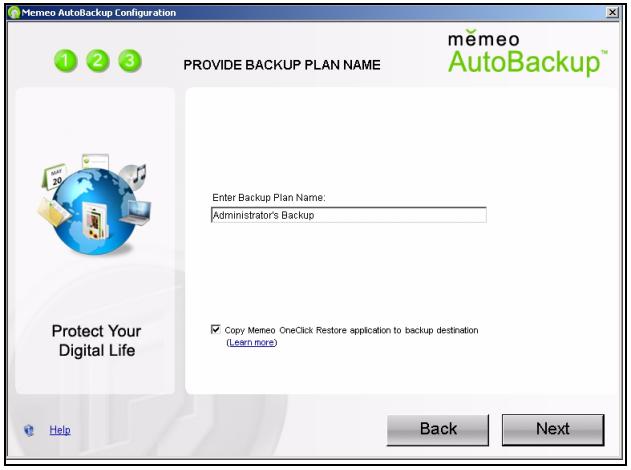
- Specify a name for your backup plan (or just use the default). Click Next and then Done.
Using Memeo Autobackup After the Initial Setup
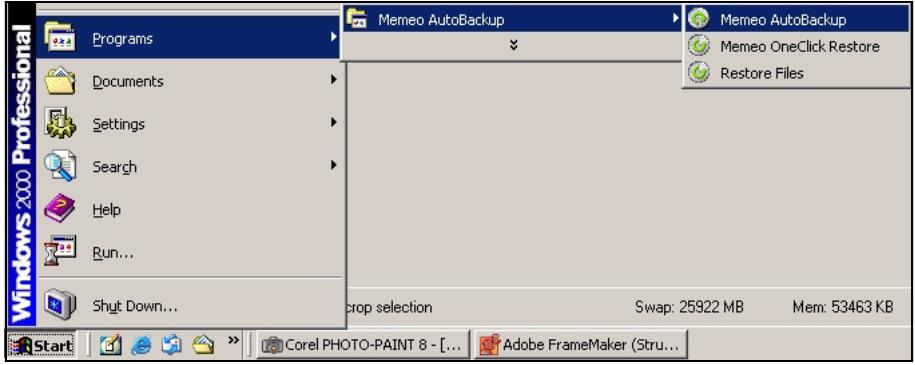
After you have installed and configured Memeo Autobackup, double-click the icon in the system tray to open the program's start screen.
If the icon is not displayed, you can click Start > Programs > Memeo Autobackup > Memeo Autobackup to start it.
Troubleshooting
Try the following if you cannot get to the NSA login screen.
- Make sure the NSA is turned on.
- Check the NSA's cable connections. Make sure the NSA's LAN LED (located on the LAN port) is on or flashing.
- If you were trying to login directly by typing the server name (default rsa220plus) into your web browsers address field, make sure you typed it correctly. If it still doesn't work, try using the discovery utility.
- Make sure your computer's IP address is in the same subnet as the NSA's IP address. You can use the discovery utility to find the NSA's IP address. See the User's Guide appendix on setting up your computer's IP address for how to change your computer's IP address. Skip this if you know that there are routers between your computer and the NSA (like if you are connecting through the Internet).
- Ping the NSA from your computer. Make sure your computer's Ethernet adapter is installed and functioning properly. In a (Windows) computer, click Start, (All) Programs, Accessories and then Command Prompt. In the Command Prompt window, type "ping" followed by the NSA's IP address and press [ENTER]. Use the discovery utility to find the NSA's IP address if you don't know it.
- Use Internet Explorer 6.0, Mozilla Firefox 1.07, Netscape Navigator 7.0, or later versions of these with JavaScript enabled.
Einführung
This is the first example of the set-up. It shows how to use a set-up technique in Japanese. The first example is used to show how to use a set-up technique in Japanese.
- Introduction
- How It Works
- Getting Started
- Before You Begin
- Install Hard Drives
- Connect the NSA
- Access the NSA
- Using the Discovery Utility to Access the NSA
- Direct Access
- Create a Volume
- Click Administration.
- Map the NSA to Your Computer Network Drive
- Backing up Files Using Memeo Autobackup
- Requirements
- Memeo Autobackup Installation and Setup
- Select the NSA's mapped drive and click OK.
- In this screen, select the items that you want to back up.
- Using Memeo Autobackup After the Initial Setup
- Troubleshooting
- Einführung
Brand : ZYXEL
Model : NSA-220 PLUS
Category : Network Attached Storage (NAS)