
930SB - Computer monitor MITSUBISHI - Free user manual and instructions
Find the device manual for free 930SB MITSUBISHI in PDF.
| Product Type | Computer monitor with cathode ray tube (CRT) |
| Brand | MITSUBISHI |
| Model | 930SB (Diamond Pro 930SB) |
| Screen Size | 19 inches (visible) |
| Connectivity | VGA (D-SUB 15 pin) |
| Power | 100-240 V AC, 50/60 Hz |
| Energy Consumption | Energy Star compliant |
| Image Functions | Brightness, Contrast, Super Brightness (SL1, SL2) |
| Geometry Adjustments | Size, Position, Trapezoid, Parallelogram, Rotation, Corner Correction |
| Color Correction | Color temperature (Kelvin presets), individual RGB, sRGB |
| Advanced Tools | Moiré eliminator, Linearity, Convergence, GlobalSync |
| Power Management | IPM (sleep mode on/off) |
| OSD Display | Multilingual, adjustable position, auto-off, lock |
| Ergonomics | Swivel and tilt base |
| Included Accessories | Power cord, D-SUB video cable, CD-ROM (PDF manual, INF), user manual |
| Maintenance | Soft lint-free cloth, alcohol-free solution, avoid abrasive products |
| Safety | Do not open, unplug if anomaly, adequate ventilation |
Frequently Asked Questions - 930SB MITSUBISHI
User questions about 930SB MITSUBISHI
0 question about this device. Answer the ones you know or ask your own.
Ask a new question about this device
Download the instructions for your Computer monitor in PDF format for free! Find your manual 930SB - MITSUBISHI and take your electronic device back in hand. On this page are published all the documents necessary for the use of your device. 930SB by MITSUBISHI.
USER MANUAL 930SB MITSUBISHI
- Use the attached specified cables with the Diamond Pro 930^SB colour monitor so as not to interfere with radio and television reception.
(1) Please use the supplied power cord or equivalent to ensure FCC compliance.
(2) Shielded captive type signal cable.
Use of other cables and adapters may cause interference with radio and television reception.
-
This equipment has been tested and found to comply with the limits for a Class B digital device, pursuant to part 15 of the FCC Rules. These limits are designed to provide reasonable protection against harmful interference in a residential installation. This equipment generates, uses, and can radiate radio frequency energy, and, if not installed and used in accordance with the instructions, may cause harmful interference to radio communications. However, there is no guarantee that interference will not occur in a particular installation. If this equipment does cause harmful interference to radio or television reception, which can be determined by turning the equipment off and on, the user is encouraged to try to correct the interference by one or more of the following measures:
-
Reorient or relocate the receiving antenna.
- Increase the separation between the equipment and receiver.
- Connect the equipment into an outlet on a circuit different from that to which the receiver is connected.
- Consult your dealer or an experienced radio/TV technician for help.
Changes or modifications not expressly approved by the party responsible for compliance could void the user ’s authority to operate the equipment.
If necessary, the user should contact the dealer or an experienced radio/television technician for additional suggestions. The user may find the following booklet, prepared by the Federal Communications Commission, helpful: "How to Identify and Resolve Radio-TV Interference Problems." This booklet is available from the U.S. Government Printing Office, Washington, D.C., 20402, Stock No. 004-000-00345-4.
DECLARATION OF CONFORMITY
This device complies with Part 15 of FCC Rules. Operation is subject to the following two conditions. (1) This device may not cause harmful interference, and (2) this device must accept any interference received, including interference that may cause undesired operation.
| U.S. Responsible Party: Address: Tel.No.: | NEC-Mitsubishi Electronics Display of America, Inc. 1250 N. Arlington Heights Road Itasca, Illinois 60143 (630) 467-3000 |
Type of Product:
Computer Monitor
Equipment Classification:
Class B Peripheral
Models:
N2901

We hereby declare that the equipment specified above conforms to the technical standards as specified in the FCC Rules.
| User's Manual | English |
| Uživotelská príručka | Česky |
| Bedienungsanleitung | Deutsch |
| Ośnytiecz Xrhońtoz | Eλληνικά |
| Manual del uso | Espanol |
| Manuel de l'utilisateur | François |
| Manuale utente | Italiano |
| Gebruikershandleiding | Nederlands |
| Podręcznik uzytkownika | Polski |
| Pyκobovodstvo noльズоватELS | Russkii |
| Kullanı Klavuzu | Türkçe |

WARNING

TO PREVENT FIRE OR SHOCK HAZARDS, DO NOT EXPOSE THIS UNIT TO RAIN OR MOISTURE. ALSO, DO NOT USE THIS UNIT'S POLARIZED PLUG WITH AN EXTENSION CORD RECEPTACLE OR OTHER OUTLETS UNLESS THE PRONGS CAN BE FULLY INSERTED. REFRAIN FROM OPENING THE CABINET AS THERE ARE HIGH VOLTAGE COMPONENTS INSIDE. REFER SERVICING TO QUALIFIED SERVICE PERSONNEL.

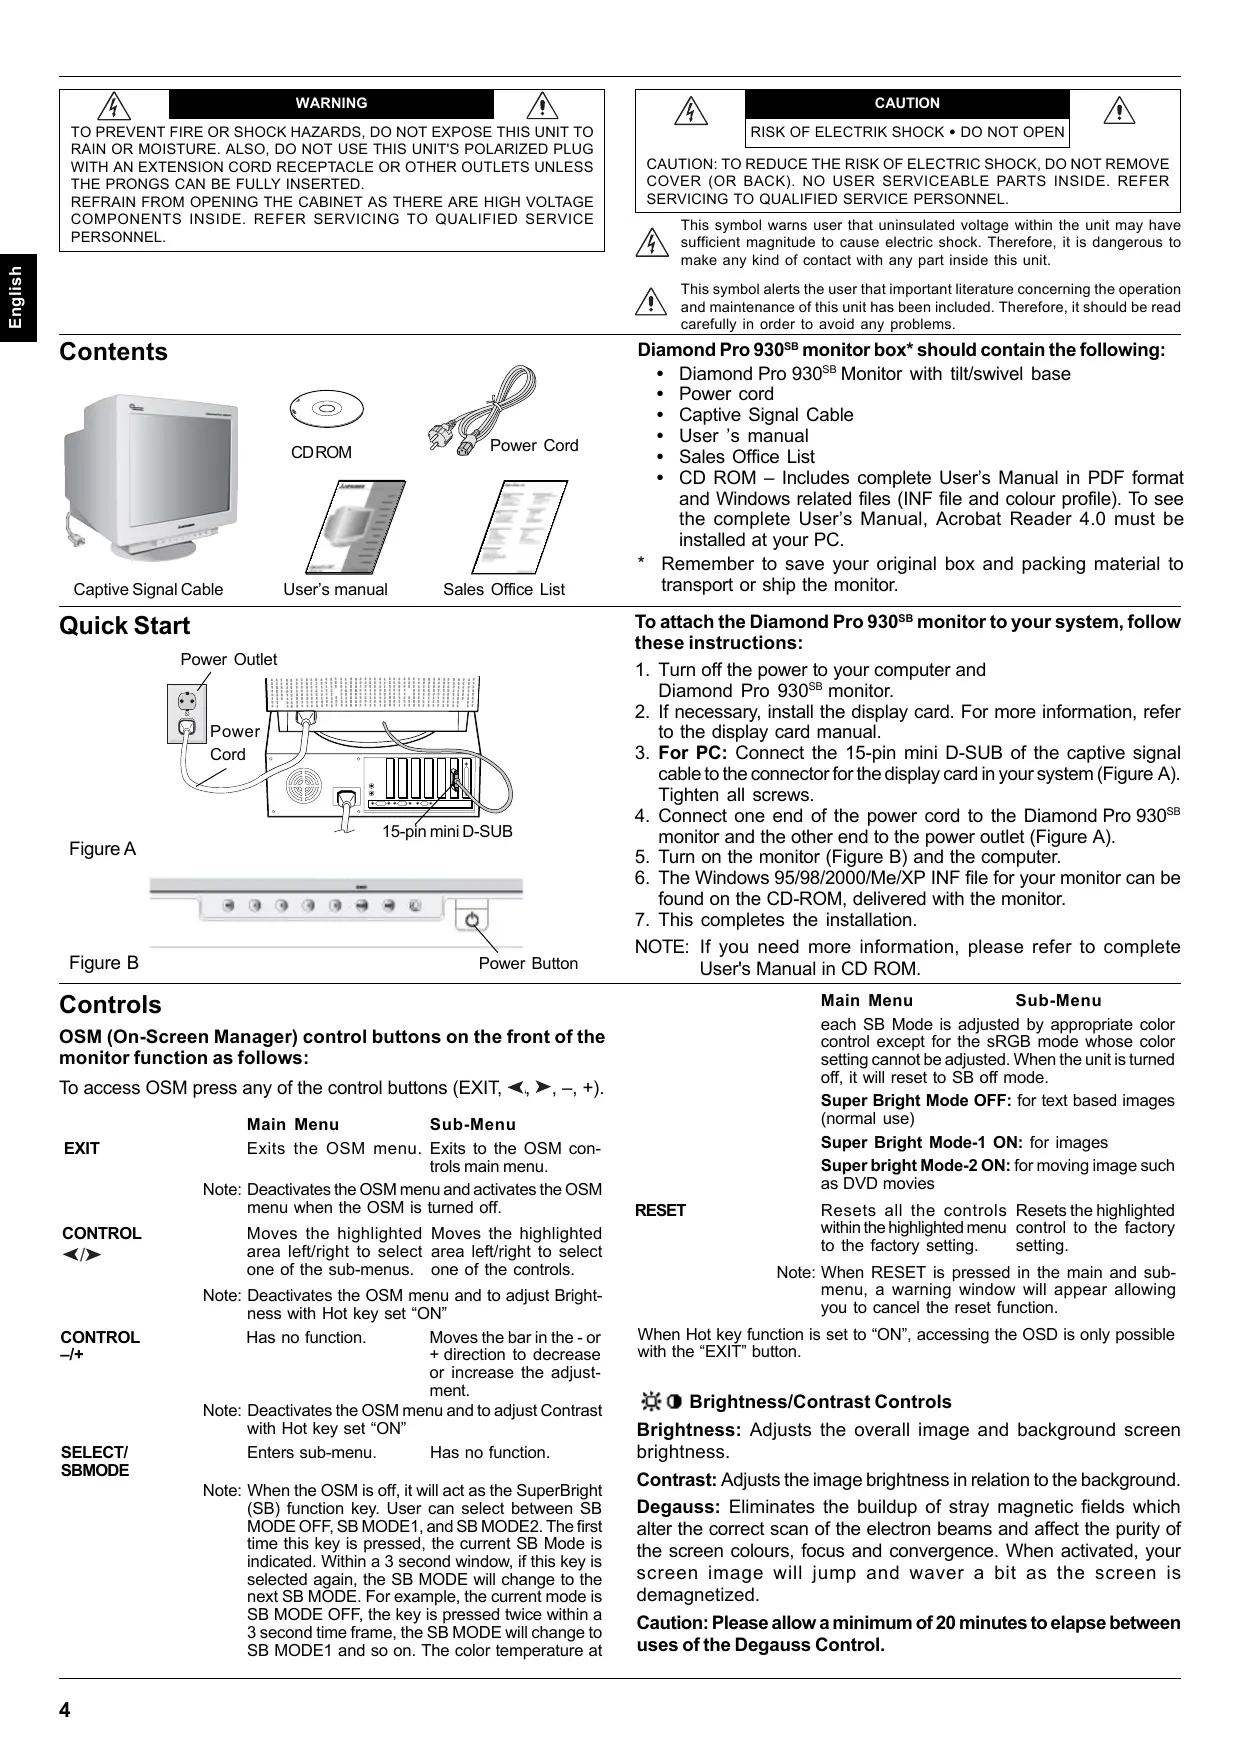
Contents
Captive Signal Cable
CDROM
User's manual
Power Cord
Sales Office List
Quick Start
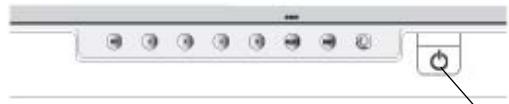
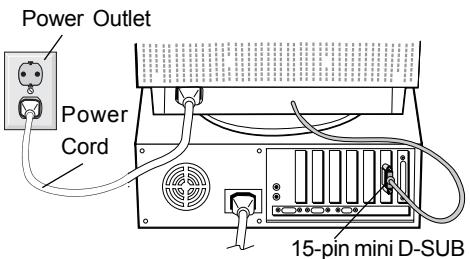
Figure A
Figure B
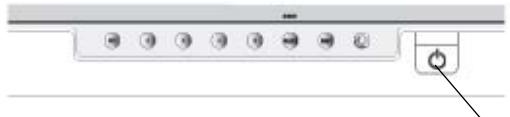
Power Button
Controls
OSM (On-Screen Manager) control buttons on the front of the monitor function as follows:
To access OSM press any of the control buttons (EXIT, , , - , + )
| Main Menu | Sub-M Menu | |
| EXIT | Exits the OSM menu. | Exits to the OSM controls main menu. |
| Note: Deactivates the OSM menu and activates the OSM menu when the OSM is turned off. | ||
| CONTROL | Moves the highlighted area left/right to select one of the sub-menus. | Moves the highlighted area left/right to select one of the controls. |
| Note: Deactivates the OSM menu and to adjust Brightness with Hot key set “ON” | |
| CONTROL | Has no function. Moves the bar in the - or + direction to decrease or increase the adjustment. |
| Note: Deactivates the OSM menu and to adjust Contrast with Hot key set “ON” | |
| SELECT/ | Enters sub-menu. Has no function. |
SELECT/ SBMODE
Note: When the OSM is off, it will act as the SuperBright (SB) function key. User can select between SB MODE OFF, SB MODE1, and SB MODE2. The first time this key is pressed, the current SB Mode is indicated. Within a 3 second window, if this key is selected again, the SB MODE will change to the next SB MODE. For example, the current mode is SB MODE OFF, the key is pressed twice within a 3 second time frame, the SB MODE will change to SB MODE1 and so on. The color temperature at

CAUTION
RISK OF ELECTRIK SHOCK · DO NOT OPEN

CAUTION: TO REDUCE THE RISK OF ELECTRIC SHOCK, DO NOT REMOVE COVER (OR BACK). NO USER SERVICEABLE PARTS INSIDE. REFER SERVICING TO QUALIFIED SERVICE PERSONNEL.

This symbol warns user that uninsulated voltage within the unit may have sufficient magnitude to cause electric shock. Therefore, it is dangerous to make any kind of contact with any part inside this unit.

This symbol alerts the user that important literature concerning the operation and maintenance of this unit has been included. Therefore, it should be read carefully in order to avoid any problems.
Diamond Pro 930^SB monitor box* should contain the following:
Diamond Pro 930^SB Monitor with tilt/swivel base
Power cord
Captive Signal Cable
- User's manual
Sales Office List
- CD ROM - Includes complete User's Manual in PDF format and Windows related files (INF file and colour profile). To see the complete User's Manual, Acrobat Reader 4.0 must be installed at your PC.
- Remember to save your original box and packing material to transport or ship the monitor.
To attach the Diamond Pro 930^SB monitor to your system, follow these instructions:
- Turn off the power to your computer and Diamond Pro 930^SB monitor.
- If necessary, install the display card. For more information, refer to the display card manual.
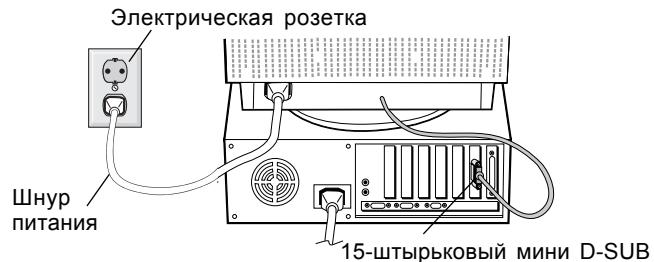
- For PC: Connect the 15-pin mini D-SUB of the captive signal cable to the connector for the display card in your system (Figure A). Tighten all screws.
- Connect one end of the power cord to the Diamond Pro 930^SB monitor and the other end to the power outlet (Figure A).
- Turn on the monitor (Figure B) and the computer.
- The Windows 95/98/2000/Me/XP INF file for your monitor can be found on the CD-ROM, delivered with the monitor.
- This completes the installation.
NOTE: If you need more information, please refer to complete User's Manual in CD ROM.
| Main Menu | Sub-Menu | |
| each SB Mode is adjusted by appropriate color control except for the sRGB mode whose color setting cannot be adjusted. When the unit is turned off, it will reset to SB off mode. | ||
| Super Bright Mode OFF: for text based images (normal use) | ||
| Super Bright Mode-1 ON: for images | ||
| Super bright Mode-2 ON: for moving image such as DVD movies | ||
| RESET | Reset all the controls | Reset the highlighted within the highlighted menu control to the factory to the factory setting. |
| Note: When RESET is pressed in the main and sub-menu, a warning window will appear allowing you to cancel the reset function. | ||
When Hot key function is set to "ON", accessing the OSD is only possible with the "EXIT" button.
Brightness/Contrast Controls
Brightness: Adjusts the overall image and background screen brightness.
Contrast: Adjusts the image brightness in relation to the background.
Degauss: Eliminates the buildup of stray magnetic fields which alter the correct scan of the electron beams and affect the purity of the screen colours, focus and convergence. When activated, your screen image will jump and waver a bit as the screen is demagnetized.
Caution: Please allow a minimum of 20 minutes to elapse between uses of the Degauss Control.
Controls - continued
Size and Position Controls
Left/Right: Moves the image horizontally (left or right).
Down/Up: Moves the image vertically (up or down).
Narrow/Wide: Decreases or increases the horizontal size of the image.
Short/Tall: Decreases or increases the vertical size of the image.
RGBColor Control System
Colour presets selects the desired colour setting. The bar is replaced by the colour setting choice. Each colour setting is adjusted at the factory to the stated Kelvin. If a setting is adjusted, the name of the setting will change from Kelvin to Custom except sRGB mode.
Red, Green, Blue: Color Control System decreases or increases the monitor's red, green or blue colour guns depending upon which is selected. The change in colour will appear on screen and the direction (decrease or increase) will be shown by the bars.
sRGB mode: sRGB mode provides the suitable colour managed picture image. You can not change Red, Green and Blue colours, brightness and contrast individually.
Colour Temperature Adjustment: Adjusts the colour temperature of the screen image.
Geometry Controls
Geometry Controls Menu
The Geometry controls allow you to adjust the curvature or angle of the sides of your display.
Sides In/Out (pincushion): Decreases or increases the curvature of the sides either inward or outward.
Sides Left/Right (pincushion balance): Decreases or increases the curvature of the sides either to the left or right.
Sides Tilt (parallelogram): Decreases or increases the tilt of the sides either to the left or right.
Sides Align (trapezoidal): Decreases or increases the bottom of the screen to be the same as the top.
Rotate (raster rotation): Rotates the entire display clockwise or counterclockwise.
Corner Correction: Allows you to adjust the geometry of the corners of your display – Top or Bottom.
Tools 1
Moiré Canceler: Moiré is a wavy pattern which can sometimes appear on the screen. The pattern is repetitive and superimposed as rippled images. When running certain applications, the wavy pattern is more evident than in others. To reduce moiré, adjust the level by using -/+ CONTROL buttons.
Linearity: This selection allows you to adjust the spacing of the area on the screen. The purpose of this control is to ensure that a one-inch circle is a true one-inch circle wherever it is on the screen. The best way to determine the vertical linearity is as follows:
- Draw equally spaced horizontal lines using a drawing application that has a ruler.
- Use the Vertical Balance control to adjust the lines near the top and bottom of your screen.
- Use the LINEARITY (VER.) control to adjust the spacing between the lines near the center and top of your screen.
Convergence: Aligns all three colors (R,G,B) to form a single color (white). The purpose of this control is to ensure that a white line drawn on the screen is as crisp and clear as possible.
- Use the CONVERGENCE (HOR.) control to adjust the alignment of the lines in the up/down direction.
- Use the CONVERGENCE (VER.) control to adjust the alignment of the lines in the left/right direction.
GlobalSync Control: Eliminates picture impurities that may result from the earth's magnetic field. While in the sub-menus (GLOBALSYNC, TOP LEFT, TOP RIGHT, BOTTOM LEFT or BOTTOM
RIGHT), use the -/+ control buttons to fine tune the GlobalSync corrections.
NOTE: Mitsubishi recommends that you perform GlobalSync correction while running a typical application such as a spreadsheet or text document.
Tools 2
Language: OSM controls menus are available in 6 languages.
- OSM Position: You can choose where you would like the OSM controls menu to appear on your screen. Selecting OSM Position allows you to manually adjust the OSM controls menu position from among Center, Top left, Top right, Bottom left and Bottom right.
OSM Turn Off: The OSM controls menu will stay on as long as it is in use. In the OSM Turn Off sub-menu, you can select how long the monitor waits after the last touch of a button for the OSM controls menu to disappear. The preset choices are 5 thru 120 seconds.
OSM Lock Out: This control completely locks out access to all OSM controls functions except Brightness and Contrast. When attempting to activate OSM controls while in the lock out mode, a screen will appear indicating that OSM controls are locked out. To activate the OSM Lock Out function, press SELECT and hold + down simultaneously. To deactivate the OSM Lock Out, press SELECT and hold + down simultaneously.
IPM System Off Mode:
Enable: The IPM System works normally and all stages of energy savings are utilized.
Disable: The Off Mode of the IPM System is not used.
NOTE: For standard systems and graphics boards, keep the factory setting at ENABLE.
NOTE: Do not keep the monitor on when 'No Signal' is applied. This could cause image burn-in on the screen due to the 'No Signal' message being displayed.
EdgeLock Control: Operating your monitor at a nonstandard timing may cause images to appear darker than normal or have color distortion. Use of the EdgeLock control will adjust images to their normal state.
Hot Key: This selection allows you to use as brightness control and - / + as contrast control. When Hot key function is set to "ON", accessing the OSD is only possible with the "EXIT" button.
Factory Preset: Selecting Factory Preset allows you a reset most OSM control settings back to the factory settings. A warning statement will appear to confirm that you do want to reset ALL settings. Individual settings can be reset by highlighting the control to be reset and pressing the RESET button.
Information
Display Mode: Indicates the current mode and frequency setting of the monitor.
Monitor Info: Indicates the model and serial numbers of your monitor.
Refresh Notifier: A message will advise you if the refresh rate of the signal being applied to the monitor by the computer is too low. For further information, please refer to your display card or system manual.
ENERGYSTAR Product
As an ENERGY STAR Partner,
NEC-Mitsubishi Electronics Display of America, Inc. has determined that this product meets the ENERGYSTAR guidelines for energy efficiency. The ENERGYSTAR emblem does not represent EPA endorsement of any product or service.
Recommended use

Safety Precautions and Maintenance:

- DO NOT OPEN THE MONITOR. There are no user serviceable parts inside and opening or removing covers may expose you to dangerous shock hazards or other risks. Refer all servicing to qualified service personnel.
- Use the monitor in a clean, dry area.
- Do not spill any liquids into the cabinet or use your monitor near water.
- Do not insert objects of any kind into the cabinet slots, as they may touch dangerous voltage points, which can be harmful or fatal or may cause electric shock, fire or equipment failure.
- Do not place any heavy objects on the power cord. Damage to the cord may cause shock or fire.
- Do not place this product on a sloping or unstable cart, stand or table, as the monitor may fall, causing serious damage to the monitor.
- To separate the equipment from the power source you have to remove the plug from the inlet socket.
- In the UK, use a BS-approved power cord with a molded plug having a black (5 A) fuse installed for use with this monitor. If a power cord is not supplied with this monitor, please contact your supplier.
- When operating the Diamond Pro 930^SB with the AC 100 - 240 V power source in EU countries except UK, use the power cord supplied.
Cleaning Your Monitor
A special coating is provided on the glass (CRT) surface of this monitor to reduce a reflection and static electricity on the glass surface. Due to the delicate coating on the glass surface, use a lint-free, non-abrasive cloth (cotton or equivalent) and a non-alcohol, neutral, non-abrasive cleaning solution to minimize dust. If the screen requires more than a light cleaning, apply a soft neutral detergent and water directly to a soft cloth and use it upon wringing water, to clean the glass surface. Clean your monitor regularly.
CAUTION: The following agents will cause damage to the CRT when cleaning the glass surface: Benzene, thinner, acid/alkaline detergent, alcohol detergent, detergent with abrasive powder, detergent with anti-static agent, detergent for cleaning.
Immediately unplug your monitor from the power outlet and refer servicing to qualified service personnel under the following conditions:
- When the power supply cord or plug is damaged.
- If liquid has been spilled, or objects have fallen into the monitor.
- If the monitor has been exposed to rain or water.
- If the monitor has been dropped or the cabinet damaged.
- If the monitor does not operate normally by following operating instructions.

CAUTION
- Allow adequate ventilation around the monitor so that heat can properly dissipate. Do not block ventilated openings or place the monitor near a radiator or other heat sources. Do not put anything on top of the monitor.
- The power cable connector is the primary means of detaching the system from the power supply. The monitor should be installed close to a power outlet which is easily accessible.
- Handle with care when transporting. Save packaging for transporting.

CORRECT PLACEMENT AND ADJUSTMENT
OF THE MONITOR CAN REDUCE EYE, SHOULDER AND NECK FATIGUE. CHECK THE FOLLOWING WHEN YOU POSITION THE MONITOR:
- Adjust the monitor height so that the top of the screen is at or slightly below eye level. Your eyes should look slightly downward when viewing the middle of the screen.
- Position your monitor no closer than 40~cm and no further away than 60~cm from your eyes. The optimal distance is 50~cm .
- Rest your eyes periodically by focusing on an object at least 6 m away. Blink often.
- Position the monitor at a 90^ angle to windows and other light sources to minimize glare and reflections. Adjust the monitor tilt so that ceiling lights do not reflect on your screen.
- If reflected light makes it hard for you to see your screen, use an anti-glare filter.
- Adjust the monitor's brightness and contrast controls to enhance readability.
- Use a document holder placed close to the screen.
- Position whatever you are looking at most of the time (the screen or reference material) directly in front of you to minimize turning your head while you are typing.
- Get regular eye checkups.
Ergonomics
To realize the maximum ergonomic benefits, we recommend the following:
- Adjust the Brightness until the background raster disappears.
- Do not position the Contrast controls to its maximum setting.
- Use the preset Size and Position controls with standard signals.
- Use the preset Colour Setting and Sides Left/Right controls.
- Use non-interlaced signals with a vertical refresh rate between 75 - 160 Hz.
- Do not use primary colour blue on a dark background, as it is difficult to see and may produce eye fatigue due to insufficient contrast.
- Keep the monitor away from high capacity transformers, electric motors and other devices such as external speakers or fans, which may create strong magnetic fields.
- If possible, position the monitor so that it is facing the east to minimize the effects of the earth's magnetic field.
- Changing the direction of the monitor while it is powered on may cause image discolouration. To correct this, turn the monitor off for 20 minutes before powering it back on.


VAROVÁNÍ

CHRANTE ZARIZENI PRED DESTEM A VLHKEM. ZABRANITE TAK NEBEZPECI POZARU NEBO URAZU ELEKTRICKYM PROUDEM. POLARIZOVANOU ZASTRCKU JEDNOTKY NEPOUZIVEJTE WE SPOJENI SE ZASUVKOU PRODLUZOVACI SNURY NEBO JINYMI ZASUVKAMI, POKUD KOLIKY NELZE ZCELA ZASUNOUT. UVNIT RZARIZENI SE NACHAZI YVSOKONAPETOV KOMPONENTY, PROTO SKRIN NEOTEVIREJTE. SERVIS SVERTE KVALIFIKOVANE OSOBE.
Super Bright Mode-1 ON
ATTENTION: POUR RÉDUIRE LES RISQUES D'ÉLECTROCUTION, N'ENLEVEZ PAS LE CAPOT (OU L'ARRÊRE).
VOUS NE POUVEZ RÉPARER AUCUNE PIECE INTERNE. CONFIEZ TOUS LES TRAVAUX DE DÉPANNAGE À DU PERSONNEL TECHNIQUE QUALIFIÉ.

in overeenstemming is met
KpaTkoe pykoBOdCTBO no Haayy pa60TbI
PucyHok A
PucyHok B
KhONka NITaHnA
IpoodyKT ENERGYSTAR
YBnraCb napThepom ENERGYSTAR,
KOMnaHnna NEC-Mitsubishi Electronics Display of Americe, Inc.
OpeJeJInJa, yTo daHHoe ycTpoiCTBO OTBeucaET Tpe6oBaHnma
ENERGYSTAR K 3NeKtpUeCKo3aUnte. 3MOnema ENERGYSTAR He
03Naaet npu3HaHnna EPA kaKoro-Jn6o npOdyKta nIyUcnyr.

OCTOPOXHOO
PICKIIOPAXHEHNAJIEKTPUUECKIM TOKOM·HEOTKpbIBATb

OCTOPOXHO:UTObI UMEHbIHTB PNCK IOPAXEHNJ 3JIKETPNUECKIM TOKOM,HE CHINMAI TE KpblIHKY (NJIN 3ADHIIO PAHEJI). BHYTPN HET DETAJIEN, OBCJNYKBAHNE KOTOpbIX MOKET BblIOJIHARbIIOJIb3OBATEJIb.10BOPPOCAM OBCJNYKBAHNIAOBPATITECB K KBALINΦIUNPOBAHHOMY CNELNAJINCTY.

3TOT 3nK npEynpejkaet O TOM, YTO BHytpn UcTpOiCTBa HaxoJrTaC HeN30InpOBaHHbIe DeTaNIOBblCOkIM HnprJaHneM, KOToPbIE MOyT CTAb TpNiunHO NopaxHeHn3AeKpUneckm TOKOM. IOn3Omy Hn B Koem Cnyuae Helb3 npKacatcbc K KaKIM-JIn6O DeTaNJm BHytpn UcTpOiCTBa.

3TOT 3nak npedynpekdaet O TOM, yTo IMeetc Baxhna DOKymentaqna NO 3KcnnyatauIN 06CnyxnbAHNO 3TOrO yctpOCTBa. NtOMy ee Heo6xOIMOB HmMaTeNbHO npouHTaB, YTObI N36ExaTb BO3MOXHbIX npo6JIem.
Bkopo6ke \*MOHntopa Diamond Pro 930SBdoJxHo 6bITb cIeDyUouee:
- MoHntop Diamond Pro 930^SB c shapnnpo onopo
- Lhyp nHTaHn
HeBbIpaIauoIyKabJIb BnDeOcHana
PykoBOCTBOIOJIb3OBATeJIa
Sales Office List -
Komпakт-DиСК: coDEpKNT NOJIHoe pyKOBOdCTBO NOJIb3OBAteJЯ PDF u COOTBeTCTBvUOuIe ΦaJIbI dIЯ Windows (Фай INF u CBETOBОИ npOΦnIb).ДЯ npOCMOTpa NOJIHOrO pyKOBOdCTBa NOJIb3OBAteJЯ Heo6xOДМо,чTOБы Ha Baшem PIK 6bla yCTaHOBJIeHa nporpamma Acrobat Reader 4.0.
-
063aTeIbHo CoXpaHnte Kopo6ky u ynaKoOchbMy MaTePnA1 nIy TpaHCnOpTnPoBKn IJI NpeBcO3Kn MOHtopa.
YTo6bI NOpKJIIOUHTb MOHITop Diamond Pro 930sB K CnCTeMe, BbINOHNHe CJeDyUOuNe HNCTpykCm:
- OTKJIIOHTe NITaHne KOMIbIOTepa N MOHITopa Diamond Pro 930SB.
- Ecnn Heo6xOdImo, yctahOBnTe pIaTy BnDeoaAnTepa.ДпЯпolyuYeHЯ ПОДрбнbIX CBeDEHm CM. pyKOBOcTBo nO PnIaTe BnDeoAanTepa.
3.ДЯ PC:ПодсоeДинHTe 15-штьрькOBьМинupa3БEM D-SUB HebinaDAIOUsoKa6eЯ BndeocirHajA K pa3beMy PnataBnideoanTepe B KOMNbHTepe.(PucyHOK A).3aTaNHTe BCE BNHTbl. - Побъединту один КОЕЦ SHHура пNTань KMонтору Diamond Pro 930SB, a pyroк к Злекгческо розтke (Pсунok A).
- BkHIOUHTe MOHITOp (PncyHOK B) n KOMnbIbTeP.
6.Фай INF Windows 95/98/2000/Me/XP INF Дя монитору можно нату на CD-ROM, поставл Jeremy с мониторom. - Ha 3TOM yCTaHOBka 3aKOHueHa.
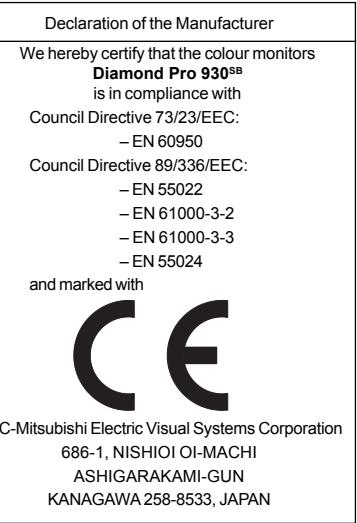
3aBbIeHne n3rOToBnTeJIa
MbHaTcToaUmNoTbEepXdaem,TODaHHbI
ZBETHOJ MOHTop Diamond Pro 930SB
COOTBETCTBYET TpeBOAHNAM
DnpeKTHBbI COBeTa 73/23/EEC
-EN60950
DinpeKTHBa coBeTa 89/336/EEC:
-EN55022
-EN61000-3-2
-EN61000-3-3
EN 55024
I COdepKNT NometkY

NEC-Mitsubishi Electric Visual Systems Corporation
686-1, NISHIOI OI-MACHI
ASHIGARAKAMI-GUN
KANAGAWA 258-8533, JAPAN
3JeMeHTbI ynpaBneHnA
KhONkynypaBneHnO SMO (3KpaHoro MeHo) Ha nepeDne HnaHeN MOHtopa BbInoHnYOT CneIyUOuNe ΦyHKun: Tyn Ha OSM, haxmnte Ha oNDHy n3 KJIaBnW ynpaBneHnE (EXIT, <, >, -, +).
| Главно MeнIO | Побимо | |
| EXIT | Выхов в галовеMeно OSM. | Выхов в галовеMeно OSM. |
| ПРIMECHAHNE: | Одклочает Meню OSM и Выковаят Meню OSM, когда оно Выковаясо. | |
| CONTROL | Перемшениe | Перемшениe |
| Быденинов | Быденинов oblaсти | |
| oblaсти Bveledo/ | Bveledo/BvpaboДя | |
| Вправо Дя Вьбopa | Вьбopa odhoro n3 | |
| ODhoro n3 помени. | napametropob. | |
| ПРIMECHAHNE: | Когда Meню OSM otклочуно, Испоньз汞сдуETСДДЯ 6ыстрого дocstура K Perулировкеяркови. | |
| CONTROL | He Imeet Функции. | Перемшение поостынданкаTopаВнданkaTopа SuperBright (SB) |
| нарразелени - ил +Дя уменьшении ил уменьшении 3начениипостrodu. | ||
| ПРIMECHAHNE: | Одклочает Meню OSM и Испоньз汞сдуETСДДЯ NaPametра Калвшии 6ыстрого дocstура установлонызачение "BKЛ" | |
| SELECT/SBMODE | Вхod B помени. | He Imeet Функции. |
| ПРIMECHAHNE: | Когда OSM otклочenv, on paBOTaET кak Функциональнай Калвшиа SuperBright (SB) (С被告ский розима). Пользовать можетевыръ меничу розимом SB OFF (SB MODE OFF), SB розимом 1 (SB MODE1) and SB розимом 2 (SB MODE2).Нжав на Функциональну Калвшиу воррьные Висец сөүхүдүлэдүхүдүлүхүдүлүхүдүлүхүдүлүхүдүлүхүдүлүхүдүлүхүдүлүхүдүлүхүдүлүхүдүлүхүдүлүхүдүлүхүдүлүхүдүлүхүдүлүхүдүлүхүdүлүхүдүлүхүдүлүхүдүлүхүдүлүхүдүлүхүдүлүхүдүлүхүдүлүхүдүлүхүдүлүхүдүлүхүдүлүхүдүлүхүдүлүхүдүлүхүдүлүxүдүлүхүдүлүхүдүлүхүдүлүхүдүлүхүдүлүхүдүлүхүдүлүхүдүлүхүдүлүхүдүлүхүдүлүхүдүлүхүдүлүхүдүлүхүдүлүхүдүlэдүхүдүлүхүдүлүхүдүлүхүдүлүхүдүлүхүдүлүхүдүлүхүдүлүхүдүлүхүдүлүхүдүлүхүдүлүхүдүлүхүдүлүхүдүлүхүдүлүxүdүлүхүдүлүхүдүлүхүдүлүхүдүлүхүдүлүхүдүлүхүдүлүхүдүлүхүдүлүхүдүлүхүдүлүхүдүлүхүдүлүхүдүлүхүдүлүхүдүlэ徳ырьдахгдэдүхүдүлэдүхүдүлүхүдүлүхүдүлүхүдүлүхүдүлүхүдүлүхүдүлүхүдүлэ徳ырьдахгдэдүхүдүлэ徳ырьдахгдэ徳ырьдахгдэ徳ырьдахгдэ徳ырьдахгдэ徳ырьдахгдэ徳ырьдахгдэ徳ырьдахгдэ徳ырьдахгдэ徳ырьдахгдэ徳ырьдахгдэ徳ырьдахг徳ырьдахг徳ырьдахг徳ырьдахг徳ырьдахг徳ырьдахг徳ырьдахг徳ырьдахг徳ырьдахг徳ырьдахг徳ырьдахг徳ырьдахг徳ырьдахг徳ыцьдэдэдэдэдэдэдэдэдэдэдэдэдэдэдэдэдэдэдэдэдэдэдэдэдэдэдэдэдэдэдэдэдэдэдэдэдэдэдэдэдэдэдэдэдэдэдэдэдэдэд��СФВТМOB DVD | |
| RESET | Сбpos BCex | Сбpos BCIxДяИЗБАгИЗ |
| пapametров B | пapametра до | |
| Быденинов Meню | З�чения, | |
| do 3нчени, | установлени. установлени. 3abode. | |
| ПРIMECHAHNE: | При Нжатий Khonки RESET в галовом яп помменю польяпся р dedупждаюцee coobшениe, которoe поьляет OTмени. функцию сбрca. | |
B cnyuae, korga yHKnOHaNbHaN KNaBnHa ycTaHOBneHa Ha "ON", BbIXoJ ha OSD ocyuEcTBnEeTc TOnbKO C NOMOuK NaBnH N "EXIT".
PerynipoBka npKoCTn/KoHTpactHOCTN
PerylnpoBka pa3Mepa n noJoxeHna
BnEBo/BnPaBo: IepemeueHne n3o6paXeHn no rOpn3OHTaII (BnEBo nIIN BnpAo).
Bn3/BBepx: IepemeueHne n3o6paJKeHn no BepTnKaJI (BBepx nIIN BHN3).
Uxke/wnpe: UMeHbIeHne uNn yBeJIuYeHne rOpN3OHTaIbHOro pa3Mepa n3O6paJxHn.
Kopooy/ДиHHee:ymeHbWeHne nIyBvEnuHHee BepTkaJIbHOro pa3Mepa n3O6paXeHn.3JeMeHTbl ynpabLeHnny npoDOnJxKeHne.
RGB Color Control System (CnCTema ynpabJeHna zBeTOM)
C NOMOJIbIO 3aDaHHbIX NaJIITp ZBETOB MOXHO BbIbpaTb HUxHHyo HAcTPOJky ZBETA. POnoca INHdNkATopa 3aMeHЯETcHa HaHacTPOJky ZBETA. KaJdA HAcTPOJka ZBETA yCTaHOBJIeHa Ha 3aBODe B NOJIOKeHHe NO ShKaNe KeJIbBnHa. Ppi n3MeHEnn HAcTPOJkn ee Ha3BaHne MeHЯETcC Kelvin Ha Custom (HAcTpanBaemaj), KpOME pexKmA RGB.
Kpacb,3eJeHb,CnH:Cnstema ynpabJenra Color Control System yMeHbIaet nIyBeyIuNbaet 3NaueHnKpachoro, 3eJeHoro nIIN CnHero B 3aBNCIMoCTOn OT BbIbpaHoro napameTpa. LbetaHa 3kpaHe n3MeHrTcA, a HapabJIeHne (B CTOpohy yMeHbSeHn IIN yBeJIuNchEHH) Bydet NOKa3aHO C NOMOsbIO nonoc INDkaTopOB.
Pexn m sRGB: Pexn m SRGB daet BO3MOXHOCTb NOJyHTb n3O6paXeHn c noxOJaIe HAcTPOKo NCBETOBn paJIITpbI. NapaMeTpbl KoTHpactHOCTb, JPKoCTb, KpacHbI, 3eJeHbI n CnHn zBETA HeJb3ra N3MeHrTaNo OTdEJIbHOCTn.
Perynnpobka zBETOBoT Tempepatpyi: PerynpyET ZBETOByo TEMpepatpyi n3O6paXKeHn.
NapaMeTpbI reOMeTpnn
MeHIOIpaametpbI reometpnn
IppaMeTpbl reOMeTpnn n03B0JIaOT peryIINpOBaTb KPNBn3Hy Iyn yroI hakloHa KpaEB 3KpaHa.
BHytpb/Hapyxky (Ipondyka/60uKa):ymeHbSeHne nIy yBeNueHne NCKpNBHeHn CTOpOH 3KpaHa BHytpb IIN Hapyxky.
BneBo/BnpaBO (BaIaHc noyukn): YmehbSeHne nIy IyBeIuYeHne NcKpNBHeHna CTOpOH 3kpaHa BNeBO nIIN BnpaBO.
Haknoh (napanlneJorpMM):ymeHbIeHne nn yBeIuHne HAKIOHa CTOpOH 3KpaHa BNeBO NIN BnpBO.
BbipabHbBaHne (Tpaneun): YmHeBWeHne nIIN yBeJIuHne HnKHeJ qactn 3KpaHa do pa3Mepa BepxHeJ qactn.
IOMOFT CHN3NTb YCTANOCTb IIA3,
PYK I ZEN. COBJIIODAITE CLENDYIOUHNE
PEKOMEHJALIM
ПРИ PA3MELSEЕНМOHINTOPA:
- YctaHOBNTe MOHtOp TAK, yTO6bI BepxHn KpaJ 3KpHa 6blb 7yTb HnKe nn Ha yPoBHe rna3. Baun rna3a DOJIKNbI CMOTpeTb HEMHOrO BnN3 npB B3rJaDe Ha cepeDInHy 3KpaHa.
Pa3mecHTe MOHITOp Ha pacCToHHn ot 40 Do 60 cm OT cBOx rJa3. ONTMaJIbHbIM YBJIaETcR paCToHHne B50cm. - PernoDnueckn daBaIte CBOUM rna3am OTdoxHyTb, fokycnpy 3peHne Ha npedMeTe, OTdaJIeHHOM He MeHee Yem Ha 6 MetpoB. Yacto mraaiTe.
Pa3mecHTe MOHITOP NOBepHyTbIM C yrIOM 90° OTOKHO npyHX nCTOuHnKOB CBeta, YTObI yMeHbUHTb OTpaXeHnI N 6NIKN. OTPeryInpuyTe HAKNOH MOHITOpA, YTObI Ha He He OTPaXaJIcR CBET C NOTONka. - Ecnn OTPaKaHbI CBet 3aTpUdHReT Bam pa6Oy C MOHTOPOM, INCNoJIb3yIte aHTn6NIKOBbl ΦnIbTp.
-Дя удобства порсмOTра ИЗобразжения отрergyлару Teяркость и КОНТСТСТь мOHITOPA. - YctaHOBIne POnCTaBky IJn DOKyMeHToB B6Ii3N 3KpaHa.
- Pa3mecHTe BCE, Ha yTO Bbl ObIyHO CMOTpIte (DOKymeHTbl, INHCTpyKcIM) nprmo nepeM MOHITOpOM, yTObI He NOBOPaYBaTb roJIOBy B cSTOPOHy pni Habope TEkCTa.
- Perylphno npoBepaTe cBoe 3peHne y BpaHa.
3rpoHOMnka
ДяdoctиженmaKcIMaJIbHbIXэproHOMuecknxycIOBmMbI pekomeHnyem cJeDyUochee:
- OTPeryuynTeЯKocTb, noka He nCue3HET oHOHBi paCTp
He BbICTabJrTe KOHTpactHOCTb Ha MaKcIMyM - IcnoIb3yIte npeducTaHOBHeHbIe HactpoKn pa3Mepa nIOJoxEHH CO cTaNapTHbIMN CnHaIamN
IcnoJb3yIte npdeUcTaHOBHeHHbIe 3HaueHnI CBETOB IJeBOI npabOI CTOpOH
IcnoJIb3yIte HeuepeDyeMble CnHAbI C YaCTOTO BepTKaJIbHO pa3BepTKm Mekdy 75-160 T
He IcnoIb3yIte B KaueCTBe OCHOBHO TcBaTa CnHn Ha TeMHOM fOHe, NocKoIbKy TaKoe CoHTaHne TpydNo DnBOCpNtTnMoXeT Bbl3BaTb yCTaIOCTb IJa3 BBNuDy HeIOCTaTOUHO KOHTpactHOCTn
He cTabbTe MOHITOp pIaOMuHbIMn TpaHCOpMaTOPbIMyycTPOiCTBaMn, TaKIMN KAK 3JIeKTpOMOTOpbl, a TaKKe BHeUHneINHAMIKN INI INBEHTINJATOpbl, KOtOpBIE MOrTy N3JIyAtb CInlbHbIe MaHNTHbIe IOnJ.
-ПОВЗМоЖHOCHTN,pa3MecTnte MOHNTOP NIuCm HA BOCTOK,YTObI CHN3ntb BJIaHnE MaHHTHOrO NOJIA 3eMNI.
CmeHa HnPaBHeHn MOHTopa, KOrda OH BkIIOueH, MoKET npNBecTn K nCKaXeHnIO ZBeTO N3O6paXeHn. YTo6bI 3TO nCnpaBnTB, BbIKNoHTe MOHTOp Ha 20 MNHyT.


DIKKAT

YANGIN VE SOK TEHLIKELERINI ONLEMEK I CIN CIHAZ YAGMUR YA DA NEME MARUZ KALMAMALIDIR. AYRICA BU CIHAZIN POLARIZE FISINI UCLAR TAM OTURMADI SI SURECE BIR UZATMA KABLOSU YA DA BAŠKA PRIZLERDE KULLANMAYIN.
ICERISINDE YUKSEK VOLTAJI BILESENLER BULUNDUGU ICIN KASAYI ACMAKTAN KAÇININ YETKIŞ SERVIS ELEMANINA BASVURUN.
IPM System Off Mode (IPM Sistem Kapali Modu):
Enable (Etkin): IPM Sistemimi normal calisir, enerji tasarrufunun tum evreleri kullanilir.
Disable (Devre DiS): IPM'in Off Mode (Kapali Modu) kullanilmaz. NOT: Standart sitemler ve grafik kartleri icin fabrika ayarini ENABLE (ETKIN) olarak tutun.
- DECLARATION OF CONFORMITY
- WARNING
- Controls
- SELECT/ SBMODE
- CAUTION
- Brightness/Contrast Controls
- Controls - continued
- Size and Position Controls
- RGBColor Control System
- Geometry Controls
- Geometry Controls Menu
- Tools 1
- Tools 2
- IPM System Off Mode:
- Information
- ENERGYSTAR Product
- Recommended use
- Safety Precautions and Maintenance:
- Cleaning Your Monitor
- CORRECT PLACEMENT AND ADJUSTMENT
- OF THE MONITOR CAN REDUCE EYE, SHOULDER AND NECK FATIGUE. CHECK THE FOLLOWING WHEN YOU POSITION THE MONITOR:
- Ergonomics
- VAROVÁNÍ
- Super Bright Mode-1 ON
- IpoodyKT ENERGYSTAR
- OCTOPOXHOO
- Bkopo6ke \*MOHntopa Diamond Pro 930SBdoJxHo 6bITb cIeDyUouee:
- YTo6bI NOpKJIIOUHTb MOHITop Diamond Pro 930sB K CnCTeMe, BbINOHNHe CJeDyUOuNe HNCTpykCm:
- 3JeMeHTbI ynpaBneHnA
- PerynipoBka npKoCTn/KoHTpactHOCTN
- PerylnpoBka pa3Mepa n noJoxeHna
- RGB Color Control System (CnCTema ynpabJeHna zBeTOM)
- NapaMeTpbI reOMeTpnn
- IOMOFT CHN3NTb YCTANOCTb IIA3,
- PYK I ZEN. COBJIIODAITE CLENDYIOUHNE
- PEKOMEHJALIM
- ПРИ PA3MELSEЕНМOHINTOPA:
- 3rpoHOMnka
- DIKKAT
- IPM System Off Mode (IPM Sistem Kapali Modu):
Brand : MITSUBISHI
Model : 930SB
Category : Computer monitor