
MSS 5572 - Sharpener AEG - Free user manual and instructions
Find the device manual for free MSS 5572 AEG in PDF.


| Product type | Electric sharpener |
| Brand | AEG |
| Model | MSS 5572 |
| Dimensions (W x D x H) | 20 x 10 x 8 cm |
| Weight | 0.5 kg |
| Power supply | 220-240 V ~ 50/60 Hz |
| Power | 100 W |
| Number of sharpening slots | 2 |
| Compatible blade types | Straight knives, scissors, serrated blades |
| Sharpening angles | 15° and 20° |
| Grinding wheel material | Diamond and ceramic |
| Automatic stop function | Yes |
| Operation indicator light | Yes |
| Non-slip base | Yes |
| Maintenance and cleaning | Clean with a damp cloth, do not immerse |
| Safety | Grounding, overheat protection |
| Included accessories | Knife guide, cooling spray |
| Spare parts available | Yes, replacement grinding wheels |
| Color | Black and silver |
| Warranty | 2 years |
Frequently Asked Questions - MSS 5572 AEG
User questions about MSS 5572 AEG
0 question about this device. Answer the ones you know or ask your own.
Ask a new question about this device
Download the instructions for your Sharpener in PDF format for free! Find your manual MSS 5572 - AEG and take your electronic device back in hand. On this page are published all the documents necessary for the use of your device. MSS 5572 by AEG.
USER MANUAL MSS 5572 AEG
natural_image
Exterior view of a silver AEG brand brush pump (no text or symbols visible on body)PERFECT IN FORM AND FUNCTION
AEG
2 Inhalt
Deutsch
Inhalt Seite
Übersicht der
Bedienelemente.... 3
Liste des diff érents
Instruction Manual .....42
Technical Data 46
Русский
Содержание стр.
Обзор
деталей прибора .....3
Руководство
Overview of the Components
D-47906 Kempen/Germany

Consommation :....60 W
Thank you for choosing our product. We hope you will enjoy using the appliance.
Safety instructions
General Safety Instructions
Read the operating instructions carefully before putting the appliance into operation and keep the instructions including the warranty, the receipt and, if possible, the box with the internal packing. If you give this device to other people, please also pass on the operating instructions.
- The appliance is designed exclusively for private use and for the envisaged purpose. This appliance is not fit for commercial use.
Do not use it outdoors. Keep it away from sources of heat, direct sunlight, humidity (never dip it into any liquid) and sharp edges. Do not use the appliance with wet hands. If the appliance is humid or wet, unplug it immediately. - When cleaning or putting it away, switch off the appliance and always pull out the plug from the socket (pull the plug itself, not the lead) if the appliance is not being used and remove the attached accessories.
- Do not operate the machine without supervision. If you leave the room you should always turn the device off. Remove the plug from the socket.
- The device and the mains lead have to be checked regularly for signs of damage. If damage is found the device must not be used.
- Do not try to repair the appliance on your own. Always contact an authorized technician. To avoid the exposure to danger, always have faulty cable be replaced only by the manufacturer, by our customer service or by qualified person and with a cable of the same type.
- Use only original spare parts.
- Pay careful attention to the following "Special Safety Instructions".
Symbols in these Instructions for Use
Important information for your safety is specially marked. It is essential to comply with these instructions in order to avoid accidents and prevent damage to the machine:

WARNING:
This warns you of dangers to your health and indicates possible injury risks.

CAUTION:
This refers to possible hazards to the machine or other objects.
i NOTE:
This highlights tips and information.
Children and Frail Individuals
- In order to ensure your children's safety, please keep all packaging (plastic bags, boxes, polystyrene etc.) out of their reach.
WARNING:
Caution! Do not allow small children to play with the foil as there is a danger of suffocation!
- This device is not intended to be used by individuals (including children) who have restricted physical, sensory or mental abilities and/or insufficient knowledge and/or experience, unless they are supervised by an individual who is responsible for their safety or have received instructions on how to use the device.
- Children should be supervised at all times in order to ensure that they do not play with the device.
Special Safety Instructions for this Device
WARNING:
Never operate the device without the guide cap.
Overview of the Components
1 Housing
2 Guide cap
3 Scissors guide
4 Guide mechanism for knifewith serrated blade
5 Guide for large/small screwdriver
6 Guide for kitchen knives
7 On/off button
Initial Operation
Before initial operation
- Unpack the device carefully and remove all packaging materials.
- Select a suitable location for the appliance, such as a dry, flat, non-slip surface on which it is easy to operate the machine.
Power supply
- Insert the mains plug into a correctly installed 230 V, 50 Hz power socket. Ensure that the voltage is the same as that indicated on the model identification plate.
Switching on
To start the device, press the on/off button.

NOTE:
For safety reasons the device only runs for as long as you press the switch.
Stopping Operation
• After use remove the plug from the socket.
Sharpening

NOTE:
- Only light pressure should be applied to the grinding stone of the device. Otherwise the motor might freeze.
- If necessary, reduce the pressure.


Kitchen Knives
Place the device on a flat surface and hold the housing in your hand so that you can press the button with your thumb.
- Turn the guide cap with the "knife" symbol as far as the dot on the device.
- Press the on/off button. The button has to be held in this position.
- Insert the knife blade either in the right-hand or left-hand blade guide mechanism and pull the knife towards you at an even speed.
- Sharpen the right-hand side of the knife on the right-hand guide mechanism and the left-hand side on the left-hand guide mechanism.
- To switch off the device release the on/off button and then remove the mains plug from the socket.


Knives with Serrated Blades
Place the device on a flat surface and hold the housing in your hand so that you can press the on/off button with your thumb.
i NOTE:
Serrated knives are only sharpened from one side.
- Turn the guide cap with the symbol "knives with serrated blades" as far as the dot on the device
- Insert the teeth of the knife into the guide mechanism and sharpen them on the grinding stone.
Then proceed as described under points 3 to 5 in the "Kitchen Knives" section.

Scissors
- Open the blades of the scissors completely.
- Hold the housing in your hand so that you can press the on/off button with your thumb.
- Turn the guide cap with the symbol "scissors" as far as the dot on the device.
- Insert a blade into the scissor guide mechanism and pull the scissors towards you at an even speed.
Please continue as described under "kitchen knives".
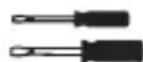
Screwdrivers
Hold the housing in your hand so that you can press the on/off button with your thumb.
- Insert the end of the screwdriver either into the small or the large screw-driver guide mechanism.
- Please ensure that you have inserted the correct size of screwdriver into the guide mechanism.
- Press the On/Off button. You must keep the button pressed in this position.

CAUTION:
The device should not be used for more than three minutes at a time. Please allow it to cool down for 30 minutes before using it again.
Take-up Mechanism for Mains Cable
The mains cable can be wound up around the base section.
Cleaning

WARNING:
▶ Remove the mains plug from the socket.
▶ Under no circumstances should you place the device in water for cleaning. Otherwise this might result in an electric shock or fire.

CAUTION:
▶ Do not use a wire brush or any abrasive items.
▶ Do not use any acidic or abrasive detergents.
- The housing of the knife grinder should be cleaned on the outside with a slightly damp cloth.
- The guide cap can be removed from the housing for cleaning purposes. To do so, turn the guide cap until the <symbol is in line with point on the device.
- Rinse the cap under running water and then dry it off.
- The cap is reattached in the reverse order and then tightened.
Noise development
The workplace-related emission value is less than 70 dB(A).
Technical Data
Model: MSS 5572
Power supply: 230 V \~ 50 Hz
Power consumption: 60 W
Short operation time: 3 Min.
Protection class:....II
Net weight: 0.49 Kg
Subject to technical changes without prior notice!
This device has been tested according to all relevant current CE guidelines, such as electromagnetic compatibility and low voltage directives, and has been constructed in accordance with the latest safety regulations.
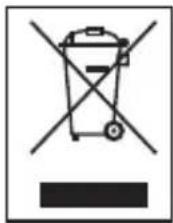
Disposal- Meaning of the "Dustbin" Symbol
Protect our environment: do not dispose of electrical equipment in the domestic waste.
Please return any electrical equipment that you will no longer use to the collection points provided for their disposal.
This helps avoid the potential effects of incorrect disposal on the environment and human health.
This will contribute to the recycling and other forms of reutilisation of electrical and electronic equipment.
Information concerning where the equipment can be disposed of can be obtained from your local authority.

- Inhalt
- Deutsch
- Inhalt Seite
- Русский
- Содержание стр.
- Safety instructions
- General Safety Instructions
- Symbols in these Instructions for Use
- WARNING:
- CAUTION:
- i NOTE:
- Children and Frail Individuals
- Special Safety Instructions for this Device
- Overview of the Components
- Initial Operation
- Before initial operation
- Power supply
- Switching on
- NOTE:
- Stopping Operation
- Sharpening
- Kitchen Knives
- Knives with Serrated Blades
- Scissors
- Screwdrivers
- Take-up Mechanism for Mains Cable
- Cleaning
- Noise development
- Technical Data
- Disposal- Meaning of the "Dustbin" Symbol
Brand : AEG
Model : MSS 5572
Category : Sharpener