
TT 44E UP0 - Toaster HOTPOINT - Free user manual and instructions
Find the device manual for free TT 44E UP0 HOTPOINT in PDF.
| Product type | 4-slice toaster |
| Brand | Hotpoint |
| Model | TT 44E UP0 |
| Power supply | 220-240 V ~ 50/60 Hz |
| Rated power | 1600 W |
| Number of slots | 4 |
| Browning levels | 8 (from 1 to 8) |
| Functions | Defrost, Reheat, Pastry/Sandwich, Emergency stop (Cancel) |
| Included accessories | Sandwich rack, Warming rack, Removable crumb tray |
| Dimensions (W x D x H) | 35 x 25 x 20 cm |
| Weight | 2.0 kg |
| Exterior material | Stainless steel with chrome parts |
| Crumb tray | Removable, weekly cleaning recommended |
| Safety | Automatic shut-off at end of cycle, Cancel button for immediate stop, lever locked in down position, overheating protection |
| Maintenance | Clean exterior with a dry cloth, do not use steam cleaner or abrasive products |
| Repairability | Repairs by qualified technician only, original spare parts available |
| Regulatory information | Compliant with European directives 2006/95/EC and 2004/108/EC |
Frequently Asked Questions - TT 44E UP0 HOTPOINT
User questions about TT 44E UP0 HOTPOINT
0 question about this device. Answer the ones you know or ask your own.
Ask a new question about this device
Download the instructions for your Toaster in PDF format for free! Find your manual TT 44E UP0 - HOTPOINT and take your electronic device back in hand. On this page are published all the documents necessary for the use of your device. TT 44E UP0 by HOTPOINT.
USER MANUAL TT 44E UP0 HOTPOINT
natural_image
Illustration of a standard 3D toaster with two grilles and a side-mounted tower (no text or symbols)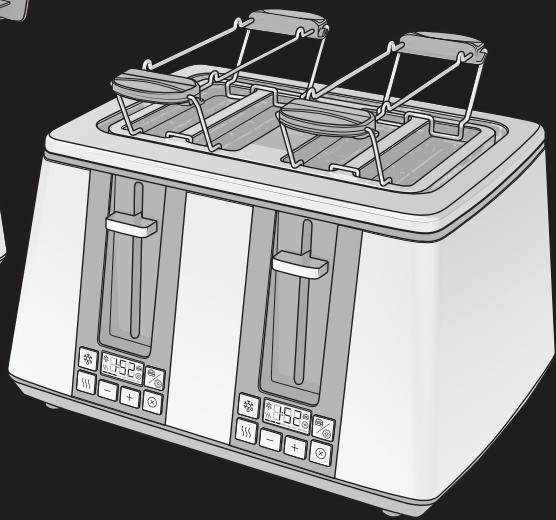
natural_image
Illustration of a modern double-tan sit-up toaster with two side grilles and control buttons (no text or symbols)EN Operating instructions
FR Mode d'emploi
natural_image
Illustration of two hands holding a mechanical device with motion arrows indicating movement (no text or symbols)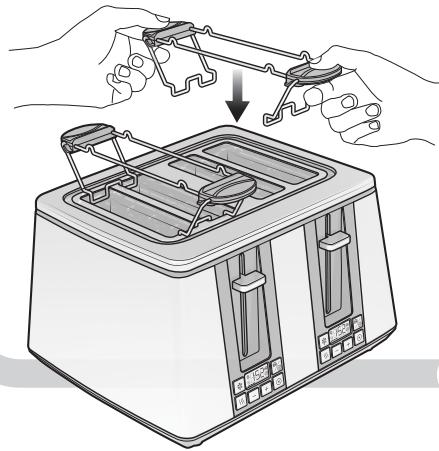
natural_image
Illustration of hands using a tool to adjust or install a two-tone tower (no text or symbols present)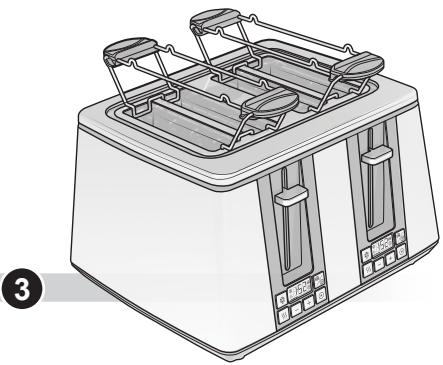
natural_image
Line drawing of a toaster with two side grilles and control knobs (no text or symbols)
ISTRUZIONI PER LA SICUREZZA
LEGGERE E RISPETTARE LE SEGUENTI INFORMAZIONI IMPORTANTI
- Before using the appliance carefully read Health and Safety and Use and Care guides.
- Keep these instructions close at hand for future reference.
• YOUR SAFETY AND SAFETY OF OTHERS IS VERY IMPORTANT - This manual and the appliance itself provide important safety warnings, to be read and observed at all times
- All safety warnings give specific details of the potential risk presented and indicate how to reduce risk of injury, damage and electric shock resulting from improper use of the appliance. Carefully observe the following instructions.
- Failure to observe these instructions may lead to risks. The Manufacturer declines any liability for injury to persons or animals or damage to property if this advice and relevant precautions are not respected.
- This product should not be used by children under 8 years old, unless supervised by an adult.
- Children from 8 years old and above and persons with reduced physical, sensory or mental capabilities or lack of experience and knowledge can use this appliance only if they are supervised. Alternatively these people can use if have been given instructions on safe appliance use and if they understand the hazards involved. Children should not play with the appliance. Cleaning and user maintenance shall not be made by children without supervision.
- Keep the appliance and its cord out of reach of children less than 8 years.
INTENDED USE OF THE PRODUCT
- This appliance is designed solely for domestic use. This product is not intended for commercial use. The manufacturer declines all responsibility for innapropiate use or incorrect setting of the controls.
en
- CAUTION : The appliance is not intended to be operated by means of an external timer or separate remote control system.
- Do not use the appliance outdoors.
- Do not store explosive or flammable substances such as aerosol cans and do not place or use gasoline or other flammable materials in or near the appliance: a fire may break out if the appliance is inadvertently switched on.
INSTALLATION
- Repairs must be carried out by a qualified technician, in compliance with the manufacturer's instructions and local safety regulations. Do not repair or replace any part of the appliance unless specifically stated in the user manual.
- Children should not perform installation operations. Keep children away during installation of the appliance. Keep the packaging materials (plastic bags, polystyrene parts, etc.) out of reach of children, during and after the installation of the appliance.
- After unpacking the appliance, make sure that it has not been damaged during transport. In the event of problems, contact the dealer or your nearest After-sales Service.
- Keep children away during installation of the appliance.
- The appliance must be disconnected from the power supply before carrying out any installation operation.
- During installation, make sure the appliance does not damage the power cable.
- Only activate the appliance when the installation procedure has been completed.
ELECTRICAL WARNINGS
- Make sure the voltage specified on the rating plate corresponds to that of your home.
• Regulations require that the appliance is connected to an earthed supply outlet. -
For appliances with fitted plug, if the plug is not suitable for you socket outlet, contact a qualified technician.
-
Do not use extension leads, multiple sockets or adapters. Do not connect the appliance to a socket which can be operated by remote control.
- The power cable must be long enough for connecting the appliance, once fitted in its housing, to the main power supply.
- Do not pull the power supply cable.
- If the power cable is damaged it must be replaced with an identical one. The power cable must only be replaced by a qualified technician in compliance with the manufacturer instructions and current safety regulations. Contact an authorized service center.
- Do not operate this appliance if it has a damaged mains cord or plug, if it is not working properly, or if it has been damaged or dropped. Do not immerse the mains cord or plug in water. Keep the cord away from hot surfaces.
- Do not touch the appliance with any wet part of the body and do not operate it when barefoot.
ELECTRICAL CONNECTIONS
Socket outlet / plug
If the fitted plug is not suitable for your socket outlet, contact After-Sales Service for further instruction. Do not attempt to change the plug yourself. This procedure needs to be carried out by a qualified technician in compliance with the manufacturer's instructions and current standard safety regulations.
CORRECT USE
• Never cover the toaster slot.
- Do not touch parts other than the operating controls, as the toaster will can become hot during toasting.
- Do not introduce any object inside the toaster, as this may cause damage or risks.
• Pull down the operating lever only for toasting: never block it.
• Make sure the crumb tray is perfectly in place before using.
- Never place aluminium foil on the warming rack. Never warm and toast at the same time.
- Avoid toasting food with extremely runny ingredients such as butter.
en
- As bread may burn, do not use toaster near or below curtains and other flammable materials.
- If the toaster starts to smoke, press the CANCEL button to stop toasting immediately.
- Do not attempt to remove the food when the toaster is in operation.
- Remove the bread carefully after toasting to avoid any injuries.
- Warning: When toasting small slices of bread less than 8.5 mm high, be careful of the potential risk of burning when taking out the slice.
- Be careful not to damage the internal mechanism or heating elements when removing the bread.
CLEANING AND MAINTENANCE
- The appliance must be disconnected from the power supply before carrying out any cleaning or maintenance.
• Never use steam cleaning equipment. - Allow the unit to cool down completely before cleaning or storing it.
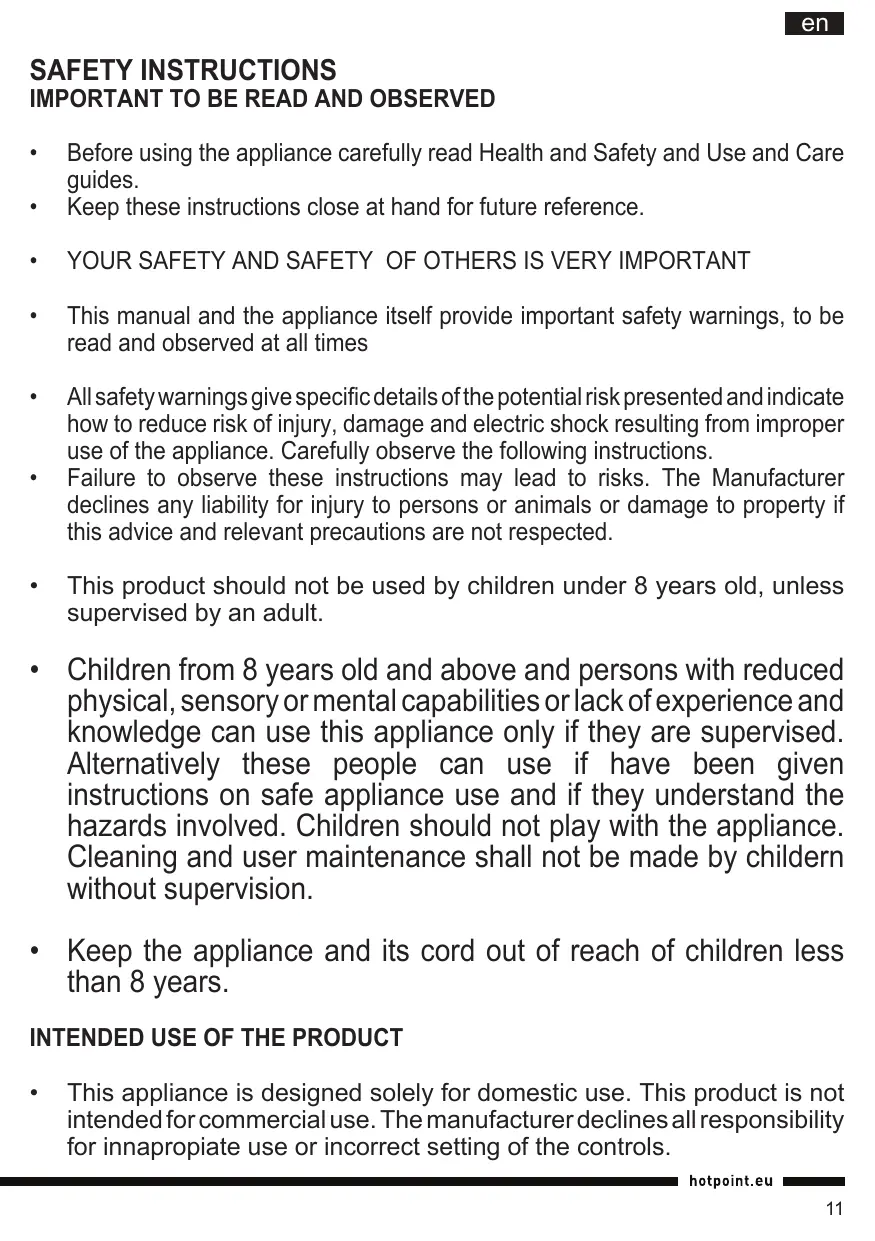
PARTS AND FEATURES
- Operating lever
- Cancel button
- Bagel/Sandwich button
- Defrost button
- Reheat button
- Toasting level buttons
- Display
- Cord wrap
- Removable crumb tray
- Sandwich cage
- Warming rack
INTRODUCTION
Thank you for purchasing our product.
In doing so, you have opted for an effective high-performance appliance.
If the instructions on the correct use of this appliance are not observed, the manufacturer shall assume no responsibility for any resulting damage.
The operating instructions may refer to different models: any difference is clearly identified.
BEFORE FIRST USE
Carefully wipe the outside of the appliance to remove any dust that may have accumulated. Dry with a dry cloth. Remove any stickers. As there is manufacturing residue or oil remained in the toaster or heat element, it usually will emit an odor for the first use. It is normal and will not occur after several times use. Before the first use, with the window open operate without any bread inside. Then let the toaster cool down and begin toasting.
USING THE TOASTER
- Put the food to be toasted into the bread slot. No more than one slice for each slot can be introduced at any one time.

Make sure the crumb tray is perfectly in place before using.
- Plug the power cord into the outlet.
- Set the toasting level to the desired colour using the toasting level buttons. The lowest level is 1 and the highest level is 8. The bar at the bottom of the display will show the set level.
If you toast only one slice, set the toasting level lower than for two slices. If you toast the food continuously, the toasting colour of the different slices can be slightly different or darker, even if the same level is used.
- Pull down the operating lever until it engages: toasting will begin at once. The display will show the countdown till the end of toasting. Once the bread has been toasted to the preset level, the operating lever will automatically spring up.

The operating lever can rest on the bottom of the slot only if the plug was connected.
- During the toasting process, if the browning is satisfactory, press the CANCEL button to stop toasting.
- If the bread was taken out of the freezer, set the toasting level according to your preference. Press the DEFROST button to toast it to your desired color, then pull down the operation lever until it is in place. The related symbol will appear on the display.
- If you want to reheat any cold toasted bread, press the REHEAT button. Toasting time is fixed in this mode: when time is over the operating lever will automatically spring up and stop the reheating process. The related symbol will appear on the display.
Press the BAGEL/SANDWICH button to switch functions bagel - sandwich - no special function activated. Related symbols will appear on the display.
- The Bagel function makes it possible to toast bread, bagels, muffins etc on one side only (external side), while the other side (internal side) remains warm. Bagels and muffins should be sliced in half before toasting.
- The sandwich function allows the user to toast sandwiches or different kinds of bread slowly. By such function, your sandwich will be well browned on the outside and cooked inside. To switch between functions, first press CANCEL before selecting the next function.
This function can also be used in combination with the warming rack, for better warming results of any kind of bread or bakery products.
During working condition, to switch between functions, first press CANCEL before selecting the next function. To make the carriage handle spring up automatically and make the appliance goes back
to the standby mode.

The function is not available on levels 1 and 2; in these cases, when the reheat button is down, the display will quickly flash 3 times reheat function will be turned off.

Toast any items only until they are golden brown and not brown or too dark.
Remove any burnt edges. Do not over-toast food containing starch - especially grain and potato products - to reduce the production of acrylamides.
If a slice gets stuck at the end of the toasting process, pull the power plug and carefully remove the bread after the toaster has cooled down.

The use of browning levels from 4 to 6 is recommended for the preparation of viches.

Depending on the quantity or quality of stuffing, it can happen that the inside of the vich is not warm enough or completely d: in these istances, please leave the vich into the slot for about one minute after g the toasting.

Internal heating elements can get less incandescent than external ones: this is a full working mode which doesn't affect the ess of browning.
USING THE SANDWICH CAGE
- Enlarge the cage opening by slightly pressing the handles with one hand.
- Place the sandwich into the cage and release the pressure on the handles; the cage will slightly close and the sandwich will be stable inside.
- Take the cage by the handles and insert the cage into one of the toaster slots.
- Set the browning level and activate the sandwich function.
- Remove the cage from the slot by taking the handles at the end of the cycle.
- Slightly press the handles to enlarge the cage and remove the sandwich into a dish.

Use this attachment in combination with the sandwich function for excellent results in ng.
USING THE WARMING RACK
The food that cannot be placed inside the slots (e.g. rolls, baguettes, croissants) can be warmed on the warming rack
- Place the support on the slot (see pic. 1 and 2)
- Use the button to set the desired toasting level.
- Pull down the operating lever until it engages.

Never place aluminium foil on the warming rack. Never warm and toast at the same

Only set browning levels 1 and 2 when using the warming rack with the four-slots per.
CLEANING AND MAINTENANCE
- Wipe the outside with a soft dry cloth after the toaster has cooled down. Never use metal polish.
- Pull out the crumb tray from the bottom of the toaster and empty it. If the toaster is used frequently, accumulated bread crumbs should be removed at least once a week. Make sure the crumb tray is completely closed before using the toaster again.
- When the toaster is not used or is stored, the power cord may be wound under the bottom of the toaster.
- If you use specific products for cleaning steel, be careful with the chrome parts, to avoid staining.
SAFEGUARDING THE ENVIRONMENT DISPOSAL OF PACKAGING MATERIALS

The packaging material is 100% recyclable and is marked with the recycle symbol (*). The various parts of the packaging must therefore be disposed of responsibility and in full compliance with
local authority regulations governing waste disposal.
SCRAPPING OF HOUSEHOLD APPLIANCES
When scrapping the appliance, make it unusable by cutting off the power cable and removing the doors and shelves (if present) so that children cannot easily climb inside and become trapped.

This appliance is manufactured with recyclable (*) or reusable materials. Dispose of it in accordance with local waste disposal regulations.
For further information on the treatment, recovery and recycling of household electrical appliances, contact your competent local authority, the collection service for household waste or the store where you purchase the appliance.
This appliance is marked in compliance with European Directive 2012/19/EU, Waste Electrical and Electronic Equipment (WEEE).
By ensuring this product is disposed of correctly, you will help prevent potential negative consequences for the environment and human health, which could otherwise be caused by inappropriate waste handling of this product.
The symbol (*) on the product or on the accompanying documentation indicates that it should not be treated as domestic waste but must be taken to an appropriate collection centre for the recycling of electrical
and electronic equipment.
DECLARATION OF CONFORMITY
This appliance has been designed, constructed and distributed in compliance with the safety requirements of European Directives:
• 2006/95/EC Low Voltage Directive
• 2004/108/EU Electromagnetic Compatibility Directive
CONSIGNES DE SÉCURITÉ
DÉCLARATION DE CONFORMITÉ
Güç (TT 22E types): 750 - 900 Watt
Güç (TT 44E types): 1500 - 1800 Watt