
PocketCinema Z20 - Projector AIPTEK - Free user manual and instructions
Find the device manual for free PocketCinema Z20 AIPTEK in PDF.


| Product Type | Pocket Projector |
| Brand | Aiptek |
| Model | PocketCinema Z20 |
| Display Technology | DLP |
| Native Resolution | 854 x 480 (WVGA) |
| Brightness | Up to 50 lumens |
| Contrast Ratio | 1000:1 |
| Projection Size | 20 to 120 inches |
| Throw Distance | 0.5 to 3 meters |
| Keystone Correction | ±30° (vertical) |
| Light Source | LED |
| Lamp Life | 20,000 hours |
| Inputs | HDMI, USB, Micro SD, AV |
| Audio | Built-in speaker (1W) |
| Power Supply | Rechargeable battery (Li-ion 5V/2A) |
| Battery Life | Up to 2 hours |
| Dimensions (W x D x H) | 10.5 x 10.5 x 2.5 cm |
| Weight | 200 g |
| Supported Media | Video, photo, music, office documents |
| Languages Support | Multiple (via OSD menu) |
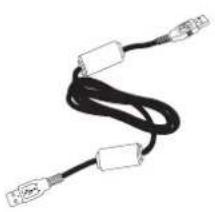
| Accessories Included | Remote control, USB cable, AV cable, manual |
| Cleaning Instructions | Wipe with a soft dry cloth; do not use liquids |
| Safety Warnings | Avoid direct eye exposure; keep away from water |
| Repairability | Lamp not user-replaceable; contact service center |
Frequently Asked Questions - PocketCinema Z20 AIPTEK
User questions about PocketCinema Z20 AIPTEK
0 question about this device. Answer the ones you know or ask your own.
Ask a new question about this device
Download the instructions for your Projector in PDF format for free! Find your manual PocketCinema Z20 - AIPTEK and take your electronic device back in hand. On this page are published all the documents necessary for the use of your device. PocketCinema Z20 by AIPTEK.
USER MANUAL PocketCinema Z20 AIPTEK
User's Manual
POCKETCINEMA™
Welcome:
Thank you kindly for purchasing this fine product.
Much investment in time and effort has gone into its development, and it is our hope that it will give you many years of trouble-free service.
Safety Notice:
- Do not drop, puncture or disassemble the device; otherwise the warranty will be voided.
- Avoid all contact with water, and dry hands before using.
- Do not expose the device to high temperature or leave it in direct sunlight. Doing so may damage the device.
- Use the device with care. Avoid pressing hard on the device body.
- For your own safety, avoid using the device when there is a storm or lightning.
- Use only the accessories supplied by the manufacturer.
- Keep the device out of the reach of infants.
- Risk of explosion if battery is replaced by an incorrect type.
FCC Compliance Statement:
This device complies with Part 15 of the FCC Rules. Operation is subjected to the following two conditions: (1) this device may not cause harmful interference, and (2) this device must accept any interference received, including interference that may cause undesired operation.

This equipment has been tested and found to comply with limits for a Class B digital device, pursuant to Part 15 of the FCC rules. These limits
are designed to provide reasonable protection against harmful interference in residential installations. This equipment generates, uses, and can radiate radio frequency energy, and if not installed and used in accordance with the instructions, may cause harmful interference to radio communications.
However, there is no guarantee that interference will not occur in a particular installation. If this equipment does cause interference to radio or television equipment reception, which can be determined by turning the equipment off and on, the user is encouraged to try to correct the interference by one or more of the following measures:
-Reorient or relocate the receiving antenna.
-Move the equipment away from the receiver.
-Plug the equipment into an outlet on a circuit different from that to which the receiver is connected.
-Consult the dealer or an experienced radio/television technician for additional suggestions.
You are cautioned that any change or modifications to the equipment not expressly approved by the party responsible for compliance could void Your authority to operate such equipment.



If the time arises to throw away your product, please recycle all the components possible.
Batteries and rechargeable batteries are not to be disposed in your domestic waste! Please recycle them at your local recycling point.
Together we can help to protect the environment.
Care and Safety Information:

Please follow all warnings, precautions and maintenance as recommended in this user's guide.
Warning- Keep away from liquid to avoid electric fires.
Warning- Do not disassemble the projector.
Warning- Avoid facing directly into projector's lens.
Avoid Hearing Damage:
Listening at high volume for a long period of time could cause
damage to your ears.


Eye Safety Warnings
Avoid staring/facing directly into the projector beam at all time.

Usage Notice:
Do:
- Turn off and unplug the power before cleaning the product.
- Use a soft dry cloth with mild detergent to clean the display housing.
- Unplug the power if the product is not used for a long period of time.
- Ensure that the ambient room temperature is within 5 - 35°C.
• Relative Humidity is 5 - 35°C, 80% (Max.), non-condensing.
Do not:

• Block the ventilation opening.
- Use abrasive cleaners, waxes or solvents to clean the unit.
• Use under the following conditions:
▶ In extremely hot, cold or humid environments.
▶ In areas susceptible to excessive dust and dirt.
▶ Near any appliance generating a strong magnetic field.
▶ In direct sunlight.
Table of Contents
Getting Started....1
Product overview .... 1
Package Content 2
Remote Controller.... 2
Reading LED indicators.... 3
Charging the battery 3
Inserting a memory card (optional).... 4
Turning on/off your projector.... 4
Setting language.... 4
Button Operation.... 5
Reading LCD indicators.... 5
Basic Operations....6
Recording a video clip 6
Taking a still picture 6
Projecting files 7
Playing files in other devices 11
Advanced Operations 13
Menu Setting items.... 13
File management with a PC.... 14
Flicker Setting Table 16
Battery Life Indicator.... 16
USB Projection (optional) 17
Specifications 22
Troubleshooting 24
Getting Started
Product overview

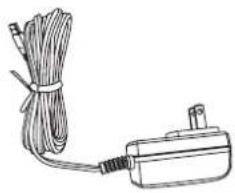
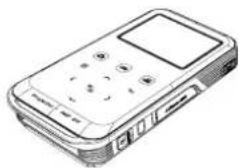
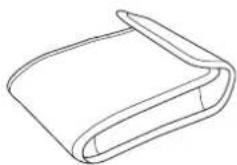
Package Content
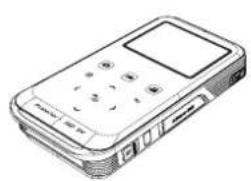
natural_image
Line drawing of a mobile phone with control panel and keypad (no text or symbols)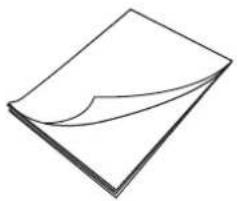
natural_image
Simple line drawing of a folded paper or document (no text or symbols)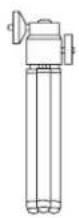

natural_image
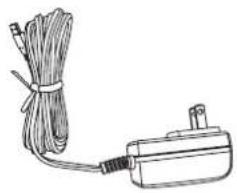
Simple line drawing of a cable-wrapped electrical component with a terminal outlet (no text or symbols)Projector Quick Guide Tripod AC power adapter
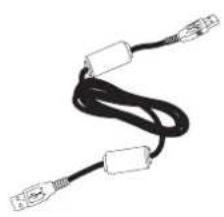
natural_image
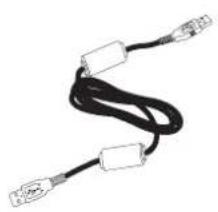
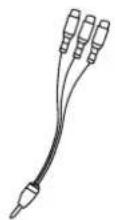
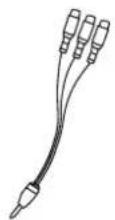
Coiled black cable with connectors, no visible text or symbolsUSB cable AV cable (RCA
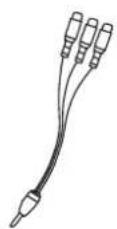
female to mini jack)

natural_image
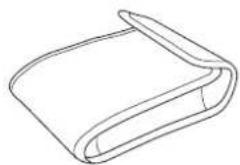
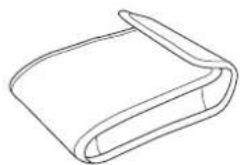
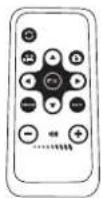
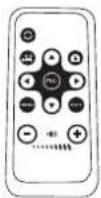
Simple line drawing of a rolled-up document or scroll (no text or symbols)Pouch Remote Controller
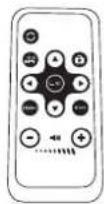
Optional Accessory:
iPod cable, AV cable (mini jack to mini jack), AV cable (RCA male to mini jack), HDMI cable, Pouch (bigger), Projection screen
Remote Controller
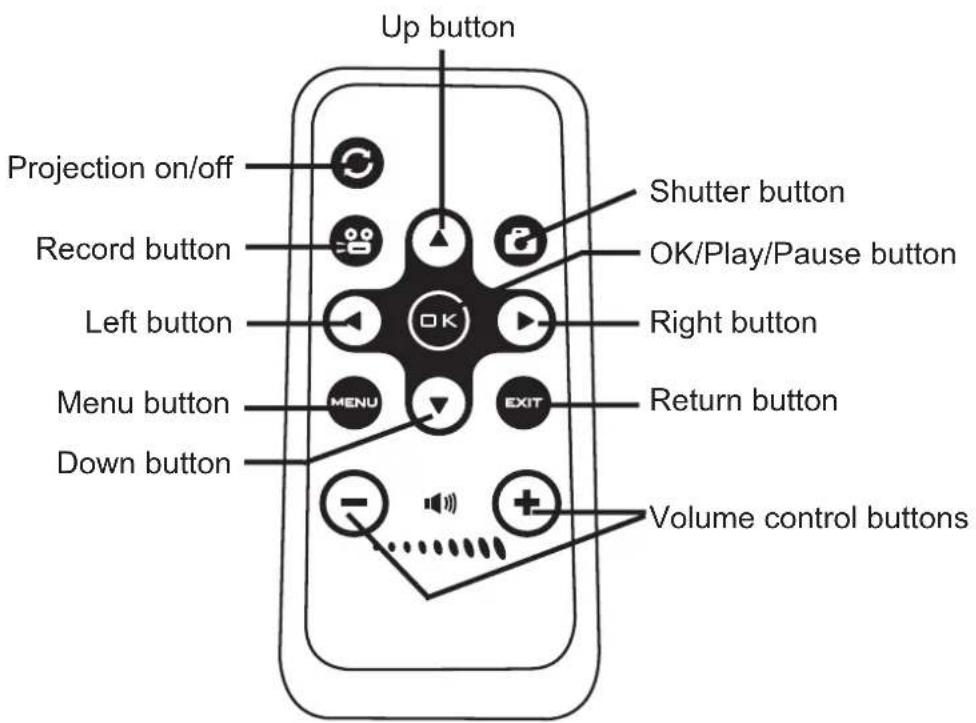
Reading LED indicators
The Power LED is lighting orange when projector is charged.
The Power LED is lighting green when connected with AC power adapter in standby mode or the battery is fully charged.
Charging the battery
1 Connect one end of the supplied AC adapter to the USB port of the projector and the other end to a wall outlet. OR
Connect one end of the supplied USB cable to the USB port of the projector and the other end to a powered PC. Make sure the projector is powered off.
2 The charging LED turns orange and the charging starts.
3 When interrupted the LED went off.

natural_image
Hand inserting a USB into a smartphone (no text or symbols visible)| Charging status Charging time | |
| Powered OFF, charged by AC adapter around 4 hours | |
| Powered OFF, charged by USB around 7 hours | |
| Powered ON and connecting with AC adapter no charging | |
| Powered ON and connecting with USB no charging | |
Inserting a memory card (optional)
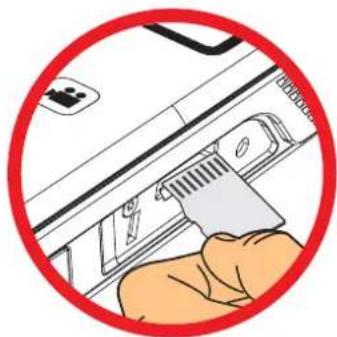
1 Open the Micro SD card cover.
2 Gently push the card as indicated (golden-fingers facing upwards) until the card reaches the end of the slot.
3 When the card is inserted successfully, the icon (☐) will appear on screen. To remove the card, push the card to release it and then pull it out gently.
4 Put the cover back.
natural_image
Illustration of a hand using a tool to adjust or install a device into a machine (no text or symbols visible)Turning on/off your projector
Slide the Power switch to "ON" position to turn on the projector. To turn off the projector, slide the Power switch to "OFF" position.

Setting language
1 Power on the projector.
2 Press the MENU button to enter the Setting screen.
3 Use the Up/Down ( ^/ ) button to select the Language item, and then Press the OK button to confirm.
4 Use the Up/Down ( ↗) button to select a language.
5 When done, press the OK button to confirm the setting.
Button Operation
| How to Action | |
| Bring up the menu Press the MENU button. | |
| Move the highlight bar Press the Up/Down/Left/Right button. | |
| Enter sub-menu/Confirm an item Press the OK button. | |
| Exit menu/Go back to upper menu Press the Return button (when in sub-menu). | |
Reading LCD indicators
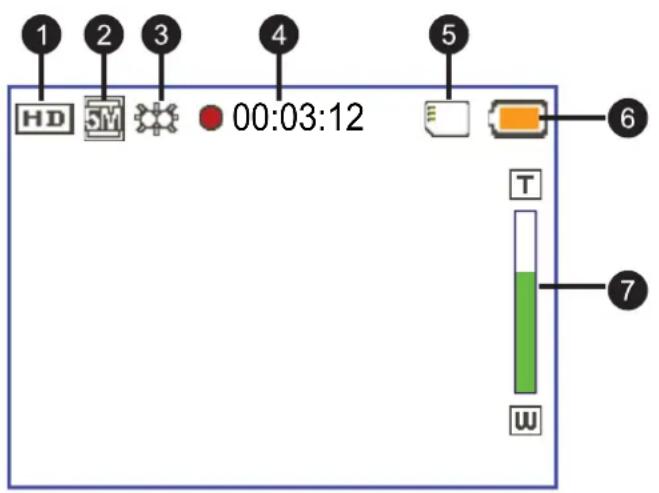
1 Video resolution Internal memory/SD of 5 I inserted
2 Picture resolution Battery life 6
3 LED light Zoom ratio indicator 7
4 Recording time
Basic Operations
Recording a video clip
1 Use the Up/Down ( ↗) buttons to zoom in or zoom out.
2 Press the Record (button to start recording.
3 Press the Record ( ) button again to stop recording.
4 While recording, press the OK/Quick Playback ( ^OK ) button to pause recording, and press the ( ^OK ) button again to resume recording.
Video recording will be stopped after 25 minutes due to power saving setting. If you want to continue recording, press the "Record" button again.
For better image quality, you may add extra light when the lighting is insufficient during recording video clips. Please press the Right button to turn on the LED light.
| Option Icon Description | ||
| On |  | Enable LED light. |
| Off |  | Disable LED light. |
Taking a still picture
1 Use the Up/Down ( ↗) buttons to zoom in or zoom out.
2 Press the Shutter ( ) button to take a picture.
For better image quality, you may add extra light when the lighting is insufficient during taking pictures. Please press the Right button to turn on the LED light.
| Option Icon Description | ||
| On |  | Enable LED light. |
| Auto |  -- -- | The LED light automatically fires when the lighting is insufficient. |
| Off |  | Disable LED light. |
Projecting files
1 Press the OK/Quick Playback (OK) button or the Left ( ) button.
2 Use the Up/Down buttons to select target folder.
3 When selecting one file, press the OK button to play it.
4 Press the Projection button (☐) to project. (☐ is lighting blue in working mode; ☐ is lighting white in standby mode.)
• There are two ways to view the files.
| OK/Quick Playback button Left button | |
| Video Picture | DCIM 0001/0001 |
| 100MEDIA 0001/0001 100MEDIA | DCIM 100MEDIA 0001/0001 |
| 100MEDIA PICT0010.JPG 0005/0012 | 100MEDIA CLIP0007.MP4 00:00:07 PICT0005.JPG 1MB CLIP0008.MP4 00:05:12 PICT0007.JPG 611KB PICT0010.JPG 809KB PICT0011.JPG 486KB 0005/0012 |
During Playback
- Playing Video
1 Press Left/Right button to move to previous/next file.
Long press Left/Right button to fast forward and fast rewind.
2 Use Up/Down button to control volume.
3 Press the OK button to pause the video (OK again for continue). The following status information will pop up.
| Icon Item Description | ||
 | FastRewind | Press Left button: scroll the files up.Long press Left button: fast rewind. |
 | Pause This is | a button to pause a Video file during playback. |
 | Play This is a | button to play a selected Video file. |
 | FastForward | Press Right button: scroll the files down.Long press Right button: fast forward. |
- Playing Photo
1 Use the Up/Down button to select target folder or a photo displayed in preview mode.
2 After a photo is selected, press the OK button to display full size of this photo.
3 Use the Left/Right button to display previous or next photo.
| Item Description | |
| Zoom in/out Push the Up/Down button. | |
| Lock/Release zoom ratio | When the zoom ratio is greater than 1.0x, press the OK button. |
| Browse the enlarged picture | When the zoom ratio is locked, use the Joystick to browse the picture. |
- Menu items in Playback mode
When playback video or photo files, press Menu (☐) button to set up the following features. Pressing menu button to bring up and close the menu screen.
| Item Description | |
| Delete Delete | the files. |
| Repeat | Repeat playing files in the folder. There are four options: Off, Single, All, and Random. |
| Slide show speed | Set the Slide show speed at 3, 5, or 8 seconds. |
| Icon Enable/Disable OSD icons to display on the screen. | |
When giving a presentation using PowerPoint/PDF documents, please save the PPT/PDF file into .jpeg format.

Adjust the Focus
Adjust the Focus by using the Focus switch to get a sharper and clear picture.
natural_image
Illustration of a suitcase inside a red circle (no text or symbols)Adjusting the Projected Image
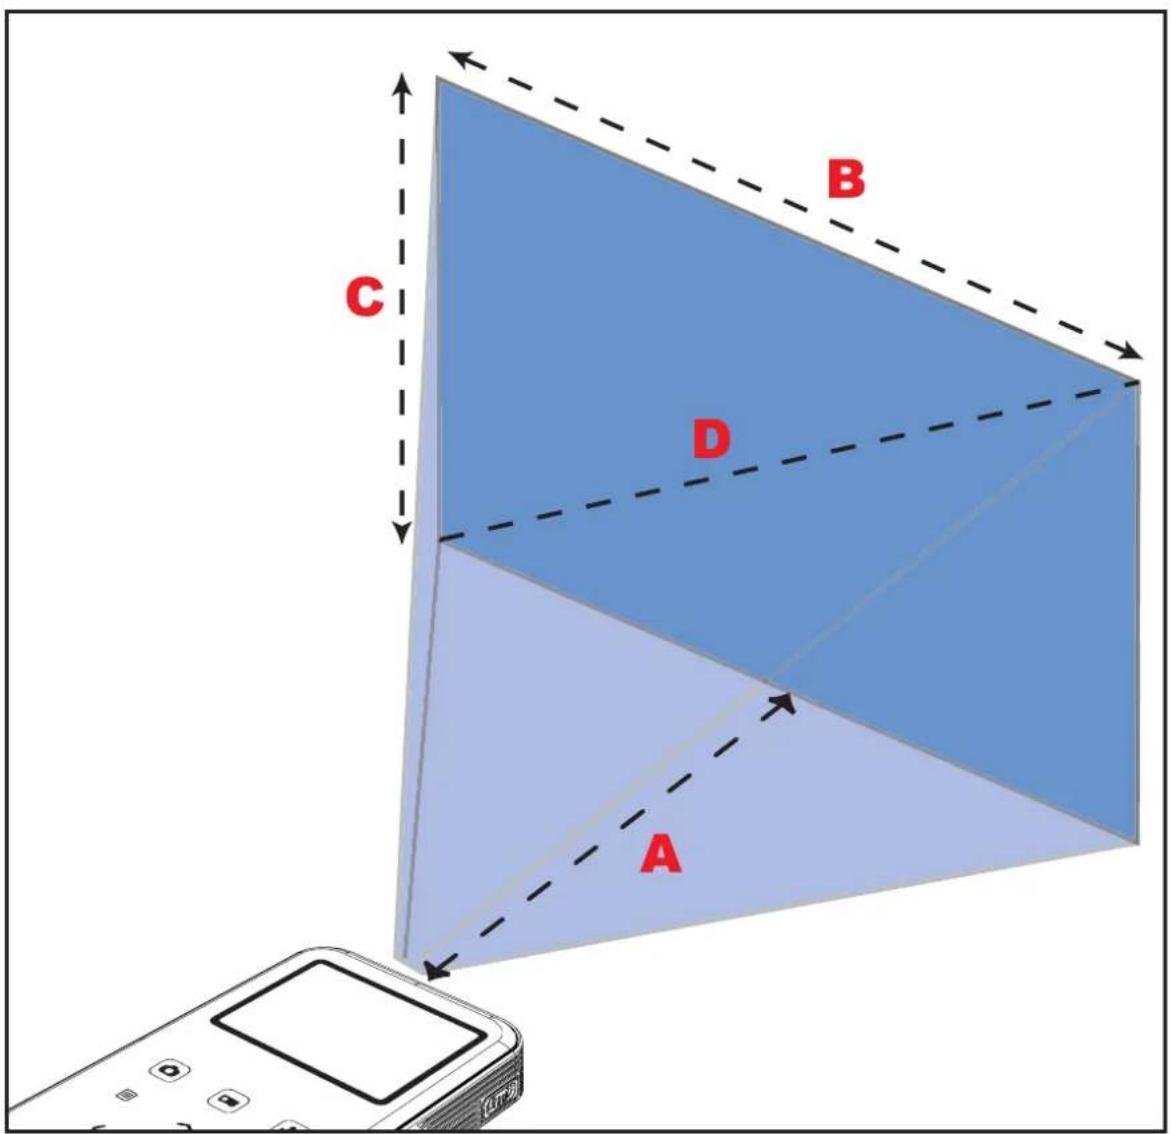
| Projection Distance (A) | Screen size - Width (B) | Screen Size - Height (C) | Screen Diagonal (D) | ||||
| (cm) (inch) | (cm) (inch) | (cm) (inch) | (cm) (inch) | ||||
| 19.0 7.5 | 12.2 4.8 9.1 | 3.6 15.2 6.0 | |||||
| 38.1 15 | 24.4 9.6 18.3 | 7.2 30.5 12.0 | |||||
| 63.5 25 | 40.6 16.0 30.5 | 12.0 50.8 | 20.0 | ||||
| 101.3 39 | 9 65.0 25.6 | 48.8 19.2 81.3 | 32.0 | ||||
| 133.0 52 | 4 85.3 33.6 | 64.0 25.2 106.7 | 42.0 | ||||
| 158.5 62 | 4 101.6 40.0 | 76.2 30.3 127.0 | 50.0 | ||||
| 190.2 74 | 9 121.9 48.0 | 91.4 36.0 152.4 | 60.0 | ||||
| 206.6 81 | 1 132.1 52.0 | 99.1 39.0 165.1 | 65.4 | ||||

Playing files in other devices
Connecting the projector with your media players
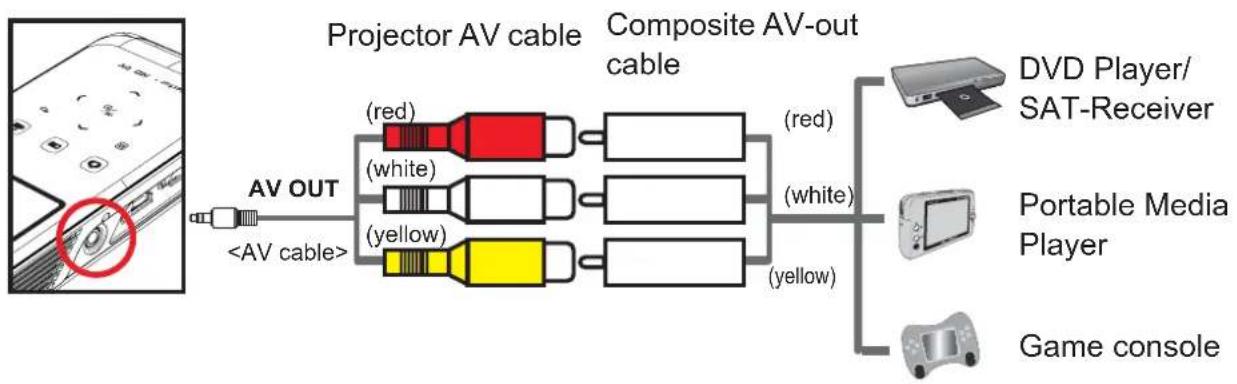
Before connecting your media player to projector, you need to have media player dedicated composite AV-out cable and projector AV cable ready.
flowchart
graph LR
    A["Projector AV cable"] --> B["Composite AV-out cable"]
    B --> C["DVD Player/SAT-Receiver"]
    B --> D["Portable Media Player"]
    B --> E["Game console"]
    F["AV OUT"] --> G["<AV cable>"]
    G --> H["(red)"]
    G --> I["(white)"]
    G --> J["(yellow)"]
    H --> K["(red)"]
    I --> L["(white)"]
    J --> M["(yellow)"]
1 Connect Composite AV-out cable to media player.
2 Connect both AV cables (yellow to yellow, white to white and red to red).
White might be black on some Media players or cables.
Please make sure that your media player is enabled with AV-out function.
Connecting the projector to your mobile media devices
1 Connect the other end of the projector cable to the AV jack of Projector.
2 Now you can project photos and videos from your mobile devices. You also can control the volume from control panel (Up/Down button).
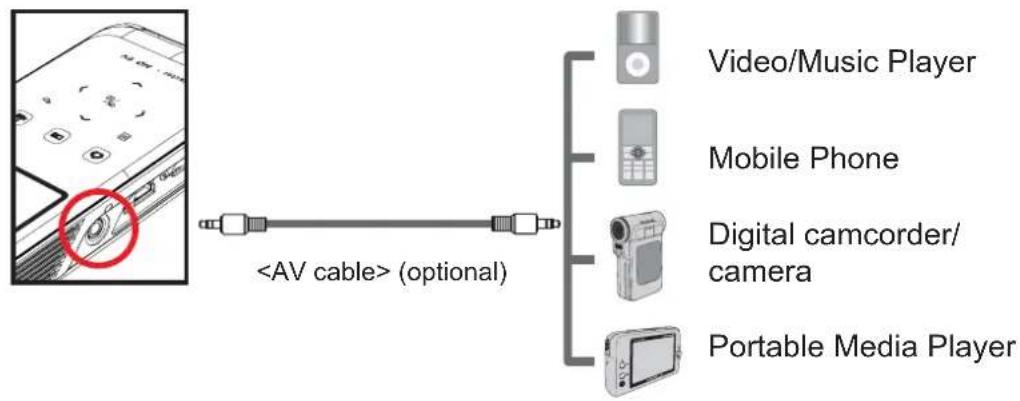
Connecting the projector with HDTV (optional)

1 Turn on your HDTV.
2 Connect the HDMI-in connector (the bigger end) of the HDMI cable to the HDTV.
3 Turn on the camcorder.
4 Connect the other end of the HDMI cable to your camcorder.
5 Switch the HDTV to "HDMI input" mode.
Menu Setting items
| Item Option Description | ||
| Video Resolution | QVGA Set the video resolution to QVGA (320x240 pixels). | |
| VGA Set the video resolution to VGA (640x480 pixels). | ||
| DVD(WVGA) Set the video resolution to DVD (854x480 pixels). | ||
| HD(720P) Set the video resolution to HD 720P (1280x720 pixels). | ||
| Picture Resolution | 3M Set the picture resolution to 3 mega pixels. | |
| 5M Set the picture resolution to 5 mega pixels. | ||
| 8M Set the picture resolution to 8 mega pixels. | ||
| Select Card | Internal memory/ Micro SD card | Select the storage devices between internal memory and Micro SD card. |
| Beep | Off | Disable beep sound. |
| On | Enable beep sound. | |
| Icon | On/Off | Enable/Disable OSD icons to display on the screen. |
| Clock - | Set date and time. | |
| Language | - | Let you select the language used for OSD. |
| Keypad Sensitivity | 1 ~ 5 Set the sensitivity of the touch-pad. | |
| Display Auto Off | On/Off Enable/Disable the LCD monitor display for power-saving purpose. | |
| Flicker | 50Hz | Set flicker frequency to 50Hz. |
| 60Hz | Set flicker frequency to 60Hz. | |
| TV System | NTSC | Set TV system compatibility to NTSC. This option is suitable for America, Taiwan, Japan, and Korea areas. |
| PAL | Set TV system compatibility to PAL. This option is suitable for Germany, England, Italy, Netherlands, China, Japan, and Hong Kong. | |
| Format | No | Cancel action. |
| Yes | Format the storage medium. Note that all files stored in the medium will be gone. | |
| Default | No | Cancel action. |
| Yes | Restore factory defaults. Note that your current settings will be overridden. | |
File management with a PC

For select model only. Please refer to the package printing for detailed specification.
Follow the procedures below to manage files in either built-in memory or memory card by using a PC or Notebook.
1 Make sure the projector is powered off.
2 Connect one end of the bundled USB cable to the USB port of the projector and the other end to a powered PC.
3 Please switch on the projector and wait until the picture below appears on the projection screen. Press OK to enter Disk mode.
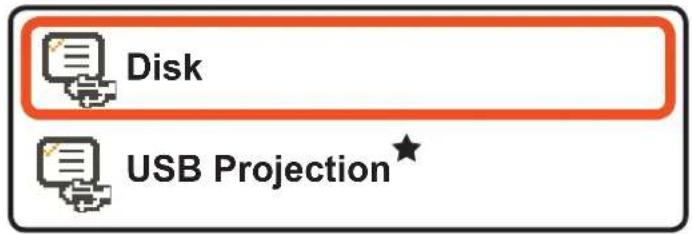
4 Two removable disks will appear in "My Computer".
| Disk Name Description | |
| Removable Disk for storing your recordings. | |
| DV Projector | for storing AMC, E-manual and USB Driver★ |
! PC can only recognize one storage medium each time (If the projector with SD Card inside, the computer will detect the SD Card. If you want to detect the internal memory, you have to remove the SD Card.)
Do not switch the storage medium during operation.
When connecting the projector to PC USB port without turning on the projector, the PC starts charging the battery inside the projector. To read the files in the memory, press the Power button.
How to download YouTube video for projection
During installing ArcSoft Media Converter (AMC), you are recommended to install ArcSoft Video Downloader as well. It will bring you more convenience to download the videos from the Internet and convert them as mp4 format to be played back in your projector. Then you can share them with your family and friends.

• How to use ArcSoft Video Downloader
1 Complete the ArcSoft Video Downloader installation.
2 Run Internet Explorer 6 or above.
3 Launch your favorite webpage and then move your cursor to the video clip.
4 Click the "download" button on the top left corner of the window.

5 This video file will be downloaded into AMC automatically. Please specify the file destination and press Start to make file conversion.
![ArcSoft MediaConverter Select Conversion Settings 2019-05-2019 ConnectedDevice Device connection not support - Value Outputs: View: (C) ArcSoft MediaConverter C:\Users\ACB\360\360\360\360\360\360\360\360\360\360\360\360\360\360\360\360\360\360\360\360\360\360\360\360\360\36 Personal Use the application to convert subbands by click the following: computer: HKEY web files [open] AMF File Name: Size Control Protocol Description Options YouTube - Xboxer_0x8 40.8 KB RLY 00:18:02 Convert To: LLCA 150 Local Directory: C:\Documents and Settings\Acq.A.B. Start](/content/2026/06/1276371/images/ab9e9ef0990d3a505120b53012e23ae194d8e96a7f99271999100243275af0a1.jpg)
6 The converted video will be as into the assigned directory as mp4 format.
Flicker Setting Table
| Region | England | Germany | France | Italy | Spain | Netherlands | Russia | |
| Setting | 50Hz | 50Hz | 50Hz | 50Hz | 50Hz | 50Hz | ||
| Region | Portugal | America | Taiwan | China | China | Japan | Korea | Thailand |
| Setting | 50Hz | 60Hz | 60Hz | 50Hz | 50Hz | 50/60Hz | 60Hz | 50Hz |
Battery Life Indicator
| Icon Description | |
 | Full battery life |
 | Moderate battery life |
 | Low battery life |
 | Empty battery life |
Note 1: To avoid sudden outage of power supply, you are recommended to plug AC power adapter first then take off the battery when the icon indicates low battery life.
Note 2: When "Battery Low" message appeared on the screen, the projector will be powered off automatically.

For select model only. Please refer to the package printing for detailed specification.
USB Projection (optional)★

System requirements

- Pentium 4 / Athlon / Core 2 Duo 2.6 GHz or higher processor.
- 1GB RAM or higher (Higher memory recommended for optimal performance)
- Available USB 2.0 port
- Windows XP SP2 / Windows Vista / Windows 7
- Recommended Resolution for video projection: 800*600
Installing Driver★
1 Make sure the projector is powered off.
2 Connect one end of the bundled USB cable to the USB port of the projector and the other end to a powered PC.
3 Please switch on the projector and wait until the picture below appears on the projection screen. Press OK to enter Disk mode.

4 Two removable disks will appear in "My Computer". Please double-click the disk named DV Projector -> USB driver folder -> Setup.exe program.
5 Click Next to continue.
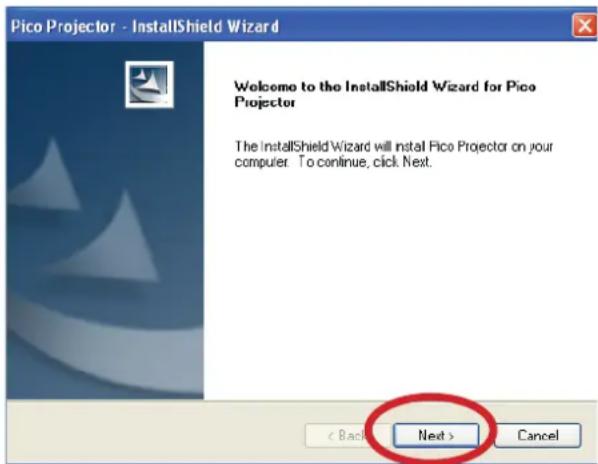
6 Click Install to begin the installation.

7 Installing driver.
(The actual screen may vary depending on the operating system you use.)

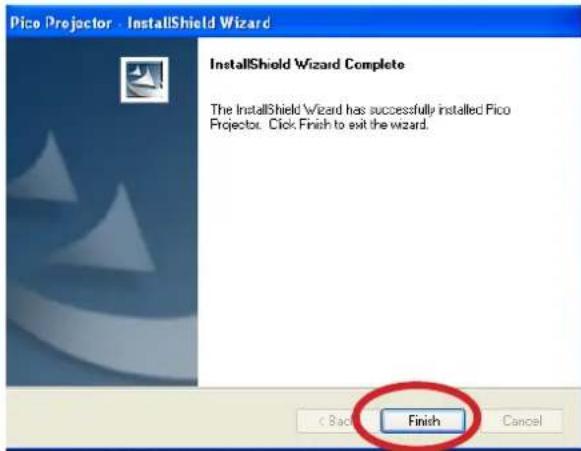
8 Click Finish.
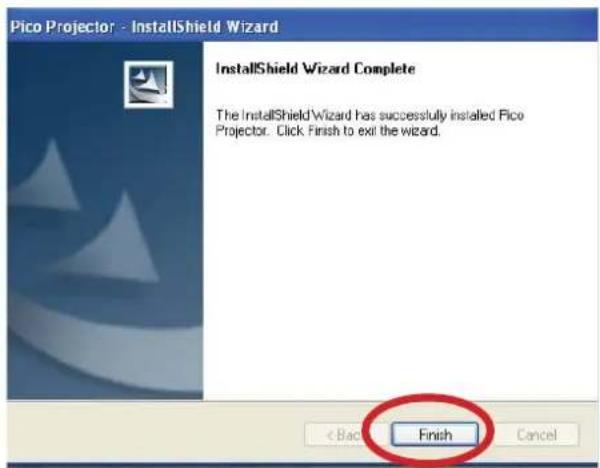
9 Please unplug the USB cable for a second to exit Disk mode. Then restart your computer then plug the USB cable again.
10 Please switch on the projector and wait until the picture below appears on the projection screen. Select "USB Projection" and press OK.
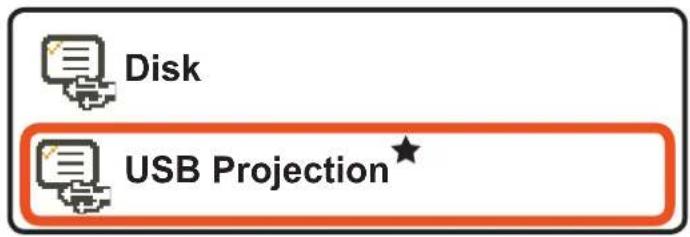
11 You will find a small projector icon ( ) on the function bar of your PC.

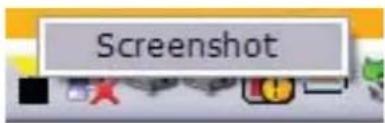
Note 1: Right-click the projector icon and click Screenshot to freeze the current projecting screen. Just PC display is in working mode.
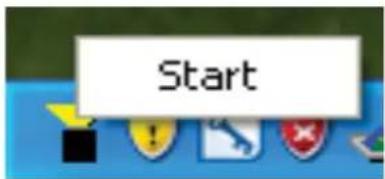
Note 2: Right-click the projector icon and click Start to resume the real-time projecting.
Verification device driver installation★
The following procedure allows you to verify the device driver installation.
1 Please right click "My Computer" -> "Properties" -> "Hardware" -> "Device Manager". (For Windows XP user)
Please right click "Start" -> "My Computer" -> "Device Manager". (For Windows Vista and Windows 7 users)
2 Then double click "Imaging devices". You will find "Pico Projector" on "Imaging devices".

Specifications
| Item Description | |
| Light Source RGB LED | |
| LCD Display 2.4" (6 cm) LCD | |
| Brightness 15 Lumens (AC) | Mode); 12 Lumens (Battery Mode) |
| Aspect Ratio 4:3 | |
| Resolution 640 x 480 (VGA) Pixels | |
| Projection Image Size 15 | cm ~ 165.1 cm (6" ~ 65" Diagonal) |
| Projection Distance 19 cm | ~ 206 cm |
| Contrast Ratio 200:1 | |
| Zoom & Focus Manual | |
| Projection Source External | from 3-in-1 AV jack, build-in memory or memory card |
| Play Back Format | Photo: JPEGVideo: MPEG-4( ASF), H.264(MP4), M-JPEG(AVI)Audio: MP3 |
| Sensor Resolution 5M | |
| Video Clip HD 720p, DVD | (WVGA), VGA, QVGA |
| Image Resolution 8M, 5M, | 3M |
| Lens Focus Fixed | |
| Output | HDMI, Audio |
| Audio Speaker | Mono |
| Built-in Memory | 2GB |
| Memory Slot | MicroSD up to 32GB |
| Power Supply | AC power adapter (5V/2A) or embedded rechargeable battery 2100mAh |
| Battery Life | Up to 120 minutes |
| Power consumption | Working mode: 5 WStandby mode (Projector light off): 3.5W |
| Operation temperature | 0°C ~ 35°C |
| Bundled Software Arcsoft | Media Converter |
| Dimension (LxWxH) 125 x | 62 x 24 mm |
| Package Content | AV cable (RCA female to mini jack), USB cable, Tripod, AC power adapter, Quick Guide, Remote controller, Pouch |
| Optional Accessory | iPod cable, AV cable (mini jack to mini jack ), AV cable (RCA male to mini jack), HDMI Cable, Pouch (bigger), Projection screen |
Note: Specifications are subject to change without notification.
Supported file types for conversion (Input file formats)
- Windows AVI files (*.AVI)
- Advanced Systems Format (*.ASF)
- Video CD (*.DAT)
- Quick Time files (*.MOV)
- MP4 files (*.MP4; *.M4V)
- MPEG (*.MPG; *.MPEG; *.MPE)
- RealMedia Video (*.RMVB)
- Windows Media Video (*.WMV)
- Microsoft PowerPoint (*.ppt, *.pps)
Supported file types for export to projector
- MPEG4 MP4 (H.264)
Troubleshooting
If your projector does not seem to be functioning properly, check the items below before you contact an authorized service center.
| Symptom Check Point | |
| The projector can not be turned on. | ·Ensure the battery is fully charged or the AC power adapter is in use. |
| The projected image is too dark. | ·Use the projector in a darker environment.·Increase the brightness by using the AC power adapter.·Project the image on a flat, white surface.·Decrease the size of projected image. |
| The projected image is dim. | ·Adjust the focus. Please refer to “Adjusting the Focus” section.·Check if the lens is dirty.·Replace with an image of higher resolution. |
| The image is not played. | ·Ensure the image format is compatible.·Replace with another file or memory card.·Convert the file with the attached AMC software. |
| No image is projected when an AV device is connected. | ·Ensure the connected device is equipped with AV-out function.·Check if the AV Cable is connected, and the projector is switched to AV-in function.·Check if the AV Cable is plugged correctly. |
| No image is projected when a computer is connected. | ·Check if the USB Cable is plugged correctly.·Make sure the PC has been switched to projector display.·Ensure the display resolution of PC screen is 640x480 or 800x600. |
| The surface temperature of projector ascended. | As the high-luminance LED equipped in the projector will generate heat in long-time use, the projector case will help to dissipate heat so that its surface temperature will ascend. This will not affect the performance of projector. Please operate the projector in a ventilated environment indoor as far as possible. |
Nutzungshinweise:
natural_image
Four line drawings of electronic devices: a cord with connectors, a medical device, and a remote control (no text or symbols)natural_image
Line drawing of a remote control device with scroll and keypad (no text or symbols)natural_image
Illustration of a hand inserting a cable into a smartphone (no text or symbols visible)natural_image
Illustration of a hand using a tool to adjust or install a device into a rack (no text or symbols visible)natural_image
Illustration of a suitcase inside a red circle (no text or symbols)Spezifikationen
natural_image
Line drawing of a mobile phone with control panel and buttons (no text or symbols)
natural_image
Simple line drawing of a folded paper or document with no text or symbols

natural_image
Simple line drawing of a cable tied with a small electronic device (no text or symbols)natural_image
Coiled black cable with two connectors, no text or symbols visibleCâble USB Câble AV


natural_image
Simple line drawing of a rolled-up document or scroll (no text or symbols)natural_image
Illustration of a hand inserting a screwdriver into a smartphone (no text or symbols visible)natural_image
Illustration of a hand using a computer to clean or install a device (no text or symbols visible)Régler la langue
natural_image
Illustration of a stylized car with 'LTRI' logo, enclosed in a red circle (no text or symbols on the car itself)• Comment utiliser ArcSoft Video Downloader
Spécifications
natural_image
Line drawing of a handheld electronic device with control panel and display (no text or symbols)
natural_image
Simple line drawing of a folded paper or document (no text or symbols)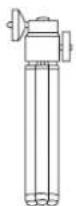
natural_image
Simple line drawing of a cable tied with a small electronic device (no text or symbols)corrente
natural_image
Coiled black cable with connector connectors (no text or symbols visible)

natural_image
Simple line drawing of a rolled-up document or scroll (no text or symbols)natural_image
Hand inserting a plug into a smartphone (no text or symbols visible)natural_image
Illustration of a hand using a computer to adjust a device (no text or symbols visible)natural_image
Illustration of a suitcase inside a red circle (no text or symbols)
Specifiche
natural_image
Line drawing of a mobile phone with control panel and display (no text or symbols)
natural_image
Simple line drawing of a folded paper or document (no text or symbols)

natural_image
Simple line drawing of a cable-wrapped electrical component with a terminal outlet (no text or symbols)alimentación de CA
natural_image
Coiled black cable with connector connectors (no text or symbols visible)

natural_image
Simple line drawing of a rolled-up document or scroll (no text or symbols)
Cable USB Cable de AV
Funda Mando a distancia
(hembra RCA a miniconector)
Accesorio opcional:
natural_image
Illustration of a hand inserting a cable into a smartphone (no text or symbols visible)natural_image
Illustration of a hand using a tool to clean or install electronic equipment (no text or symbols visible)natural_image
Illustration of a suitcase inside a red circle (no text or symbols)- Cómo utilizar ArcSoft Video Downloader
8 Haga clic en Finalizar (Finish).

Especificaciones
Gebruiksmededeling:
Dit moet u doen:
natural_image
Line drawing of a mobile phone with control panel and buttons (no text or symbols)
natural_image
Simple line drawing of a folded paper or document (no text or symbols)
natural_image
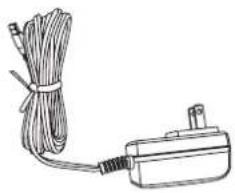
Simple line drawing of a cable and plug (no text or symbols)Projector Snelstartgids Statief Wisselstroomadapter
natural_image
Coiled black cable with connector connectors (no text or symbols visible)USB-kabel AV-kabel
natural_image
Simple line drawing of a folded or curled object (no text or symbols)natural_image
Hand inserting a USB into a smartphone (no text or symbols visible)natural_image
Illustration of a hand using a tool to clean or install electronic equipment (no text or symbols visible)De taal instellen
natural_image
Illustration of a stylized car with a red circular border (no text or symbols)Specificaties
natural_image
Line drawing of a mobile phone with control panel and buttons (no text or symbols)
natural_image
Simple line drawing of a folded paper or document (no text or symbols)Projector Guia de consulta rápida

natural_image
Simple line drawing of a cordless cable connected to a small electrical component (no text or symbols)Tripé Transformador AC
natural_image
Coiled black cable with connector connectors (no text or symbols visible)Cabo USB Cabo AV

natural_image
Simple line drawing of a folded or curled object resembling a rolled document or scroll (no text or symbols)Bolsa Controlo remoto
natural_image
Illustration of a hand inserting a cable into a smartphone (no text or symbols visible)natural_image
Illustration of a hand using a computer to adjust a device (no text or symbols visible)Ligar/desligar o projector
Definição do idioma
natural_image
Illustration of a closed box with a red circular border (no text or symbols)- Como utilizar o ArcSoft Video Downloader
7 A instalar o controlador.

Especificações
natural_image
Coiled black cable with three connectors (no text or symbols visible)USB kablosu
AV kablosu

(RCA dişi -> mini jak)
natural_image
Simple line drawing of a rolled-up document or scroll (no text or symbols)Kilif
Uzaktan Kumanda
İsteğe Bağlı Aksesuar:
natural_image
Illustration of a hand inserting a screwdriver into a smartphone (no text or symbols visible)natural_image
Illustration of a hand using a tool to clean or install electronic equipment (no text or symbols visible)Dil ayarı
natural_image
Illustration of a suitcase inside a red circle (no text or symbols)7 Sürücü kuruluyor.
Teknik Özellikler
natural_image
Line drawing of a mobile phone with control panel and display (no text or symbols)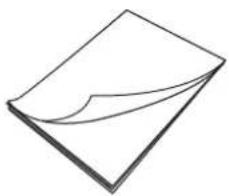
natural_image
Simple line drawing of a folded paper or document (no text or symbols)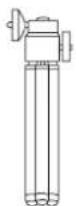
natural_image
Simple line drawing of a cable and power plug (no text or symbols)energia AC
natural_image
Coiled black cable with connector connectors (no text or symbols visible)Cabo USB Cabo AV
(RCA fêmea para mini entrada)

natural_image
Simple line drawing of a rolled-up document or scroll (no text or symbols)Bolsa Controle remoto

Acessório Opcional:
natural_image
Illustration of a hand inserting a cable into a smartphone (no text or symbols visible)natural_image
Illustration of a hand using a tool to clean or install electronic equipment (no text or symbols visible)Definição do idioma
natural_image
Illustration of a suitcase inside a red circle (no text or symbols)- Como usar o ArcSoft Video Downloader
7 Instalando o driver.
Especificações
natural_image
Simple line drawing of a cable-wrapped electrical plug with a terminal outlet (no text or symbols)محول thyار المتردد

二十五ي حامل

natural_image
Simple line drawing of a folded paper or document (no text or symbols)ال二十五SRيع
natural_image
Line drawing of a mobile phone with control panel and display (no text or symbols)جهاز العرض

وحدة التحكم عن بُعد
natural_image
Simple line drawing of a rolled-up document or scroll (no text or symbols)جراب
natural_image
Coiled black cable with connector connectors (no text or symbols visible)USB كبل
الملحق الاختياري:
natural_image
Hand holding a smartphone with a screwdriver inserted, enclosed in a red circle (no text or symbols visible)natural_image
Illustration of a hand using a computer to adjust a device (no text or symbols visible)natural_image
Illustration of a suitcase inside a red circle (no text or symbols)ضبط التركيز

natural_image
Line drawing of a mobile phone with control panel and buttons (no text or symbols)
natural_image
Simple line drawing of a folded paper or document (no text or symbols)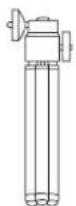

natural_image
Simple line drawing of a cable and a small electric motor (no text or symbols)投影機 快速指南 三腳架 AC 變壓器

natural_image
Coiled black cable with connector connectors (no text or symbols visible)USB 連接線 AV 端子線

(RCA 母插頭對迷你插孔)

natural_image
Simple line drawing of a folded or curled object (no text or symbols)便攜袋 遙控器
選購配件:
natural_image
Illustration of a hand inserting a cable into a smartphone (no text or symbols visible)natural_image
Illustration of a hand using a knife to clean or store items (no text or symbols visible)開/關投影機
設定語言
natural_image
Illustration of a stylized car with 'LTR' logo, enclosed in a red circle (no text or symbols on the car itself)調整投影影像
| 投影距離(A) | 螢幕大小—寬度(B) | 螢幕大小—高度(C) | 螢幕對角線(D) | ||||
| (公分) | (吋)(公分) | (吋) | (公分)(吋) | (公分) | (吋) | ||
| 19.0 | 7.5 | 12.2 | 4.8 | 9.1 | 3.6 | 15.2 | 6.0 |
| 38.1 | 15 | 24.4 | 9.6 | 18.3 | 7.2 | 30.5 | 12.0 |
| 63.5 | 25 | 40.6 | 16.0 | 30.5 | 12.0 | 50.8 | 20.0 |
| 101.3 | 39.9 | 65.0 | 25.6 | 48.8 | 19.2 | 81.3 | 32.0 |
| 133.0 | 52.4 | 85.3 | 33.6 | 64.0 | 25.2 | 106.7 | 42.0 |
| 158.5 | 6 | 2 6.4 | 101.40.0 | 76.2 | 30.3 | 127.0 | 50.0 |
| 190.2 | 74.9 | 121.9 | 48.0 | 91.4 | 36.0 | 152.4 | 60.0 |
| 206.6 | 81.1 | 132.1 | 52.0 | 99.1 | 39.0 | 165.1 | 65.4 |
連接投影機與您的媒體播放器
6 按一下安裝,開始進行安裝。

7 安裝驅動程式。
8 按一下完成。

確認裝置驅動程式安裝★
系統規格表
natural_image
Illustration of a hand inserting a cable into a smartphone (no text or symbols visible)natural_image
Illustration of a hand using a tool to adjust or install a device into a rack (no text or symbols visible)打开/关闭投影机电源
设置语言
natural_image
Close-up of a metallic hard drive component enclosed in a red circle (no text or symbols visible)调整投影图像
| 投影距离(A) | 屏幕尺寸 - 宽度(B) | 屏幕尺寸 - 高度(C) | 屏幕对角线(D) | ||||
| (cm) | (英寸) | (cm) | (英寸) | (cm) | (英寸) | (cm) | (英寸) |
| 19.0 | 7.5 | 12.2 | 4.8 | 9.1 | 3.6 | 15.2 | 6.0 |
| 38.1 | 15 | 24.4 | 9.6 | 18.3 | 7.2 | 30.5 | 12.0 |
| 63.5 | 25 | 40.6 | 16.0 | 30.5 | 12.0 | 50.8 | 20.0 |
| 101.3 | 39.9 | 65.0 | 25.6 | 48.8 | 19.2 | 81.3 | 32.0 |
| 133.0 | 52.4 | 85.3 | 33.6 | 64.0 | 25.2 | 106.7 | 42.0 |
| 158.5 | 62.4 | 101.6 | 40.0 | 76.2 | 30.3 | 127.0 | 50.0 |
| 190.2 | 74.9 | 121.9 | 48.0 | 91.4 | 36.0 | 152.4 | 60.0 |
| 206.6 | 81.1 | 132.1 | 52.0 | 99.1 | 39.0 | 165.1 | 65.4 |

播放其它设备中的文件
将投影机连接到媒体播放机
7 安装驱动程序。
8 单击Finish(完成)。
natural_image
Line drawing of a mobile phone with control panel and display (no text or symbols)
natural_image
Simple line drawing of a folded paper or document (no text or symbols)

natural_image
Simple line drawing of a cable and a small electric motor (no text or symbols)natural_image
Coiled black cable with connector connectors (no text or symbols visible)natural_image
Simple line drawing of a rolled-up document or scroll (no text or symbols)
ポーチ リモートコントロ 一ラー
オプションアクセサリー:
natural_image
Illustration of a hand inserting a plug into a smartphone (no text or symbols visible)natural_image
Illustration of a hand using a knife to clean or adjust a device (no text or symbols visible)言語を設定する
natural_image
Illustration of a stylized suitcase inside a red circle (no text or symbols)映写された画像を調整する
| 映写距離(A) 画面サイズ-幅(B) 画面サイズ-高さ(C) 画面対角(D) | ||||||||||
| (cm) | (インチ) | (cm) | (インチ) | (cm) | (インチ) | (cm) | (インチ) | |||
| 19.0 | 7.5 | 12.2 | 4.8 | 9.1 | 3.6 | 15.2 | 6.0 | |||
| 38.1 | 15 | 24.4 | 9.6 | 18.3 | 7.2 | 30.5 | 12.0 | |||
| 63.5 | 25 | 40.6 | 16.0 | 30.5 | 12.0 | 50.8 | 20.0 | |||
| 101.3 | 3 | 9.9 | 65.0 | 25.6 | 48.8 | 19.2 | 81.3 | 32.0 | ||
| 133.0 | 5 | 2.4 | 85.3 | 33.6 | 64.0 | 25.2 | 106.7 | 42.0 | ||
| 158.5 | 6 | 2.4 | 101.6 | 40.0 | 76.2 | 30.3 | 127.0 | 50.0 | ||
| 190.2 | 7 | 4.9 | 121.9 | 48.0 | 91.4 | 36.0 | 152.4 | 60.0 | ||
| 206.6 | 8 | 1.1 | 132.1 | 52.0 | 99.1 | 39.0 | 165.1 | 65.4 | ||

7 ドライバをインストールします。
仕様
natural_image
Illustration of a hand using a screwdriver to insert a smartphone (no text or symbols visible)natural_image
Illustration of a hand using a knife to clean or adjust a device (no text or symbols visible)프로젝터 켜기/끄기
언어설정하기
natural_image
Illustration of a stylized refrigerator inside a red circle (no text or symbols)투사 이미지 조정하기
| 투사 거리(A) | 화면 크기-폭(B) | 화면 크기-높이(C) | 화면 대각선(D) | ||||
| (cm) | (인치) | (cm) | (인치) | (cm) | (인치) | (cm) | (인치) |
| 19.0 | 7.5 | 12.2 | 4.8 | 9.1 | 3.6 | 15.2 | 6.0 |
| 38.1 | 15 | 24.4 | 9.6 | 18.3 | 7.2 | 30.5 | 12.0 |
| 63.5 | 25 | 40.6 | 16.0 | 30.5 | 12.0 | 50.8 | 20.0 |
| 101.3 | 39.9 | 65.0 | 25.6 | 48.8 | 19.2 | 81.3 | 32.0 |
| 133.0 | 52.4 | 85.3 | 33.6 | 64.0 | 25.2 | 106.7 | 42.0 |
| 158.5 | 62.4 | 101.6 | 40.0 | 76.2 | 30.3 | 127.0 | 50.0 |
| 190.2 | 74.9 | 121.9 | 48.0 | 91.4 | 36.0 | 152.4 | 60.0 |
| 206.6 | 81.1 | 132.1 | 52.0 | 99.1 | 39.0 | 165.1 | 65.4 |

다른장치의파일재생하기
프로젝터를 미디어플레이어에연결하기
7 드라이버 설치하기.

장치 드라이버 설치 확인★


- POCKETCINEMA™
- Welcome:
- Safety Notice:
- FCC Compliance Statement:
- Care and Safety Information:
- Avoid Hearing Damage:
- Eye Safety Warnings
- Usage Notice:
- Do:
- Do not:
- Table of Contents
- Getting Started....1
- Basic Operations....6
- Advanced Operations 13
- Specifications 22
- Troubleshooting 24
- Getting Started
- Product overview
- Package Content
- Optional Accessory:
- Remote Controller
- Reading LED indicators
- Charging the battery
- Inserting a memory card (optional)
- Turning on/off your projector
- Setting language
- Button Operation
- Reading LCD indicators
- Basic Operations
- Recording a video clip
- Taking a still picture
- Projecting files
- During Playback
- - Playing Video
- - Playing Photo
- - Menu items in Playback mode
- Adjust the Focus
- Playing files in other devices
- Connecting the projector with your media players
- Connecting the projector to your mobile media devices
- Connecting the projector with HDTV (optional)
- File management with a PC
- How to download YouTube video for projection
- • How to use ArcSoft Video Downloader
- Flicker Setting Table
- Battery Life Indicator
- USB Projection (optional)★
- System requirements
- Installing Driver★
- Click Install to begin the installation.
- Installing driver.
- Click Finish.
- Verification device driver installation★
- Specifications
- Supported file types for conversion (Input file formats)
- Supported file types for export to projector
- Troubleshooting
- Nutzungshinweise:
- Spezifikationen
- Régler la langue
- • Comment utiliser ArcSoft Video Downloader
- Spécifications
- Specifiche
- Accesorio opcional:
- - Cómo utilizar ArcSoft Video Downloader
- Especificaciones
- Gebruiksmededeling:
- Dit moet u doen:
- De taal instellen
- Specificaties
- Ligar/desligar o projector
- Definição do idioma
- - Como utilizar o ArcSoft Video Downloader
- Especificações
- İsteğe Bağlı Aksesuar:
- Dil ayarı
- Teknik Özellikler
- Acessório Opcional:
- - Como usar o ArcSoft Video Downloader
- 選購配件:
- 開/關投影機
- 設定語言
- 連接投影機與您的媒體播放器
- 按一下安裝,開始進行安裝。
- 安裝驅動程式。
- 按一下完成。
- 確認裝置驅動程式安裝★
- 系統規格表
- 打开/关闭投影机电源
- 设置语言
- 播放其它设备中的文件
- 将投影机连接到媒体播放机
- オプションアクセサリー:
- 言語を設定する
- 仕様
- 프로젝터 켜기/끄기
- 언어설정하기
- 다른장치의파일재생하기
- 프로젝터를 미디어플레이어에연결하기
- 장치 드라이버 설치 확인★
Brand : AIPTEK
Model : PocketCinema Z20
Category : Projector