
GTB 16/5 R - Drill GUDE - Free user manual and instructions
Find the device manual for free GTB 16/5 R GUDE in PDF.


| Product type | Pillar drill |
| Brand | Güde |
| Model | GTB 16/5 R |
| Article number | 95026 |
| Rated voltage | 230 V / 50 Hz |
| Power consumption | 550 W |
| No-load speed | 500 – 2500 rpm |
| Spindle stroke | 80 mm |
| Max. drilling capacity (steel) | 16 mm |
| Max. drilling capacity (wood) | 35 mm |
| Spindle taper | MT 2 (Morse taper 2) |
| Column diameter | 70 mm |
| Column height | 550 mm |
| Table dimensions | 260 x 260 mm |
| Dimensions (L x W x H) | 380 x 290 x 720 mm |
| Net weight | 22 kg |
| Power supply | 230 V – 50 Hz (Schuko plug) |
| Main functions | Vertical drilling, speed adjustment via pulleys |
| Integrated lighting | Yes (LED) |
| Emergency stop | Yes (red push button switch) |
| Maintenance and cleaning | Dust regularly, lubricate slides |
| Spare parts | Chucks, belts, work holders available |
| Repairability | Repairability index: 8.2/10 |
| General information | 2-year warranty, CE certification |
Frequently Asked Questions - GTB 16/5 R GUDE
User questions about GTB 16/5 R GUDE
0 question about this device. Answer the ones you know or ask your own.
Ask a new question about this device
Download the instructions for your Drill in PDF format for free! Find your manual GTB 16/5 R - GUDE and take your electronic device back in hand. On this page are published all the documents necessary for the use of your device. GTB 16/5 R by GUDE.
USER MANUAL GTB 16/5 R GUDE
ENGLISH Please read the instructions carefully before starting the machine.



| DE | Montage | SI | Montaža |
| GB | Assembly | HR | Montaža |
| FR | Montage | BG | Монтаж |
| IT | Montaggio | RO | Montaj |
| NL | Montage | BA | Montaža |
| CZ | Montáž | ||
| SK | Montáž | ||
| HU | Szerelés |
| DE | Inbetriebnahme | SI | Uvedba v pogon |
| GB | Starting-up the machine | HR | Puštanje u rad |
| FR | mise en service | BG | Пускане в действие |
| IT | Messa in funzione | RO | Punerea în funcțiune |
| NL | Inbedrijfstelling | BA | Puštanje u rad |
| CZ | Uvedení do provozu | ||
| SK | Uvedenie do prevádzky | ||
| HU | Üzembe helyezés |
| DE | Betrieb | SI | Delovanje |
| GB | Operation | HR | Rad |
| FR | Fonctionnement | BG | Păbota |
| IT | Esercizio | RO | Funcționare |
| NL | Gebruik | BA | Rad |
| CZ | Provoz | ||
| SK | Prevádzka | ||
| HU | Üzemeltetés |
| DE | Reinigung / Wartung | SI | Čiščenje / Vzdrževanje |
| GB | Cleaning / Maintenance | HR | Čišćenje / Održavanje |
| FR | Nettoyage / Entretien | BG | Чистене / Поддръжка |
| IT | Pulizia / Manutenzione | RO | Curățare / Întreținere |
| NL | Schoonmaken / Onderhoud | BA | Čišćenje / Održavanje |
| CZ | Čištění / Údržba | ||
| SK | Čistenie / Údrzba | ||
| HU | Tisztítás / Karbantartás |
| 1 | DE Montage | SI Montaža |
| GB Assembly | HR Montaža | |
| FR Montage | BG Монтаж | |
| IT Montaggio | RO Montaj | |
| NL Montage | BA Montaža | |
| CZ Montáž | ||
| SK Montáž | ||
| HU Szerelés |



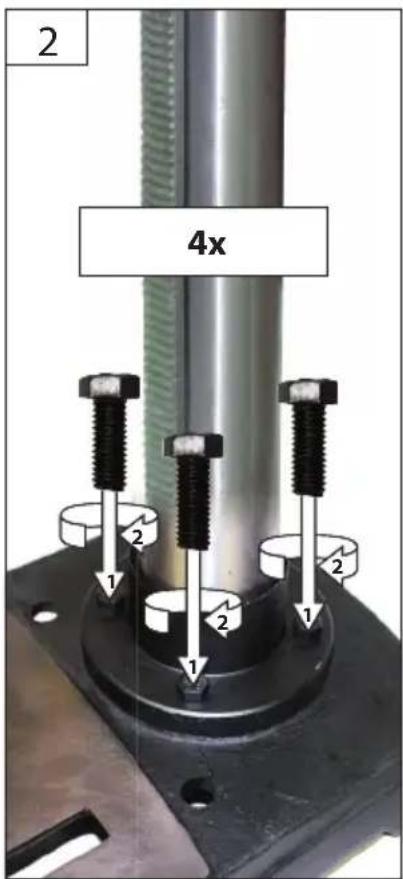


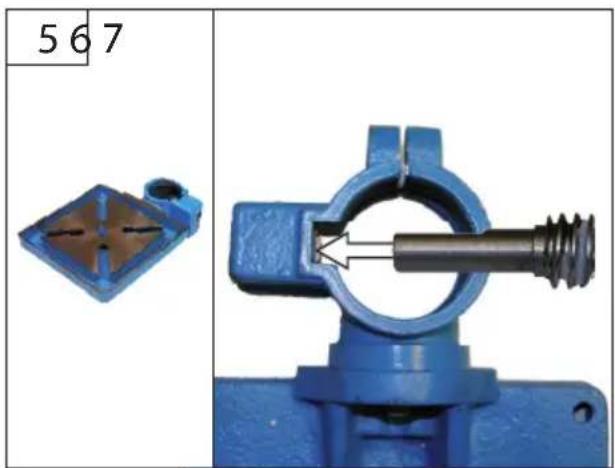


DE Montage
GB Assembly
FR Montage
IT Montaggio
NL Montage
CZ Montáž
SK Montáž
HU Szerelés
SI Montaža
HR Montaža
BG Монтаж
RO Montaj
BA Montaža




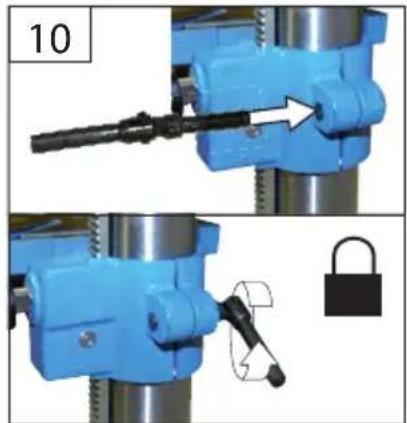


| 1 | DE Montage | SI Montaža |
| GB Assembly | HR Montaža | |
| FR Montage | BG Монтаж | |
| IT Montaggio | RO Montaj | |
| NL Montage | BA Montaža | |
| CZ Montáž | ||
| SK Montáž | ||
| HU Szerelés |


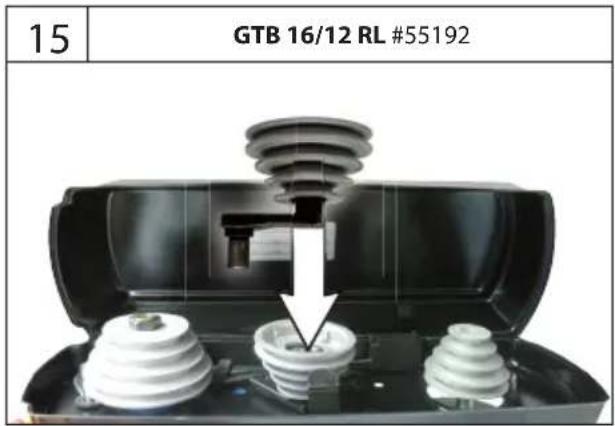

DE Montage
GB Assembly
FR Montage
IT Montaggio
NL Montage
CZ Montáž
SK Montáž
HU Szerelés
SI Montaža
HR Montaža
BG Монтаж
RO Montaj
BA Montaža


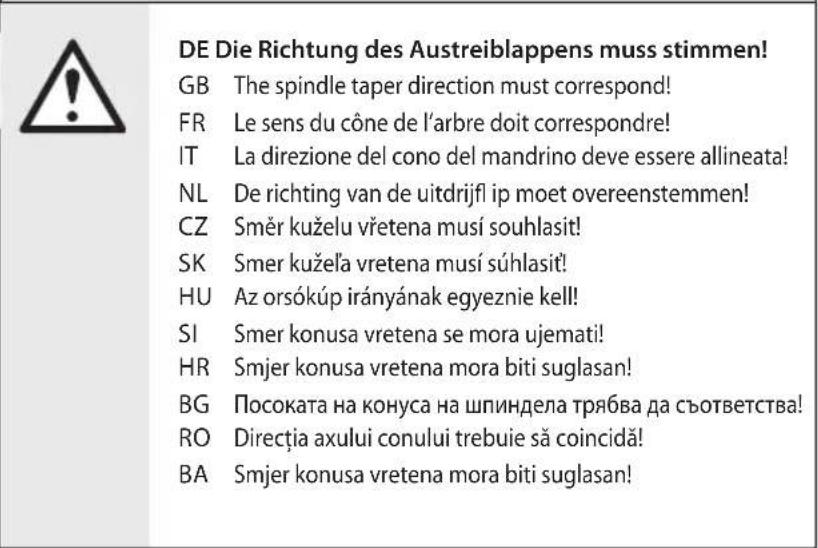
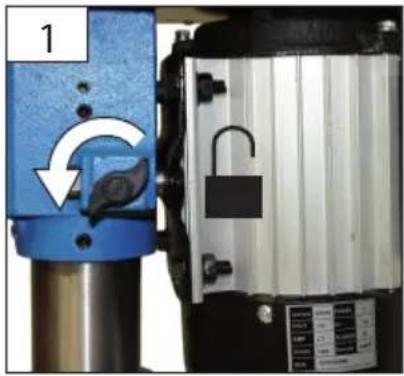
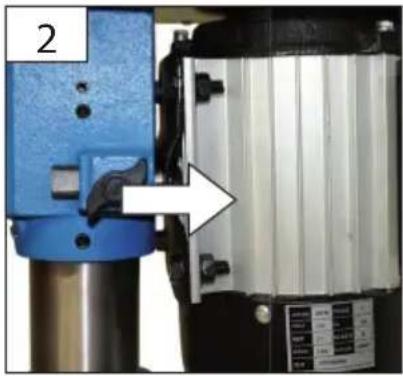
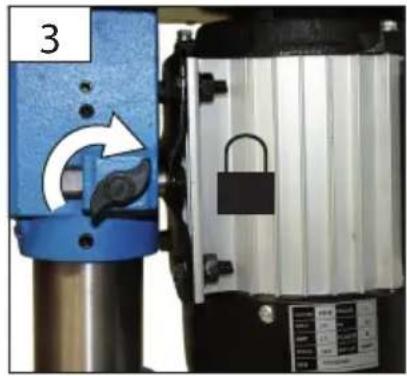
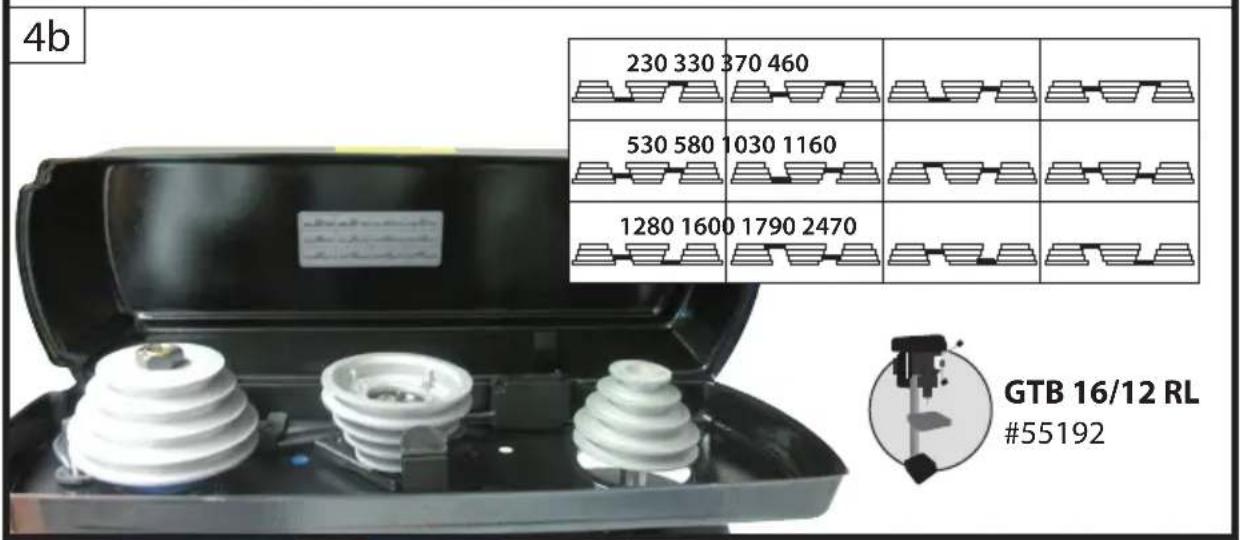
| 2 | DE Keilriemen spannenGB V-belt tensionFR Tension de la courroie cunéiformeIT La tensione della cinghia trapezoidaleNL V-riemen spannenCZ Napnutí klínového remenuSK Napnutie klinového remena | HU Ékszíj megfeszítéseSI Napenjanje klinastega jermenaHR Napetost klinastog remenaBG Direcția axului conului trebuie să coincidă!RO Întinderea curelei trapezoidaleBA Napetost klinastog remena |





DE Inbetriebnahme
GB Starting-up the machine
FR mise en service
GB Caution! The chuck wrench to be pulled out at all times.
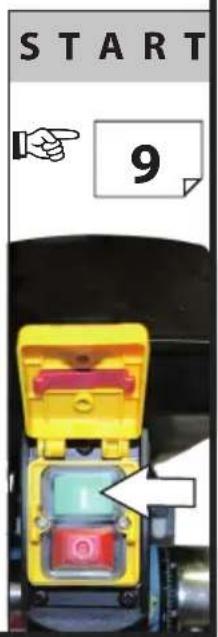
DE Betrieb - START
GB Operation - START





1

2a
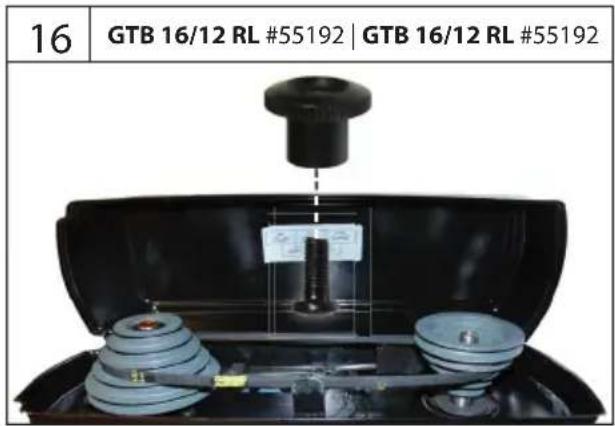
GTB 16/12 RL #55192


GTB 16/12 RL #55192
2b

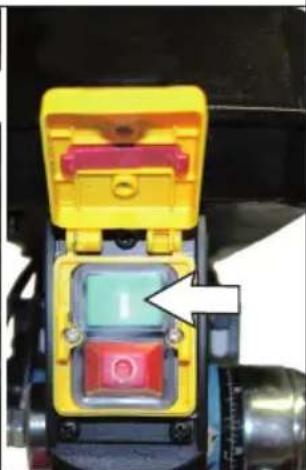
 | DE | Betrieb | SI | Delovanje |
| GB | Operation | HR | Rad | |
| FR | Fonctionnement | BG | Pábota | |
| IT | Esercizio | RO | Functionare | |
| NL | Gebruik | BA | Rad | |
| CZ | Provoz | |||
| SK | Prevádzka | |||
| HU | Üzemeltetés |


DE Betrieb
GB Operation
FR Fonctionnement
IT Esercizio
NL Gebruik
CZ Provoz
SK Prevádzka
HU Üzemeltetés
SI Delovanje
HR Rad
BG Работа
RO Functionare
BA Rad







GTB 16/12 RL
55192


3
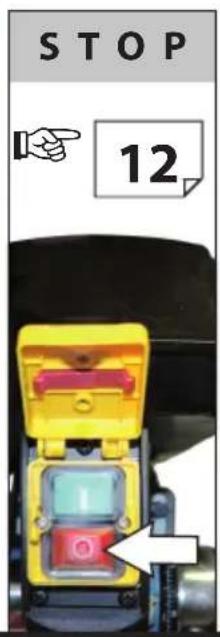
DE Betrieb - STOP
GB Operation - STOP
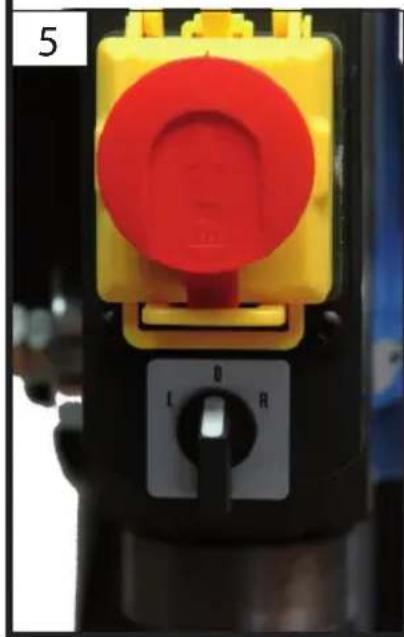
DE Not-Ausschalter
GB emergency switch

2b
GTB 16/12 RL #55192


3

GB Cleaning / Maintenance
FR Nettoyage / Entretien
2

3


4

 | DE Reinigung/WartungGB Cleaning / MaintenanceFR Nettoyage / EntretienIT Pulizia / ManutenzioneNL Schoonmaken / OnderhoudCZ Čištění / ÚdržbaSK Čistenie / ÚdrzbaHU Tisztítás / Karbantartás | SI Čiščenje / VzdrževanjeHR Čiščenje / OdržavanjeBG Чистене / ПоддръжкаRO Curățare / ÎntreținereBA Čiščenje / Održavanje |




Technische Daten
Tischbohrmaschine ....GTB 16/5R....GTB 16/12RL
Spindelhub....60 mm....60 mm

Bohrfutter 3 - 16 mm 3 - 16 mm
Bench drill....GTB 16/5R....GTB 16/12RL
Art. No 55190 55192
Voltage \~ frequency 230 V\~50 Hz 400 V\~50 Hz
Motor output....600 W / P1 S6 60%....600 W / P1 S6 60%
IP 44 Protection type.... IP 44.... IP 44
Quill stroke....60 mm....60 mm
Chuck....3 - 16 mm....3 - 16 mm
Reach....120 mm....125 mm
Bench size....192 x 192 mm....192 x 192 mm
Base plate size....340 x 205 mm....340 x 205 mm
5 Stufen Quill speed ....5 steps 450 - 2500 min -1 .... 12 steps 230 - 2470 min 1
Fixture....MK 2 - B 16....MK 2 - B 16
Weight....30 kg....30 kg
Noise and Vibration Information
Sound power level LWA1) 80 dB (A) 80 dB (A)
Wear ear protectors!


Read and understand the operating instructions before using the appliance. Familiarise
with the control elements and how to use the appliance properly. Abide by all the safety measures stated in the service manual. Act responsibly toward third parties. The operator is responsible for accidents or risks to third parties.
In case of any doubts about connection and operation refer please to our customer center
Specifi ed Conditions Of Use
Bench drills must not be used for metal cutting, machining of wood and plastics; Respecting technical data and safety precautions.
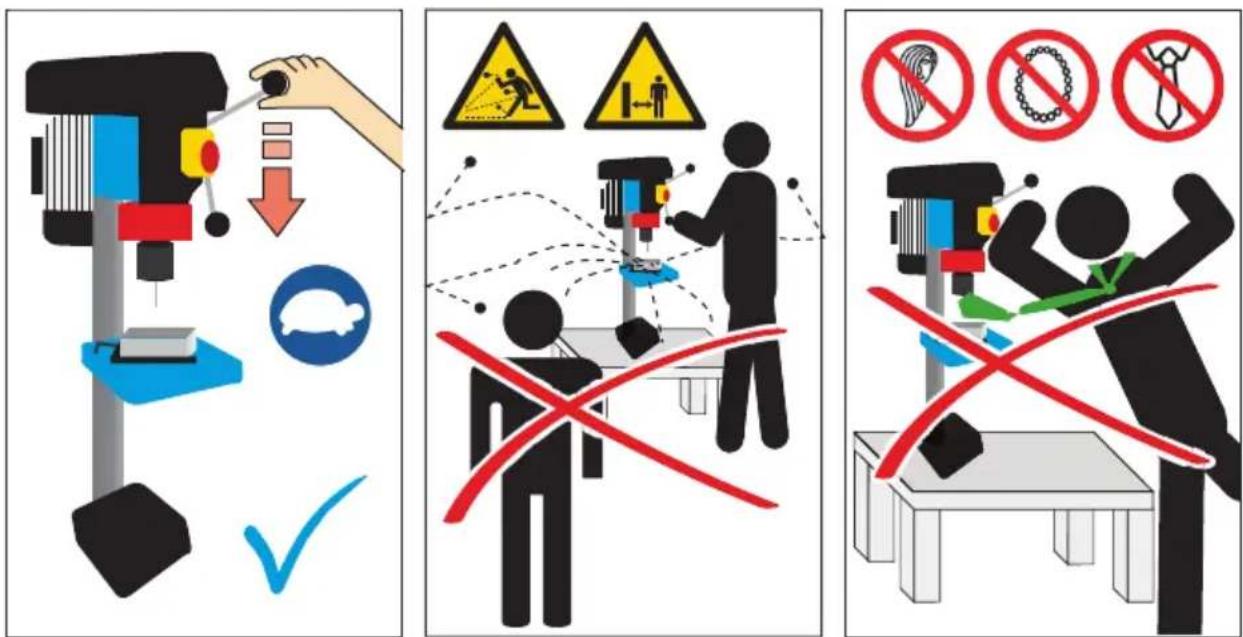
The machine may only be operated by one person. Make sure there is nobody present in the dangerous area. The minimum distance is 2 m.
Operation is only allowed with a safety switch against stray current (RCD max. stray current of 30mA).
The machine cannot be used for works other than for which the machine has been designed and that are specified in the Operating Instructions. Any other use is a use in conflict with the designation. The manufacturer will not be liable for any consequential damage and injuries. Please be sure to know that the machine has not been designed for industrial purposes.
General instructions for electric tools

WARNING
Read all safety instructions and manuals. Failure to follow the safety instructions and manuals may result in electric shock, fire and/or serious injuries.
Save all warnings and instructions for future reference.
The term „electric tools“ used in the safety instructions refers to electricity-powered tools (including electric cable) and battery-powered tools (without electric cable).
1) Safety in the place of work
a) Keep the place of your work clean and well lit. Mess or an unlit workplace may lead to injuries.
b) Do not work with electric tools in conditions with fl ammable liquids, gases or dust. Electric tools produce sparks able to ignite dust or fumes.
c) Keep children and other persons outside the place where the electric tools are used. When not concentrated, you may lose control over the machine.
2) Electrical safety
a) The plug of an electric tool must strictly correspond to the socket. The plug must not be altered in any case. Do not use any adapters together with earthed electric tools. Unaltered plugs and appropriate sockets reduce the risk of electric shock.
b) Prevent contact of your body with earthed surfaces, such as tubes, heating, cookers and fridges. There is an increased risk of electric shock if your body is earthed.
c) Do not expose electric tools to rain and moisture. Water entered in electric tools increases the risk of electric shock.
d) Do not use the cable in conflict with its designation, to carry or hang electric tools or to pull the plug out of socket. Protect the cable against high temperatures, oil, sharp edges or moving parts of the machine. Damaged or entangled cables increase the risk of electric shock.
e) When working with electric tools outdoors, use extension cables suitable for outdoor use. Using an extension cable suitable for outdoor use reduces the risk of electric shock.
f) If operating electric tools in wet conditions cannot be avoided, use a safety switch against stray current. Using a safety switch against stray current reduces the risk of electric shock.
3) Safety of persons
a) Be careful, pay attention to what you are doing and use common sense when working with electric tools. Do not use electric tools when you are tired or under the influence of drugs, alcohol or pharmaceuticals. A moment if inattention when using electric tools may lead to serious injuries.
b) Use personal protective equipment and protective glasses at all times. Using personal protective equipment, such as the respirator, non-slip shoes, protective helmet or ear protectors, depending on the type and use of electric tools, reduces the risk of injuries.
c) Prevent the machine from unintentional starting. Before plugging and/or connecting the machine to battery, handling or carrying, make sure the electric tools are switched off. Having a finger on the switch when carrying the electric tool or when the machine is on when plugging it may lead to injuries.
d) Before starting any electric tool, remove any adjusting wrenches and screwdrivers. A tool or a wrench present in the rotating part of the machine may lead to injuries.
e) Avoid any abnormal body posture. Provide good stability and keep balance at all times. By this, electric tools are better controlled in unexpected situations.
f) Wear appropriate clothing. Do not wear loose clothing and jewels. Keep hair, clothing and gloves out of rotating parts. Loose clothing, jewels and long hair may get caught by moving parts.
g) If dust exhausters and catchers are to be installed, make sure they are fitted and used properly. Using a dust exhauster may reduce the exposure to dust.
4) Use and treatment of electric tools
a) Do not overload the machine. Use appropriate electric tools for your work. Working with appropriate electric tools is better and safer when within the specified power range.
b) Do not use electric tools with a defective switch. An electric tool that cannot be switched on or off is dangerous and must be repaired.
c) Unplug the machine and/or remove the battery before any machine adjustment, replacement of accessory equipment and storing the machine. This safety measure prevents unintentional starting of the electric tool.
d) Keep any electric tool that is not being used out of reach of children. The machine must not be used by persons not familiarised with its use and not having read these Instructions. Electric tools are dangerous if used by inexperienced persons.
e) Treat electric tools carefully. Check whether the moving parts work perfectly and do not drag, whether not broken or damaged to such an extent that functioning of electric tools could be affected. Have any damaged parts repaired before using the machine. Poor maintenance of electric tools is a cause of many injuries.
f) Keep the cutting tools sharp and clean. Carefully treated cutting tools with sharp edges get stuck less often and are easier to guide.
g) Electric tools, accessory equipment, extensions, etc. to be used in accordance with these Instructions. Consider the working conditions and the activity being performed. Using electric tools for purposes other than those specified may lead to dangerous situations.
5) Service
a) Have your electric tools repaired by qualified authorised staff only, using original spare parts only. The safety of electric tools will be maintained by this.
Safety instructions for bench drills
Danger of injury!
Never put your hands and feet near the rotating parts.
Read carefully the operating and maintenance instructions. Familiarise thoroughly with the controls and proper use of the appliance. You need to know how the appliance works and how controls can immediately be switched off.
Never let children work with the appliance. Never let adults work with the appliance unless they have been properly trained.
Keep all persons, especially small children, and pets out of reach of the place of your work.
Being careful prevents slipping or falling, especially when reversing.
Do not adjust the appliance when the engine is running (except for settings directly recommended by the manufacturer).
Protective glasses or a shield should always be used when operating, adjusting or repairing the appliance.
Wear close-fitting clothes. Ties, jewels, long hair and sleeves may get caught by the drill.
Device to be operated in a perfect state only. Inspect the device visually every time it is to be used. Check in particular the safety equipment, electrical controls, electric cables and screwed connection for damage and if tightened properly. Replace any damaged parts before operating the device.
NEVER put your hands and finger close to the drill bit.
DO NOT ATTEMPT to drill material with the surface other than fl at unless a suitable support is available.
NEVER switch the machine on while pressing the drill bit against the material.
Before switching the machine on, MAKE SURE that the bench-clamping lever is firmly tightened.
MAKE SURE that the bit is firmly clamped in the chuck.
Before switching the machine on, MAKE SURE that the chuck key is removed.
USE A CLIP OR CLAMPING JAWS to secure the piece to be drilled on the bench.
DON'T wear gloves when operating the drill.
Set the drill to speed answering a specific job.
Requirements for operating staff
The operating staff must carefully read the Operating Instructions before using the appliance.
Qualifi cation: Apart from the detailed instructions by a professional, no special qualifi cation is necessary for appliance using.
Minimum age: Persons over 16 years of age can only work on the appliance. An exception includes youngsters trained in order to reach knowledge under supervision of the trainer during occupational education.
Training: Using the appliance only requires corresponding training by a professional or the Operating Instructions. No special training is necessary.
Emergency procedure
Conduct a fi rst-aid procedure adequate to the injury and summon qualified medical attendance as quickly as possible. Protect the injured person from further harm and calm them down. For the sake of eventual accident, in accordance with DIN 13164, a workplace has to be fitted with a fi rst-aid kit. It is essential to replace any used material in the fi rst-aid kit immediately after it has been used. If you seek help, state the following pieces of information:
-
Accident site
-
Accident type
-
Number of injured persons
-
Injury type(s)
Maintenance
⚠️ Treatment, maintenance and cleaning may only be performed when the drive is off and the machine idle. The drive must necessarily be turned off when the machine is not working properly.
Check all screw and plug-in connections and protective equipment if firm and tightened properly and whether all moving parts are running smooth whenever the appliance is to be put into operation.
Prior to every use, visually check the machine to rule out any defects, in particular on the power cable and the plug.
At all times, keep the machine, ventilation slots, in particular, clean. Never spray water on the machine!
All moving parts should be treated with environmental-friendly oil. Never use any grease!
Repairs and works specified in these Instructions may only be performed by qualified authorised staff.
Use only original accessories and original spare parts.
Only a regularly maintained and treated appliance can serve as a satisfactory aid. Insufficient maintenance and care can lead to unforeseen accidents and injuries.
If necessary, a list of spare parts can be found at www.guede.com.
Guarantee
A warranty period of 24 months apply to private use and commences on the day of purchase of the device.
Warranty applies exclusively to failures due to defective material or workmanship. An original sale slip with indication of date of sale must be presented in case of claiming for the warranty rights.
Warranty does not cover unprofessional use such as device overload, violent use, damage caused by third party or foreign materials, failure to comply with operations and assembly manual, and normal wear and tear.
Service
Do you have any technical questions? Any claim? Do you need any spare parts or operating instructions? We will quickly help you and without needles bureaucracy at our web pages at www.guede.com in the Servicing part. Please help us be able to help you. In order to identify your device in case of claim we need the serial No., product No. and year of production. All this data can be found on the type label. Please enter it here for future reference:
Serial No.:
Art. No:
Year of production:
Symbols

Read the Operating Instructions

Wear eye protective goggles! Wear ear protectors!

Before carrying out any work on the machine, disconnect the plug from the socket.

Slow

Warning/caution!

Warning against dangerous voltage!

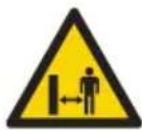
Keep distance of persons! Observe to keep out of dangerous zone.

Caution, risk of drawing-in!

Warning against thrown-off items!

Warning against hand injuries!

Strong

Do not touch the rotating tool.

Do not operate the device with long hair!

Do not operate the device with a neck chain!

Do not operate the device with a tie!

Any damaged or disposed devices must be delivered to appropriate collection centres.

Protect against humidity

This side up
Inspection and maintenance plan
| Regular servicing period Before | any start-up | Whenever the device is put into operation | After 1 months | After 3 months | After 6 months | After 12 months |
| 20 Hours of operation | 50 Hours of operation | 100 Hours of operation | 300 Hours of operation | |||
| Check the safety equipment | √ | |||||
| Check the V-belt and tighten it if necessary→6 | √ | |||||
| Apply a thin layer of oil on the pillar and the bench | √ | |||||
| Apply some fat on the angle drift | √ | |||||
| Remove drill cuttings and metal chips from the device | √ |
Provide appropriate servicing upon the earlier of the following: in the given month or after the specified hours of operation have expired.
Failure removal
| Failures | Causes | Removal |
| Engine not starting | The micro switch in the belt housing prevents starting if the housing is not closed properly. | Close the belt housing properly! |
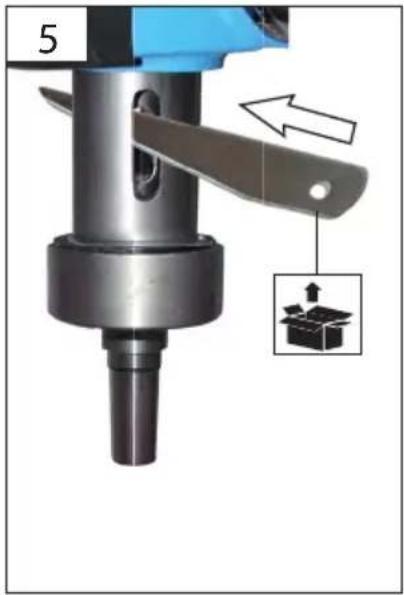
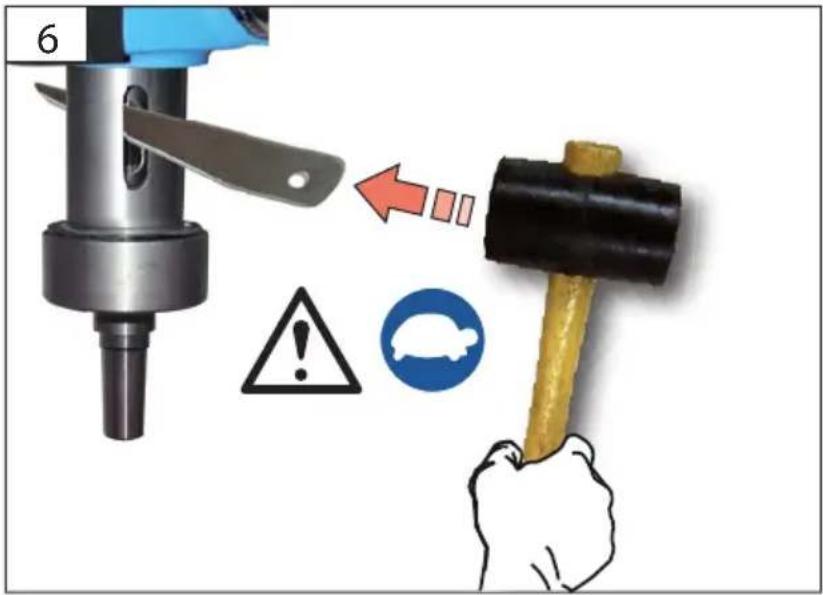
| Drill is turning unevenly | The choke is not fitted properly on the angle drift. Push in the chuck by light tapping. | |
EC-Declaration of Conformity
We, hereby declare the conception and construction of the below mentioned appliances correspond - at the type of construction being launched - to appropriate basic safety and hygienic requirements of EC Directives.
In case of any change to the appliance not discussed with us the Declaration expires.


- 55192
- DE NOT-AUSSCHALTER
- TECHNISCHE DATEN
- TISCHBOHRMASCHINE ....GTB 16/5R....GTB 16/12RL
- BENCH DRILL....GTB 16/5R....GTB 16/12RL
- NOISE AND VIBRATION INFORMATION
- WEAR EAR PROTECTORS
- SPECIFI ED CONDITIONS OF USE
- GENERAL INSTRUCTIONS FOR ELECTRIC TOOLS
- WARNING
- SAVE ALL WARNINGS AND INSTRUCTIONS FOR FUTURE REFERENCE
- SAFETY IN THE PLACE OF WORK
- ELECTRICAL SAFETY
- SAFETY OF PERSONS
- USE AND TREATMENT OF ELECTRIC TOOLS
- SERVICE
- SAFETY INSTRUCTIONS FOR BENCH DRILLS
- DANGER OF INJURY
- REQUIREMENTS FOR OPERATING STAFF
- EMERGENCY PROCEDURE
- MAINTENANCE
- GUARANTEE
- SYMBOLS
- EC-DECLARATION OF CONFORMITY
Brand : GUDE
Model : GTB 16/5 R
Category : Drill