
C300EXC - Network card / adapter CONCEPTRONIC - Free user manual and instructions
Find the device manual for free C300EXC CONCEPTRONIC in PDF.


| Product type | Network card / adapter |
| Brand | Conceptronic |
| Model | C300EXC |
| Dimensions (L x W x H) | 120 x 20 x 10 mm |
| Weight | 40 g |
| Interface | PCI Express |
| Network connector | 1 x RJ-45 Ethernet 10/100/1000 Mbps |
| Network standard | IEEE 802.3, IEEE 802.3u, IEEE 802.3ab |
| Maximum speed | 1000 Mbps (Gigabit) |
| Supported operating systems | Windows, Linux, macOS |
| Power supply | Via PCI Express slot |
| Power consumption | 2 W (max) |
| Operating temperature | 0°C to 50°C |
| Operating humidity | 10% to 90% (non-condensing) |
| Maintenance and cleaning | Disconnect before cleaning. Use a soft dry cloth. Avoid solvents. |
| Safety instructions | Install in an unpowered and disconnected case. Observe ESD precautions. |
| Spare parts and repairability | Not user repairable. Contact technical support for any issues. |
| Warranty | 2 years |
Frequently Asked Questions - C300EXC CONCEPTRONIC
User questions about C300EXC CONCEPTRONIC
0 question about this device. Answer the ones you know or ask your own.
Ask a new question about this device
Download the instructions for your Network card / adapter in PDF format for free! Find your manual C300EXC - CONCEPTRONIC and take your electronic device back in hand. On this page are published all the documents necessary for the use of your device. C300EXC by CONCEPTRONIC.
USER MANUAL C300EXC CONCEPTRONIC
5. WPS - Wireless Protected Setup
Wanneer verbinding is gemaakt, wordt de melding 'WPS status is connected successfully' (WPS-verbinding gelukt) getoond:

Wanneer verbinding is gemaakt, wordt de melding 'WPS status is connected successfully' (WPS-verbinding gelukt) getoond:
Congratulations on the purchase of your Conceptronic 802.11N Wireless Network Client.
This User Manual gives you a step-by-step explanation of how to install the Conceptronic 802.11N Wireless Network Client on your computer.
When problems occur, we advise you to go to our support-site (go to www.conceptronic.net and click 'Support'. Here you will find the Frequently Asked Questions Database.
When you have other questions about your product and you cannot find it at our website, contact us by e-mail: support@concepttronic.net
For more information about Conceptronic products, please visit the Conceptronic Web Site: www.conceptronic.net
The Software installation as described below may be slightly different from the installation on your computer. This depends on the Windows version you are using.
1. Package contents
The following items are present in the package of the Conceptronic 802.11N Client: (Depending on the bought 11N Client)
| Conceptronic C300EXi | * | Conceptronic 802.11N PCI-Express Card * | 3x Antenna* Product CD-ROMMulti-language User I |
| Or | * | ||
| Conceptronic C300EXC | * | Conceptronic 802.11N PC-Express Card * | Product CD-ROMMulti-language User I |
2. Driver & Software installation
Note: Before you insert the card, you must install the Drivers & Software!
A. Insert the CD-ROM in your CD-ROM Drive. The Autorun should appear automatically. If the Autorun menu does not appear, navigate to "My Computer" and double-click on the CD-ROM drive to start the Autorun menu.
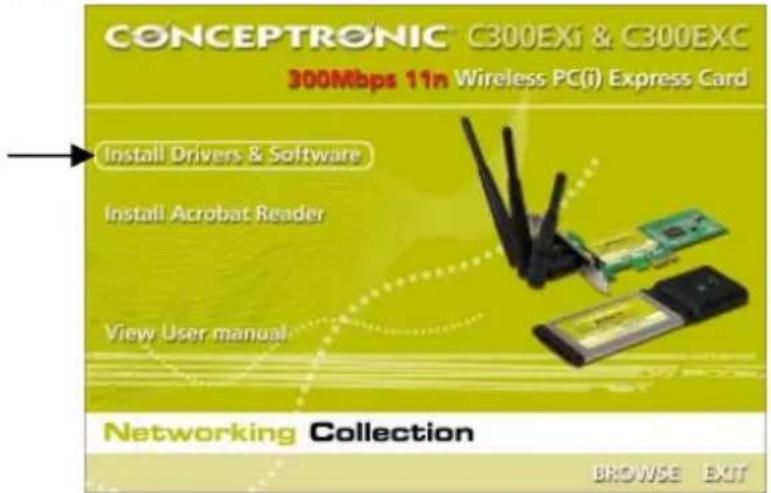
B. Select the option "Install Drivers & Software" from the Autorun Menu. The Setup Wizard will appear.
C. Click "Next" to continue.
Note : Step D and E are for Windows XP only!
D. Select "Conceptronic Configuration Tool" if you want to use the Conceptronic software for connection, or select "Microsoft Zero Configuration Tool" if you want to use the Microsoft wireless configuration software. Click "Next" to continue.
E. Select "Optimize for WiFi mode", or select "Optimize for performance mode". Click "Next" to continue.
Note : When you select "Optimize for performance mode", the TX-Burst option of the card will be enabled. This will allow higher transfer speeds on your wireless network, but your access point needs to have the TX-Burst option too in order to benefit from this feature.
F. The Setup Wizard will ask you to proceed with the installation. Click "Install" to continue with the installation. The Setup Wizard will now install the drivers and software on your computer. Wait for the Setup Wizard to finish the installation.
G. When the installation is finished, click "Finish" to close the Setup Wizard.
Proceed to Chapter 3 for the Hardware Installation of your 802.11N Wireless Network Client.
3. Hardware installation
When the software for your 802.11N Client is installed, you can proceed with the hardware installation.
Conceptronic C300EXi - PCI-Express Card
A. Turn off your computer and disconnect the computer from the AC outlet.
B. Open your computer case by removing the screws from the back and remove the panel.
C. Find a free PCI-Express slot and remove the protective plate from your computer case.
D. Insert the C300EXi gently in the free PCI-Express slot and fix it with a screw to your computer casing.
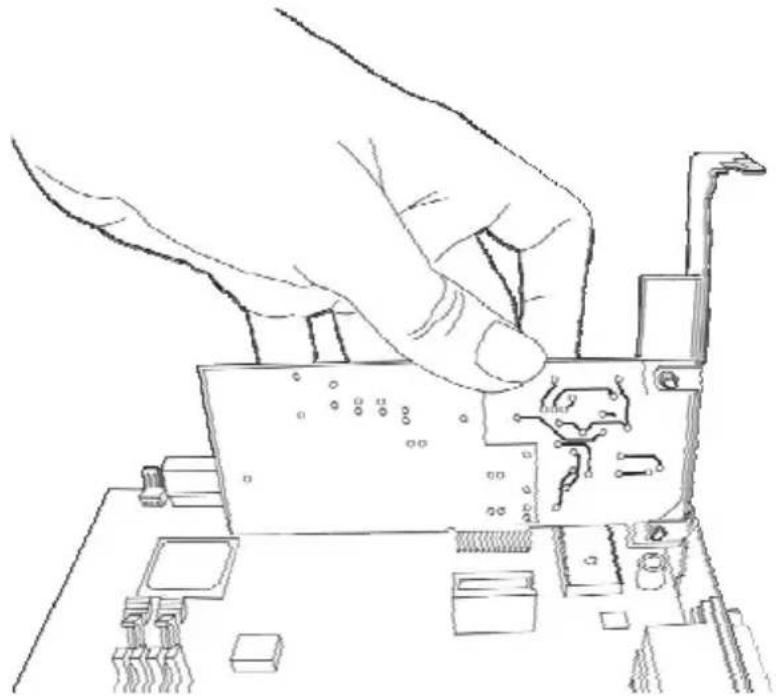
E. Close your computer case and assemble the 3 antenna's to the C300EXi.
F. Turn on your computer.
Windows will detect new hardware and installs the drivers automatically.
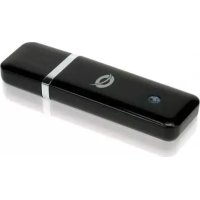
Conceptronic C300EXC - PC-Express Card
A. After your notebook is rebooted, insert the C300EXC into a free PC-Express Card slot of your notebook.
Windows will detect new hardware and installs the drivers automatically.
4. Connect to a wireless network
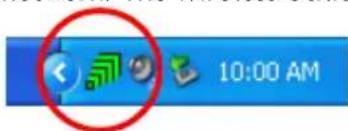
When the hardware is installed by the computer, the Wireless Network Client is ready to use. You will see an active Wireless Utility in your system tray:

- Double-click on the system tray icon of the Conceptronic Wireless Utility.
The Conceptronic Wireless Utility will be shown like below:

The Conceptronic Wireless Utility will show all the wireless networks in the area of your computer. If your wireless network is not shown, you can click "Rescan" to rescan for networks.
- Click on the network you want to connect to from the list with networks.
- Click "Connect" (Windows XP) or "Add to Profile" (Windows Vista).
ENGLISH
The Wireless Utility automatically detects which security level is used on your wireless network.
Unsecured Network:
If your wireless network is unsecured, the Wireless Utility will establish a connection with your wireless network.
Note: If you are connecting to your own network and it is unsecured, we advise you to add security to your network to prevent unauthorized access to your network. See the documentation of your Wireless Router/Access Point how to setup your network security.
Secured Network:
If your wireless network is secured, the Wireless Utility will ask you for the encryption key or pass phrase, depending on the configured security level of your wireless network:
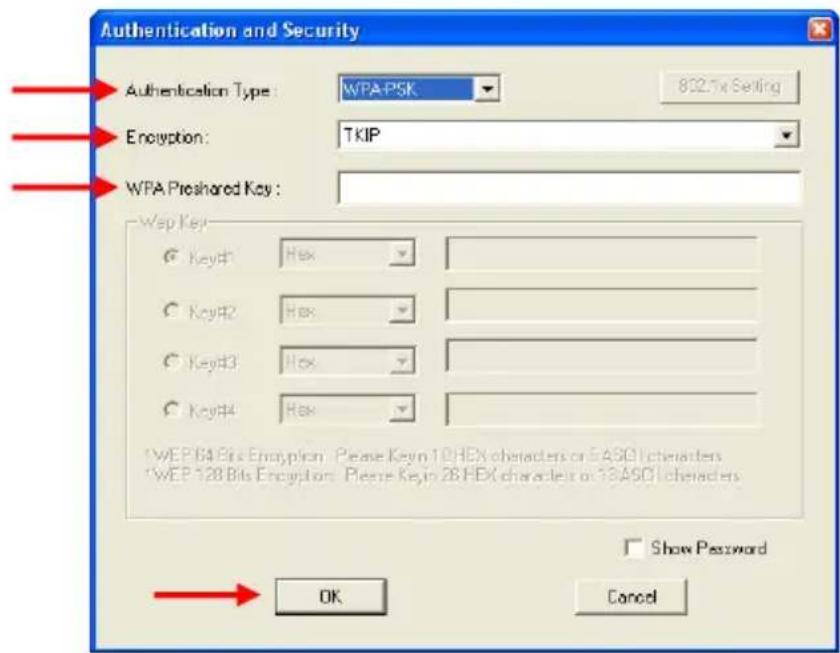
- Verify if the detected Authentication Type and Encryption matches your wireless network security.
- Enter the pass phrase in the “WPA Preshared Key” field when you are using WPA security, or enter the WEP encryption key in the “Wep Key” field when you are using WEP security.
- Click "OK" to connect to the selected wireless network.
Note: When using Windows Vista, click the "Activate" button in the main window of the Wireless Utility to connect to the wireless network.
You are now connected to the wireless network. The Wireless Utility will indicate the signal strength in your system tray:

5. WPS - Wireless Protected Setup
The Conceptronic 802.11N Clients support WPS (Wi-Fi Protected Setup). WPS is a standard to easily secure your wireless network. With WPS you can protect your wireless network with just a few easy steps without knowledge of different encryption options.
Note : To use WPS with your 802.11N Client, you need to have a router or access point which supports WPS.
5.1 WPS - Push Button connection
- Push the WPS button on your router or access point to enable WPS connection.
- Press and hold the WPS button on your 802.11N Client for about 5 seconds.
Note: When you have the C300EXi (PCI-Express card), the button is located next to the antenna's on the back. When you have the C300EXC (PC-Express card), the button is located on the top of the card.

The Wireless Utility will be triggered by the button and will try to connect to your wireless network. If the Wireless Utility main window is shown on your screen, you can see the WPS activity at the bottom of the window:

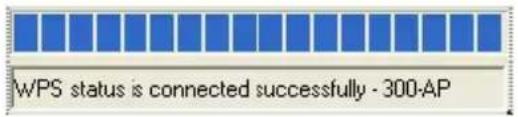
When the connection is established, the message "WPS status is connected successfully" will be shown:

You are now connected to the wireless network. The Wireless Utility will indicate the signal strength in your system tray:
ENGLISH
5.2 WPS - Pin Code connection
When your router or access point does not have a push button, you can also connect with WPS with a Pin Code.

The Wireless Utility can work in "Enrollee" or "Registrar" mode:
- When "Enrollee" is selected, the Wireless Utility will generate a Pin Code which must be entered in the WPS configuration of your router or access point.
- When "Registrar" mode is selected, you can enter a Pin Code in the Wireless Utility. This mode is needed when your router or access point provides a Pin Code which must be used for the wireless connection.
Activate the PIN WPS connection on your router or access point.
Select the correct "Config Mode" in the Wireless Utility, according to the information above.
Click the "PIN" button in the Wireless Utility.
You can see the WPS activity at the bottom of the window:

When the connection is established, the message "WPS status is connected successfully" will be shown:

You are now connected to the wireless network. The Wireless Utility will indicate the signal strength in your system tray:

6. Windows Zero Configuration Tool
The Conceptronic 802.11N Clients can also be managed with the Windows Zero Configuration Tool, the standard wireless configuration utility of Windows XP.
Note : It is only possible to use the Wireless Zero Configuration Tool when using Windows XP. In Windows Vista, you need to use the Conceptronic Wireless Utility.
You can enable the Wireless Zero Configuration in 2 different ways:
- Select during the installation of the drivers & software for "Microsoft Zero Configuration Tool".
- Right click the Conceptronic Wireless Utility icon in the system tray and select "Use Zero Configuration as Configuration Utility".
You can access the Wireless Zero Configuration by double-clicking on the wireless icon of your network card:

The Wireless Zero Configuration window will be shown on your screen.

Note : For more information about the Wireless Zero Configuration tool and the options you can refer to the Windows XP manual.
Enjoy the use of the Conceptronic 802.11N Wireless Client!
ESPAÑOL
C300EXi / C300EXC de Conceptronic
Manual de usuario
5. WPS - Wireless Protected Setup
Scheda Express-PCI - Conceptronic C300EXi
Scheda Express-PC - Conceptronic C300EXC
- WPS - WIRELESS PROTECTED SETUP
- CONGRATULATIONS ON THE PURCHASE OF YOUR CONCEPTRONIC 802.11N WIRELESS NETWORK CLIENT
- PACKAGE CONTENTS
- DRIVER & SOFTWARE INSTALLATION
- HARDWARE INSTALLATION
- CONCEPTRONIC C300EXI - PCI-EXPRESS CARD
- CONCEPTRONIC C300EXC - PC-EXPRESS CARD
- CONNECT TO A WIRELESS NETWORK
- ENGLISH
- UNSECURED NETWORK
- SECURED NETWORK
- 5.1 WPS - PUSH BUTTON CONNECTION
- 5.2 WPS - PIN CODE CONNECTION
- WINDOWS ZERO CONFIGURATION TOOL
- MANUAL DE USUARIO
- C#.1 HEX
- C#.2 HEX
- C#.3 HEX
- C#.4 HEX
- SCHEDA EXPRESS-PCI - CONCEPTRONIC C300EXI
- SCHEDA EXPRESS-PC - CONCEPTRONIC C300EXC
Brand : CONCEPTRONIC
Model : C300EXC
Category : Network card / adapter