
AVR 1100 - Lawn mower BOSCH - Free user manual and instructions
Find the device manual for free AVR 1100 BOSCH in PDF.


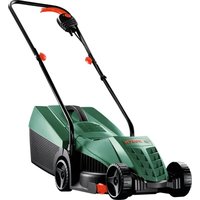
| Product type | Electric corded lawn mower |
| Brand | Bosch |
| Model | AVR 1100 |
| Motor power | 1100 W |
| Cutting width | 32 cm |
| Adjustable cutting height | Yes, from 20 to 60 mm |
| Grass box capacity | 31 L |
| Power supply type | Mains, 10 m cable |
| Weight | 7.5 kg |
| Dimensions (L x W x H) | 78 x 32 x 38 cm |
| Central height adjustment | Yes |
| Safety | Two-hand switch, automatic stop |
| Blade type | Steel, high-speed rotation |
| Ergonomic handle | Yes, foldable for storage |
| Sound level | 84 dB(A) |
| Cleaning | Clean after each use, removable box |
| Maintenance | Regular blade sharpening, no oil change needed |
| Spare parts | Blade, box, cable available |
| Warranty | 2 years |
| Recommended use | Gardens up to 300 m² |
Frequently Asked Questions - AVR 1100 BOSCH
User questions about AVR 1100 BOSCH
0 question about this device. Answer the ones you know or ask your own.
Ask a new question about this device
Download the instructions for your Lawn mower in PDF format for free! Find your manual AVR 1100 - BOSCH and take your electronic device back in hand. On this page are published all the documents necessary for the use of your device. AVR 1100 by BOSCH.
USER MANUAL AVR 1100 BOSCH

Robert Bosch GmbH
Power Tools Division
70745 Leinfelden-Echterdingen
Germany
www.bosch-pt.com
F 016 L70 481 (2008.10) O / 283 UNI

ALR 900 | AVR 1100

BOSCH


F 016 L70 481 | (10.10.08) Bosch Power Tools
6 | Deutsch
Safety Instructions
Dr. Egbert Schneider Senior Vice President Engineering
Dr. Eckerhard Strötgen Head of Product Certification

01.07.2008, Robert Bosch GmbH, Power Tools Division D-70745 Leinfelden-Echterdingen
Assembly
For Your Safety
Warning! Read these instructions carefully, be familiar with the controls and the proper use of the machine. Please keep the instructions safe for later use!
Explanation of symbols on the machine

General hazard safety alert.

Read instruction manual.

Pay attention that bystanders are not injured through foreign objects thrown from the machine.

Keep bystanders a safe distance away from the machine.

Sharp tines/blades. Beware of severing toes or fingers.

Switch off and remove plug from mains before adjusting, cleaning or if the cable is entangled and before leaving the machine unattended for any period. Keep the supply flexible cord away from the raking tines/blades.
Beware electric shock hazard.

Keep supply flexible cord away from cutting means.

Wait until all machine components have completely stopped before touching them. The tines/blades continue to rotate after the machine is switched off, a rotating tine/blade can cause injury.

Do not use the machine in the rain or leave it outdoors when it is raining.

Operation
This appliance is not intended for use by persons (including children) with reduced physical, sensory or mental capabilities, or lack of experience and knowledge, unless they have been given supervision or instruction concerning use of the appliance by a person responsible for their safety. Children should be supervised to ensure that they do not play with the appliance. ▶ Never operate the product when you are tired, ill or under the influence of alcohol, drugs or medicine. ▶ Never allow children or people unfamiliar with these instructions to use the machine. Local regulations may restrict the age of the operator. When not in use store the machine out of reach of children. ▶ Never rake/verticut while people, especially children or pets are nearby. The operator or user is responsible for accidents or hazards occurring to other people or their property. ▶ Wear hearing protection and safety glasses at all times while operating the machine. ▶ Do not operate the machine when barefoot or wearing open sandals, always wear substantial footwear and long trousers. Thoroughly inspect the area where the machine is to be used and remove all stones, sticks, wires, bones and other foreign objects. Before using, always visually inspect to see that the tines and tine assembly are not worn, damaged or loose. ▶ Replace worn or damaged tine and assemblies in sets to preserve balance. On multitined machines, take care as rotating one tine can cause other tines to rotate. ▶ Wear full eye protection when using the machine without the catcher. ▶ Walk, never run. ▶ Rake/Verticut only in daylight or in good artificial light.
- Avoid operating the machine in wet grass, where feasible or take additional precautions to avoid slipping. ▶ Raking/Verticutting on banks can be dangerous. ▶ Do not rake/verticut excessively steep slopes.
- Always be sure of your footing on slopes or wet grass.
- Rake/Verticut across the face of slopes - never up and down.
- Exercise extreme caution when changing direction on slopes.
- Use extreme caution when stepping back or pulling the machine towards you. ▶ Never rake/verticut by pulling the machine towards you. ▶ Stop the machine if the machine has to be tilted for transportation when crossing surfaces other than grass and when transporting the machine to and from the area to be raked/verticut. ▶ Never operate the machine without the catcher or deflector guard in position. ▶ Switch on the motor according to the instructions with feet well away from rotating parts. Do not tilt the machine when starting or switching on the motor, except if the machine has to be tilted for starting in long grass. In this case, do not tilt if more than absolutely necessary and tilt only the part which is away from the operator. Always ensure that both hands are in the operating position before returning the machine to the ground. ▶ Do not put hands or feet near or under rotating parts. ▶ Always stand clear of the discharge zone when operating the machine. ▶ Never pick up or carry the machine while the motor is running. ▶ Be careful during adjustment of the machine to prevent entrapment of the feet and hands between moving tines/blades and fixed parts of the machine.
▶ Regularly inspect the supply cable and any extension cables. Do not connect damaged cables to the supply or touch a damaged cable before it is disconnected from the supply. A damaged cable can lead to contact with live parts. Beware electric shock hazard. ▶ Do not touch the tines before the machine is disconnected from the supply and the tines have come to a complete stop. ▶ Keep supply cables and extension cables away from the tines. The tines can cause damage to the cables and lead to contact with live parts. Beware electric shock hazard.
Remove the plug from the socket:
- whenever you leave the machine, – before clearing a blockage, – before checking, cleaning or working on the machine,
- after striking a foreign object. Inspect the machine for damage and make repairs as necessary,
- if the machine starts to vibrate abnormally (check immediately).
Maintenance
- Keep all nuts, bolts and screws tight to be sure that the machine is in safe working condition. ▶ Check the catcher frequently for wear or deterioration. ▶ Examine the machine and replace worn or damaged parts for safety. ▶ Ensure replacement parts fitted are Bosch approved. ▶ Always wear gardening gloves when handling or working near the sharp tines/blade.
Power supply
The voltage indicated on the rating plate must correspond to the voltage of the power source. We recommend that this equipment is only connected into a socket which is protected by a circuit-breaker that would be actuated by a 30 mA residual current.
▶ Only use or replace power supply cables for this unit which correspond to the types indicated by the manufacturer. See the operating instructions for the order no. and types. ▶ Never touch the mains plug with wet hands. ▶ Do not run over, crush or pull the power supply cable or extension lead, otherwise it may be damaged. Protect the cable from heat, oil and sharp edges. The extension lead must have a cross section in accordance with the operating instructions and be protected against splashed water. The connection must not be in water. ▶ Always wear gardening gloves when handling or working near the sharp tines/blade.
Functional Description

Read all safety warnings and all instructions. Failure to follow the warnings and instructions may result in electric shock, fire and/or serious injury.
Intended Use
This product is intended for domestic, lawn raking, scarifying or verticutting of lawn.
At higher height of cut level the product is intended for collection of leaves in the lawn area.
Delivery Scope
Carefully remove the machine from its packaging and check if the following parts are complete:
- Lawnraker (ALR 900)/Verticutter (AVR 1100)
- Handle bottom
- Handle top
- Grassbox top
- Grassbox bottom (packed inside grassbox top)
- 4 Bolts
- 4 Wing nuts
- 2 Cable clips
- Operating instructions
When parts are missing or damaged, please contact your dealer.
When fully assembled the machine weighs approximately 9.9–10.4 kg. If necessary, obtain assistance to remove from packaging.
Take care when removing from packaging or carrying the machine to the lawn, as the tines/blades are sharp.
Product Features
The numbering of the components shown refers to the representation of the machine on the graphic pages.
1 Handle top 2 Switch lever 3 Safety button 4 Power plug** 5 Cable restraint 6 Handle bottom 7 Grassbox 8 Ventilation slots 9 Height of cut lever
10 Serial number
** country specific
Accessories shown or described are not part of the standard delivery scope of the product. A complete overview of accessories can be found in our accessories program.
Technical Data
| Lawnraker / Verticutter ALR 900 AVR 1100 | |||
| Article number | 3 600 H8A 0.. | 3 600 H8A 1.. | |
| Rated power input | W 900 1100 | ||
| Cutting width | cm 32 32 | ||
| Grassbox, capacity | l | 5 | 0 |
| Cutting system | |||
| - Double wound tines | ● | - | |
| - Pivoting blades | - | ● | |
| Collection system | Jet Collect Jet Collect | ||
| Height of cut | mm +10/+5/0/-5 | +5/0/-5/-10 | |
| Weight according to EPTA-Procedure 01/2003 | kg | 9.9 | 10.4 |
| Serial number | See serial number 10 (type plate) on the machine | ||
Noise/Vibration Information
Measured values determined according to 2000/14/EC (1.60 m height, 1.0 m distance away) and EN ISO 5349.
Typically, the A-weighted noise levels of the product are: sound pressure level 78 dB(A); guaranteed sound power level lower than 94 dB(A). Uncertainty K = 3 dB.
The hand-arm acceleration is typically below 2.5 m/s2 .
Dr. Egbert Schneider Senior Vice President Engineering
Dr. Eckerhard Strötgen Head of Product Certification

i.v. Wuhen
01.07.2008, Robert Bosch GmbH, Power Tools Division D-70745 Leinfelden-Echterdingen
Declaration of Conformity C€
We declare under our sole responsibility that the product described under "Technical data" is in conformity with the following standards or standardization documents: EN 60335 according to the provisions of the directives 2004/108/EC, 98/37/EC (until 28 Dec 2009), 2006/42/EC (from 29 Dec 2009), 2000/14/EC. 2000/14/EC: Measured sound power level 92 dB(A). Conformity assessment procedure according to Annex V.
Technical file at: Bosch Lawn and Garden Ltd., PT-LG/EAE, Stowmarket, Suffolk IP14 1EY, England Leinfelden, 01.07.2008
Assembly
For Your Safety
Warning! Switch off, remove plug from mains before adjusting, cleaning or if cable is cut, damaged or entangled. The tines/blades continue to rotate for a few seconds after the machine is switched off. Caution – do not touch rotating tines/blades. Always wear gardening gloves when handling or working near the sharp tines/blade.
Electrical Safety
Your machine is double insulated for safety and requires no earth connection. The operating voltage is 230 V AC, 50 Hz (for non-EU countries 220 V, 240 V as applicable). Only use approved extension cables. Contact your Bosch Service Centre for details.
Extension cords/leads should only be used if they comply with H05VV-F, H05RN-F types or IEC type design (60227 IEC 53, 60245 IEC 57).
If you want to use an extension cable when operating your product, only the following cable dimensions should be used:
- 1.0 mm²: max. length 40 m
- 1.5 mm²: max. length 60 m
- 2.5 mm²: max. length 100 m
Note: If an extension cable is used it must be earthed and connected through the plug to the earth cable of your supply network in accordance with prescribed safety regulations.
If in doubt contact a qualified electrician or the nearest Bosch Service Centre.
WARNING! Inadequate extension cables can be dangerous. Extension cable, plug and socket must be of watertight construction and intended for outdoor use.
Cable connections should be kept dry and off ground.
It is recommended for increased electrical safety to use a Residual Current Device (RCD) with a tripping current of not more than 30 mA. Always check your RCD every time you use it.
If the supply cord is damaged, it must be replaced by a Bosch Service Centre.
Products sold in GB only: Your product is fitted with an approved 13 A (BS 1363/A) electric plug and is protected by a 13 A fuse (ASTA Approved to BS 1362).
If the fitted plug is not suitable for your socket outlets, it should be cut off and an appropriate plug fitted in its place.
The severed plug must be disposed of to avoid a possible shock hazard and should never be inserted into a 13 A socket elsewhere.
Assembly
▶ Ensure the cables are not trapped when folding/unfolding top/bottom handles. Do not drop the handles.
Assembly of Product A
Fix the handle bottom 6 to the body of the machine with two bolts and wing nuts.
Attach the handle top 1 with the bolts and the wing nuts to the handle bottom 6.
Note: Ensure that the cable clips supplied are used to fix the cable to the handle.
Attach cable to cable restraint 5 ensuring that sufficient cable slack is available.
Grassbox B C
Separate the grassbox top from the grassbox bottom.
Locate the rear of the grassbox top into the rear of the grassbox bottom and close the two halves together.
Fasten the two red clips (one per side).
Attach/remove the grassbox 7 as shown.
Adjusting the Cutting Height D
Pull the lever top 9 towards the wheel and then rotate it to the front or rear of the machine to achieve the desired cutting height.
Repeat this for both sides of the product.
Make sure that both levers 9 are set to the same position.
Note: In certain conditions, mud can build up on the tread of the wheels and/or the machine may sink slightly into the ground. This can effect the depth of ground penetration.
Operation
Starting
The tines/blades continue to rotate for a few seconds after the machine is switched off. Allow the motor and tines/blades to stop rotating before switching "on" again.
Do not rapidly switch off and on.
Note: To aid starting, push handle down to lift front wheels.
Starting E F

Press and hold the safety button 3. Squeeze the switch lever 2 towards the handle.
Release the safety button 3.
Stopping
Release the switch lever 2.
Working Advice
Raking/Verticutting
![graph TD A["Vehicle"] --> B["Route 1"] A --> C["Route 2"] A --> D["Route 3"] A --> E["Route 4"] A --> F["Route 5"] A --> G["Route 6"] A --> H["Route 7"] A --> I["Route 8"] A --> J["Route 9"] A --> K["Route 10"] style A fill:#f9f,stroke:#333 style B fill:#ccf,stroke:#333 style C fill:#ccf,stroke:#333…](/content/2026/06/1251901/images/6adaf7ef3eff2b962d4bcf50ef1bfd669f2999de13265659795daff7996440da.jpg)
Place the ALR 900/AVR 1100 on the edge of the lawn, as close to the power point as possible. Work away from the power point.
Position the cable to opposite side (already raked/verticut lawn) at the end of each turn.
When raking/verticutting, do not allow the motor to labour.
ALR 900:
When the motor labours, the speed of the motor drops and you will hear a change in the motor sound. When this occurs, stop raking, release switch lever 2, and raise the height of cut. Failure to do so could damage the machine.
AVR 1100:

The motor is protected by a safety cut-out which is activated when the blades become jammed, clogged, or if the motor is overloaded. When this occurs, stop using the machine.
The safety cut-out will only reset if switch lever 2 is released.
Remove the plug from the power supply, clear any obstruction, and wait a minute for the safety cut-out to reset before continuing to use the machine.
▶ Always wear gardening gloves when handling or working near the sharp tines/blade.
Note: When waiting for a reset, operating switch lever 2 too early with the machine plugged into the supply will prolong the reset time of the safety cut-out.
If the machine cuts out again, increase the height of cut or postpone use until conditions improve. Please refer to the "trouble shooting table" and "raking/verticutting tips".
Raking/Verticutting Tips
Optimum conditions for raking/verticutting are when the grass is short and slightly damp. Raking/verticutting when the ground is very soft or hard may damage the lawn and will result in poor collection.
- Kill moss with a proprietary moss killer before raking/verticutting.
- Start the ALR 900/AVR 1100 at the highest raking/verticutting position and lower as necessary.
- Rake/verticut the lawn in one direction, then proceed at right angles a week later until the whole lawn has been completed.
- The action of removing moss and debris during raking/verticutting may reveal ragged and bare patches depending on lawn conditions.
Note: In conditions with excessive tree debris (e.g. leaves, twigs, etc.) first clear the surface by using the machine with a height of cut setting of either 3 or 4.
For best results mow the lawn before reseeding. Promote the spread of grass into bare and weak areas with good quality lawn seed after raking/verticutting. Allow fresh grass seed to root and establish before fertilising, where necessary water to prevent fresh seeds drying out. Ideal times for raking/verticutting are spring and late autumn.
Also lawn can be maintained by raking/verticutting on a higher setting after every six cuts.
Troubleshooting
The following chart lists problem symptoms, possible causes and corrective action, if your machine does not operate properly. If these do not identify and correct the problem, contact your service agent.
Warning: Switch off and remove plug from mains before investigating fault.
| Problem Possible Cause Corrective Action | ||
| Machine fails to operate | Power turned off Turn power on Mains socket faulty Use another socket Extension cable damaged Inspect cable, replace if damaged Fuse faulty/blown Replace fuse Possible clogging Check underneath the machine and clear out as necessary (always wear gardening gloves) Motor protector activated (AVR 1100 only) Raking/Verticutting too low for the conditions Obstructed rotor Clear obstruction (always wear gardening gloves) Blocked side grilles Clear debris from the outside of the side grilles Grassbox full Empty the grassbox regularly | See below* Increase height of cut |
| Machine functions intermittently | Extension cable damaged Inspect cable, replace if damaged Internal wiring of machine damaged Worn/Missing tines/blades ALR 900: Fit replacement (see “Removing/Fitting Raker Tines”) AVR 1100: Contact Service Agent Conditions too wet Increase height of cut (see “Raking/Verticutting Tips”) Too much debris on the ground See below* Possible clogging Check underneath the machine and clear out as necessary (always wear gardening gloves) Raking/Verticutting too low for the conditions Grass too long Cut grass Very uneven surface Increase height of cut Grassbox full Empty the grassbox regularly | See below* Increase height of cut |
Problem Possible Cause Corrective Action
| Machine labours or belt squeals | Height of cut too low Increase height of cut (see “Adjusting the Cutting Height”) | |
| Cutting tines/blades not rotating | Cutting tines/blades obstructed by grassBelt is slipping or is damaged | Clear obstruction (always wear gardening gloves)Contact Service Agent |
| Excessive vibrations/noise | Cutting tines/blades damaged ALR 900:Fit replacement (see “Removing/Fitting Raker Tines”)AVR 1100:Contact Service Agent | |
| Poor collection Raking/Verticutting in wet conditionsRaking/Verticutting too low for the conditionsPossible clogging Check underneath the machineand clear out as necessary (always wear gardening gloves)Blocked side grilles Clear debris from the outside of the side grillesMissing tine springs (ALR 900 only)Replace tine springs (always wear gardening gloves) | ||
In conditions with excessive tree debris (e.g. leaves, twigs, etc.) first clear the surface by using the machine with a height of cut setting of either 3 or 4.
Maintenance and Service
Maintenance and Cleaning
Stop, remove plug from the power supply and remove the grassbox. Always wear gardening gloves when handling or working near the sharp tines/blade.
Note: To ensure long and reliable service, carry out the following maintenance regularly.
Regularly check for obvious defects such as loose, dislodged or damaged tines/blades, loose fixings, and worn or damaged components.
Check that covers and guards are undamaged and correctly fitted. Carry out necessary maintenance or repairs before using.
If the machine should happen to fail despite the care taken in manufacture and testing, repair should be carried out by an authorised customer service agent for Bosch garden products.
In all correspondence and spare parts orders, please always include the 10-digit article number given on the type plate of the machine.
Removing/Fitting Raker Tines G
▶ Stop, remove plug from the power supply and remove the grassbox. ▶ Always wear gardening gloves when handling or working near the sharp tines/blade.
Turn the machine over.
Use long-nose pliers to grip the tine 12, press down and remove the tine 12 from the pin 11. (see figure G)
The new tine 12 is mounted in reverse order.
After Raking or Verticutting/Storage H
Clean the exterior of the machine thoroughly using a soft brush and cloth. Do not use water, solvents or polishes. Remove all grass and debris, especially from the ventilation slots 8.
Turn the machine on its side and clean the tine/blade area. If grass or dirt is compacted in the tine/blade area, remove with a wooden or plastic implement.
▶ Always wear gardening gloves when handling or working near the sharp tines/blade.
Store the machine in a dry place. Do not place other objects on top of the machine. To save space, fold up the handle fully.
Ensure the cables are not trapped when folding/unfolding top/bottom handles. Do not drop the handles.
The machine can be stored with the grassbox disassembled. (see figure H)
After-sales Service and Customer Assistance
Our after-sales service responds to your questions concerning maintenance and repair of your product as well as spare parts. Exploded views and information on spare parts can also be found under:
www.bosch-pt.com
Our customer consultants answer your questions concerning best buy, application and adjustment of products and accessories.
Great Britain
Robert Bosch Ltd. (B.S.C.)
P.O. Box 98
Broadwater Park
North Orbital Road
Denham
Uxbridge
UB 9 5HJ
Tel. Service: +44 (0844) 736 0109
Fax: +44 (0844) 736 0146
Australia, New Zealand and Pacific Islands
Robert Bosch Australia Pty. Ltd.
Power Tools
Locked Bag 66
Clayton South VIC 3169
Customer Contact Center
Inside Australia:
Phone: +61 (01300) 307 044
Fax: +61 (01300) 307 045
Inside New Zealand:
Phone: +64 (0800) 543 353
Fax: +64 (0800) 428 570
Outside AU and NZ:
Phone: +61 (03) 9541 5555
www.bosch.com.au
Disposal
The machine, accessories and packaging should be sorted for environmental-friendly recycling.
Only for EC countries:

Do not dispose of power tools into household waste!
According to the European Guideline 2002/96/EC for Waste Electrical
and Electronic Equipment and its implementation into national
right, power tools that are no longer usable must be collected separately and disposed of in an environmentally correct manner.
Subject to change without notice.
26 | Français
Bosch Lawn and Garden Ltd., PT-LG/EAE, Stowmarket, Suffolk IP14 1EY, England
Leinfelden, 01.07.2008
Dr. Egbert Schneider Senior Vice President Engineering
Dr. Eckerhard Strötgen Head of Product Certification


01.07.2008, Robert Bosch GmbH, Power Tools Division D-70745 Leinfelden-Echterdingen
Assembly
For your safety
Robert Bosch (France) S.A.S.
Bosch Lawn and Garden Ltd., PT-LG/EAE, Stowmarket, Suffolk IP14 1EY, England
Leinfelden, 01.07.2008
Español | 41
Dr. Egbert Schneider Senior Vice President Engineering
Dr. Eckerhard Strötgen Head of Product Certification

i.v. Muoyen
01.07.2008, Robert Bosch GmbH, Power Tools Division D-70745 Leinfelden-Echterdingen
Assembly
For your safety
Dr. Egbert Schneider Senior Vice President Engineering Dr. Eckerhard Strötgen Head of Product Certification
ppa. Amaia i.v. Nuoyen
01.07.2008, Robert Bosch GmbH, Power Tools Division D-70745 Leinfelden-Echterdingen
52 | Portuguese
Assembly
For your safety
Bosch Lawn and Garden Ltd., PT-LG/EAE, Stowmarket, Suffolk IP14 1EY, England
Leinfelden, 01.07.2008
Dr. Egbert Schneider Senior Vice President Engineering
Dr. Eckerhard Strötgen Head of Product Certification


01.07.2008, Robert Bosch GmbH, Power Tools Division D-70745 Leinfelden-Echterdingen
Assembly
Technical file at: Bosch Lawn and Garden Ltd., PT-LG/EAE, Stowmarket, Suffolk IP14 1EY, England
Leinfelden, 01.07.2008
Dr. Egbert Schneider Senior Vice President Engineering
Dr. Eckerhard Strötgen Head of Product Certification

01.07.2008, Robert Bosch GmbH, Power Tools Division D-70745 Leinfelden-Echterdingen
74 | Dutch
Assembly
For your safety
Dr. Egbert Schneider Senior Vice President Engineering
Dr. Eckerhard Strötgen Head of Product Certification

i.v. MacKen
01.07.2008, Robert Bosch GmbH, Power Tools Division D-70745 Leinfelden-Echterdingen
CE Declaration of Conformity
Technical file at: Bosch Lawn and Garden Ltd., PT-LG/EAE, Stowmarket, Suffolk IP14 1EY, England Leinfelden, 01.07.2008
Assembly
Bosch Service Center
Telegrafvej 3
2750 Ballerup
Tel. Service Center: +45 (4489) 8855
Fax: +45 (4489) 87 55
E-Mail: vaerktoej@dk.bosch.com
Disposal
Dr. Egbert Schneider Senior Vice President Engineering
Dr. Eckerhard Strötgen Head of Product Certification

i.v. MacKen
01.07.2008, Robert Bosch GmbH, Power Tools Division D-70745 Leinfelden-Echterdingen
Assembly
For your safety
Bosch Service Center
Telegrafvej 3
2750 Ballerup
Denmark
Tel.: +46 (020) 41 44 55
Fax: +46 (011) 18 76 91
Waste management
Dr. Egbert Schneider Senior Vice President Engineering
Dr. Eckerhard Strötgen Head of Product Certification

i.v. MacKen
01.07.2008, Robert Bosch GmbH, Power Tools Division D-70745 Leinfelden-Echterdingen
CE Declaration of Conformity
Technical documentation at: Bosch Lawn and Garden Ltd., PT-LG/EAE, Stowmarket, Suffolk IP14 1EY, England Leinfelden, 01.07.2008
Assembly
Dr. Egbert Schneider Dr. Eckerhard Strötgen Senior Vice President Head of Product Engineering Certification
ppa. Amana i.v. Moyen
01.07.2008, Robert Bosch GmbH, Power Tools Division D-70745 Leinfelden-Echterdingen
Installation
For safety reasons
Dr. Egbert Schneider Senior Vice President Engineering
Dr. Eckerhard Strötgen Head of Product Certification
ppa. Amaka i.v. Mozyen
01.07.2008, Robert Bosch GmbH, Power Tools Division D-70745 Leinfelden-Echterdingen
Assembly
Dr. Egbert Schneider Senior Vice President Engineering
Dr. Eckerhard Strötgen Head of Product Certification

i.v. Nuoyen
01.07.2008, Robert Bosch GmbH, Power Tools Division D-70745 Leinfelden-Echterdingen
Assembly
CE Declaration of Conformity
Bosch San. ve Tic. A.S.
Ahi Evran Cad. No:1 Kat:22
Polaris Plaza
80670 Maslak/Istanbul
Dr Egbert Schneider Senior Vice President Engineering Dr Eckerhard Strötgen Head of Product Certification
ppa. Aucuca i.v. Nuoyen
01.07.2008, Robert Bosch GmbH, Power Tools Division D-70745 Leinfelden-Echterdingen
Assembly
Robert Bosch Sp. z o.o.
Dr. Egbert Schneider Senior Vice President Engineering
Dr. Eckerhard Strötgen Head of Product Certification

i.v. Wuhen
01.07.2008, Robert Bosch GmbH, Power Tools Division D-70745 Leinfelden-Echterdingen
Bosch Service Center PT
K Vápence 1621/16
692 01 Mikulov
Tel.: +420 (519) 305 700
Fax: +420 (519) 305 705
E-Mail: servis.naradi@cz.bosch.com
www.bosch.cz
Disposal
Bosch Lawn and Garden Ltd., PT-LG/EAE, Stowmarket, Suffolk IP14 1EY, England Leinfelden, dated 01.07.2008
Dr. Egbert Schneider Senior Vice President Engineering
Dr. Eckerhard Strötgen Head of Product Certification


01.07.2008, Robert Bosch GmbH, Power Tools Division D-70745 Leinfelden-Echterdingen
Assembly
Bosch Lawn and Garden Ltd., PT-LG/EAE, Stowmarket, Suffolk IP14 1EY, England
Leinfelden, 01.07.2008
Dr. Egbert Schneider Senior Vice President Engineering
Dr. Eckerhard Strötgen Head of Product Certification

i.v. Nuoyen
01.07.2008, Robert Bosch GmbH, Power Tools Division D-70745 Leinfelden-Echterdingen
Assembly
For your safety
Dr. Egbert Schneider Senior Vice President Engineering
Dr. Eckerhard Strötgen Head of Product Certification


01.07.2008, Robert Bosch GmbH, Power Tools Division D-70745 Leinfelden-Echterdingen
Assembly
Dr. Egbert Schneider Senior Vice President Engineering
Dr. Eckerhard Strötgen Head of Product Certification

i.v. Nuoyen
01.07.2008, Robert Bosch GmbH, Power Tools Division D-70745 Leinfelden-Echterdingen
Bosch Power Tools F 016 L70 481 | (10.10.08)
196 | Ukrainian
Mounting
For your safety
Technical documentation at: Bosch Lawn and Garden Ltd., PT-LG/EAE, Stowmarket, Suffolk IP14 1EY, England
Leinfelden, 01.07.2008
Dr. Egbert Schneider Senior Vice President Engineering
Dr. Eckerhard Strötgen Head of Product Certification
ppa. A##ca i.v. Nu#gen
01.07.2008, Robert Bosch GmbH, Power Tools Division D-70745 Leinfelden-Echterdingen
Mounting
Bosch Service Center
Str. Horia Măcelariu Nr. 30-34,
013937 Bucharest
Tel. Power tools service: +40 (021) 4 05 75 40
Fax: +40 (021) 4 05 75 66
E-Mail: infoBSC@ro.bosch.com
Dr. Egbert Schneider Senior Vice President Engineering
Dr. Eckerhard Strötgen Head of Product Certification


01.07.2008, Robert Bosch GmbH, Power Tools Division D-70745 Leinfelden-Echterdingen
Mounting
For your safety
Dr. Egbert Schneider Dr. Eckerhard Strötgen Senior Vice President Head of Product Engineering Certification
ppa. Amana i.v. Moyen
01.07.2008, Robert Bosch GmbH, Power Tools Division D-70745 Leinfelden-Echterdingen
Dr. Egbert Schneider Dr. Eckerhard Strötgen Senior Vice President Head of Product Engineering Certification
ppa. Amana i.v. Moyen
01.07.2008, Robert Bosch GmbH, Power Tools Division D-70745 Leinfelden-Echterdingen
CE Declaration of Conformity
Dr. Egbert Schneider Senior Vice President Engineering
Dr. Eckerhard Strötgen Head of Product Certification
ppa. Aauca i.v. Nuoyen
01.07.2008, Robert Bosch GmbH, Power Tools Division D-70745 Leinfelden-Echterdingen
Assembly
Dr. Egbert Schneider Senior Vice President Engineering Dr. Eckerhard Strötgen Head of Product Certification
ppa. Amara i.v. Mozyen
01.07.2008, Robert Bosch GmbH, Power Tools Division D-70745 Leinfelden-Echterdingen
CE Conformity
Dr. Egbert Schneider Senior Vice President Engineering
Dr. Eckerhard Strötgen Head of Product Certification

01.07.2008, Robert Bosch GmbH, Power Tools Division D-70745 Leinfelden-Echterdingen
Assembly
For your safety
Dr. Egbert Schneider Senior Vice President Engineering
Dr. Eckerhard Strötgen Head of Product Certification

i.v. Wuhen
01.07.2008, Robert Bosch GmbH, Power Tools Division D-70745 Leinfelden-Echterdingen
CE Declaration of Conformity


- ALR 900 | AVR
- BOSCH
- DEUTSCH
- SAFETY INSTRUCTIONS
- ASSEMBLY
- FOR YOUR SAFETY
- EXPLANATION OF SYMBOLS ON THE MACHINE
- OPERATION
- REMOVE THE PLUG FROM THE SOCKET
- MAINTENANCE
- POWER SUPPLY
- FUNCTIONAL DESCRIPTION
- INTENDED USE
- DELIVERY SCOPE
- PRODUCT FEATURES
- NOISE/VIBRATION INFORMATION
- DECLARATION OF CONFORMITY C€
- ELECTRICAL SAFETY
- WARNING! INADEQUATE EXTENSION CABLES CAN BE DANGEROUS. EXTENSION CABLE, PLUG AND SOCKET MUST BE OF WATERTIGHT CONSTRUCTION AND INTENDED FOR OUTDOOR USE
- ASSEMBLY OF PRODUCT A
- GRASSBOX B C
- ADJUSTING THE CUTTING HEIGHT D
- STARTING
- STARTING E F
- STOPPING
- WORKING ADVICE
- RAKING/VERTICUTTING
- ALR
- AVR
- ALWAYS WEAR GARDENING GLOVES WHEN HANDLING OR WORKING NEAR THE SHARP TINES/BLADE
- RAKING/VERTICUTTING TIPS
- TROUBLESHOOTING
- MAINTENANCE AND SERVICE
- MAINTENANCE AND CLEANING
- REMOVING/FITTING RAKER TINES G
- AFTER RAKING OR VERTICUTTING/STORAGE H
- ENSURE THE CABLES ARE NOT TRAPPED WHEN FOLDING/UNFOLDING TOP/BOTTOM HANDLES. DO NOT DROP THE HANDLES
- AFTER-SALES SERVICE AND CUSTOMER ASSISTANCE
- WWW.BOSCH-PT.COM
- GREAT BRITAIN
- AUSTRALIA, NEW ZEALAND AND PACIFIC ISLANDS
- DISPOSAL
- ONLY FOR EC COUNTRIES
- FRANÇAIS
- PORTUGUESE
- DUTCH
- CE DECLARATION OF CONFORMITY
- WASTE MANAGEMENT
- INSTALLATION
- FOR SAFETY REASONS
- UKRAINIAN
- MOUNTING
- CE CONFORMITY
Brand : BOSCH
Model : AVR 1100
Category : Lawn mower