
FT 4919 - Thermometers AEG - Free user manual and instructions
Find the device manual for free FT 4919 AEG in PDF.


| Product type | Infrared ear thermometer |
| Brand | AEG |
| Model | FT 4919 |
| Power supply | 1 Lithium CR2032 battery (included) |
| Ear measurement range | 34 °C to 42.2 °C (93.2 °F to 108 °F) |
| Scan mode measurement range | -22 °C to 80 °C (-7.6 °F to 176 °F) |
| Ear measurement accuracy | ±0.2 °C (35.5 °C to 42 °C); ±0.3 °C outside range |
| Scan mode accuracy | ±0.3 °C (22 °C to 42.2 °C); ±4% or ±2 °C outside range |
| Operating temperature | 10 °C to 40 °C (50 °F to 104 °F) |
| Storage temperature | -20 °C to 50 °C (-4 °F to 122 °F), RH ≤85% |
| Measurement units | °C / °F (switchable) |
| Main functions | Clock, ambient temperature, ear measurement, Scan mode, stopwatch, fever alarm (>37.5 °C), memory (9 slots with date/time) |
| Auto power off | After 1 minute of inactivity |
| Display | LCD screen with date, time and temperature |
| Maintenance and cleaning | Clean the tip after each use with a cotton cloth soaked in 70% alcohol, let dry for 1 minute |
| Safety | Do not immerse; avoid shocks; store away from liquids and direct sunlight |
| Standards | ASTM E1965-98, EN12470-5:2003, IEC/EN60601-1-2 (EMC), IEC/EN60601-1 (safety) |
| Package contents | Thermometer, protective cap, CR2032 battery, user manual |
Frequently Asked Questions - FT 4919 AEG
User questions about FT 4919 AEG
0 question about this device. Answer the ones you know or ask your own.
Ask a new question about this device
Download the instructions for your Thermometers in PDF format for free! Find your manual FT 4919 - AEG and take your electronic device back in hand. On this page are published all the documents necessary for the use of your device. FT 4919 by AEG.
USER MANUAL FT 4919 AEG
Contents Page Location of Controls.....3 Technical Data......68 Instruction Manual......69
- Lens
- Measuring tip
- Scan button
- ON/MEM (On/Memory)
- LCD Display
- Protection cap
- Battery cover
Functions
| Technical Data | ☑ Temperature-Measurement range:Measurements in the “ear area”: 34~42.2°C(93.2~108°F), Scan- operation: -22~80°C (-7.6~176°F).☑ Operation temperature range: 10~40°C (50~104°F).☑ Storage temperature range: -20~50°C (-4~122°F), relative humidity ≤85%.Transport temperature should be lower than 70°C, relative humidity ≤95%.☑ In accordance to ASTM E1965-98, EN12470-5:2003Clinical Thermometers Part 5: Performance of Infra-red ear thermometers (with maximum device), IEC/EN60601-1-2 (EMC), IEC/EN60601-1 Safety Guidelines.☑ DeviationsWith measurements in the ear: +/-0.2°C (0.4°F) within the range of 35.5~42°C (95.9~107.6°F),+/-0.3°C (0.5°F) out of this range.In Scan-mode +/-0.3°C (0.5°F) within the range of 22~42.2°C (71.6~108°F),+/-4% or +/-2°C (4°F) out of this range—the higher value is decisive.☑ Fever Alarm saving locations for ear operation (display of date/time/operation mode for each measurement).☑ Time display, °C / °F toggle function.☑ Battery, 1 Lithium cell (CR2032 1 pc.).☑ Measurement in the ear, the device will calculate the corresponding value which would be derived from an oral measurement.☑ Battery low warning.☑ Automatic switch-off of measurement activation.⚠ This symbol indicates important for persons or the device! |
Overview of operational elements:
- Lens
- Measuring tip
- Scan button
- ON/MEM (On/Memory)
- LCD Display
- Protection cap
- Battery cover
Functions
| Clock | The fever thermometer has a clock you have to set first. When saving measurement results, the time is included.→Please follow the “Setting the Clock” instructions. |  |
| YXGZ | ||
| Ambient Temperature | A comfortable ambient temperature is important for children and patients. The thermometer assists you with watching the room temperature.→Set the time first. After switch-off, the room temperature will be displayed with the symbol ↙.→Please adhere to the instructions for use of the thermometer to obtain correct temperature readings. |  |
| Ear Temperature | This Thermometer has been designed for practical use at home.⚠ It does not replace seeing the doctor.→Please refer to the chapter “Use of the Thermometer” to learn how to measure body temperature. |  |
| Scan Operation | In Scan mode, the current surface temperature is displayed. This does not mean the body temperature. This is useful for checking the temperature of an object (e.g. a milk bottle).→ Please refer to the chapter “Use of the Thermometer” to learn how to measure a surface temperature. |  |
| Stop Watch | The built-in stop watch assists you with checking the pulse. The heartbeat is an important indicator of the vital functions of the body.→ Please refer to the chapter “Use of the Stop Watch” for measuring the pulse. |  |
| Fever Alarm | When the thermometer detects a temperature exceeding 37.5°C in the “Ear” mode, it will sound an alarm. At first, you will hear a long signal tone, then three short tones. This is to warn the user of potential fever. |  |
| Memory There | are 9 memories for ear measurement results. Each memory records the measurement together with date/time/operation mode/measuring point information.→ When the device is on, press the “ON/MEM” button. The symbol “,” will be displayed and you can read the temperature value. |  |
| °C / °FToggle | → With the clock set first (see set clock), the display shows “date, time and room temperature”. Press and hold the “SCAN” key. Press and release immediately the “ON/MEM” button. After 3 seconds, the display will be switched from “°C” to “°F”. (The same way, you get back to “°C”.) |  |
Setting the Clock
- Press the "ON/MEM" button. You will hear two low signal beeps.
- Press and hold the "ON/MEM" button for 5 seconds. When the icon Set flashes, you will see the setting display (see the following picture).
- Press the "SCAN" button till the "24" icon flashes. You can now change the 12/24 setting. Press the "SCAN" button to select the 12 hour or the 24 hour display.
- Press the "ON/MEM" button to move within the display as explained below. Hour → Minute → Year → Month → Day → Exit from the Setting display.
- While the display of "Hour", "Minute", "Year", "Month", "Day" flashes, press the "SCAN" key to change the setting.
Use of the Thermometer
⚠️ If you keep the thermometer in hand for too long, ambient temperature can be shown higher than it actually is. Measurement of body temperature can then be inaccurate as well.
Fig. a
Fig. b
Fig. c
- Make sure the measuring tip and the lens are clean and undamaged.
- Press the "ON/MEM" button (see Fig. a). 3.1 Ear temperature: Press the "ON/MEM" button, the ear temperature measuring mode is set. The thermometer is ready when the symbol ? appears on the display and two signal tones sound (Fig. a). In this mode you can obtain the body temperature by a measurement in the ear. 3.2 Scan Operation: After switching on the device, press and hold the "ON/MEM" button and press the "SCAN" key once. You'll see the symbol "💡" for infrared temperature measurement on your LCD Display (Fig. b). In this mode you can determine surface temperatures.
3.3 Stop Watch: After switching on the device, press and hold the "ON/MEM" button and press the "SCAN" key twice. You'll see the symbol "L" for the stop watch function on the LCD Display (Fig. c). To start, you press the "SCAN" key once. To stop, you press the "SCAN" key again. The time will go on running if you press the "SCAN" key once more. In this mode, the time will run from 0.01 seconds to 3 minutes. A single pressing of the "ON/MEM" button will set the stop watch back to "00". By pressing "ON/MEM" and "SCAN" key simultaneously, you'll get back to the standard display of time/date/temperature.
English
4. Temperature Measurement:
4.1 Ear Temperature Measurement, important – adhere unconditionally:
a. It is recommendable to measure 3 times in the same ear. If the results differ take the highest value.
b. To avoid the risk of cross-infections you should clean the measuring tip after every use as described under “Maintenance and Cleaning”.
4.1.1 Gently pull the ear back to stretch the auditory canal. (Fig.4.1.1) Place the measuring tip comfortably into the auditory canal. It has to be directed towards the eardrum to ensure a reliable measurement. (Fig.4.1.2)
4.1.2 Press and hold the “SCAN” key till you hear a beep. You can now remove the measuring tip from the ear and read the measurement from the display.
c. For healthy individuals, temperatures at different body parts can vary by 0.2~1°C.
d. Clinical repeatability of readings: Deviation max. 0.23°C (<1 year old), 0.22°C (1~5 years old), 0.21°C (>5 years old)
4.2 Temperature Measurement in Scan Mode:
4.2.1 When you press the “SCAN” key, the device will immediately show the current temperature. Holding the “SCAN” key will update the temperature reading continually.
4.2.2 Possible applications: Temperature measurements of water, milk, clothing, skin or other objects.
Note: In this mode, a present surface temperature is measured, not the body temperature.
4.3 Room Temperature Measurement
4.3.1 You have to set the clock first before you can measure the room temperature. After switching off the device, the symbol will appear on the display together with the current room temperature.
4.3.2 For room temperature measurement: Put the device on a table and avoid the influence of direct sunlight or air conditions during measurement.
4.3.3 The room temperature can be obtained 15 minutes later.
5. After Measurements:
5.1 If the device is not operated for more than one minute, it will switch off automatically. The LCD display will show only date, time and room temperature. 5.2 To obtain an accurate measuring result and to avoid the risk of cross-infections, you should clean the measuring tip after every use as described under "Maintenance and Cleaning". 5.3 Put the protection cap onto the device when you don't use it.
How to measure the heartbeat pulse?
Use the stop watch to determine your pulse frequency. Also see chapter 3.3 "Stop Watch".
If you have counted 18 heartbeats within 15 seconds, you can calculate that you have 72 heartbeats within one minute.

Important!
| Cleaning and Maintenance | ⚠ The measuring tip is the most sensible part of the thermometer. You should carefully clean the lens to avoid damages.a. After measuring, clean the lens (it is inside the measuring tip) with a cotton cloth and 70%vol alcohol.b. Let the lens dry for at least one minute.c. The device should be stored at -20~50°C (-4~122°F). Relative humidity ≤85%.d. Store the thermometer in a dry place and keep it away from fluids and direct sunlight.e. Don’t dip the tip into fluids.Note: In case the device has been dropped down, check it for any damage. If you are not sure you should have it checked at a service point. |
 | Battery ChangeOpening of the battery cover:Push the battery cover out with your thumb.Hold the device and lever the battery out with a small screwdriver.Insert the new battery under the metal clip on the left.Press the battery down till you hear a click.Attach the Battery cover again.Keep batteries away from children (A lithium cell (CR2032) is included with the delivery of the device.)The positive pole (+) must be on top, the negative pole (-) on the bottom.The device is delivered with the battery in place.Remove – if present- the protecting foil between battery and pole. This foil protects the battery during transport from potential discharge. |
Troubleshooting
| Error Display | Problem Solution | |
 | Error 5~9,the system doesn't function properly. | Remove the battery for one minute and insert it again.If the error message appears again, consult a service special-ist. |
 | Measurement was taken before the device was ready. | Wait till the display doesn't flash any more. |
 | The device displays a grave change in ambient temperature. | Put the thermometer in a room with a temperature of 10°C ~ 40°C (50°F ~104°F) for at least 30 minutes. |
 | The room temperature is not within the range of 10°C~ 40°C (50°F ~104°F). | |
| H1 | (1) When measuring in the ear: temperature higher than +42.2°C (108°F).(2) When measuring in Scan mode: temperature higher than +80°C (176°F). | Select the settings according to your special purpose. If the error message appears again consult a service specialist. |
| Lo | (1) When measuring in the ear: temperature lower than +34°C (93.2°F).(2) When measuring in Scan mode: temperature lower than -22°C (-7.6°F). | |
 | Device cannot be put into an operable state. | Change the battery for a new one. |

If you keep the thermometer in hand for too long, ambient temperature can be shown higher than it actually is. Measurement of body temperature can then be inaccurate as well.

The Meaning of the Symbol "Garbage Can"
Protect our environment. Electronic devices do not pertain to general waste. Use the collection points designated for the disposal of electric devices and hand over your electric appliances you will not use any more there. Thus you help avoid potential effects of wrong disposal on the environment and human health.
Thereby you contribute to reuse, recycling and other forms of utilization of outdated electric and electronic devices.
Information on where to dispose of these devices can be obtained at your community or at the municipal administration.
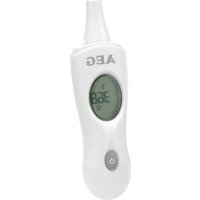
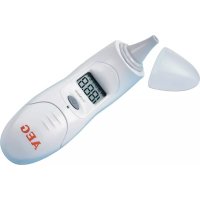
Ear thermometer FT 4919 AEG (TH520B)
- OVERVIEW OF OPERATIONAL ELEMENTS
- SETTING THE CLOCK
- USE OF THE THERMOMETER
- ENGLISH
- TEMPERATURE MEASUREMENT
- EAR TEMPERATURE MEASUREMENT, IMPORTANT – ADHERE UNCONDITIONALLY
- TEMPERATURE MEASUREMENT IN SCAN MODE
- ROOM TEMPERATURE MEASUREMENT
- AFTER MEASUREMENTS
- HOW TO MEASURE THE HEARTBEAT PULSE
- THE MEANING OF THE SYMBOL "GARBAGE CAN
- EAR THERMOMETER FT 4919 AEG (TH520B)
Brand : AEG
Model : FT 4919
Category : Thermometers