PRIMA PAPPA DONDOLINO - High chair PEG PEREGO - Free user manual and instructions
Find the device manual for free PRIMA PAPPA DONDOLINO PEG PEREGO in PDF.
| Product type | Evolutive high chair with rocking and music functions |
| Brand and model | Peg Perego Prima Pappa Dondolino |
| Recommended age and weight | From 4 kg up to 10 kg for the electric rocking function; child able to sit unaided |
| Main materials | Plastic, metal, fabric or PVC cover depending on version |
| Approximate dimensions (open) | Adjustable height: approx. 90-110 cm; width: approx. 60 cm; depth: approx. 70 cm |
| Approximate weight | About 10 kg |
| Power supply | 4 C (LR14) batteries for rocking, 2 AA (LR6) batteries for music – batteries not included |
| Main functions | Electric rocking with 5-minute timer, music 6 melodies, seat height adjustment 7 positions, backrest recline 4 positions, adjustable footrest, 2 removable trays (rocking and meal) |
| Mobility | 4 swivel castors, two with brake |
| Safety harness | 5-point system, height adjustable (2 positions) |
| Safety standards | Compliant with standard NF S 54-007 (French market) |
| Care and cleaning | Clean plastic parts with damp cloth; light oil for moving parts; cover washable according to instructions (do not immerse if PVC) |
| Batteries: safety | Do not recharge, observe polarity, remove if prolonged inactivity, do not mix types |
| Assistance and spare parts | Peg Perego customer service: assistenza@pegperego.it, original spare parts only |
| Warranty | Not specified in the manual – contact the manufacturer |
| Country of origin | Made by Peg Perego S.p.A., Italy |
Frequently Asked Questions - PRIMA PAPPA DONDOLINO PEG PEREGO
User questions about PRIMA PAPPA DONDOLINO PEG PEREGO
0 question about this device. Answer the ones you know or ask your own.
Ask a new question about this device
Download the instructions for your High chair in PDF format for free! Find your manual PRIMA PAPPA DONDOLINO - PEG PEREGO and take your electronic device back in hand. On this page are published all the documents necessary for the use of your device. PRIMA PAPPA DONDOLINO by PEG PEREGO.
USER MANUAL PRIMA PAPPA DONDOLINO PEG PEREGO
- IMPORTANT: read the instructions carefully before use. Save the instructions for future reference.
- PEG PEREGO reserves the right to make any necessary changes or improvements to the products shown at any time without notice.

Peg Perego S.p.A. is an ISO 9001 certified company.
The fact that we are certified provides a guarantee of our honesty for our customers, and fosters trust in the company's way of working.
CUSTOMER SERVICE
If parts of the model are accidentally lost or damaged, use only original Peg Perego spare parts. Contact the Peg Perego Customer Service for all repair work, replacements, information about products, and sale of original spare parts and accessories, at the following:
tel.: 0039-039-60.88.213
Peg Perego is at the consumer's service, meeting every need in the best way possible. This is why our customers' opinions are so important and valuable to us. We would be very grateful if you would kindly fill in the CUSTOMER SATISFACTION QUESTIONNAIRE after using one of our products. You will find the questionnaire on the Internet at "www.pegperegoo.com/SSCo.html.en-UK".
Please note any observations or suggestions you may have on the questionnaire.
INSTRUCTIONS FOR USE
ASSEMBLING THE HIGH CHAIR
- When mounting the rockers on the high chair, take care to position the right and the left rocker correctly, placing the exterior side of the rocker on the outside. The exterior side of the rocker has holes on the ends for the screw heads.
- The figure shows the correct position for the rockers on the high chair.
- Mount the narrow part at the bottom of the rocker on the high chair as shown in the figure, pushing the long screw with the short bushing through the hole. Use the tool that comes with the high chair to tighten the screw.
- Mount the wide part at the top of the rocker on the high chair as shown in the figure, pushing the short screw with the long bushing through the hole. Use the tool that comes with the high chair to tighten the screw.
- Mount the wheels on the high chair, pressing until they snap into place and taking care to insert the ones without brakes on the front of the high chair.
- Mount the rear wheels, pressing until they snap into place.
7- Cut the band.
OPENING THE HIGH CHAIR
- To open the high chair push the red side levers down, pressing on the rear frame, as shown in the figure.
- Open the high chair, lowering the rear cross bar until it clicks into place.
- Lower the footrest, as shown in the figure.
- The high chair is not in the correct position for use when it is removed from the packing. To use
the high chair, lift it to adjust it to one of the seven different heights, as shown in the figure. To put the high chair back into the packing position, see the instructions below.
BRAKE
- The high chair has four swivel wheels, with brakes on two of them. To brake the high chair, lower the little brake levers on the rear wheels. To release the brakes, lift the levers. For your convenience, always make sure the brakes are set before carrying out any other operation on the high chair.
TRAYS
Dondolino comes with 2 trays: a small tray for the rocking-chair, and a large tray for mealtimes.
- To attach the rocking-chair tray, place it in the position shown in fig. A. Push the tray all the way in, turning the knob under the tray at the same time (fig. B). To remove the tray, carry out the instructions in the reverse order.
- To attach the mealtime tray, hook the back part of the tray onto the high chair first, as shown in fig. A. Press the red button under the tray and pull the lever, while fastening the front part of the tray (fig. B). To remove the tray from the high chair, follow the instructions in the reverse order.
- Both trays can be adjusted to two different positions (1 & 2) by turning the knob under the tray counterclockwise. Position 3 is used only to fold the trays up.
SAFETY BELT
- Make sure that the shoulder strap is correctly inserted, by pressing on it, as shown in figure A. Fasten the lap belt as shown in figure B.
- To unfasten the safety belt, press the sides of the buckle (fig. A) while pulling the lap belt outwards (fig. B).
- The shoulder straps can be adjusted to two different heights. Unfasten the safety belt from behind the backrest by pushing the buckle downwards (fig. A). Slip the safety belt out of the sack (fig. B).
- Next, slip the safety belt buckle through the other opening in the backrest (fig. A), and fasten the buckle to the peg, pulling the safety belt until it clicks into place (fig. B).
7 HEIGHTS
The high chair adjusts to 7 different heights.
- To lift the high chair, hold it under the tray and pull upwards.
- To lower the high chair, simultaneously press the two side buttons, stopping at the desired height. These operations can be carried out with the child in the high chair.
RECLINING HIGH CHAIR
- The high chair reclines, and adjusts to four different positions: for mealtime, playtime, relaxing, or napping. To adjust it, lift the handle behind the backrest and set the high chair to the desired position. This operation can be carried out with the child in the high chair.
TO FOLD THE HIGH CHAIR
- To close the tray, turn the knob under the tray counterclockwise, and pull the tray out as far as the red markers shown with the arrows in the figure.
24 Press button nr. 1. - Lower button number 2 while lifting the tray (fig. A). Figure B shows the tray in the closed position.
- Move the high chair seat to the lowest position by pressing the side buttons. Lift the backrest to the upright position, and close the footrest.
- Lift the handle on the back of the high chair (fig. A) to completely fold the chair up. The high chair
stands upright when closed (fig. B).
TO OPEN THE HIGH CHAIR
-
To open the high chair, push the red side levers downwards, pressing on the rear frame as shown in figure 8. Press until the high chair clicks open.
-
To open the tray, press only button 2. Lower the tray as shown in the figure.
REMOVING THE HIGH CHAIR COVER
- To remove the high chair cover, remove the safety belt from under the chair and the backrest.
- Lower the high chair completely, and unbutton the cover from the sides of the backrest. Slip the cover off the top of the high chair.
FOLDING THE HIGH CHAIR BACK UP INTO ITS PACKING POSITION
- To fold the high chair back up into its "packing position" (for transporting it or storing it in its box):
- Remove the tray.
- Return the backrest to the upright position.
- Lower the high chair to the lowest position.
-
Close the footrest.
-
A small screwdriver is necessary for this step. Press the side button while slipping the screwdriver into the slit. Push to the right.
- Repeat the same operation, pushing the screwdriver to the left and lowering the high chain to the lowest position (the position in which it cannot be used).
- Fold the high chair up and place it in its box.
INSERTING THE BATTERIES
Batteries ARE NOT SUPPLIED with the high chair.
ELECTRIC ROCKING-CHAIR
To activate the electric rocking-chair option, you will need four MN 1400-LR14 1.5-Volt, type "C" flashlight batteries.
- Using a screwdriver, open the lower part of the rocker and insert the batteries. Screw the cover back onto the battery compartment.
MUSIC
To play the high chair melodies, you will need two MN 1500-LR6 1.5-Volt, type "AA" batteries.
34. Using a screwdriver, open the cover on the battery compartment located under the footrest, and insert the batteries. Screw the cover back onto the battery compartment.
ROCKING - CHAIR OPTION
CAUTION: For the electric rocking-chair option, attach the rocking-chair tray to the high chair (remove the mealtime tray), and place the backrest in the completely lowered position. Dondolino will work in the electric mode for children weighing up to 10kg . It is necessary to adjust the height of the seat according to the child's weight.
- The figure shows the correct seat height for a child weighing 4 kg.
- The figure shows the correct seat height for a child weighing 10kg .
- To turn on the rocking-chair option, use the rear handle and push the crossbar downwards. This operation can be also carried out with the child in the seat.
- Set the crossbar by pressing on it with both hands until it clicks into place. The rocking-chair works MANUALLY in this position. This operation can also be carried out with the child in the seat.
39· To turn on the electric rocking-chair, press the
button located on the bottom part of the rocker.
- The electric rocking-chair works on a timer which is set to run for about 5 minutes at a time. When the rocking-chair comes to a stop, re-set it by pressing the button twice.
- If you wish to stop the rocking-chair before the time is up, press the same button once.
Dondolino may work IMPROPERLY if:
- the height of the seat has not been correctly adjusted according the child's weight. In this case, check the seat position.
- the child is not fully leaning against the backrest or is moving too much;
the batteries are dead.
MUSIC OPTION
- To turn on the music, press the red button located on the control panel once (see figure). The same button allows you to choose from six different tunes. The chosen melody will be repeated for about 5 minutes. To turn the music off, hold the red button down for at least one second. The other buttons serve to adjust the volume of the music.
CLEANING & MAINTENANCE
Your product requires only minimal maintenance. Cleaning and maintenance operations must be performed only by adults.
- Be sure to keep all moving parts clean, lubricating them with light oil if necessary.
- Dry off metal parts to prevent rusting.
- Regularly clean the plastic parts with a damp cloth. Do not use solvents or similar products.
- Remove any dust and sand from the wheels.
- Protect the product against smog, water, rain and snow. Continued and extended exposure to sunlight can change the colours of many materials.
- Store the product in a dry area.
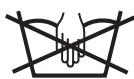
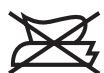
- If the bag is made of PVC, do not soak it in water but clean it with a damp cloth and neutral soap.
- To wash the lining, carry out the following instructions.


SAFETY RELATED TO THE ELECTRIC PARTS OF THE ROCKING-CHAIR
- THE ROCKING-CHAIR AND THE MUSIC OPTION MUST BE TURNED ON AND OFF ONLY BY AN ADULT.
- IF DONDOLINO IS TO BE LEFT UNUSED FOR A LONG PERIOD OF TIME, WE RECOMMEND REMOVING THE BATTERIES FROM THE ROCKER AND THE CONTROL PANEL (MUSIC OPTION).
- ONLY THE RECOMMENDED BATTERIES OR EQUIVALENT TYPES MUST BE USED IN THE ROCKING-CHAIR.
- THE BATTERIES MUST BE CORRECTLY INSERTED WITH REGARDS TO POLARITY.
DO NOT USE NEW AND USED BATTERIES SIMULTANEOUSLY. - DEAD BATTERIES MUST BE REMOVED FROM THE ROCKING-CHAIR.
DO NOT SHORT-CIRCUIT THE POWER CLAMPS. - RECHARGEABLE BATTERIES MUST BE REMOVED FROM THE ROCKING-CHAIR FOR RECHARGING.
- RECHARGEABLE BATTERIES MUST BE CHARGED ONLY UNDER ADULT SUPERVISION.
- WHILE CLEANING THE ROCKING-CHAIR, BE CAREFUL NOT TO GET THE BATTERY COMPARTMENTS WET
ON THE ROCKER (ROCKING-CHAIR OPTION) AND ON THE CONTROL PANEL (MUSIC OPTION).
WARNING
- ALL ASSEMBLY AND OPERATING PROCEDURES SHOULD BE PERFORMED BY AN ADULT; DO NOT USE THE PRODUCT IF IT HAS BROKEN OR MISSING PARTS.
- TAKE PRECAUTIONS TO PREVENT THE CHILD FROM FALLING OR SLIPPING OUT OF THE PRODUCT. ALWAYS USE THE 5-POINT SAFETY BELT. USE THE SAFETY BELT WHEN THE CHILD IS LYING DOWN AND SITTING UP.
- NEVER LEAVE THE CHILD UNATTENDED; ALWAYS KEEP CHILD IN VIEW WHILE IN THE HIGHCHAIR.
DO NOT USE THIS PRODUCT FOR YOUR CHILD UNTIL HE OR SHE IS ABLE TO SIT UPRIGHT ALONE. - TRAY AND ACCESSORY TRAYS ARE NOT DESIGNED TO SUPPORT THE CHILD'S WEIGHT; TRAY IS NOT DESIGNED TO HOLD THE CHILD IN THE CHAIR.
- ALWAYS USE THE HIGHCHAIR ON A FLAT, HORIZONTAL SURFACE.
BE CAREFUL OF WHERE YOU PLACE THE PRODUCT. AVOID PLACING THE CHILD NEAR SAFETY HAZARDS SUCH AS ELECTRICAL CORDS, SOURCES OF HEAT, OR FLAMES. - DO NOT PUT FINGERS IN THE MECHANISM. MAKE SURE YOUR CHILD'S ARMS AND LEGS ARE CLEAR OF THE MOVING PARTS DURING ADJUSTMENT.
- USING ACCESSORIES THAT HAVE NOT BEEN APPROVED BY THE MANUFACTURER MAY BE HAZARDOUS.
DO NOT USE THE PRODUCT NEAR STAIRS OR STEPS.
BE CAREFUL NOT TO PLACE THE PRODUCT NEAR SOURCES OF HEAT OR FLAMES, SUCH AS GAS STOVES, ELECTRIC HEATERS, ETC.
FROFRANÇAIS
CBOPKA BbICOKOTO CTVJIA
1.Дя yctaHOBNyHa BbICOKn CTyI Heo6xOIMO 6paTntb BHImaHne Ha HappaBHeHne npaBoN IeBOJ dyRn, OCTabJIra HApXHyIO CTOpOHy ChapyKn.Ha KOHcax HApYXHOI CTOpOHbI Dyrn IMeIOTc rHe3da NODrOLOBKn BNHTOB.
2- Ha pncyHke noka3aHO npabnIbHoe noloxeHne dYr Ha BbICOKOM CTyIe.
3. YctaHOBnTe y3kyIO CTOpOHy dUyH BHN3y BbICOKOro CtUJa, KaK NOKa3aHO Ha pncyHKe, BCTaBnJr B OTBepCTne DInHHbI BnHT C KOpOTKO BTyIKoJ. 3aTaNHe BXODaUHM B KOMPJIeKTe npincoco6JeHnEM.
4·YCTaHOBnTe ⅢPOKyU qAcTb Dpyr BBepeXy BbICOKOTo CtUla, KaK NOKa3aHo Ha pNCyHKe, BCTaBnJa B OTBepCTne KOpOTKn BnHT CДlnHHoB BtynKo. 3aTaHNTe BXODaIIM B KOMnJIeKTe npncocO6JIeHnEm.
5. UCTaHOBnTe KOJeca C HaxmOM, O6paUaB BHNMaHHe Ha To, YTObI UCTaHOBnTb KOJeca 6e3 TOPMO3a B IpeDHeu YaCTN BbICOKOro CTyJa.
6. YCTaHOBnTE C HaxmOM DBa 3aHnx KOleCa C TOPMO3OM.
7. OtpexbTe IeHTouky.
BKJIIOUeyHE MEJIODNI
40.ДявьклоченmaMeIoOnnHaXmTe1pa3KpaChyO KhoNky,paCNoIooJeeHHyoHa naHeJIuYnpaBJeHn(CMOTpnPncyHOK).ПрпnomoиЗToJжe KhoNknMOxHO Bb6paTb6IMeIoUnxCЯMeIoOnn. Bb6paHnaЯMeIoOnn6BydET NOBTOpArybcB TeueHne OKoI05MnHT.DЯOTKlOuyehnMaMeIoOnn HaxMnte n He OTnycKaIte KpaChyO KhoNky He MeHee OndHoi CeKyHdbI. OctaIbHbIe KhoNKnIpeHa3HaueHbIДЯ peryuInpOBKn rPOMKocTn.
CHCTKA I yXoI
Baue n3dJIne HxJdaTcB HeCLOXHOM yXOe.
Onepaunno nucTke nyxOdy OJXHbI BblONHrToJIbKO B3PocJIbe.
- PeKOMeHnyetc coJepXaTb B uNCTOTE BCE DnJxUneCyaCTn, npn Heo6xOuMocTn CmaXbTe IN XJIeRKM MaCnOM.
- BbItpnte Hacyxo MeTaNIIuYeCKne qactn, YTO6bl npEoTbPaTnTB o6pa3OBaHHe pXaBvHbI.
- PepnoDnueckn OunuAte nlaCTMaCCOBbIe qactN BnaJHOn TKaHbIO, He NOpIb3yIteCb pactBOpNTeJIaMn IIN CXoNDbIMN C HmN BeIeCTBaMn.
OuHauTe OT nbIn n necka KOleca.
3aunTne n3dene OTA moccepehblx ocakOB -BOdbI, CHERa nnI DoJx. NocToHHaN I npOdoXnTeJIbHaN IOBBePKeHHoCTb COJIHeuHbIM lyuam MOKeT BbI3BaTb LBeTOBbIe N3MeHeHn MHOrNX MaTepnaIOB.
XpaHnTe n3dJIeB CcyxOM MeCTe. - Ecnn O6BbKa BblOnHeHa n3 PBX, To He nOrpykaTe ee B Body, a PpOtpnTe BlaJxHOb TkaHbIO N HeITpaJIbHbIM MOUoM CpeDCTBOM.
-Дясторки ТkaHоОбИКи ВьЮнITE Слedyшпe
yka3aHn.

БЕЗПАСНОCTь ᝀЛЕКТРИЧЕСКИX KOMПОHETOВ
- BKJIIOUOHEH N BbIKJIIOUOHEH KAYAJKIN MEJODNI DOJIXEH BbIIOJNHARbB3POCJIbY EJIOBEK.
ECJIN BbI HE bYdETE NOJIb3OBATbCry DONDOLINO B TEUHNE DOJIoTO BPEMEHN, PEKOMEHyETcB bHyTb BAtAPEIKN N3 OTCEKA KauAJIKN N3 OTCEKA MEJODINI.
HEO6XoJIMO IcIIOJIb3OBATb BATAPEIKN PEKOMEHdyEMOTO TnA, NIN 3KBVBAJIeHTHBIE.
HEO6XOДIMO BCTABNTb BAATAPEKIN, COBJIOJAR INPABUNbHNoIPOJIaPHoCTb. - HE CMEUINBAIHTE HOBIE I NTAPBIE BATAPEIKN.
- YДАЛNTЕ ИЗ ИЗДЕЛЯ PA3РЖЕHHьE BATAPEйКИ.
- HE BbI3bIBAIte KOPOTKOE 3AMbIKAHIE KJIEMM ПИТAHЯ.
- PEPE3APRAJXAEMbIE BATAPEIKNCJIeIyET YDAJIaTb I3 N3DEJIINДЛЯ INX PEPE3APRdKl.
- PEPE3APRAJKAEMbIE BATAPEIKN IOJIJKHbI 3APJXATbCЯ TOJIbKO IOD HAD3OPOM B3POCLOTO YEJOBEKA.
BO BPEM YNCTKN OBPATNTE BHIMAHNE HA TO, UTObI BOIDA HE IONAIA BOTCEKIN BATAPEEK JIIKAUJIKN (DyTA) IN DJIY MEJIOIDNI (NAHEJIb UYPABJEHNA).
BHIMAHNE
- ONEPAUIN IO CBOPKE IN PEGYINIPOBKE IN3DEJIINJIOJXHbI BbIPOJIHARb TOJIbKO B3POCSJIbIE;HE INCNOJIb3UYTE IN3DEJIINE, ECJIIN C5OBPKA HEPPABUNbHO 3ABEPUHEA, A TAKJE ECJIIN IN3DEJIINE OBHAPYKIBAET IIOLOMKN INJIN HEIOCTAOUIN DETAJIIN.
HEIONYCKAITE PAIDEHNE IIN CNOJ3AHNE PEBEHKA; BCEFDA INCIOJIb3yITE PEMHNI BE3OJNACHOCTN CIIATbIO TOUKAMN KPEJIENHNA; ICNIOJIb3yIITPEMHN KAK B ONYUSEHHOM, TAK IN B CTOJUSEM IOLOXEHNI CINHKN. - HNKOДA HE OCTABЛЯITE BAJIЕTO PEBEHKA BE3 ПИСМOTРА; HE YПУСКАITE EGO ИЗ BИДА.
- HE ПОЛьзУИТЕСь ИЗДЕЛПЕМ, ПOKA PЕБЕHOK HE YMEET CИДETь CAMOCTОЯТELьHO.
JLOTOK IN EGO IPNHAДLEXHOCTN HE IPREDAHA3Hauehb IJIЯ BblDEPKINBAHNA BECA PEBEHKA;IOTOK HE IPREDAHA3Haueh DJIЯ YIDEPKINBAHNAPEBENKA HA CNDEHNI, N OH HE 3AMEHRETPEMEHB E3ONACHOCTN. - YBΕДΙΝΤΕСБ, ΚΤΟ ΙΝΙДΕΝΙΝΕ ΠΤΟΝΤΗ ΓΟΡΙΝΙΘΑΝΙβΗΟ ΠΟΒΕΡΧΗΟCTΝι.
- YCTAHOBNTE ИЗДЕЛЕ TAK,ЧTOБИ ДЕРЖАТБ PESEHKA BДАЛN OT TAKNX ИСТОУнКOB ОПАCHOCTN, KAK ЗЛЕКТРИЧЕCKNE KABELI, IСТОУнКИ TEPЛА ИЛIN OROHь.
- N35E7AITE NOIADAHNIAJbUcEB MEXAHIN3MbI, IN O6PATITE BHIMAHNE HA IIOJOXEHNE KOHEYHOCTEN PESEHKA IPII BbIIOJIHEHNI ONIEPAUIN IO PEYUNPOBKE.
- INCIOJIb3OBAHHe IPNHAДJIEXHOCTE, HE OДОБPEHHbIX N3ΓOTOBITEJIEM, MOXET bblb OPACHbIM.
- HE ПОлььзУITEСь ИЗДЕЛПЕМ ВБЛИЗ N ЛECHИЦИЛСТУПЕНК.
OBPATNTBE BHIMAHHE HA TO, YTOBbI HE CTABNTb I3JENIE B6JIIN3T TAKNX NCTOCHNKOB TEPJIANIOrH, KAK FA3OBbI E PINTbI, 3JEKTPUeCKNE HARPEBATEJI IN T.D.
TROTÜRKÇE
TONOETHsH MInATAPIQN
IIAIIAKA EIH BPEΦANANTYEHS KAI PAIXNIA EΓYHSE
H PEG - PEREGO eyyuatai yia tuxov epyootaoiaka eaaattwmaTsw Tpoiovtwv TnC yia diaoTnma exi mnuwv aTNO Tnv npeounviα ayopac. H pookómuon TnC avaloync taieaikcns aTIOBElNCS ayopac civai anapaiTNTN. Ealpouvtai TnC eyyuynong oI eTavwpoticiOevec mTATAPIEc kai oI metaox-n-matiotec Paxviidow. (beta. avalutkec obnyiec xpnoewc paixviidow).
phone 905●839●3371 fax 905●839●9542
Call us toll free 1•800•661•5050
www.pegperegoo.com

MARTINELLI is produced by Peg Perego.