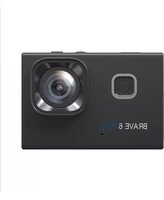
Brave 4 Pro - Caméra vidéo Akaso - Notice d'utilisation et mode d'emploi gratuit
Retrouvez gratuitement la notice de l'appareil Brave 4 Pro Akaso au format PDF.
| Type de produit | Caméra d'action |
| Marque | AKASO |
| Modèle | Brave 4 Pro |
| Résolution vidéo maximale | 4K à 30 ips |
| Résolution photo maximale | 20 MP |
| Angle de vue | Super large, Large, Moyen, Étroit |
| Écrans | Écran tactile arrière + écran avant |
| Stabilisation d'image | Oui (désactivable) |
| Mode diving | Oui (compensation des couleurs sous-marines) |
| Mode boucle | Oui (2, 3 ou 5 min) |
| Mode rafale | Jusqu'à 10 photos/s |
| Mode time lapse vidéo | Intervalles de 0,5 s à 60 s |
| Mode self-timer | Retardateur de 3 s à 60 s |
| Wi-Fi intégré | Oui |
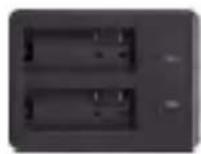
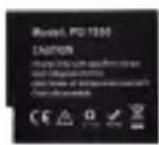
| Alimentation | Batterie rechargeable (2 incluses) + chargeur |
| Type de carte mémoire | microSD U3 jusqu'à 64 Go (FAT32) |
| Connecteurs | Micro USB, Micro HDMI |
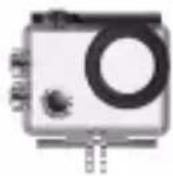
| Étanchéité | Avec caisson étanche inclus |
| Télécommande | Incluse (avec pile CR2032) |
| Contenu de la boîte | Caméra, caisson étanche, chargeur, 2 batteries, câble USB, télécommande, dragonne, supports, chiffon, etc. |
| Entretien | Nettoyer l'objectif avec un chiffon doux ; éviter les températures extrêmes |
| Consignes de sécurité | Ne pas démonter la batterie ; éviter le contact avec des objets métalliques ; ne pas exposer à la chaleur excessive |
| Réparabilité | Pièces détachées non listées ; contactez le service client |
FOIRE AUX QUESTIONS - Brave 4 Pro Akaso
Questions des utilisateurs sur Brave 4 Pro Akaso
0 question sur cet appareil. Repondez a celles que vous connaissez ou posez la votre.
Poser une nouvelle question sur cet appareil
Téléchargez la notice de votre Caméra vidéo au format PDF gratuitement ! Retrouvez votre notice Brave 4 Pro - Akaso et reprennez votre appareil électronique en main. Sur cette page sont publiés tous les documents nécessaires à l'utilisation de votre appareil Brave 4 Pro de la marque Akaso.
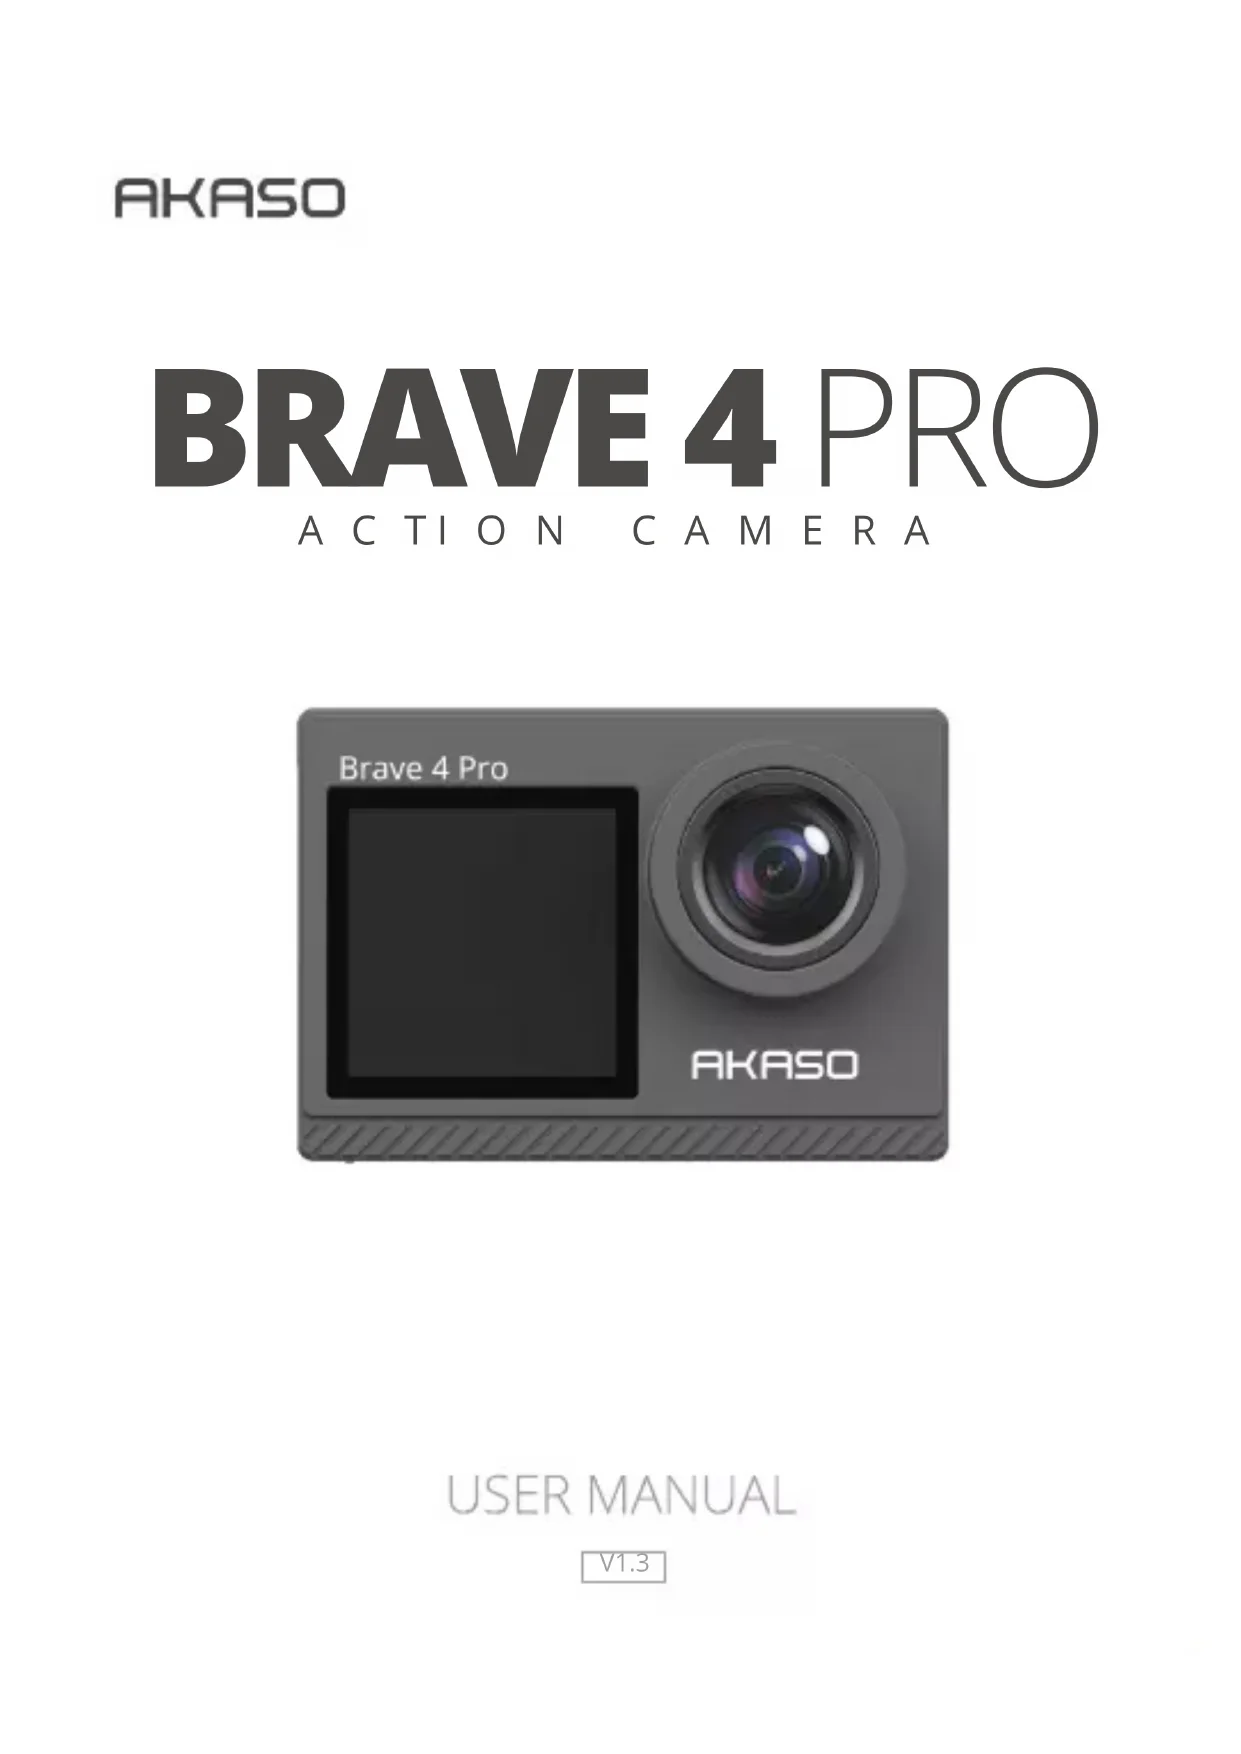
MODE D'EMPLOI Brave 4 Pro Akaso
BRAVE 4 PRO
ACTION CAMERA
USER MANUAL
V1.3
English >>
Deutsch >>
Español >>
Français >>
Italiano >>
日本語
Polski >>
CONTENTS
What's in the Box 02
Your Brave 4 Pro 03
Getting Started----05
Overview of Modes----06
Video & Photo Setting 08
Camera Setting 12
Connecting to the AKASO GO App 14
Playing Back Your Data 14
Deleting Videos and Photos on Your Brave 4 Pro ----14
Transferring Your Data 15
Maintaining Your Camera----16
Maximizing Battery Life----16
Adjusting the Zoom Level----16
Reformatting Your Memory Card 17
Battery Storage and Operation 17
Remote 18
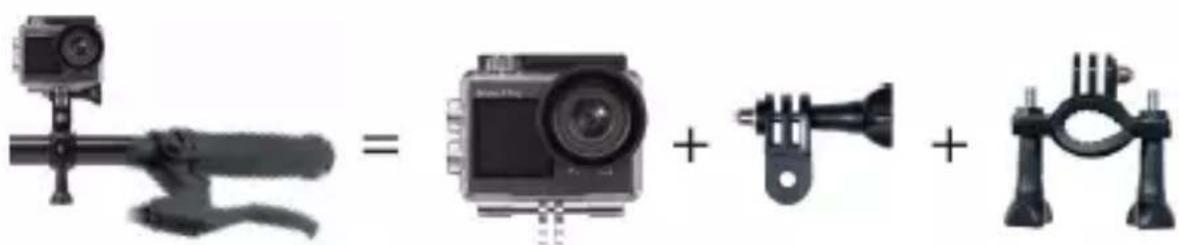
Mounting Your Camera----21
Contact Us 22
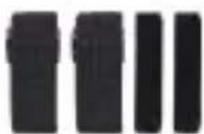
WHAT'S IN THE BOX
AKASO Brave 4 Pro
x 1
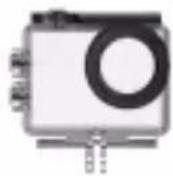
Waterproof Housing x 1
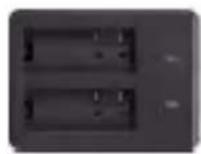
Battery Charger
x 1
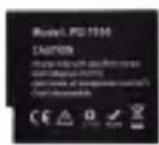
Battery x 2

USB Cable x 1
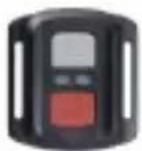
Remote Control
x 1
Remote Control
Strap x 1

Protective Backdoor x 1
Clip x 1
Clip 2
x 1

Mount 1 x 1

Mount 2
x 1
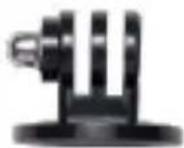
Mount 3 x 1
Mount 4 x 1
Mount 5 x 1

Mount 6 x 1
Mount 7 x 1

Handle Bar / Pole Mount x 1
Helmet Mounts
x 2

Spanner x 1
Bandages x 4

Tethers x 5

Lens Cloth
x 1

Double Sided Tape x 2

Quick Start Guide x 1

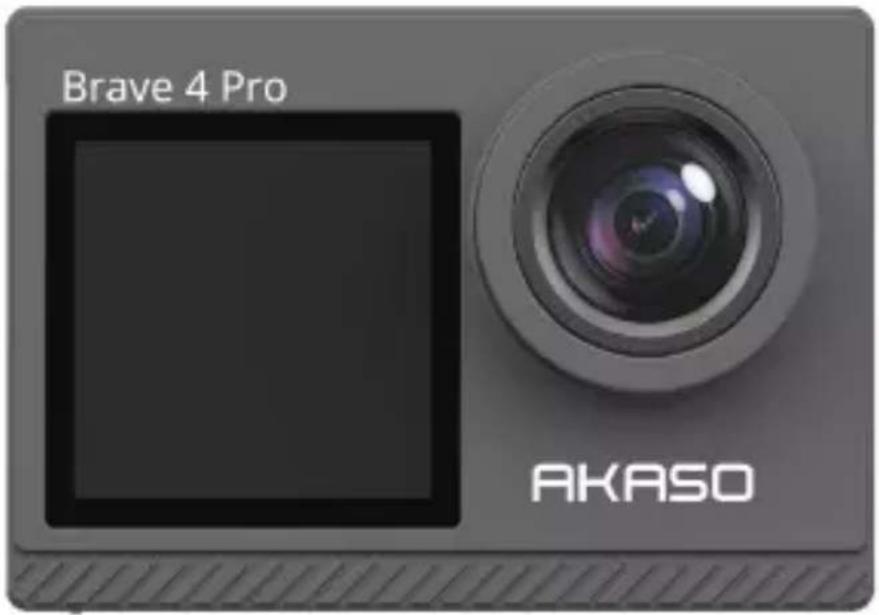
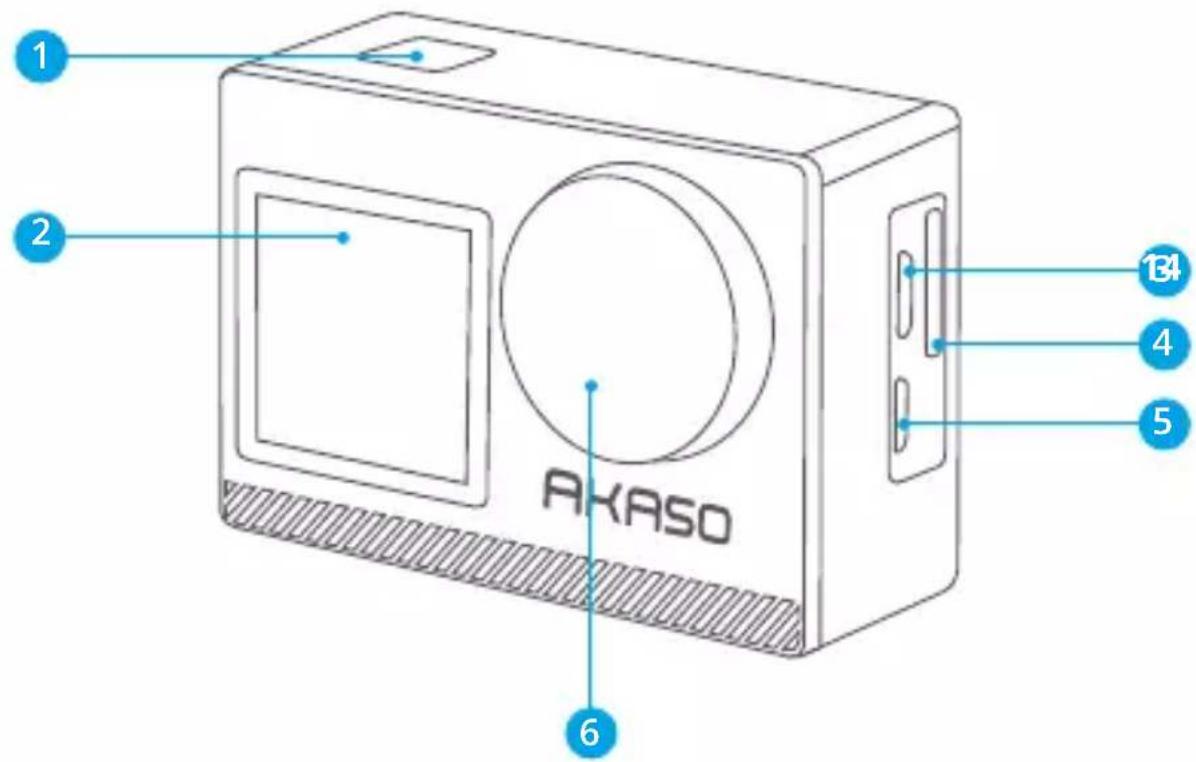
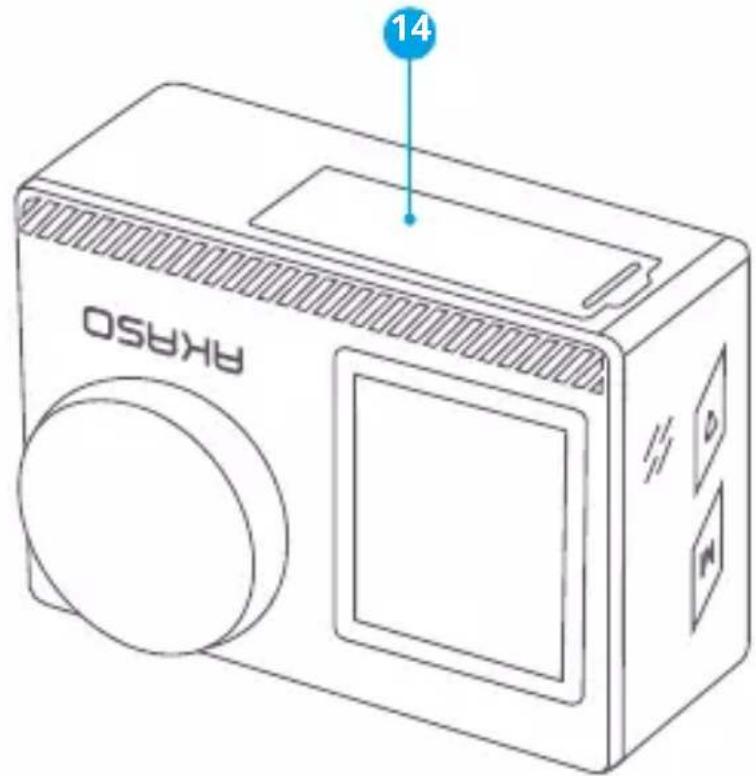
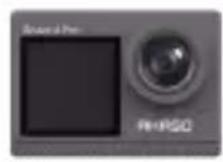
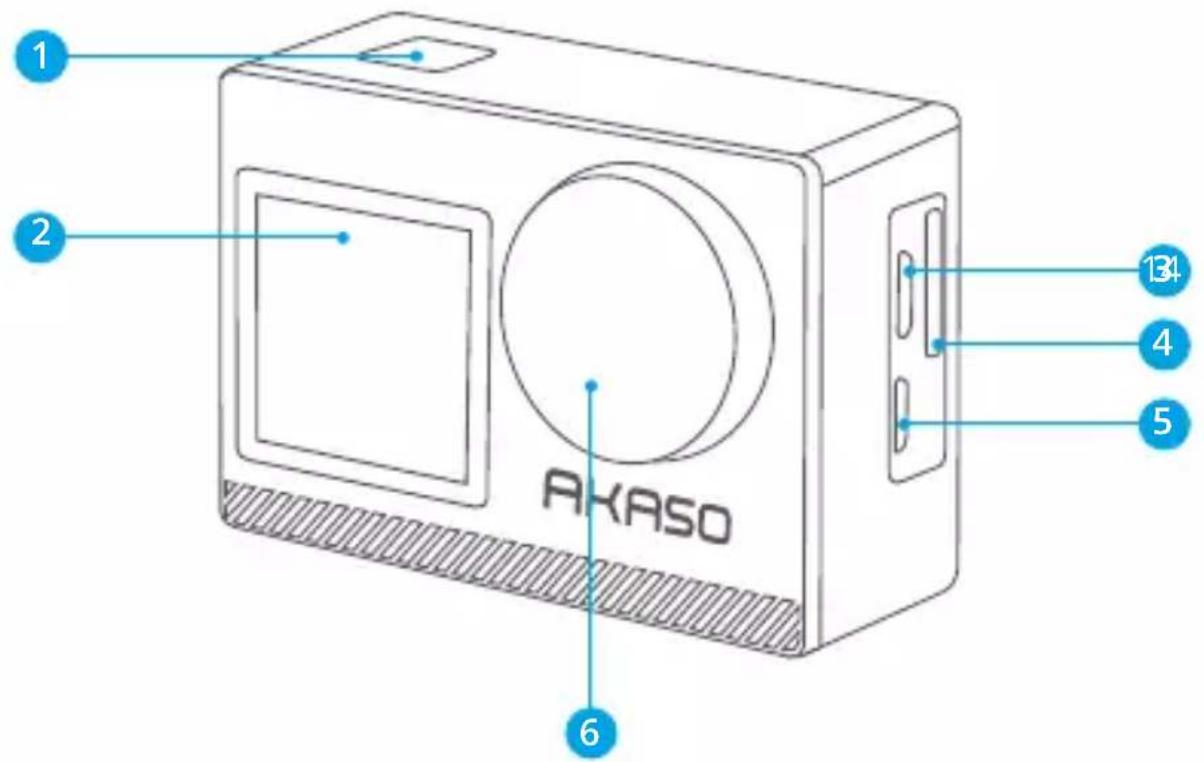
1 OK/Shutter/Power Button
2 Front Screen
3 Micro USB Port
4 Memory Card Slot
5 Micro HDMI Port
6 Lens
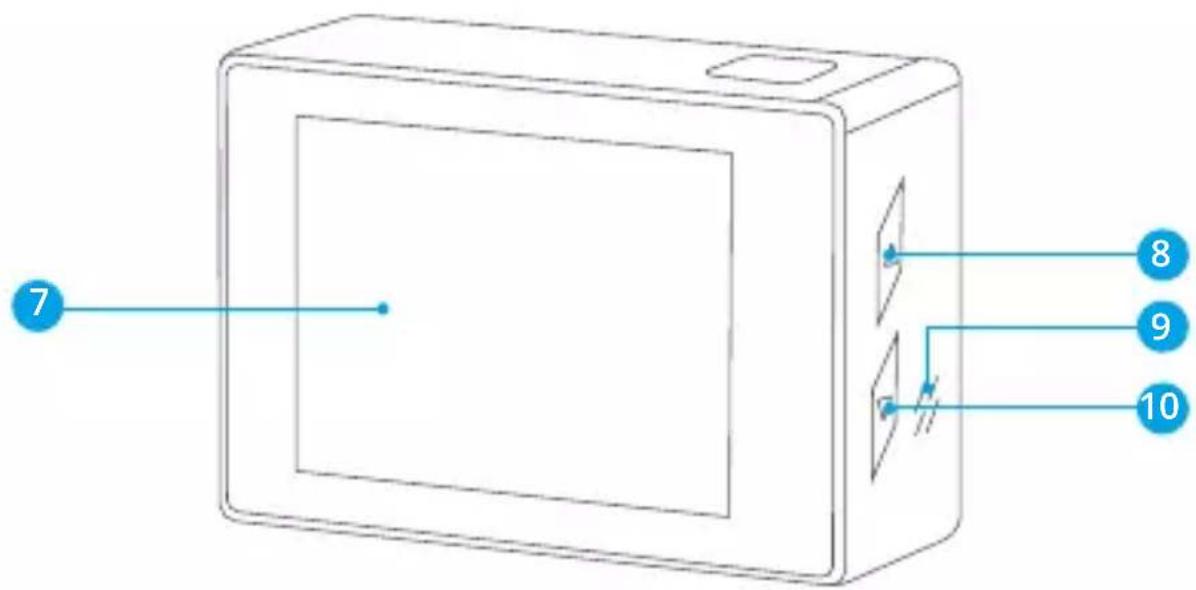
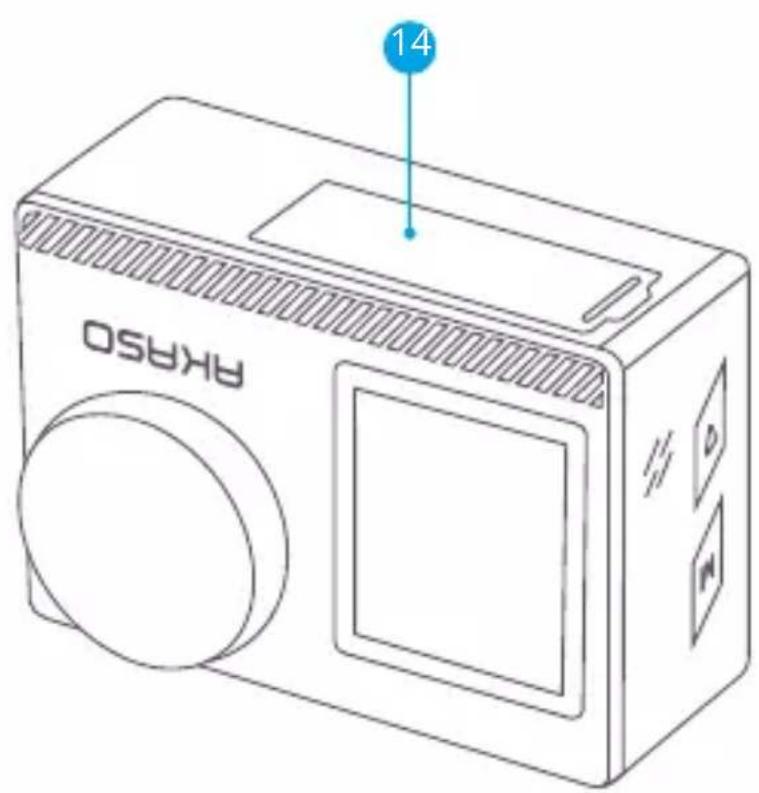
7 Touch Screen
8 Mode/Up Button
9 Speaker
10 Down Button
11 Battery Cover
Note: The camera will not record sound when it is in the waterproof case.
GETTING STARTED
Welcome to your AKASO Brave 4 Pro. To capture videos and photos, you need a memory card (not included).
MEMORY CARDS
Use brand name memory cards that meet these requirements:
• U3
• Capacity up to 64GB (FAT32)
Note:
- Before using, please format the memory card in the camera. To keep your memory card in good condition, reformat it on a regular basis. Reformatting deletes all of your data, so be sure to transfer your photos and videos first.
- The FAT32 format memory card will stop recording when the storage of each file exceeds 4GB and start to record again on a new file.
QUICK BUTTON GUIDE
Power Button
Long Press: Power on/off
Short Press: Confirm
Up Button
Long Press: Switch the front/rear screen
Short Press: Playback
Down Button
Long Press: Turn on Wifi
Short Press: Setting
POWERING ON/OFF
To Power On
Press and hold the Power button for three seconds. The status light will be on and the camera will make a sound. When information appears on the display or the camera status screen, your camera is on.
To Power Off
Press and hold the Power button for three seconds. The camera will make a sound and the status light will be off.
SWITCHING MODE
To Switch Mode
Turn on camera, swipe up to switch mode, or tap "Video" on the screen to select modes.
To Exit Mode
Press the Mode button or click the "X" to exit Mode.
TURNING ON/OFF Wifi
To turn on Wifi
Turn on camera, long press the Down button to turn on Wifi. You can also swipe up to the mode menu to turn on Wifi.
To turn off Wifi
Press the OK button to turn off Wifi.
OVERVIEW OF MODES
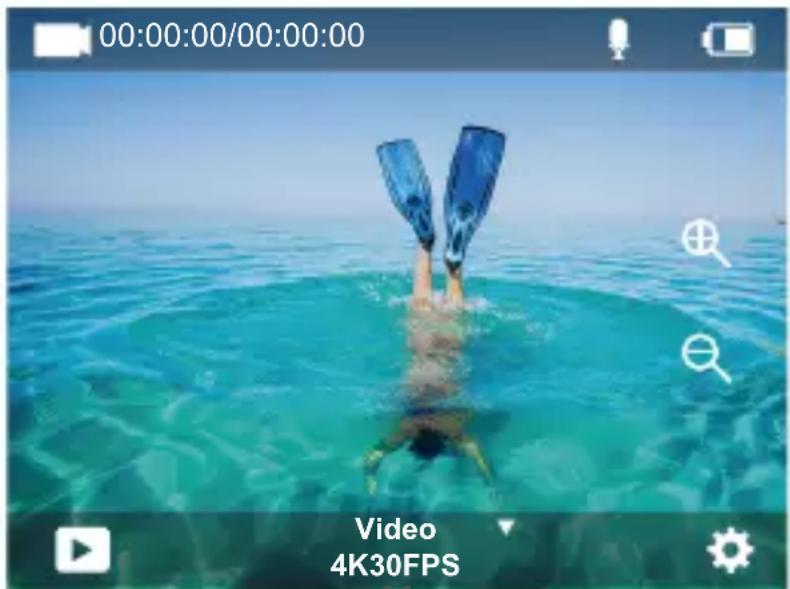
There are 6 modes: Video, Photo, Burst Photo, Time Lapse Video, Timer Photo and Wifi. When the camera is on, tap the current mode at the bottom of the camera screen or swipe up to to enter the mode menu.
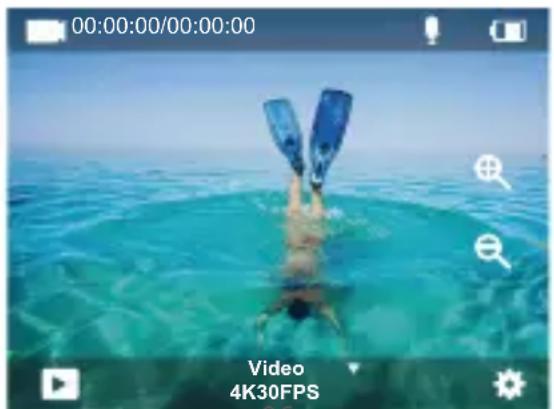
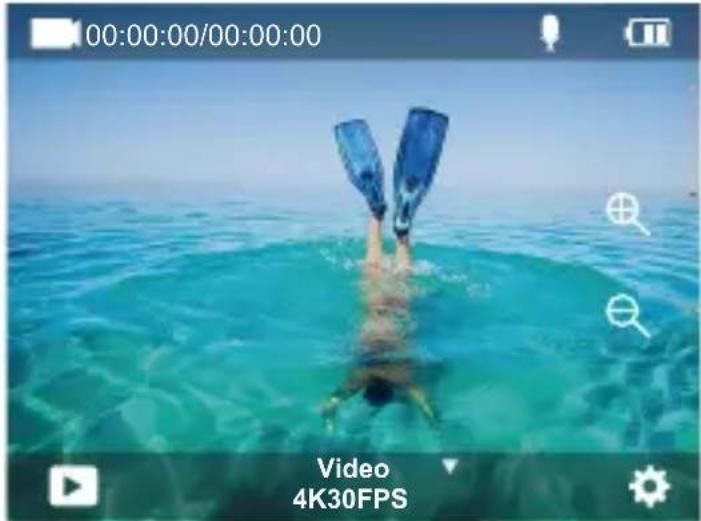
Video Mode
Video Mode is the default mode when you turn on the camera.
In Video Mode, press Shutter button, the camera starts recording video. Press Shutter button again to stop recording. Click the ⊕ to adjust the zoom level.
06
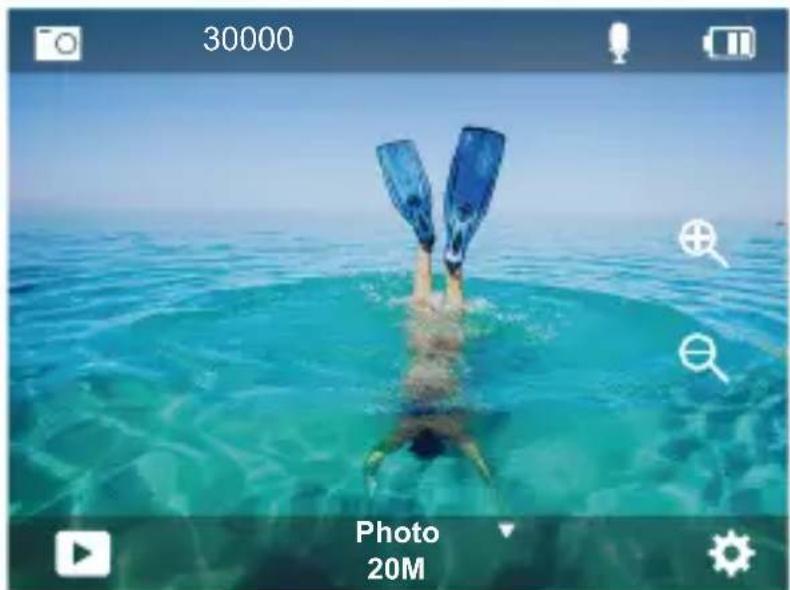
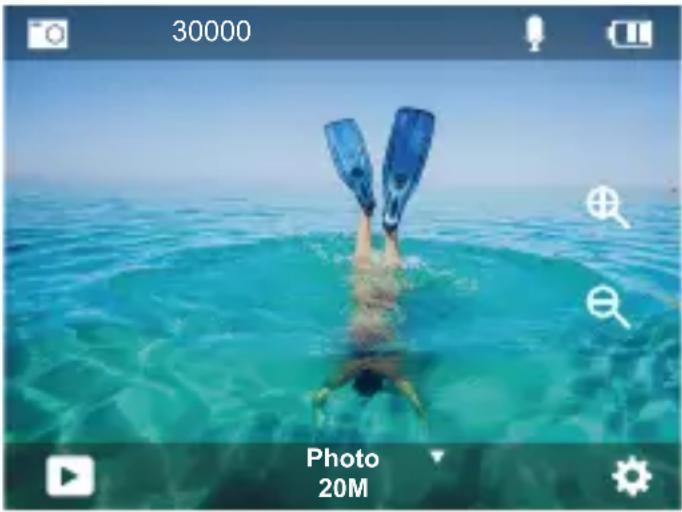
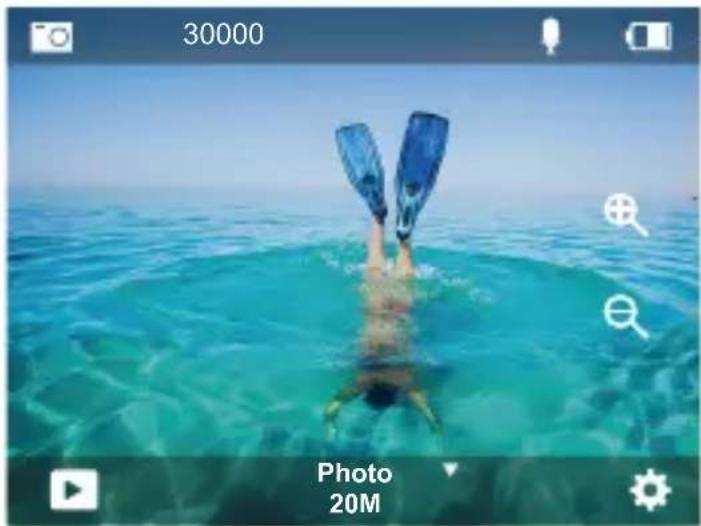
Photo Mode
Swipe right to switch to Photo Mode after you turn on camera.
In Photo Mode, press Shutter button, the camera takes a photo. Click the 🔒 to adjust the zoom level.
natural_image
Person diving into the ocean with blue fins, captured in a photo editing interface (no text or symbols on the image itself)Burst Photo Mode
Swipe up to "Select Mode" or click "Video" to enter Burst Photo Mode.
In Burst Photo Mode, press the Shutter button, the camera will take 3/5/10 photos per second.
Time Lapse Video Mode
Swipe up to "Select Mode" or click "Video" to enter Time Lapse Video Mode.
In Time Lapse Video Mode, press the Shutter button to take a serial of Videos at 0.5s/1s/2s/5s/10s/30s/60s intervals.
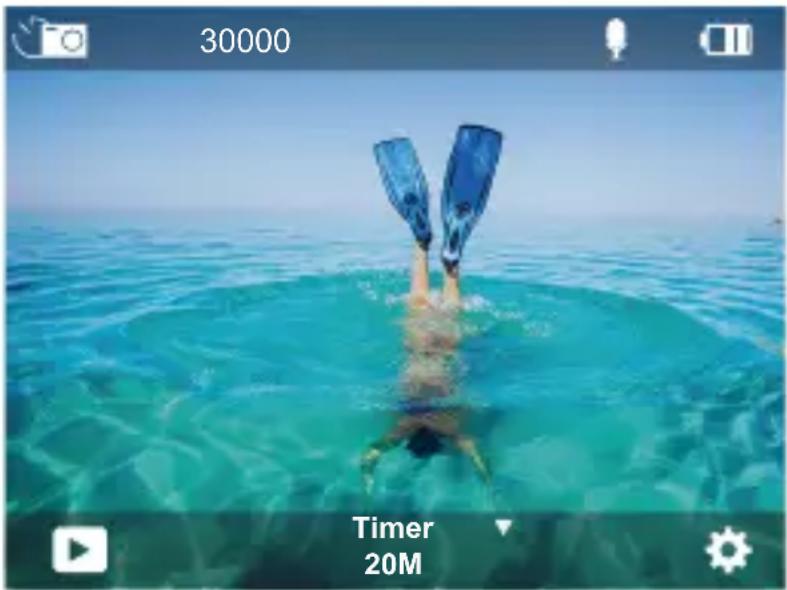
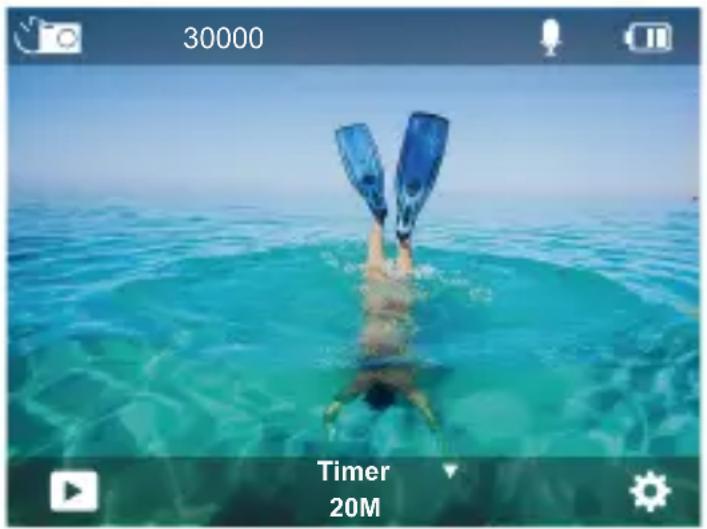
Timer Photo Mode
Swipe up to "Select Mode" or click "Video" to enter Timer Photo Mode.
In Timer Photo Mode, press the Shutter button to take photos at 3s/5s/10s/20s/30s/60s timer.
natural_image
Person diving into the ocean with blue fins, captured in a photo editing interface (no text or symbols on the image itself)Wifi Mode
When the camera is on, press and hold the Down button or enter the mode menu to turn on Wifi.
VIDEO & PHOTO SETTING
- Video Resolution: 4K30FPS, 2.7K30FPS, 1080P120FPS, 1080P60FPS, 1080P30FPS, 720P240FPS, 720P120FPS, 720P60FPS, 720P30FPS
Default setting is 4K30FPS.
Note: When capturing video at high resolutions or high frame rates in warm ambient
- Video Mode: Video, SlowMotion, Loop Record
Default setting is Video.
This setting is to select video, slow motion, loop record mode.
- Image Stabilization: Off/On
Default setting is Off.
This setting adjusts the footage to offset for motion during capture. The result is smoother footage, especially in activities with relatively small but fast motion including cycling, motorcycling, and handheld uses.
4. Angle: Super Wide, Wide, Middle, Narrow
Default setting is Super Wide.
The angle refers to how much of the scene (measured in degrees) can be captured through the camera lens. Super wide angle captures the largest amount of the scene, while narrow angle captures the least. This function is not available while image stabilization is on.
5. Diving mode: Off/On
Default setting is Off.
Diving Mode can compensate for the lack of yellow light in underwater environments. Diving Mode is designed to be used in tropical and blue water, optimized for use between 10 and 80 feet.
6. Video Length: 2 Min/3 Min/5 Min
Default setting is 2 Min.
Using Loop Recording, you can continuously record but only save the moments you want to keep. For example, if you select a 5-minute interval, only the previous 5 minutes are saved when you press the Shutter button to stop recording. If you record for 5 minutes and do not press the Shutter button to stop recording and save, the camera will record a new 5-minute interval by recording over your previous 5 minutes of footage. When the memory card is full, the new files will cover the old one if loop recording is on.
7. Exposure: -3, -2, -1, 0, 1, 2, 3
Default setting is 0.
By default, your camera uses the entire image to determine the appropriate exposure level. However, Exposure lets you select an area that you want the camera to prioritize when determining exposure. This setting is particularly useful in shots where an important region might otherwise be over- or underexposed.
When you change this setting, the display immediately shows you the effect on your image. If you change modes, the camera returns to using the entire scene to determine the correct level of exposure.
8. WDR: Off/On
Default setting is Off.
Wide Dynamic Range (WDR) retains a greater level of detail in the dark and bright areas of an image. The result is a photo that is properly exposed for both of these extremes. This setting is especially useful for scenes that are backlist or that have large bright regions and a dark foreground. WDR is available in Video mode only.
9. Metering: Average/Center/Spot
Default setting is average.
Choose the way your camera measures the light of the scene.
10. Sharpness: High/Middle/Low
Default setting is High.
Sharpness controls the quality of details captured in your video footage or photos.
When you change this setting, the touch display immediately shows you the effect on your image.
11. Video Quality: High/Middle/Low
Default setting is Middle.
12. ISO: Auto/100/200/400/800/1600/3200/6400
Default setting is Auto.
ISO determines the camera's sensitivity to light, and creates a trade-off between brightness and resulting image noise. Image noise refers to the degree of graininess in the image. In low light, higher ISO values result in brighter images, but with greater image noise. Lower values result in lower image noise, but darker images. When you change this setting, the display immediately shows you the effect on your image.
13. Date Stamp: Off/On
Default setting is On.
Turn on Date Stamp, this camera will add a date stamp to your videos and photos.
14. Motion Detection: Off/On
Default setting is Off.
Motion detection is the process of detecting a change in the position of an object relative to its surroundings or a change in the surroundings relative to an object.
Turn on Motion Detection and camera, the camera records video automatically when it detects a change in the position of an object relative to its surroundings.
15. Photo Resolution: 20MP, 16MP, 13MP, 8MP
Default setting is 20M.
16. Anti-shake: Off/On
Default setting is Off.
This setting adjusts the footage to offset for motion during capture. The result is smoother footage, especially in activities with relatively small but fast motion including cycling, motorcycling, and handheld uses.
17. Burst Photo: 3P/s, 5P/s, 10P/s
Default setting is 3P/s.
Burst captures up to 10 photos in 1 second, so it is perfect for capturing fast-moving activities.
18. Time Lapse Interval: 0.5Sec/1Sec/2Sec/5Sec/10Sec/30Sec/60Sec
Default setting is 0.5Sec.
Time Lapse Video creates video from frames captured at specific intervals. This option lets you capture a time lapse event and immediately view or share it as a video.
Note: Time Lapse Video is captured without audio.
19. Photo Interval: 3Sec/10Sec/20Sec/30Sec/60Sec
Default setting is 3Sec.
Turn off the Self Timer, go back and you can see Time Lapse icon. Click it and enter the setting, you will find Photo Interval. This camera continuously takes pictures at the set time interval until it stops manually.
20. Self-Timer: Off/On
Default setting is On.
A Self Timer gives a delay between pressing the shutter release and the shutter's firing. It is most commonly used to let photographers to take a photo of themselves (often with family).
CAMERA SETTING
-
Special Effects: Normal/Black and White/Negative/Retro/Red/Green/Blue Default setting is Normal.
-
Power Frequency: Auto/50 Hz/60 Hz Default setting is Auto.
-
Language: English/Français/Deutsch/Espanol/Italiano/日本語/한국어/简体中文 Default setting is English.
4. Date & Time: YY/MM/DD
When the camera is connected to the AKASO GO App, its date and time will be synchronized with that of your phone.
Note: If the battery is removed from the camera, the date and time will be reset automatically.
5. Sounds:
Shutter: Off/On Beep: Off/On
Volume: 0/30/70/100 Boot: Off/On
Default setting is on.
You can turn on or off the shutter, boot, beep sounds.
This option sets the volume of your Brave 4 Pro's alerts.
6. Drive Mode: Off/On
Default setting is Off.
7. Upside Down: Off/On
Default setting is Off.
This setting determines the orientation of your videos or photos to help you prevent upside down footage.
Note: The user interface will be upside down when the Upside Down option is enabled.
8. Microphone: Built-in/External
Default setting is Built-in.
9. Screen Saver: Unlimited/30S/1Min/2Min
Default setting is 1 Minute.
Turn off the display after a period of inactivity to save battery life. To turn on the display again, press any button on the camera.
10. Auto Power Off: Unlimited/3 Min/5 Min/10 Min
Default setting is 3 Min.
Power off your Brave 4 Pro after a period of inactivity to save battery life.
11. Format
To keep your memory card in good condition, reformat it on a regular basis.
Reformatting erases all of your content, so be sure to offload your photos and videos first. To reformat your card, press the Down button to enter camera settings, then find and tap on the Format option to complete formatting.
12. Reset: Confirm/Cancel
This option resets all settings to their default values.
13. Device Info:
Brave 4 Pro Version: FX9307I-V1.0 4-20-2021
You can check the model, version and updated time of your Brave 4 Pro.
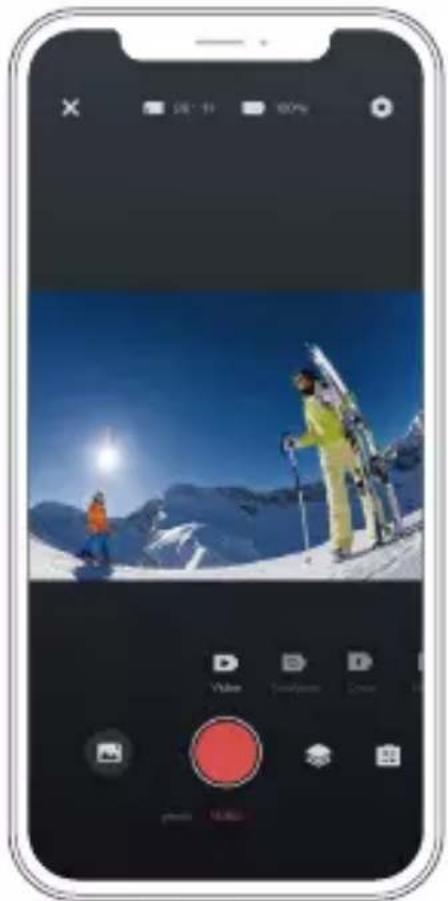
CONNECTING TO THE AKASO GO APP
Please download AKASO GO app to your mobile device from the Apple App Store or Google Play first.
The AKASO GO app lets you control your camera remotely using a smartphone or tablet. Features include full camera control, live preview, playback, download, sharing of content and setting camera.
- Turn on the camera, then long press the down button to turn on Wifi. You can also swipe up to the mode menu to turn on Wifi.
- Turn on your phone's Wifi to enter the Wifi settings, find the camera Wifi AKASO-Brave 4 Pro-B1-XXXX in the list and tap on it, then enter the password 1234567890 to connect.
- Open the AKASO GO app, tap "Device" → "Add device", choose "Brave 4 Pro".
- Tick "The above operation has been confirmed", and click "Live Preview", your camera will connect with the AKASO GO app.
PLAYING BACK YOUR DATA
You can play back your content on the camera's display, your computer, TV, or smartphone/tablet.
You can also play back content by inserting the memory card directly into a device, such as a computer or compatible TV. With this method, playback resolution depends on the resolution of the device and its ability to play back that resolution.
VIEWING VIDEOS AND PHOTOS ON YOUR BRAVE 4 PRO
- Turn on camera.
- Tap video playback icon ▶ at the left corner of the screen to enter playback mode.
- Tap file icon □.
- Tap Forward or Backward icon to playback videos or photo files.
- Tap video playback icon ▶ to playback videos in full-screen view.
- To exit the videos or photo files, tap return icon ➡.
Note: If your memory card contains a lot of content, it might take a minute to load.
DELETING VIDEOS AND PHOTOS ON YOUR BRAVE 4 PRO
- Enter playback mode.
- Tap video playback icon ▶ or file icon ■.
- Tap Forward or Backward icon to locate the video or photo file you want to delete.
- Tap 📂. The screen shows "Delete this file? Yes/No".
- Tap"Yes", the selected file will be deleted.
TRANSFERRING YOUR DATA
TRANSFERRING YOUR DATA TO A COMPUTER
To play back your video and photos on a computer, you must first transfer these files to a computer. Transferring also frees up space on your memory card for new content. To offload files to a computer using a card reader (not included) and your computer's file explorer, connect the card reader to the computer, then insert the memory card. You can then transfer files to your computer or delete selected files on your card. Note that you must use a card reader to offload photos or video files.
TRANSFERRING YOUR DATA TO SMARTPHONE OR TABLET
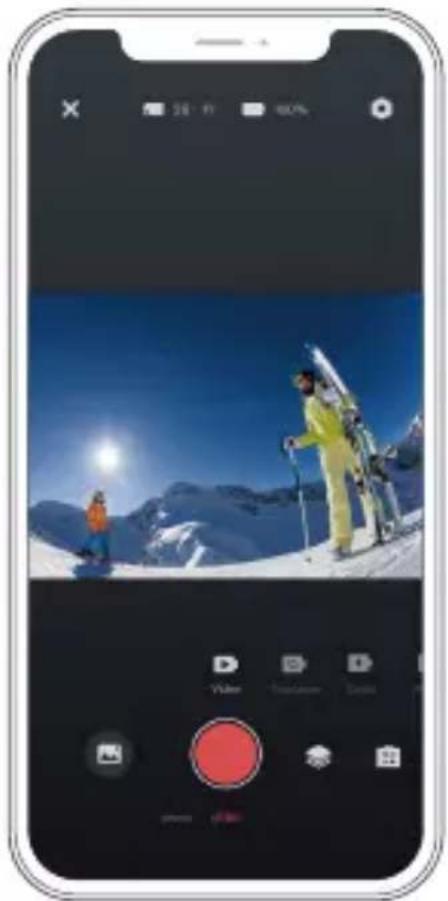
- Open the AKASO GO App. Connect the camera with the App.
- Tap the playback icon in the bottom left corner to see all the videos and photos.
- Tap the 🔒 icon and select the photo or video you want to download and then tap the Download icon at the bottom right corner.
Note:
- If you cannot offload videos or photos to your iPhone, please enter Settings → Privacy → Photos, find "AKASO GO" and select "All Photos".
- iPhone does not allow you to download 4K or 2.7K videos via the app. Please offload 4K or 2.7K videos via card reader.
MAINTAINING YOUR CAMERA
Follow these guidelines to get the best performance from your camera:
- For best audio performance, shake the camera or blow on the mic to remove debris from the microphone holes.
- To clean the lens, wipe it with a soft, lint-free cloth. Do not insert foreign objects around the lens.
- Don't touch the lens with fingers.
- Keep the camera away from drops and bumps, which may cause damage to the parts inside.
- Keep the camera away from high temperature and strong sunshine to avoid being damaged.
MAXIMIZING BATTERY LIFE
If the battery reaches 0% while recording, the camera saves the file and powers off.
To maximize battery life, follow these guidelines when possible:
- Turn off Wireless Connections
• Capture video at lower frame rates and resolutions - Use Screen Saver settings.
ADJUSTING THE ZOOM LEVEL
The Zoom function lets you adjust how close or far away the subject appears in your photo. The default is no zoom. Zoom function is available in Video, Burst Photo and Timer Photo modes. Brave 4 Pro can zoom up to 5X.
- Turn on Brave 4 Pro.
- Enter Video or Burst Photo, Timer Photo Mode.
- Click the ⊕ to adjust the zoom level.
REFORMATTING YOUR MEMORY CARD
To keep your memory card in a good condition, reformat it on a regular basis. Reformatting erases all of your content, so be sure to offload your photos and videos first.
- Press and hold the Power button to turn on your Brave 4 Pro.
- Press the Down button or tap the settings icon on the screen to enter Camera Settings.
- Find the Format option in the settings, then tap on it.
- The screen shows "Storage Space: xxG/xxG and Format/Cancel."
- Press the OK button or tap "Format", the screen shows "Formatting..." and "Format successfully". Then you format your memory card successfully.
BATTERY STORAGE AND OPERATION
The camera contains sensitive components, including the battery. Avoid exposing your camera to very cold or very hot temperatures. Low or high temperature conditions may temporarily shorten the battery life or cause the camera to temporarily stop working properly. Avoid dramatic changes in temperature or humidity when using the camera, as condensation may form on or within the camera.
- Do not dry the camera or battery with an external heat source such as a microwave oven or hair dryer. Damage to the camera or battery which caused by liquid inside the body is excluded from the warranty.
- Do not store the battery with metal objects such as coins, keys or necklaces. If the battery terminals come close to metal objects, fire may be caused.
- Do not make any unauthorized alterations to the camera as this may compromise safety, regulatory compliance or performance, and may void the warranty.
WARNING: Do not drop, disassemble, open, crush, bend, deform, puncture, shred, microwave, incinerate or paint the camera or battery. Do not insert foreign objects into the battery opening of the camera. Do not use the camera or the battery if it has been damaged - for example, if cracked, punctured or damaged by water. Disassembling or puncturing the battery can cause an explosion or fire.
Splashproof only, not waterproof
VIDEO
To record video, put the camera in Video Mode.
To start recording:
Press the Grey Video Button. The camera will emit one beep and the camera light will flash while recording.
To stop recording:
Press the Grey Video Button again. The camera will emit one beep, the camera light will stop flashing and the camera will stop recording.
PHOTO
To capture a photo, put the camera is in Photo Mode.
To take a photo:
Press the Red Photo Button. The camera will emit a camera shutter sound.
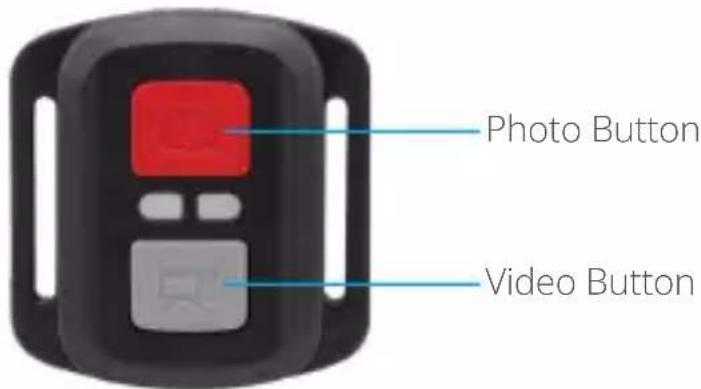
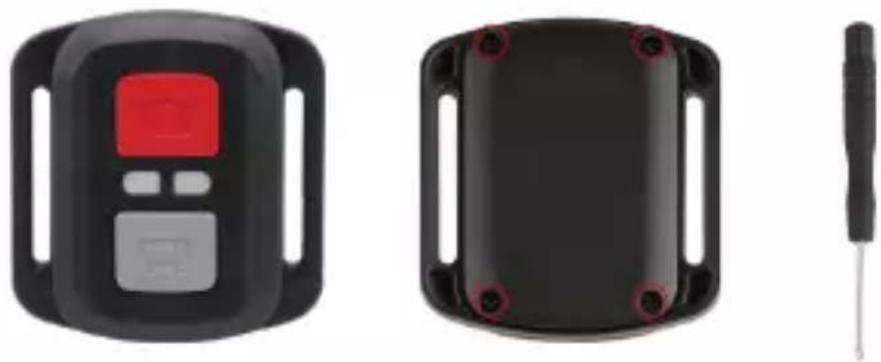
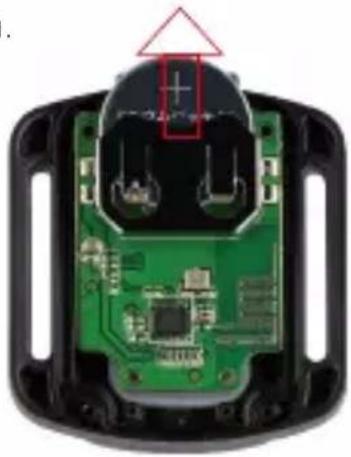
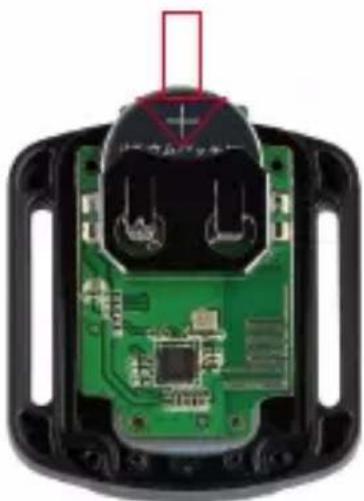
CR2032 BATTERY REPLACEMENT FOR BRAVE 4 PRO REMOTE
- Use a 1.8mm Phillips tip screwdriver to remove the 4 screws on the back cover of the remote, allowing you to open it.
natural_image
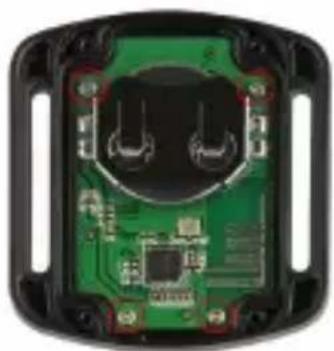
Three black electronic devices: a digital display, a black plastic case with screw holes, and a tool (no visible text or symbols)- Remove the other four screws in the PCB board.
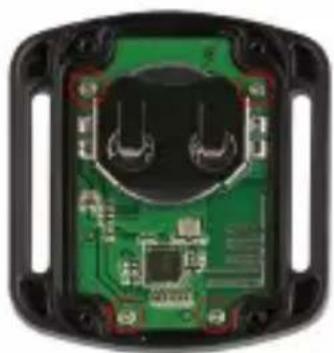
natural_image
Interior view of an electronic device showing a green circuit board with two circular components and red connectors (no text or symbols visible)- Lift the PCB board and slide out the battery, as shown in the picture.
Note: Do NOT rotate the PCB board to avoid reversing the camera and video button functions.
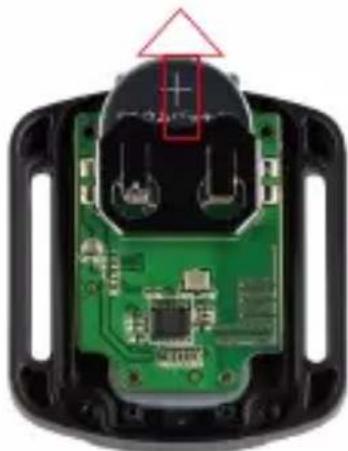
natural_image
Close-up of a green printed circuit board with exposed internal components and a red arrow pointing to a component (no text or symbols visible)EN
-
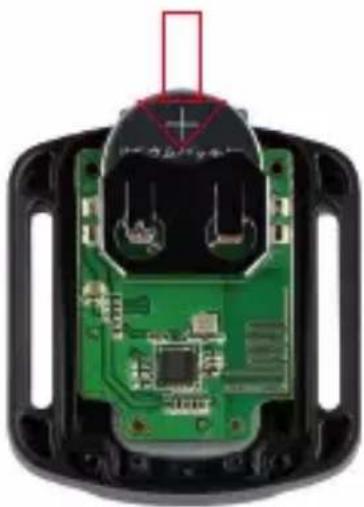
Install the new battery, keeping the "+" pole facing up.
-
Install all 4 screws back into the PCB board.
natural_image
Interior view of a black plastic electronic device showing internal circuit board and connector (no text or symbols visible)- Install all 4 screws back into the cover.
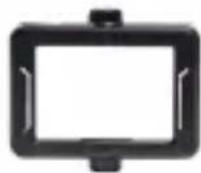
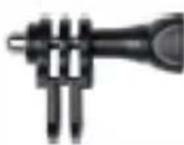
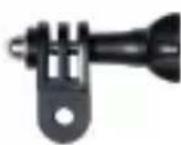
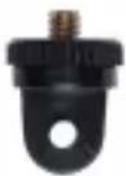
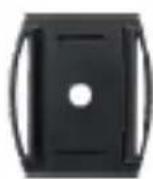
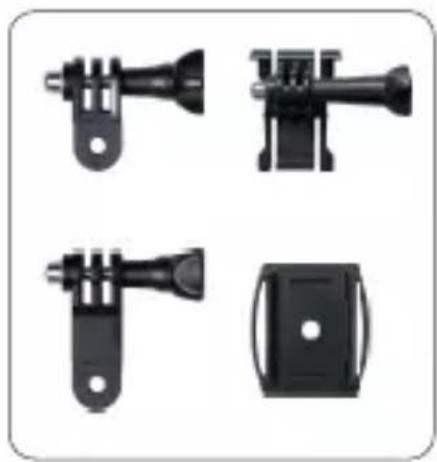
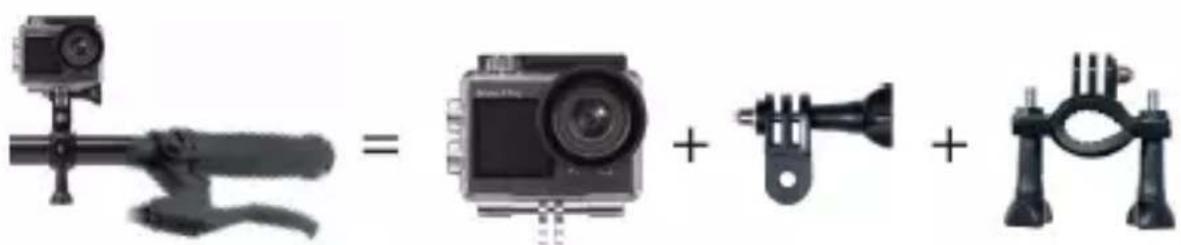
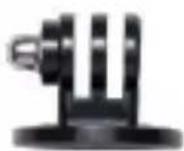
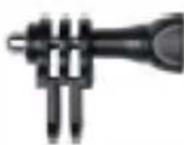
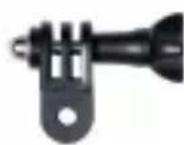
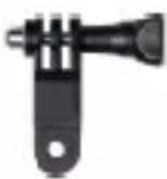
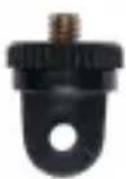
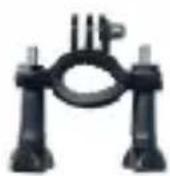
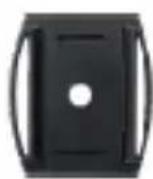
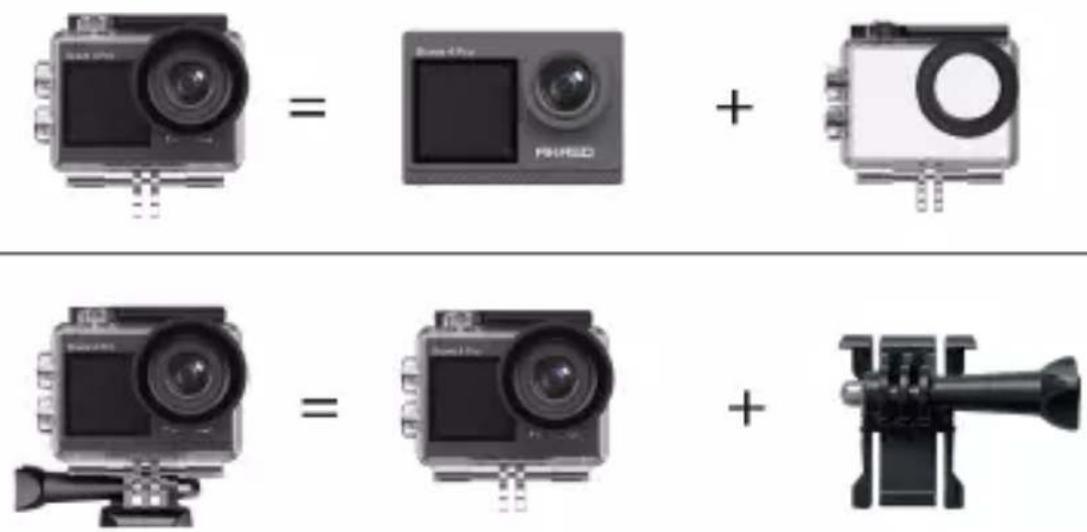
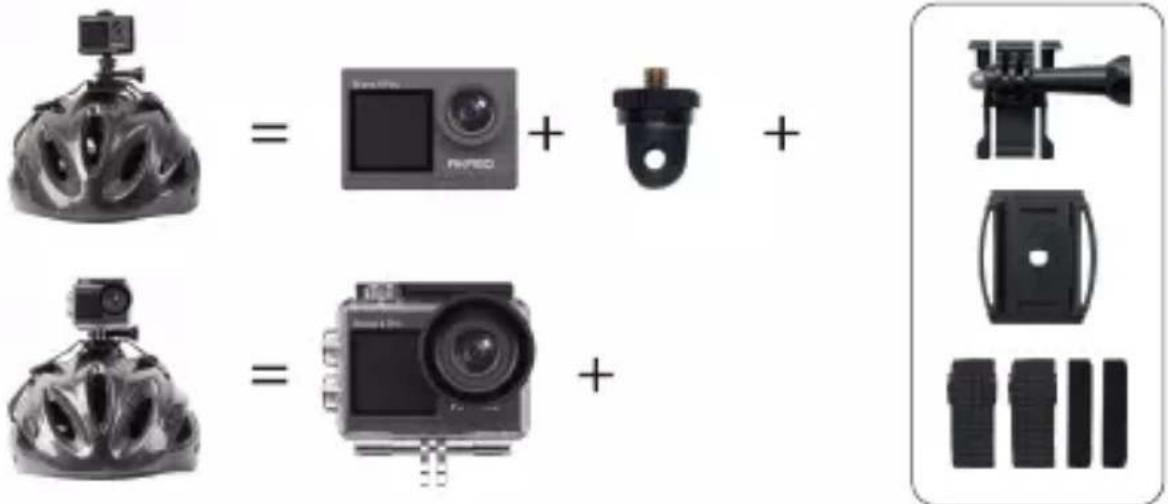
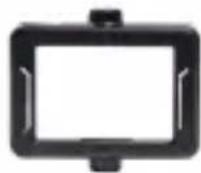
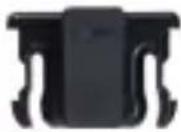
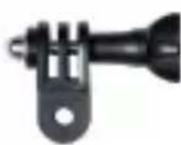
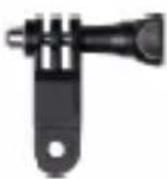
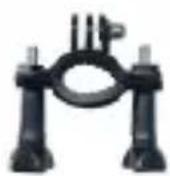
MOUNTING YOUR CAMERA
You can attach your camera to helmets, handlebars and equipment, as follows:
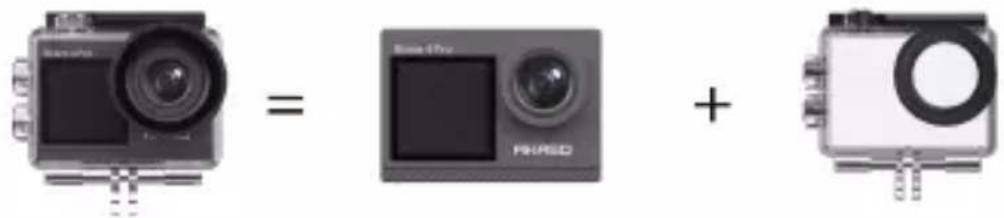
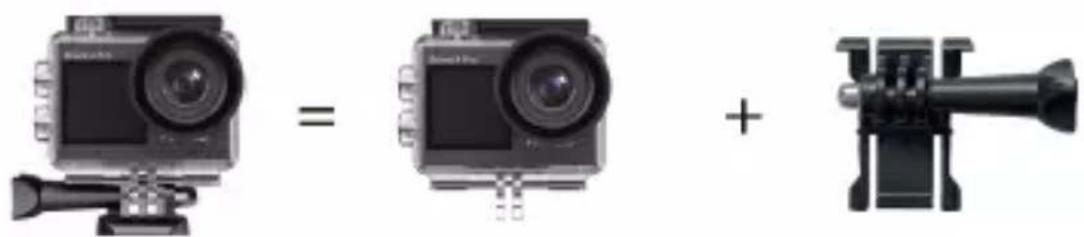
natural_image
Three different types of camera modules shown: a flat-screen, a video camera with lens, and a mounted optical device (no text or symbols visible)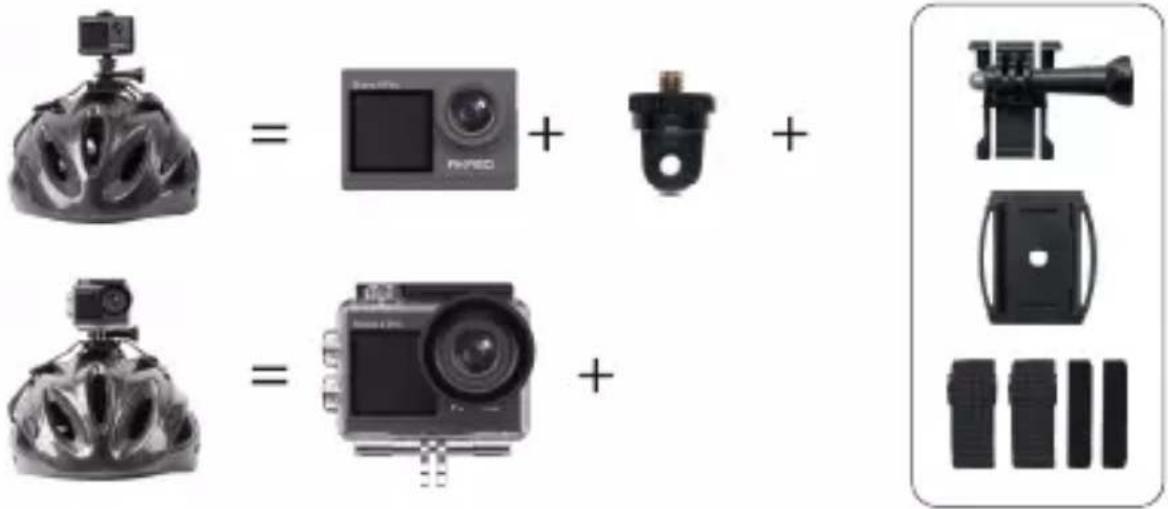
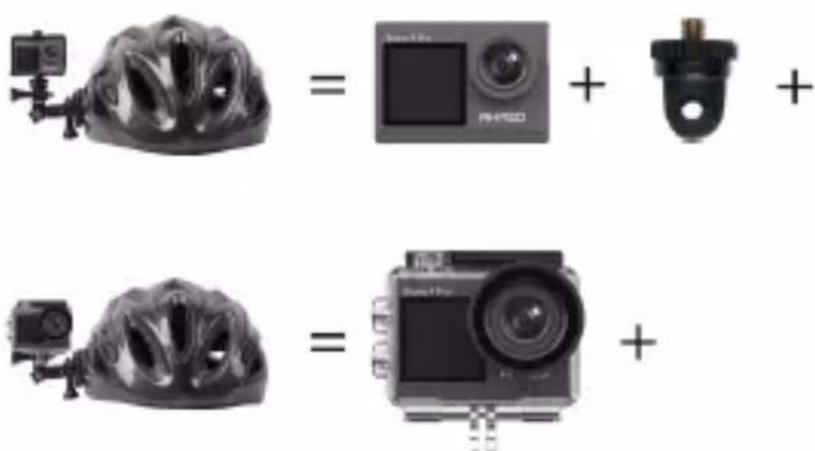
natural_image
Four black mechanical components with mounting holes and brackets, shown in a 2x2 grid (no text or symbols visible)
CONTACT US
For any inquiries about AKASO products, please feel free to contact us. We will respond within 24 hours.
Tel: (888) 466-9222 (US)
Email: cs@akasotech.com
Web: www.akasotech.com
BRAVE 4 PRO
AKTION KAMERA

BENUTZERHANDBUCH
INHALTE
WAS IST IN DER BOX 02
IHRE BRAVE 4 PRO----03
ERSTE SCHRITTE 05
MODUSÜBERSICHT----06
VIDEO- & FOTOEINSTELLUNGEN 08
KAMERAEINSTELLUNG 12
MIT DER AKASO GO APP VERBINDEN----14
IHRE INHALTE WIEDERGEBEN 14
VIDEOS UND FOTOS AUF IHRER BRAVE 4 LÖSCHEN ----15
IHRE DATEN ÜBERTRAGEN 15
IHRE KAMERA PFLEGEN----16
MAXIMIERUNG DER AKKULAUFZEIT----17
EINSTELLUNG DER ZOOMSTUFE 17
SPEICHERKARTE NEU FORMATIEREN 17
AKKULAGERUNG UND AKKUBETRIEB----17
FERNBEDIENUNG 18
IHRE KAMERA ANBRINGEN 21
KONTAKTIEREN SIE UNS 22
WAS IST IN DER BOX

AKASO Brave 4 Pro
x 1
Wasserdichtes Gehäuse x 1
Ladegerät
x 1
Batterie x 1

USB Kabel
x 1

Fernbedienung
x 1

Fernbedienungsband
x 1

Tylne drzwi
x 1
Klemme 1
x 1
Klemme 2 x 1

Befestigung 1
x 1

Befestigung 2
x 1
Befestigung 3
x 1
Befestigung 4
x 1
Befestigung 5
x 1
Befestigung 6
x 1
Befestigung 7
x 1
Griff/Halterung
x 1
Helmbefestigung
× 2

Schraubenschlüssel x 1
Binden x 4

Anbindungen
x 5

Linsentuch
x 1

Doppelseitiges Klebeband x 2

Kurzanleitung
x 1
1 OK/Auslöser/Einschalttaste
2 Frontscheibe
3 Speicherkartensteckplatz
4 Micro-USB Anschluss
5 Micro-HDMI Anschluss
6 Linse

7 Touchscreen
10 Abwärts-Taste
8 Modus/Aufwärtstaste
11 Batterieabdeckung
9 Lautsprecher
Hinweis: Die Kamera nimmt im wasserdichten Gehäuse keinen Ton auf.
ERSTE SCHRITTE
Wir begrüßen Sie zu Ihrer AKASO Brave 4 Pro. Um Videos und Fotos aufzunehmen, benötigen Sie eine speicherkarte (nicht im Lieferumfang enthalten).
SPEICHERKARTE
Verwenden Sie Markenspeicherkarten, die diese Anforderungen erfüllen:
• U3
- Kapazität bis zu 64GB (FAT32)
Hinweis:
- Bitte formatieren Sie vor der Verwendung die Einschalttaste in der Kamera. Um Ihre Einschalttaste in gutem Zustand zu halten, formatieren Sie sie regelmäßig neu. Beim Neuformatieren werden alle Ihre Daten gelöscht. Übertragen Sie daher unbedingt zuerst Ihre Fotos und Videos.
- Die Einschalttaste im FAT32-Format stoppt die Aufzeichnung, wenn der Speicherplatz der einzelnen Dateien 4 GB überschreitet, und beginnt die Aufzeichnung in einer neuen Datei.
KURZANLEITUNG
Einschalttaste
Langes Drücken: Ein- / Ausschalten Kurzes Drücken: Bestätigen
Aufwärts-Taste
Langes Drücken: Schalten Sie den vorderen / Hinteren Bildschirm um Kurzes Drücken: Wiedergabe
Abwärts-Taste
Lange Drücken: WLAN einschalten Kurzes Drücken: Einstellung
EIN-/AUSSCHALTEN
Zum Einschalten
Halten Sie die Einschalttaste drei Sekunden lang gedrückt. Die Statusanzeige leuchtet und die Kamera gibt einen Ton ab. Wenn Informationen auf dem Display oder dem Kamerastatusbildschirm erscheinen, ist Ihre Kamera eingeschaltet.
Zum Einschalten
Halten Sie die Einschalttaste drei Sekunden lang gedrückt. Die Kamera gibt einen Signalton aus und die Statusleuchte ist aus.
DEN MODUS WECHSELN
Den Modus wechseln
Schalten Sie die Kamera ein und wischen Sie nach oben, um zwischen den Modi zu wechseln, oder tippen Sie auf "Video" auf dem Bildschirm, um der Modi auszuwählen.
Den Modus verlassen
Drücken Sie die Modus-Taste oder klicken Sie auf das "X", um den Modus zu beenden.
Wifi EIN-/AUSSCHALTEN
Das Wifi einschalten
Schalten Sie die Kamera ein und drücken Sie dann lange die Abwärtstaste, um WLAN einzuschalten. Sie können auch zum Modusmenü nach oben wischen, um WLAN einzuschalten.
Das Wifi ausschalten
Drücken Sie die OK-Taste, um das Wifi auszuschalten.
MODUSUBERSICHT
Es gibt 6 Modi: Video, Foto, Serienfoto, Zeitraffer-Video, Selbstauslöser-Foto und Wifi. Wenn die Kamera eingeschaltet ist, tippen Sie auf den aktuellen Modus unten auf dem Kamerabildschirm oder wischen Sie nach oben, um das Modusmenü aufzurufen.
Videomodus
Der Videomodus ist der Standardmodus, wenn Sie die Kamera einschalten. Wenn Sie im Videomodus den Auslöser drücken, beginnt die Kamera mit der Videoaufnahme. Drücken Sie den Auslöser erneut, um die Aufnahme zu stoppen. Drücken Sie die Modus-Taste, um während der Videoaufzeichnung ein Foto zu machen. Klicken , um die Zoomstufe einzustellen.
natural_image
Person diving into the ocean with blue fins, captured in a photo editing interface (no text or symbols on the image itself)06
Fotomodus
Nach rechts wischen, um in den Fotomodus zu wechseln, nachdem Sie die Kamera eingeschaltet haben.
Drücken Sie im Fotomodus den Auslöser, die Kamera nimmt ein Foto auf. Klicken Ⓧ, um die Zoomstufe einzustellen.
natural_image
Person floating in turquoise water with blue fins, captured via camera interface (no text or symbols on the image itself)Serienbildmodus
Wischen Sie nach oben zu "Modus auswählen" oder klicken Sie auf "Video", um in den Serienbildmodus zu gelangen. Drücken Sie im Serienbildmodus den Auslöser, die Kamera nimmt 3 Fotos pro Sekunde auf.
Zeitraffer-Videomodus
Wischen Sie nach oben zu "Modus auswählen" oder klicken Sie auf "Video", um den Zeitraffer-Videomodus aufzurufen. Drücken Sie im Zeitraffer-Videomodus den Auslöser, um eine Serie von videos in Abständen von 2s/3s/5s/10s/20s/30s/60s aufzunehmen.
Selbstauslöser-Fotomodus
Wischen Sie nach oben zu "Modus auswählen" oder klicken Sie auf "Video", um den Selbstauslöser-Fotomodus aufzurufen. Drücken Sie im Selbstauslöser-Fotomodus die Auslösertaste, um Fotos selbst in 3s/5s/10s/20s/30s/60s Abstand aufzunehmen.

natural_image
Person diving into the ocean with blue fins, captured in a photo editing interface (no text or symbols on the image itself)Wifi-Modus
Halten Sie bei eingeschalteter Kamera die Abwärtstaste gedrückt oder rufen Sie das Modusmenü auf, um Wifi einzuschalten.
VIDEO- & FOTOEINSTELLUNGEN
- Videoauflösung: 4K30FPS, 2.7K30FPS, 1080P120FPS, 1080P60FPS, 1080P30FPS, 720P240FPS, 720P120FPS, 720P60FPS, 720P30FPS Standardeinstellung ist 4K 30fps.
Hinweis: Bei der Aufnahme von Videos mit hohen Auflösungen oder hohen Bildraten bei warmen Umgebungstemperaturen kann die Kamera eine hohe Temperatur erreichen und mehr Strom verbrauchen.
- Video-Modus: Video, SlowMotion, Loop Record
Die Standardeinstellung ist Video.
Mit dieser Einstellung können Sie den Video-, Zeitlupen- und Schleifenaufnahmemodus auswählen.
3. Bildstabilisierung: Aus/Ein
Die Standardeinstellung ist Aus.
Mit dieser Einstellung wird das Filmmaterial so angepasst, dass Bewegungen während der Aufnahme kompensiert werden. Das Ergebnis sind flüssigere Aufnahmen, insbesondere bei Aktivitäten mit relativ kleinen, aber schnellen Bewegungen, z. B. beim Radfahren, Motorradfahren und bei handgeführten Anwendungen.
4. Winkel: Super Weit/Weit/Mittel/Kurz
Standardeinstellung ist Super Weit.
Der Winkel gibt an, wie viel von der Szene durch das Kameraobjektiv erfasst werden kann. Der Weitwinkel fängt den größten Teil der Szene ein, während der Kurzwinkel den kleinsten Teil einfängt.
5. Tauch-Modus: Aus/Ein
Standardeinstellung ist Aus.
Der Tauch-Modus kann den Rotlichtmangel in Unterwasserumgebungen kompensieren. Der Tauch-Modus ist für den Einsatz in tropischem und blauem Wasser konzipiert und für den Einsatz zwischen 3 und 25 Metern optimiert.
6. Videolänge: 2 Min/3 Min/5 Min
Die Standardeinstellung ist 2 Min.
Mit der Loop-Aufnahme können Sie kontinuierlich aufnehmen, aber nur die Momente speichern, die Sie behalten möchten. Wenn Sie z. B. ein 5-Minuten-Intervall auswählen, werden nur die letzten 5 Minuten gespeichert, wenn Sie den Auslöser drücken, um die Aufnahme nicht zu funktionieren. Wenn Sie 5 Minuten lang aufnehmen und den Auslöser nicht drücken, um die Aufnahme zu stoppen und zu speichern, zeichnet die Kamera ein neues 5-Minuten-Intervall auf, indem sie über die vorherigen 5 Minuten des Filmmaterials aufzeichnet. Wenn die speicherkarte voll ist, werden die neuen Dateien über die alten Dateien geschrieben, wenn die Loop-Aufnahme eingeschaltet ist.Zeitraffferfoto nimmt eine Serie von Fotos in bestimmten Abständen auf. Verwenden Sie diesen Modus, um Fotos von einer beliebigen Aktivität aufzunehmen, und wählen Sie dann später die besten Fotos aus.
7. Belichtung: -3, -2, -1, 0, 1, 2, 3
Standardeinstellung ist 0.
Standardmäßig verwendet Ihre Kamera das gesamte Bild, um die geeignete Belichtungsstufe zu bestimmen. Mit der Belichtung können Sie jedoch einen Bereich auswählen, den die Kamera bei der Bestimmung der Belichtung vorrangig berücksichtigen soll. Diese Einstellung ist besonders nützlich bei Aufnahmen,
bei denen ein wichtiger Bereich sonst über- oder unterbelichtet sein könnte. Wenn Sie diese Einstellung ändern, zeigt Ihnen das Display sofort die Auswirkung auf Ihr Bild an.
Wenn Sie den Modus ändern, verwendet die Kamera wieder die gesamte Szene, um die richtige Belichtung zu bestimmen.
8. WDR: Aus/Ein
Standardeinstellung ist aus.
Wide Dynamic Range (WDR) hält größere Details in den dunklen und hellen Bereichen eines Bildes fest. Das Ergebnis ist ein Foto, das für diese beiden Extreme richtig belichtet ist. Diese Einstellung ist besonders nützlich für Szenen, die im Hintergrund liegen oder große helle Bereiche und einen dunklen Vordergrund haben. WDR ist nur im Videomodus verfügbar.
9. Belichtungsmessung: Durchschnitt/Zentrum/Spot
Die Standardeinstellung ist Durchschnitt.
Bestimmen Sie die Methode, mit der Ihre Kamera das Licht der Szene misst.
10. Schärfe: Hoch/Mittel/Niedrig
Die Standardeinstellung ist Hoch.
Schärfe steuert die Qualität der Details, die in Ihren Videoaufnahmen oder Fotos erfasst werden. Wenn Sie diese Einstellung ändern, wird Ihnen im Bildschirm unmittelbar die Auswirkung auf Ihr Bild angezeigt.
11. Videoqualität: Hoch/Mittel/Niedrig
Standardeinstellung ist Mittel.
12. ISO: Auto/100/200/400/800/1600/3200/6400
Die Standardeinstellung ist Auto.
ISO bestimmt die Lichtempfindlichkeit der Kamera und stellt einen Abgleich zwischen Helligkeit und Bildrauschen her. Bildrauschen bezieht sich auf den Grad der Körnigkeit im Bild. Bei schlechten Lichtverhältnissen führen höhere ISO-Werte zu helleren Bildern, jedoch mit stärkerem Bildrauschen. Niedrigere Werte führen zu einem geringeren Bildrauschen, aber zu dunkleren Bildern. Wenn Sie diese Einstellung ändern, wird Ihnen im Display sofort die Auswirkung auf Ihr Bild angezeigt.
13. Datumstempel: Aus/Ein
Standardeinstellung ist Ein.
Schalten Sie den Datumsstempel ein, diese Kamera versieht Ihre Videos und Fotos mit einem Datumsstempel.
14. Bewegungserkennung: Ausschalten/Einschalten
Die Standardeinstellung ist Ausschalten.
Bei der Bewegungserkennung wird eine Änderung der Position eines Objekts relativ zu seiner Umgebung oder eine Änderung der Umgebung relativ zu einem Objekt erkannt. Schalten Sie die Bewegungserkennung und die Kamera ein, nimmt die Kamera automatisch ein Video auf, wenn sie eine Änderung der Position eines Objekts relativ zu seiner Umgebung erkennt.
15. Fotoauflösung:20MP, 16MP, 13MP, 8MP
Standardeinstellung ist 20M.
16. Bildstabilisator: Aus/Ein
Standardeinstellung ist aus.
Bei dieser Einstellung wird das Filmmaterial angepasst, um Bewegungen während der Aufnahme auszugleichen. Das Ergebnis sind flüssigere Aufnahmen, insbesondere bei Aktivitäten mit relativ kleinen, aber schnellen Bewegungen, z. B. beim Radfahren, Motorradfahren und bei handgeführten Anwendungen.
17. Serienbilder: 3P/s, 5P/s, 10P/s
Die Standardeinstellung ist 3P/s.
Bei Serienbildern werden bis zu 10 Fotos in 1ner Sekunde aufgenommen, ist also perfekt für die Aufnahme von sich schnell bewegenden Aktivitäten.
18. Zeitraffer-Intervall: 0.5Sek/1Sek/2Sek/5Sek/10Sek/30Sek/60Sek
Standardeinstellung ist 0.5Sek.
Time Lapse Video erstellt Videos aus Frames, die in bestimmten Intervallen aufgenommen wurden. Mit dieser Option können Sie ein Zeitrafferereignis erfassen und sofort als Video anzeigen oder freigeben.
Hinweis: Zeitraffer-Video wird ohne Audio aufgenommen.
19. Kontinuierlicher Zeitraffer: 3Sek/10Sek/20Sek/30Sek/60Sek
Standardeinstellung ist 3Sek.Schalten Sie den Selbstauswäher aus, gehen Sie zurück und Sie können das Zeitraffersymbol sehen. Klicken Sie darauf und geben Sie die Einstellung ein, Sie finden Fotointervall. Diese Kamera nimmt eine kontinuierliche Zeitrafferaufnahme für maximal 60 Sekunden auf.
20. Selbstauslöser: Aus/Ein
Die Standardeinstellung ist Ein.
Ein automatischer Aufnahmemodus, der rückwärts herunterzählt und dann ein Foto aufnimmt.
KAMERAEINSTELLUNG
-
Spezialeffekt: Normal/Schwarz und Weiß/Negativ/Retro/Rot/Grün/Blau Standardeinstellung ist Normal.
-
Leistungsfrequenz: Auto/50 Hz/60 H Standardeinstellung ist Auto.
3.Sprache: English/Français/Deutsch/Espanol/Italiano/日本語/한국어/简体中文 Standardeinstellung ist Englisch.
4. Datum & Uhrzeit:JJ/MM/TT
Das Datum und die Uhrzeit werden automatisch aktualisiert, wenn Sie Ihre Kamera mit der AKASO GO App verbinden. Sie können diese Einstellungen bei Bedarf auch manuell ändern.
Hinweis: Wenn der Akku aus der Kamera entfernt wird, werden Datum und Uhrzeit automatisch zurückgesetzt.
5. Sounds:
Auslöser: Aus/Ein Tasten: Aus/Ein
Lautstärke: 0/30/70/100 Einschalten: Aus/Ein
Standardeinstellung ist Ein.
Sie können die Auslöse-, Start- und Signaltöne ein- oder ausschalten.
Mit dieser Option können Sie die Lautstärke der Alarmsignale des Brave 4 Pro einstellen.
6. Tauchmodus: Aus/Ein
Die Standardeinstellung ist Aus.
7. Bildrotation: Aus/Ein
Die Standardeinstellung ist Aus
Diese Einstellung bestimmt die Ausrichtung Ihrer Videos oder Fotos, sodass Sie auf dem Kopf stehende Aufnahmen vermeiden können.
Hinweis: Die Benutzeroberfläche steht auf dem Kopf, wenn die Option "Bildrotation" aktiviert ist.
8. Mikrofon: Eingebaut / Extern
Die Standardeinstellung ist Integriert.
9. Bildschirmschoner: Unbegrenzt/30 Sekunden/1 Min/2 Min
Standardeinstellung ist 1 Min.
Der Bildschirm wird nach einer bestimmten Zeit der Inaktivität ausgeschaltet, um die Batterie zu schonen. Um den Bildschirm wieder einzuschalten, drücken Sie eine beliebige Taste an der Kamera.
10. Automatisches Ausschalten: Unbegrenzt/3Mins/5Mins/10Mins
Standardeinstellung ist 3 Mins.
Schaltet Ihre Brave 4 Pro nach einer bestimmten Zeit der Inaktivität aus, um die Batterie zu schonen.
11. Formatieren:
Um Ihre speicherkarte in gutem Zustand zu halten, sollten Sie sie regelmäßig neu formatieren. Bei der Neuformatierung werden alle Inhalte gelöscht. Stellen Sie daher sicher, dass Sie Ihre Fotos und Videos zuerst entladen.
Um die Karte neu zu formatieren, drücken Sie die Abwärtstaste, um die Kameraeinstellungen aufzurufen, drücken Sie dann die Modus-Taste und drücken Sie mehrmals die Aufwärtstaste, um Format > speicherkarte > Speicherplatz formatieren /abbrechen aufzurufen.
12. Zurücksetzen: Bestätigen/Abbrechen
Diese Option setzt alle Einstellungen auf ihre Standardwerte zurück.
13. Geräte-Info: Brave 4 Pro
Version: FX9307I-V1.0 4-20-2021
Sie können das Modell, die Version und die Update-Zeit Ihrer Brave 4 Pro überprüfen.
MIT DER AKASO GO APP VERBINDEN
Bitte laden Sie zuerst die AKASO GO App aus dem Apple App Store oder Google Play auf Ihr Mobilgerät herunter. Mit der AKASO GO App können Sie Ihre Kamera über ein Smartphone oder Tablet fernsteuern. Zu den Funktionen gehören die vollständige Kamerasteuerung, Live-Vorschau, Wiedergabe, Download, das Teilen von Inhalten und die Einstellung der Kamera.
- Schalten Sie die Kamera ein und drücken Sie dann lange die Abwärtstaste, um WLAN einzuschalten. Sie können auch zum Modusmenü wischen, um WLAN einzuschalten.
- Schalten Sie das WLAN Ihres Telefons ein, um die WLAN-Einstellung einzugeben, suchen Sie das WLAN der Kamera in der Liste und klicken Sie darauf, und geben Sie dann das Standardkennwort ein: 1234567890 zum Verbinden.
- Öffnen Sie die AKASO GO App, tippen Sie auf "Gerät" → "Gerät hinzufügen" und wählen Sie "Brave 4 Pro".
- Aktivieren Sie "Der obige Vorgang wurde bestätigt" und klicken Sie auf "Live-Vorschau", Ihre Kamera stellt eine Verbindung mit der AKASO GO-App her.
IHRE INHALTE WIEDERGEBEN
Sie können Ihre Inhalte auf dem Display der Kamera, Ihrem Computer, Fernseher, Smartphone oder Tablet wiedergeben.
Sie können Inhalte auch wiedergeben, indem Sie die speicherkarte direkt in ein Gerät, wie z. B. einen Computer oder ein kompatibles Fernsehgerät, einsetzen. Bei dieser Methode hängt die Wiedergabeauflösung von der Auflösung des Geräts und dessen Fähigkeit, diese Auflösung wiederzugeben, ab.
VIDEOS UND FOTOS AUF IHRER BRAVE 4 PRO ANSCHAUEN
- Schalten Sie die Kamera ein.
-
Tippen Sie auf das Videowiedergabesymbol ▶ in der linken Ecke des Bildschirms, um den Wiedergabemodus aufzurufen.
-
Tippen Sie auf das Dateisymbol ☐.
- Tippen Sie auf das Vorwärts- oder Rückwärtssymbol, um Video- oder Fotodateien abzuspielen.
- Tippen Sie auf das Wiedergabesymbol für Videos ▶, um das Video in der Vollansicht abzuspielen.
- Um die Video- oder Fotodateien zu beenden, tippen Sie auf das Zurück-Symbol
Hinweis: Wenn Ihre speicherkarte viele Inhalte enthält, kann der Ladevorgang bis zu einer Minute dauern.
VIDEOS UND FOTOS AUF IHRER BRAVE 4 PRO LÖSCHEN
- Wiedergabemodus aufrufen.
- Tippen Sie auf das Videowiedergabesymbol ▶ oder das Dateisymbol ■.
- Tippen Sie auf das Vorwärts- oder Rückwärtssymbol, um die Video- oder Fotodatei zu suchen, die Sie löschen möchten.
- Tippen Sie auf 📄 . Der Bildschirm zeigt „Diese Datei löschen? Ja/Nein“.
- Tippen Sie auf „Ja“ und die ausgewählte Datei wird gelöscht.
IHRE DATEN ÜBERTRAGEN
IHRE DATEN AUF EINEN COMPUTER ÜBERTRAGEN
Um Ihre Videos und Fotos auf einem Computer wiederzugeben, müssen Sie diese Dateien zunächst auf einen Computer übertragen. Durch die Übertragung wird auch Speicherplatz auf Ihrer speicherkarte ür neue Daten frei. Um Dateien mit einem Kartenlesegerät (separat erhältlich) und dem Datei-Explorer Ihres Computers auf einen Computer zu übertragen, schließen Sie das Kartenlesegerät an den Computer an und legen Sie dann die speicherkarte ein. Sie können dann Dateien auf Ihren Computer übertragen oder ausgewählte Dateien auf der Karte löschen. Beachten Sie, dass Sie zum Übertragen von Fotos oder Audiodateien ein Kartenlesegerät verwenden müssen.
Übertragen Ihrer Daten auf Smartphone oder Tablet
- Öffnen Sie die AKASO GO App. Verbinden Sie die Kamera mit der App.
- Tippen Sie auf das Wiedergabesymbol in der unteren linken Ecke, um alle Videos und Fotos anzuzeigen.
- Tippen Sie auf das Symbol und wählen Sie das Foto oder Video, das Sie herunterladen möchten, und tippen Sie dann auf das Download-Symbol in der unteren rechten Ecke.
natural_image
Smartphone screenshot displaying a snowy mountain scene with skiers and snowboarders under a clear blue sky (no text or symbols visible)Hinweis:
-
Wenn Sie Videos oder Fotos nicht auf das iPhone übertragen können, gehen Sie bitte auf Einstellungen → Datenschutz → Fotos, suchen Sie „AKASO GO“ und wählen Sie „Alle Fotos“.
-
Auf dem iPhone können Sie keine 4K- oder 2.7K-Videos über die App herunterladen. Bitte laden Sie 4K- oder 2.7K-Videos über einen Kartenleser aus.
THRE KAMERA PFLEGEN
Befolgen Sie diese Anweisungen, um die beste Leistung Ihrer Kamera zu erzielen:
- Um die beste Audioleistung zu erzielen, sollten Sie die Kamera schütteln oder in das Mikrofon blasen, um Verschmutzungen aus den Mikrofonöffnungen zu entfernen.
- Um das Objektiv zu reinigen, wischen Sie es mit einem weichen, fusselfreien Tuch ab. Führen Sie keine Fremdkörper um das Objektiv herum ein.
- Berühren Sie das Objektiv nicht mit den Fingern.
- Halten Sie die Kamera von Stürzen und Stößen fern, da diese die Teile im Inneren beschädigen können.
- Halten Sie die Kamera von hohen Temperaturen und starker Sonneneinstrahlung fern, damit sie nicht beschädigt wird.
MAXIMIERUNG DER AKKULAUFZEIT
Wenn der Akku während der Aufnahme 0 % erreicht, speichert die Kamera die Datei und schaltet sich aus. Um die Akkulaufzeit zu maximieren, befolgen Sie nach Möglichkeit die folgenden Anweisungen:
- Wireless-Verbindungen ausschalten.
• Video mit niedrigeren Bildraten und Auflösungen aufzeichnen.
• Bildschirmschoner-Einstellung verwenden.
EINSTELLUNG DER ZOOMSTUFE
Mit der Zoomfunktion können Sie bestimmen, wie nah oder weit entfernt das Motiv auf Ihrem Foto erscheint. Die Standardeinstellung ist ohne Zoom. Die Zoomfunktion ist im Video-, Serienbild- und Timer-Fotomodus verfügbar verfügbar. Brave 4 Pro kann bis zu 5x zoomen.
- Schalten Sie die Brave 4 Pro ein.
- Video- oder Serienbild-Modus eingeben, Timer-Foto-Modus.
- Klicken Ⓧ , um die Zoomstufe einzustellen.
SPEICHERKARTE NEU FORMATIEREN
Um Ihre speicherkarte in einem guten Zustand zu halten, sollten Sie sie regelmäßig neu formatieren. Bei der Neuformatierung werden alle Inhalte gelöscht. Stellen Sie daher sicher, dass Sie Ihre Fotos und Videos zuerst entladen.
- Halten Sie die Einschalttaste gedrückt, um das Brave 4 Pro einzuschalten.
- Drücken Sie die Taste Nach unten oder tippen Sie auf das Einstellungssymbol auf dem Bildschirm, um die Kameraeinstellung einzugeben.
- Suchen Sie die Option Format in den Einstellungen und tippen Sie darauf.
- Der Bildschirm zeigt Speicherplatz: xxG / xxG und Format / Abbrechen.
- Drücken Sie die OK-Taste oder tippen Sie auf Formatieren. Auf dem Bildschirm erscheint Formatieren... und Formatieren erfolgreich. Dann haben Sie Ihre Speicherkarte erfolgreich formatiert.
AKKULAGERUNG UND AKKUBETRIEB
Die Kamera enthält empfindliche Komponenten, einschließlich des Akkus. Vermeiden Sie es, die Kamera sehr kalten oder sehr heißen Temperaturen auszusetzen. Niedrige oder hohe Temperaturen können die Lebensdauer des Akkus verkürzen oder dazu führen, dass die Kamera vorübergehend nicht mehr richtig funktioniert. Vermeiden Sie drastische Temperatur- oder Feuchtigkeitsschwankungen, wenn Sie die Kamera
benutzen, da sich sonst Kondensation auf oder in der Kamera bilden kann.
- Trocknen Sie die Kamera oder den Akku nicht mit einer externen Wärmequelle wie z. B. einem Mikrowellenherd oder einem Fön. Schäden an der Kamera oder dem Akku, die durch Flüssigkeit im Inneren des Gehäuses verursacht werden, sind von der Garantie ausgeschlossen.
- Bewahren Sie den Akku nicht zusammen mit Metallgegenständen wie Münzen, Schlüsseln oder Halsketten auf. Wenn die Batteriepole in die Nähe von Metallgegenständen kommen, kann ein Brand verursacht werden.
- Nehmen Sie keine unautorisierten Änderungen an der Kamera vor, da dies die Sicherheit, die Einhaltung von Vorschriften oder die Leistung beeinträchtigen und zum Erlöschen der Garantie führen kann.
WARNING: Lassen Sie die Kamera oder den Akku nicht herunterfallen, öffnen, zerlegen, zerquetschen, verbiegen, verformen, durchstechen, schreddern, in der Mikrowelle erhitzen, verbrennen oder lackieren Sie sie nicht. Stecken Sie keine Fremdkörper in die Akkuöffnung der Kamera. Verwenden Sie die Kamera oder den Akku nicht, wenn sie beschädigt sind, z. B. durch Risse, Löcher oder Wassereinwirkung. Wenn der Akku zerlegt oder durchstochen wird, kann dies eine Explosion oder einen Brand verursachen.
FERNBEDIENUNG
Nur spritzwassergeschützt, nicht wasserdicht
VIDEO
Um ein Video aufzunehmen, schalten Sie die Kamera in den Videomodus.
Eine Aufnahme starten:
Drücken Sie die graue Video-Taste. Die Kamera gibt einen Signalton aus und die Kameraleuchte blinkt während der Aufnahme.
Eine Aufnahme beenden:
Drücken Sie die graue Video-Taste erneut. Die Kamera gibt einen Signalton ab, die Kameraleuchte hört auf zu blinken und die Kamera beendet die Aufnahme.
FOTO
Um ein Foto aufzunehmen, schalten Sie die Kamera in den Fotomodus.
Ein Foto aufnehmen:
Drücken Sie die rote Foto-Taste. Die Kamera gibt einen Auslöseton ab.
CR2032 ERSATZBATTERIE FÜR BRAVE 4 PRO FERNBEDIENUNG
- Verwenden Sie einen 1,8-mm-Kreuzschlitzschraubendreher, um die 4 Schrauben an der hinteren Abdeckung der Fernbedienung zu entfernen, damit Sie diese öffnen können.
natural_image
Three black electronic devices: a digital display, a black rectangular device with red buttons, and a small tool (no visible text or symbols)- Entfernen Sie die anderen vier Schrauben auf der Platine.

natural_image
Interior view of a black electronic device showing green circuit board and two circular components (no text or symbols visible)DE
- Heben Sie die Platine an und schieben Sie die Batterie heraus, wie in der Abbildung gezeigt.
Hinweis: Drehen Sie die Platine NICHT, um die Funktionen der Kamera- und
Videotaste nicht zu vertauschen.
natural_image
Close-up of a green electronic circuit board with exposed components and a red triangle pointing to a component (no text or symbols visible)-
Setzen Sie die neue Batterie ein, so dass der „+“-Pol nach oben zeigt.
-
Bringen Sie alle 4 Schrauben wieder auf der Platine an.
natural_image
Close-up of a green printed circuit board with exposed components and a red rectangular annotation (no readable text or symbols)- Bringen Sie alle 4 Schrauben wieder an der Abdeckung an.
IHRE KAMERA ANBRINGEN
Sie können Ihre Kamera an Helmen, Lenkern und Ausrüstungen wie folgt anbringen:
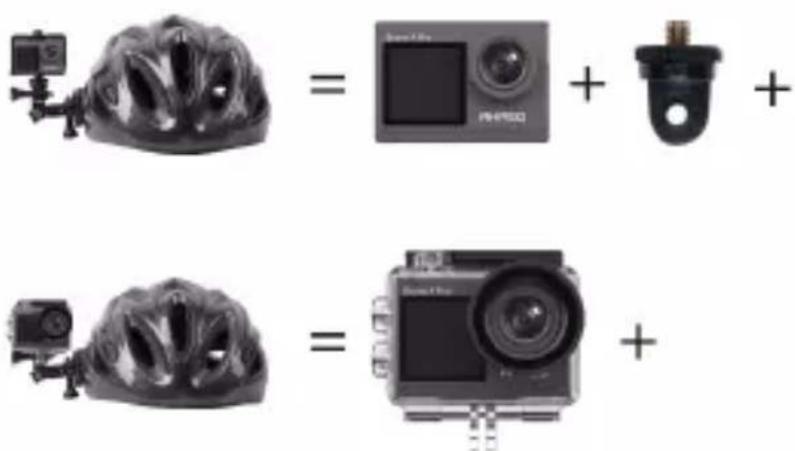
natural_image
Four black mechanical components with mounting holes and connectors, shown in a row (no text or symbols visible)
KONTAKTIEREN SIE UNS
Bei Fragen zu unseren AKASO-Produkten können Sie sich gerne an uns wenden, wir werden innerhalb von 24 Stunden antworten.
E-Mail: cs@akasotech.com
Offizielle Website: www.akasotech.com
BRAVE 4 PRO
CÁMARA DE ACCIÓN

MANUAL DE USUARIO
V1.3

CONTENIDOS
QUÉ HAY EN LA CAJA 02
SU BRAVE 4 PRO----03
GUÍA DE INICIO 05
DESCRIPCIÓN GENERAL DE LOS MODOS----06
CONFIGURACIÓN DE VIDEOS Y FOTOS----08
CONFIGURACIÓN DE LA CÁMARA---- 12
CONEXIÓN A LA APLICACIÓN AKASO GO---- 14
REPRODUCCIÓN DE CONTENIDOS 14
ELIMINAR VIDEOS Y FOTOS DE SU BRAVE 4 PRO ----15
TRANSFERENCIA DE DATOS 15
MANTENIMIENTO DE LA CÁMARA 16
MAXIMIZAR LA VIDA DE LA BATERÍA 17
AJUSTE DEL NIVEL DE ZOOM----17
FORMATEO DE LA TARJETA DE MEMORIA 17
FUNCIONAMIENTO Y ALMACENAMIENTO DE LA BATERÍA ----17
CONTROL REMOTO 18
MONTAJE DE LA CAMERA 21
CONTÁCTENOS 22
QUÉ HAY EN LA CAJA
AKASO Brave 4 Pro
x 1
Carcasa Impermeable x 1
Cargador x 1
Batería
x 3

Cable USB x 1

Control Remoto
x 1
La muñequera de Control Remoto x 1

Puerta Trasera
Protectora x 1
Clip x 1
Clip 2
x 1

Montaje 1
x 1

Montaje 2
x 1

Montaje 3
x 1

Montaje 4
x 1
Montaje 5
x 1
Montaje 6
x 1

Montaje 7
x 1
Manillar/
Barra de montaje x 1
Soporte Para
Casco x 2

Llave Inglesa
x 1

Correas Sujetadoras
x 4

Ataduras x 5

Paño Para Lente
x 1

Doble Cinta
x 2

Guía de Inicio
Rápido x 1
1 Botón OK/Obturador/Encendido
2 Pantalla frontal
3 Puerto Micro USB
4 Ranura para tarjeta de memoria
5 Puerto Micro HDM
6 Lenta


7 Pantalla táctil
10 Botón Abajo
8 Botón Arriba/Modo
11 Cubierta de la batería
9 Altavoz
Nota: la cámara no grabará sonido mientras esté dentro de la cubierta impermeable.
GUÍA DE INICIO
Bienvenido a su AKASO Brave 4 Pro. Para capturar videos y fotos, necesita una tarjeta de memoria (no incluida).
TARJETA DE MEMORIA
Utilice tarjetas de memoria de marcas reconocidas que cumplan con los siguientes requisitos:
• U3
- Capacidad de hasta 64 GB (FAT32)
Nota:
- Antes de utilizar su cámara, formatee la tarjeta de memoria en la cámara. Para mantener su tarjeta de memoria en buenas condiciones, formatéela con regularidad. El formateo de la tarjeta eliminará todos sus datos por lo que, antes de proceder, asegúrese de transferir sus fotos y videos.
- Con el formato FAT32, la tarjeta de memoria dejará de grabar cuando el almacenamiento de un archivo exceda los 4 GB y reiniciará a grabar en un archivo nuevo.
GUÍA DE BOTÓN RÁPIDO
Botón de encendido
Presionar: Encender/apagar
Prensa corta: Confirmar
Botón Arriba
Presionar: Conmutar la pantalla delantera/trasera
Prensa corta: Reproducción
Botón Abajo
Presionar: Enciende Wifi
Prensa corta: Ajuste
ENCENDIENDO/APAGANDO LA CÁMARA
Para encender
Mantenga presionado el Botón de Encendido por tres segundos. La luz de estado estará enceny la cámara emitirá un sonido. Cuando aparezca información en la pantalla o en la pantalla del estado de la cámara, significa que la cámara está encendida.
Para apagar
Mantenga presionado el Botón de Encendido por tres segundos. La cámara emitirá un pitido y la luz indicadora del estado se apagará.
MODO DE CONMUTACIÓN
Para cambiar de Modo
Encienda la cámara y hacia arriba, para cambiar de modo, o click en "Video" en la pantalla para seleccionar los modos.
Para salir de la función de Modo
Pulse el botón Mode o haga clic en la "X" para salir del modo.
ENCENDIENDO/APAGANDO WIFI
Para encender Wifi
Encienda la cámara y, a continuación, mantenga presionado el botón hacia abajo para activar Wifi. También puede deslizar hacia arriba hasta el menú de modo para activar Wifi.
Para apagar Wifi
Pulse el botón OK para desactivar el Wifi.
DESCRIPCION GENERAL DE LOS MODOS
Hay 6 modos: Video, Foto, Fotos en ráfaga, Videos con lapso de tiempo, Fotos con temporizador y Wifi.
Cuando la cámara esté encendida, toca el modo actual en la parte inferior de la pantalla de la cámara o desliza el dedo hacia arriba para entrar en el menú de modos.
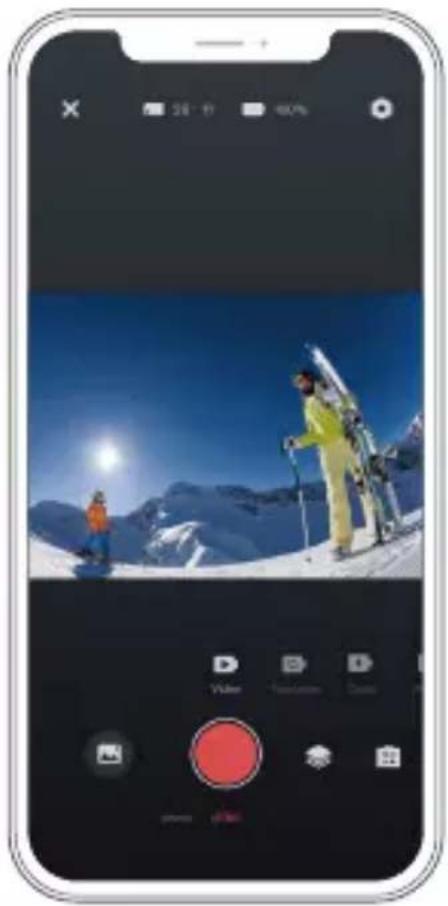
Modo de Video
Cuando enciende la cámara, el modo predeterminado es el modo de Video.En el modo de Video, presione el botón Obturador para que la cámara comience a grabar un video. Para detener la grabación, presione el botón Obturador otra vez.Para ajustar el nivel de zoom, haga clic aquí
natural_image
Person diving into the ocean with blue fins, captured in a photo editing interface (no text or symbols on the image itself)Modo de Foto
Para cambiar al modo de Foto, encienda la cámara y luego deslice a la derecha.
En el modo de Foto, presione el botón Obturador para tomar fotos. Presione el botón Arriba o Abajo, para ajustar el nivel de zoom.
natural_image
Person diving into the ocean with blue fins, captured in a photo editing interface (no text or symbols on the image itself)Modo de Fotos en ráfaga
Para entrar al modo de Fotos en ráfaga, desdeslice hasta "seleccionar modo" o haga clic en "vídeo".
En el modo de Fotos en ráfaga, presione el botón Obturador para tomar 3/5/10 fotos por segundo.
Modo de Videos con lapso de tiempo
Para entrar al modo de videos con lapso de tiempo, desdeslice hasta "seleccionar modo" o haga clic en "vídeo".
En el modo de videos con lapso de tiempo, presione el botón Obturador para tomar una serie de videos a intervalos de 0.5 s/1 s/2 s/5 s/10 s/30 s/60 s.
Modo de Fotos con temporizador
Para entrar al modo de Fotos con temporizador, desdeslice hasta "seleccionar modo" o haga clic en "vídeo".
En el modo de Fotos con temporizador, presione el botón Obturador para tomar fotos con temporizador en 3 s/5 s/10 s/20 s/30 s/60 s.
natural_image
Person diving into the ocean with two blue fins, captured in a photo editing interface (no text or symbols on the image itself)Modo Wifi
Cuando la cámara esté encendida, mantén pulsado el botón Abajo o entra en el menú de modos para activar el Wifi.
CONFIGURACIÓN DE VIDEOS Y FOTOS
- Resolución de video: 4K30FPS, 2.7K30FPS, 1080P120FPS, 1080P60FPS,
1080P30FPS, 720P240FPS, 720P120FPS, 720P60FPS, 720P30FPS
La configuración predeterminada es de 4K30FPS.
Nota: la captura de video a altas resoluciones o alta velocidad de fotogramas, en ambientes con temperaturas cálidas, puede causar el sobrecalentamiento de la cámara y aumentar el consumo de energía.
- Modo de vídeo: vídeo, cámara lenta, grabación de bucle
La configuración predeterminada es Video.
Esta configuración es para seleccionar vídeo, cámara lenta, modo de grabación de bucle.
3. Estabilización de la imagen: Apagado/Encendido
La configuración predeterminada es Apagado.
Esta configuración permite el ajuste del material de grabación, para compensar el movimiento durante la captura. El resultado es una grabación más pareja, especialmente en actividades en las que se producen movimientos pequeños pero rápidos, incluyendo, ciclismo, motociclismo y el manejo manual de la cámara.
4. Ángulo: Súper ancho, Ancho, Medio, Estrecho
La configuración predeterminada es Súper ancho.
El ángulo se refiere a cuánto del total de la escena se puede capturar con la lente de la cámara (medida en grados). El ángulo Súper Ancho captura la mayor parte de laescena, mientras que el ángulo Estrecho captura la menor cantidad de la escena. La función no estará disponible cuando la estabilización de imagen esté activada.
5. Modo de Buceo: Apagado/Encendido
La configuración predeterminada es Apagado.
El modo de buceo ayuda a compensar la falta de luz amarilla en ambientes acuáticos. El modo de buceo está diseñado para utilizarse en aguas tropicales y azules, y optimizado para utilizarse entre los 10 y 80 pies.
6. Longitud del video: 2 min/3 min/5 min
La configuración predeterminada es 2 min.
Utilizando la Grabación en bucle, puede grabar videos continuamente, pero almacenar solo aquellos que desee conservar. Por ejemplo, si selecciona el intervalo de 5 minutos y presiona el botón Obturador para detener la grabación, solo los últimos 5 minutos serán guardados. Si graba por 5 minutos, pero no presiona el botón Obturador para detener la grabación y guardar, la cámara grabará un nuevo intervalo de 5 minutos, sobrescribiendo los 5 minutos anteriores de metraje. Cuando la tarjeta de memoria esté llena, los nuevos archivos se grabarán sobre los anteriores si la grabación en bucle está encendida.
7. Exposición: -3, -2, -1, 0, 1, 2, 3
La configuración predeterminada es de 0.
De forma predeterminada, la cámara utiliza la imagen completa para determinar el nivel de exposición apropiado. Sin embargo, la función de Exposición le permite seleccionar un área prioritaria con la que la cámara determinará el nivel de exposición. Esta configuración es particularmente útil en tomas en las que un área importante
podría quedar sobre o subexpuesta.
Al seleccionar esta configuración, la pantalla muestra inmediatamente el efecto sobre la imagen. Si cambia de modo, la cámara regresará a utilizar la escena completa para determinar el nivel de exposición correcto.
8. WDR: Encendido/Apagado
La configuración predeterminada es Apagado.
El Rango Dinámico Amplio (WDR) mantiene un mayor nivel de detalles en las áreas oscuras y brillantes de una imagen. El resultado es una foto con la exposición apropiada para estos dos extremos. Esta configuración es especialmente útil para escenarios que están al fondo o que tienen áreas iluminadas muy extensas con un primer plano oscuro. WDR está disponible solo para el modo de Video.
9. Medición: Promedio/Centro/Puntual
La configuración predeterminada es Promedio.
Seleccione la forma en que la cámara mide la luz del escenario.
10. Nitidez: Alta/Media/Baja
La configuración predeterminada es Alta.
La configuración de Nitidez controla la calidad de los detalles captados en las fotos y videos Al seleccionar esta configuración, la pantalla táctil muestra inmediatamente el efecto sobre la imagen.
11. Calidad del video: Alto/Medio/Bajo
La configuración predeterminada es Medio.
12. ISO: Automático/100/200/400/800/1600/3200/6400
La configuración predeterminada es Automático.
La función ISO determina la sensibilidad de la cámara a la luz y compensa el brillo y el ruido resultantes en una imagen. El ruido de una imagen se refiere al grado de granulación de la imagen.
En ambientes con poca luz, un valor de ISO mayor resulta en imágenes más brillantes, pero con mayor ruido. Valores de ISO más bajos resultan en menor ruido en las imágenes, pero más oscuras. Al seleccionar esta configuración, la pantalla muestra inmediatamente el efecto sobre la imagen.
13. Sello de fecha: Encendido/Apagado
La configuración predeterminada es Encendido.
Al encender el Sello de fecha, la cámara agregará a los videos y fotos un sello con la fecha.
14. Detección de movimiento: Apagado/Encendido
La configuración predeterminada es Apagado.
La detección de movimiento es el proceso de detectar un cambio en la posición de un objeto en relación con su entorno, o un cambio en el entorno con relación a un objeto.
Al seleccionar Detección de movimiento, la cámara grabará videos automáticamente al detectar un cambio en la posición de un objeto en relación con su entorno.
15. Resolución de fotos: 20MP, 16MP, 13MP, 8MP
La configuración predeterminada es de 20MP.
16. Antivibración: Apagado/Encendido
La configuración predeterminada es Apagado.
Esta configuración permite ajustar el metraje, para compensar el movimiento durante la captura de la imagen. El resultado es una imagen más pareja, especialmente en actividades en que se producen movimientos pequeños, pero rápidos, incluyendo ciclismo, motociclismo y el manejo manual de la cámara.
17. Fotos en ráfaga: 3P/s, 5P/s, 10P/s
La configuración predeterminada es 3P/s
La configuración de Fotos en ráfaga captura hasta 10 fotos en 1 segundo, siendo perfecta para capturar actividades con movimientos rápidos.
18. Intervalo del lapso de tiempo: 0.5 s/1 s/2 s/5 s/10 s/30 s/60 s
La configuración predeterminada es de 0.5 s.
Time Lapse Video crea videos a partir de fotogramas capturados a intervalos específicos. Esta opción le permite capturar un evento de lapso de tiempo y verlo o compartirlo instantáneamente como un video.
Nota: El vídeo time-lapse se graba sin audio.
19. Intervalo de fotografía: 3 s/10 s/20 s/30 s/60 s
La configuración predeterminada es de 3 s.
Apague el temporizador, vuelva atrás y se puede ver el icono de lapso de tiempo. Haga clic en él y entrar en la configuración, se encuentra intervalo de fotos. Esta cámara toma fotografías continuamente en el intervalo de tiempo establecido, hasta que se detenga manualmente.
20. Temporizador: Apagado/Encendido
La configuración predeterminada es Encendido.
Esta configuración permite la toma de una foto de forma automática con una cuenta regresiva.
CONFIGURACIÓN DE LA CÁMARA
-
Efectos especiales: Normal/Blanco y Negro/Negativo/Retro/Rojo/Verde/Azul La configuración predeterminada es Normal.
-
Frecuencia de energía: Auto/50 Hz/60 Hz La configuración predeterminada es de Auto.
-
Idioma: English/Français/Deutsch/Espanol/Italiano/日本語/한국어/简体中文 La configuración predeterminada es Inglés.
4. Fecha y hora: AA/DD/MM
La fecha y la hora de la cámara se sincronizarán con la de su teléfono después de conectarla a la aplicación AKASO GO.
Nota: Si se retira la batería de la cámara, la fecha y la hora se restablecen automáticamente.
5. Sonidos:
Obturador: Apagado/Encendido Pitido: Apagado/Encendido
Volumen: 0/30/70/100 Encendido: Apagado/Encendido
La configuración predeterminada es Encendido.
Con esta configuración puede encender o apagar los sonidos del obturador, pitido, volumen y encendido.
Permite ajustar el volumen de las alertas de su Brave 4 Pro.
-
Modo de conducción: Apagado/Encendido La configuración predeterminada es Apagado.
-
Boca abajo: Apagado/Encendido
La configuración predeterminada es Apagado.
Esta configuración sirve para determinar la orientación de los videos y fotos, para evitar que una imagen se capture al revés.
Nota: La interfaz de usuario aparecerá al revés cuando esté activada la opción Boca abajo.
- Micrófono: Incorporado/Externo
La configuración por defecto está incorporada.
- Salvapantallas: Ilimitado/30 s/1 min/2 min
La configuración predeterminada es de 1 Min.
Esta configuración apagará la pantalla después de un período de inactividad, para ahorrar energía y aumentar la vida de la batería. Para encender la pantalla nuevamente, presione cualquier botón de la cámara.
- Apagado automático: Ilimitado/3 min/5 min/10 min
La configuración predeterminada es de 3 Min.
Esta configuración apagará la Brave 4 Pro después de un periodo de inactividad, para aumentar la vida de la batería.
11. Formatear
Para mantener su tarjeta de memoria en buenas condiciones, formatéela con regularidad. El formateo de la tarjeta eliminará todos sus contenidos por lo que, asegúrese de transferir sus fotos y videos primero.
Para volver a formatear su tarjeta, presione el botón Abajo para ingresar a la configuración de la cámara, luego busque y toque la opción Formato para completar el formateo.
- Restablecer: Confirmar/Cancelar.
Esta opción regresa todas las configuraciones a sus valores predeterminados.
- Información del dispositivo:
Brave 4 Pro Versión: FX9307I-V1.0 4-20-2021
Puede verificar el modelo, la versión y la hora de actualización de su Brave 4 Pro.
CONEXIÓN A LA APLICACIÓN AKASO GO
Descargue primero la aplicación AKASO GO en su dispositivo móvil desde Apple App Store o Google Play. La aplicación AKASO GO le permite controlar su cámara de forma remota, utilizando un teléfono inteligente o una tableta. Las funciones incluyen el control total de la cámara, vista previa en vivo, reproducción, descarga, compartir contenidos y configuración de la cámara.
- Encienda la cámara y, a continuación, mantenga presionado el botón hacia abajo para activar Wifi. También puede deslizar hacia arriba hasta el menú de modo para activar Wifi.
- Encienda el Wifi de su teléfono para ingresar a la configuración de Wifi, busque el Wifi de la cámara en la lista y haga clic en él, luego ingrese la contraseña 1234567890 para conectarse.
- Abra la aplicación AKASO GO, toque "Dispositivo" → "Agregar dispositivo", elija "Brave 4 Pro".
- Marque "Se ha confirmado la operación anterior" y haga clic en "Vista previa en vivo", su cámara se conectará con la aplicación AKASO GO.
REPRODUCCIÓN DE CONTENIDOS
Puede reproducir sus contenidos en la pantalla de la cámara, en una computadora, TV, o en un teléfono inteligente/tableta.
También puede reproducir sus contenidos insertando la tarjeta de memoria directamente en un dispositivo como una computadora o un TV compatible. Con este método, la resolución de la reproducción depende de la resolución del dispositivo y su capacidad para reproducir dicha resolución.
VER VIDEOS Y FOTOS EN SU BRAVE 4 PRO
- Encienda la cámara.
- Para entrar al modo de Reproducir, toque el símbolo ▶ de reproducción de video, en la esquina izquierda de la pantalla.
- Toque el símbolo de archivos
- Toque el símbolo de Adelante o Atrás para reproducir los archivos de fotos y videos.
- Toque el símbolo de reproducción de video para reproducir videos en vista de pantalla completa.
- Para salir de los archivos de videos y fotos, toque el símbolo de regresar.
Nota: si su tarjeta de memoria tiene mucho contenido, puede tardar unos minutos cargar.
ELIMINAR VIDEOS Y FOTOS DE SU BRAVE 4 PRO
- Ingrese al modo de Reproducir.
- Toque el símbolo ▶ de reproducción de video o el símbolo ▶ de archivos.
- Toque el símbolo de Adelante o Atrás para localizar el archivo de video o foto que desea eliminar.
- Toque el símbolo 📄 . La pantalla mostrará el mensaje "¿Eliminar este archivo? Sí/No".
- Toque "Sí" para que el archivo seleccionado sea eliminado.
TRANSFERENCIA DE DATOS
TRANSFERENCIA DE DATOS A UNA COMPUTADORA
Para reproducir sus videos y fotos en una computadora, primero debe transferir los archivos a la computadora. La transferencia de datos también libera espacio en su tarjeta de memoria para almacenar contenidos nuevos. Para descargar archivos en una computadora, utilizando un lector de tarjetas (no incluido) y el explorador de archivos de la computadora, primero, conecte el lector de tarjetas a la computadora. Luego, inserte la tarjeta de memoria en el lector de tarjetas. Ahora, puede transferir archivos hacia la computadora o eliminar archivos seleccionados en su tarjeta. Tome en consideración que es necesario utilizar un lector de tarjetas para descargar archivos de foto o audio.
TRANSFERENCIA DE DATOS A UN TELÉFONO INTELIGENTE O TABLETA
- Abra la aplicación AKASO GO y conecte la cámara a la aplicación.
- Toque el icono de reproducción en la esquina inferior izquierda para ver todos los videos y fotos.
- Toque el símbolo y seleccione la foto o video que desea descargar. Luego, toque el símbolo de Descargar en la esquina inferior derecha.
natural_image
Smartphone screenshot displaying a snowy mountain scene with skiers and snow-capped peaks, no visible text or symbols on the main image area.Nota:
-
Si no logra descargar videos o fotos en su iPhone, ingrese a Configuración → Privacidad → Fotos. Busque "AKASO GO" y seleccione "Todas las fotos.
-
El iPhone no le permite descargar videos 4K o 2.7K a través de la aplicación. Descargue videos 4K o 2.7K a través del lector de tarjetas.
MANTENIMIENTO DE LA CAMARA
Para obtener el mejor rendimiento de su cámara, siga los siguientes lineamientos:
- Para obtener el mejor rendimiento de audio, sacuda la cámara o sople el micrófono, para retirar la suciedad alojada en los orificios del micrófono.
- Para limpiar la lente, utilice un paño suave que no suelte pelusa. No inserte objetos extraños alrededor de la lente.
- No toque la lente con sus dedos.
- Evite botar o golpear la cámara, ya que las partes internas se pueden dañar.
- Mantenga la cámara alejada de temperaturas altas y la luz solar intensa, para evitar daños.
MAXIMIZAR LA VIDA DE LA BATERÍA
Si la batería llega al 0% durante la grabación, la cámara guardará el archivo y se apagará. Para maximizar la vida de la batería, siga los siguientes lineamientos cuando le sea posible:
- Apague las conexiones inalámbricas.
- Tome los videos a resolución y velocidad de fotogramas bajas.
- Utilice la función Salvapantallas.
AJUSTE DEL NIVEL DE ZOOM
La función Zoom le permite ajustar qué tan cerca o lejos aparecerá el sujeto en una foto. La configuración predeterminada es Apagado. La función de zoom está disponible en los modos Video, Foto en ráfaga y Foto con temporizador. Brave 4 Pro puede hacer zoom hasta 5X.
- Encienda su Brave 4 Pro.
- Ingrese al modo de Video, Fotos en ráfaga o Fotos con temporizador.
- Haga clic aquí ⊕, para ajustar el nivel de zoom.
FORMATEO DE LA TARJETA DE MEMORIA
Para mantener su tarjeta de memoria en buenas condiciones, formatéela con regularidad. El formateo de la tarjeta eliminará todos sus contenidos por lo que, asegúrese de transferir sus fotos y videos primero.
- Mantén pulsado el botón de encendido para encender tu Brave 4 Pro.
- Presiona el botón Abajo o da click en el ícono de configuración en la pantalla para entrar a Configuración de Cámara.
- Busque la opción Formato en la configuración, luego tóquela.
- La pantalla muestra Espacio de almacenamiento: xxG / xxG y Formatear / Cancelar.
- Presione el botón OK o toque Formato, la pantalla muestra Formateo ... y Formatear correctamente. A continuación, formatee su tarjeta de memoria con éxito.
FUNCIONAMIENTO Y ALMACENAMIENTO DE LA BATERIA
La cámara contiene componentes sensibles, incluyendo la batería. Evite exponer la cámara a temperaturas extremadamente frías o calientes. Las condiciones de altas o bajas temperaturas pueden acortar la vida de la batería o causar que la cámara deje de funcionar adecuadamente temporalmente. Durante el uso de la cámara, evite los cambios drásticos de temperatura o humedad, ya que puede formarse condensación
en o dentro de la cámara.
- No seque la cámara o la batería con fuentes de calor externas como un horno microondas o una secadora de pelo. Los daños causados a la cámara o la batería por la presencia de líquidos dentro de la cámara, están excluidos de la garantía.
- No almacene la batería junto con objetos metálicos como monedas, llaves o cadenas. La cercanía de los terminales de la batería a objetos metálicos, puede causar un incendio.
- No realice ninguna alteración no autorizada en la cámara, ya que puede comprometer su seguridad, el cumplimiento de normativas o su rendimiento, pudiendo anular la garantía.
ADVERTENCIA: no deje caer, desarme, abra, aplaste, doble, deforme, perfore, triture, coloque en el microondas, incinere o pinte la cámara o la batería. No inserte objetos extraños en la apertura de la batería de la cámara. No utilice la cámara o la batería si han sido dañadas, por ejemplo, si están agrietadas, perforadas o dañadas por el agua. Desarmar o perforar la batería puede causar una explosión o incendio.
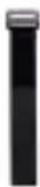
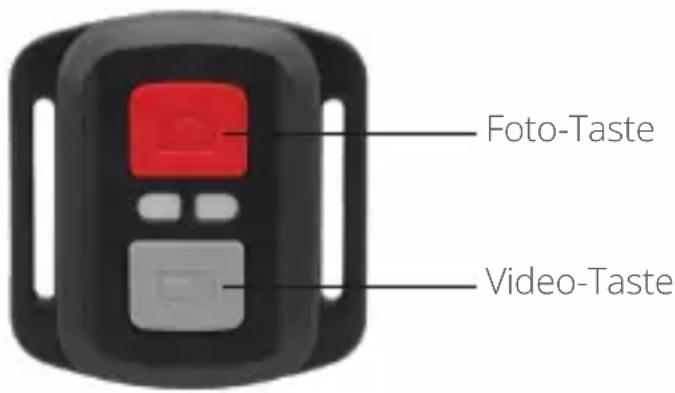
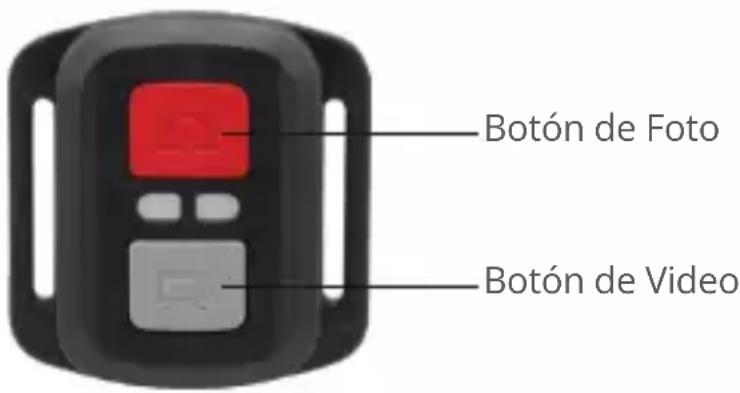
CONTROL REMOTO
A prueba de salpicaduras, no impermeable
VIDEO
Para grabar videos, ponga la cámara en modo de Video.
Para comenzar la grabación:
Presione el botón gris de Video. La cámara emitirá un pitido y la luz indicadora de la cámara parpadeará mientras esté grabando.
Para detener la grabación:
Presione el botón gris de Video otra vez. Cuando la cámara deje de grabar, emitirá un pitido y la luz indicadora dejará de parpadear.
FOTO
Para tomar una foto, ponga la cámara en el modo de Foto.
Para tomar una foto:
Presione el botón rojo de Foto. La cámara emitirá un sonido de obturación.
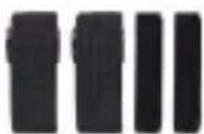
REEMPLAZO DE LA BATERÍA CR2032 DEL CONTROL REMOTO DE LA BRAVE 4 PRO
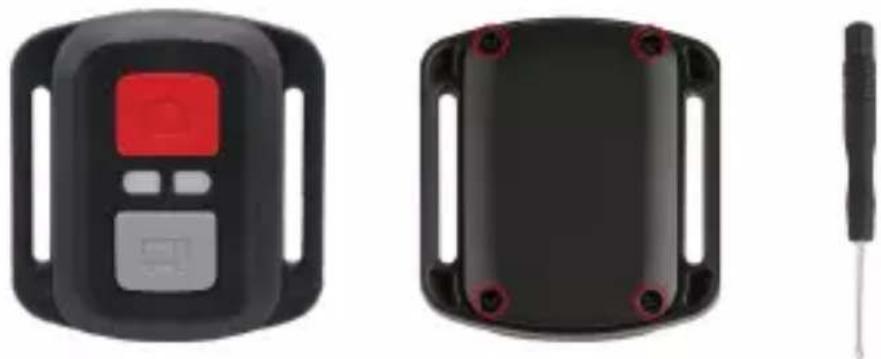
- Utilice un destornillador Phillips de punta de 1.8mm y retire los 4 tornillos de la tapa posterior del control remoto, para abrirlo.

natural_image
Three black electronic devices: a digital display, a black rectangular casing with red mounting holes, and a small tool (no visible text or symbols)- Retire los otros 4 tornillos de la tarjeta PCB.