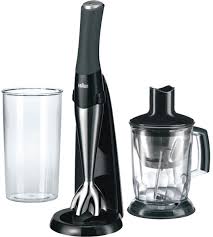
MULTIQUICK 7 MR 730 CM, MULTIQUICK 7 MR 740 CC - Blender BRAUN - Free user manual and instructions
Find the device manual for free MULTIQUICK 7 MR 730 CM, MULTIQUICK 7 MR 740 CC BRAUN in PDF.


User questions about MULTIQUICK 7 MR 730 CM, MULTIQUICK 7 MR 740 CC BRAUN
0 question about this device. Answer the ones you know or ask your own.
Ask a new question about this device
Download the instructions for your Blender in PDF format for free! Find your manual MULTIQUICK 7 MR 730 CM, MULTIQUICK 7 MR 740 CC - BRAUN and take your electronic device back in hand. On this page are published all the documents necessary for the use of your device. MULTIQUICK 7 MR 730 CM, MULTIQUICK 7 MR 740 CC by BRAUN.
USER MANUAL MULTIQUICK 7 MR 730 CM, MULTIQUICK 7 MR 740 CC BRAUN
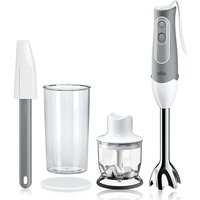
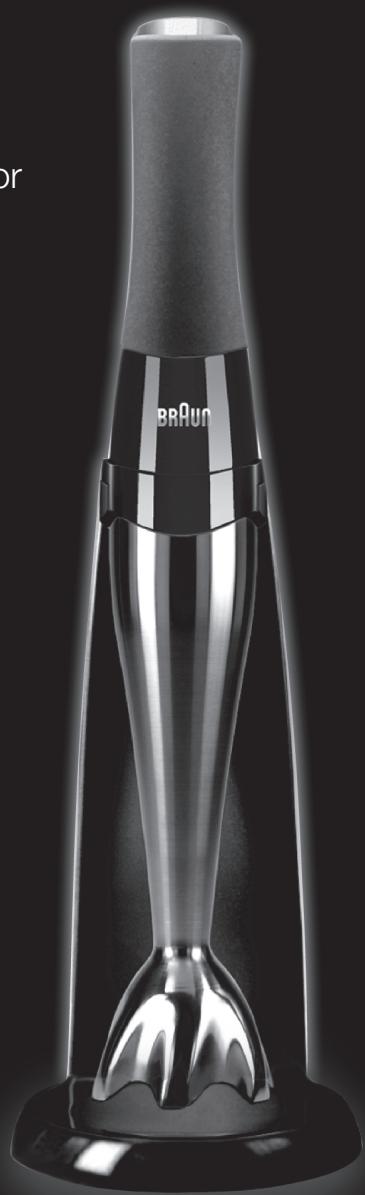
Cordless Hand Processor
Deutsch 6
English 9
Français 14
Espanol 18
Portugues 21
Italiano 25
Nederlands 28
Dansk 31
Norsk 34
Svenska 37
Suomi 40
Eληνικά 43

Braun Infolines

A 0080027286463
00800 BRAUNINFOLINE

0844-884010

08007837010

1800509448

0800944802

080014592

901 11 61 84

808 20 00 33

(02) 6 67 86 23

0800-4455388

70150013

22630093

020-213321

020377877

1800641820

0800108909

852-25249377
(Audio Supplies Company Ltd.)
Internet:
www.braun.com
www.service.braun.com
Braun GmbH
Our products are engineered to meet the highest standards of quality, functionality and design. We hope that you thoroughly enjoy your new Braun appliance.
Please read the use instructions carefully and completely before using the appliance.
Caution

The blades are very sharp! Handle blades with utmost care in order to prevent injuries.
- High risk of injury by switching on the appliance unintentionally. As this is a rechargeable appliance, it is ready for use anytime (when charged).
- Do not expose the appliance to direct sunlight.
- When the blades are blocked remove motor part from blender shaft, before removing the food/ blockage.
- Before cleaning, remove blender shaft from motor part.
- The appliance is constructed to process normal household quantities.
- This appliance is provided with a special cord set with an integrated Safety Extra Low Voltage power supply. Do not exchange or manipulate any part of it. Otherwise there is risk of electric shock.
- Only use the appliance with the charging unit supplied.
- The charging unit can remain permanently connected to the mains.
- Protect the motor part, the charging unit and special cord set against humidity. Motor part and power supply of special cord set must no longer be used after they have been immersed in water.
- This appliance is not intended for use by children or persons with reduced physical or mental capabilities, unless they are given supervision by a person responsible for their safety. In general, we recommend that you keep the appliance out of reach of children. Children should be supervised to ensure that they do not play with the appliance.
- Before use, make sure that charging unit and special cord set are not damaged. Braun electric appliances meet applicable safety standards.
- Repairs or the replacement of the mains cord must only be done by authorised service personnel.
- Faulty, unqualified repair work may cause considerable hazards to the user.
Description
1 Pilot light
2 Switch release button
3 On switch (
4 Motor part
5 Push buttons for releasing the accessories
6 Blender shaft
7 Beaker
8 Charging unit (incl. cord storage)
9 Special cord set
10 Chopper attachment
(a) Gear lid
(b) Blade
(c) Chopper bowl
(d) Anti-slip base/lid
(e) Ice blade
(f) Ice crusher insert
Charging
The ideal temperature range for charging is between 15^ and 35^ .
Make sure that the charging unit (8) is located on a level surface. Connect the charging unit to the mains via the special cord set.
For charging, place the complete handblender in the charging unit (8) - (motor part alone also possible).
The green pilot light confirms that the appliance is properly inserted in the charging unit and that it is being charged.
Full charge: ca. 2 hours
- Fully charged: the pilot light flashes with longer intervals
Operation time is ca. 20 minutes (depending on way of usage)
After every usage, place the appliance back onto the charging unit for recharging. This will make sure that it is always ready for use with optimum charging conditions. You may as well store the appliance on the charging unit. Even if not in use for a long period of time, the lithium ion batteries implemented maintain their charging level to a large extent.
The batteries are protected against deep discharge. A completely discharged appliance has to be charged for at least ca. 15 minutes before it can be used for an application (e.g. soup).
Pilot Light
| Appliance in charging unit (connected to the mains) | Charging or operation conditions |
| Green flashing | Battery is charging |
| Green flashing (in longer intervals) | Battery is fully charged |
| Switch release button (2) pressed down | Charging or operation conditions |
| Green | Battery is fully charged |
| Red/green flashing | Charge sufficient for at least one usage |
| Red | Battery is discharged |
| Red | Overheating protection active (go to Safety features → Overheat protection) |
Safety features
Switching on the appliance / Switch lock
The appliance has a switch lock. To safely switch it on, follow these points:
1 First press the switch release button (2) with your thumb and hold.
2 Then press the On switch (3). During operation, you can stop pressing the switch release button.
- If the On switch (3) is not pressed within 5 seconds, the appliance cannot be switched on. The pilot light goes off.
- In order to switch the appliance on, start again with step 1.
Overheat protection
When the overheat protection feature is active, the appliance turns off and the pilot light shines permanently red.
| Reason | Trouble shooting |
| Blade is blocked | 1. Remove motor part 2. Remove the food/ blockage 3. Place the motor part into the charging unit (connected to the mains) for at least 1 second 4. Processing can be continued |
| Appliance is overheated | Follow points 1.-4. If the pilot light still shines red when switching on the appliance, place the motor part back into the charging unit and let it cool down for ca. 1 hour. During this time, the pilot light flashes green. |
Auto Off
For safety reasons the appliance turns off after 4 minutes of permanent usage. The appliance can be turned directly on again.
Using your handblender
The handblender is perfectly suited for preparing dips, sauces, soups, mayonnaise and baby food as well as for mixing drinks and milkshakes.
a) Remove knife protection at the bottom of the blender shaft by removing the adhesive tape. Insert the motor part (4) into the blender shaft (6) until it locks.
b) Introduce the handblender vertically into the vessel, keep the switch release (2) pressed down, then press the On switch (3).
c) To remove the blender shaft from the motor part, press push buttons (5).
When operating the handblender in hot liquids do not immerse the blender shaft into - or remove it from the liquid while the appliance is switched on.
Recipe example:
Mayonnaise
200-250 ml oil,
1 egg (yolk and white),
1 tbsp. lemon juice or vinegar, salt and pepper to taste
Put all ingredients into the beaker according to the a.m. order. Introduce the handblender to the base of the beaker. After switching on, keep the handblender in this position until the oil emulsifies. Then, without switching off, slowly move it up and down until the mayonnaise is well combined.
Using your chopper attachment
The chopper is perfectly suited for chopping meat, cheese, onions, herbs, garlic, carrots, walnuts, almonds, prunes etc.
N.B.: Do not chop extremely hard food, such as nutmeg, coffee beans and grains.
Before chopping ...
- pre-cut meat, cheese, onions, garlic, carrots, chilis (see processing guide S. 5)
- remove stalks from herbs, un-shell nuts
- remove bones, tendons and gristle from meet.
Chopping
(see picture section A)
- Carefully remove the plastic cover from the blade (10b). Caution: the blade is very sharp! Always hold it by the upper plastic part. Press the blade onto the centre pin of the chopper jug (10c) until it locks. Always place the chopper jug on the anti-slip base (10d).
- Place the food in the chopper jug.
- Put the gear lid (10a) on the chopper jug.
- Insert the motor part into the gear lid until it locks.
- Keep the switch release button (2) pressed down and press the On switch (3) to operate the chopper. During processing, hold the motor part with one hand and the chopper jug with the other. When chopping hard foods, press down the motor part.
- After use, press buttons to remove the motor part.
- Then remove the gear lid.
- Carefully take out the blade.
- Remove the processed food from the chopper jug. The anti-slip base also serves as an airtight lid for the chopper jug.
For purées, when very fine results are preferred, you may also use the handblender shaft in the jug.
Light dough (pancake batter)
First pour liquids into the jug, then add flour and finally eggs.
Crushed ice
(see picture section B)
- Place the ice crusher insert (10f) into the jug. Ensure it fits properly.
- Place the shaft of the ice blade (10e) into the centre hole of the ice crusher insert and press it down.
- Fill ice cubes into the ice crusher insert.
- Fit the gear lid on the jug.
- Insert the motor part into the gear lid until it locks.
- Keep the switch release button (2) pressed down and press the On switch (3) to operate the chopper. After use, press buttons to remove the motor part. Then remove gear lid, ice blade and ice crusher insert.
- Remove the crushed ice or simply fill your drink into the jug for serving at the table. Alternative: First mix fruits in the jug with the chopper blade (10b), filling it up to 0.5 litres maximum. Remove the blade and place the ice crusher insert into the jug in order to crush ice directly into the pureed fruits.
Cleaning
Before cleaning remove the motor part. Do not immerse the motor part (4) and charging unit (8) in water nor hold them under running water. These parts can only be cleaned with a damp cloth. The chopper gear lid (10a) is not dishwasher-proof. All other parts are dishwasher-proof.
When processing foods with colour (e.g. carrots), the plastic parts of the appliance may become discoloured. Wipe these parts with vegetable oil before cleaning them.
For electric specifications, please see printing on the special cord set. The special cord set automatically adapts to any worldwide AC voltage.
Subject to change without notice.
This appliance contains Li-1on rechargeable batteries. Please do not dispose of the product in the household waste at the end of its useful life. Disposal can take place at a Braun Service Centre or at appropriate collection points provided in your country.

For UK only:
Guarantee
We grant 2 years guarantee on the product commencing on the date of purchase. Within the guarantee period we will eliminate, free of charge, any defects in the appliance resulting from faults in materials or workmanship, either by repairing or replacing the complete appliance as we may choose.
This guarantee extends to every country where this appliance is supplied by Braun or its appointed distributor.
This guarantee does not cover: damage due to improper use, normal wear and tear (e.g. shaver foil or cutter block) as well as defects that have a negligible effect on the value or operation of the appliance. The guarantee becomes void if repairs are undertaken by unauthorised persons and if original Braun parts are not used.
To obtain service within the guarantee period, hand in or send the complete appliance with your sales receipt to an authorised Braun Customer Service Centre.
This guarantee in no way affects your rights under statutory law.
For Australia & New Zealand only:
Warranty
We grant a 24 Month Replacement Warranty on this appliance commencing on the date of purchase.
This warranty applies in all States and Territories of Australia and in New Zealand and is in addition to any mandatory statutory obligations imposed on Procter & Gamble Australia Pty. Ltd., its distributors and its manufacturer. This express warranty does not purport to exclude, restrict or modify any such mandatory statutory obligations.
This warranty only covers defects in the appliance resulting from faults in workmanship or materials. Therefore, if your appliance becomes faulty as a result of faults in workmanship or materials, it will be exchanged by your retailer, on presentation of proof of purchase.
This warranty only applies to domestic or household use of this appliance and the warranty will only apply if the correct operating instructions included with this product have been followed. The warranty on any appliance replaced under this warranty ends on the expiry of the warranty period that applied to the original appliance.
This warranty does not cover:
A. Damage arising from improper use or operation on incorrect voltages.
B. Breakages to shaver foils, glass jars, etc.
C. Normal wear due to moving parts.
D. Repairs undertaken by unauthorised service personnel or use of non genuine parts.
E. Appliances that are outside the warranty period or are not faulty.
This appliance is not intended for use by young children or infirm persons without supervision. Young children should be supervised to ensure that they do not play with the appliance.
If the appliance is powered by a cord extension set or electrical portable outlet device these should be positioned so they are not subject to splashing or ingress of moisture.
To the extent permitted by the laws of the Commonwealth of Australia and New Zealand and applicable laws of a State or Territory of Australia, and subject to the second paragraph of this warranty above, this warranty is given in exchange for any other rights you may have against Procter & Gamble Australia Pty. Ltd. or its distributors or manufacturer, whether at law, in tort (including negligence), in equity or under statute.
Please retain proof of purchase of this appliance. If you have any questions in relation to this warranty, please call our Consumer Service line (see below for numbers).
Repairs and service
If you are sending your appliance for repair, please pack the appliance adequately and send it to your nearest Service Agent.
For service or replacement parts refer to the authorised Service Agents listed overleaf. Local Service Agents may change from time to time - in that event please contact the Consumer Service free call number below for updated local service agent details.
Australian Consumer Service (free call): 1800641820
New Zealand Consumer Service (free call): 0800108909

N2820
Australian & New Zealand Service Agents
VICTORIA & TASMANIA
Statewide Services Pty Ltd
trading as J A Appliances
17-19 Hossack Avenue
Coburg North, VIC 3058
Tel. (03) 8371 9100
Fax. (03) 9355 8644
Email: jaappliances@
statewideservices.com.au
QUEENSLAND
Walters Import trading as
Brisbane Appliance Service Centre
449 Beaudesert Road
Moorooka
QLD 4105
Tel. (07) 3277 0360
Fax. (07) 3274 2909
Email: basc@waltersimport.com.au
WESTERN AUSTRALIA
Mark 1 Appliances
Unit 1, 46 Abernethy Road
Belmont, WA 6104
Tel. (08) 9475 0911
Fax. (08) 9475 0922
Email: mark1app@iinet.net.au
NEW SOUTH WALES & ACT
Faulder Appliance Services Pty Ltd
Shop 4, 9 Evans Road,
Rooty Hill, NSW 2766
Tel. (02) 9625 3064
Fax. (02) 9625 3037
Email:fas16@bigpond.com
SOUTH AUSTRALIA & NT
Adelaide Service Centre
Shop B2,
Parkholme Shopping Centre
319 Oaklands Road, Parkholme
Adelaide, SA 5043
Tel. (08) 8357 5800
Fax. (08) 8357 5833
Email: ascpkh@adam.com.au
NEW ZEALAND
Key Service Ltd
7D Echelon Place
East Tamaki
Manukau City
Auckland
New Zealand
(PO Box 38569, Howick, Auckland,
New Zealand)
Tel. (09) 916 0960
Fax. (09) 916 0970
Email: key-service-ltd@xtra.co.nz