
GP12 - Gps TAKARA - Free user manual and instructions
Find the device manual for free GP12 TAKARA in PDF.

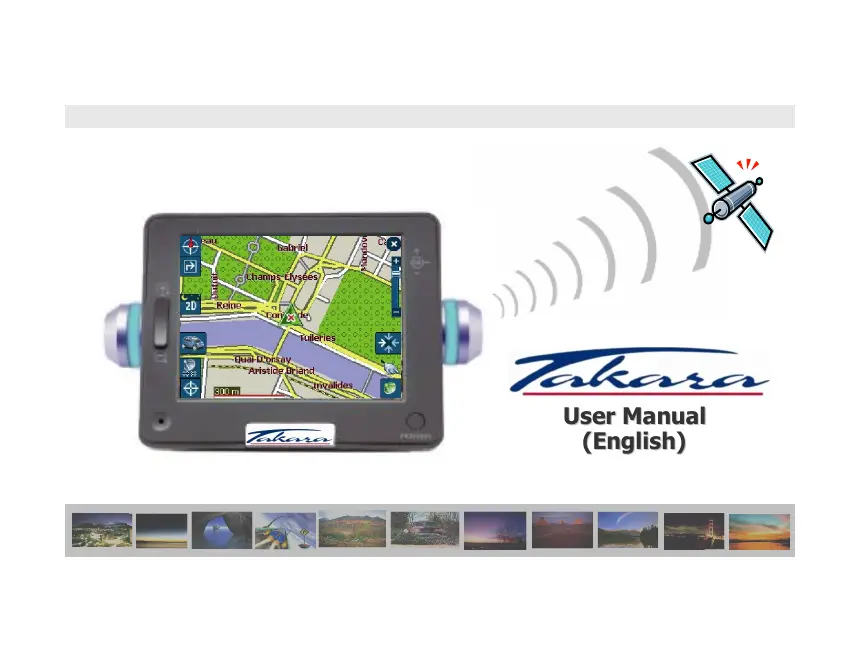


| Product Type | GPS Navigation System |
| Brand | TAKARA |
| Model | GP12 |
| Screen | Color touchscreen LCD, high brightness, anti-glare treatment, millions of colors, landscape format |
| Processor | High-performance processor |
| GPS Receiver | SIRFIStar / SIRFIIXtrac, fast hot/cold start, external antenna support |
| Storage | SD memory card reader (card not included as standard) |
| Supported Multimedia Formats | MP3, MPEG4, JPEG |
| Operating System | Microsoft WinCE .Net |
| Battery | Rechargeable built-in lithium-ion battery |
| Power Supply | 12V cigarette lighter adapter (included), optional AC adapter |
| Connectivity | USB, audio output, external GPS connector |
| Navigation Functions | Voice instructions, turning light indicators, preinstalled maps on SD card |
| Additional Functions | MP3 player, video player, photo viewer, brightness adjustment, screen calibration, time setting |
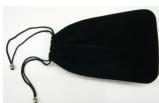
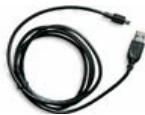
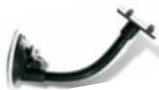
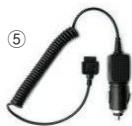
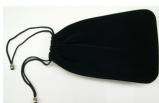
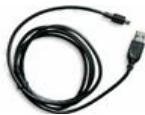
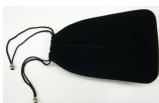
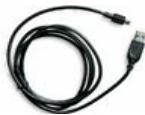
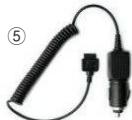
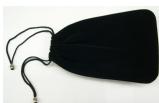
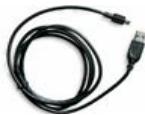
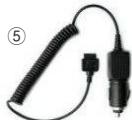
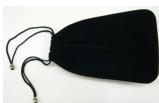
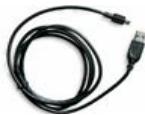
| Included Accessories | Manual CD, quick guide, suction cup mount, stylus, cigarette lighter adapter, carry case, USB cable |
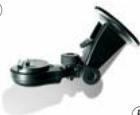
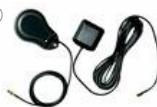
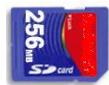
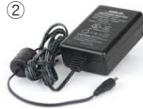
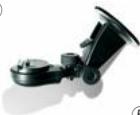
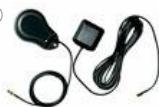
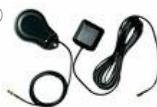
| Optional Accessories | SD card, AC adapter, mounting bracket, deluxe case, external GPS antenna |
| Weight | Approx. 200 g |
| Dimensions | Approx. 130 x 85 x 25 mm |
| Operating Temperature | 0°C to 50°C |
| Maintenance | Clean with a soft damp cloth, do not use chemicals |
| Safety | Do not use while driving, do not expose to excessive heat, handle Li-ion battery with care |
Frequently Asked Questions - GP12 TAKARA
User questions about GP12 TAKARA
0 question about this device. Answer the ones you know or ask your own.
Ask a new question about this device
Download the instructions for your Gps in PDF format for free! Find your manual GP12 - TAKARA and take your electronic device back in hand. On this page are published all the documents necessary for the use of your device. GP12 by TAKARA.
USER MANUAL GP12 TAKARA
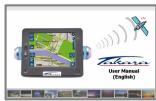
User Manual (English) 25
natural_image
Line drawing of a flexible hose with a pointed tip and handle (no text or symbols)natural_image
Technical line drawing of a mechanical device with no visible text or symbolsnatural_image
Technical line drawing of a mechanical assembly with no visible text or symbols③
natural_image
Close-up of a black curved mechanical component with a flat top and flange (no text or symbols visible)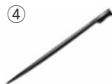
natural_image
Coiled black cable with a connector and plug, labeled with number 5 (no text or symbols on the device itself)⑥
natural_image
Black fabric bag with string tied with small accessories (no text or symbols visible)⑦
natural_image
Coiled black USB cable with connector (no text or symbols visible)natural_image
Electric compact charger with black body, cables, and earplugs (no visible text or symbols)③
natural_image
Mechanical component with black housing and mounting bracket (no visible text or symbols)④

⑤
natural_image
Coiled black electronic components with a square connector (no text or symbols visible)natural_image
Woman driving a car at night, wearing a blue shirt and headlamp (no visible text or symbols)
flowchart
graph LR
    A["TIME SET"] --> B["CALIBRATE"]
    B --> C["ABOUT"]
    D["Careful press and briefly hold stylus on the center of the target. Repeat as the target moves around the screen."] --> E["+"]
    E --> F["New calibration settings have been measured. Key to accept the new settings."]


natural_image
Technical line drawing of three electronic component packages (no text or symbols)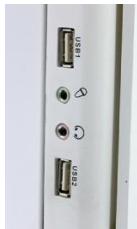
natural_image
Close-up of a vertical panel with two USB ports and three circular buttons, no visible text or symbolsnatural_image
Illustration of a satellite with signal waves and solar panels (no text or symbols)
User Manual (English)


Thank you for choosing and purchasing the Takara Navigation system, the most complete on the market. This model includes:
√ CPU to ensuring remarkably powerful performance
√ LCD equipped with extremely high brightness, anti-reflective view, millions of colors and landscape-style display
√ Premium multimedia function supporting, navigation, music (MP3), video (MPEG4) and picture (JPEG)
√ Dream-speed GPS (SIRFIStar/SIRFIIXtrac) proudly presenting exceptionally quick cold/warm/hot start as well as extensibility to external antenna
√ Slim, chic and unique design highlighted with charming turn-indicating lamps
√ SW based on Microsoft WinCE .Net and easy-to-use mapping data plus navigation application preinstalled in SD memory card
"In order to validate the warranty and to join the TAKARA Navigation Mobile Club, it is mandatory to register the number of the device, your name and address, as well as your e-mail address. Thanks to the TAKARA Navigation Mobile Club, you will enjoy various types of services which will enable a perfect evolution of your TAKARA Navigation device.
The Customer Service."
1. About This Book
This handbook provides a quick guide to the TAKARA NAVIGATION system, and the basic functions of the device are described, mainly in respect of hardware. For reasons of product development some of the information is not up-to-date as yet, and contents may be changed at any time without prior notification. No liability shall be assumed for technical or editorial errors or omissions herein; nor for incidental or consequential damages resulting from the performance or use of this material.
This document contains information protected by copyright and thus may not be reproduced in whole or in part for any purpose whatsoever. Likewise, it may not be transmitted or reproduced in any form whatsoever, whether electronically or mechanically - including photocopying and recording.
All brands and trademarks mentioned in this document may be registered by a third party and subject to current legislation and to the rights of their respective owners, without reservation. The absence of explicit labeling of registered trademarks does not admit the conclusion that the brand is not subject to the rights of third parties.
2. For Proper/Best Use
2.1 General
⑧ Effective route planning prior to beginning each journey is recommended. If you need to setup a new itinerary while en route, find an absolutely safe place in which to do so, or drive to a parking site first. For your own safety, do not operate the product while driving.
⑥ The product is intended to be used only as a navigation aid, not as a precise measurement of direction, distance, location or topography. Because calculated routes and voice guidance are for reference only and may be different from the actual road circumstances, it is the user's responsibility to follow traffic signs, road layout and local regulations above all else.
© When you get out of the car, please do not leave your device on the dashboard in direct sunlight, since an overheated battery can cause malfunction and/or hazard. Use the product within the recommended operational temperature range (0°C \~ 50°C), and do not expose it to excess heat or cold.
① GPS satellite signals cannot pass through solid materials other than glass. So when you are inside a tunnel or a building or in case of metallic windshield, GPS positioning may not be available. Likewise, signal reception can be affected by
situations such as bad weather or dense overhead cover such as trees. Similarly, wireless devices may interfere with satellite signals, causing variable signal reception.
⑧ Look at the display only when it is absolutely safe to do so. If you have not fully understood
2. For Proper/Best Use
2.1 General
the instructions given by the device, or if you are not sure about what to do next, you may refer briefly to the map or arrow view of your navigation system.
A car holder is necessary when using the device in a car, and it is strongly recommended that you place the device in an appropriate place, avoiding areas for example which obstruct airbag panels and instrumentation, or which interfere with the driver's vision.
⑨ Taking good care of your device will ensure trouble-free operation and reduce the risk of damage to it. Use only the stylus to tap on the screen. Avoid touching it with your fingers, pens, pencils or any other sharp objects. Never clean your device with the power on. Use a soft, lint-free cloth moistened with water to wipe the screen and the exterior of your device. Do not use paper towels to clean the screen. Do not place anything on top of your device or drop objects on top of it. Do not drop your device or subject it to severe shock. Be careful not to sit on your device when it is in the back pocket of your trousers, etc. The screen surface is easily scratched.
Keep your device away from excessive moisture and extreme temperatures. Do not subject your device to sudden and severe temperature changes that could cause condensation inside the unit, with consequent damage. In the event of moisture condensation, allow your device to dry out completely. Avoid exposing your device to direct sunlight or strong ultraviolet light for extended periods of time.
2. For Proper/Best Use
2.2 Safety Precaution
① Main System
Never attempt to disassemble, repair or make any modification to your device since this could cause damage to the device, and even bodily injury or property damage. Do not store or carry flammable liquids, gases or explosive materials in the same compartment as your device and its parts or accessories.
⑥ Battery
This device contains an non-replaceable Lithium-Ion internal battery that can burst or explode, releasing hazardous chemicals. To reduce the danger of fire or burns, never disassemble, crush, puncture, or dispose of in fire or water. Since there is a high risk of explosion if the battery is replaced by an incorrect type, replace it only with same type or an equivalent one recommended by the manufacturer. The battery must be recycled or disposed of properly. Similarly, use a specified battery charger as approved by the manufacturer.
© Adapter
Never use the AC adapter in a high-moisture environment, or touch it when your hands/feet are wet. Also,
for cooling purposes, make sure there is adequate ventilation around the adapter when in use, and do not cover it with paper, vinyl, cloth (including the carrying case) or any other material. The adapter moreover, must be connected to the correct power source, according to the voltage requirements indicated on the case or packaging of the product. Do not attempt to service the unit if its power lead or body becomes damaged or exposed to excess moisture.
(d) SD Memory Card
Keep SD or MMC cards in a well-protected case so as to avoid dust and humidity when you are not using it, and also make sure that no foreign objects can enter the SD slot.
2. For Proper/Best Use
2.3 Customer Support
In case of problems with the navigation software, please call the following number.
Service Hotline: +33.(0)4.93.51.27.02
The Call Center is open from Monday-Friday from 09:00 to 12:00 and 15:00 to 17:00 (not on weekends).
Questions may also be mailed to: contact@takara.fr
3. Getting It Started
3.1 Inserting a SD Card
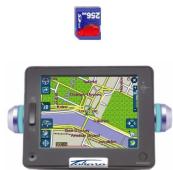
Your device has an SD slot in the centre of the top, for an optional Secure Digital card storing the initial startup program, digital maps and other data i.e. MP3 files, movie files and image files. To use the memory card, insert it with the connector pointing down into the slot, and the label facing the front of the device. To remove the card, first make sure that no application is accessing it, slightly push the top of the card to release it, and then pull it out of the slot. To take out the card, please turn off the unit. Before to insert another card, please press on the reset button. When you put SD Card into SD Slot located at the top device, please give a deep and hard push, which works for taking it out of the slot as well.
3.2 Mounting & Connecting
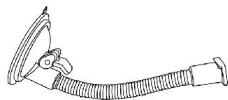
natural_image
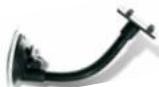
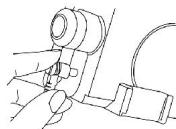
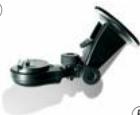
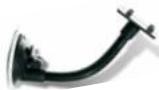
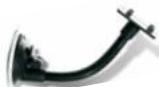
Line drawing of a flexible hose with a bulbous cap (no text or symbols)- First, clean the windshield. Then, Push the center of the suction cup onto the wind-hield and then press the fixing lever down

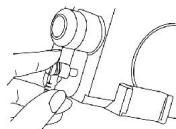
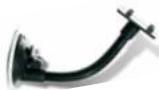
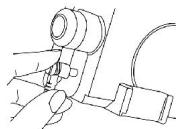
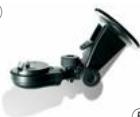
- Slide the rectangular part of the suction-cup mount into the corresponding part at the bottom rear of the unit

natural_image
Technical line drawing of a mechanical device with no visible text or symbols
natural_image
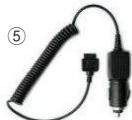
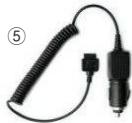
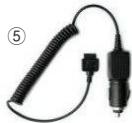
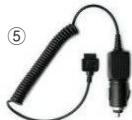
Technical line drawing of a mechanical assembly with no visible text or symbols- Insert the jack at the end of the DC power lead into the small socket on the side of device and put the other end into the cigar lighter socket.
3. Getting It Started
3.3. Power Manipulation
| Function | Concept | How To Do |
| Power On | In the literal sense of the word (no other special explanation should be necessary) | Pressing Power Switch. In case of first use or when device is discharged, connect power into the unit thru cigar power jack or AC adaptor, then press Power Switch button. |
| Reset | A state where the reset of CPU itself applies as well (you can choose this as a last resort in case system doesn't seem to work properly) | Pressing Reset Switch once |
| Power Off | A state where whole power has been completely cut off and only battery charging logic is still working (in case 12V power jack is connected to device, battery can be charged through such a logic) | Pressing Power Switch and Reset Switch simultaneously and then softly releasing Power Switch only |
| Sleeping Mode | A state where CPU has already gone into power-saving state and only SDRAM and battery-charging circuit of external logic are still running. | Pressing Power Switch for more than 3 sec until Blue LEDs blink and then getting it off |
| Screen Saving Mode | A state only the screen is powered off | Pressing shortly on Power Switch |
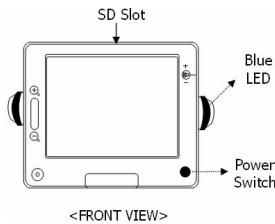
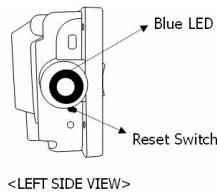
WARNING: the battery is still running and discharging in all modes, except Power Off mode.
* Please allow this delicate gadget to have enough time for its operation (e.g. in pressing buttons, tapping touch screen, executing each menu, pushing in/out SD card etc.) since running it too hastily/excessively often leads to mechanical trouble.
4. Hardware Features
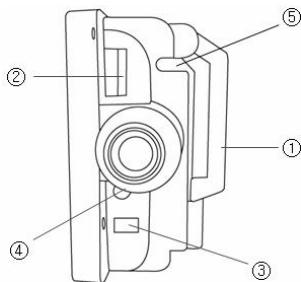
4.1 Front View
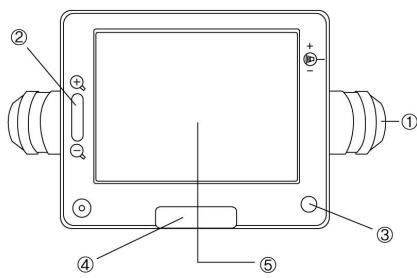
① Turn-Indicating Lamp
② Map Zoom-In/Out Button
③ Power On/Off Button
④ Main Menu Button Knob
⑤ Touch Screen
4.2 Rear View5
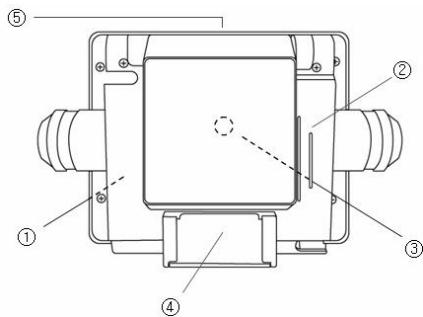
① Built-In Battery
② Speaker
③ External GPS Connector
④ Docking Mount Connector
⑤ Secure Digital Card Slot
4. Hardware Features
4.3 Left Side
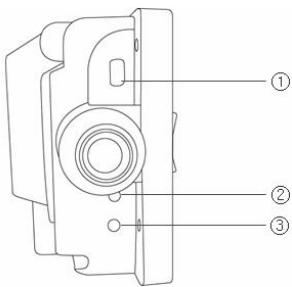
① USB Connector
② Reset Button
③ Sync Button
4.4 Right Side
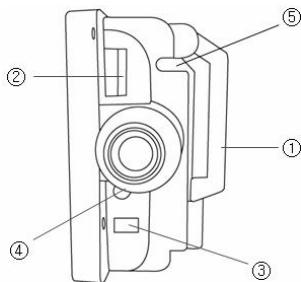
① GPS antenna
② Volume Control
③ Power-Supply Jack
④ Audio-Out Jack
⑤ Stylus-Pen Pocket
5. Hardware Accessories
5.1 Standard
①

②
③
natural_image
Close-up of a black curved mechanical component with mounting flanges (no text or symbols visible)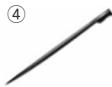
natural_image
Coiled black cable with a connector and connector (no text or symbols visible)⑥
natural_image
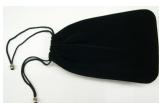
Black fabric bag with pleated ends and a string tied with a small loop (no text or symbols visible)⑦
natural_image
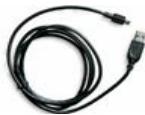
Coiled black USB cable with connector (no text or symbols visible)① Manual CD
② Quick Guide
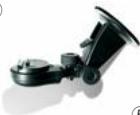
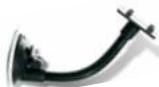
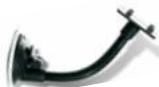
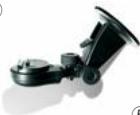
③ Suction-Cup Mount
④ Stylus-Pen
⑤ Cigar-Lighter Adapter
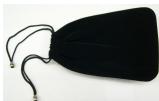
⑥ Carrying Case
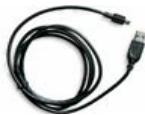
⑦ USB Cable
5.2 Options
①
②
natural_image
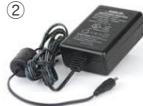
Electric compact charger with black body, cables, and power cord (no visible text or symbols)③
natural_image
Mechanical component with black lever and mounting bracket (no visible text or symbols)④

⑤
natural_image
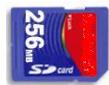
Coiled black electronic components with a square connector (no text or symbols visible)① SD Memory Card
② AC Power Adapter
③ Hard-Case Mount
④ Luxury Case
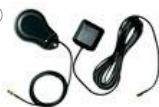
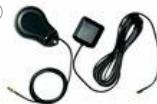
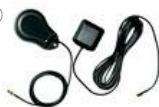
⑤ External GPS Antenna
6. A Look at the Home Screen
6.1 Overview
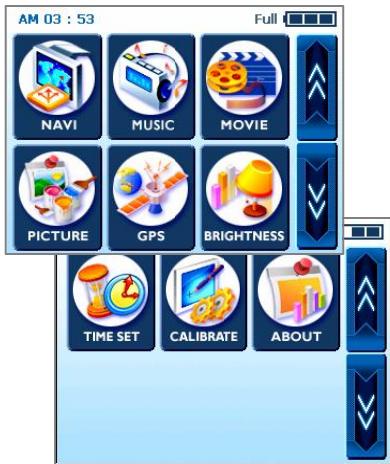
When you first turn your device on, the home screen appears as shown here. At the top right corner you can see a battery-status indicator, together with the actual percentage of charge remaining, whilst the time clock is at the top left corner.
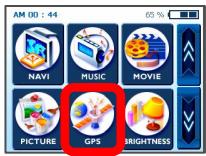
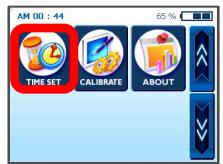
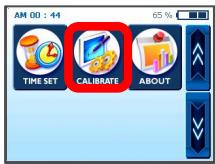
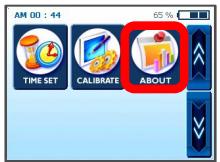
For the main menus, there is first a group of the six most frequently used buttons (NAVI, MUSIC, MOVIE, PICTURE, GPS & BRIGHTNESS), which appear in the centre, and then when you click the down arrow button on the right hand side, three more (TIME SET, CALIBRATE, & ABOUT) come up.
Each button represents a software feature (NAVI, MUSIC, MOVIE or PICTURE) or a setting-related function (GPS, BRIGHTNESS, TIMESET, CALIBRATE or ABOUT); to access one of them, just tap the corresponding button. Remember to press the TAKARA knob button whenever you jump back to the Home Screen or step back to an upper-level screen. The following sections describe these nine buttons.
6. A Look at the Home Screen
6.2 Navigation
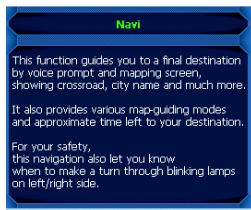
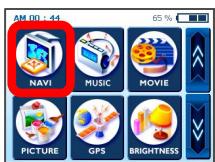
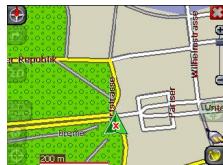
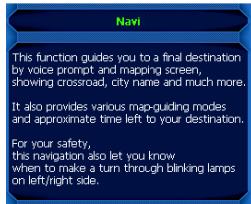
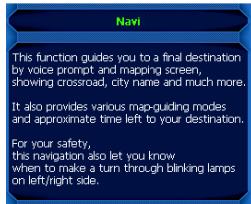
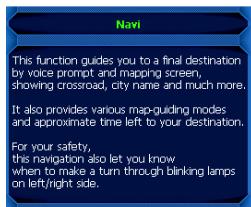
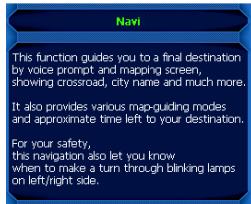
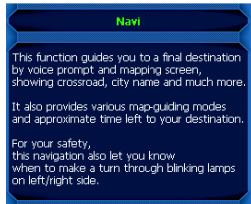
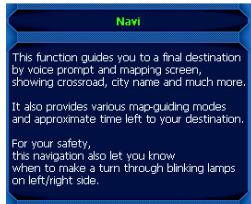
This function guides you to your final destination by voice prompts and a mapping screen, showing crossroads, city names and much more. It also provides various map-guiding modes and the approximate time left to your destination. For your safety, it also lets you know when to make a turn, by means of a blinking lamp on the left/right side.
Pop into the Navi menu and wait for the navigation program to load all the necessary data. Soon a digital map will appear before your eyes. For further information regarding navigation usage, refer to the separate quick-guide book dedicated to the map application, or the full-version user manual contained in the SW CD provided with the TAKARA navigation package.



6. A Look at the Home Screen
6.3 Music
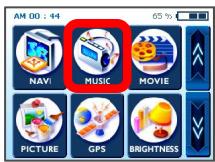
Thanks to this program, you can listen to your favorite music while driving. Since the MP3 browser has been pre-installed, you just need to download and save your favorite songs.
When stepping into the Music menu, you will find a complete digital MP3 player in your device. The upper part of the player has a play list from which you can select, and also a music slider which helps you to select the point where you want the music to start, by dragging the square button to the right.
There are more buttons in the lower part. In order from the left side: backwards, play-and-pause and, lastly, playback (the cycle-symbol button) to repeat the current file. In addition, a scroll bar and on/off switch are provided, the former for volume control and the latter for sound-on and sound-off.

![Big Mama - Break Away (03.08.02).mp3 Never Ending Story.mp3 [Bon Jovi] Always.mp3 [BritneySpear] MeAgainstTheMusic.mp3 00:56 / 01:49](/content/2024/12/95292/images/aea4e6f0b956586500ef4f1a4e031a79359525f63ec66e656cb5b80ff5adba48.jpg)

![Big Mama - Break Away (03.08.02).mp3 Never Ending Story.mp3 [Bon Jovi] Always.mp3 [Britney'Spears] MeAgainstTheMusic.mp3 00:33 / 01:49](/content/2024/12/95292/images/ad935fa971c65c4fe488d591d0a9a7fc70c61b6d3f681bc46176940589138fc0.jpg)
6. A Look at the Home Screen
6.4 Movie
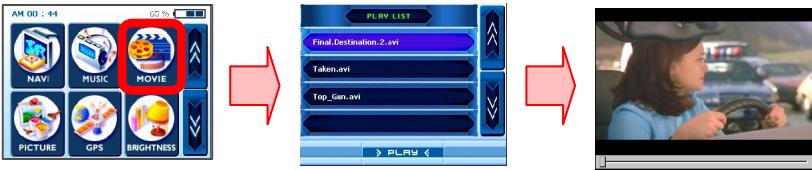
How about enjoying some movies right inside your car? Go for it! - all you have to do is download movie files to the extra storage.
After tapping the Movie button on the Home screen, select an item you want to play by nudging the up or down arrow button. Once you are ready, simply hit the Play button. Now you can feel just as if you are inside some kind of movie theater.
During movie screening, if you have missed a scene and want to go back to a certain point, all you have to do is to touch the screen. The screen will freeze so that you can manipulate the slider to jump from one part of the movie to another. Touching the screen once again will unfreeze the screen.
* Supported format: MPEG4
flowchart
graph LR
    A["AM 00:44 NAV/NAV/NAV"] --> B["MOVIE MOVIE"]
    B --> C["Final Destination.2.avi"]
    C --> D["Token.avi"]
    D --> E["Top_Gen.avi"]
    E --> F["PLAY LIST"]
    F --> G["→ PLAY <"]
6. A Look at the Home Screen
6.5 Picture
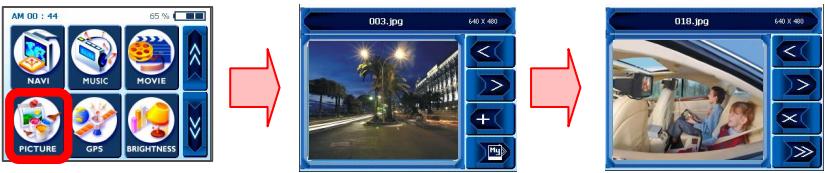
You want to take your precious pictures of home and family with you, everywhere you go? Just save them and play this menu – you will get endless pleasure from it.
To enjoy it, tap the 'Picture' menu and you will see a frame with an image on the left and playing buttons on the right. The left arrow button leads you to a previous image while the right arrow button leads to the next one. If you want to see a picture in full-screen mode, just touch the screen, and everything will disappear except the picture, making your device look like a photo frame.
Further, the plus button enables you to add the present image to your special photo album, and the 'My' button actually takes you to another screen for an album that is full of your favorite collection. The first two buttons at the top function the same as in the previous screen, but the two below act differently. The X button totally deletes the image from the album and the double right arrow button has the same result as touching the screen – i.e. it makes an image full size.
6. A Look at the Home Screen
6.6 GPS
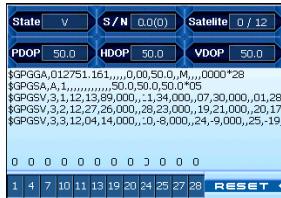
If your Navi appears to be unstable, please check the satellite acquisition signals received by the GPS antenna; tapping into the "GPS" menu and resetting the GPS status may help you to rectify the situation.
Once you get into the second screen, you will find something like a GPS dashboard. There, 'State' gives the overall performance of the GPS antenna in terms of acquiring satellite signals, where V means failure and 2D/3D means success. 'Satellite' tells you which satellite signals are acquired (by the device's antenna) from all that are available. PDOP is an abbreviation of Positional Dilution of Precision, HDOP of Horizontal Dilution of Precision and VDOP of Vertical Dilution of Precision. The numerical values for these three are literally 'the smaller, the better'. At the bottom, you can see cells with unique numbers in them, which represent the respective satellites, and graphic bars with figures below them, which show the current detailed status in obtaining a signal from each satellite. If you want to start afresh, tap the Reset button. The GPS antenna will start all over again. When you change of area, it is recommended to press on the reset button.

6. A Look at the Home Screen
6.7 Brightness
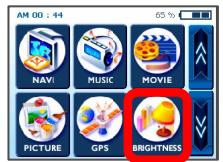
Initially your device has the backlight set to a default setting. However, according the time of day – daytime or nighttime - or other physical conditions or personal needs, you can select the most suitable navigation view, at the most comfortable level, by adjusting the brightness of the screen. Once you customize it, the settings will remain till the next change.
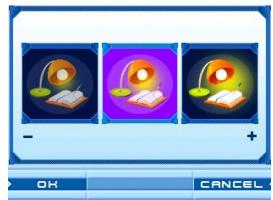
To open the BRIGHTNESS screen, tap the 'BRIGHTNESS' button on the home screen. Three icons will appear there, each indicating a different degree of brightness; the one at the left provides the darkest LCD, the one in the middle gives a moderately lit LCD, and the one at the right produces the brightest LCD screen. By tapping, just choose whichever you wish. If you are completely satisfied with the change you have made in the brightness setting, just touch the OK button on the screen – unless, that is, you want to undo the change by clicking 'Cancel'.

6. A Look at the Home Screen
6.8 Time Setting
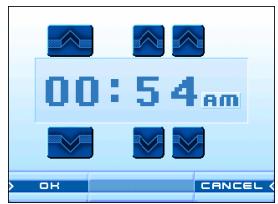
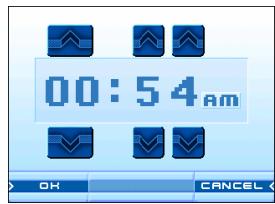
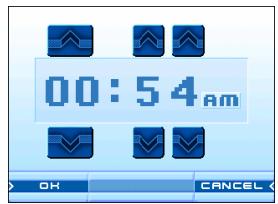
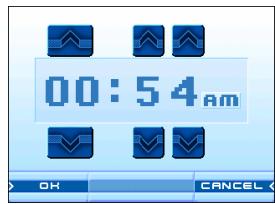
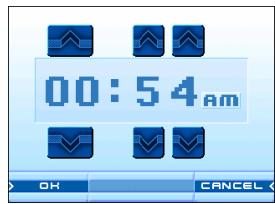
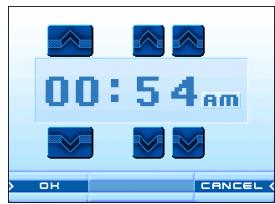
When you are traveling around, you will be better off taking advantage of the time-setting function based on your present location, for the sake of convenience. To set the time, tap the TIME SET button. Then you will see an up arrow over the first set of double figures, and a down arrow under them; these will increase or decrease the 'hours'.
Likewise, up/down arrows over/under the next two single-digit figures - in the same way as before – alter the minutes. In addition, you will find a small AM (or PM) section; tapping it will toggle between the two. When you have completely finished setting the time, just touch the OK button on the screen, unless you want to undo the setting by nudging 'Cancel'.

6. A Look at the Home Screen
6.9 Calibration
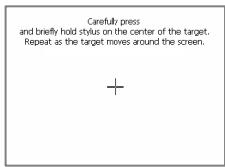
If the touch screen of your device doesn't seem to work correctly - not responding accurately to your stylus taps - you can adjust it with CALIBRATE, the screen-measuring function. After this adjustment, the LCD display screen may be able to perform and react correctly.
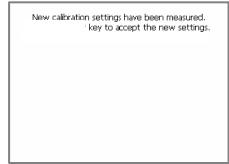
To begin the calibration, tap and hold the center of the target. When the target moves to another position, tap and hold again. Repeat the same step to complete the adjustment. Once the calibration is complete, a new screen with a message starting "New calibration settings have been measured" will appear. If you feel OK with the changed settings, just touch the screen. Otherwise, press the TAKARA button to return to the original menu.


6. A Look at the Home Screen
6.10 About
Here you can find a brief explanation for each function of the main service menu. Enter the About menu and the first thing you will find are some descriptions of the Navi function. If you want to figure out what the other menus are all about, just keep tapping the up or down arrow buttons.


7. Transferring Multimedia Files
7.1 Using USB Cable
① You need the Microsoft ActiveSync Program (of which there are various versions) to be installed in your PC in order to transfer the various music/movie files you want to enjoy, while on the move, to the TAKARA Navigation system; and once you have installed the program, you don't need to do it again. To being with, copy MSASYNC.EXE at the [ActiveSync] folder in the SW CD provided to your PC by double clicking.
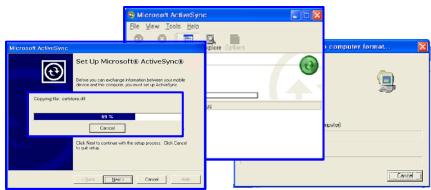
② As for music/movie files, first put the socket of AC power adapter and into an outlet and, at the same time, the other end into DC jack of the device. Next, connect the mini-USB end of the USB cable to its top left and the other end to a USB port on your computer. Next, press the sync button at the bottom left and Move to the appropriate location (folder) in the storage card – going to [my computer], [Mobile Device] and finally [Storage Card] - so that the MP3 Player program can detect and play MP3 files. Select and copy your targeted files/whole folder in one of the drives on your PC, or on a CD or any other type of storage disk to the [my computer]-[Mobile Device]-[Storage Card].
* When you connect the Takara Navigator to a computer through the provided USB cable, it is important not to modify the system files and to limit the connexion to the transfer of files. In case wrong information is transmitted to the Takara Navigator, it should damage irremediably your Takara Navigator. This kind of damage is easily recognizable by our technical services; it is imperative to be really careful with the connexion to a computer. All internal deterioration of the Takara Navigator is not under guarantee.
7. Transferring Multimedia Files
7.2 Using an SD Card Reader
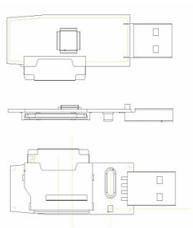
natural_image
Technical line drawing of three electronic component packages (no text or symbols)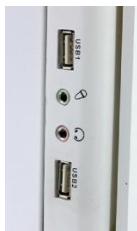
natural_image
Close-up of a vertical panel with two USB ports and three circular buttons, no visible text or symbols① Insert an SD storage card (there are brands specified/ supported by TAKARA Navigation) into your device and turn on your computer and the device. Once the SD reader and your PC are connected by a mini USB cable, move the desired objects to the SD card
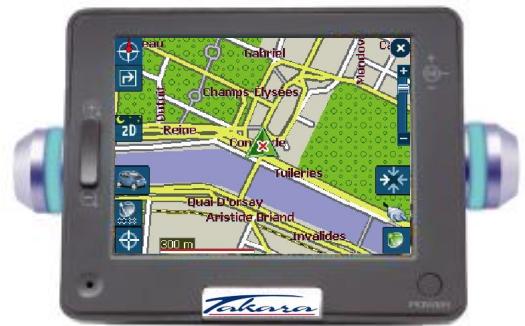
Takara
natural_image
Line drawing of a flexible hose with a bulbous cap (no text or symbols)
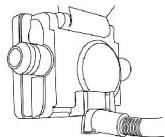
natural_image
Technical line drawing of a mechanical device with no visible text or symbols
natural_image
Technical line drawing of a mechanical assembly with no visible text or symbols③
natural_image
Close-up of a black curved mechanical component with mounting flanges (no text or symbols visible)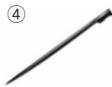
natural_image
Coiled black cable with a connector and connector (no text or symbols visible)⑥
natural_image
Black fabric bag with string tied with small accessories (no text or symbols visible)⑦
natural_image
Coiled black USB cable with connector (no text or symbols visible)natural_image
Electric compact charger with black body, cables, and power cord (no visible text or symbols)③
natural_image
Mechanical component with black lever and mounting bracket (no visible text or symbols)④

⑤
natural_image
Coiled black electronic device with a small square component and circular base (no text or symbols visible)
flowchart
graph LR
    A["AM 00 : 44"] --> B["TIME SET"]
    B --> C["CALIBRATE"]
    C --> D["ABOUT"]
    D --> E["65%"]

    E --> F["+"]

    F --> G["Caneful press and briefly hold stylus on the center of the target. Repeat as the target moves around the screen."]

    G --> H["New calibration setting: have been measured. Key to accept the new settings."]


natural_image
Technical line drawing of three electronic component packages (no text or symbols)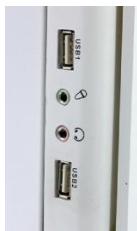
natural_image
Close-up of a vertical panel with two USB ports and three circular buttons, no visible text or symbolsnatural_image
Illustration of a satellite with signal waves and solar panels (no text or symbols)
Service Hotline: +33.(0)4.93.51.27.02
natural_image
Line drawing of a flexible hose with a bulbous cap (no text or symbols)natural_image
Technical line drawing of a mechanical device with no visible text or symbolsnatural_image
Line drawing of a mechanical assembly with no visible text or symbols③
natural_image
Close-up of a black curved mechanical component with a flat top and flange (no visible text or symbols)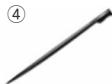
natural_image
Coiled black cable with a connector and plug, labeled with number 5 (no text or symbols on the device itself)⑥
natural_image
Black fabric bag with loose string and small accessories (no text or symbols visible)⑦
natural_image
Coiled black USB cable with connector (no text or symbols visible)natural_image
Electric compact charger with black body, cables, and earplugs (no visible text or symbols)③
natural_image
Mechanical component with black housing and mounting bracket (no visible text or symbols)④

⑤
natural_image
Coiled black electronic device with a small square component and a circular head (no text or symbols visible)
flowchart
graph LR
    A["AM 00 : 44"] --> B["TIME SET"]
    B --> C["CALIBRATE"]
    C --> D["ABOUT"]
    D --> E["65%"]

    E --> F["+"]

    F --> G["Caneful press and briefly hold stylus on the center of the target. Repeat as the target moves around the screen."]

    G --> H["New calibration setting: have been measured. Key to accept the new settings."]


natural_image
Technical line drawing of three electronic component packages (no text or symbols)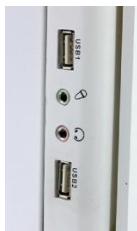
natural_image
Close-up of a vertical panel with two USB ports and three circular buttons, no visible text or symbolsnatural_image
Illustration of a satellite with signal waves and solar panels (no text or symbols)
natural_image
Line drawing of a flexible hose with a bulbous cap (no text or symbols)natural_image
Technical line drawing of a mechanical device with no visible text or symbols
natural_image
Technical line drawing of a mechanical assembly with no visible text or symbols① Pila integrada
② Altavoz
③ Conector GPS externo
④ Acoplamiento del conector
⑤ Ranura de tarjeta Digital Secure
③
natural_image
Close-up of a black curved mechanical component with a flat top and flange (no text or symbols visible)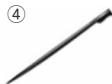
natural_image
Coiled black cable with a connector and plug, labeled with number 5 (no text or symbols on the device itself)⑥
natural_image
Black fabric bag with loose string and small accessories (no text or symbols visible)⑦
natural_image
Coiled black USB cable with connector (no text or symbols visible)natural_image
Electric compact charger with black body, cables, and earplugs (no visible text or symbols)③

natural_image
Mechanical component with black housing and mounting bracket (no visible text or symbols)④

⑤
natural_image
Coiled black electronic components with a square connector (no text or symbols visible)natural_image
Woman driving a car at night, wearing a blue shirt and headlamp (no visible text or symbols)

flowchart
graph LR
    A["AM 00 : 44"] --> B["TIME SET"]
    B --> C["CALIBRATE"]
    C --> D["ABOUT"]
    D --> E["65%"]

    E --> F["+"]

    F --> G["Caneful press and briefly hold stylus on the center of the target. Repeat as the target moves around the screen."]

    G --> H["New calibration setting: have been measured. Key to accept the new settings."]


natural_image
Close-up of a vertical panel with three labeled buttons (USB1, USB2, and two circular icons) pointing to different ports (no readable text beyond labels)natural_image
Line drawing of a flexible hose with a bulbous cap (no text or symbols)natural_image
Technical line drawing of a mechanical device with no visible text or symbolsnatural_image
Technical line drawing of a mechanical assembly with no visible text or symbols③
natural_image
Close-up of a black curved mechanical component with mounting holes (no text or symbols visible)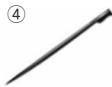
natural_image
Coiled black cable with a connector and plug, labeled with number 5 (no text or symbols on the device itself)⑥
natural_image
Black fabric bag with string tied with small accessories (no text or symbols visible)⑦
natural_image
Coiled black USB cable with connector (no text or symbols visible)① Manual em formato CD
② Guia de refer. rápida
③ Suporte de ventosa
④ Caneta de toque
⑤ Adaptador de isqueiro
⑥ Bolsa de transporte
⑦ Cabo USB
4.2 Opcionais
①
②
natural_image
Electric power adapter with black buttons and cable, no visible text or symbols③
natural_image
Mechanical component with black housing and mounting bracket (no visible text or symbols)④

⑤
natural_image
Coiled black electronic device with a small square component and circular base (no text or symbols visible)6. O ecrã inicial

6. O ecrã inicial
6.9 Calibragem
flowchart
graph LR
    A["AM 00 : 44"] --> B["TIME SET"]
    B --> C["CALIBRATE"]
    C --> D["ABOUT"]
    D --> E["65%"]

    E --> F["+"]

    F --> G["Caneful press and briefly hold stylus on the center of the target. Repeat as the target moves around the screen."]

    G --> H["New calibration setting: have been measured. Key to accept the new settings."]
6. O ecrã inicial
6.10 Acerca


natural_image
Close-up of a vertical panel with two USB ports and three circular buttons, no visible text or symbolsnatural_image
Illustration of a satellite with signal waves and the word 'Takara' below (no text or symbols on the diagram itself)Service-hotline: +33.(0)4.93.51.27.02
natural_image
Line drawing of a flexible hose with a bulbous cap (no text or symbols)natural_image
Technical line drawing of a mechanical component with threaded end (no text or symbols)natural_image
Technical line drawing of a mechanical assembly with no visible text or symbols① USB-connector
② Knop Reset
③ Knop Sync
4.4 Rechterkant
③
natural_image
Close-up of a black curved mechanical component with a flat end and mounting bracket (no text or symbols visible)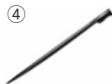
natural_image
Coiled black cable with a connector and plug, labeled with number 5 (no text or symbols on the device itself)⑥
natural_image
Black fabric bag with black bands and gold buttons, isolated on white background (no text or symbols)⑦
natural_image
Coiled black USB cable with connector (no text or symbols visible)natural_image
Electric compact charger with black body, cables, and earplugs (no visible text or symbols)③
natural_image
Mechanical component with black housing and mounting bracket (no visible text or symbols)④

⑤

natural_image
Coiled black electronic device with a small square component and a circular head (no text or symbols visible)① SD-geheugenkaart
② Wisselstroomadapter
③ Montagehouder
④ Luxe opbergtasje
⑤ Externe GPS-antenne

flowchart
graph LR
    A["AM 00 : 44"] --> B["TIME SET"]
    B --> C["CALIBRATE"]
    C --> D["ABOUT"]
    D --> E["65%"]

    E --> F["+"]

    F --> G["Caneful press and briefly hold stylus on the center of the target. Repeat as the target moves around the screen."]

    G --> H["New calibration setting: have been measured. Key to accept the new settings."]


7. Multimediabestanden overdragen
natural_image
Technical line drawing of three views of an electronic component with ports and internal structures (no text or symbols)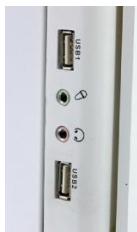
natural_image
Close-up of a device panel with ports labeled USB1, USB2, and two circular icons (no readable text or symbols beyond labels)
- Thank you for choosing and purchasing the Takara Navigation system, the most complete on the market. This model includes:
- About This Book
- For Proper/Best Use
- General
- Safety Precaution
- Customer Support
- Getting It Started
- Inserting a SD Card
- Mounting & Connecting
- Power Manipulation
- Hardware Features
- Front View
- Rear View5
- Left Side
- Right Side
- Hardware Accessories
- Standard
- Options
- A Look at the Home Screen
- Overview
- Navigation
- Music
- Movie
- Picture
- GPS
- Brightness
- Time Setting
- Calibration
- About
- Transferring Multimedia Files
- Using USB Cable
- Using an SD Card Reader
- Takara
- Opcionais
- O ecrã inicial
- Calibragem
- Acerca
- Rechterkant
- Multimediabestanden overdragen
Brand : TAKARA
Model : GP12
Category : Gps