
Latte Smart EA860E - Coffee maker KRUPS - Free user manual and instructions
Find the device manual for free Latte Smart EA860E KRUPS in PDF.


| Product type | Automatic coffee machine with grinder |
| Brand | Krups |
| Model | Latte Smart EA860E |
| Dimensions (W x D x H) | Approx. 28 x 34 x 43 cm |
| Weight | Approx. 10 kg |
| Power supply | 220-240 V, 1350 W, 50/60 Hz |
| Water tank | Capacity 1.8 L, removable |
| Bean hopper | Capacity 250 g |
| Pressure | 15 bar |
| Heating system | Compact Thermoblock System |
| Grinder | Metal burr grinder, adjustable grind setting |
| Main functions | Ristretto, Espresso, Coffee, Long Coffee, Cappuccino, Latte Bueno, Hot water, Favorites |
| Milk system | One Touch Cappuccino (OTC) with integrated milk container |
| Connectivity | Bluetooth Low Energy, mobile app |
| Display | Color touch screen |
| Settings | Water hardness, coffee temperature, volume, grind fineness, auto rinse |
| Maintenance | Automatic rinsing, integrated cleaning and descaling programs |
| Water filter | Claris Aqua Filter System F088 cartridge (optional) |
| Safety | Auto shut-off, tank detection, overheat protection |
| Spare parts accessories | Cleaning tablets XS3000, descaler F054, OTC cleaner XS4000, steam nozzle, pin |
| Warranty | Exclusive use of Krups accessories |
Frequently Asked Questions - Latte Smart EA860E KRUPS
User questions about Latte Smart EA860E KRUPS
0 question about this device. Answer the ones you know or ask your own.
Ask a new question about this device
Download the instructions for your Coffee maker in PDF format for free! Find your manual Latte Smart EA860E - KRUPS and take your electronic device back in hand. On this page are published all the documents necessary for the use of your device. Latte Smart EA860E by KRUPS.
USER MANUAL Latte Smart EA860E KRUPS
CAUTION : the safety precautions are part of the appliance. Read them carefully before using your new appliance for the first time. Keep them in a place where you can find and refer to them later on.
②
①
1 252 263 274 28
5 296 307 318 32
9 3310 3411 3512 36
13 3714 3815 3916 40
17 4118 4219 4320 44
21 4522 4623 24

L Grille repose-tasses
2 Ecran graphique
M Ecran graphique
APPLICATION LATT'INTENSE KRUPS
INFORMATIONS PRODUIT
PRODUKTINFORMATIONEN
IMPORTANT: The safety instructions are included with your appliance. Please carefully read them prior to using your new appliance for the first time. Keep them in a safe place for future reference.
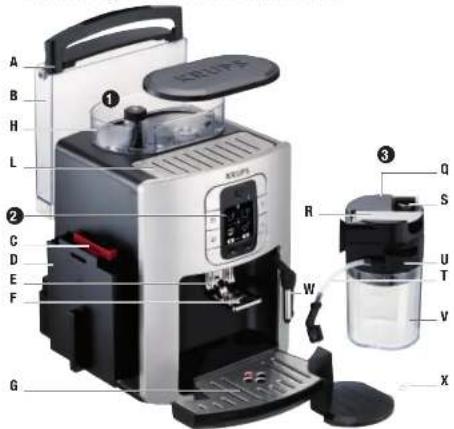
DESCRIPTION
A Handle/water tank cover
B Water tank
C Coffee drawer (1)
D Coffee grounds tray
E Coffee spout, height adjustable handle
F Magnetic part to attach the milk spout
G Removable drip grid and tray
H Coffee bean container
1
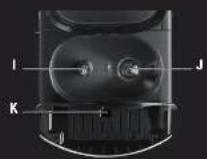
I Grind fineness setting button
J Metal grinding mill
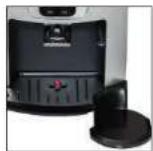
K Cleaning tablet funnel
L Cup rest grid
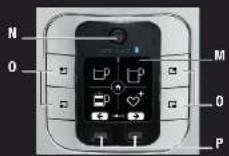
2 Display screen
M Display screen
N On/off button
- Selection buttons
P Scrolling buttons
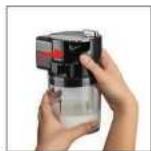
3 Milk pot
Q Cover
R Locking lever
S Clean / cappuccino system button
T Flexible pipe
U Cartridge
v Container
W Steam nozzle
X Cleaning pin
ACCESSORIES (SOLD SEPARATELY)
F 088 Claris Cartridge - Aqua Filter System (depending on the model).
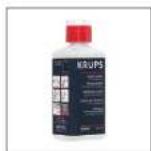
XS 4000 KRUPS Liquid Cleaner for Cappuccino system (not included).
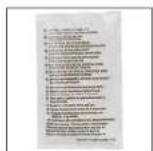
F 054 Descaling Powder (1 pouch provided).
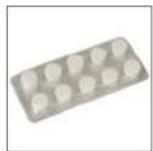
XS 3000 Tray of 10 cleaning tablets (2 tablets provided).
Note: For the guarantee to be valid, this machine must be used with Krups accessories only
Dear Customer,
Congratulations on your purchase of this Krups Latte Smart Espresseria. You will equally appreciate the quality of the product in your cup and the appliance's great ease of use.
Whether you prefer an espresso or a lungo, a ristretto or a latte bueno, your automatic coffee/espresso machine has been designed so you can enjoy bistro-quality coffee prepared at home, at any time of the day or week.
Thanks to its Compact Thermoblock System, its 15-bar pump and because it works exclusively with coffee beans that are freshly ground prior to extraction, your Automatic Espresseria will enable you to obtain a drink containing a maximum of aromas, topped with a lovely thick, golden crema, a product that comes from the natural oil of the coffee beans.
Espresso is not served in a traditional coffee cup, but instead in small porcelain cups.
To obtain an espresso at an optimal temperature and a compact layer of crema, we advise that you thoroughly preheat your cups.
You will almost certainly need several trial runs to find the type of coffee bean blend and grinding level that best suit your taste. We recommend that you start with a coarse grind, particularly for dark roasted beans, and then adjust the grinding later if necessary. Of course, the quality of the water used is also another determining factor in the quality of the coffee in your cup.
You must ensure that the water has just come out the tap (i.e. that it has not had time to become stagnant due to contact with the air), that it does not have an odour of chlorine and that it is cold.
Espresso coffee has a richer aroma than classic filter coffee. Despite its more pronounced taste that is very present and longer lasting in the mouth, espresso actually contains less caffeine than filter coffee (approximately 60 to 80 mg per cup compared to 80 to 100 mg per cup). This is due to its shorter percolation period. You may also use your LATTE SMART to prepare excellent latte buenos thanks to the ingenious system that incorporates a milk pot into the machine.
Thanks to its great ease of handling, the visibility of all of its containers as well as its automatic cleaning and descaling programs, your LATTE SMART will provide exceptional ease of use.
PRIOR TO THE FIRST USE
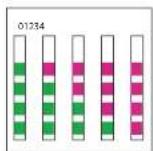
Water Hardness Measurement
Prior to using the appliance for the first time or after having noticed a change in water hardness, users should adapt the appliance to the perceived water hardness. To check the water hardness, measure it using the strip included with the appliance or contact your local water authority. Upon first use, the appliance will request the hardness of your water.
| Degree of Hardness | Class 0 Very soft | Class 1 Soft | Class 2 Moderately hard | Class 3 Hard | Class 4 Very hard |
| ° dH < 3° > | 4° > 7° > 14° > 21° | ||||
| ° e < 3.75° | > 5° > 8.75° > 17.5° > 26.25° | ||||
| ° f < 5.4° > | 7.2° > 12.6° > 25.2° > 37.8° | ||||
| Appliance Setting | 0 1 2 3 | 4 |
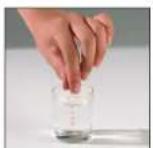
Fill a glass with water and dip a strip in it. After 1 minute, read the water hardness level (1-2).
OVERALL VIEW
| Pictogram | Description | Pictogram | Description |
 | Home |  | Ristretto |
 | Pre-heating |  | Espresso |
 | Alert |  | Coffee |
 | Favourites setting |  | Long coffee |
 | Maintenance |  | Hot water |
 | Favourites to be created |  | Cappuccino |
 | Bluetooth® activated |  | Latte Bueno |
 | Machine connected |  | Screen personalisation |
 | Coffee rinse |  | Settings |
 | Product information | ||
Preparing the Appliance
Please ensure that the appliance is placed and used on a flat, stable, heat & water resistant surface.
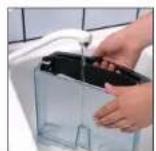
Remove and fill the water tank (3).
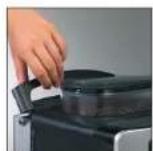
Put it back in place by pressing firmly and re-closing the cover (4).
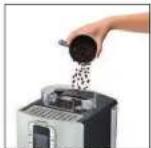
Remove the cover from the coffee bean container and pour in some coffee beans. Put the cover back on (5).
Do not fill the tank with hot water, milk or any other liquid. If, when the appliance is switched on, the water tank is missing or insufficiently filled (under the "min" level), the message "Fill the tank" is displayed and it is momentarily impossible to prepare the recipe.
NEVER PUT GROUND COFFEE IN THE COFFEE BEAN CONTAINER.
The use of oily, caramelised or flavoured coffee beans is not advised for this machine. These types of beans could damage the machine.
Ensure that no foreign bodies such as little pebbles contained in the coffee beans enter the reservoir. Any damage due to foreign bodies having entered the coffee bean reservoir shall not be covered by the guarantee.
Do not put any water in the coffee bean container.
To prevent flows of waste water from dirtying your counter top or from potentially burning you, don't forget to install the drip tray.
Check the cleanliness of your water tank.
First Use / Configuration of the Machine
You may use the App in order to make it easier to configure the machine (see the Application Download).
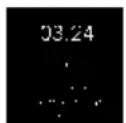
Plug in the appliance. During its connection, the appliance will automatically be powered and a standby screen will appear (screen X1 p.30).
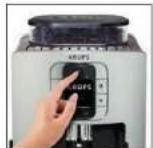
Press "On / Off" (6) and follow the steps provided by the instructions on the screen.
Upon first use, the appliance will prompt you to adjust several settings. If you unplug your appliance, you will be prompted to re-enter some of these settings.
The appliance will ask you to set:
Language You may select the language of your choice from among those listed.
Unit of Measurement You may select the unit of measurement (either ml or oz).
Auto-On You may automatically start the pre-heating of your appliance at the time and day of the week selected
Auto-Off You may choose the length of the period of inactivity after which your appliance will automatically switch off.
Clock You may select either 12- or 24-hour time display.
Date You must set the date.
Water Hardness You must set your water hardness between 0 and 4. See "Water Hardness Measurement" chapter.
Auto Rinse You may program a rinse for each time the machine is switched on.
Filter You must indicate whether or not a filter is present (Claris - Aqua Filter System cartridge).
Upon first use, the appliance may request a refill. You may then simply follow the instructions on the screen.
Automatic Rinse
Upon first start-up, you may activate the machine's automatic rinse mode. To do so, choose the option "YES" under the "Auto Rinse" menu. This rinse will be performed each time the machine is switched on.
For a subsequent modification, you may select "Auto Rinse" by pressing on Settings: Auto Rinse.
Installing the Filter (Claris - Aqua Filter System Cartridge)
Note: To correctly prime your cartridge, ensure that you follow the installation procedure each time you change the cartridge. For the best flavours and to make sure your appliance lasts as long as possible, we recommend you only use the F088 Claris-Aqua Filter System cartridge, sold separately
Your appliance will send a message to advise you when to replace your Claris - Aqua Filter System cartridge:
Upon first start-up: choose the option "YES" in the "Filter" function, and follow the instructions on the screen.
For a subsequent installation or replacement: Select "Filter" under the Maintenance menu - "Filter" - "Install" (or change) and follow the instructions on the screen.
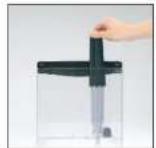
Installation of the cartridge in the machine: screw the filter in the bottom of the water tank by using the handle provided for this purpose (7).
Place a 0.6 L container under the nozzles (8).
Preparing the Grinder
You may adjust the strength of your coffee by setting the grind fineness of the coffee beans.
- Grindness does not affect the strength of the coffee – it is the type of bean (dark roast/light roast etc...).
For a strong coffee you don't need a fine grind. This depends on your beans.
■ To obtain the taste/strength you want, always start with a course grind – then adjust the grind to taste as necessary. Dark roasted beans on a course grind will still give a strong coffee - Dry beans on a fine grind will produce a powder – which may block the system and force the machine to go into auto-maintenance. This is most noticeable if doing an Americano as this is too long a drink for a fine grind.
■ Always make an Americano (long coffee) using a course grind.
Set the level of grind fineness by turning the 'Grind fineness setting' button. Turn to the left for a finer grind. Turn to the right for a coarser grind (9).
ADJUSTMENTS MUST ONLY BE MADE DURING GRINDING.
NEVER FORCE THE GRIND FINENESS SETTING BUTTON.
THE KRUPS LATT'INTENSE APPLICATION
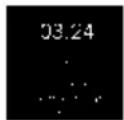
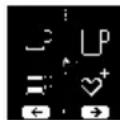
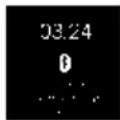
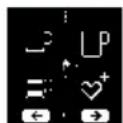
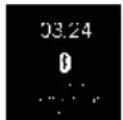
Screen X1 Screen X2 Screen X3
Please check the compatibility of your smartphone on www.krups.com
Application Download
In order to download the application, you must have a smartphone equipped with a Bluetooth® BLE (Bluetooth Low energy) module and Android version 4.3 or up, or IOS 8 and up. If your smartphone does not have the aforementioned, you will not be able to use the application.
The LATTE SMART KRUPS application is available from the Play Store (Android version) and Apple Store (iOS version).
Account Set-Up
In order to benefit from all of the opportunities offered by the application, you must first create an account. The application's various functions will not be available before the creation of your account.
Complete the fields requested during the creation of the account and then validate the conditions of use in order to complete the creation of your account.
You will be asked to provide a password in order to guarantee the confidentiality of your data.
Bluetooth® Activation
In order to connect your telephone to the machine, you must activate your smartphone's Bluetooth® BLE module and ensure that the machine's module Bluetooth® is also activated. Go the "Settings" menu, select the Bluetooth® function and activate the Bluetooth® module if it has been deactivated (by default, the Bluetooth® module is activated).
Pairing with the Machine
Follow the instructions described on your telephone in order to pair your smartphone to the machine.
The pairing can only be completed when the machine is in one of 2 specific modes:
Standby mode (screen X1)
Home mode (screen X2)
When the machine detects a pairing request from the smartphone, a screen will appear asking you to accept the pairing. Accept by pressing OK. A screen will then appear on your smartphone asking you to confirm this pairing, then press "Pairing".
Should the pairing fail, you may retry several times and we recommend checking that the machine's Bluetooth® BLE module is indeed activated.
If the problem persists, you may contact the after-sales service in order to obtain assistance with the installation of your application.
In stand-by mode, when the machine is paired, you will see the Bluetooth® symbol surrounded by a white oval (screen X3).
Machine Settings
Once paired, you may directly modify the machine settings via the application (the smartphone's date and time will then be automatically updated on the machine, thus avoiding the need for you to do so).
Using the Application
Several functions are available to you via the use of the application:
■ Remote launch of a recipe
■ Management of the favourites library and recipe book
■ Personalisation of the menu screens: this may only be done from the application. If you select this function on the
machine, you will be prompted to use the application

■ Access to the account and information about the machine
■ Access to news and information about the world of coffee
■ Access to a user's guide with tutorials and videos to fully benefit from all of the machine's capabilities
■ Contact with the after-sales service
You may explore all of these functions by browsing the application (whether or not you are connected to your machine) Feel free to log into the application as frequently as possible in order to see the latest news and regularly follow-up on your machine.

PREPARING COFFEE RECIPES
YOUR APPLIANCE IS EXCLUSIVELY DESIGNED TO USE COFFEE BEANS.
During preparation of your first coffee, following a long period of absence or after a cleaning or descaling procedure, a little bit of steam and hot water may come out of the steam nozzle (auto-priming).
If the coffee spout is set too high in relation to the height of your cups, there is a risk of splashing or burns.
Please note:
The quantity of water for a ristretto ranges between 20 and 35ml .
The quantity of water for a espresso ranges between 40 and 70 ml.
The quantity of water for a coffee ranges between 80 and 160 ml.
The quantity of water for a long coffee ranges between 160 and 320 ml.
(The appliance automatically performs a double cycle, do not remove your cup before completion of the preparation.)
Launching a Coffee Recipe
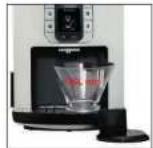
Place a cup under the coffee spout. You can lower or raise the coffee spout to accommodate the height of your cup (10). Select your drink by pressing the button corresponding to the desired recipe.
At any time, you may set the water volume using the settings buttons.
To stop the flow of coffee in your cup, you may either press "Stop", or reduce the volume with the + and - buttons.
The ground coffee is first dampened with a little water after the grinding phase. A few moments later, the actual percolation continues. A function enables you to adjust your coffee temperature.
PREPARATIONS WITH HOT WATER
Install the steam nozzle on the machine. Select the hot water recipe via the home menu. A message prompts you to place a container under the steam nozzle. You may start producing hot water by pressing the corresponding selection button.
To pause the hot water function, simply press the stop button.
If the nozzle is blocked, unblock it using the needle provided (X).
The maximum quantity of hot water per cycle is limited to 300 ml.

The machine returns to its initial position if the hot water command is not activated after a certain amount of time has elapsed.

The cycle does not stop immediately.
We advise that you use very fresh, very cold pasteurised milk or UHT milk. The use of unpasteurised milk does not yield optimal results.
You may pause the cycle by pressing STOP.
WARNING, THE CYCLE DOES NOT STOP IMMEDIATELY.
Preparing and installing the milk pot on the machine
The milk pot is comprised of a plastic container, a cover (including a cartridge) and a flexible pipe connecting it to the machine's drinks spout. Prior to first use, carefully clean the various components.
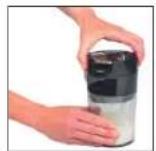
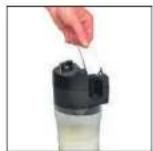
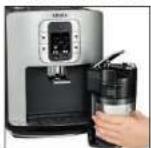
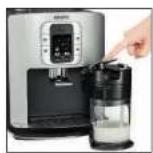
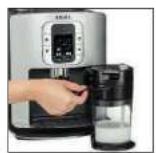
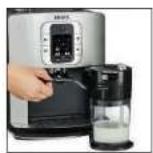
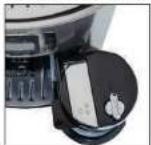
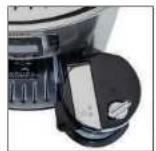
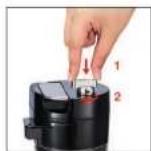
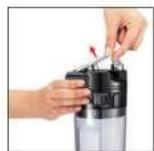
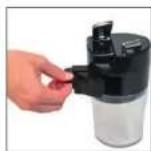
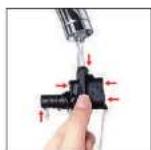
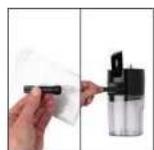
Pour the milk in the pot (minimum 150 ml). Put the cover on the pot by screwing it in with a slight pressure (11). Lift the locking lever (12). Install the milk pot on the machine by connecting it to the steam outlet (13) and then lower the locking lever (14). Insert the flexible pipe in the opening of the cartridge provided for that purpose (15) and then place the other end under the magnetic drinks spout (16). Check that the button of the system's cover is set to the Latte recipe position (17).
Cappuccino Preparation
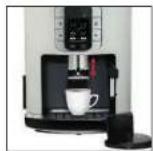
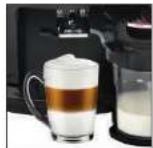
When the screen displays the drinks selection menu, press the button corresponding to the cappuccino recipe. You may select the time of the milk frothing phase as well as the coffee volume. Once the settings have been validated by pressing OK, the preparation of the recipe starts, a pre-heating phase occurs, then the milk frothing and lastly the delivery of the espresso. Your drink is ready for you to enjoy (18).
Latte Bueno Preparation
This drink is prepared by reversing the steps for making a cappuccino, i.e. the delivery of the coffee comes first, followed by the frothed milk.
When the screen displays the drinks selection menu, press the button corresponding to the latte bueno recipe. You may select the time of the milk frothing phase as well as the coffee volume. Once the settings have been validated, the preparation of the recipe is launched, and the machine will first perform an espresso cycle, and then a milk frothing cycle. Your drink is ready for you to enjoy.
A message appears on the screen for system cleaning. We recommend that you perform it by referring to the OTC (One Touch Cappuccino) SYSTEM RINSE and/or OTC SYSTEM MANUAL MAINTENANCE paragraphs.
FAVOURITES
The machine enables users to create 3 favourites. It is possible to have larger favourites library on your application and to download your desired 3 favourites on your machine.
Creating Favourites
There are many ways to create your favourite. You may either create it from the application, or create it from the machine.
From the application, simply go to the "My Preferences" menu and select the desired recipe, configure it according to your personal taste and name it. It is then possible to download it on your machine by sliding the resulting icon onto 1 of 3 hearts
From the machine, you may create favourites in several ways:
■ either at the completion of a recipe that you enjoy by pressing the ♥+ icon and then assigning it the desired heart.
■ or by pressing the heart icon in the home menu 🥐 and following the instructions.
■ or by going to the Settings menu, favourites and selecting the function "Modify a favourite".
Managing Favourites
Users can manage these favourites via the application by sliding the favourites library icons onto one of the 3 hearts. From the machine, users can modify a favourite by holding down (pressing for more than 3 seconds) a favourite on the home page or by going to the settings menu, favourites and then selecting the "Modify a favourite" function.
Finally, users can also delete a favourite by going to the settings menu, favourites and then selecting the "Delete a favourite" function.
APPLIANCE MAINTENANCE
General Maintenance
Always remove the power cord from the electrical outlet and let the appliance cool before cleaning it. Don't use utensils or products likely to scratch or corrode the appliance.
Wipe the outside of the appliance housing using a damp cloth.
Rinse the water tank with clean water.
These parts are not designed to be washed in a dishwasher.
Emptying the Coffee Grounds Tray, Coffee Drawer ^(1) and Drip Tray
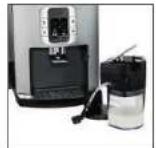
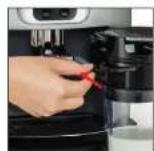
First remove the OTC (One Touch Cappuccino) system (19).
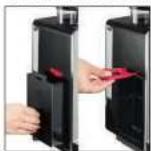
If the message is displayed, remove, empty and clean the drip tray (20).
Remove, empty and clean the coffee grounds tray (21a).
Remove the coffee drawer (1) and wipe clean the area where the coffee drawer (1) sits (21b).
The drip tray is equipped with floats that indicate at any time when to empty it (22).
Once you remove the coffee grounds tray, you must empty it completely to prevent any subsequent overflow.
Circuits Rinse
Coffee circuit rinse:
You may perform a rinse at any time by pressing "Coffee Rinse"

OTC (One Touch Cappuccino) System Rinse
The machine will enable you to perform a rinse of the system after the preparation of your Latte recipes. This is possible even if some milk remains in the container of the milk pot. It is important to perform this rinse after each Latte recipe prepared. The milk pot must be in place as described in the PREPARING LATTE RECIPES paragraph.
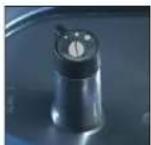
Turn the button of the cover of the OTC system to the CLEAN position (23).
Go to the maintenance menu, press the OTC Rinse key. Simply follow the instructions on the screen in order to start the rinse cycle. At the conclusion of this cycle, return the button of the OTC system to the Latte recipe position before starting a new recipe.
IMPORTANT:
This rinse should be performed before returning the milk pot (if it still contains milk) to the refrigerator upon completion of the last Latte recipe prepared. After each rinse, the various parts of the system should be cleaned by running them under the water from the tap (see "Manual Maintenance of the OTC System" paragraph).
Cleaning Program of the Coffee Circuit - total length: approximately 20 minutes
Warning! To meet the guarantee conditions, it is essential to perform the cleaning cycle when the appliance requests it. Carefully follow the instructions displayed on the screen. You may continue to use the appliance, but it is advised to perform the cycle as soon as possible.
Only use KRUPS cleaning tablets (XS 3000) (24). No liability shall be incurred for damages resulting from the use of tablets of other brands. You can obtain cleaning tablets from the KRUPS After-Sales Service. Make sure to perform the entire cleaning program to prevent any risk of poisoning.
The cleaning cycle is an intermittent cycle — do not place hands under the coffee spouts during the cycle.
The cleaning program must be performed approximately every 360 coffee preparations.
When a cleaning is necessary, the appliance advises you by displaying a pictogram in the central section of the home menu. You may go to the maintenance section by pressing the key matching this same pictogram, which will appear in the lower left-hand part of the home menu screen.
To perform the cleaning program, you will need a container that holds at least 0.6 L and a KRUPS cleaning tablet (XS 3000).
If you unplug your machine during cleaning or in the event of a power failure, the cleaning program will resume at the step underway during the incident. It will not be possible to defer this operation.
This is mandatory for reasons related to water circuit rinsing. In this case, a new cleaning tablet may be required.
When the "Cleaning required" message is displayed, you may start the automatic cleaning program by pressing OK. Please follow the instructions displayed on the screen.
The automatic cleaning program is comprised of 3 parts: the cleaning cycle itself, and then 2 rinse cycles. This program lasts approximately 20 minutes. You may perform a cleaning at any time by going to the maintenance menu and then selecting COFFEE CLEANING.
Descaling Program - length: approximately 22 minutes
Warning! To meet the guarantee conditions, it is essential to perform the descaling cycle when the appliance requests it. Carefully follow the instructions displayed on the screen. You may continue to use the appliance, but it is advised to perform the cycle as soon as possible.
Only use KRUPS descaling products (F054) (25). You can obtain descaling products from KRUPS After-Sales Service centres.
No liability shall be incurred in the case of damage to the appliance caused by the use of other products.
Make sure to perform the entire descaling program to prevent any risk of poisoning.
The descaling cycle is an intermittent cycle — do not place hands under the steam nozzle during the cycle.
Make sure to properly protect your counter top during the descaling cycles, particularly if it is made of marble, stone or wood.
If your product is equipped with our Claris - Aqua Filter System F088 cartridge, please remove this cartridge before starting the descaling operation.
The quantity of scale deposited depends on the hardness of the water used. When a descaling is necessary, the appliance advises you by periodically displaying a warning message.
To perform the descaling program, you will need a container that holds at least 0.6 L and a pouch of KRUPS descaling agent.
When the message "Descaling required" is displayed, you may start the automatic descaling program by pressing OK.
Please follow the instructions displayed on the screen, making sure to dissolve the contents of the pouch.
The descaling cycle is comprised of 3 parts: the descaling phase itself, followed by 2 rinse phases.
If you unplug your machine during descaling or in the event of a power failure, the descaling program will resume at the step underway during the incident. It will not be possible to defer this operation.
This is mandatory for reasons related to water circuit rinsing.
To perform this cleaning program, you will need a container (at least 0.6 L) and some KRUPS XS 4000 cleaning liquid (26).
Turn the button of the cover of the OTC system to the Latte recipe position 📄 (17).
You may launch a cleaning program by going to the maintenance menu and then pressing OTC Cleaning. Follow the instructions on the screen.
To disassemble the system, follow the instructions below:
■ Remove the flexible hose from the opening of the pot and from the drinks spout (27).
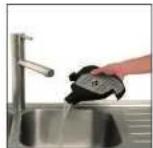
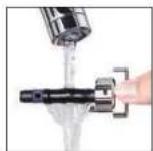
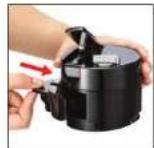
■ Turn and remove the settings button of the cover (28) and run it under water (29). Then reposition it (30).
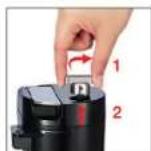
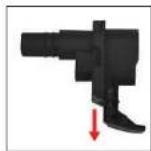
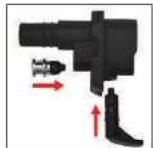
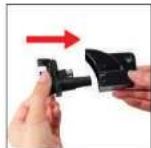
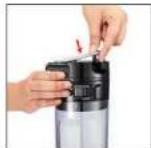
■ Lift the lever (31) and remove the cartridge (32).
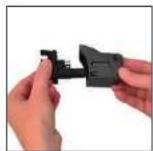
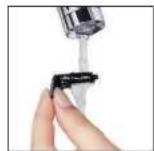
■ Remove the black silicone body from the cartridge (33), and remove the plastic part (34) to run it under water (35).
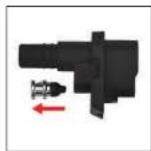
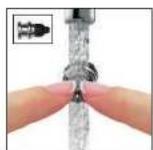
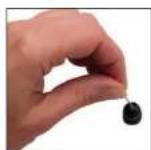
■ Remove the air tip (36) and run it under water as you pinch its lips (37).
■ Run the entire silicone part under water (38).
■ Take the disassembly tool and unscrew the steam nozzle tip (39).
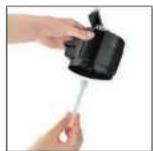
■ Use the pin (X) to clean the steam nozzle tip (40). Screw it back in.
■ Reposition all parts (41-42-43-44).
■ Remove the milk delivery hose from the cover of the pot (45), run it under water, and then reposition it.
■ Re-assemble the OTC system on the milk pot (46).
The manual cleaning of the OTC system is now performed.
OTHER FUNCTIONS
To access the menu of the appliance's other functions, use the settings function from the home menu screen.
MAINTENANCE
All of these options will enable you to start the programs selected. Next, you must follow the instructions on the screen.
| MAINTENANCE OTC Rinse | Enables you to access the rinse of the OTC system. | |
 | Coffee Cleaning | Enables you to access cleaning. |
| Filter | Enables you to access the filter mode. | |
| OTC Cleaning | Enables you to access the cleaning of the OTC system. | |
| OTC Descaling | Enables you to access the descaling of the OTC system. | |
SETTINGS
 SETTINGS Languages SETTINGS Languages | You may select the language of your choice from among those listed. |
| Favourites | |
| Auto Rinse | |
| Contrast | |
| Clock | |
| Auto-Off | |
| Auto-On | |
| Unit of Measurement | |
| Water Hardness | |
| Coffee Temperature | |
| Date | |
| Reset | |
| Bluetooth® |
PRODUCT INFORMATION
PRODUCT INFO | Coffee cycles | Displays the total number of coffees made by the machine. |
| Water cycles | Displays the total number of hot water cycles performed by the machine. | |
| Milk cycles | Displays the total number of milk cycles performed by the machine. | |
| Coffee cleaning | Displays the number of coffee cycles that may be performed before the next coffee circuit cleaning. | |
| Descaling | Displays the number of cycles hot water or steam that may be performed before the next descaling. | |
| Filter | Displays whether or not the filter is present and the number of days remaining or the volume of water remaining to go through before the next change. |
The 2 first options of the Filter sub-menu will only be validated if you have previously correctly installed a filter, with the program accessible under MAINTENANCE▶FILTER▶INSTALL.
TRANSPORTING THE APPLIANCE
Save and use the original packaging to transport the appliance. Should the appliance fall out of the packaging, it would be best to return it to an authorised centre to avoid any risk of fire or electrical problems.
ELECTRICAL OR ELECTRONIC PRODUCT AT THE END OF ITS LIFE
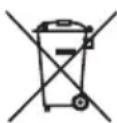
Let's contribute to protecting the environment! Your appliance contains many materials which can be recovered or recycled. Leave it a local civic waste collection point.
| MALFUNCTION/PROBLEM CORRECTIVE ACTIONS | |
| The appliance does not switch on after pressing the "On / Off" button. | Switch off and unplug the machine, remove the filtering cartridge, wait 20 seconds and restart the machine.Check that the plug of the electrical cord is properly inserted in the electrical outlet. |
| Some water or steam unusually comes out of the steam nozzle. | In the case of repeated operations, a few drops may flow from the steam nozzle. |
| The espresso or the coffee is not hot enough. | Change the coffee temperature setting. Heat the cups by rinsing them with hot water. |
| The coffee is too light or not strong enough. | Check that the coffee beans container contains coffee and that they flow down properly. Refrain from using oily, caramelised or flavoured coffee beans. Reduce the volume of coffee using the selection buttons. Turn the grind fineness button to the left to obtain a finer grind. |
| The coffee is delivered too slowly or does not flow at all. | Turn the grind fineness button to the right to obtain a coarser grind (may depend on the type of coffee used).Perform one or several rinse cycles.Pass a damp sponge under the coffee spout. |
| The coffee does not contain a lot of crema. | Turn the grind fineness button to the left to obtain a finer grind (may depend on the type of coffee used).The coffee beans may not be fresh enough. Change the Claris Aqua Filter System cartridge (follow the installation procedure). Perform one or several rinse cycles. |
| The appliance did not deliver any coffee. | An incident was detected during preparation.The appliance was automatically reset and is ready for a new cycle. |
| You have used ground coffee instead of coffee beans. | Using your vacuum cleaner, vacuum up the pre-ground coffee contained in the coffee bean container. |
| The grinder produces an abnormal noise. | Foreign bodies are present in the grinder. Contact the KRUPS Consumer Service Department. |
| The grind fineness setting button is hard to turn. | Modify the setting of the grinder only when it is in operation.Foreign bodies are present in the grinder: contact the KRUPS Consumer Service Department |
| The steam outlet of your OTC system appears to be partially or completely blocked. | Disassemble the nozzle using the disassembly tool (39).Start the rinse cycle of the OTC system to clear out any remaining deposits.Clean the steam outlet and check that the nozzle hole is not blocked by milk or scale residue. Use the cleaning needle if necessary (40). |
| The OTC system does not draw in any milk.The OTC system produces little or no foam. | Check that the system is properly assembled.Check that the settings button is set to the Latte recipes position.Check that the steam outlet is not blocked.Check that the air tip has not been overlooked and that it is properly assembled.Check that the flexible hose is not blocked or pierced and that it is properly fitted into the cartridge to prevent any air intake.Check that the milk aspiration tube is properly submerged in the milk.Rinse and clean the system (see corresponding chapters).For milk-based preparations: we advise that you use cold fresh milk, pasteurised milk or UHT milk that has been recently opened. The use of a cold container is also recommended. |
| After having washed the coffee drawer (1), the warning message is still displayed. | Remove the coffee drawer (1), wait 6 seconds and put it back in place.Check that it is properly pushed in. |
| A power failure occurred during a cycle. | The appliance automatically resets itself when it is again switched on and is ready for a new cycle. If the power failure occurred during a cleaning or descaling cycle, the machine will resume the cycle at the step underway during the incident. |
| There is some water or coffee under the appliance. | The drip tray has overflowed: empty it and clean the coffee drawer (1). Check the proper positioning of the drip tray.Do not remove the water reservoir before the recipe's completion. |
| The application fails to connect or frequently disconnects | Check that the machine's Bluetooth BLE module is not deactivated.Come as close as possible to the machine when using the application. |
| The application does not detect the machine | Close and re-open the application. |
The logo  splayed splayed | Unplug the appliance for 20 seconds, remove the Claris Aqua Filter System cartridge if present, and then put it into operation again.If the defect persists, contact the KRUPS Consumer Service Department. |
| After having filled the water reservoir, the warning message is still displayed on the screen. | Check that the reservoir is properly positioned in the appliance. The float at the bottom of the reservoir must move freely. Check the float and unblock it, if necessary. |
| The machine is not requesting a descaling cycle. | The descaling cycle is requested based on a significant number of uses of the steam circuit. |
| The machine requests that the coffee grounds tray and the drip tray be emptied when they are not full. | The machine is programmed to request that the coffee grounds tray and the drip tray be emptied after a certain number of coffees, irrespective of the any intermediate emptying that you may have performed. |
| There is some ground coffee in the drip tray. | Small quantities of ground coffee may be deposited in the drip tray. |

Never open the appliance. Warning, mortal danger due to electrical current! Any unauthorised opening of the appliance voids the guarantee. Don't use the appliance if it is not operating properly or if it has been damaged. In such cases, it is advised to have the appliance examined by a centre authorised by KRUPS (review the list in KRUPS Service booklet).
Here a few recipes you can make with your Espresseria Automatic:
Cappuccino
To make a classic cappuccino, the ideal proportions are as follow: 1/3 hot milk, 1/3 coffee, 1/3 milk froth.
White Coffee
Prepare a classic espresso in a large cup. Add a drop of cream to make a white coffee.
Café Corretto\*
Prepare a cup of espresso as usual.
Next, slight adjust the taste by adding a 1/4 or 1/2 shot glass of cognac.
Anisette, grape spirits, Sambuco, Kirsch and Cointreau are also suitable for this purpose. There are still several other options to "elevate" espresso. The only limit is your imagination.
Coffee Liqueur\*
In an empty 0.75 litre bottle, mix 3 cups of espresso, 250 g of brown candied sugar, 1/2 litre of Cognac or Kirsch. Allow the blend to steep for at least 2 weeks.
You will obtain a delicious liqueur, especially for coffee enthusiasts.
Italian Iced Coffee
4 scoops of vanilla ice cream, 2 cups of sweetened cold espresso, 1/8 l milk, fresh cream, grated chocolate.
Mix the cold espresso with some milk.
Divide up the scoops of ice cream between glasses, pour the coffee over top and decorate using the fresh cream and the grated chocolate.
Frisian Coffee\*
Add a small glass of rum to one cup of sweetened espresso.
Decorate with a generous layer of fresh cream and serve.
Flambéed Espresso\*
2 cups of espresso, 2 small glasses of Cognac, 2 teaspoons of brown sugar, fresh cream. - Pour the Cognac into heat-resistant glasses, heat and flambé.
Add the sugar, mix, pour the coffee and decorate with fresh cream.
Espresso Parfait\*
2 cups of espresso, 6 egg yolks, 200 g of sugar, 1/8 litre of sweetened fresh cream, 1 small glass of orange liqueur. - Beat the egg yolks with the sugar until you form a thick, foamy mass.
Add the cold espresso and the orange liqueur.
Next, mix the whipped fresh cream.
Pour it all in goblets or glasses.
Place the goblets in the freezer.

MANUTENÇÃO MANUAL DO SISTEMA OTC (ONE TOUCH CAPPUCCINO)
Wykonywanie cappuccino
APLIKACE LATT'INTENSE KRUPS
Obrazovka X1 Obrazovka X2 Obrazovka X3
Zkontrolujte kompatibilitu smartphonu na www.krups.com
Stáhnutí aplikace
RECEPTY S HORKOU VODOU
ÚDRŽBA VAŠEHO PŘÍSTROJE
Obecná údržba
RECEPTY S TEPLOU VODOU
- APPLICATION LATT'INTENSE KRUPS
- INFORMATIONS PRODUIT
- PRODUKTINFORMATIONEN
- IMPORTANT: The safety instructions are included with your appliance. Please carefully read them prior to using your new appliance for the first time. Keep them in a safe place for future reference.
- DESCRIPTION
- 1
- ACCESSORIES (SOLD SEPARATELY)
- Dear Customer,
- PRIOR TO THE FIRST USE
- Water Hardness Measurement
- OVERALL VIEW
- Preparing the Appliance
- NEVER PUT GROUND COFFEE IN THE COFFEE BEAN CONTAINER.
- First Use / Configuration of the Machine
- The appliance will ask you to set:
- Automatic Rinse
- Installing the Filter (Claris - Aqua Filter System Cartridge)
- Preparing the Grinder
- THE KRUPS LATT'INTENSE APPLICATION
- Application Download
- Account Set-Up
- Bluetooth® Activation
- Pairing with the Machine
- Machine Settings
- Using the Application
- PREPARING COFFEE RECIPES
- Launching a Coffee Recipe
- PREPARATIONS WITH HOT WATER
- Preparing and installing the milk pot on the machine
- Cappuccino Preparation
- Latte Bueno Preparation
- FAVOURITES
- Creating Favourites
- Managing Favourites
- APPLIANCE MAINTENANCE
- General Maintenance
- Emptying the Coffee Grounds Tray, Coffee Drawer (1) and Drip Tray
- Circuits Rinse
- OTC (One Touch Cappuccino) System Rinse
- IMPORTANT:
- Cleaning Program of the Coffee Circuit - total length: approximately 20 minutes
- Descaling Program - length: approximately 22 minutes
- OTHER FUNCTIONS
- MAINTENANCE
- PRODUCT INFORMATION
- TRANSPORTING THE APPLIANCE
- ELECTRICAL OR ELECTRONIC PRODUCT AT THE END OF ITS LIFE
- Here a few recipes you can make with your Espresseria Automatic:
- Cappuccino
- White Coffee
- Café Corretto\*
- Coffee Liqueur\*
- Italian Iced Coffee
- Frisian Coffee\*
- Flambéed Espresso\*
- Espresso Parfait\*
- MANUTENÇÃO MANUAL DO SISTEMA OTC (ONE TOUCH CAPPUCCINO)
- Wykonywanie cappuccino
- APLIKACE LATT'INTENSE KRUPS
- Stáhnutí aplikace
- RECEPTY S HORKOU VODOU
- ÚDRŽBA VAŠEHO PŘÍSTROJE
- Obecná údržba
- RECEPTY S TEPLOU VODOU
Brand : KRUPS
Model : Latte Smart EA860E
Category : Coffee maker