
IAN 297680 - Boat CRIVIT - Free user manual and instructions
Find the device manual for free IAN 297680 CRIVIT in PDF.

| Product type | Inflatable boat |
| Brand | Crivit |
| Model | IAN 297680 |
| Dimensions (L x W x H) | approx. 272 x 130 x 56 cm |
| Oar dimensions | approx. 155 cm |
| Weight without accessories | approx. 6.3 kg |
| Maximum permitted load | 260 kg |
| Number of persons allowed | 3 |
| Operating pressure | 0.04 bar (40 mbar / 0.58 psi) |
| Design category | D – sheltered waters (wind force max 4, waves up to 0.5 m) |
| Material | PVC |
| Delivery contents | 1 boat, 2 oars, 2 anti-drip rings, 2 screw valves, 1 rope 680 cm, 1 rope 200 cm, 1 control gauge, 1 repair kit, 1 storage bag, 1 sailor bag, instructions |
| Intended use | Private navigation on sheltered waters (lakes, rivers, canals, sheltered coastal areas) |
| Main safety instructions | Never leave children unattended; respect max load; always distribute loads; use life jacket; avoid sharp objects; do not use under alcohol/drugs |
| Care and cleaning | Rinse with fresh water and mild soap after each use; dry completely; avoid acidic or silicone-based products |
| Storage | In a dry, temperate place, deflated, out of reach of rodents, flat without deformation |
| Repairs | Minor damage repairable with the included kit (glue + patch); wait 12 h before re-inflating; for major damage, contact after-sales service |
| Warranty | 3 years from date of purchase (defects in materials and workmanship) |
| After-sales service | Belgium: 070 270 171 (0.15 EUR/min) or deltasport@lidl.be |
| Standard | ISO 6185-1, category D, type 1 |
Frequently Asked Questions - IAN 297680 CRIVIT
User questions about IAN 297680 CRIVIT
0 question about this device. Answer the ones you know or ask your own.
Ask a new question about this device
Download the instructions for your Boat in PDF format for free! Find your manual IAN 297680 - CRIVIT and take your electronic device back in hand. On this page are published all the documents necessary for the use of your device. IAN 297680 by CRIVIT.
USER MANUAL IAN 297680 CRIVIT
natural_image
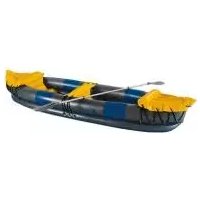
Black and white photo of an inflatable boat with rowers, no visible text or symbols on the boat itself.SCHLAUCHBOOT DINGHY CANOT PNEUMAT
DE AT CH
SCHLAUCHBOOT
Bedienungsanleitung
FR BC
CANOT PNEUMATIQUE
Instructions for use
NL H
OPBLAASBARE RUBBERBOOT
Gebruiksaonwiizing
ES
BARCA INFLABLE
Before reading, told out the illustration page and get to know all of the functions of your unit.
图 11
DELTA-SPORT HANDELSKONITOR GMBH
Wingkorp 6 • DB-21397 Hamburg
GERMANY

04/2018
D: 10 Spout No.: 52 5001
(No text)
IAN 297680
8
IAN 297680
DF AF CH GB SE FR
RE NCL CT H PI
GS/IF, Industrials and Salids Online, Paris, 16
Risk of injury 16 - 17
Avoiding damage to the item 17
Assembly 18-19
Assembling the screw-on valves 18
Inflating 18
Inflating order 18
Inflating the air chambers 18
Regulating the operating pressure 19
Accessories 19
Assembling the paddles 19
Cord 19
Kit bag 19
Storage pouch 19
Dismantling the dinghy 19
Carrying the dinghy 19
Storage and cleaning 20
Repairs 20
Disposal 20
Notes on the guarantee and
service handling 20
Complies with ISO 6185-1, Category D, Type 1
FR BE
Congratulations! With this purchase you have opted for a high-quality item. Familiarise yourself with the item before using it for the first time.
Please read and obey the following instructions carefully.
Only use this item in the manner described and for the purpose for which it was intended.
Store these instructions carefully.
When passing the item on to third parties, hand over all accompanying documents as well.
They contain important details about the item, including instructions for assembly, use and maintenance, as well as safety regulations. There is always a risk associated with water sports; to avoid injury, or even death, it is therefore important that you have detailed knowledge about this product.
Package contents (Fig. A)
1 x inflatable dinghy (1)
2 x paddles (2)
2 x drip rings (3)
2 x screw-on valves (4)
1 x cord 680cm (5)
1 x cord 200cm (6)
1 x guide ruler (7)
1 x repair kit (8)
1 x storage pouch (9)
1 x kit bag (10)
1 x instructions for use
Technical data
Dinghy dimensions: approx. 272 x 130 x 56cm (L x W x H)
Paddle dimensions: approx. 155cm (L)
Weight not including accessories: approx. 6.3kg
Maximum load
Symbols used
Date of manufacture (month/year): 04/2018
Permissible operating pressure
□ Label on the dinghy
permissible number of persons: 3
permissible carrying capacity: 260kg (573.30lbs)
Within 300m of protected sharelines Beware of offshore winds and currents! Do not use in winds stronger than force 4 and/or in waves higher than 0.5m!
Intended use
This product has been designed for private use. Design category D "protected waters":
Designed for use on protected waters close to the shoreline; small bays; small lakes; narrow rivers and canals, in which weather conditions with a wind strength up to and including 4 and significant wave heights up to and including 0.3m and occasional wave heights of a maximum of 0.5m, for example due to passing ships, may occur.
Safety information
The dinghy is a tested and safe item of water sports equipment. Nevertheless, we urge you to comply with the following rules and regulations:
Life-threatening hazard!
- Never leave children unattended with packing materials. There is a risk of suffocation.
- Never allow children to play with the item unsupervised.
Risk of injury!
Beware of offshore winds!
Beware of offshore currents!
- Ensure that the weight (people and load) is always evenly distributed in the boat as otherwise there is a risk of capsizing.
- Pay attention to the maximum permissible carrying capacity, the number of persons and the safety warning detailed on the identification plate.
- Always comply with the local navigation rules.
- Do not take any sharp or pointed objects with you in the dinghy.
- The dinghy should be protected from contact with potentially unsafe liquids or acids, as these can cause irreparable damage.
- Protect the dinghy from heat and fire! Be careful with lit cigarettes!
- To avoid damage to the hull, take care to ensure that the dinghy does not end up on stony ground.
- Do not leave the dinghy under any circumstances, if damage should occur to one of the three air chambers during use on the water. The buoyancy of the two intact air chambers will be sufficient to keep the dinghy afloat.
- Do not, under any circumstances, transport the dinghy on a vehicle while it is still inflated.
- Never leave your dinghy unmanned on the water. It will be carried away too fast for a swimmer to be able to reach it.
• Always make sure that you have paddles with you, before using the dinghy, otherwise you will not have sufficient control over the boat. - Do not make any technical alterations to your dinghy. Modifications of any kind will impair the operation of this item of sports equipment.
- Never use your dinghy under the influence of alcohol, drugs or medications.
- Never overestimate your strength; always pace yourself when paddling so that you can easily retrace the distance you have covered.
Stay within 300m of protected shorelines and pay attention to changing wind and current conditions which can severely hamper your ability to keep moving.

CAUTION!
It is extremely important that you exercise caution and self-awareness when on the water. Never overestimate your strength and boat-handling skills! Always stay close to the shore!
Pay attention to the weather conditions, storm warnings and any light signals or flares!

CAUTION!
Please observe the safety rules and applicable statutory regulations for lakes and open waters, and for your own safety always wear an approved life jacket.

CAUTION!
Avoid using sunscreen and skincare products which contain alcohol. Sunscreens and skincare products which contain alcohol can strip off the coloured layer of this inflatable PVC product. This can result in staining on your body, clothing or other articles which come into contact with the product.

WARNING!
In the event of a person falling over-board, he or she must always climb back in over the bow or stern, as there is a high risk of capsizing when climbing in over the sides.
Avoiding damage to the item!
- All inflatable items are sensitive to cold. Never unfold and inflate the item at temperatures below 15^ !
- If the air pressure in the inflatable increases in direct sun, this must be rectified by releasing the corresponding amount of air.
- Ensure that the item does not come into contact with stones, gravel or sharp objects, particularly when inflated, and do not allow it to rub or scrape against any surfaces as this can cause damage to the PVC.
- Only insert suitable pump adapters into the safety valves. Use of other adapters could result in damage to the valves.
- Do not over-inflate, as there is a risk that the seams might split open. Ensure the valves are firmly closed after inflating.
- Avoid contact with sharp, hot, pointy or hazardous items.
Assembly
Please follow the step-by-step instructions in the order given. Failure to inflate the three air chambers in the correct order may result in an uneven distribution of pressure. This can cause the dinghy to be unstable, and thus impair its handling characteristics.
- Due to its size, the item should always be assembled by two adults.
- Find a clean, level area with sufficient room to accommodate the fully unfolded dinghy. Check to make sure that all the parts are to hand and in perfect condition.
- When assembling the dinghy for the second and subsequent times, check for any damage, holes or tears and seal them as described in the section entitled "Repairs". Once you are on the water, it is too late to repair any damage.
- Do not over-inflate the air chambers as this will overstretch the PVC.
- Make sure that the inflated dinghy does not come into contact with stones or other sharp objects that can damage it.
Assembling the screw-on valves (Fig. B)
The chambers b of the inflatable each have a threaded hole for the enclosed screw-on valves (4).
- Pull the ring (4a) of the valve over the threaded hole (1a) so that it sits neatly in the groove.
- Screw the base (4b) clockwise into the threaded hole.
Inflating

CAUTION!
- Follow the correct order when inflating the air chambers.
- The recommended operating pressure is 0.04bar (= 40mbar = 0.58psi).
- Avoid over-inflating the air chambers - otherwise you risk overstretching or even splitting the seams.
-
To inflate the dinghy, use a commercially available foot pump or double stroke piston pump with the appropriate attachments and pressure gauge if necessary.
-
Do not use a compressor or compressed air canister to inflate the item.
This can damage the item.
• Always inflate each chamber fully.
Inflating order
Inflate the air chambers in the following order:
-
- Safety chamber with screw-on valve 1
-
- Floor chamber with stopper valve 2
-
- Buoyancy chamber with screw-on valve 3
Note: The air chambers on the dinghy are marked with their respective numbers (1) (Fig. F).
Inflating the air chambers
After inflating an air chamber, always check the air pressure as described in the section "Regulating the operating pressure".
-
Safety chamber with screw-on valve
-
Screw the cap (4c) on the screw-on valve (4) anticlockwise to open it.
- Inflate the safety chamber 1 with the appropriate pump until the imprinted measuring strip matches the length of the guide ruler.
- Screw the cap (4c) on the screw-on valve (4) clockwise to close it.
Note: The safety chamber is not yet completely inflated.
-
Floor chamber with stopper valve
-
Open the valve cap (1b) (Fig. D).
- Inflate the floor chamber 2 with the appropriate pump (Fig. E).
-
Close the valve cap and depress the valve using a light pressure (Fig. D).
-
Buoyancy chamber with screw-on valve
-
Screw the cap (4c) on the screw-on valve (4) anticlockwise to open it.
- Inflate the buoyancy chamber 3 with the appropriate pump until the measuring strip on the identification plate matches the guide ruler.
- Screw the cap (4c) on the screw-on valve (4) clockwise to close it.
Note: The buoyancy chamber 3 and the safety chamber 1 are now filled tight. The measuring strip on the safety chamber 1 no longer matches the guide ruler (7). This is correct and intentional.
Regulating the operating pressure

IMPORTANT!
The PVC material will stretch slightly after the initial inflation of the item, and will not revert to its original state. Please be aware that the required pressures may vary slightly depending on the load and outdoor temperature.
- Inflate the floor chamber 2 until it feels firm and no more creases are visible in the material.
Note: There should still be a small amount of give in the air chamber when it is pressed with the thumb.
- To regulate the operating pressure of the safety chamber and the buoyancy chamber 3 place the guide ruler (7) along the measuring strip (1c) on each chamber. The guide ruler (7) must match the length of the respective measuring strip (1c) (Fig. G).
Note: After all air chambers are completely inflated, the measuring strip (1c) on the safety chamber ① will no longer match the guide ruler (7). This is correct and intentional.
Accessories
Assembling the paddles
Note: The paddles may not be loosed from the rowlocks (1e) when the boat is in use on the water, but must remain secured in the rowlocks (1e) so as not to be lost!
- Join the two paddle tubes (2). The locking button (2a) must audibly and visibly click into place (Fig. 1).
- Slide the tube end through the rowlock (1e) and secure the paddle by sliding on a drip ring (3) (Fig. J).
- Repeat the procedure on the other side of the boat for the second paddle.
Cord (Fig. H)
Attach the 680cm cord (5) to the eyelets of the boat.
- Begin at the stern and pass the cord (5) through the eyelets provided around the dinghy.
- Secure the cord with a reef knot.
Kit bag (Fig. L)
A kit bag (10) is included with the product, which can be used to carry and store the dinghy.
Use the 200cm cord (6) to tie up the bag. The kit bag can also be used to protect provisions, clothing etc. from spray on board the dinghy.
Note: Please note that the kit bag is not waterproof. Do not store any sensitive objects such as cameras in the kit bag.
When using it on board, remove the cord and roll up the top end evenly. Then close the kit bag using the Velcro fastenings.
Storage pouch (Fig. M)
A spray-proof storage pouch (9) is also included with the product. This can be attached to the interior of the dinghy using the Velcro fastenings (1g). Smaller objects can be kept in this storage pouch.
Note: Please note that the pouch is not water-proof. Do not keep sensitive objects in this pouch.
Dismantling the dinghy
Remove the paddles from the rowlocks (1e).
Deflating
Deflate the dinghy as follows:
- To bleed air out of the air chamber using the plug valves, pull the plug valves out of the recesses and press the shafts lightly together (Fig. E).
- To deflate the chambers with screw-on valves, unscrew the valves fully out of their bases and let the air escape completely (Fig. C).
Dismantling the paddle
- Press the respective locking button (2a).
- Pull the two paddle tubes apart.
Carrying the dinghy
- The dinghy should always be carried by two people. Use the cord on the stern and the carrying handle (1d) on the bow.
- Attach the paddles to their respective paddle holders (1f) on the sides of the boat (Fig. K).
Storage and cleaning
CAUTION!
Only use cleaning agents that do not contain acids or petrol, and never use silicon-based products.
The product must always be kept dry, clean and deflated in a temperature-controlled room, and out of reach of rodents. Valves should always be kept closed when the dinghy is being stored. Ensure that the product is stored flat and not in a distorted position.
- Clean your dinghy thoroughly after each use by rinsing with fresh water and mild soap in order to remove any salt crystals, grains of sand and other minor soiling. After cleaning, allow the item to dry completely before storing.
- Let the air escape completely out of all the air chambers.
- Fold up the dinghy carefully.
Repairs
CAUTION!
You should never attempt to repair larger damaged areas yourself.
Minor damage can be repaired using the enclosed repair kit (8).
- Let the air out of the dinghy completely and clean the damaged area with an alcohol-based solution. Roughen the area surrounding the tear or hole slightly using fine sandpaper.
- Cut a patch that is large enough to cover the damaged area plus 1.25cm around it on all sides.
- Apply the glue to the appropriate spot on the dinghy as well as on the patch itself. Let the glue dry off a little.
- Press the patch down firmly with a soft object.
Note: Make sure to work on an even surface without any creases or folds. Using a rounded object, gently remove any bubbles, moving outwards from the centre.
- Wait for at least 12 hours after the repair before re-inflating the dinghy.
Disposal
Dispose of the article and the packaging materials in accordance with current local regulations. Packaging materials such as foil bags are not suitable to be given to children. Keep the packaging materials out of the reach of children.
Notes on the guarantee and service handling
The product was produced with great care and under constant supervision. You receive a three-year warranty for this product from the date of purchase. Please retain your receipt.
The warranty applies only to material and workmanship and does not apply to misuse or improper handling. Your statutory rights, especially the warranty rights, are not affected by this warranty. With regard to complaints, please contact the following service hotline or contact us by e-mail. Our service employees will advise as to the subsequent procedure as quickly as possible. We will be personally available to discuss the situation with you.
Any repairs under the warranty, statutory guarantees or through goodwill do not extend the warranty period. This also applies to replaced and repaired parts. Repairs after the warranty are subject to a charge.
IAN: 297680
GB Service Great Britain
Tel.: 0871 5000 720
(£ 0.10/Min.)
E-Mail: deltasport@lidl.co.uk
IE Service Ireland
Tel.: 1890 930 034
(0,08 EUR/Min., (peak))
(0,06 EUR/Min., (off peak))
E-Mail: deltasport@lidl.ie
- SCHLAUCHBOOT DINGHY CANOT PNEUMAT
- FR BE
- Please read and obey the following instructions carefully.
- Package contents (Fig. A)
- Technical data
- Symbols used
- Intended use
- Safety information
- Life-threatening hazard!
- Risk of injury!
- CAUTION!
- WARNING!
- Avoiding damage to the item!
- Assembly
- Assembling the screw-on valves (Fig. B)
- Inflating
- Inflating order
- Inflating the air chambers
- After inflating an air chamber, always check the air pressure as described in the section "Regulating the operating pressure".
- Regulating the operating pressure
- IMPORTANT!
- Accessories
- Assembling the paddles
- Cord (Fig. H)
- Kit bag (Fig. L)
- Storage pouch (Fig. M)
- Dismantling the dinghy
- Deflating
- Dismantling the paddle
- Carrying the dinghy
- Storage and cleaning
- Repairs
- Disposal
- Notes on the guarantee and service handling
Brand : CRIVIT
Model : IAN 297680
Category : Boat