
MMC1500BK - Food processor GORENJE - Free user manual and instructions
Find the device manual for free MMC1500BK GORENJE in PDF.

| Type de produit | Robot de cuisine (Food processor) |
| Marque | Gorenje |
| Modele | MMC1500BK |
| Puissance nominale | 1500 W |
| Capacite du bol | Jusqu'à 2,3 kg de pâte |
| Materiau du bol | Acier inoxydable |
| Niveau sonore | 72 dB(A) |
| Accessoires inclus | Fouet, crochet petrisseur, pale melangeur, disques a trancher/râper (5 disques) |
| Disques fournis | Râpe moyenne, râpe fine, râpe grossiere, trancheuse epaisse, trancheuse moyenne |
| Fonctions | Melanger, petrir, fouetter, trancher, râper, hacher (avec bol separate) |
| Vitesse | Reglable (positions 1-6 + pulsation) |
| Type de commande | Molette rotative |
| Tete multifonction | Relevable et inclinable |
| Securite | Verrouillage de securite, arret automatique en surcharge |
| Alimentation | 220-240 V ~ 50/60 Hz (estimation) |
| Entretien | Bol et accessoires lavables au lave-vaisselle (recommandation manuelle) |
| Poids net | Environ 8 kg (estimation) |
| Dimensions (L x P x H) | Environ 400 x 250 x 350 mm (estimation) |
| Garantie | 2 ans (standard Gorenje) |
| Pays de fabrication | Slovenie (Gorenje est une marque slovene) |
Frequently Asked Questions - MMC1500BK GORENJE
User questions about MMC1500BK GORENJE
0 question about this device. Answer the ones you know or ask your own.
Ask a new question about this device
Download the instructions for your Food processor in PDF format for free! Find your manual MMC1500BK - GORENJE and take your electronic device back in hand. On this page are published all the documents necessary for the use of your device. MMC1500BK by GORENJE.
USER MANUAL MMC1500BK GORENJE
natural_image
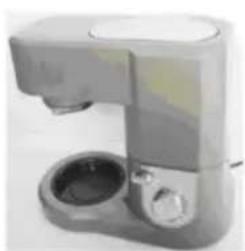
Modern kitchen mixer with whisk inside a black stand, no visible text or symbols on the device itself.MMC1500BK
| Kuhinjski robot | Navodila za uporabo | SI |
| Kuhinjski robot | Upute za uporabu | BIH HR |
| Kuhinjski robot | Uputstvo za upotrebu | BIH SRB MNE |
| Кујнски робот | Упатства за употреба | MK |
| Kitchen robot mixer | Instruction manual | GB |
| Кухненски робот | Инструкции за употреба | BG |
| Robot de bucătărie | Manual de utilizare | RO |
| Konyhai robotgép | Használati utasítás | H |
| Robot kuchenny | Instrukcja obsługi | PL |
| Kuchynské roboty | Návod na obsluhu | SK |
| Kuchyňské roboty a procesory | Návod na použití | CZ |
| Küchenmaschine | Gebrauchsanweisung | D |
| Robot kuchenny | Інцтрукція з експлуатації | UA |
| Кухонный комбайн | Инструкция по эксплуатации | RUS |
natural_image
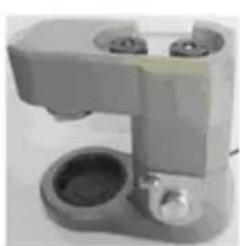
Modern kitchen mixer with a bowl and control knob (no visible text or symbols)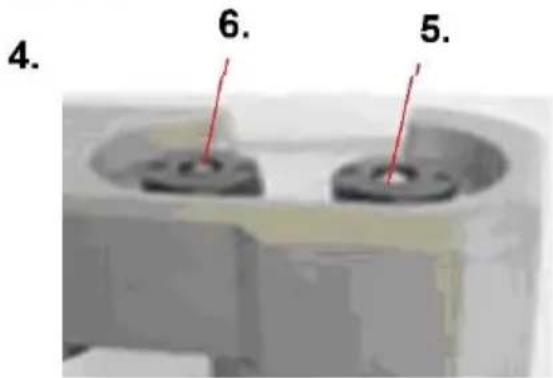
Opis:
natural_image
Exterior view of a modern kitchen brush unit (no visible text or symbols)②
natural_image
Exterior view of a modern office building (no signage)③
natural_image
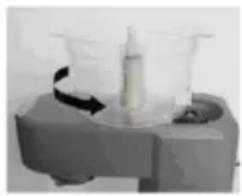
Laboratory setup with two glassware and a syringe on a stand (no visible text or labels)④
natural_image
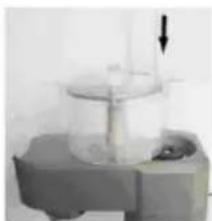
Close-up of a laboratory apparatus with a glass container and a downward arrow, no visible text or symbols- Večfunkcijsko glavo aparata (8) postavite v vodoravni položaj ter odstranite pokrov (4).
- Namestite sekljalnik na ustrezen priključek (6) ter pritrdite sekljalnik tako, da ga obrnete v nasprotni smeri urinega kazalca. Sekljalnika ni mogoče namestiti na priključek za mešalnik (5).
- Na gred sekljalnika namestite disk za srednje grobo sekljanje, fino sekljanje, grobo sekljanje, rezanje na srednje ali rezanje na debele rezine (odvisno od vaših želja in sestavin – uporabite le en disk naenkrat).
- Nato namestite pokrov na posodo sekljalnika. Dodajte sestavine, ki jih želite sesekljati.
Pozor:
- Uporabite sveže sestavine in ne sekljajte premajhnih količin hrane. Širina cevi za dodajanje sestavin naj bo zapolnjena.
- Nikoli ne segajte s prsti v cev za dodajanje
sestavin.
- Disk za srednje grobo sekljanje, fino sekljanje, grobo sekljanje, rezanje na srednje ali rezanje na debele rezine lahko uporabite za sir, korenje, krompir, kumarice, čebulo, rdečo peso itd.
- Rezila na diskih so ostra. Bodite previdni.
- Po uporabi vedno obrnite stikalo v položaj za izklop (off).
- Če je pokrov težko zakleniti, obrnite gred in disk v smeri urinega kazalca eden ali dva obrata; tako boste ustrezno namestili gred. Nato bo laže zakleniti pokrov.
Čiščenje
natural_image
Exterior view of a modern kitchen brush unit with handle and base (no visible text or symbols)②
natural_image
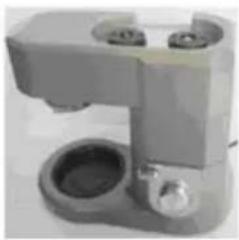
Close-up of a metallic mechanical component with two circular ports and a central bore (no visible text or symbols)③
natural_image
Close-up of a mechanical device with a cylindrical component and a curved arrow indicating rotation (no visible text or symbols)④
natural_image
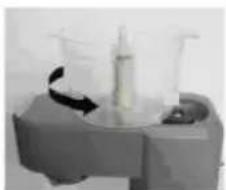
Laboratory apparatus with a glass stand and mechanical component, no visible text or symbolsVaši nastavci omogućavaju podešavanje visine iznad dna radne činije, čime možete postići najoptimalnije rezultate. Ovisno o sastojcima, činija (9) s poklopcem omogućuje vam da napravite i do 2,3 kg testa.
- Dugme za otpuštanje višenamenske glave (10) gurnite nagore. Podignite višenamensku glavu, i namestite činiju (9) na postolje aparata. Zatim je okrenite tako da se uglavi u svoj položaj. U činiju sada možete stavljati sastojke.
Činiju iz nerđajućeg čelika pokrijte poklopcem i namestite nastavak za mešanje, kuku (spiralu) za mešenje testa, ili metlicu za mućenje – ovisno o sastojcima i o traženoj teksturi. Okretanjem osovine regulišite idealnu visinu montiranog nastavka.
Višenamensku glavu (8) aparata gurnite u smeru nadole, dok ne začujete da se je uglavila (čuje se klik).
Tokom pripreme možete dodavati sastojke ubacujući ih kroz otvor u poklopcu.
Ukoliko želite zaustaviti rad aparata, dugme za regulisanje (10) obrnite nazad u položaj "0".
Pre prve upotrebe sve delove aparata operite sapunicom, a zatim ih isperite i obrišite da budu suvi.
natural_image
Exterior view of a modern kitchen brush unit with a circular base and handle (no visible text or symbols)②

natural_image
Close-up of a mechanical component with two circular ports and a central base (no visible text or symbols)③
natural_image
Laboratory equipment setup with glassware and a bottle, no visible text or symbols④
natural_image
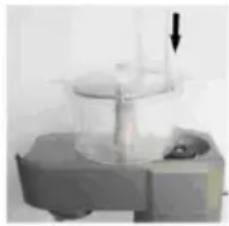
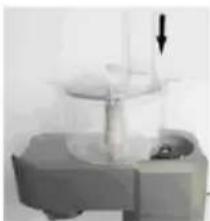
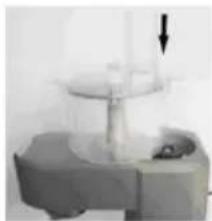
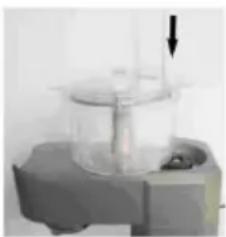
Close-up of a mechanical device with a downward arrow and a small object on top (no visible text or symbols)- Višenamensku glavu aparata (8) postavite u horizontalan položaj i skinite poklopac (4).
- Seckalicu namestite na odgovarajući priključak (6) i uglavite je okrećući je u suprotnom smeru od kazaljki na satu. Seckalica ne može da se namesti na priključak za mikser (5).
- Na osovinu seckalice nataknite ploču za srednje grubo seckanje, fino seckanje, grubo seckanje, rezanje na srednje ili rezanje na debele kriške (ovisno o vašim željama i o sastojcima kojima raspolažete – u svakom slučaju koristite samo jednu ploču odjednom). Zatim stavite poklopac na posudu seckalice. Dodajte sastojke koje želite seckati.
Pažnja!
- Koristite sveže sastojke, i nikad nemojte seckati premalene količine hrane. Širina
natural_image
Exterior view of a modern office building (no signage)②
natural_image
Close-up of a mechanical device with two circular ports and a central base (no visible text or symbols)③

natural_image
Laboratory setup with two glassware and a tray (no visible text or labels)④
natural_image
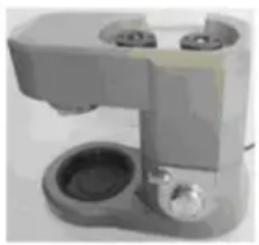
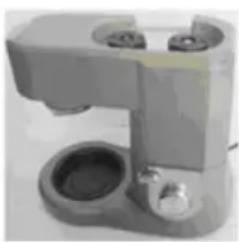
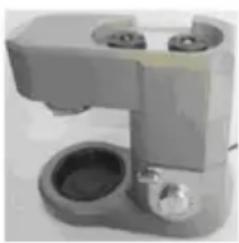
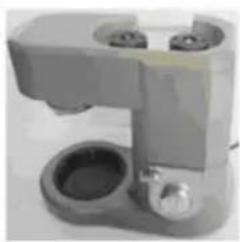
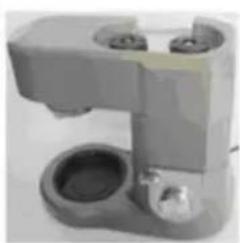
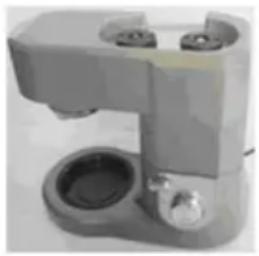
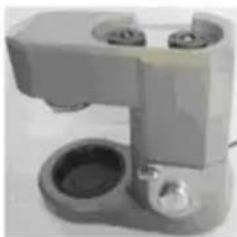
Close-up of a mechanical device with a cylindrical component and a downward arrow, no visible text or symbols- Removable cover for mincer power outlet
- Release button for cutte housing
- Power outlet for mincer
- Cover
- Power outlet for blender
- Power outlet for food processor bowl
- Protective cover
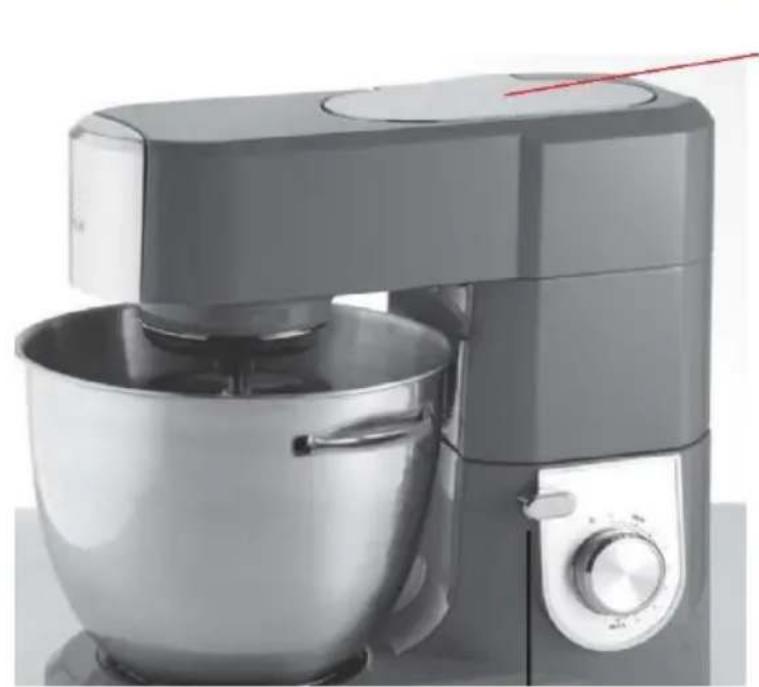
- Multifunction head
- Stainless steel bowl
- Release button for multifunction head
- Speed control switch
- Whisk
- Dough hook
- Mixer blade
- Fine shredding disc
- Coarse shredding disc
- Thick slicing disc /medium slicing disc
- Pusher for food processor bowl
- Cover for food processor bowl
- Food processor bowl
Danger
Do not immerse the motor unit in water nor rinse it under the tap.
Warning
- Carefully read the instructions before using your appliance.
- Switch off the appliance before fitting and removing the attachment.
- Keep your fingers away from moving parts and the opening on the attachment.
- Only use the appliance for its intended domestic use. The manufacture will not accept any liability if the appliance is subject to improper use or failure to comply with these instructions.
- Check that the voltage rating of the appliance matches that of your electrical system.
- Any connection error will nullify the guarantee.
- The appliance must be plugged into an earthed electrical socket.
- If you have to use an electrical extension lead, it must be earthed and you should make sure that noone can trip over it.
- Unplug the appliance as soon as you have finished using it and before cleaning it.
- Don't use your attachment and/or appliance if it has been damaged. Contact an approved service centre.
-
Any work on the appliance other than normal care and cleaning by the customer must be carried out by an approved service centre.
-
Do not immerse the appliance, the power cord or the plug in water or in any other liquid.
- Do not allow the power cord to hang within the reach of children, to come close to or into contact with hot parts of your appliance, any other source of heat or any sharp edge.
- Switch off the appliance and disconnect it from power supply before changing accessories or approaching any moving parts.
- Do not touch the whisk, mixer blade or kneading hook while the appliance is in operation.
- Only use one attachment at a time.
- Do not operate the appliance continuously for more than 10 minutes at a time. Allow 30 minutes rest before next use.
- Appliances can be used by persons with reduced physical, sensory or mental capabilities or lack of experience and knowledge if they have been given supervision or instruction concerning use of the appliance in a safe way and if they understand the hazards involved.
- Children should be supervised to ensure that they do not play with the appliance.
- If the supply cord is damaged, it must be replaced by the manufacturer, service agent or a similarly qualified person, in order to avoid a hazard.
- This appliance may not be used by children. Keep the appliance and its cord out of reach of children.
• Children may not play with the appliance. - Children may not clean the appliance or perform user maintenance tasks on it without supervision.
- When you use one power outlet for blender 5 or the power outlet for food process bowl 6, it is necessary to use protective cover 7 on the other power outlet.
- Be careful when handling the sharp cutting blades, emptying the bowl and during cleaning
- Be careful when pouring hot liquid into the food processor or blender as it can be ejected out of the appliance due to sudden steaming.
- Do not use the appliance if the rotating sieve or the protecting cover is damaged or has visible cracks.
- This appliance is intended to be used in household and similar applications.
- Noise level: 72 dB(A)
This appliance is marked according to the European directive 2012/19/EU on Waste Electrical and Electronic Equipment (WEEE). This guideline is the frame of a European-wide validity of return and recycling on Waste Electrical and Electronic Equipment.
Caution
Always place the appliance on a flat, stable surface.
Do not use the citrus press longer than 10 minutes without interruption.
This appliance is intended for household use only.
Never use any accessories or parts from other manufacturers unless they are authorized by Gorenje. In case you use these accessories the warranty will be canceled.
Before use
Clean all detachable parts before using the appliance for the first time (see chapter 'Cleaning').
Make sure the appliance is assembled properly (see chapter 'General description') before you plug it in the wall socket.
Put the plug in the wall socket.
Using the appliance
MIXER BLADE/ WISK/ DOUGH HOOK

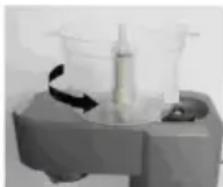
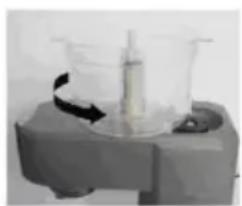
Your accessories are equipped with a system for adjusting the height above the bottom of the bowl for optimum results. Depending on the nature of the ingredients, the bowl (9) with its cover can be used to prepare up to 2.3 kg of dough.
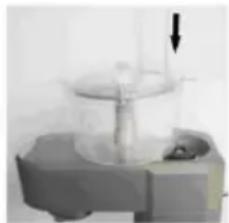
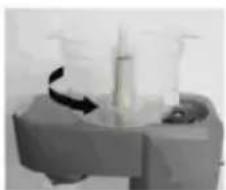
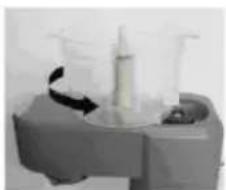
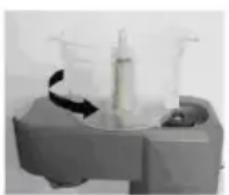
- Press the release button for the multifunction head (10) up, lift the multifunction head then fit the bowl(9) onto the appliance by turning until it locks into position. Place the ingredients in bowl first.
- Put the stainless steel bowl cover onto the stainless bowl and insert the mixer blade, hook or whisk (depending on the consistency you prefer). Adjust the height by turning the shaft: adjust the accessories to the ideal position.
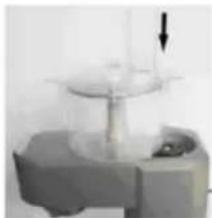
- Press the multifunction head (8) of the appliance down until a click is heard.
- During preparation, you can add ingredients through the opening in the cover.
- To stop appliance operation, turn the knob (10) back to 0.
- Before using for the first time, clean all parts of the accessories with soapy water, rinse and dry.
- Place the appliance on a flat, clean and dry surface and then plug in your appliance.
SLICING/SHREDDING DISCS
①
natural_image
Exterior view of a modern kitchen brush unit with a circular base and handle (no text or symbols visible)②
natural_image
Close-up of a mechanical device with two circular components and a central hole (no visible text or symbols)③

natural_image
Laboratory equipment setup with a bottle, vials, and a tray (no visible text or labels)④
natural_image
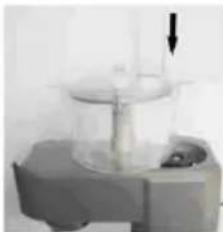
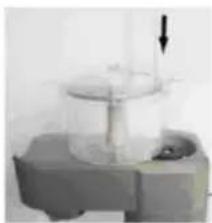
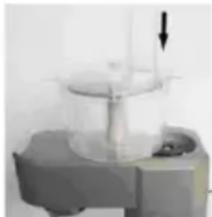
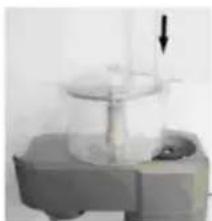
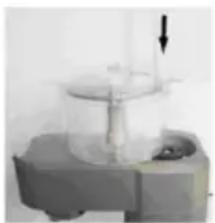
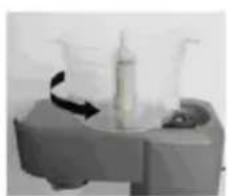
Close-up of a mechanical device with a downward arrow indicating motion or force (no visible text or symbols)- Fit the multifunction head of the appliance (7) to a horizontal position and then remove the cover (4).
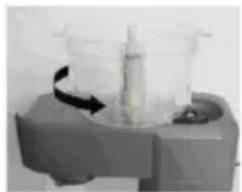
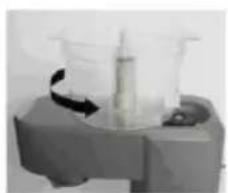
- Fit the food processor bowl on the power outlet for the food processor bowl (6) and lock it in position by turning it anticlockwise. The food processor bowl will not fit on the blender power outlet (5)
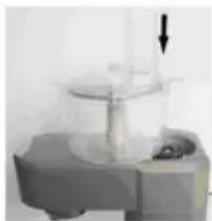
- Place the medium shredding disc, fine shredding disc, coarse shredding disc or thick slicing disc / medium slicing disc (depending on the consistency you prefer, using only one slicing / shredding disc at a time) onto the worm shaft.
- Then put the cover onto the food processor bowl
- Add the ingredients to be processed.
Caution:
- Use fresh ingredients and don't cut food too small. Make sure the large feed tube is fairly full along the entire width.
- Never put your fingers in the feed tube.
- Use the medium shredding disc, fine shredding disc, coarse shredding disc or thick slicing disc / medium slicing disc for cheese, carrots, potatoes, cucumber, onions, beetroot etc.
- The blades are sharp. Handle carefully.
- After use, always turn the switch to the OFF position.
- If the lid is hard to lock, rotate the shaft and disk clockwise by 1-2 turns to fit the shaft firmly into position. Then, lock the lid
Cleaning
- Unplug the appliance.
- Never immerse the motor unit in water or put it under running water. Wipe it with a soft dry or slightly damp cloth.
- For easier cleaning, quickly rinse the accessories after use. Completely dismantle the mixer attachment. Handle the blades with care, as some have sharp cutting edges.
- If your accessories are discoloured by food (carrots, oranges etc.), rub them gently with a kitchen towel dipped in cooking oil and then clean in the usual way.
| Accessory | Food | Maximum amount | Operation time | Speeds | Preparation |
| Whisk | Cream (38% fat) | 500 ml | 10 minutes | 5-6 | / |
| Egg white | 12 pcs | 3 minutes | 5-6 | / | |
| Dough hook | Flour | 1500 g | Operation 1 minute and 30 seconds at MIN speed, and then 3 minutes and 30 seconds at I speed. Don’t operate the appliance for more than 5 minutes. | / | |
| Salt | 10 g | ||||
| Yeast | 20 g | ||||
| Sugar | 10 g | ||||
| Water(43°C) | 750 g | ||||
| Lard | 30 g | ||||
| Mixer blade | Flour | 200 g | 5 minutes | 3-4 | / |
| Caster sugar | 200 g | ||||
| Margarine | 200 g | ||||
| Eggs | 4 pcs | ||||
| Slicing/shredding discs | Ccarrots | 400 g | 15 seconds | 4 | / |
| Potatoes | 400 g | 15 seconds | 4 | / | |
| Onions | 400 g | 15 seconds | 4 | / | |
Environment
This marking indicates that this product should not be disposed of with other household waste throughout the EU. To prevent possible harm to the environment or human health from uncontrolled waste disposal, recycle it responsibly to promote the sustainable reuse of material resources. To return your used device, please use the return and collection systems or contact the retailer where the product was purchased. They can take this product for environmentally safe recycling.
Guarantee & service
If you need information or if you have a problem, please contact the Gorenje Customer Care Centre in your country (you find its phone number in the worldwide guarantee leaflet). If there is no Customer Care Centre in your country, go to your local Gorenje dealer or contact the Service department of Gorenje domestic appliances.
For personal use only!
GORENJE
WISHES YOU A LOT OF PLEASURE WHEN USING YOUR APPLIANCE
We reserve the right to any modifications!
natural_image
Exterior view of a modern kitchen brush unit (no visible text or symbols)②
natural_image
Close-up of a mechanical device with two circular ports and a central base (no visible text or symbols)③
natural_image
Close-up of a mechanical device with a cylindrical component and a base, no visible text or symbols④
natural_image
Close-up of a laboratory apparatus with a glass bowl and a downward arrow, no visible text or symbolsMANUAL DE INSTRUCTIUNI
RO
natural_image
Exterior view of a modern kitchen brush unit with a circular base and handle (no text or symbols visible)②
natural_image
Close-up of a mechanical device with a circular base and two circular ports (no visible text or symbols)③
natural_image
Close-up of a mechanical device with two transparent containers and a central cylindrical component (no visible text or symbols)④
natural_image
Close-up of a metallic mechanical device with a downward arrow and base, no visible text or symbolsnatural_image
Exterior view of a modern kitchen appliance with a side sink and control knob (no text or symbols visible)②
natural_image
Close-up of a metallic mechanical device with two circular ports and a central base (no visible text or symbols)③
natural_image
Close-up of a laboratory apparatus with glassware and a curved arrow indicating motion (no visible text or symbols)④
natural_image
Close-up of a laboratory apparatus with a glass bowl and a pointer, no visible text or symbolsflowchart
graph TD
    A["Step ①: Initial mixing bowl"] --> B["Step ②: Close-up mixing bowl"]
    B --> C["Step ③: Control panel with arrow indicating rotation"]
    C --> D["Step ④: Final mixing bowl with arrow indicating rotation"]
natural_image
Exterior view of a modern kitchen brush unit with a circular base and handle (no text or symbols visible)②
natural_image
Close-up of a mechanical device with a circular base and two cylindrical components (no visible text or symbols)③
natural_image
Exterior view of a modern office building (no signage)④
natural_image
Laboratory apparatus with a glass bowl and a vertical rod, mounted on a base (no visible text or symbols)natural_image
Exterior view of a modern kitchen brush unit with a circular base and handle (no visible text or symbols)②
natural_image
Close-up of a mechanical component with two circular ports and a central bore (no visible text or symbols)③
natural_image
Close-up of a laboratory apparatus with a glass tube and control unit (no visible text or symbols)④
natural_image
Close-up of a laboratory apparatus with a downward arrow indicating a component (no visible text or symbols)- Multifunkčnú hlavu nasadte na spotrebič (8) do horizontálnej polohy a potom odstráňte kryt (4).
- Nasad'te nádobu na pohon nádoby (6) a uzamknite ju do svojej polohy otočením proti smeru hodinových ručičiek. Nádoba nebude sediet' na pohon mixéra (5).
- Umiestnite disk na stredne hrubé strúhanie, disk na jemné strúhanie, disk na hrubé strúhanie alebo disk na hrubé krájanie/disk na stredne hrubé krájanie (podl'a toho, akú konzistenciu uprednostňujete, avšak len jeden disk na krájanie/strúhanie naraz) na slimáka.
- Potom na nádobu položte kryt.
- Pridajte ingrediencie.
Pozor:
natural_image
Exterior view of a modern kitchen or oven appliance (no visible text or symbols)②
natural_image
Close-up of a mechanical device with two circular ports and a central base (no visible text or symbols)③
natural_image
Laboratory setup with glassware and a cylindrical object on a tray (no visible text or symbols)④
natural_image
Close-up of a modern bathroom sink with a faucet and toilet (no visible text or symbols)natural_image
Exterior view of a modern kitchen brush unit with a circular base and handle (no text or symbols visible)②
natural_image
Close-up of a mechanical device with two circular components and a central bore (no visible text or symbols)③
natural_image
Laboratory setup with a glass beaker and a test tube on a base (no visible text or labels)④
natural_image
Close-up of a laboratory apparatus with a glass container and an arrow pointing to it (no visible text or symbols)natural_image
Exterior view of a modern kitchen brush unit with a circular base and handle (no visible text or symbols)②
natural_image
Close-up of a metallic mechanical device with two circular ports and a central bore (no visible text or symbols)③
natural_image
Exterior view of a modern office building (no signage)④
natural_image
Close-up of a laboratory apparatus with a cylindrical component and a downward arrow, no visible text or symbolsflowchart
graph TD
    A["Step ①: Covering mixture"] --> B["Step ②: Stopping with a mouse"]
    B --> C["Step ③: Stopping with a bowl"]
    C --> D["Step ④: Covering the kitchen with a bowl"]

Brand : GORENJE
Model : MMC1500BK
Category : Food processor