PL-140 - Iron FAGOR - Free user manual and instructions
Find the device manual for free PL-140 FAGOR in PDF.

| Brand | FAGOR |
| Model | PL-140 |
| Product type | Iron with water tank |
| Power | 1400 W |
| Voltage / Frequency | 230 V ~ 50 Hz |
| Tank capacity | 200 cc |
| Soleplate | Stainless steel |
| Spray function | Yes, activated by pressing the spray button |
| Extra steam function | Yes, also in vertical position |
| Dry ironing | Yes, function selector in dry ironing position |
| Steam ironing | Yes, continuous steam adjustment |
| Vertical steam | Possible via the extra steam function |
| Self-cleaning | Yes, self-cleaning button to be used at least twice a month |
| Safety | Automatic shut-off not mentioned; unplug before filling; do not immerse; use a grounded outlet |
| Maintenance | Clean the soleplate with a slightly damp cloth; do not use abrasive products |
| Recommended water type | Distilled water if water is hard; do not use battery water, starch, perfume, or softener |
| Spare parts | Power cord replaceable by an authorized service center |
| Usage | Household use only |
| Recycling | Do not dispose of with household waste; take to a specific collection point |
Frequently Asked Questions - PL-140 FAGOR
User questions about PL-140 FAGOR
0 question about this device. Answer the ones you know or ask your own.
Ask a new question about this device
Download the instructions for your Iron in PDF format for free! Find your manual PL-140 - FAGOR and take your electronic device back in hand. On this page are published all the documents necessary for the use of your device. PL-140 by FAGOR.
USER MANUAL PL-140 FAGOR
The manufacturer reserves the right to modify the models described in this User's Manual.
natural_image
Line drawing of a FAGOR air iron with control knobs and a central dial (no text or symbols)PLANCHA DE VAPOR / FERRO DE ENGOMAR A VAPOR / STEAM IRON
/ FER VAPEUR / DAMPFBÜGELEISEN / FERRO DA STIRO A VAPORE
/ ATMOSIΔEPO / GÓZÖLŐS VASALÓ / NAPAŘOVACÍ ŽEHLIČKA /
NAPAROVACIA ŽEHLIČKA / ŽELAZKO NA PARĘ / ПАРНА ЮТИЯ /
3

natural_image
Illustration of a steam iron with a small cylindrical component and a close-up of its tip, alongside a schematic diagram of its internal components (no text or symbols present)4
5

natural_image
Line drawing of a steam iron with a cutting tool and a magnified inset showing the tip (no text or symbols)6
natural_image
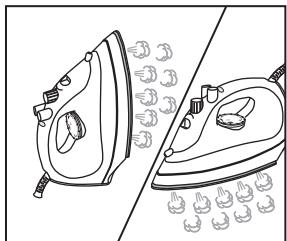
Line drawing of two steam iron holders, one on opposite sides, with decorative cloud-like patterns (no text or symbols)7
8
- Before using the appliance for the first time, read this instruction manual carefully and keep it for future reference. Keep these instructions throughout the life of the iron.
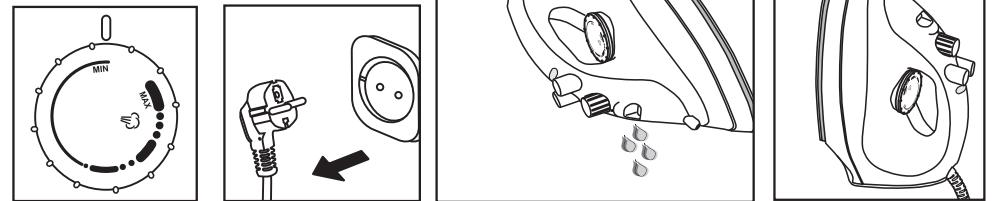
- Ensure that the domestic mains voltage is the same as that indicated on the appliance. Only connect the iron to an AC supply.
- The electrical safety of this appliance is only guaranteed if it is correctly earthed. In case of doubt, contact a professionally qualified technician.
- This appliance is for domestic use only. Any other use will be considered unsuitable or dangerous.
- Do not submerge this appliance in water or other liquids. Do not fill it with water under the tap.
- Keep the iron out of the reach of children.
- This appliance reaches high temperatures during use and there is therefore a risk of burns. Always pick up the appliance by its handle and avoid any contact with the metal parts and steam.
- Never pull on the cord to unplug the appliance.
- Check the state of the cord. If it is damaged and needs replacing, this must only be done by an authorised technical assistance service.
- Prevent the cord from coming into contact with hot surfaces or the surface of the iron itself.
- Unplug the iron before filling or emptying the water tank. Stand the iron vertically during pauses in ironing.
- If the iron is to be left unattended after finishing ironing, even for a short period of time:
- Turn the temperature dial to "MIN" position
– Leave the iron in vertical position
– Unplug the iron from the mains
- If the iron (or cord) needs to be repaired for any reason, do not use the appliance. Take it to an authorised Technical Assistance Service for repair.
- Repairs carried out by non-qualified personnel may cause accidents or damage to the user.
BEFORE USING THE IRON FOR THE FIRST TIME
- Remove all labels and protectors from the soleplate and outer casing.
- Completely unwind and straighten the supply cord.
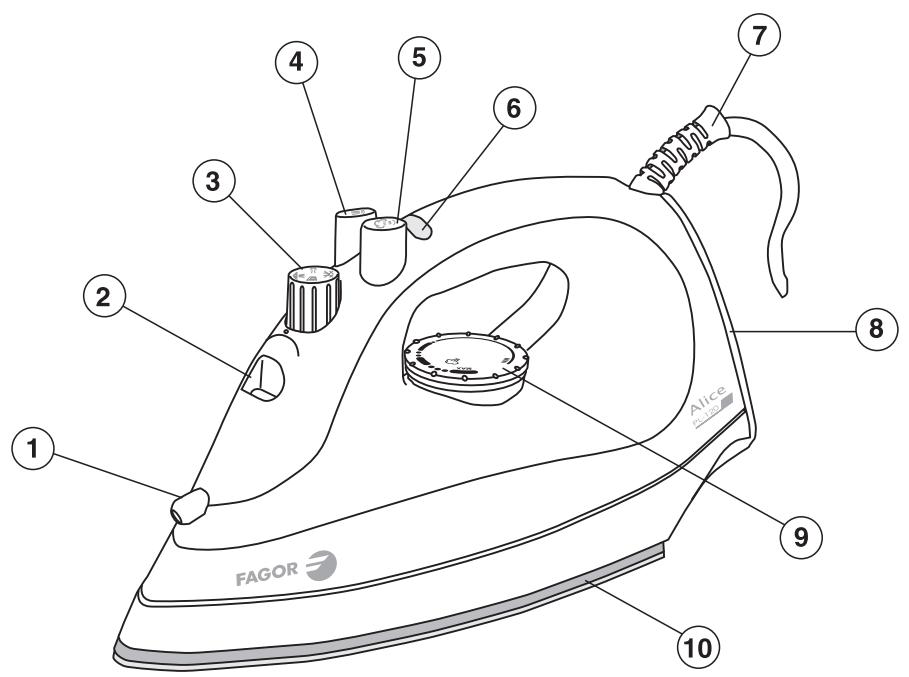
1. DESCRIPTION
- Spray nozzle
- Fill hole
- Function selector
- Spray button
- Extra steam button
- Indicator light
- Cord protector
- Standing heel
- Temperature dial
- Stainless steel soleplate
2. FILLING THE WATER TANK
- In hard water areas, we recommend you use distilled water. Do not use battery water or water with additives such as starch, perfume, fabric softeners, etc.
- Stand the iron horizontally and fill the water tank. Do not exceed the "MAX" level.
- Plug the iron into the mains and select the temperature according to the indications given on the label of the clothes to be ironed. If you are not sure about the composition of the fabric to be ironed, start with a low temperature and iron a hidden part of the garment, gradually increasing the temperature until the creases come out without the fabric being damaged. The temperature selector (9) is marked with the following symbols:
MIN Iron on
● Synthetics, acrylics
Silk, rayon, wool
● ● ● Cotton/linen
MAX Linen
- When the indicator light (6) switches off, the soleplate (10) has reached the selected temperature.
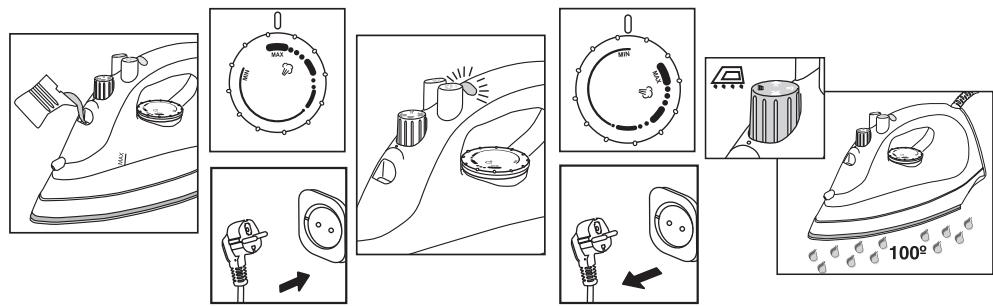
3. DRY IRONING
- Turn the function selector (3) to dry ironing position
- During dry ironing, the spray function can be used providing there is water in the tank. (See "Spray" and "Filling the tank" sections).
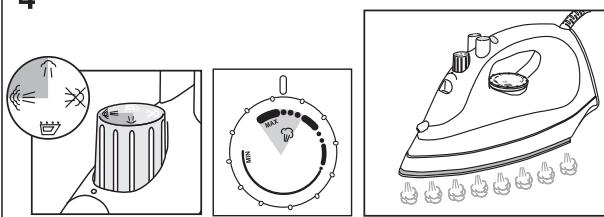
4. STEAM IRONING
- Turn the temperature selector (9) to the steam position between ●●● and "MAX" position. The closer to "MAX" position the selector is, the more steam there will be.
- Turn the function selector (3) to a steam ironing position between the symbols (minimum) and (maximum). Place the iron in horizontal position and the steam will begin to come out of the holes in the soleplate. If no steam is coming out of the iron, gently tap the soleplate against the ironing surface. When the iron is stood up vertically the steam will stop coming out.
Warning! Avoid any contact with the steam and do not direct it towards people.
Note: If the tank needs to be filled during ironing, unplug the iron before filling it with water.
5. SPRAY
Press the Spray button (4). Press it repeatedly to activate the spray action.
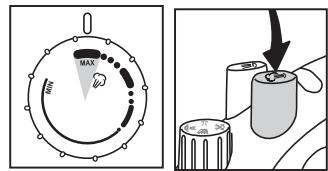
6. EXTRA STEAM
The temperature selector must be on "MAX" position. If it is not in this position the iron will leak water. Before using this function press the extra steam button (5) several times to activate it. To prevent the iron from leaking water, do not press the button too quickly. Wait around 5 seconds before pressing it each time.
Vertical steam: The extra steam function
also works when the iron is in vertical position.
7. AFTER IRONING
- Turn the temperature selector (9) to minimum, and turn the function selector (3) to dry ironing position.

- Unplug the iron from the mains and empty the tank.
- Wait for it to cool down and then store it in a dry place, always in vertical position.
CLEANING AND MAINTENANCE
Cleaning
Unplug the iron and wait until it cools down before cleaning.
Clean the outside of the iron and the soleplate with a damp cloth.
Do not use abrasive cleaning agents, vinegar or decalcifying products to clean the iron.
To prevent the soleplate from being scratched, avoid ironing fasteners, zips, metal buttons, etc., and do not place the iron on rough or metal surfaces.
Maintenance
This iron has a self-cleaning button which should be used at least twice a month in order to prevent harmful minerals from accumulating in the steam chamber.
Proceed as follows:
8. Self-cleaning
- Fill the water tank, plug the iron in and turn the temperature selector to "MAX" position.
- Wait until the indicator light has switched on and off about 2 or 3 times.
- Turn the temperature selector to "Min" position and unplug the iron.
- Hold the iron horizontally over a sink or washbasin and turn the function selector to self-cleaning position Steam with drops of boiling water will come out of the soleplate outlet holes.
-
Gently move the iron backwards and forwards, until the tank has emptied.
-
Press the extra steam button several times.
- Run the iron over a dry cloth to dry the soleplate.
- When you have finished, turn the function selector to position and allow the iron to cool down before putting it away.
TECHNICAL CHARACTERISTICS
| PL-120 | PL-140 | |
| Voltage /Frequency | 230V~50 Hz | |
| Power | 1200W | 1400W |
| Tank volume | 200c.c. | |
8. INFORMATION FOR THE CORRECT DISPOSAL OF ELECTRICAL AND ELECTRONIC APPLIANCES
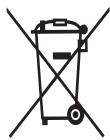
At the end of its working life, the product must not be disposed of as urban waste. It must be taken to a special local authority differentiated waste collection centre or to a dealer providing

this service. Disposing of a household appliance separately avoids possible negative consequences for the environment and health deriving from inappropriate disposal and enables the constituent materials to be recovered to obtain significant savings in energy and resources.
To remind you that you must collaborate with a selective collection scheme, the symbol shown appears on the product warning you not to dispose of it in traditional refuse containers.
For further information, contact your local authority or the shop where you bought the product.