
GAMEPAD 2 - Handheld game console ARCHOS - Free user manual and instructions
Find the device manual for free GAMEPAD 2 ARCHOS in PDF.


| Product type | Portable game console |
| Brand | ARCHOS |
| Model | GAMEPAD 2 |
| Operating system | Android |
| Display | 7-inch touchscreen |
| Processor | Quad-core 1.5 GHz |
| RAM | 1 GB |
| Internal storage | 8 GB |
| Connectivity | WiFi 802.11 b/g/n, Bluetooth 4.0, micro-USB, mini-HDMI, audio jack |
| Power supply | Rechargeable lithium-ion battery, 5V/2A charger included |
| Dimensions (approx.) | 250 x 100 x 20 mm |
| Weight (approx.) | 300 g |
| Main functions | Gaming with physical buttons (L/R, A/B/X/Y, analog sticks), virtual button mapping, Android touchscreen, access to Google Play Store |
| Care and cleaning | Clean with a soft, dry cloth. Do not use abrasive products. Avoid moisture. |
| Security | Screen lock by pattern, PIN code, or password. Factory reset possible. |
| Spare parts and repairability | Charger and USB cable included. No official spare parts listed. |
| General information | Hybrid console combining a game controller and an Android tablet. Allows playing Android games with physical controls. |
Frequently Asked Questions - GAMEPAD 2 ARCHOS
User questions about GAMEPAD 2 ARCHOS
0 question about this device. Answer the ones you know or ask your own.
Ask a new question about this device
Download the instructions for your Handheld game console in PDF format for free! Find your manual GAMEPAD 2 - ARCHOS and take your electronic device back in hand. On this page are published all the documents necessary for the use of your device. GAMEPAD 2 by ARCHOS.
USER MANUAL GAMEPAD 2 ARCHOS
Package Contents. 2 Getting started. 3 Description of the device. 4 Connecting to a WiFi network.. 6 ARCHOS mapping tool. 8 The AndroidTM interface. 14 Getting familiar with Android TM 18 Troubleshooting 20
For more information, please consult the FAQs of your product on www.archos.com.
Make sure to read them before considering any product return.
Package Contents
ARCHOS GAMEPAD 2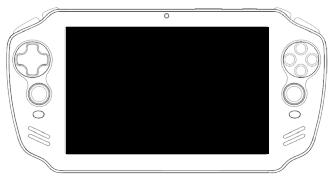

QSG booklet
Warranty, legal & safety booklet
USB cable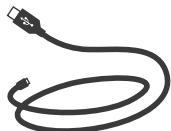
Charger
2
Getting Started
Charging
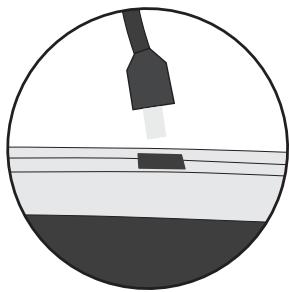
- Charge your device by plugging your power cable into the micro-USB port. The GamePad will start charging.
- Press the Power button to turn on the device.
The charging indicator light is on when the battery is charging.
- You can use your GamePad whilst it charges.
- Let your device charge completely the first time you use it.
- Use only the supplied charger.
When your device is completely decharged, you need to charge it for at least 10 minutes before the charging battery icon can be displayed.
TIPS:
To receive more complete service, please register your product.
From a computer, go to www.archos.com/register.
Description of the GamePad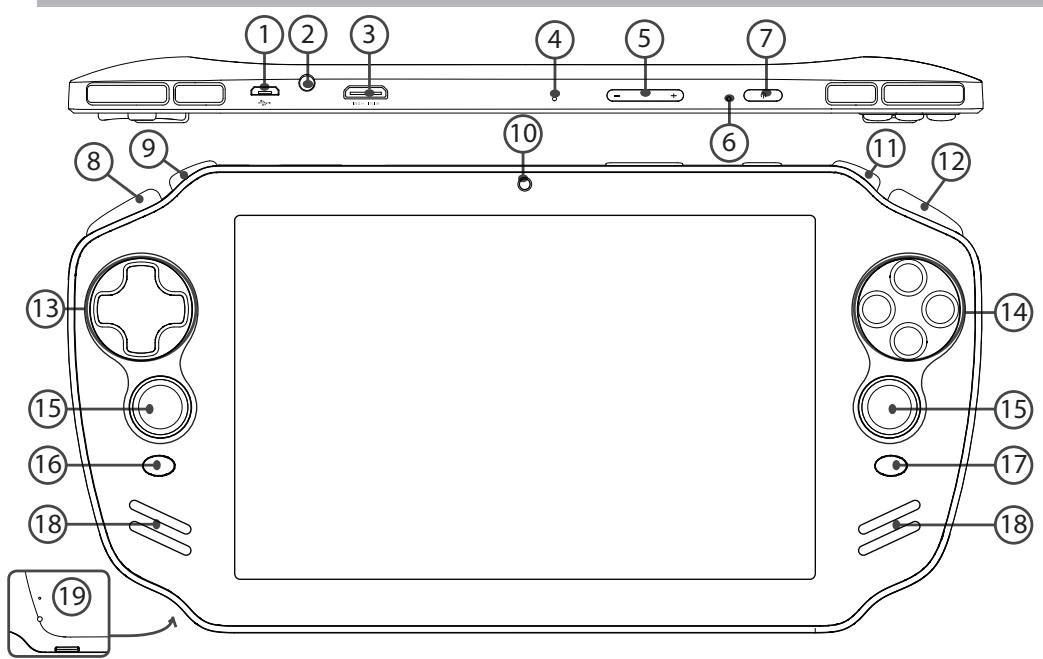
4
1 Micro-USB port ② Headphone jack ③ Mini-HDMI video output* (4) Microphone Volume buttons Charging indicator ON/OFF button L1 button 9 L2 button 10 Camera
11 R2 button 12 R1 button 13 Directional pad Y 14 A, B, Y, X buttons 15 Analog sticks 16 SELECT button 17 START button 18 Loudspeakers 19 Micro-SD card slot
- With optional Mini-HDMI to HDMI cable.
Connecting to a WiFi Network
CAUTION: Make sure that you are in a WiFi zone.

① Touch and hold the time & battery icons to reveal the status bar. A blue line is displayed.

② Pull the blue line down to display the status dashboard.

③ Touch "WiFi off" in the status dashboard. The WiFi page will be displayed.

④ Slide the WiFi switch to "ON" position.
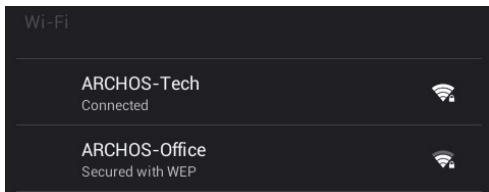
The GamePad will scan for WiFi networks in range. Touch the name of the network you want to connect to.
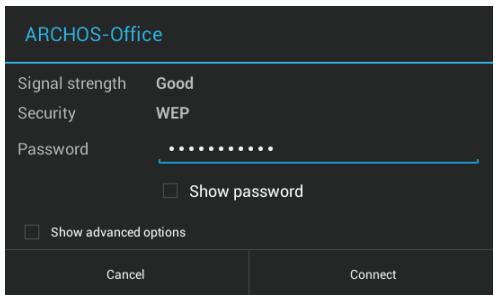
Private networks are shown with a lock icon and will require you to enter your password.
TIPS:
- When entering a WiFi password, we recommend that you select "Show password" so you can see the characters you are typing. To get the correct WiFi password (or settings) for the network, contact the WiFi network provider. If your WiFi is on and you are in range of a network that you previously connected to, your GamePad will automatically attempt to connect to it.
- To keep your WiFi connection ON when the device is on sleep, select the Menu icon in the "WiFi" page. Then, select Advanced > Keep WiFi on during sleep > Always.
ARCHOS mapping tool
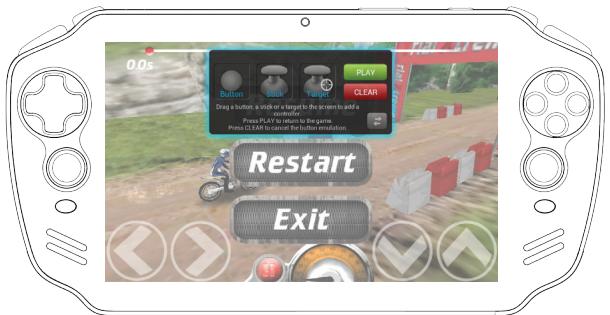
ARCHOS mapping tool is an application installed in your GamePad. It allows you to link the virtual controls of games to the physical controls of the GamePad by using mapping controls.
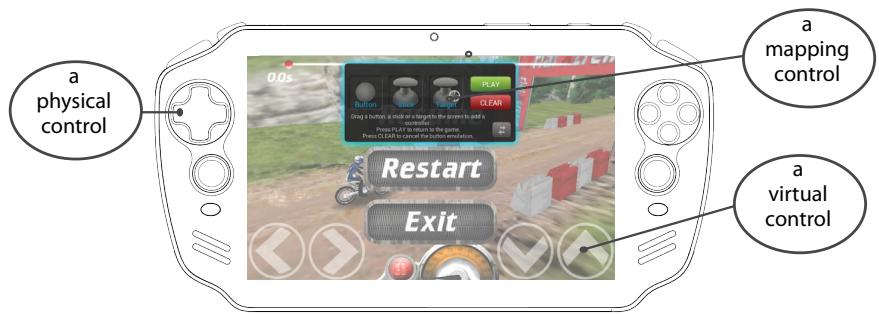
Tip 1:
Within ARCHOS mapping tool, there are already mapping profiles for over 100 games. Also, many games function automatically with physical buttons.
Tip 2:
Whenever you launch a game whose virtual controls are mapped, the right mapping profile will automatically be selected.
Starting ARCHOS mapping tool
- Launch a game. When you reach the starting screen, the virtual controls are displayed.
- Select the ARCHOS mapping tool icon from the system bar.

ARCHOS mapping tool icon
The mapping overlay is displayed with the mapping tool interface.
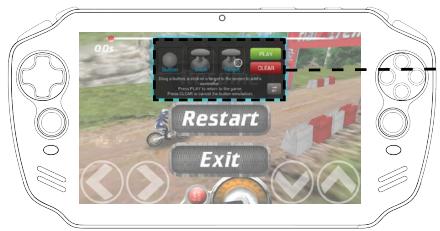
ARCHOS mapping tool interface
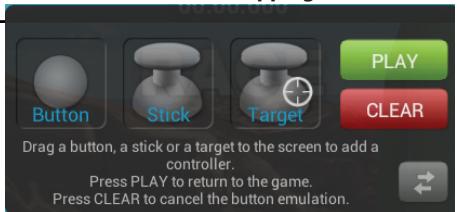
ARCHOS mapping tool
Positioning a mapping control
Hold and drag a type of mapping control to the desired virtual button.
There are three types of mapping control

Button
It is for the directional pad
, , , , the X, Y, B, A, buttons and the L1, R1, L2, R2, Start, Select buttons.

Stick
It is for the analog directional sticks.

Target
It is for analog stick targeting. It is placed normally in the central area of the screen on shooting games.
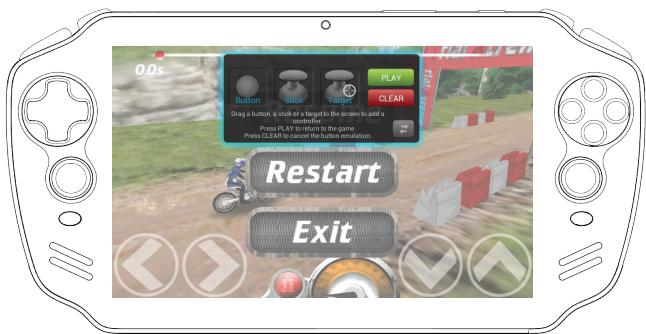
Linking a mapping control to a physical control
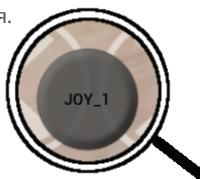
- When a mapping control is placed on a virtual control, you are asked to select the desired physical control you want to associate with it.

- Once a physical control is associated to the mapping control, the name of the physical control is displayed on the mapping control.
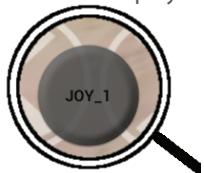
ARCHOS mapping tool
Enlarging a mapping control
Some virtual controls are larger than the mapping controls. Enlarge the mapping control so that it is tailored to the virtual control.
- Resize with right analog stick.
- Press button A when done
You can only enlarge the mapping controls Stick and Target.
Saving your parameters
When you have mapped the virtual controls of a game, select "Play" to validate.
The profile is saved and associated with that game.
The mapping overlay disappears and you can play.
Whenever you start the game, you are informed that the emulation of virtual controls is running. Each mapping is specific to a game.
Press the notification to display the mapping profile of the game. You can either modify it, or delete it.
Q&A about the mapping
You placed a mapping control on a virtual control but no option is available?
- Tap the mapping control. A menu box is displayed.
- Select the icon to set up the mapping control. You want to remove a mapping control that you set?
- Tap the mapping control. A menu box is displayed.
- Select the × icon to remove the mapping control. You want to remove a mapping profile set for a game?
- In the interface of the Game, select the mapping tool icon.
- From ARCHOS mapping tool, select "Clear".
- Select "OK" to confirm.
Displaying options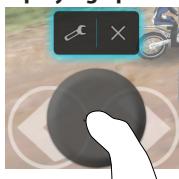
Removing a mapping profile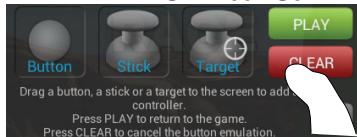
The button emulation will be canceled
Cancel
The Android™ Interface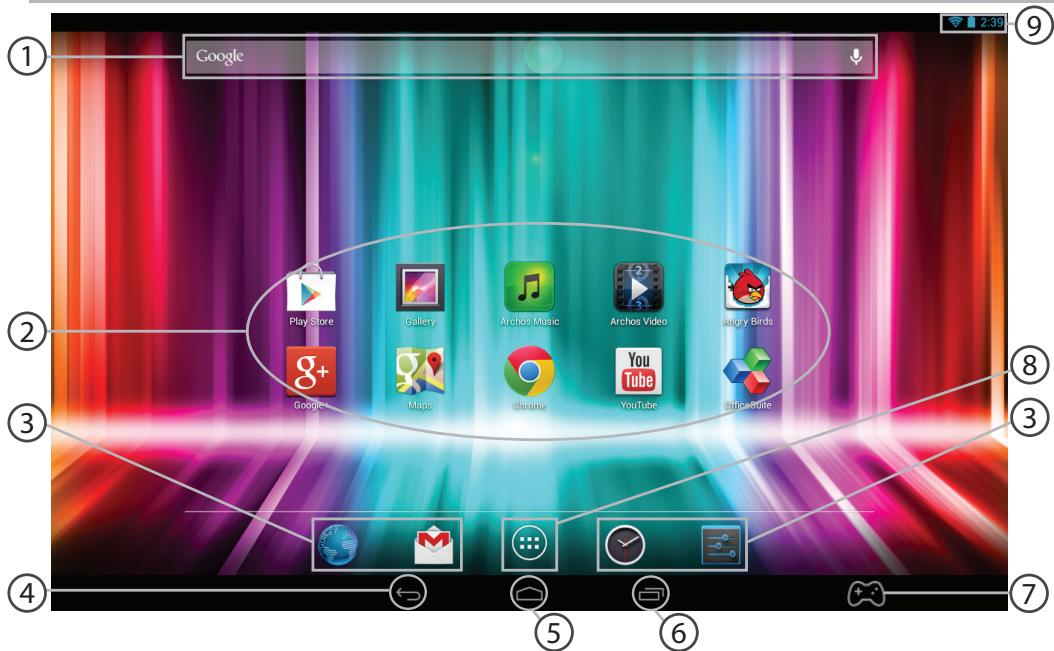
GoogleTM Search > Touch "Google" for text search or touch the microphone icon for voice search. ② AndroidTM apps shortcuts > Touch to start an application. 3 Permanent Android™ apps shortcuts > Touch to start an application. Back button, Home button, Recent apps buttons. 7 Archos mapping tool icon. 8 All Apps button > Touch this icon to show all the applications and widgets installed on your ARCHOS. All your downloaded applications are here. The status bar > Displays notifications and quick settings.
The Android™ Interface
3:18
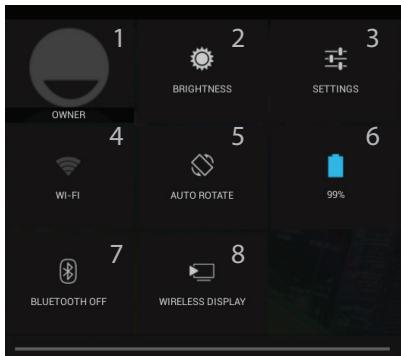
The Quick settings
1 Current user(1) 2 To adjust the screen brightness. 3 To access all your settings. 4 To turn on/off your WiFi connection. 5 To activate/deactivate automatic screen orientation as you turn your ARCHOS. 6 Percentage of battery remaining 7 To turn on/off your Bluetooth connection. 8 To enable wireless display(2)

The Recent Apps
Opens a list of thumbnail images of apps you've worked with recently:
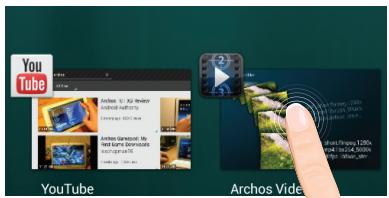
Touch: to open an app.
Hold down: to display options
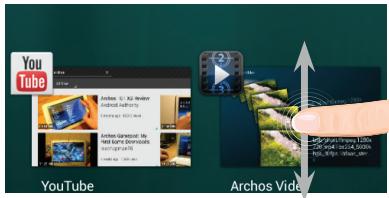
Swipe up or down: to close an app.
Getting familiar with Android™
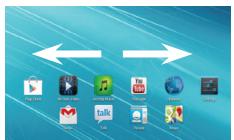
The extended home screen:
Navigate between different home screen panels by swiping left and right.
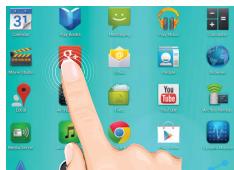
Moving a home screen item:
Touch and hold your finger onto it until the positioning gridlines appear, then slide it to the desired location, and release your finger.
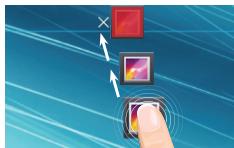
Removing a home screen item:
Touch and hold it, slide your finger towards the top of the screen and drop it over the Remove icon.
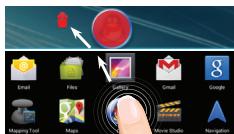
Uninstalling an item:
From the All apps screens, touch and hold it, slide your finger towards the top of the screen and drop it over Uninstall bin.
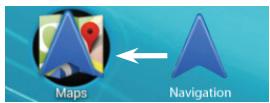
Creating application folders:
Drop one app icon over another on a home screen and the two icons will be combined.

Widgets:
Touch the All Apps icon on your home screen. Touch Widgets at the top of the screen. From the main Widgets screen, you can move around widgets just as you do for app icons.
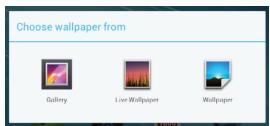
Changing your wallpaper:
Hold your finger on a home screen at an empty location, then choose from the list.
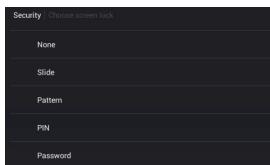
Locking the touchscreen:
In Settings, scroll down and touch security. Touch Screen lock. Touch the type of lock you would like to use. After you set a lock, a lock screen is displayed whenever your screen wakes up, requesting the pattern, PIN or other specified key.
Troubleshooting
If your device is frozen:
Press the ON/OFF button for 10 seconds.
If your device doesn't turn on:
- Charge your device.
- Press the ON/OFF button for 10 seconds.
If you want to extend the life of your battery:
Decrease the screen brightness and turn off the wireless connections if not in use.
If your device functioning is too slow:
Close all apps which are not currently used. Use the System Monitor app.
If your WiFi reception is too low:
Make sure you are not far from the WiFi hotspot.
Update the firmware of the device: http://www.archos.com/support.
Reset and redefine your connection parameters.
Contact your WiFi connection provider.
If you want to restore your product (forgotten password? erase all your settings?):
While holding Volume+, press the ON/OFF button to turn on the device.
The Android system recovery is displayed.
Use the Volume buttons to scroll and the ON/OFF button to validate.
Select "Wipe data/ factory reset" and validate.
Select "Yes -- delete all user data" and validate.
Select "Reboot system now" and validate.
The button emulation will be canceled
Cancel
The Android™ Interface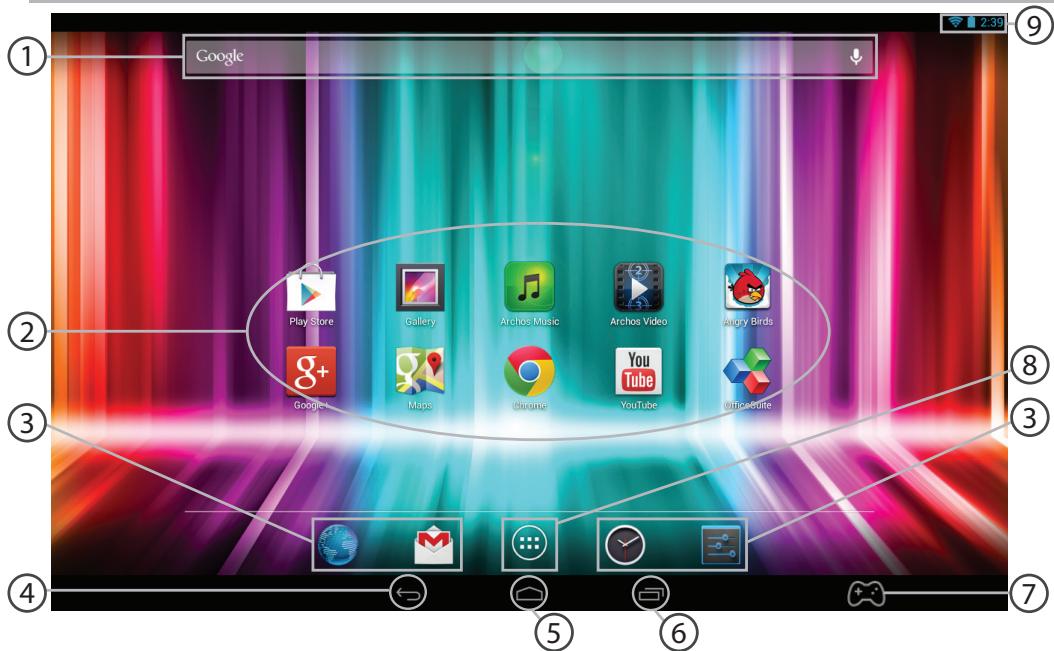
The button emulation will be canceled

Cancel
ARCHOS mapping tool. 68
The Android™ Interface 74
The button emulation will be canceled

Cancel
The button emulation will be canceled

Cancel
Android™ Interface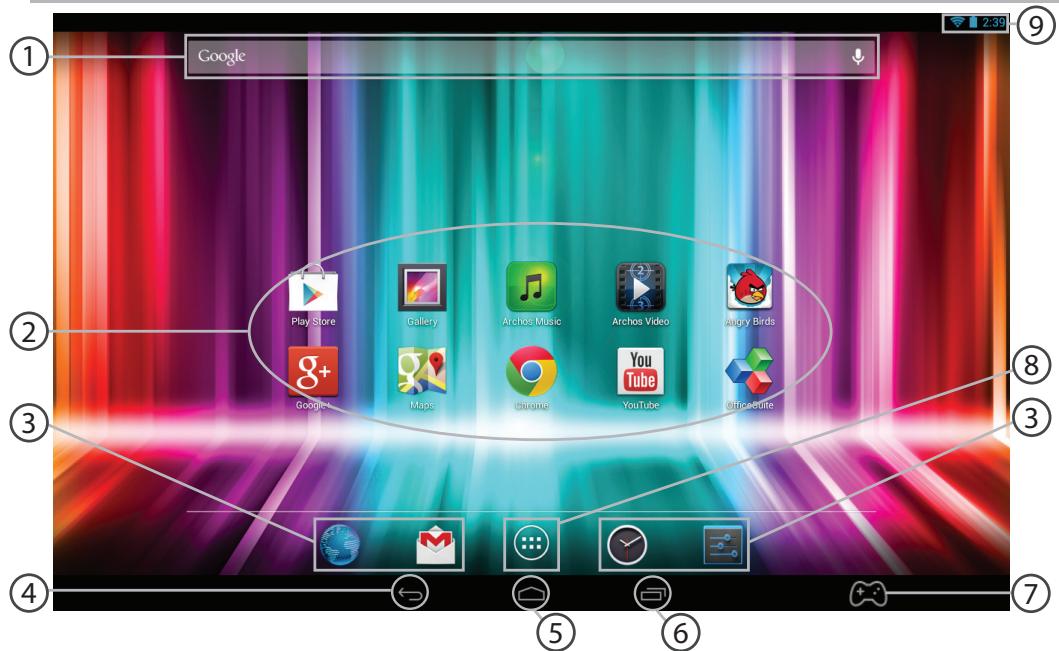
Google™ Search
Wi-Fi network connection
R1, L2, R2, Start, Select.

Stick
For
The button emulation will be canceled
Cancel
The Android™ Interface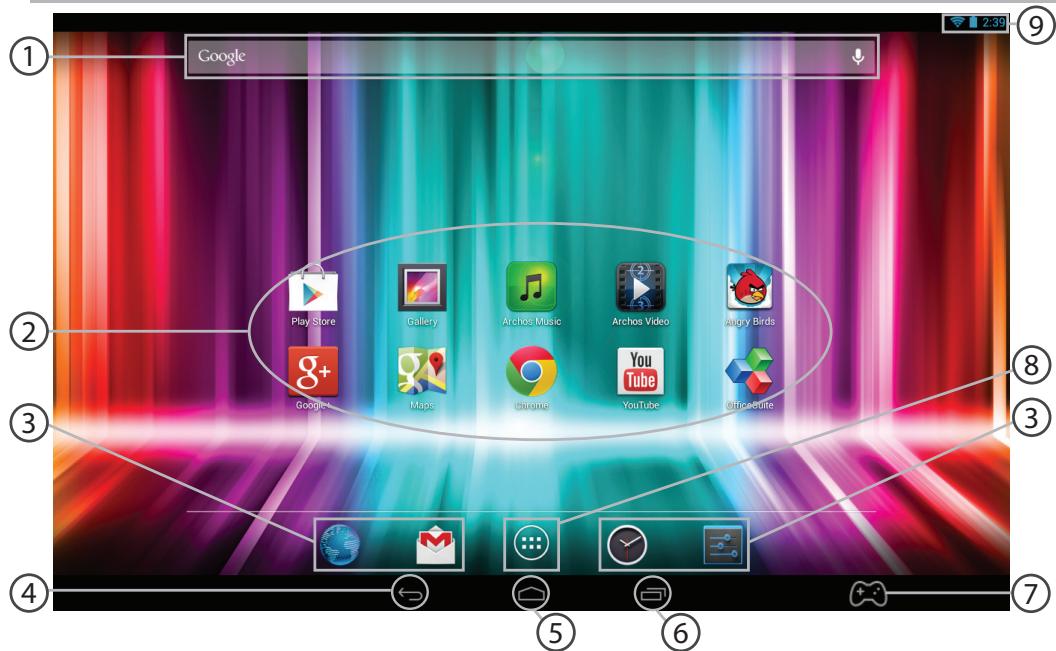
Google™ Search
The button emulation will be canceled
Cancel
The Android™ Interface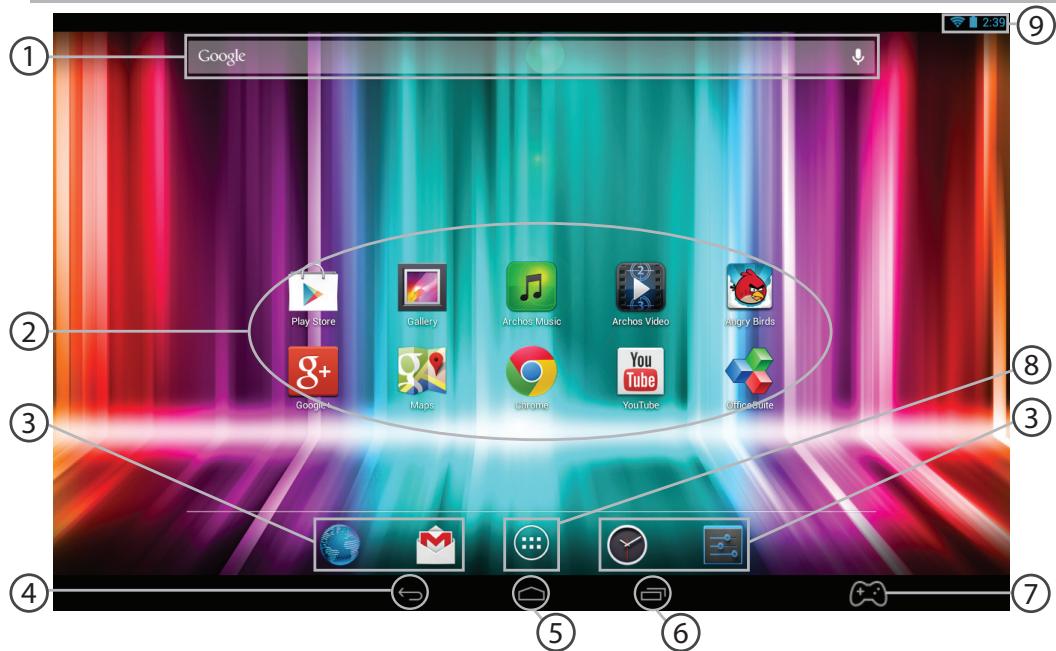
ARCHOS mapping tool. 148
AndroidTM interface 154
AndroidTM interface. See p. 158
Troubleshooting. 160
For additional information, refer to the FAQ section and the user guide for your device on the website www.archos.com. Be sure to read them before requesting a return of the product.
Package contents
ARCHOS GAMEPAD 2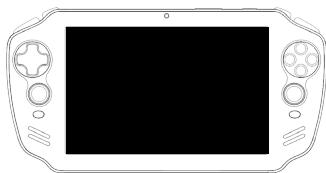
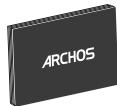

Quick start guide, warranty, and safety instructions
USB cable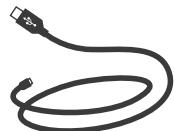
Charger
Getting started
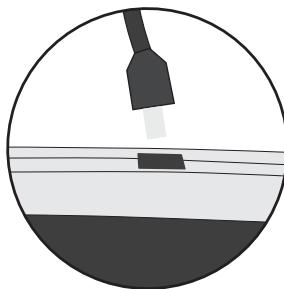
Charging
There is a type of comparison tool

Button
This is a comparison tool
Intended for buttons
Cross button
Direction of movement of the joystick
X, Y, B, A, attack keys of joystick L1,
R1, L2, R2, Start, Select

Joystick
This tool
Comparison
Designed
For dialog
Joystick
Direction.

Left
This tool is compared
Designed for joystick
Attachment. Usually, in
The crosshairs are positioned
in the center of the screen.
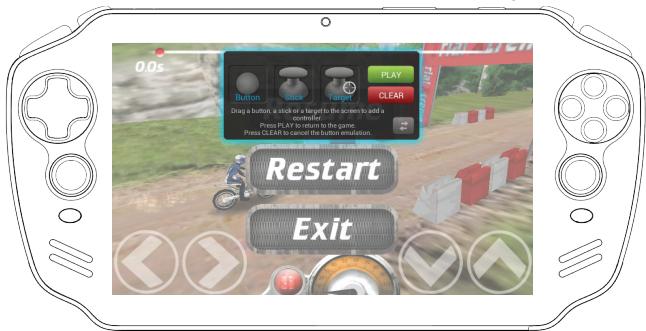
Task: Linking a physical control device with a virtual control device
1. To associate a physical control device with a virtual control device, you must select the required physical control device that will be associated with the virtual one.
- As soon as the link between the physical control device and the virtual control device is established, the name of the physical control device will immediately appear on the virtual
control device.
ARCHOS mapping tool
Scaling of control devices
The size of some virtual control devices is larger than the size of the control devices.
1. Change the size together with the right analog joystick. 2. Press the button to confirm.
Only the control devices "Joystick" and "Target" can be enlarged.
Saving parameters
After completing the association of physical and virtual control devices, select Play (Play) or press confirm. The profile will be saved and linked to that game.
Do you want to delete the association profile configured for this game?
If the device does not turn on:
1.3 Device setup.
- Press the ON/OFF button and hold it for 10 seconds.
If the device is completely discharged
Charge the device for at least 10 minutes before it turns on.
If you want to extend the battery life:
Reduce the screen brightness and turn off wireless connections if they are not used.
If the device is functioning too slowly:
Close all applications that are not currently in use. Use the System monitor application.
If the Wi-Fi signal is too weak:
Make sure you are not too far from the Wi-Fi access point.
Update the device's built-in firmware:
http://www.archos.com/support.
Reset and re-enter the connection parameters.
Contact your Wi-Fi provider.
If you want to restore the factory settings (forgot password? erase all settings):
- Press and hold the Power button to turn the device on/off. To restore the Android screen, use the volume buttons to navigate and press the Power button to confirm.
- Select "Wipe data/ factory reset" and confirm.
- Select "Yes -- delete all user data" and confirm.
- Select "Reboot system now" and confirm.
National restrictions
This device is intended for home and office use in all EU countries (and other countries following the EU directive 1999/5/EC) without any limitation except for the countries mentioned below:
| Country | Restriction | Reason/remark |
| Bulgaria | None | General authorization required for outdoor use and public service |
| France | Outdoor use limited to 10 mW e.i.r.p. within the band 2454-2483.5 MHz | Military Radiolocation use. Refarming of the 2.4 GHz band has been ongoing in recent years to allow current relaxed regulation. Full implementation planned 2012 |
| Italy | None | If used outside of own premises, general authorization is required. |
| Luxembourg | None | General authorization required for network and service supply (not for spectrum) |
| Norway | Implemented | This subsection does not apply for the geographical aera within a radius of 20 km from the centre of Ny-Alesund |
| Russian Federation | None | Only for indoor applications |
Note: Frequency 2454-2483.5 MHz is restricted to indoor use in France.
Consult the declaration of conformity on http://www.archos.com/products/declaration_conformity.html
Open Source Software Offer
The software bundled with this product includes software files subject to certain open source license requirements. Such open source software files are subject solely to the terms of the relevant open source software license. Such open source software is provided on an "AS IS" basis to the maximum extent permitted by applicable law.
For the open source files contained herein, please access "Open source license" section located at: Settings\About tablet\Legal information on the device for the relevant copyright and licensing terms. You may obtain a copy of Apache License, Version 2.0 at http://www.apache.org/licenses/License-2.0. You may also obtain a copy of GNU General Public License, Version 2 at the Free Software Foundation, INC, 51 Franklin Street, Fifth Floor, Boston, MA 02110-1301, USA.
Until the date that is three years after our last shipment of this product, you may obtain a copy of the source code corresponding to the binaries for any GPL-Licensed file by contacting ARCHOS customer service at http://www.archos.com and ARCHOS will send you a link to such source code or will provide instructions to get the source on a physical medium. This offer is valid to anyone in receipt of this information.

- PACKAGE CONTENTS
- GETTING STARTED
- CHARGING
- TIPS
- CONNECTING TO A WIFI NETWORK
- ARCHOS MAPPING TOOL
- TIP
- STARTING ARCHOS MAPPING TOOL
- ARCHOS MAPPING TOOL INTERFACE
- POSITIONING A MAPPING CONTROL
- LINKING A MAPPING CONTROL TO A PHYSICAL CONTROL
- ENLARGING A MAPPING CONTROL
- SAVING YOUR PARAMETERS
- Q&A ABOUT THE MAPPING
- THE ANDROID™ INTERFACE
- THE QUICK SETTINGS
- THE RECENT APPS
- GETTING FAMILIAR WITH ANDROID™
- THE EXTENDED HOME SCREEN
- MOVING A HOME SCREEN ITEM
- REMOVING A HOME SCREEN ITEM
- UNINSTALLING AN ITEM
- CREATING APPLICATION FOLDERS
- WIDGETS
- CHANGING YOUR WALLPAPER
- LOCKING THE TOUCHSCREEN
- TROUBLESHOOTING
- THE BUTTON EMULATION WILL BE CANCELED
- WI-FI NETWORK CONNECTION
- TASK: LINKING A PHYSICAL CONTROL DEVICE WITH A VIRTUAL CONTROL DEVICE
- SCALING OF CONTROL DEVICES
- SAVING PARAMETERS
- IF THE DEVICE DOES NOT TURN ON
- IF THE DEVICE IS COMPLETELY DISCHARGED
- IF YOU WANT TO EXTEND THE BATTERY LIFE
- IF THE DEVICE IS FUNCTIONING TOO SLOWLY
- IF THE WI-FI SIGNAL IS TOO WEAK
- IF YOU WANT TO RESTORE THE FACTORY SETTINGS (FORGOT PASSWORD? ERASE ALL SETTINGS)
- NATIONAL RESTRICTIONS
- OPEN SOURCE SOFTWARE OFFER
Brand : ARCHOS
Model : GAMEPAD 2
Category : Handheld game console