
Ringo DB2 - Home Automation Evolveo - Free user manual and instructions
Find the device manual for free Ringo DB2 Evolveo in PDF.


| Product Type | Smart Video Doorbell |
| Brand | EVOLVEO |
| Model | Ringo DB2 |
| Product Code | RINGODB2 |
| Power Supply | 2x integrated 18650 Li-ion batteries or 8-24 VAC (optional) |
| Working Voltage | 3.7 V |
| Max. Consumption | 280 mA |
| Connection | Wi-Fi 2.4 GHz and RF 443 MHz |
| IP Rating | IP65 |
| Operating Temperature | -20°C to 50°C |
| Battery Life | Up to 6 months (depending on usage) |
| Charging Time | Approximately 4-5 hours |
| Memory | MicroSD card slot (card not included) |
| Audio | Two-way talk (half-duplex) |
| Motion Detection | PIR sensor with adjustable sensitivity (Low/Medium/High) |
| Human Body Detection | Yes (settings) |
| Installation | Flat bracket, angle bracket, screws or 3M adhesive tape |
| Safety Screw | Included for theft prevention |
| Smart Home Integration | Google Home and Amazon Alexa |
| Mobile App | Smart Life or Tuya Smart |
| Package Contents | Video doorbell, socket doorbell, brackets, screws, USB cable, Allen key, etc. |
| Certification | CE compliant |
Frequently Asked Questions - Ringo DB2 Evolveo
User questions about Ringo DB2 Evolveo
0 question about this device. Answer the ones you know or ask your own.
Ask a new question about this device
Download the instructions for your Home Automation in PDF format for free! Find your manual Ringo DB2 - Evolveo and take your electronic device back in hand. On this page are published all the documents necessary for the use of your device. Ringo DB2 by Evolveo.
USER MANUAL Ringo DB2 Evolveo
natural_image
Two EVOLVE devices: a black digital camera with a bell icon and a white USB device with musical notes (no text or symbols visible on the devices themselves)Obsah / Contents / Tartalom / Cuprins
Česky....4
Slovensky 19
English....34
Magyar....49
Română....65
Obsah
Obsah balení....4
DÜLEŽITÉ INFORMACE....4
| 1) voděodolná krytka2) slot pro microSD kartu | 3) Micro USB 5V/2A |
iOS

natural_image
Technical line drawing of a two-port device with screw fasteners and internal components (no text or symbols)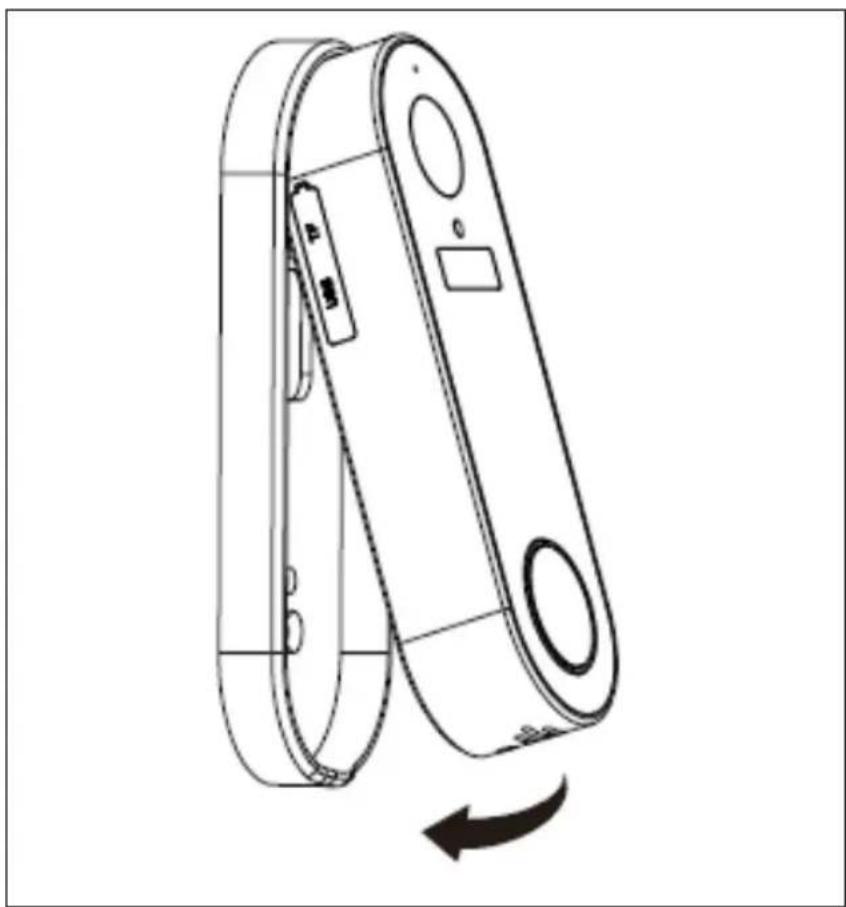
natural_image
Line drawing of a smartphone with a scroll wheel and internal components, showing a right-hand rule for rotation (no text or symbols)Copyright © Abacus Electric, s.r.o.
www.evolveo.com
www.facebook.com/EvolveoCZ
Dovozce / Výrobce
Abacus Electric, s.r.o.
DÔLEŽITÉ INFORMÁCIE....19
| 1) vodoodolná krytka2) slot pre microSD kartu | 3) Micro USB 5V/2A |
iOS

natural_image
Technical line drawing of a mechanical device with two views: one showing a threaded component and the other showing a closed housing (no text or symbols present)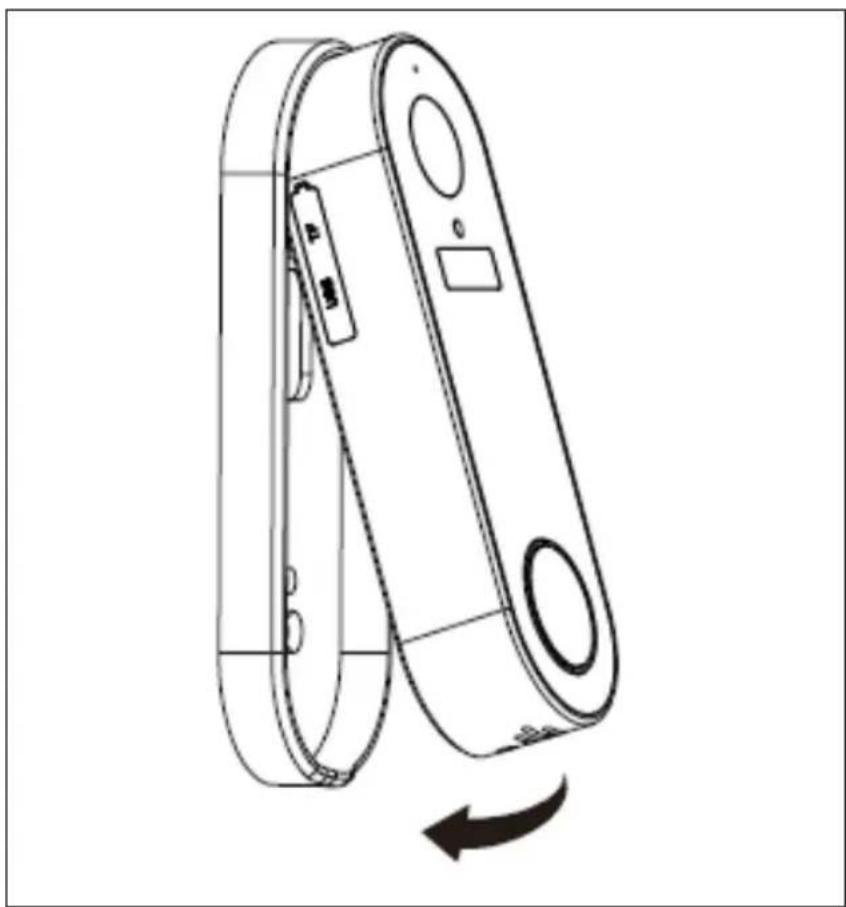
natural_image
Line drawing of a smartphone with a scroll wheel and internal components, showing a right-hand rule for rotation (no text or symbols)Package contents: 34
IMPORTANT INFORMATION 34
Device Specifications – Smart doorbell 37
Settings and Application Pairing.... 38
Pairing with Socket Doorbell 39
Video Phone Charging 40
Video Phone Installation....40
Application Use....43
Notifications 43
Record Display 44
Record Sharing....44
Recommended Settings......44
Sharing and Receiving Calls on More Devices 45
Working with Google Home 45
Pairing with Amazon Alexa 45
Removing the Doorbell from the Application 46
Doorbell Resetting 46
Package contents:
1× Smart video doorbell
(with 2 pcs of rechargeable batteries, type 18650)
1× Socket doorbell
1× User manual
1× Flat installation bracket
1× Angle installation bracket
1× 3M self-adhesive installation sticker
1× USB charging cable
1× Small Allen key
1× Safety screw
(with head fitting the Allen key)
2× Installation screws + wall plugs
2× Installation screws for the angle bracket (small)
2× Connectors for fixed cabling
(optional, only for professional installation)
2× Screws for connectors
(optional, only for fixed cabling)
IMPORTANT INFORMATION
This Manual contains instructions for daily control, setting, and installation of the EVOLVEO Ringo DB2 doorbell.
To set this device, internet connection and router with WiFi 2.4 GHz must be available. This device does not work with WiFi 5 GHz.
We recommend to set the doorbell using the application before its actual installation.
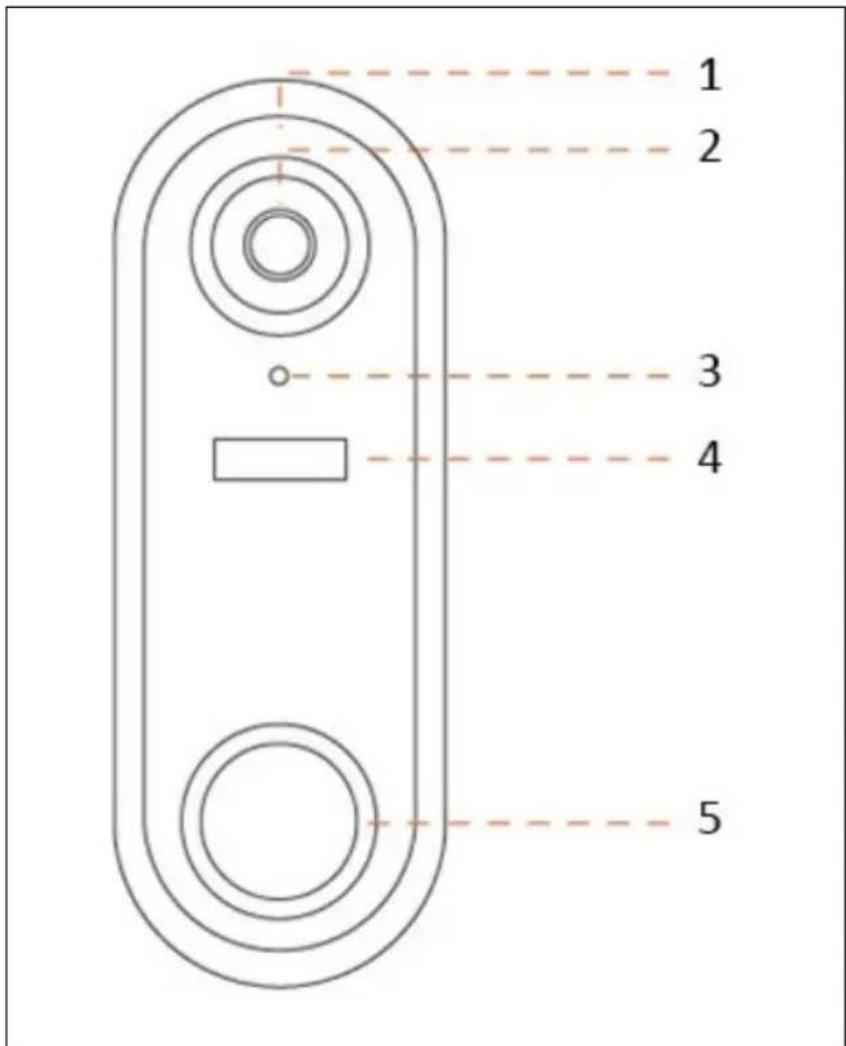
| 1) Turning ON/OFF2) Reset | 3) AC 8~24V (for fixed installation only) |
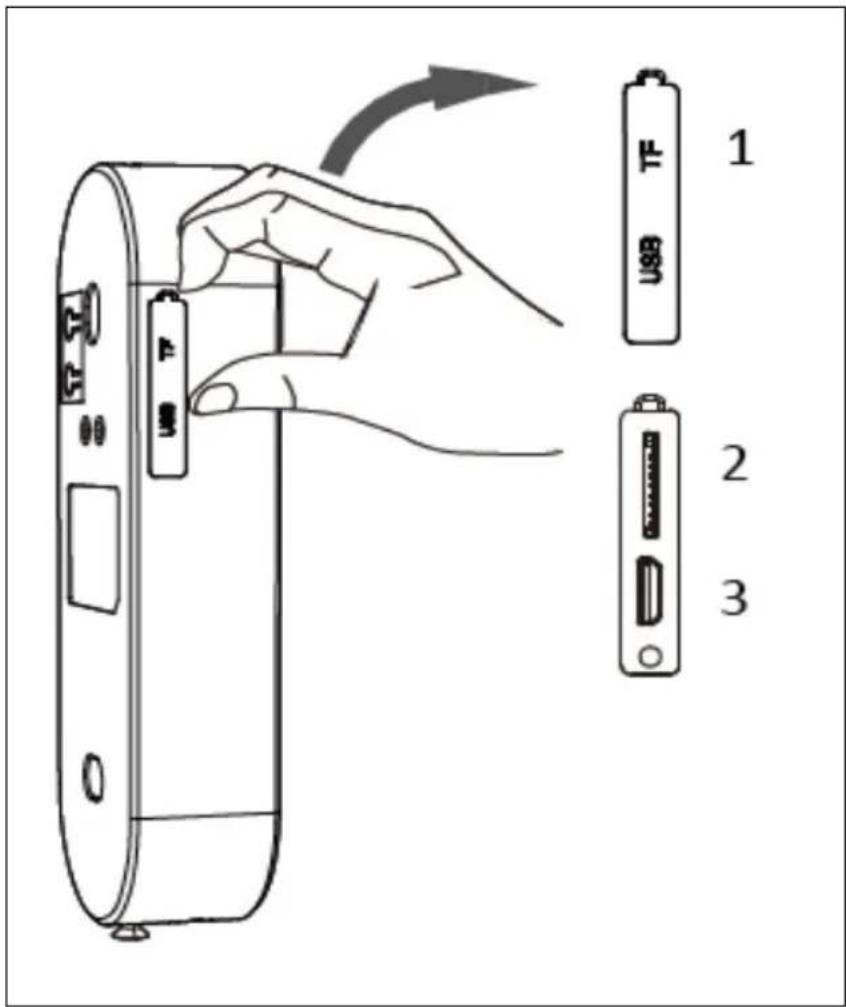
| 1) Waterproof cover2) MicroSD card slot | 3) Micro USB 5V/2A |
Device Specifications – Smart doorbell
| Name | EVOLVEO Ringo DB2 |
| Product Code | RINGODB2 |
| Power Supply | 2x integrated battery18650/8~24 VAC |
| Working Voltage | 3.7 V |
| Max. Consumption | 280 mA |
| Connection | Wi-Fi 2.4 GHz/RF 443 MHz |
| IP Rating | IP65, outdoor use |
| Operating Temperature | -20 to 50°C |
Note: The external power source is not included. You can use, e.g., electric lock power supply if it meets power supply requirements.
Settings and Application Pairing
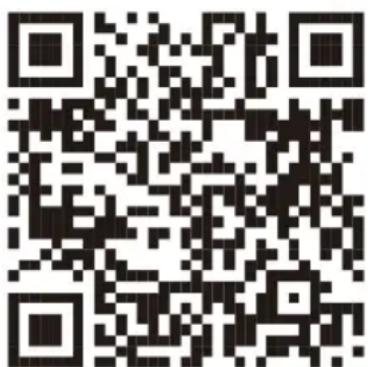
- D ownload the Smart Life application to your phone. Look for the Smart life application in your app store or scan the QR code below. Note: Alternatively, you can also use the Tuya Smart application.
Android
iOS

-
Register yourself and create an account using your e-mail. Fill in the verification steps and set you password. If you already have a Smart Life account, log in.
-
On the home page, select the option to add a device using the "+" symbol in the top right corner.
-
Select "Video Surveillance" and then "Smart Doorbell".
-
Press and hold the ON button on the bell until the LED indication starts to blink blue. After a while, the LED indication starts to blink red. That means that the doorbell is in the pairing mode.
-
In the application, confirm that the doorbell is ready for pairing.
-
Enter your Wi-Fi data. Only 2.4 GHz is compatible.
-
Press the "Next" button.
-
Use the outdoor doorbell to scan the QR code displayed in the application in the distance of 15 to 20 cm until you hear a beep. Press the "Beep Heard" button.
- Pairing is finished as soon as you hear a beep. Now you can rename your device (pencil symbol). Then, press "Finish" in the top right corner. Your device is successfully paired.
!!! IMPORTANT !!! The application is continuously updated and developed; individual steps may differ after updates. In case of any difficulties during the process, we recommend that you contact the service center.
Pairing with Socket Doorbell
Ringing, except for notification activation in the phone, activates the doorbell for standard household notification.
EVOLVEO Ringo DB2 and the doorbell are interconnected via 443 MHz (not Wi-Fi). To pair, we recommend complying with the distance of up to 10 metres to get the best possible functionality.
Every obstacle, wall or other interference source in the surroundings, can decrease the signal strength. In such cases, move the doorbell closer or to another position.
- Plug the bell into an active outlet. The doorbell rings and starts to blink.
- Repeatedly press the volume button and select the required doorbell volume. Five options are available, including Silent (only blinking).
- You can leave the initial tone unchanged (move to Step 4), or repeatedly press the melody button to listen to all available options.
- After selecting the melody, press and hold the volume button until the LED indication illuminates.
- Press the ringing button on the video doorbell within 5 seconds.
The units are paired now.
The volume can be edited any time without re-pairing.
Any melody change will show only after repeated pairing.
If you relocate the doorbell, test the connection in the new position and repeat pairing if necessary.
Video Phone Charging
The video phone contains 2 lithium-ion batteries 18650 with long service life, which, when fully charged, can withstand up to 6 months of continuous operation depending on the number of activations and the ambient temperature. Batteries are integrated in the unit.
Do not attempt to access the batteries. This could lead to a serious device damage and void of warranty.
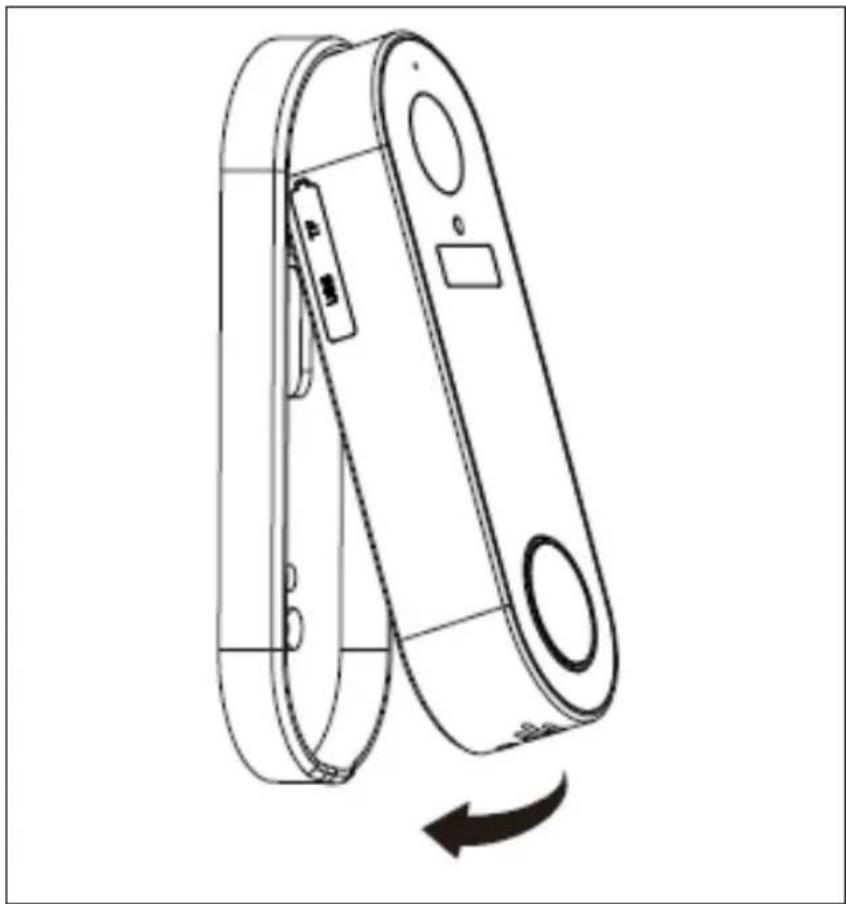
Charge the video phone properly before its first use (at least 5 hours). The battery service life is visibly displayed in the live application preview. If charging is needed, simply remove the doorbell from the holder (unscrew the safety screw).
Connect the included Micro USB cable to a suitable USB 5V/2A power source.
Full charging lasts approximately 4 to 5 hours. The indicator will blink blue during charging and you can check the charge percentage using your application.
Video Phone Installation
The installation bracket can be mounted using a double-sided adhesive tape or included screws. Mount it at a height you prefer, the optimum installation height ranges from 120 to 150 cm.
Whatever method you use, never forget to attach the safety screw in the bottom holder part to prevent doorbell theft.
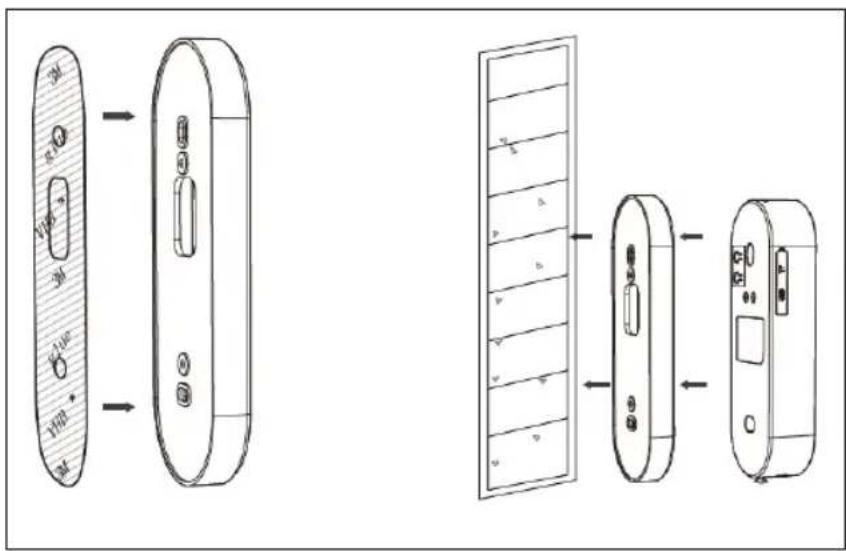
Double-sided adhesive tape – optional for smooth surfaces, e.g. UPVC.
Before installation, degrease both surfaces, preferably with alcohol.
Please note that impurities may remain after the adhesive tape is removed; however, these can be eliminated using alcohol.
- Peel off one side of the double-sided 3M sticker and attach it to the rear side of the waterproof holder (NOT the doorbell) so that all holes match.
- Peel off the other side and attach it to the wall in the required position. Apply pressure to secure the attachment.
- Insert the doorbell into the holder and fasten the safety screw.
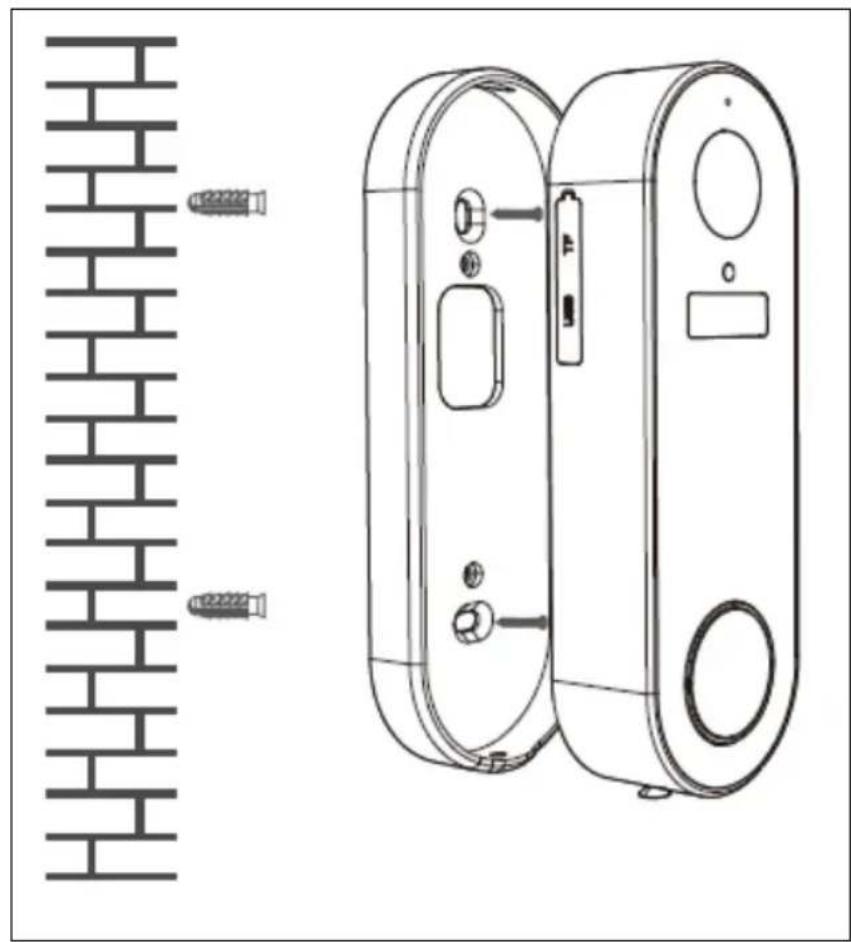
Screws – for walls or concrete.
- Align the bracket to the desired location on the wall and mark the drilling points in the top and bottom hole.
- Hold the bracket firmly and place the first long screw horizontally to the bottom hole.
- Using a screwdriver and a suitable bit, tighten the bottom screw until firmly secured. Repeat the procedure for the top hole.
- Insert the doorbell into the holder and fasten the safety screw.
natural_image
Technical line drawing of a two-port refrigerator with screw fasteners and internal components (no text or symbols)
natural_image
Line drawing of a smartphone with a scroll wheel and internal components, showing a right-hand rule for rotation (no text or symbols)If you use the angle bracket in both ways, attach it to the flat frame first using the smallest supplied screws. Locate the flat frame to the angle frame until the holes align and fasten the screws in small circular openings. Proceed as instructed above.
EVOLVEO Ringo DB2 can be attached to an AC power source 8-24V using included conductors and screws. This connection must be performed by a qualified company or an electrician.
Application Use
After selecting EVOLVEO Ringo DB2 (displayed under the name stated during pairing), live preview and the control panel will be displayed. Here you can view, record, and change settings.
Control Panel icons (below the live broadcast):
Screenshot: Saves current display to the application album.
Talk: Enables two-way communication.
Record: Records the current view into the application album.
Play: Timeline of captured images.
Cloud: Add paid cloud storage (third party, not necessary).
Acoustic signal: Doorbell alarm.
Album: (scroll down); images saved in the application that can be shared or saved in the phone library.
Notifications
The system is pre-set to send notifications to your phone when the doorbell rings or motion is detected. By clicking on notifications, a preview is displayed in the application message centre; click on the View button to get access to a live preview/control panel. In a real-time preview, you can communicate with the visitor. If not, see the next section. It is necessary to select necessary authorizations for the application in the phone settings.
Record Display
Select Play in the control panel. Here you can go to different dates and move the timeline to show the taken records, which are displayed as white blocks. Using two fingers, you can zoom-in/zoom-out for easier navigation. Swipe right to play the next recording automatically or move to the left/right to select certain blocks. Here you can also take screenshots/record footage for the application album.
Record Sharing
All screenshots and recordings are saved in the album in the control panel. Here you can select and share video clips using several displayed methods.
Recommended Settings
Select the top right icon in the live display to enter the doorbell settings. The below stated settings are recommendations only:
- Adjust the PIR sensitivity level according to your needs: medium is usually suitable for most households. Test what suits you.
Low: In this state, the device will be able to revive as soon as the device detects motion for 6 seconds. The device will record videos and at the same time will send notification to the mobile phone.
Medium: In this state, the device will be able to revive after the device detects motion for 4 seconds. The device will record videos and at the same time will send notification to the mobile phone.
High: In this state, the device will be able to revive after the device detects motion for 1 second. The device will record videos and at the same time will send notification to the mobile phone. - Turn on the human body detection in the detection alarm settings to detect only human body motions. This will reduce false alarms caused by animals, vehicles, etc., and decrease the amount of notifications and battery consumption.
- Set the low battery charge level in the setting of the power supply management. This setting
will send a notification reminding you to charge the battery.
- Turn on the Notification function when it is offline. This will send the notification if the bell loses signal for more than 30 minutes.
Please note that the purchase of VAS/cloud services is not required for this system. It is solely up to your decision. These services are provided independently by Smart Life as a third party.
Sharing and Receiving Calls on More Devices
In Settings, select Share Device and Add Sharing. You can send link to a direct invitation in several ways, but the recipient must download the application and create their Smart Life account before the invitation can be accepted.
The recipient can easily click on the link, open the application, and “accept” viewing. Shared users can view images but cannot modify Settings. There is no limit to the number of shares. Shared users can be removed anytime by going to the same section in the application.
Working with Google Home
Open your Google Home app and select "Smart Life" in Home Control. To successfully pair the device, enter correct login details. Your device will show in the Home Control list.
Pairing with Amazon Alexa
1) C onnect your Smart Life account with Alexa.
2) Open the Alexa app, select "Skills" in the menu, and search for "Smart Life". To choose "Smart Life", select "Enable" to enable Smart Life function.
3) You will be redirected to login screen. Enter correct Smart Life account login details. Then select "Link Now" to connect accounts.
4) Control your device
5) Device recognition: First, Echo needs to recognize your device before you can control it. Say “Alexa, discover devices.” to your Echo. Echo will recognize the device previously added using the Smart Life
app. The alternative for a new device recognition is selecting the “discover devices” button.
6) The recognized devices will be displayed in the list.
Note: Whenever you rename the device in the Smart Life app, Echo will need new pairing.
Removing the Doorbell from the Application
In Settings, go fully down and select Remove Device. This will delete all records and settings. Records on the SD card will be preserved.
Doorbell Resetting
Remove the device from the list of devices in the application, then press and hold the Reset button on the rear side until you hear a beep. The doorbell switches to the pairing mode again. Any records in the application will be lost; therefore, consider backing them up/saving them in the application or phone library if necessary. Records on the SD card will be preserved.
Technical Support
Contact Technical Support EVOLVEO:
www.evolveo.eu/helpdesk/
The warranty DOES NOT APPLY to:
- using the device for different purposes
- installation of a different firmware than the one installed in EVOLVEO Ringo DB2 or one which can be manually or automatically downloaded from the device menu
- electromechanical or mechanical damage caused by improper use
- damage caused by natural elements such as fire, water, static electricity, voltage surges, etc.
- damage caused by unauthorized repair
Disposal
The symbol of crossed container on the product, literature, or packaging means that in the EU, all electric and electronic devices, batteries, and accumulators must be disposed of in sorted waste at the end of their working life. These products must not be disposed of as unsorted municipal waste.

DECLARATION OF COMPLIANCE
Abacus Electric, s.r.o. hereby declares that EVOLVEO Ringo DB2 complies with the requirements of the standards and regulations applicable to this type of device.
The full text of the Declaration of Conformity can be found at https://ftp.evolveo.com/CE/
Copyright © Abacus Electric, s.r.o.
www.evolveo.com
www.facebook.com/EvolveoCZ
Importer / Manufacturer
Abacus Electric, s.r.o.
Planá 2, 370 01, The Czech Republic
Made in China
All rights reserved.
The design and specifications are subject to change without prior notice.
Tartalom
iOS
natural_image
Technical line drawing of a mechanical device with two views: top shows a vertical strip, bottom shows a side view of a cylindrical device (no text or symbols)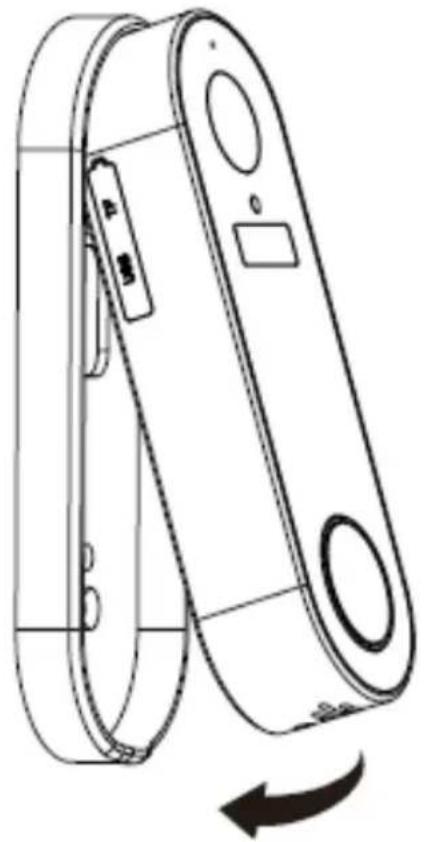
natural_image
Line drawing of a smartphone with a scroll wheel and buttons, showing a left-hand rule for rotation (no text or symbols)Copyright © Abacus Electric, s.r.o.
www.evolveo.com
www.facebook.com/EvolveoCZ
Importör / Gyártó:
Abacus Electric, s.r.o.
iOS
natural_image
Technical line drawing of a mechanical device with two views: top shows a vertical brick wall pattern, bottom shows a side view of a cylindrical device with internal components and mounting holes (no text or symbols)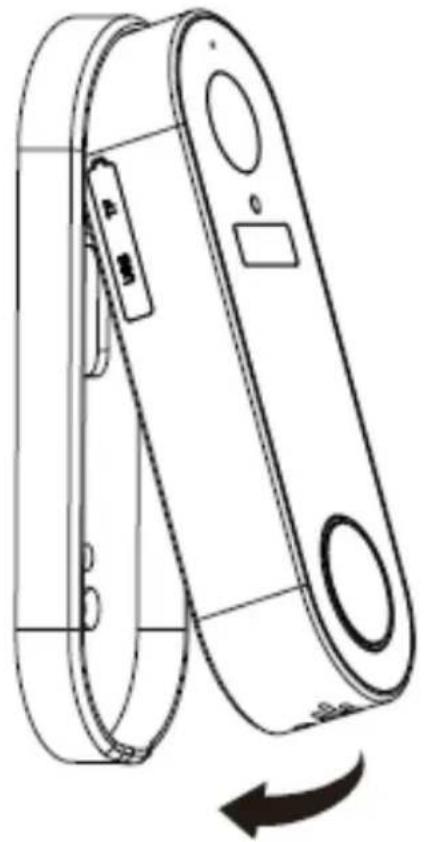
natural_image
Line drawing of a smartphone with a scroll wheel and internal components, showing a right-hand rule for rotation (no text or symbols)Copyright © Abacus Electric, s.r.o.
www.evolveo.com
www.facebook.com/EvolveoCZ


- Obsah / Contents / Tartalom / Cuprins
- Obsah
- iOS
- Package contents:
- IMPORTANT INFORMATION
- Settings and Application Pairing
- Pairing with Socket Doorbell
- Video Phone Charging
- Do not attempt to access the batteries. This could lead to a serious device damage and void of warranty.
- Video Phone Installation
- Application Use
- Notifications
- Record Display
- Record Sharing
- Recommended Settings
- Sharing and Receiving Calls on More Devices
- Working with Google Home
- Pairing with Amazon Alexa
- Removing the Doorbell from the Application
- Doorbell Resetting
- Technical Support
- The warranty DOES NOT APPLY to:
- Disposal
- DECLARATION OF COMPLIANCE
- Tartalom
Brand : Evolveo
Model : Ringo DB2
Category : Home Automation