
VT-4205 BK - Multicooker Vitek - Free user manual and instructions
Find the device manual for free VT-4205 BK Vitek in PDF.


| Product Type | Multicooker |
| Brand | Vitek |
| Model | VT-4205 BK |
| Color | Black |
| Dimensions (W x H x D) | 28 x 25 x 28 cm |
| Weight | 3.2 kg |
| Power Consumption | 700 W |
| Capacity | 5 liters |
| Inner Bowl Material | Non-stick coating |
| Lid Type | Hinged with sealing ring |
| Display | LED digital display |
| Control Type | Touch buttons |
| Cooking Programs | 10 preset programs (rice, soup, stew, steam, etc.) |
| Timer Function | Delayed start up to 24 hours |
| Keep Warm Function | Automatic keep warm for up to 12 hours |
| Steam Function | Included steam basket |
| Safety Features | Overheat protection, auto shut-off, lid lock |
| Cleaning and Maintenance | Removable non-stick bowl and steam valve, easy to clean |
| Spare Parts Availability | Inner bowl, sealing ring, steam basket available |
| Repairability | User-replaceable parts; service center recommended for electronics |
| Included Accessories | Measuring cup, rice paddle, steam basket, power cord |
| Voltage / Frequency | 220-240 V, 50/60 Hz |
| Certification | CE, RoHS |
Frequently Asked Questions - VT-4205 BK Vitek
User questions about VT-4205 BK Vitek
0 question about this device. Answer the ones you know or ask your own.
Ask a new question about this device
Download the instructions for your Multicooker in PDF format for free! Find your manual VT-4205 BK - Vitek and take your electronic device back in hand. On this page are published all the documents necessary for the use of your device. VT-4205 BK by Vitek.
USER MANUAL VT-4205 BK Vitek
natural_image
3D rendering of a gray cylindrical container with a labeled pointer indicating value 12 (no other text or symbols)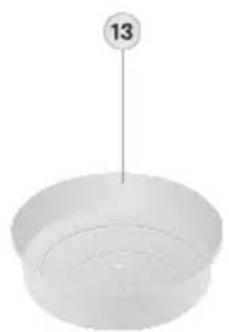
natural_image
Simple 3D illustration of a bowl with a numbered label '13' pointing to the top (no text or symbols on the bowl itself)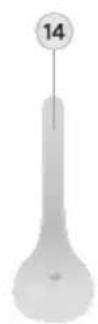
natural_image
3D rendered diagram of a circular object with six numbered circular features on its surface (no text or symbols)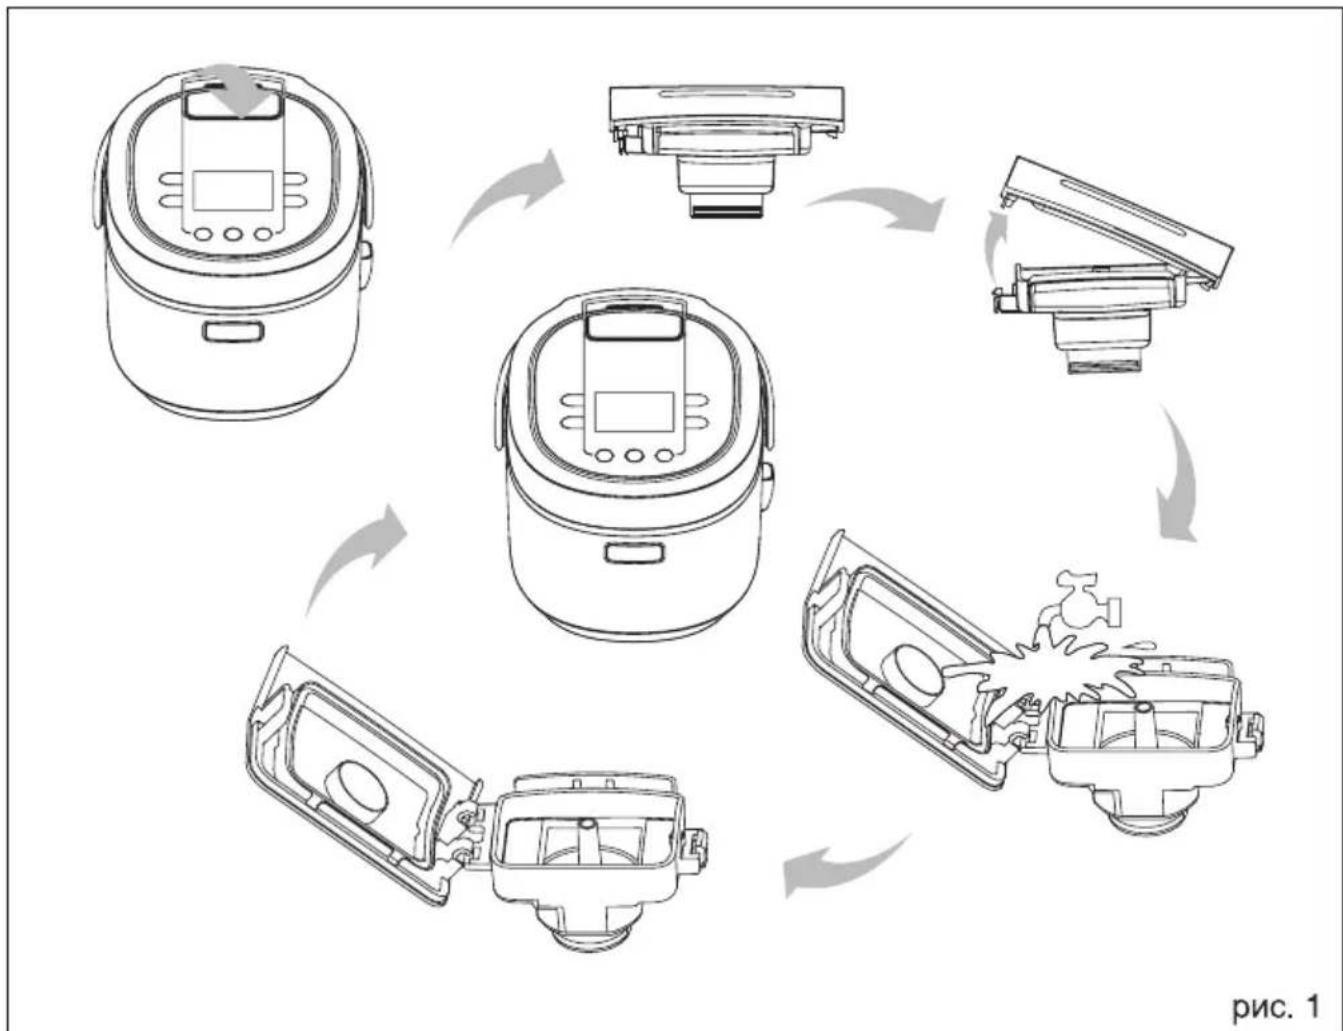
flowchart
graph TD
    A["Raw Material"] --> B["Add 1 Box"]
    B --> C["Add 2 Box"]
    C --> D["Add 3 Box"]
    D --> E["Add 4 Box"]
    E --> F["Final Packaging"]
    style A fill:#f9f,stroke:#333
    style B fill:#ccf,stroke:#333
    style C fill:#cfc,stroke:#333
    style D fill:#fcc,stroke:#333
    style E fill:#cff,stroke:#333
    style F fill:#ffc,stroke:#333
ENGLISH
MULTICOOKER
The multicooker is intended for cooking.
For your information:
All pictures in this manual are given for reference only. The unit shown in the pictures can be slightly different from the purchased one.
DESCRIPTION
- Body
- Control panel
- Display
- Lid
- Lid opening button
- Carrying handle
- Steam release openings
- Steam valve
- Power cord connector
- Heating element
- Temperature sensor
- Bowl
- Steam cooking basket
- Soup ladle
- Spatula
- Measuring cup
Display and control panel
-
"Start" button with indicator
-
"Menu" button
-
"Minutes" button
-
"Bread" button
-
"Time" button
-
"Hours" button
-
"Multicook" button
-
"Timer" button with indicator
-
"Taste" button
-
"Keep warm/Stop" button with indicator
Additional accessories:
-
Yoghurt cups
-
Lids
-
Tray
- For additional protection it is reasonable to install a residual current device (RCD) with nominal operation current not exceeding 30 mA. To install RCD contact a specialist.
SAFETY MEASURES
Before using the unit, read this instruction manual carefully. Keep this manual for future reference.
Use the unit for intended purposes only, as specified in this manual. Mishandling the unit can lead to its breakage and cause harm to the user or damage to his/her property.
- Before using the unit, closely examine the power cord and the power cord connector located on the unit body and make sure that they are not damaged. Never use the unit if the power cord or power cord connector is damaged.
- Before switching the unit on make sure that voltage of the mains corresponds to unit operating voltage.
- Power cord is equipped with "euro plug"; plug it into the socket with reliable grounding contact.
- Do not use adapters for plugging the unit in.
- Make sure that the power cord is properly inserted into the corresponding connector of the unit body and the socket.
- Use only the supplied power cord, do not use a power cord of other units.
• Use the supplied removable parts only. - Place the unit on a flat heat-resistant surface away from sources of moisture, heat and open flame.
- Correct work of the unit is possible at the height of 0-2,000 meters above the sea level.
- Place the unit with free access to the mains socket.
- Use the unit in places with proper ventilation.
- Do not expose the unit to direct sunlight.
- Do not place the unit too close to walls and furniture walls.
- Provide that the power cord does not contact with hot surfaces and sharp furniture edges. Avoid damaging the isolation of the power cord.
- Do not touch the power cord or power plug with wet hands.
- Do not immerse the unit, the power cord and power plug into water and other liquids.
- If the unit was dropped into water, unplug it immediately. Do not put your hands into water! Apply to the authorized service center for further use of the unit.
- Do not insert foreign objects into the openings of the unit or between its parts.
- Provide that edges of clothes or foreign objects do not get between the lid and unit body.
- Do not leave the operating unit unattended, always switch the unit off and unplug it when you are not using it.
• To avoid injury do not bend over the steam release openings and opened bowl. - Do not touch the lid during operation, open the lid by pressing the lid opening button.
- Be very careful when opening the multicooker lid.
- Keep the steam release openings clean, clean them when they get dirty. Do not cook products which may block the steam valve in the multicooker.
- Never use the unit without the installed bowl and do not switch the multicooker on without products and sufficient amount of liquid in the cooking bowl.
- Do not use the multicooker if the silicone gasket on the inner surface of the lid is damaged.
- Follow the recommendations in the recipe book for amount of dry products and liquids while cooking.
- Do not remove the bowl during operation.
- Do not cover the multicooker during operation.
- Watch the level of liquid remaining in the bowl during steam cooking.
-
Do not carry the unit during operation. Use the carrying handle; unplug the unit, remove the bowl with products and let it cool down preliminary.
-
The lid, cooking bowl and body parts heat up strongly during operation, do not touch them, use potholders if you need to take out the hot bowl.
• Clean the unit regularly. - For children safety reasons do not leave polyethylene bags, used as a packaging, unattended.
- Attention! Do not allow children to play with polyethylene bags or packaging film. Danger of suffocation!
• Never allow children to use the unit as a toy. - This unit is not intended for usage by children or disabled persons unless they are given all the necessary and understandable instructions by a person who is responsible for their safety on safety measures and information about danger that can be caused by improper usage of the unit.
- Children and disabled people can use the unit under supervision only.
• Do not use the unit outdoors. - Never pull the power cord when disconnecting the unit from the mains, take the power plug and carefully pull it out of the socket.
- Never use the unit if the power cord or the power plug is damaged, the unit works improperly or after it was dropped. Do not try to repair the unit by yourself. Contact an authorized service center for all repair issues.
- Unpack the unit, remove any stickers and package materials that can prevent unit operation.
- Place the unit on a flat, dry, heat-resistant surface away from water, moisture and open flame. Distance to the nearest surfaces should be at least 20 cm.
Attention! Do not place the unit near bath tubs, kitchen sinks or other containers filled with water.
Note: After unit transportation or storage at low temperature keep it for at least two hours at room temperature before switching on.
- Open the lid (4) by pressing the button (5).
- Remove the steam valve (8), dissemble it, wash and dry carefully (pic. 1). Assemble the steam valve and install it back to its place.
- Wash all removable parts with a soft sponge and neutral detergent, then rinse in running water and dry.
- Wipe the unit body with a soft damp cloth. Let the unit dry.
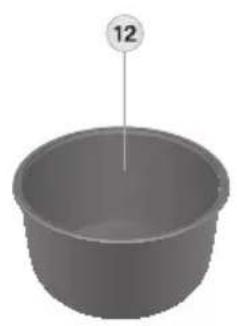
USING OF THE COOKING BOWL (12)
- Use the unit and its parts for the intended purposes only. Do not use the cooking bowl (12) with other heating units or cooking surfaces.
- Do not use the unit if the bowl (12) is damaged.
- Do not replace the bowl (12) with any other container.
• Always make sure that the heating surface and the bottom of the bowl (12) are clean and dry.
- Do not use the bowl (12) for mixing products. Never chop the products in the bowl (12) to avoid damage of non-stick coating.
- Never leave or keep any foreign objects in the bowl (12).
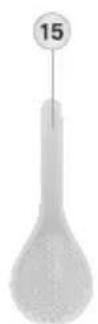
- When cooking stir the products in the bowl (12) only with the plastic soup ladle (14) or spatula (15).
- Do not use metal objects which can scratch the non-stick coating of the bowl (12).
• After cooking dishes with spices and seasonings wash the bowl (12) right after cooking.
- To avoid damage of the non-stick coating do not put the bowl (12) into cold water right after cooking, let it cool down preliminary.
- The bowl (12) is not intended for washing in the dishwashing machine.
Current time setting
- Insert the power cord into the connector (9), insert the plug into the socket.
- Press and hold the "Hours" button (22) or "Minutes" button (19), indication will start flashing on the display.
- Set the current time by pressing "Hours" button (22) or "Minutes" button (19).
- Press the "Start" button (17) or wait for 10 seconds to keep the settings.
- Use the "Hours" button (22) or "Minutes" button (19) to check the current time.
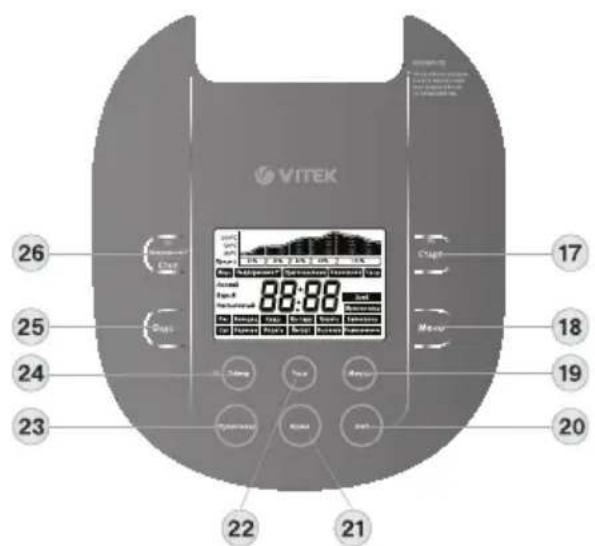
CONTROL PANEL BUTTONS (2)
"Start" Button (17)
Use the button to switch the program on and keep settings of the current time.
"Menu" Button (18)
Press the button (18) to choose automatic cooking program.
"Minutes" (19) and "Hours" (22) buttons
Use the buttons to set the current time and duration of cooking.
"Bread" Button (20)
Use the button (20) to quickly switch to the "Bread" program.
"Time" Button (21)
Use the button (21) to switch to cooking time setting mode.
"Multicook" Button (23)
The “Multicook” program allows the user to set the temperature and cooking duration independently. Use the button (23) to quickly switch to this program.
"Timer" Button (24)
Use the button (24) to set the cooking end time.
"Taste" Button (25)
Use the button (25) to quickly switch to the “Rice” program and select the program: glutinous, brown, fluffy rice.
"Keep warm/Stop" (26) Button
Use the button (26) to reset settings, switch the cooking off, and switch the keep warm mode on/off.
COOKING PROGRAMS
| # Program Cooking time Delayed start: Keep warm | ||||
| 1 | Rice 15-45 minutes available available | |||
| 2 | Jelly 2 - 8 hours available available | |||
| 3 | Porridge 20 minutes - 1 hour 10 minutes available available | |||
| 4 | Steam 20 minutes - 2 hours 30 minutes available available | |||
| 5 | Stew 30 minutes - 3 hours available available | |||
| 6 | Pudding 30 minutes - 2 hours available available | |||
| 7 | Soup | 1 - 4 hours available available | ||
| 8 | Jam | 20 minutes - 4 hours available available | ||
| 9 | Boil | 10 minutes - 2 hours | available available | |
| 10 | Yogurt 6 - 10 hours | no | no | |
| 11 | Baking 40 minutes - 2 hours no available | |||
| 12 | Roasting | 5 minutes - 1 hour | no | no |
| 13 | Bread | 30 minutes - 3 hours no | no | |
| 14 | Multicook | 1 minute - 24 hours | available available | |
Note:
- In "Baking" mode do not open the lid till the baking is finished.
- To avoid scorching of the product upon termination of the "Baking" program, cancel the keep warm function by pressing the "Stop" button (26).
- In “Roasting” mode the unit operates similarly to a stove, the user has to watch the readiness of food during cooking and switch the unit off by himself when the food is ready.
- Do not use the keep warm mode to heat up cold products.
- See recipes of dishes in the recipe book (supplied with the unit). All recipes are to be taken as recommendations, as the amount and proportions of the ingredients required for the recipes may vary depending on local peculiarities of the food and altitude above sea level.
USING OF THE MULTICOOKER
- Put the necessary ingredients into the bowl (12).
Note: Make sure that the ingredients and liquids level do not exceed the maximal mark "8". The maximal mark for porridges (except rice) - 6, maximal mark for other products and liquids - "8".
- If you steam products, pour water into the bowl (12) so that boiling water doesn't reach the bottom of the basket (13). Put the basket (13) with products into the bowl (12).
- Place the bowl (12) in the process chamber. Make sure that the bowl (12) is placed evenly and is in secure contact with heating element (10) surface.
Note:
- Do not use the bowl (12) for washing cereals and chopping products, this can damage the non-stick coating.
- Wipe the outer surface and the bottom of the bowl (12) dry before use. Make sure that there are no
foreign objects, dirt and moisture in the process chamber and on the bottom of the bowl.
- In the middle of the heating element (10) there is a temperature sensor (11). Make sure that the movement of the sensor (11) is not limited.
- Close the lid (4) tightly.
- Insert the power cord into the connector (9), and insert the cord plug into the socket, the display (3) will light up and you will hear a sound signal. The unit is ready for use.
– Choose a cooking program:
a) automatic programs (except "Rice")
Choose an automatic cooking program by pressing the "MENU" button (18).
b) "Rice" program
Choose the “Rice” program by pressing the “Taste” button (25). Consequently press the “Taste” button to choose the desired program: glutinous, brown or fluffy rice.
c) "Multicook" program
To choose the “Multicook” program press the “Multicook” button (23) and set the temperature with the “Hours” (22) and “Minutes” (19) buttons.
d) "Bread" program
Press the button (20) to quickly switch to the program.
- Press the "Time" button (21), and then set the desired cooking time with the "Hours" (22) and "Minutes" (19) buttons.
- Set the delayed start function (available for some programs. See "Cooking Programs"). Press the "Timer" button (24), then set the end cooking time with the "Hours" (22) and "Minutes" (19) buttons. If you want to start cooking immediately, skip this step.
- To start cooking press the "Start" button (17).
-
A sound signal will inform you that cooking is finished.
-
In certain programs the unit switches to the keep warm mode automatically (see “Cooking Programs”), “Keep Warm” sign will light up on the display (3) and operation time of the unit in this mode will be shown. To switch the keep warm off press the “Stop” button (26).
- To force the unit to switch from the standby mode to the keep warm mode press the "Keep warm" button (26). To switch this function off press the button (26) again.
Note:
- Despite the unit keeps the ready dish warm for 24 hours, it is not recommended to leave the cooked food in the multicooker bowl for a long time, because this may spoil the food.
- Do not use the keep warm mode to heat up products.
Attention!
- Do not leave the unit unattended during cooking and in the keep warm mode.
- To avoid burns be very careful when opening the multicooker lid (4), do not bend over the opening (7) during unit operation and do not place open parts of your body above the bowl (12)!
- During the first operation of the multicooker some foreign smell from the heating element can appear. It is normal.
- Watch the food during cooking, if necessary, stir the products with a plastic soup ladle (14) or spatula (15). Do not use metal objects that can scratch the non-stick coating of the bowl (12).
- Switch the unit off by unplugging it, and let the unit cool down completely.
"YOGURT" PROGRAM
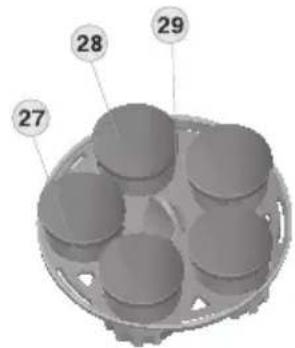
- Pour leaven and milk into the cups (27) in the proportion 1:10.
Note: Use natural yogurt with minimum shelf-life free of additives and coloring agents as a leaven. You can make leaven by yourself from special bacteria leaven (you can find it in a drugstore or in health food stores) following the instructions attached.
- Place the tray (28) into the bowl (12), and then yoghurt cups in it.
- Place the bowl (12) into the process chamber, select the "YOGHURT" program and set the cooking time (see "Using of the multicooker").
Attention! Do not move the unit during its operation.
- Cover cups with ready yoghurt with lids (29) and place into the fridge for several hours to stop bacteria growth.
You can add fruit, jam and honey in the ready natural yogurt.
CLEANING AND CARE
• Unplug the unit and let it cool down.
- Clean the unit body (1) and lid (4) with a slightly damp cloth, and then wipe dry.
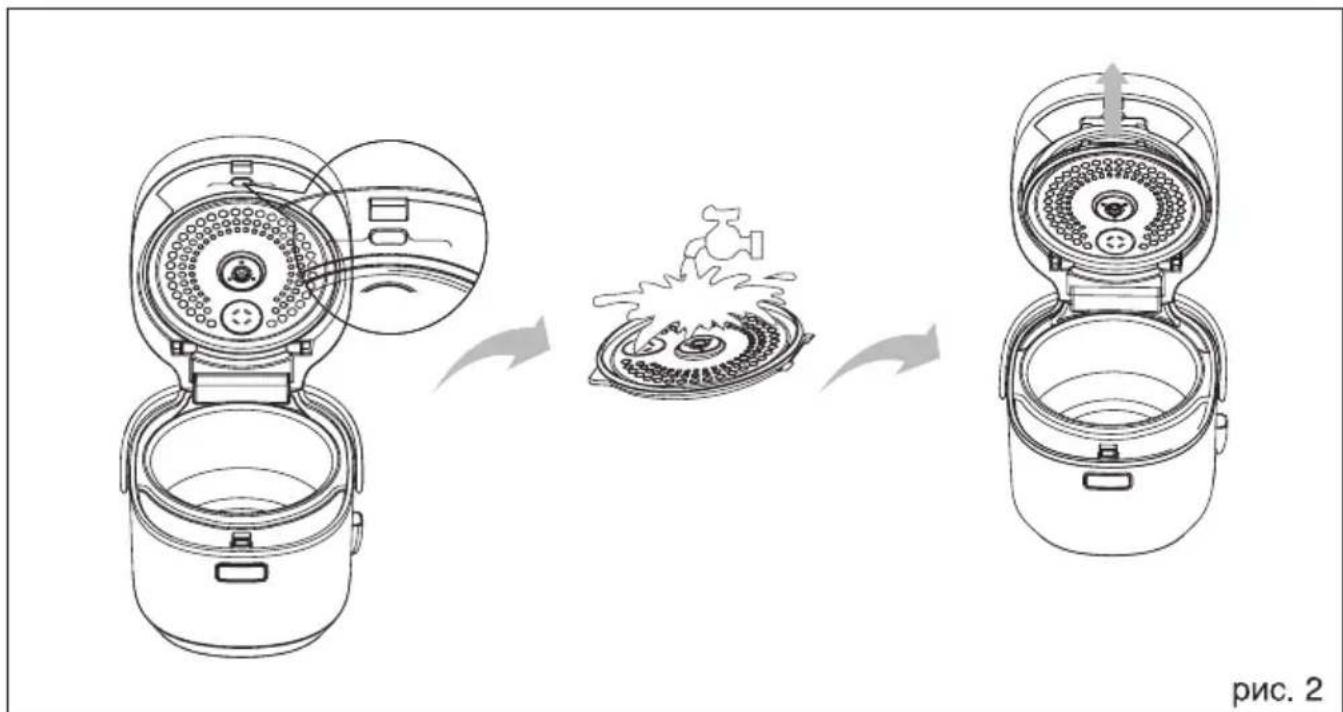
- Remove the protection screen of the lid (4) by pressing the button on the inner side (pic. 2), wash
the screen with warm water and neutral detergent, dry it thoroughly. Install the lower part of the screen into the grooves of the lid and press the upper part until click.
- Remove the steam valve (8), dissemble it, wash and dry thoroughly (pic. 1) Assemble the steam valve and install it back to its place.
- Wash all removable parts with a soft sponge and neutral detergent, then rinse in running water.
- Do not place the cooking bowl (12) in the dishwashing machine.
- Wipe the surface of the heating element (only when it is cold), never let water get inside the unit body.
- Do not immerse the body, the power cord and power plug into water and other liquids.
- Do not use abrasive and aggressive detergents for washing the unit and accessories.
STORAGE
• Unplug the unit and clean it.
- Keep the unit away from children in a dry cool place.
DELIVERY SET
Multicooker - 1 pc.
Bowl - 1 pc.
Yoghurt cups with lids - 5 pc.
Tray for cups - 1 pc.
Steam cooking basket - 1 pc.
Soup ladle - 1 pc.
Spatula – 1 pc.
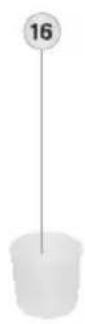
Measuring cup - 1 pc.
Instruction manual - 1 pc.
TECHNICAL SPECIFICATIONS
Power supply: 220 V \~ 50 Hz
Maximal power consumption: 860 W
Bowl capacity: 4 L
The manufacturer preserves the right to change the specifications of the unit without a preliminary notification.
Unit operating life is 3 years
Guarantee
Details regarding guarantee conditions can be obtained from the dealer from whom the appliance was purchased. The bill of sale or receipt must be produced when making any claim under the terms of this guarantee.

This product conforms to the EMC-Requirements as laid down by the Council Directive 2004/108/EC and to the Low Voltage Regulation (2006/95/EC)
DEUTSCH
MULTIKOCHER
A production date of the item is indicated in the serial number on the technical data plate. A serial number is an eleven-unit number, with the first four figures indicating the production date. For example, serial number 0606xxxxxx means that the item was manufactured in June (the sixth month) 2006.
De


- ENGLISH
- MULTICOOKER
- For your information:
- DESCRIPTION
- Display and control panel
- Additional accessories:
- SAFETY MEASURES
- Attention! Do not place the unit near bath tubs, kitchen sinks or other containers filled with water.
- USING OF THE COOKING BOWL (12)
- Current time setting
- CONTROL PANEL BUTTONS (2)
- "Start" Button (17)
- "Menu" Button (18)
- "Minutes" (19) and "Hours" (22) buttons
- "Bread" Button (20)
- "Time" Button (21)
- "Multicook" Button (23)
- "Timer" Button (24)
- "Taste" Button (25)
- "Keep warm/Stop" (26) Button
- Note:
- USING OF THE MULTICOOKER
- a) automatic programs (except "Rice")
- b) "Rice" program
- c) "Multicook" program
- d) "Bread" program
- Attention!
- "YOGURT" PROGRAM
- Attention! Do not move the unit during its operation.
- CLEANING AND CARE
- STORAGE
- DELIVERY SET
- TECHNICAL SPECIFICATIONS
- Unit operating life is 3 years
- Guarantee
- DEUTSCH
- MULTIKOCHER
- De
Brand : Vitek
Model : VT-4205 BK
Category : Multicooker