
HM 210 - Saw Cocraft - Free user manual and instructions
Find the device manual for free HM 210 Cocraft in PDF.


| Product Type | Compound Mitre Saw |
| Brand | Cocraft |
| Model | HM 210 |
| Power Supply | 230 V AC, 50 Hz |
| Rated Power | 1200 W (S1 duty) |
| No-Load Speed | 5000 rpm |
| Blade Diameter | 210 mm |
| Blade Bore | 30 mm |
| Blade Thickness | 2.6 mm |
| Number of Teeth | 24 |
| Bevel Range | 0° to 45° left |
| Mitre Range | -45°, 0°, +45° (with positive stops at 0°, 15°, 22.5°, 30°, 45°) |
| Max. Cutting Capacity at 90° | 60 x 120 mm |
| Max. Cutting Capacity at 45° (bevel) | 60 x 85 mm |
| Max. Cutting Capacity at 2x45° (double mitre) | 35 x 85 mm |
| Table Dimensions | 390 x 135 mm |
| Sound Pressure Level (LpA) | 89.2 dB(A), K=3 dB |
| Sound Power Level (LwA) | 102.2 dB(A), K=3 dB |
| Dust Extraction | Dust bag included; compatible with external extraction |
| Accessories Included | Blade wrench, dust bag, extension wings (2), rear support, mitre table handle, clamp |
| Safety Features | Fixed and movable blade guards, spindle lock, safety switch with release lever |
| Maintenance | Check carbon brushes every 50 hours initially, then every 10 hours; replace if <6 mm |
| Repairability | Use genuine spare parts; repairs by qualified technician only |
| Recommended Fuse | 10 A slow-blow, earthed outlet |
| Net Weight | Approx. 12 kg (estimated) |
Frequently Asked Questions - HM 210 Cocraft
User questions about HM 210 Cocraft
0 question about this device. Answer the ones you know or ask your own.
Ask a new question about this device
Download the instructions for your Saw in PDF format for free! Find your manual HM 210 - Cocraft and take your electronic device back in hand. On this page are published all the documents necessary for the use of your device. HM 210 by Cocraft.
USER MANUAL HM 210 Cocraft
Read the entire instruction manual carefully and make sure that you fully understand it before you use the equipment. Keep the manual for future reference.
Viktig information:
Original instructions
Bruksanvisning i original
Originalbruksanvisning
1200 W Compound Mitre Saw
Art. no 18-3204 Model 92109-UK
40-7895
92109
Read through the entire user guide before using the product and save the guide for future reference. We cannot accept responsibility for any errors in the text or pictures and reserve the right to make changes to technical data. If you have technical problems or questions, contact our customer service (see addresses on the last page).
Safety
General safety rules for your safety and the safety of others
- Keep the work area clean. Cluttered surfaces and workbenches can result in accidents.
- Do not use the machine in an environment where risks are present. Electrical machines must not be used on damp or wet surfaces or in rain. Provide good lighting in the work area. Provide ample air exchange where work produces dust. Never use electrical machines/tools where they might cause fire or explosion.
- Avoid electric shock. Avoid contact between your body and earthed objects such as water pipes, radiators, cookers etc. when using electrical machines or tools. Contact with these may cause electric shock.
- Keep children and visitors away. All children and visitors should be kept at a safe distance from electrical machines and tools or electric cables in the work area.
- Store the machines where children cannot get at them. When electrical machines/tools are not in use, store them under lock and key or out of the reach of children.
- Do not force the machine. It does its job best at the feed rate for which it was designed.
- Use the correct tool. Do not force a tool or an attachment to perform an operation for which it was not designed.
- Wear suitable clothing. Do not wear loose clothing, gloves, necklaces, rings, necklaces or other items that might get caught in rotating parts. Non-slip shoes are recommended. If you have long hair, wear a hairnet (or equivalent).
- Always wear safety glasses. Ordinary glasses do not provide enough protection. Wear a dust filter or protective mask when doing work which produces dust.
- Use a dust extraction system. If the machine is designed for it, use extraction equipment to remove and collect dust and chips. Make sure that the equipment is used properly and is emptied when necessary.
- Do not mistreat the mains lead. Never carry the machine by the mains lead. Do not unplug the machine by tugging on the mains lead. To do this, pull on the plug. Make sure that the mains lead does not come into contact with heat, oil or sharp edges.
- Secure the workpiece properly. Use clamps or a vice where possible, so that you can operate the tool with two hands. This is safer than using one hand to hold the object.
- Do not stretch too far. Always stand securely and properly balanced.
- Keep the tools in shape. For optimal efficiency and a safe result, make sure that they are clean and that the cutting edges are sharp. Follow the recommendations in the manual for lubrication and replacement of accessories. Check the mains lead regularly. If it is damaged, it must be replaced by a qualified service technician. Check all extension leads regularly for damage. Make sure that the handles and controls of the machine/tool are dry, clean and free of oil, grease, etc.
- Switch off the power. Unplug the mains lead and press the emergency stop button before servicing and when replacing accessories such as blades, drill bits, cutters or abrasive strips.
- Make a habit of checking that all keys and servicing tools have been removed from the machine before you switch on the power.
- Avoid accidental starting. Do not carry the tool by one finger on the power switch or trigger if the tool is plugged in. Make sure that the switch is set to OFF when you plug in the machine.
- When working outdoors, use only extension leads intended for outdoor use. Use extension leads with sufficient conductor area. Uncoil the entire lead.
- Use common sense and take care. Think before performing an operation, so that you perform it safely. Do not use the machine/tool when you are tired or affected by medicines, etc.
- Before starting the tool, check: that all guards and other parts are undamaged and work as intended, that moving parts can turn freely and are properly aligned, that no moving parts can get stuck, and that no fault or other circumstances have arisen that might affect the performance of the work. If a guard or some other part has been damaged, it must be repaired professionally or replaced. Damaged mains leads and switches must always be replaced by a qualified technician. Never use the tool if you cannot switch it off or start it safely.
- Use recommended accessories. Using non-recommended accessories may cause accidents or present a risk of injury.
- The tool conforms to current safety requirements. Repair work on the tool must only be done by a qualified technician, using genuine spare parts; otherwise the tool may cause accidents or present a risk of injury.
- For safety, electrical tools should be connected to the power supply via a residual current device (RCD).
- The product must not be modified or used for operations for which it was not intended. Check regularly that all screws and nuts are tight.
Product marking with safety symbols on the machine

Read the user guide. Read this manual carefully and consider the information it contains. Use the manual to get to know the machine and how to use it and to learn the safety rules.
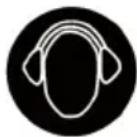
Warning! Using the machine could damage your hearing. Use ear protectors when working with the machine.

Warning! Use safety glasses or a visor to protect your eyes from flying chips.
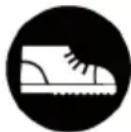
Warning! Risk of crushing. Wear safety shoes.
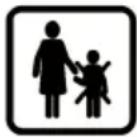
Warning! Keep children away from the work area. Store the machine out of the reach of children when it is not in use.
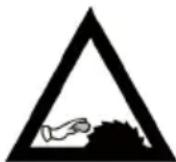
Warning! Keep your fingers clear of the rotating blade. Take care to position your hands safely so that they do not come into contact with the saw blade if you lose your balance. Never saw workpieces that are too small to be held securely.
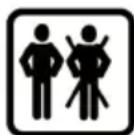
Warning! The machine is intended to by used by only one person at a time. The machine must not be used by more than one person at the same time.
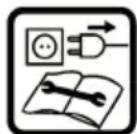
Warning! Before servicing, cleaning, etc., read the user guide and unplug the machine.
Special safety regulations for the compound mitre saw
- Warning! Unplug the mains lead before servicing the saw or replacing the blade.
- Before starting the saw, check that all its parts are working properly and that the safety devices provide the necessary protection.
- Warning! Use only crosscutting blades. Make sure that the carbide-tipped blades have negative rake. Do not use blades with deep gaps between the teeth since the teeth may bend and foul the blade guard. Replace a damaged blade immediately.
-
Do not use the saw until it has been completely assembled and fully installed as described in this user guide. Check the direction of rotation of the motor and the blade (see the arrow on the blade guard). Check that the saw blade does not foul the mitre table in any position. Unplug the saw and tilt the saw blade manually to 45° and 90°. Adjust the cutting head if necessary.
-
If you do not understand how to use the saw, get advice from someone who does.
- Do not saw freehand. Secure the workpiece firmly against the fence before starting to cut. If the workpiece is so short that your hand would be as close as about 10 cm from the blade, secure the workpiece with a clamp or similar device before cutting it.
- Warning! Keep your hands away from the saw blade. Never cut small pieces. Use a pusher.
- Check that the blade is properly centred and sharp and that it runs freely without vibration.
- Allow the motor to come up to speed before starting to cut.
- Keep the ventilation openings of the motor clean and free from dust.
- Always make sure that all clamp screws are tight before you start to cut, even if the table is secured in a fixed angled position.
- Make sure that the blade and collars are clean and that the spindle nut is tight. Use only the correct blade collars for your saw.
- Use only 210 mm diameter blades of the right speed class (at least 5000 rpm).
- Provide suitable extra supports when cutting long workpieces.
• Always check before cutting that the blade is not cracked or damaged. If it is, replace it immediately. - Do not use the saw if any of its components is missing, damaged or not working properly. If the saw makes a strange noise or vibrates, unplug it. Arrange for a specialist to replace the missing or defective part before using the saw again.
- Do not use the saw if the guards are not in place and are not working properly.
- Never reach around or behind the saw when it is running. Stand firmly so that you can keep your balance at all times.
- Check that the blade can rotate freely (especially after transport and/or a change of blade) before you plug the saw in and start it again.
- Never lock the switch in the ON position.
- Important! When you have cut right through the workpiece: release the switch and wait for the blade to stop rotating before you raise the cutting head.
- Release the switch and wait for the blade to stop rotating before you move the workpiece or change a setting.
- Wait for the blade to stop rotating before you remove offcuts or trapped pieces of wood.
- Never cut ferrous metals, bricks or mortar.
- Never use the saw near flammable gases or liquids.
- Never use solvents to clean the plastic parts of the saw. Solvents may dissolve the plastic or damage the material in some other way. Use only a soft damp cloth for cleaning.
• Before leaving the saw, unplug it and clean it. Tidy the work area when you have finished working. - Keep this user guide. Read it often and use it to instruct other people. Make sure that everyone who uses the saw has read this user guide.
- Do not expose the saw to rain and do not use it in a damp environment.
- Provide good lighting at the workplace.
- Wear suitable work clothes. Loose clothing or jewellery may get caught in moving parts.
- Users must be at least 18 years old. Users aged 16 must be supervised by an instructor when operating. Keep children away from the saw when it is connected to a power socket.
- Keep the work area tidy. Do not leave offcuts and other rubbish lying about. Make sure that waste pieces can be removed from the saw blade; otherwise they may be thrown out by the blade.
-
Do not distract someone who is working with the saw.
-
Do not attempt to stop the blade rotating by pressing something against the side of the blade when you have switched off the power to the saw.
- Never use saw blades that do not conform to the specifications in this manual.
- It is important always to check that all guards covering the saw blade are working properly.
- Never lock the lower blade guard in the open position and never dismantle the guards of the machine or modify their function. Never use a damaged or defective safety device. Replace it immediately!
- Take care to position your hands safely so that they do not come into contact with the saw blade if you lose your balance. Never saw workpieces that are too small to be held securely.
- When working with long workpieces, use a table, roller supports, etc., to prevent the machine tipping.
- Use suitable means to clamp circular-section workpieces so that they cannot rotate.
- There must be no nails or other foreign bodies in the workpiece.
- Always stand away from the line of the saw blade when using the machine, so that you would not be struck by fragments of the blade if it were to break.
- Always press the workpiece against the table and the fence when sawing, so that it cannot turn or move when you cut it.
- Never cut more than one workpiece at the same time.
- Never attempt to remove dust, chips or trapped pieces of wood while the saw blade is rotating. Always switch off the machine first and unplug the power lead, before adjusting the machine or removing trapped pieces of wood.
- Always switch off the machine and unplug the power lead before adjusting or cleaning the machine or measuring the workpiece.
- When leaving your work location, switch off the motor and unplug the power lead.
- Electrical installation, repair or maintenance work must be done by a qualified technician.
- All guards and safety devices must be refitted immediately after repair or maintenance.
- It is important to follow the manufacturer's instructions on safety, use and maintenance, and to observe the timber size limits given under Technical data.
- It is essential to follow official health and safety rules and other general safety rules.
- To avoid causing negative pressure, only use the machine in an enclosed space with a dust extraction system if there is a supply air connection.
- Only connect the saw to a 230 V socket protected by a fuse or circuit-breaker rated at not less than 10 A.
- Damaged safety devices and parts must be repaired by a qualified technician at an authorised service workshop.
- This machine conforms to all relevant safety regulations. The machine may only be repaired by a qualified technician at an authorised service workshop, using genuine spare parts. If you do not observe this rule, a hazardous situation may arise, exposing the user to danger.
The package contains
- Blade wrench
- Dust bag
- Extension wings (two)
-
Compound mitre saw
-
User guide
- Support (for rear)
- Mitre table handle
Description
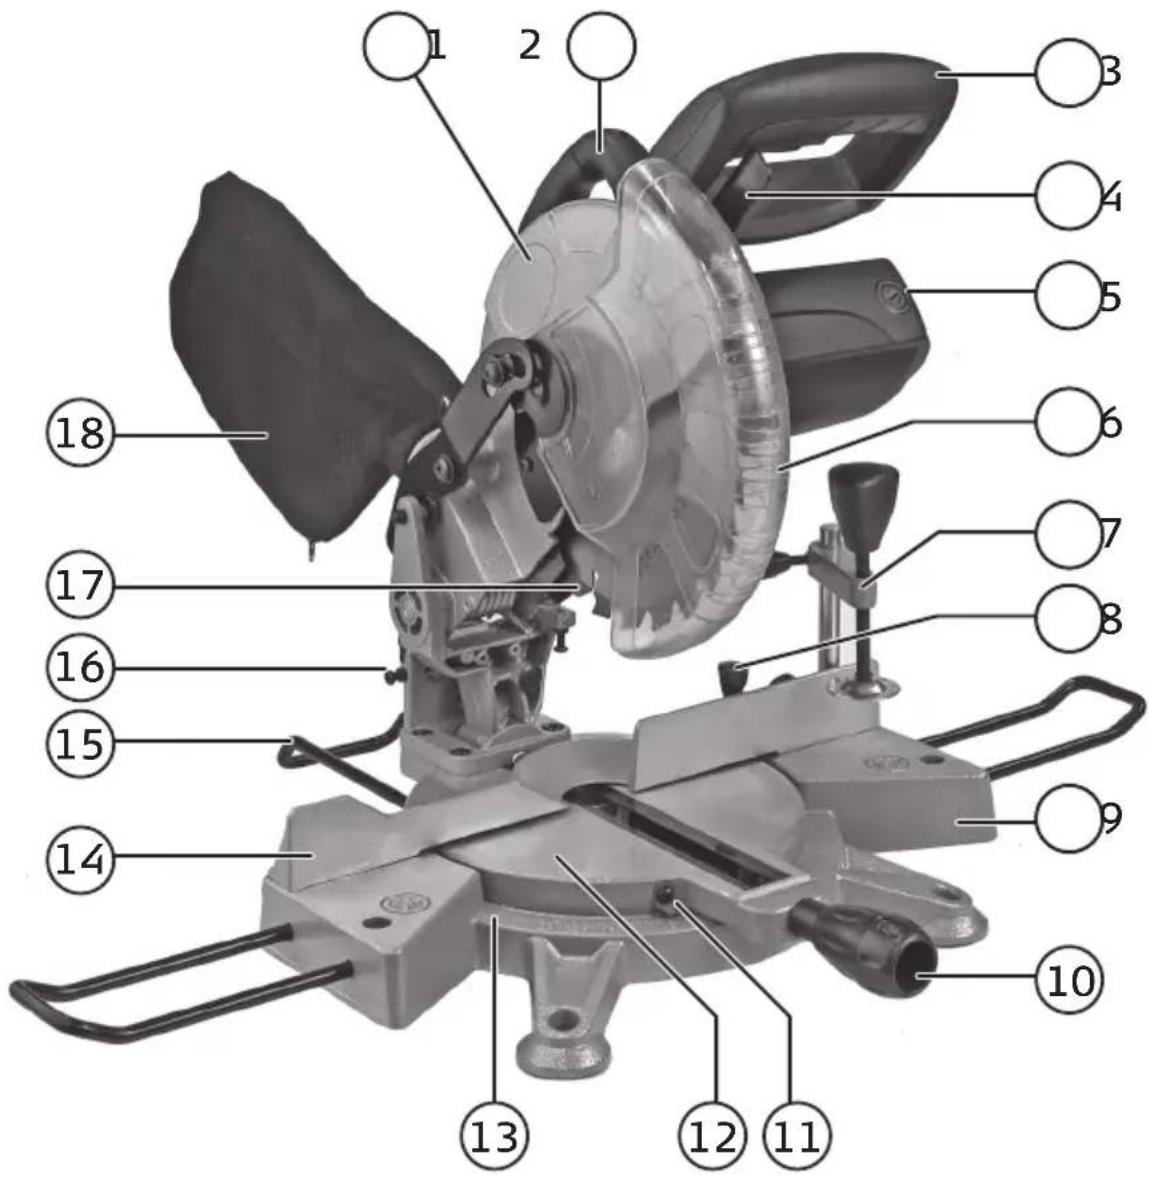
- Fixed blade guard
- Handle, rear
- Handle
- Release lever
- Cover for carbon brush holders
- Blade guard, movable
- Clamp
- Mitre table locking knob
-
Base
-
Mitre table handle
- Mitre scale index
- Mitre table
- Mitre scale
- Fence
- Rear support
- Stop screw for 45° tilt (bevel cuts)
- Saw blade
- Dust bag
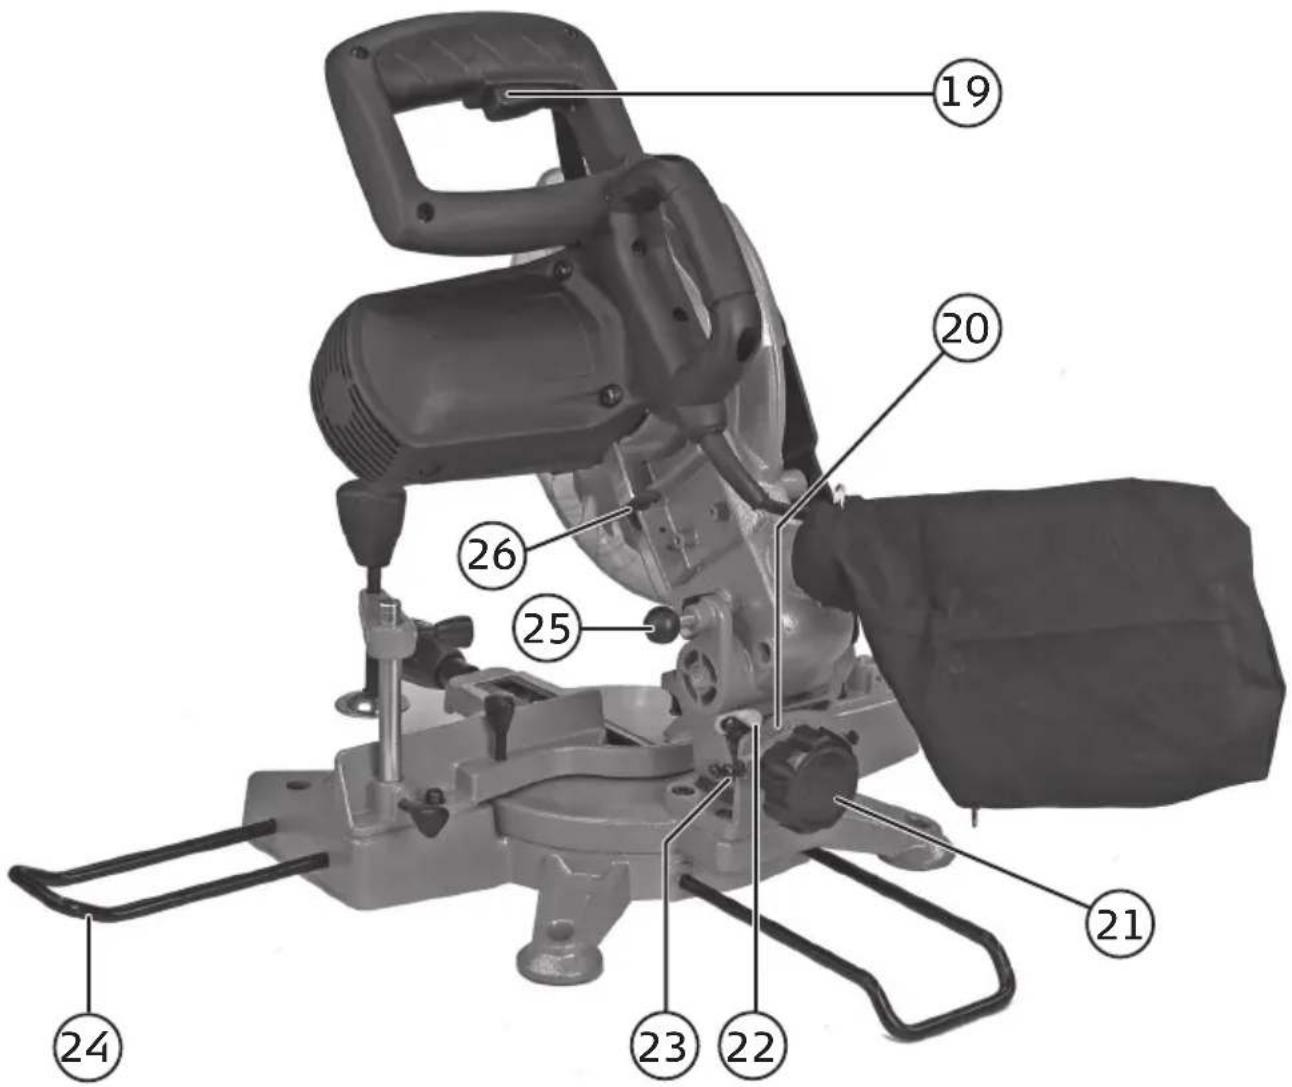
- Switch
- Bevel scale
- Bevel lock knob
- Bevel scale index
- Stop screw for 90° tilt (bevel cuts)
- Extension wings
- Cutting head latch
- Spindle lock
Assembly
- Install the extension wings (24) on the sides of the base (9) and secure them with the screws on the underside.
- Install the clamp (7) in one of the mounting holes in the fence and secure it with a locking screw.
- Screw on the rear support (15) with the bent part downwards.
- Install the dust bag (18) or connect a dust extraction system.
Steps to be taken before the machine is used
- The machine must be firmly mounted, for example on a workbench or table.
- All guards and safety devices must be correctly fitted before the machine is started.
- The saw blade must rotate freely in every possible position.
- When working with timber that has been used before, be observant and look out for foreign bodies such as nails or screws in the workpiece.
- Before starting the machine, check that the saw blade is correctly fitted and that all moving parts operate freely.
- Check that the locking knobs that secure the cutting head and the mitre table are tight before you start sawing.
- Before connecting the machine to a power socket, check that it is designed for the voltage at the socket.
Use
Setting up the compound mitre saw
- Releasing the mitre table.
Adjust the mitre table (12) and back off the locking knob (8) about two turns. Turn the mitre table to the desired angle with the handle (10).
- Setting the mitre table.
The mitre table (12) has fixed positions for: 0^ , 15^ , 22.5^ , 30^ and 45^ . Back off the locking knob (8) and set the desired angle at the index mark (11). Lock the mitre table with the locking knob (8).
- Releasing the cutting head.
Carefully press down the cutting head and pull out the latch (25) to release the cutting head (if it is locked in the down position).
- Letting the cutting head rise to the up position.
Hold the handle and allow the spring to move the cutting head to the up position.
Check that the release lever (4) locks the movable blade guard (6).
- Setting the cutting head tilt.
Slacken the locking screw (16) and set the desired tilt (bevel). The cutting head can be tilted up to 45^ to the left.
Cutting with the blade tilted 0°
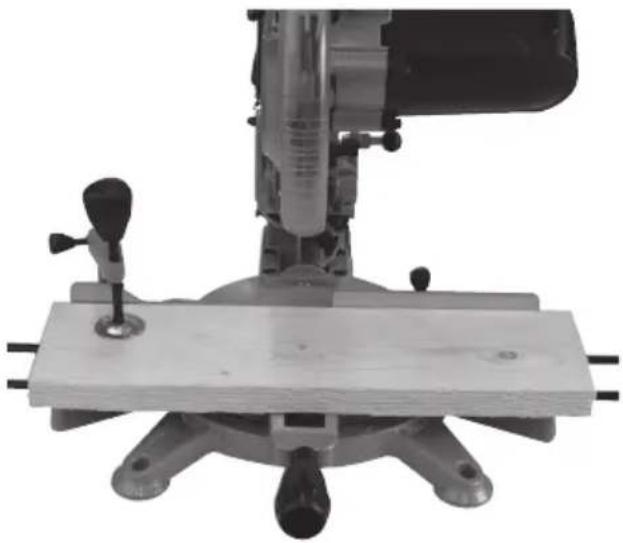
- Check that the index mark is at 0 on the scale.
- Pull out the latch and allow the cutting head to move to the up position.
- Position the workpiece to be cut against the fence on the mitre table.
- Press the switch to start the motor, press the release lever, carefully and smoothly pull down the handle and let the saw blade cut the workpiece.
- When cutting is complete: release the switch. When the motor has stopped, the cutting head can be raised to the up position.
Warning! The balancing springs of the machine automatically raise the cutting head after cutting. Do not let go the handle when cutting is complete. Hold the handle and gently control its upward movement.
natural_image
Mechanical setup with a drill bit and wooden base, no visible text or symbolsCutting with the blade tilted 0-45°
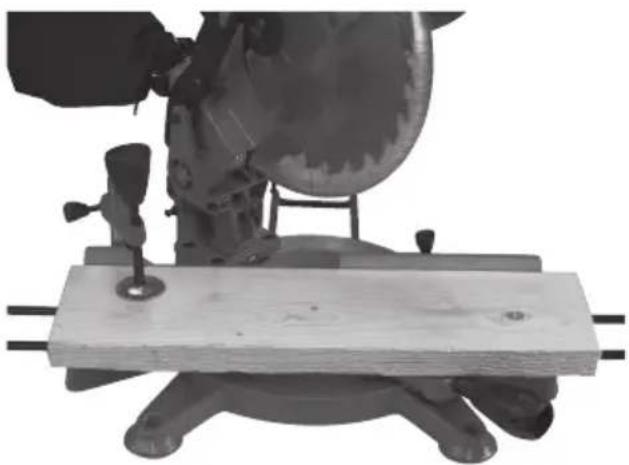
You can use the saw to make bevel cuts at angles of 0–45°.
- Slacken the bevel lock knob. Then tilt the blade to the desired angle as shown on the scale.
- Tighten the bevel lock knob to fix the position of the blade.
- Cut the workpiece as described above.
natural_image
Mechanical setup with a cutting machine and wooden base (no visible text or symbols)Fine adjustment of the 0 and 45^ end positions
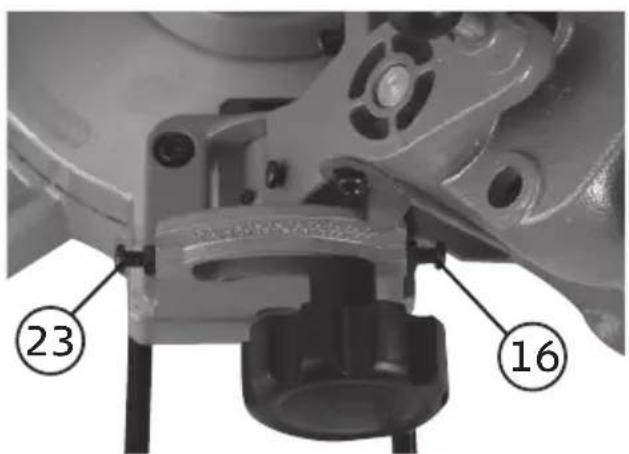
- Slacken the lock knob and tilt the saw to the 0^ end position.
- Using a 90° template, check the angle between the blade and the mitre table.
- If necessary adjust the end position by slackening the nut and turning the internal hexagon stop screw (23).
- After adjusting, tighten the nut.
- Follow the same procedure when checking the 45^ end position but use a 45^ template and adjust the nut with the stop screw (16).
Mitre cutting
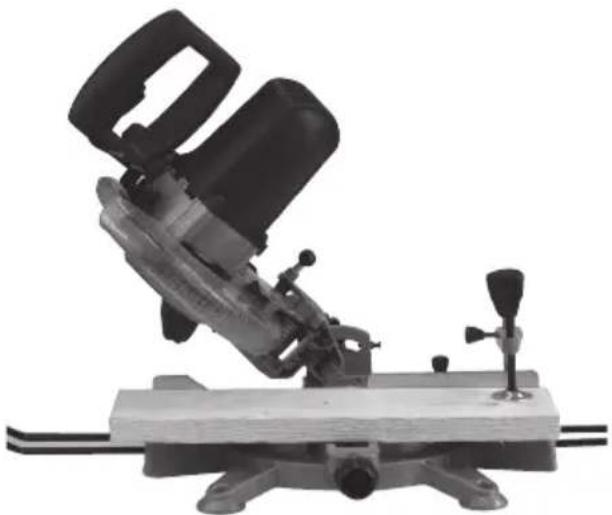
You can use the saw to make mitre cuts at -45^/0^/+45^ .
- Pull out the latch and allow the cutting head to move to the up position.
-
Position the workpiece to be cut against the fence on the mitre table.
-
Slacken the mitre table locking knob and set the desired mitre angle on the mitre scale. Tighten the locking knob.
-
Press the switch to start the motor, press the release lever, carefully and smoothly pull down the handle and let the saw blade cut the workpiece.
-
When cutting is complete: release the switch. When the motor has stopped, the cutting head can be raised to the up position.
natural_image
Mechanical tool with clamping mechanism mounted on a wooden base (no visible text or symbols)Cutting bowed workpieces
natural_image
Pure geometric diagram of a trapezoidal shape with no text, numbers, or symbols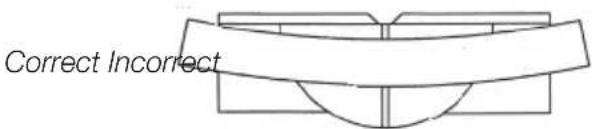
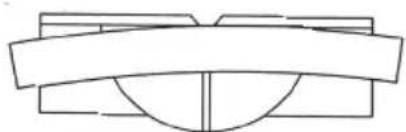
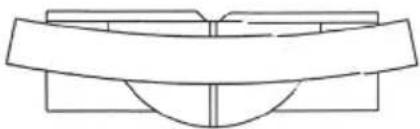
When cutting flat workpieces, you should check whether the workpiece is bowed. Position it as shown in the illustration, otherwise the workpiece will pinch the blade at the end of the cut.
Dustbag
The saw has a dustbag. It can be emptied by opening the zip on the underside. Alternatively you can connect an extraction system to the dust outlet.
Changing the saw blade
Only use blades of the recommended type. Replace bent, cracked or otherwise damaged blades immediately.
- Unplug the mains lead.
- Pull out the latch and carefully allow the cutting head to go up.
-
Press the release lever and swing the movable blade guard upwards.
-
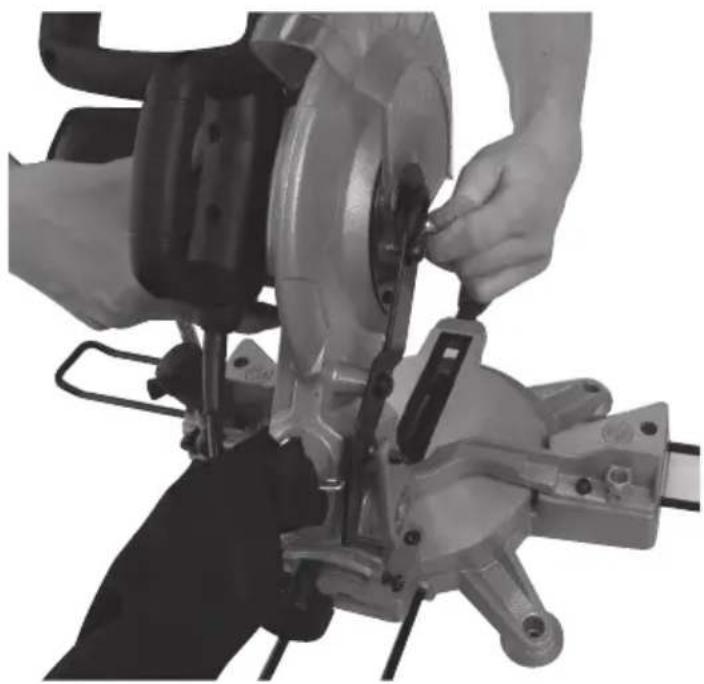
Press in the arbor lock with one hand and turn the blade with the other hand until the blade locks. Keeping the arbor lock pressed in, use the supplied wrench to slacken the arbor bolt (by turning it clockwise).
-
Remove the arbor bolt and the outer blade collar.
-
Remove the saw blade.
-
Install the new blade, reversing the above sequence of operations.
-
Clean the blade collar and arbor bolt before assembly. The direction of rotation of the blade must match the arrow on the guard.
natural_image
Close-up of hands operating a cutting tool with a grinding wheel and workpiece (no visible text or symbols)- Check that the arbor lock has been disengaged by its spring.
- Check that all guards are correctly fitted and are working properly before starting the saw.
Warning! After changing the saw blade, always check that the blade rotates easily in every possible position.
Warning! Before starting the machine, remove the wrench and check that the arbor lock has been disengaged by its spring.
Inspecting and replacing carbon brushes
Warning! Unplug the mains lead before checking the carbon brushes.
The life of the carbon brushes depends on how hard the motor has been worked. Check the brushes after 50 hours' running if the saw is new or if you have fitted new brushes. After the first check, inspect the brushes every ten hours' running until they need replacing.
How to check the carbon brushes:
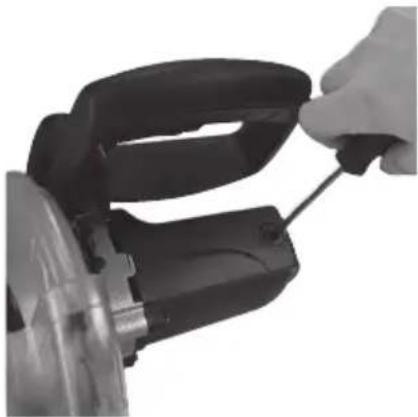
- Remove the two covers, one on each side of the motor.
- Remove the carbon brushes, which are under the covers.
- Check the length of the carbon brushes (at least 6 mm).
- If any brush is less than 6 mm long or if a spring or shunt wire is scorched or damaged in any way, replace both brushes.
natural_image
Close-up of a hand using a power tool to adjust or install a mechanical component (no visible text or symbols)Troubleshooting
- To prevent overheating of the motor, clean it regularly with an air jet or vacuum-clean it to remove any chips or dust that might reduce cooling.
- Connect the saw to an earthed outlet protected by a slow-blow fuse rated at not less than 10 A.
- If the motor does not start immediately, release the trigger/switch. Unplug the mains lead and check that the saw blade runs freely. If it does, try starting the motor again.
- If the motor stops when the saw is cutting: immediately release the trigger/switch and unplug the mains lead. Free the blade from the workpiece. Try starting the motor again.
- Check connections, overloading (several devices on the same circuit, floodlights, etc.), conductor area at least 1.5 mm ^2 up to a cable length of 7 metres and at least 2 mm ^2 for a cable length of 7 to 15 metres. The power cable must not be more than 15 metres long.
Responsible disposal
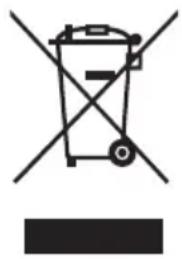
This symbol indicates that this product should not be disposed of with general household waste. This applies throughout the entire EU. In order to prevent any harm to the environment or health hazards caused by incorrect waste disposal, the product must be handed in for recycling so that the material can be disposed of in a responsible manner. When recycling your product, take it to your local collection facility or contact the place of purchase. They will ensure that the product is disposed of in an environmentally sound manner.
natural_image
Symbol of a trash bin with crossed lines and a blank rectangular block below (no text or labels)Technical data
Motor 230 V AC, 50 Hz
Rated power 1200 W
Duty S1
No-load speed 5000 rpm
Carbide-tipped saw blade ∅ 210 × ∅ 30 × 2.6 mm
Number of teeth 24
Adjustable saw blade tilt (bevel cuts) 0–45° to the left
Adjustable mitre cutting -45^/0^/+45^
LpA (sound pressure level) 89.2 dB(A), K: 3dB(A)
LwA (sound power level) 102.2 dB(A), K: 3dB(A)
Table: 390 × 135 mm
Max. timber size at 90° 60 × 120 mm
Max. timber size at 45^ 60 × 85 mm
Max. timber size at 2 × 45° (double mitre) 35 × 85 mm
natural_image
Mechanical setup with a drill bit and wooden base, no visible text or symbolsnatural_image
Mechanical setup with a cutting tool and wooden base, no visible text or symbolsnatural_image
Mechanical tool with clamping mechanism mounted on a wooden base (no visible text or symbols)natural_image
Pure geometric diagram of a trapezoidal shape with no text, numbers, or symbolsRätt Fel
natural_image
Pure technical line drawing of a symmetrical mechanical component with no text or symbolsnatural_image
Close-up of hands operating a cutting tool on a workbench (no visible text or symbols)natural_image
Close-up of a hand using a power tool to adjust or install a mechanical component (no visible text or symbols)Felsökning
natural_image
Symbol of a trash bin with crossed lines indicating no waste or restriction, and a solid black rectangle below (no text or labels)Tekniska data
Motor 230 V AC, 50 Hz
Märkeffekt 1200 W
Driftläge S1
Varvtal, obelastad 5000 rpm
natural_image
Mechanical setup with a cutting machine and wooden base (no visible text or symbols)natural_image
Mechanical setup with a cutting machine and wooden workbench (no visible text or symbols)natural_image
Mechanical device with clamping mechanism mounted on a wooden base (no visible text or symbols)natural_image
Pure geometric diagram of a trapezoidal shape with no text, numbers, or symbols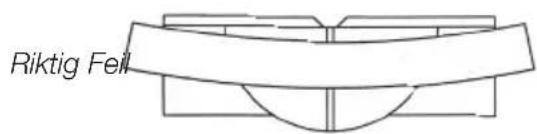
natural_image
Close-up of hands operating a cutting tool with a grinding wheel and blade assembly (no visible text or symbols)natural_image
Close-up of a hand using a power tool to adjust or install a mechanical component (no visible text or symbols)Feilsøking
natural_image
Mechanical setup with a drill bit and wooden base, no visible text or symbolsnatural_image
Mechanical setup with a cutting machine and wooden workbench (no visible text or symbols)natural_image
Mechanical tool with clamping mechanism mounted on a wooden base (no visible text or symbols)natural_image
Simple line drawing of a symmetrical geometric shape with no text or symbols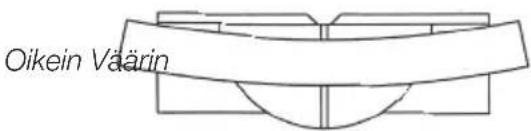
natural_image
Close-up of hands operating a cutting tool with a grinding wheel (no visible text or symbols)natural_image
Close-up of a hand using a power tool to adjust or install a black mechanical device (no visible text or symbols)Vianetsintä
natural_image
Mechanical setup with a cutting machine and wooden base (no visible text or symbols)natural_image
Mechanical setup with a wooden plank and tool, no visible text or symbolsnatural_image
Mechanical device with clamping mechanism mounted on a wooden base (no visible text or symbols)natural_image
Pure geometric diagram of a trapezoidal shape with no text, numbers, or symbols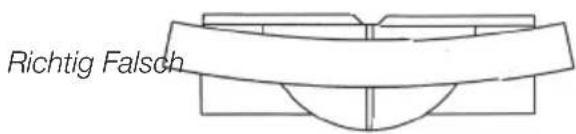
natural_image
Close-up of hands operating a cutting tool on a metal workpiece (no visible text or symbols)natural_image
Close-up of a hand using a power tool to adjust or install a black electrical device (no visible text or symbols)Fehlersuche
natural_image
Symbol of a recycling bin with crossed lines and a blank rectangular base (no text or numbers)Technische Daten
Motor 230 V AC, 50 Hz
Nennleistung 1200 W
Betriebsart S1
Declaration of Conformity
Declares that this product complies with the requirements of the following directives and standards
Cocraft 40-7895 / 18-3204
92109 / 92109-UK
Machinery
Directive
2006/42/EC
EMC Directive
2014/30/EU
Low Voltage
Directive
2006/95/EC
EN 61029-1:2009/A11:2010
EN 61029-2-9:2012/A11:2013
EN 55014-1:2006/A2:2011
EN 55014-2:1997/A2:2008
EN 61000-3-2:2014
EN 61000-3-11:2000
EC type certificate, no. M8A15064439954
Issued by the following notified body:
Manager Technique & Quality
Insjön, Sweden, 2016-07-12
Sverige
Postal 10 - 13 Market Place
Kingston Upon Thames
Surrey
KT1 1JZ
Deutschland
Kundenservice

- Viktig information:
- W Compound Mitre Saw
- Safety
- General safety rules for your safety and the safety of others
- Product marking with safety symbols on the machine
- Special safety regulations for the compound mitre saw
- The package contains
- Description
- Assembly
- Steps to be taken before the machine is used
- Use
- Setting up the compound mitre saw
- Cutting with the blade tilted 0°
- Cutting with the blade tilted 0-45°
- Fine adjustment of the 0 and 45° end positions
- Mitre cutting
- Cutting bowed workpieces
- Dustbag
- Changing the saw blade
- Inspecting and replacing carbon brushes
- Troubleshooting
- Responsible disposal
- Technical data
- Felsökning
- Tekniska data
- Feilsøking
- Vianetsintä
- Fehlersuche
- Technische Daten
- Declaration of Conformity
- Cocraft 40-7895 / 18-3204
- / 92109-UK
- Sverige
- Deutschland
Brand : Cocraft
Model : HM 210
Category : Saw