USER MANUAL eBike c101 MS Energy
1. VAŽNE SIGURNOSNE UPUTE
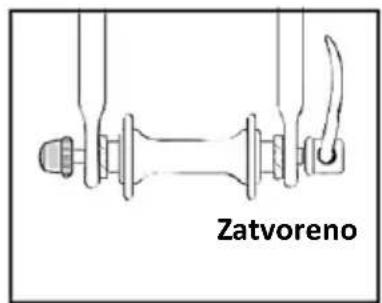
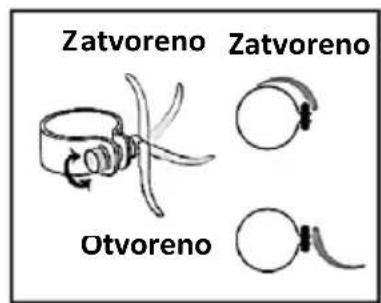
Postavljanje i ugađanje sjedala

3. OSNOVNI DIJELOVI I NAZIVI
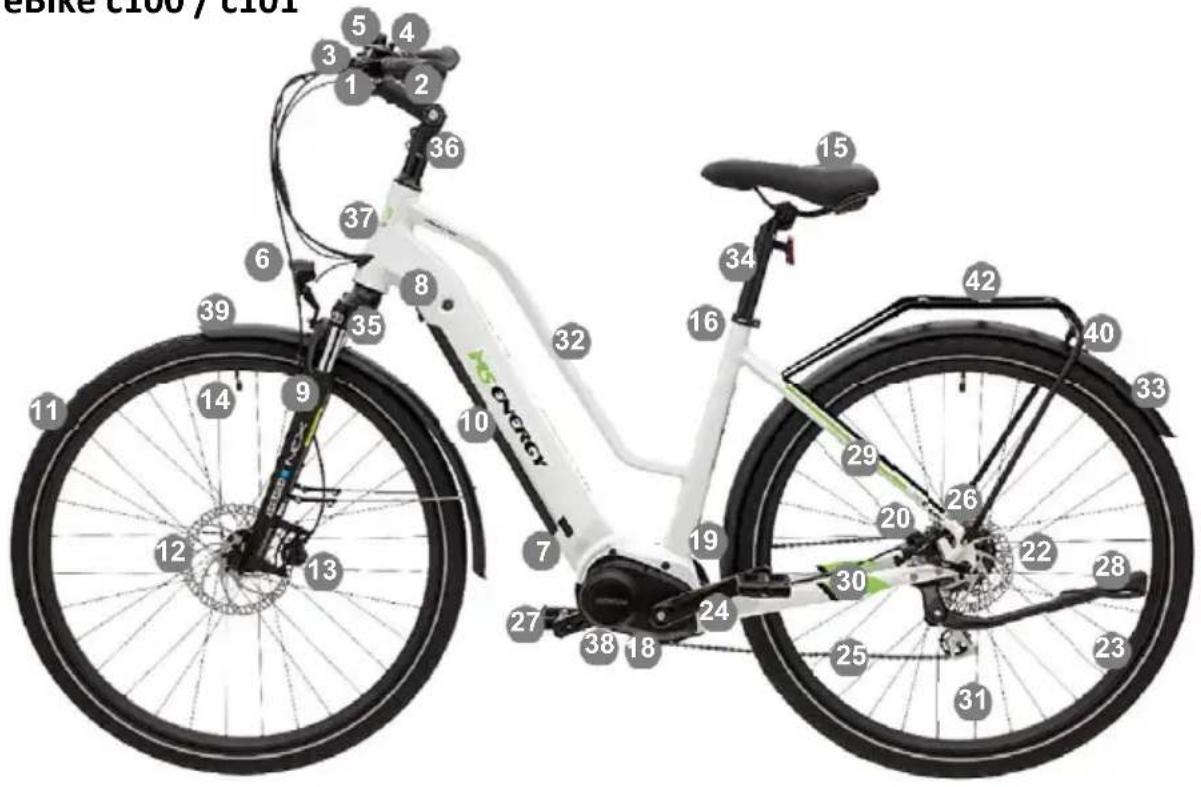
eBike c100 / c101


| 1. | Ručica kočnice | 15. | Sjedalo | 29. | Stražni nosač rame |
| 2. | Ručka | 16. | Poluga učvršćenja visine sjedala | 30. | Donji nosač rame |
| 3. | Cijev upravljača | 17. | Zadnji amortizer (akc postoji) | 31. | Žbice |
| 4. | Mjenjač | 18. | Motor | 32. | Gornja cijev rame |
| 5. | LCD Zaslon | 19. | Štitnik lanca | 33. | Stražnji blatobran |
| 6. | Prednje svjetlo | 20. | Čeljust stražnje kočnice | 34. | Cijev sjedala |
| 7. | Priključak za punjenj € | 21. | Senzor | 35. | Poluga zaključavanja suspenzije (opcija) |
| 8. | Zaključavanje baterije | 22. | Stražnji disk kolnice | 36. | Vertikalni stup upravljača |
| 9. | Vilica sa suspenzijom | 23. | Rama | 37. | Glavna cijev rame |
| 10. | Baterija | 24. | Poluga pedale | 38. | Lančanik |
| 11. | Guma | 25. | Lanac | 39. | Prednji blatobran |
| 12. | Prednja disk kočnica | 26. | Stražnji mjenjač | 40. | Stražnje svjetlo |
| 13. | Čeljust prednje kočnice | 27. | Pedala | 41. | Zaključavanje |
| 14. | Ventil zračnice | 28. | Preklopna nogica | 42. | Stražnji nosač |
4 LCD UPRAVLJAČ
Početna vrijednost podrške (opcija)
Moguće je postaviti početnu vrijednost podrške na: 0, 1, 2, 3.
Postavke fotosenzora

Postavljanje prednje disk kočnice *
-
Izvadite disk kočnicu i odvrnite dva vijka ispred prednje kočnice;
-
Vizualno pregledajte udaljenost između dvije pakne disk kočnice koja treba biti 3 do 4mm;
-
Stavite ploču disk kočnice pakne te pričvrstite disk kočnicu na predviđene rupe na vilici s dva unutarnja šesterokutna M6×16mm vijka s momentom sile od 8 do 10N.m:
-
Nakon što su vijci pričvršćeni, zaokrenite prednji kotač te provjerite ima li 1
nepravilnih zvukova (pakne kočnice); ukoliko ima, potrebno je podesiti disk kočnicu (Molimo obratiti pažnju na Poglavlje 4 za određene postupke ponovnog postavljanja kotača).
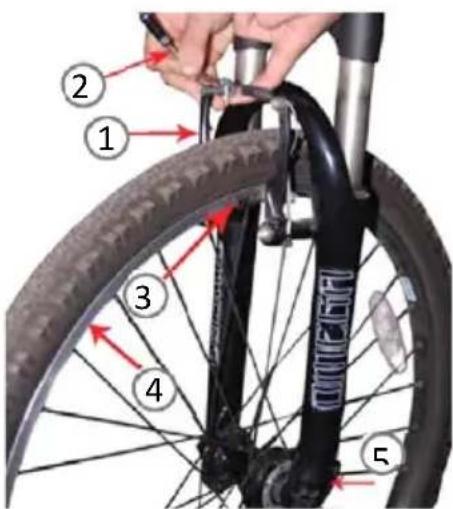
① Ploča disk kočnice ② Disk kočnica
③ Unutarnji šesterokutni M6×16mm
vijak ④ Pakna ⑤ Pričvrsna mjesta disk kočnice

Prednje svjetlo

Stražnje svjetlo
se namestiti tako da se upravljač može
nagnuti prema napred ili nazad. Ako je cev upravljača uklonjena radi lakšeg transporta, postavite cev upravljača u središte vertikalnog stuba, proverite jesu li ručke na pravom mestu i da li je ugao nagiba ručki udoban. Zategnite vijke koji pritežu upravljač za vertikalni stub pazeći da su sve sajle slobodne i da nisu nategnute. Preporučena sila obrtnog momenta zatezača upravljača je 13-14 Nm.


Preporučene vrednosti okretnih momenata za pritezanje matica i vijaka.
| Matice prednjeg točka | 22-27 Nm 16.2 | -19.8 ft.-lb. |
| Matice stražnjeg točka | 24-29 Nm 17.5 | -21.3 ft.-lb. |
| Matica sedišta | 12-17 Nm 8.8 | -12.5 ft.-lb. |
| Stezna matica stuba sedišta | 15-19 Nm 11.0 | -14.0 ft.-lb. |
| Pričvrsna matica kočnice | 7-11 Nm | 5.1-8.1 ft.-lb. |
| Stezna matica upravljača | 17-19 Nm 12.5 | -14.0 ft.-lb. |
| Upravljač - matica vertikalnog stuba | 17-19 Nm | 12.5-14.0 ft.-lb. |
Postavljanje prednjeg blatobrana (opcija)
- Izvadite prednji blatobran i pričvrstite držač blatobrana i držač prednjeg svjetla na prednju vilicu sa šesterokutnim vijcima;
- Postavite prednji blatobran u odgovarajući položaj na objema stranama prednje vilice i pričvrstitite ga vijcima;
- Križnim odvijačem pritegnuti vijke.
2. OSNOVNI DELOVI I NAZIVI
eBike c100 / c101


| 1. | Ručica kočnice | 15. | Sedište | 29. | Gornji nosač ram |
| 2. | Ručka | 16. | Poluga učvršćenja visine sedišta | 30. | Donji nosač ram |
| 3. | Cev upravljača | 17. | Zadnji amortizer (akc postoji) | 31. | Žice |
| 4. | Menjač | 18. | Motor | 32. | Gornja cev rama |
| 5. | LCD ekran | 19. | Štitnik lanca | 33. | Zadnji blatobran |
| 6. | Prednje svetlo | 20. | Čeljust zadnje kočnice | 34. | Cev sedišta |
| 7. | Priključak za punjenj € | 21. | Senzor | 35. | Poluga zaključavanja suspenzije (opcija) |
| 8. | Zaključavanje baterije | 22. | Zadnji disk koćnice | 36. | Vertikalni stub upravljača |
| 9. | Vilica sa suspenzijom | 23. | Ram | 37. | Glavna cev rama |
| 10. | Baterija | 24. | Poluga pedale | 38. | Lančanik |
| 11. | Guma | 25. | Lanac | 39. | Prednji blatobran |
| 12. | Prednja disk kočnica | 26. | Zadnji mjenjač | 40. | Zadnje svetlo |
| 13. | Čeljust prednje kočnice | 27. | Pedala | 41. | Zaključavanje |
| 14. | Ventil | 28. | Preklopna nogica | 42. | Zadnji nosač |
4 LCD UPRAVLJAČ
LCD upravljač ANANDA D10 pruža širok spektar funkcija i pokazatelja u skladu s potrebama korisnika. Sadržaj prikaza je sledeći:
- Status baterije
- Brzina (Stvarna brzina, Prosečna brzina i Najveća brzina)
- Pređena udaljenost vožnje (Trip) i Ukupna pređena udaljenost (Total)
• Vreme trenutne vožnje
• Nivo PAS-a (podrška motora u 5 nivoa)
• Status prednjeg svetla
- Kod greške u sastavu
• Postavke jedinica km/Milja
- Podršku vožnje prilikom guranja bicikla
Razni parametri, kao što je veličina točkova, ograničenje brzine, jačina svetla na LCD ekranu i drugo.
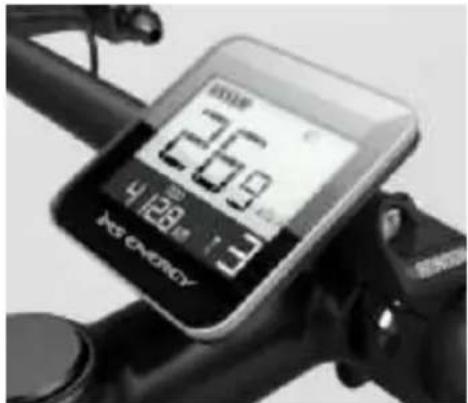
Opis ekrana
1. Napunjenost baterije
5- segmentna indikacija napunjenost baterije
Kada je na ekranu prikazana oznaka "0", tada je podrška je isključena.
Postavke fotosenzora

* Opcionalno, samo modeli sa sastavom V-kočnice
Postavljanje prednje disk kočnice *
- Izvadite disk kočnicu i odvrnite dva vijka ispred prednje kočnice;
- Vizualno pregledajte udaljenost između dva pakna disk kočnica koja treba biti 3 do 4mm;
-
Stavite ploču disk kočnice između dve pakne te pričvrstite disk kočnicu na predviđene rupe na vilici s dva unutrašnja šestougaona M6×16mm vijka s momentom sile od 8 do 10N.m;
-
Nakon što su vijci pričvršćeni, zaokrenite prednji točak te proverite ima li 1
nepravilnih zvukova pakne kočnice); ukoliko ima, potrebno je podesiti disk kočnicu (Molimo obratiti pažnju na Poglavlje 4 za određene postupke ponovnog postavljanja točka).
① Ploča disk kočnice ② Disk kočnica
③ Unutrašnji šestougaoni M6×16mm
vijak ④ Pakna ⑤ Pričvrsna mesta disk
kočnice


Napomena: prilikom učvršćivanja vijka disk kočnice, povucite donji deo disk kočnice rukama i gurnite disk kočnice prema gore što je više moguće.
* Opcionalno, zavisi od modela kočnice na vašem modelu
Reflektirajući sastav i sastav osvetljavanja (opcija)
Reflektujući sastav sadrži reflektore na ramu, prednje i zadnje pričvršćeno svetlo, torbu, kacigu i reflektujeće umetke na biciklističkoj odeći. Sastav osvetljavanja čini baterija ili samoobnovljivo prednje i zadnje svetlo. Ovi predmeti pomažu označiti vaš položaj u noćnoj vožnji.
Preporuka: Obavezno koriste reflektujeće oznake i sastav osvetljavanja u skladu s lokalnim zakonima i standardima.

Prednje svjetlo
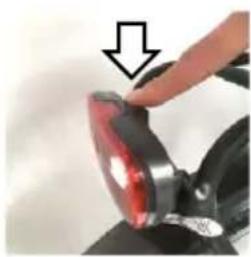
Stražnje svjetlo


Предно светло
Задно светло
pressure frequently. If the air pressure is too low, the resistance will increase, affecting the running range.


Rregulloni shalën

3. STRUKTURA THEMELORE DHE EMRI
eBike c100 / c101


Note: some models of front fender sticks need to be installed on the front wheel axis.

* Opsioni, vetëm modelet me sistem V-Frenim

Front Light

Back Light
8 TEKNOLOGJIA E NGASJES


Žaromet (Headlight)
Pritisnite gumb "Headlight", da vklopite žaromet in zadnjo luč.
Ponovno pritisnite gumb, da izklopite žaromet/zadnjo luč.
Izbira načina asistence
Pritisnite "+"ali"-", da izberete nivo podpore motorja.
Pomoč pri hoji

Prednja luč

Zadnja luč
7 UPORABA IN VZDRŽEVANJE
4.Rama in sprednje vilice


Přední světlo

Back Light
7 OBSLUHA A ÚDRŽBA
Počas nabíjania nenechávajte koleso bez dozoru


| Matica predného kolesa 22-27 Nm 16,2 - 19,8 ft.-lb. | | |
| Matica zadného kolesa 24-29 Nm 17,5-21,3 ft.-lb. | | |
| Sedlová matica 12-17 Nm 8,8-12,5 stop-lb. | | |
| Matica sedlovky 15-19 Nm 11,0-14,0 ft.-lb. | | |
| Matica kotvy brzdy | 7-11 Nm | 5,1-8,1 ft.-lb. |
| Upínacie matice na riadidlá | 17-19 Nm | 12,5-14,0 stop-lb. |
| Riadidlá- Matica vretena | 17-19 Nm | 12,5-14,0 stop-lb. |
3. ZÁKLADNÉ ČASTI A NÁZVY
eBike c100 / c101


Svetlomet
Nastavenia jednotky

Predné svetlo

Zadné svetlo
7 POUŽÍVANIE A ÚDRŽBA

3. PODSTAWOWA KONSTRUKCJA I NAZWY
eBike c100 / c101
eBike t100


Back Light
- Zasilanie z suchej baterii.
7 UŻYTKOWANIE I KONSERWACJA
Disposal of waste batteries



2. ALKATRÉSZEK ÉS ELNEVEZÉSEIK
eBike c100 / c101


Elülső lámpa

Hátulsó lám pa
Hátulsó hordozó


Reglarea șeii

3. STRUCTURA DE BAZĂ ȘI DENUMIRI
eBike c100 / c101


T (Tur) → S (Sport) → C (Personalizat) → E (Eco) → T (Tur).

Şurub hexagonal interior M6×16mm

Lumină față

Lumină spate
7 UTILIZARE ŞI ÎNTRETINERE
Thank you for purchasing the Electric MS Energy Bike.
Cautions!
This assembly and operation manual shall remain an integral part of the electric bicycle. When you transfer the electric bicycle to others, please enclose with this manual as it contains the important safety guidance and operation instructions. Anyone riding the electric bike shall carefully read the safety guidance and operation instructions first. The changes in the pictures, data, descriptions and specifications under this manual may not be notified separately with continuous improvement of our corporate products In order to fully benefit from this product, please follow the instructions in this user manual very carefully, especially Warning and Safety chapters. Store this user manual in a safe place for future reference.
This device lives up to the highest standards, innovative technology and high user comfort.

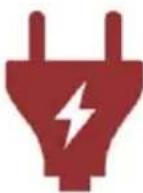
The flash with the symbol of arrowhead, inside an equilateral triangle alerts the user about the presence of a dangerous tension not isolated inside the product which can be sufficiently powerful to constitute a risk of electrocution.

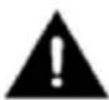
The point of exclamation inside an equilateral triangle alerts the user about the presence of important operating instructions and maintenance in the document enclosed in the package.
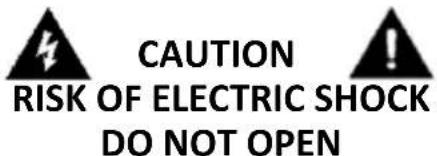
Do not open the cover of Electric Charger or any other Electric parts. In no case the user is allowed to operate inside the Electric parts. Only a qualified technician from the manufacture is entitled to operate.
Main plug is used as the disconnect Charger device.
Incorrect replacement of the battery may lead to t including the replacement of another similar or the same type.
Do not expose batteries to heat such as something like that.
Please read the following safeguards for your Bike and retain for future reference. Always follow all warnings and marked instructions.
This Product fulfill all requirements according to EN 15194, EPAC
Max supported speed: 25km/h
Motor power: 250W
1. IMPORTANT SAFETY INSTRUCTIONS
- Before carefully reading the Manual and understanding the performance of the electric bike, do not use the electric bike, and do not lend it to the persons who can manipulate or don't have a knowledge how to use the electric bike.
The following operation manual is a guide to assist you. This manual is not a complete document on all aspects for the maintenance and repair of your bike. The electric bicycle you have purchased is not a complex device however, it is recommended that you consult an e-bike repair specialist if you have concerns as to your ability to assemble, repair, or maintain this product.
RIDING AND THINGS YOU MUST KNOW BEFORE YOUR RIDE
- Please learn and observe all the road rules while riding your e-bike on public roads, including ALWAYS wearing an approved helmet.
The correct helmet should:
- Be comfortable to the rider
- Be of light weight
• Have good ventilation for the head
- Fit snugly
- Cover the forehead

It is your responsibility to familiarize yourself with the laws of the state where you ride and to comply with bicycle laws
Young children, pregnant women and any persons with vision, balance, or other problems that would prevent them from riding a bicycle should not use the pedelec.
The e-bikes are not designed for two riders. Please ensure only one person at a time is riding the e-bike
-
E-bikes are for on road or improved trail use only and should not be used for riding rough trails (Unless otherwise indicated, e.g special designed Mountain Bikes). Damage to the bike may occur if used off road.
-
Do not operate your electric bike after consuming any amount of alcohol or taking any drugs
-
Always Check Bike, Brakes, Tires and Screws/Nuts for Tightness Before Riding.
-
WARNINGS
• NEVER carry a passenger on the Electric Bike!
- NEVER modify the Electric Bike with unapproved accessories
• NEVER ride through deep water
• NEVER perform wheelies, jumps or trick stunts.
- AVOID riding in the rain for long periods of time.
- AVOID water contact to motor and electric lines.
• ALWAYS keep both hands on handlebars.
- ALWAYS apply brakes lightly when riding on rocks or loose surfaces.
• ALWAYS use caution when going through puddles.
- ALWAYS inspect the Electric Bike before each ride to insure a safe ride.
-
For saving the energy and extending the life of battery, please use pedal for assistance on the electric bike when climbing the slope or meeting windy day.
-
When in the bad weather like rain or snow, the brake distance should be increased.
-
When the electric bikes runs at the speed of 20km/h, the wet brake distance should be not longer than 15m. Please adjust the brake frequently, and change the brake pad in time.
-
Check the tightness of the chain. The tightness should be about 15mm. When adjust the chain, loose the rear axle nuts, adjust the chain tightness screw making sure the chain tightness is proper, then tighten the rear axle screw.
-
For the safety of you and other people, cut the power supply when it is not used.
-
Check the tire air pressure frequently. If the air pressure is too low, the resistance will increase, affecting the running range.
-
The electric element can only be cleaned outside, no need to be maintained for the inside. Do not open it by yourself (If these parts opened by yourself, the warranty will not be valid any more)
-
It is forbidden to be overloaded for the electric bicycle. If it is overloaded, the electrical parts will be damaged (the plastic parts may disformed for the high temperature, or the fuse socket will be damaged for the high temperature). These are not under warranty.
-
Please cut off the power if there is problem on the electrical parts.
-
Please pay attention to national legal requirements when the bicycle is to be ridden on public roads (e.g. lighting and reflectors)
-
The fasten torque of the fixing screw for the rear rack should be 16Nm.
-
The A-weighted emission sound pressure level at the driver ears should be less than 70 dB(A).
-
Don't put a trailer on the bicycle.
-
Warning: Not to touch hot surfaces after prolonged use. (e.g. disc brake)
-
Do not pedal or move the bicycle while the battery charger is connected. If you do, it may cause the power cable to become entangled in the pedals, which may damage the battery charger, the power cable and/or the charging port.
-
Do not ride the bicycle if there is a fault with the battery or any component of the pedal assistance system. Otherwise you may lose control and suffer serious injury.
-
Do not start moving with one foot on a pedal and the other on the ground and then start riding the bicycle when you have reached a certain speed. Otherwise you may lose control and suffer serious injury. You should only start moving when you are properly seated on the bicycle seat.
-
Do not activate the throttle function if the back wheel is not touching the ground. Otherwise, the wheel will rotate in the air at high speed and may cause injury.
-
Be sure to check the remaining battery capacity before riding at night. The light powered by the battery pack will go off soon after the remaining battery capacity decreases to the point where riding

with assisted power is no longer possible. Riding without a light may increase the risk of injury.
-
Do not modify or remove any parts of the pedal assistance system. Do not install non-original parts or accessories. If you do, they may damage the product, cause a fault or increase the risk of injured.
-
When you stop, make sure that you apply the front and rear brakes and keep your feet on the ground. Leaving one foot on a pedal when stationary could accidentally activate the assisted power function, which could cause you to lose control and suffer serious injury.
-
Preparations before riding: wear your helmet, gloves and other protective gears before riding to protect yourself from damage in case of an accident.
-
Cycling conditions: ambient temperature of -10 to 40C, no wind, snow, ice and flat roads; without frequent startup and brake, the general running distance may be vary according to the battery capacity and other conditions. For aprox. distance check technical specifications.
-
Maximum load: the maximum load of the bike is 125kg (together with load of the rear rack) The real maximum load of rear rack is stamped on the rack and may vary between 15-25kg, depends on model of the rear rack. If an accident happens when the load is more than 125kg, the company does not undertake any responsibility.
-
In case of frequent brake, startup, uphill, headwind running, muddy roads, overload and others, a large quantity of electric power of the storage battery will be consumed, thus affecting the continued mileage, so we recommend that you avoid the above factors when riding.
-
If the storage battery is disabled for a long time, make sure to charge it enough, and it need be additionally charged once if its storage is more than a month.
-
Make sure to pay attention: the electric bike can not wade for a long time because if water enters into the controller and motor, it may cause short circuit to damage the electrical appliances!
CHARGER
-
Never use this battery charger to charge other electrical devices.
-
Do not use any other charger or charging method to recharge the
batteries of the electric bicycle. Using any other charger may lead to a fire, explosion or damage to the batteries.
- This battery charger may be used by children aged 8 or over and by persons with physical, sensory or mental impairments, or who lack the necessary experience and knowledge, provided that they are supervised and instructed on how to use the battery charger safely and they understand the dangers involved. Do not allow children to play with the battery charger. Cleaning and maintenance should not be performed by unsupervised children.
This appliance is not intended for use by persons (including children) with reduced physical, sensory or mental capabilities, or lack of knowledge and experience to use the appliance, unless they are supervised by a person who is responsible for their safety. Children should be supervised to ensure that they do not play with the appliance.
- Do not allow Charger to be submerged in water or other liquids, expose to the rain or snow. Furthermore, never use the battery charger if the terminals are wet. The charger is designated for indoor use only.
-
Never touch the charger's power plug, charging port or contacts with wet hands. You may suffer an electric shock.
-
Do not touch the charger's contacts with metal objects. Do not allow any foreign matter to enter, it may cause short circuits in the contacts, which may cause electric shock, a fire or damage to the battery charger.
-
Regularly clean any dust off the power plug. Moisture or other problems could reduce the effectiveness of the insulation and cause a fire.
-
Never dismantle or modify the battery charger. You may cause a fire or suffer an electric shock.
-
Do not use multi-socket adaptors or extension cables. Using a multi-socket adaptor or similar may exceed the rated current and cause a fire.
-
Do not use with the cable tied up or coiled and do not store with the cable coiled around the body of the main charger. If the cable is damaged it may cause a fire or you may suffer an electric shock.
-
Firmly insert the power plug and charging plug in the socket. If the power plug and charging plug are not fully inserted, this may cause a fire due to an electric discharge or overheating.
- Do not use the battery charger near to flammable materials or gases. This may cause a fire or explosion. Always provide adequate ventilation and charge battery in good ventilated spaces.
- Never cover the battery charger or place objects on it while it is charging. This may lead to internal overheating and cause a fire.
- Do not drop the battery charger or expose it to strong impacts. Otherwise, it may cause a fire or electric shock.
- If the power cable is damaged, stop using the battery charger and take it to an authorised dealer.
- Handle the power cable with care. Plugging in the battery charger indoors while the bicycle is outdoors may lead to the power cable being caught on or damaged by doors or windows.
- Do not pass the wheels of the bicycle over the power cable or plug. Otherwise you may damage the power cable or port.
- Store the charger in a cool and dry place when not in use.
BATTERY
- All lithium ion batteries must be well cared for to optimize useful life and range. It is the responsibility of the bike owner/operator to ensure the battery is looked after properly. Incorrect use or storage of your battery may cause damage and void your warranty.

-
It is not unusual for a well-maintained battery to last for several years. Though your bike will feel less powerful as the battery gets older, and the range will diminish, you can continue using the battery for many years to come.
-
Keep the battery and battery charger out of the reach of children.
-
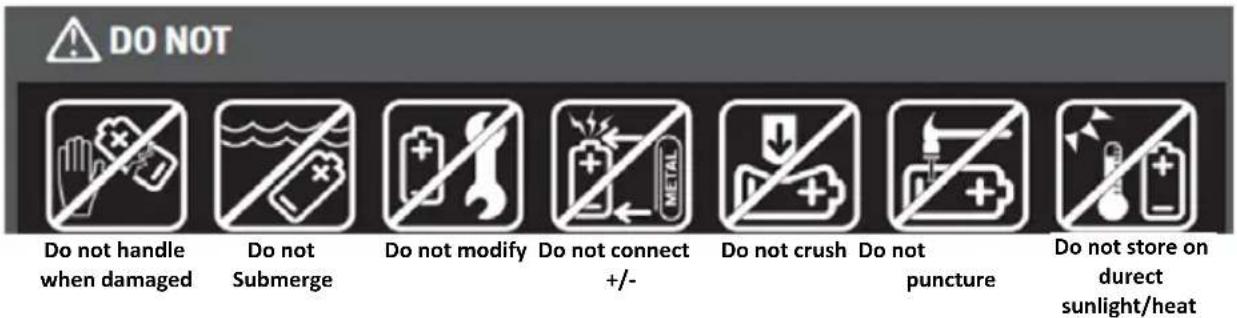
Do not touch the battery or battery charger during charging. As the battery pack and battery charger reach temperatures of 40° C– 70° C during charging, touching them may lead to first degree burns.

- If the battery case is damaged, cracked or you notice
unusual smells, do not use it. The leakage of fluid from the battery may cause serious injury.

- Do not short the contacts of the battery's charging port.
If you do, it may cause the battery to heat up or catch fire, causing serious injury or damage to property.
-
Do not dismantle or modify the battery. If you do, it may cause the battery to heat up or catch fire, causing serious injury or damage to property.
-
Do not drop the battery or subject it to impacts. If you do, it may cause the battery to heat up or catch fire, causing serious injury or damage to property.
-
Do not dispose of the battery in a fire or expose it to
heat sources. Otherwise, this may cause a fire or explosion, resulting in serious injury or damage to property.

- If you do not use the electric bike for several months, charge the battery to 100% before storing it. In addition, it is advisable to turn on the Bike every few months, let the engine run for a few minutes and recharge the battery up to 100%.

Do not leave your bike unattended while charging

Charge at least
every 90 days
Only use approved charger
Tips
In order to your correct use and security, please pay attention to the following matters:
- In the process of use, pay attention to checking the fastening status of the motor and front fork, and if a loose phenomenon is found, it should be tightened timely.
- When starting the power supply or meeting a steep slope, use the Pedal to assist as far as possible to reduce the starting current and extend the battery life and continuation line mileage.
- In rainy days, please pay special attention to: when the water depth is more than the wheel center, it is likely for the motor to s water, thus resulting in failure.
- Users must use the charger specified by manufacturer for charging the storage battery. When charging, put the battery and charger smoothly.
- It is prohibited that other items are covered on the battery box and charger to impede heat, where good ventilation environment should be maintained.
- Please keep appropriate air pressure inside the tires, so as to avoid increasing the resistance when driving, and easily wearing the tires and deforming the Rim.
- Drivers should abide by traffic rules, and the riding speed should be controlled below 25km/h and the goods to be carried shall not exceed Max load for rear rack.
- When high-speed running or downhill hard braking, do not use the front brake to avoid the center of gravity from moving ahead, thus resulting in danger.
Don't tamper the electric bicycle spec and setting, if you tamper spec or setting, you need take full responsibility for safety. Definition of tampering: change the motor or controller, the maximum speed or maximum power or the power assisted mode.
Suitably covering any coil spring under the saddle to prevent trapping of fingers if you need fit a child seat on your bicycle
2. GETTING STARTED AND ASSEMBLY INSTRUCTIONS
First, unpack your electric bike carefully and save all packing material. Be sure to locate your charger, pedals, keys and any small parts like nuts or screws inside the shipping carton. Sometimes small parts like nuts or screws may come loose during shipping so be sure and check the bottom of the carton and protective wrapping carefully. Keep your packing material until you are through assembling your bike and know that it is running properly.
This bicycle was fully assembled, inspected and tuned at the factory and then partially disassembled for shipping.
Your bike arrives in the shipping carton about 90% assembled. To ship the bike, the pedals, seat, front wheel and sometimes the handlebar are loosened or removed.
This manual will list all of the steps required for the various models.
The following “basic” assembly instructions will assist in getting the bike ready to ride. If you have questions about your ability to assemble this product, please consult a qualified bicycle technician.
We recommend that two people work together to assemble the electric bicycle
- Alen key wrenches 4, 5, 6, 7mm
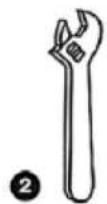
- Adjustable wrench
- Tire lever
- Standard Philips head screwdriver
- Open and or pedal wrench 15mm
- Standard slip joint pilers
- Tire pump
- Standard flat head screwdriver



Attach and adjust the handlebar
Your handlebars have two main parts:
- The bar itself
- The stem.
On some models, the stem can be adjusted to tip the handlebar forward or back. If your bar has been removed for shipping,

position the bar in the center of the stem and check, to be sure that your grips are in the right place and the angle of the bar is comfortable. Tighten the screws to hold the bar in place, ensuring all brake cables is clear, the suggested torque is 13-14Nm.
ATTENTION: Be sure to check that your handlebars are centered and tight before riding
The stem must be inserted to the Minimum depth or lower as indicated on the steer post to insure the safety, see the picture. Tighten the stem screw located on the top of the handlebar stem.
Warning:
The danger of damaging the stem-to-fork assembly and the risk of injury to the rider that can result from overtightening the stem bolt or other clamping device.
You may adjust the handlebar stem angle by loosening the Allen key screw located underneath the stem (A).
Tighten the stem, adjustment screw securely after positioning the stem

angle. The tightening torque between the handlebar and the frame stem should be bigger that 18-20Nm.
Check that the forks and the handlebars are facing forward and straight. Stand at the front of the handlebar, vise the front wheel by your legs and hold the
handlebar, adjust the hadlebar and the body of the bicycle to form an angle of 90 degree, see the picture.
Some models have a light/power meter console that attaches to the handlebar. Attach this with the plastic brackets and screws provided.
The adjustment of the wheel
After loose the wheel, please adjust it according to the torque. The fasten torque should be no less than 30Nm for the rear wheel. The fasten torque of the front wheel should be no less than 25Nm.

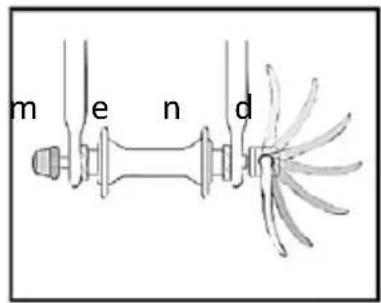


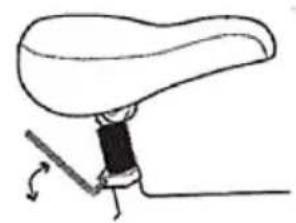
Adjust the Saddle
Your seat height is adjusted by a quick release or must be tighten by Allen wrench key (options).
Pull the quick release lever or unscrew nut with Alen Wrench key (option).
Insert your seat post to at least the minimum insertion line marked on the post. Tighten the adjusting nut by quick release lever, then push the quick release lever to the closed position or tight the nut with Alen Wrench key (option), the suggested torque is no less than 19.5Nm.
The seat angle is adjusted with the nuts that attach the seat to the seat rail. Ensure that the nuts are tightened firmly and that the seat does not move forward or back while you are sitting on it.

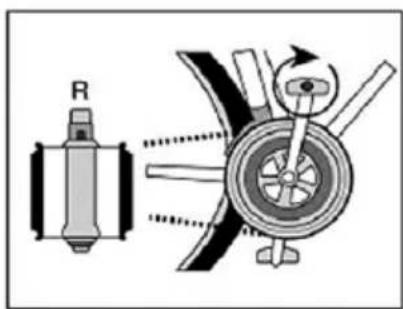
Attach the Pedals
Pedals are marked „L“ and „R“ on axle end.
Screw the pedal marked „L“ into the left side of crank and „R“ to right.
(1). The right pedal attaches to crank arm with (clockwise) thread
(2). The left pedal attaches to the other arm and has a left-hand (counter clockwise) thread.

Check your pedals before each ride to ensure that they are tight. If you ride your bi pedals, you may strip the threads the pedal to the crank.

Recommended values of the nut torque.
| Front Wheel Nuts 22-27 Nm 16.2 - 19.8 ft.-lb. | | |
| Rear Wheel Nuts 24-29 Nm 17.5- 21.3 ft.-lb. | | |
| Saddle Nut | 12- 17 Nm | 8.8- 12.5 ft.-lb. |
| Seat Post Clamp Nut | 15- 19 Nm | 11.0-14.0 ft.-lb. |
| Brake Anchor Nut | 7- 11 Nm | 5.1- 8.1 ft.-lb. |
| Handlebar Clamp Nut | 17- 19 Nm 12.5- 14.0 ft.-lb. |
| Handlebar- Stem Nut | 17-19 Nm | 12.5- 14.0 ft.-lb. |
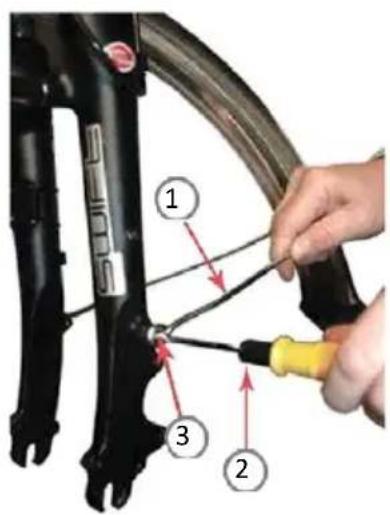
Front fender Installation (option)
- Take out the front fender and fix the fender hanger and Headlightrack on the Front fork with hexangular bolts
- Fix the pan head screw and the front fender stick on the corresponding positions at both sides of the Front fork
- With the cross screwdriver, and tighten the bolts, as shown.
When the lifting ear of the front fender is installed, please fender up as much as possible so as not to interfere the fender with the tire.
For other adjustments and maintenance, please refer to the chepter: "6 ASSEMBLY METHODS"
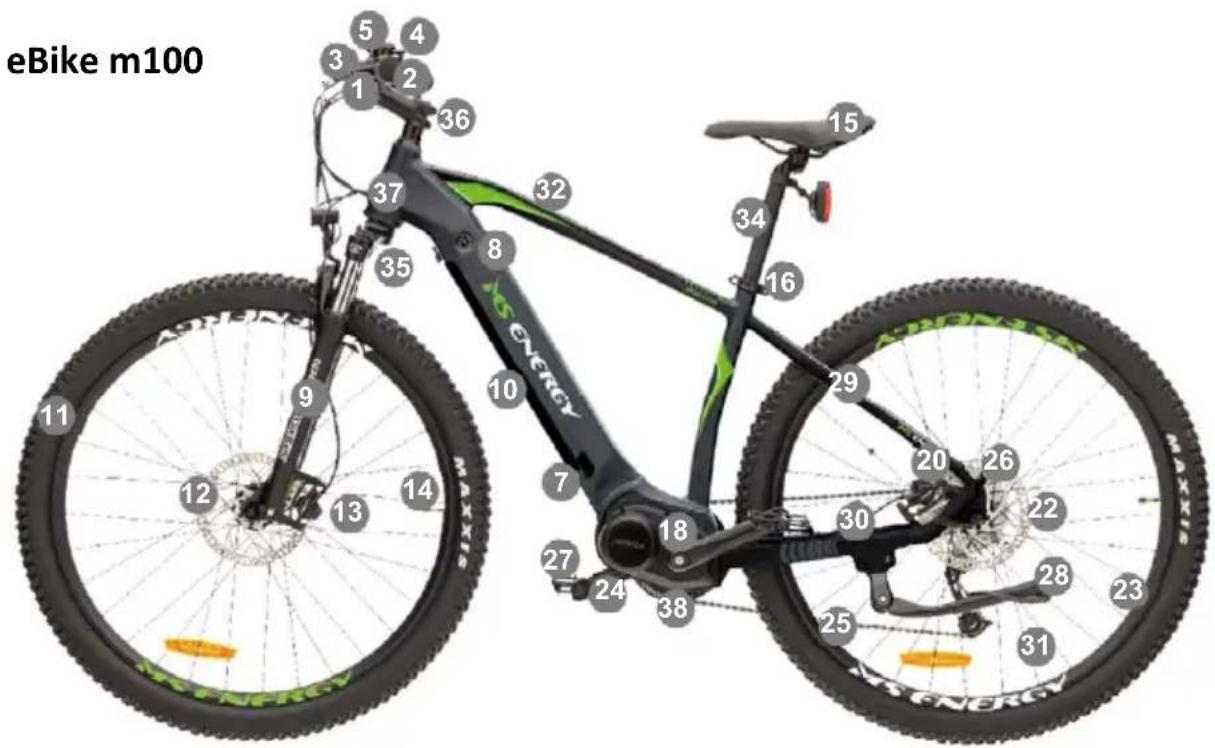
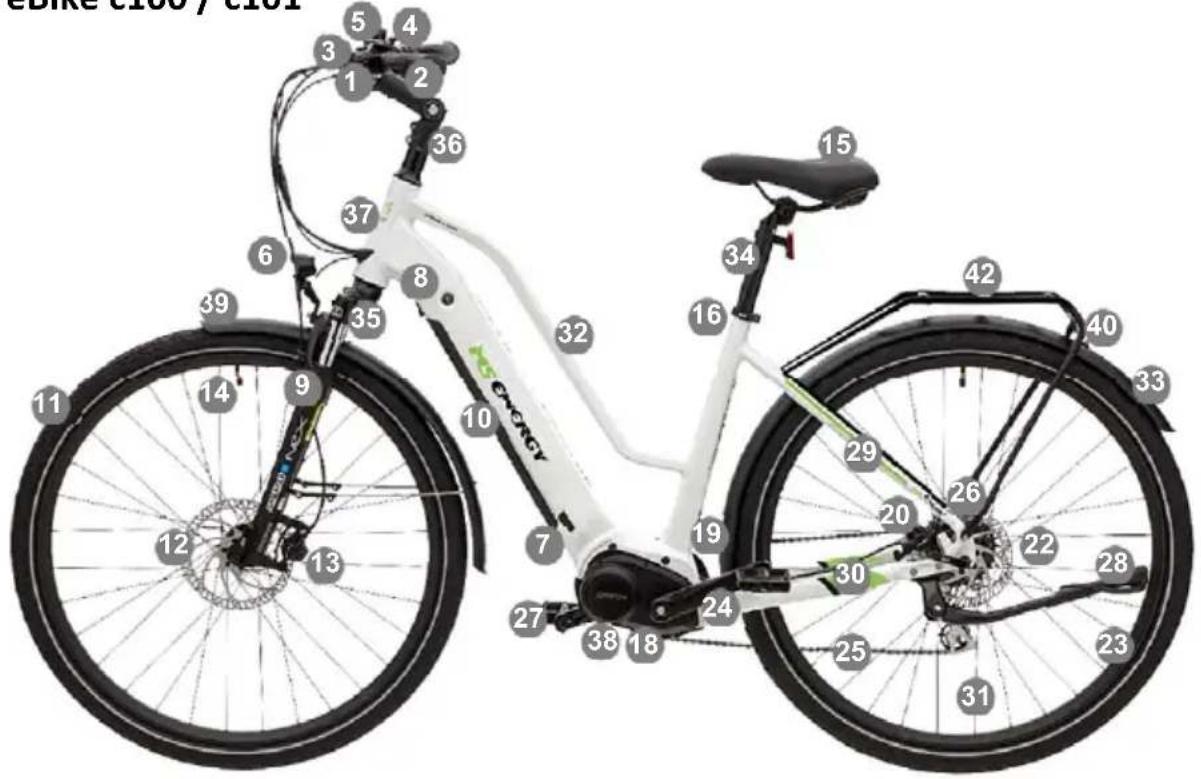
3. BASIC STRUCTURE AND NAME
eBike c100 / c101


| 1. | Brake Lever | 15. Saddle | 29. Seat Stay |
| 2. | Grip | 16. Clamp | 30. Chainstay |
| 3. | Handle Bar | 17. Rear Shock (opt) | 31. Spokes |
| 4. | Shifter | 18. Motor | 32. Top Tube |
| 5. | LCD Display | 19. Chain Cover (opt) | 33. Rear Mudguard (opt) |
| 6. | Front Light (opt) | 20. Rear Brake Caliper | 34. Seat Post |
| 7. | Charging Socket | 21. Sensor (opt) | 35. Lock Out (opt) |
| 8. | Battery Lock | 22. Rear Brake Disc | 36. Stem |
| 9. | Fork | 23. Rim | 37. Head Tube |
| 10. | Battery | 24. Crank | 38. Chainwheel |
| 11. | Tire | 25. Chain | 39. Front Mudguard (opt) |
| 12. | Front Brake Disc | 26. Rear Derailleur | 40. Rear Light (opt) |
| 13. | Front Brake Caliper | 27. Pedal | 41. Lock (opt) |
| 14. | Tyre Valve | 28. Kick Stand | 42. Rear Rack (opt) |
4. LCD DISPLAY CONTROLLER
LCD Controller ANANDA D10 provides a wide array of functions and indicators to fit the user's needs. The indicated contents are as follows:
- Battery status
- Speed (Real-time speed, Average speed and Max speed)
- Trip distance and Total distance
- Single time riding time
• PAS Level (5 level support)
• Headlight On/Off and Status
- Error Code
- Setting units: km/Mile
- Walk assistance
- Various parameters settings, such as wheel size, speed-limit, Auto backlight brightness, backlight, gear range, initial value of gear, unit, sensitive value.
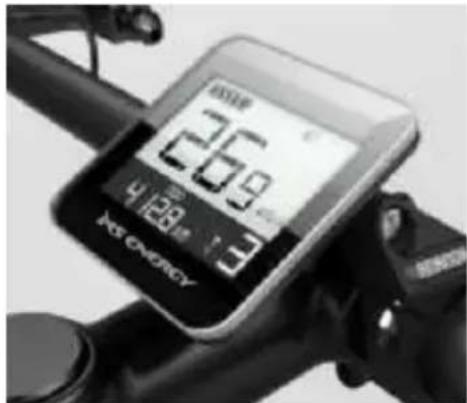
Display description
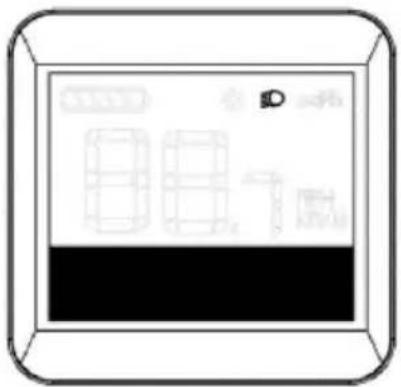
1. Battery capacity
10-segment battery indication; the voltage that each segment represents can be customized
2. Setting mode
3. Headlight ON
Only shows when headlight or backlight are on.
4. Push asistance
Push and walk assistance at 6km/h
5. Unit km/h or mile/h
6. History of riding speed
Average speed (AVG km/h), maximum speed (MAXS km/h).
7. PAS Level indication
The chosen level 1–5 will be displayed; if there is "0" on the display, it means that there is no PAS assistance.
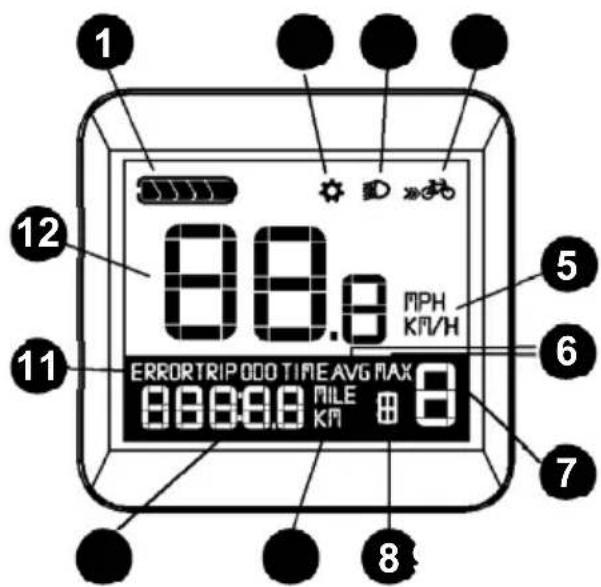
8. Riding mode
Display riding modes: T (Tour); S (Sport); C (Customized); E (Eco); T (Tour).
9. Unit Distance (km or mile)
10. Data & Info display
Display Distance, Riding time and other setting data
11. Error warning
12. Riding speed
When there is a need for maintenance the symbol SERVICE will be displayed (riding distance or the number of battery charge cycles exceed the set value, function can be deactivated).
Buton controller

Turn on the device, press and hold button for 3s to power on the display.
Press and hold again for 3s to power off the display, If the bike is not used, after minutes the display will be automatically turned off.
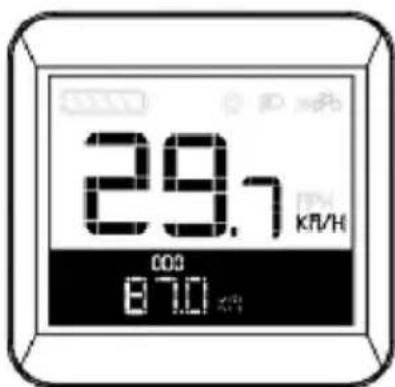
Speed/Mileage display
Open display, display default shows real time speed, total mileage.
Short press"Switch" button to switch display information.
Shown in order:
Real time speed → Accumulative mileage → Average speed → Single mileage → Max.speed → Single time → Riding time.
Hold and press "Headlight" button in single time mileage or single riding time display to clear single time mileage and single riding time at the same time.
Headlight
Press "Headlight" button to turn On the headlight and taillight.
Press button again to power off headlight / taillight.

Assist Mode Selection
Press the "+" or "-" button to choose the motor level support.
The lowest level is Level 1, the highest Level 5.
The default mode is Level 1.
When there
there is no power
assistance.

Walk Assistance
Press and hold "Walk Assist" to enter electronic power boost mode, E-bike travels at a constant speed of 6km/h.
The e-bike enters the walk assistance mode, and the symbol is displayed. Once the key is released, the e-bike will exit the walk assistance mode.
Riding mode
Short press "Walk Assist" buton to change between available riding modes:
T (Tour) → S (Sport) → C (Customized) → E (Eco) → T (Tour).
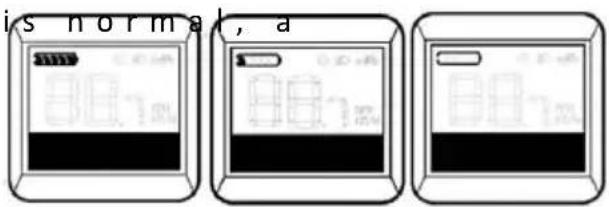
Battery Status Indication
When the battery status certain number of the battery LCD segments as well as the border light up according to the actual quantity of charge. If all of the segments will black out with the border blinking, the battery needs to be charged immediately.
Display light brightness auto adjustment
When brightness of surrounded environment changed, it will adjust brightness of display backlight automatically through built-in photosensitive sensor. When the external environment is getting darker, backlight brightness will become dimmed, also it will turn bright when backlight brightness become brighter.
After turn on light automatically and press "Headlight" button to turn off light and photosensitive function, re-open display and restore photosensitive function.
Error Code Info
If there is a problem with the electronic system, an error code will appear automatically. When an error appears, please check the corresponding part of e-bike or contact authorized service.
| Error Code | Definition Solution | |
| 21 | Current failure | Check whether the three phases of the motor shorted |
| 22 | Handle failure Check whether handle is restored to initial state |
| 23 | Motor lack of phase | Check if the phase line is goodCheck whether the motor phase line is connected to the controller |
| 24 | Motor hall signal cable fault | No hall controller:check whether the phase line is good with hall controller:Check whether hall is in good condition. |
| 25 | Braking failure | Before turn on display, check whether Brake is reset. |
| 30 | Controller temperature sensor failure | Inspect the controller |
If an error occurs, try turning your eBike off/On. If the error persists, contact an authorized service center.
In case of motor overheating, wait for the motor to cool down and after that continue driving.
General Setup *
Press "+" and "-" buttons at the same time to enter setting item1 at the speed of 0. Short press "On/Off" button to select the setting item.
Press "+" and "-" buttons at the same time to enter setting item 1 then loose button, and then press "+" and "-" to enter setting item 2.
Items to be Set:
• Display backlight brightness
- Unit Settings
- Wheel diameter
• Gear range settings
- Speed limit
- Photosensitive setting
* Some options and features in Setup mode may not be available or may be locked
Backlight Brightness setting
BL stands for backlight can set parameters1 mean brightness of backlight, 1 is the darkest, 2 is standard lightness, 3 is the brightness.
Factory default value of the display is 1.
Short press"+" and "-" can change backlight brightness parameters.
Press "On/Off" button to confirm the selection of backlight brightness and enter next setting item.

Wheel diameter
Wheel diameter setting can be set to: 16inch, 18 inch, 20inch, 22inch, 24inch, 26inch, 700C, 28inch, 29inch.
Factory default wheel diameter is 700C.
Press "+" and "-" to switch wheel diameter, press "On/Off" button to confirm the select corresponding to bikes and enter next setting item at the same time.

Speed Limit Settings
Speed limit can be set max. riding speed of E-bike.
When the motor exceeds setting value, controller stops power supply to motor to protect riding safety of riders. Range of the Max. limit speed setting value from 12Km/h to 40Km/h.
Default value of the Max.riding speed is 25Km/h. Press "+" and "-" to switch limit speed value press "On/Off" button to select limit speed value which corresponding to bikes and enter to next setting item at the same time.

Unit Settings
Unit setting can set display speed and mileage units, default factory is metric system.
Press "+" and "-" to switch metric unit (Km/h) and English unit (MPH).
Hold and press "On/Off" button to confirm setting and then enter normal working mode.
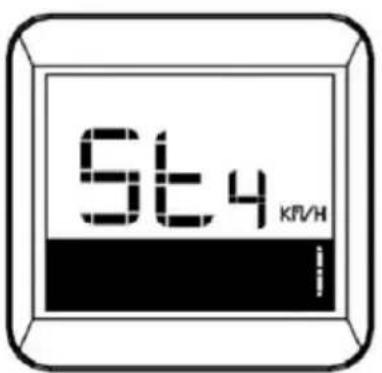
Gear range setting
Gear range including 0-3, 1-3, 0-5, 1-5, 0-7, 1-7, 0-9, 1-9.
Factory default gear rang is 0-5.
Press "+" and "-" to switch to switch gear range.
Press "On/Off" to confirm the selection of display gear range and enter next setting item at the same time.
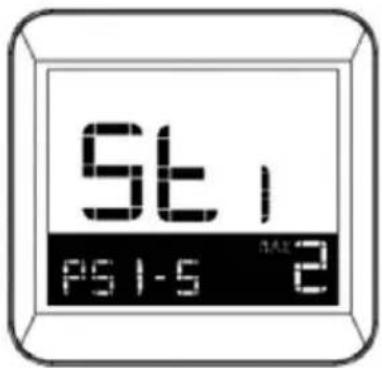
Gear initial value
Initial value of gear including: 0, 1, 2, 3.
Gear initial value of factory default is 1 gear.
Press "+" or "-" to switch initial value of gear.
Press "On/Off" to confirm the selection of initial value of gear and enter next setting item at the same time.
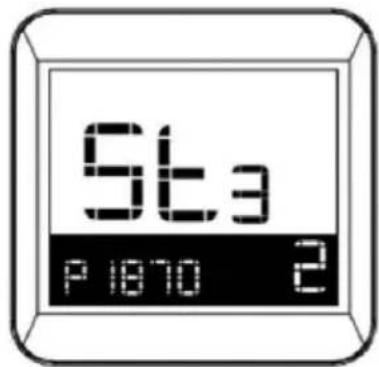
Photosensitive Settings
Here you can adjust light threshold, adjustment this parameter is to adjust the sensitivity of light function according to outside environment light. The larger setting value means the lower sensitivity. It means, sensor required the weaker ambient light to automatically turn on headlight.
Press "+" and "-" button to adjust sensing threshold, hold and press "On/Off" to confirm setting, and then enter normal working mode.
5. CHARGING
As it will last a certain period of time for the ex-factory, transport and storage of a just purchased new bike, it is likely to result in shortage of the battery power, the battery should be first charged before it is used.
The charger configured or designated by our company must be used for charging; otherwise it might damage the battery, and may even lead to fire and other danger, but no warranty is provided by our company.
Battery power indicator:
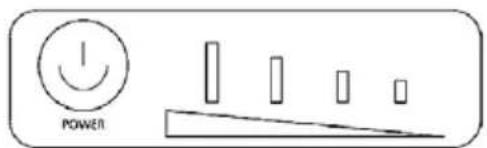
The battery is not detachable.
Fully charge your battery before your first ride and then after any operation, especially after long distance riding, Use your temperature from -5°C to 40°C.
Charge your battery indoor and with the temperature 0°C to 35°C.
You must plug your charger to the bike first and then to the wall outlet.
The light on the charger will be RED while charging and turn GREEN when charging is finished. When the charger light turns GREEN, please keep on charging the battery for 1-2 hours to ensure that the battery has a longer usage life. Then unplug your charger from the socket firstly and then unplug charger from the battery.
Always charge your battery before it gets too low. If you let your pac completely dead, it may not re-charge.
Remember: the sooner you charge after riding the longer your pack will last.
The Lithium battery is built with circuitry that prohibits over-charging and excessive discharging.
The battery charger is designed specifically for the bike; connecting the battery to any other charger will void the warranty
Important:
The battery should be charged in a spacious environment, staying away from high temperature, high humidity and close fire, because the battery and the charger are electronic products, high temperature and humidity will corrode electronic components, resulting in some harmful gases and soot, and even a possible explosion to wound.
6. OTHER ASSEMBLY METHODS (options)
Installation of Headlight (option)
Close the whole power supply, avoid the positive and negative pole of the lamp wire from short-circuit, install the head light, and do not pull the head light, in order to avoid the lamp wire from shedding, causing unnecessary trouble.
-
Take out the Headlight and the front fender;
-
Align the hanger of the front fender with the hole of the Headlightrack
-
Fix the hexagonal M6 × 16 bolt inside the screw hole of the Front fork with 10mm opening wrench, and tighten the bolt.

Note: some models of front fender sticks need to be installed on the front wheel axis.
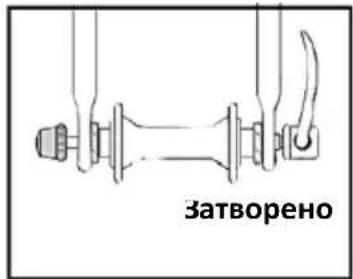
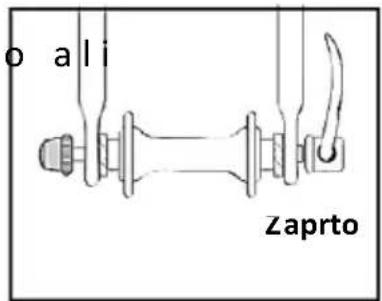
Installation of quick release front wheel and V brake *
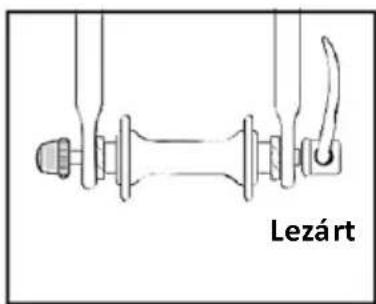
- Take out the front wheel, and rotate the quick release handle for laps counterclockwise.
-
Remove the black plastic rack below the Front fork, and take the V brake conduit out of the V brake, and put the front wheel axis into the Front fork foot contact pin.
-
Rotate the quick release handle for laps clockwise and lock the quick release handle to ensure the front wheel can not be loose;
-
Extrude the V brake by force, and put the V brake conduit into the V brake.
-
Pinch the Brake handle repeatedly, and check whether the two brake blocks have the same gap as the rim, and if the gap is uneven, re-debug the V brake (Please refer to Chapter 4 for the specific debugging method).

N o t e : When tightening the quick release handle of the front wheel, press the Front fork by force downward, so that the front wheel axis can work closely with the Front fork.

* Option, only models with V-Brake system
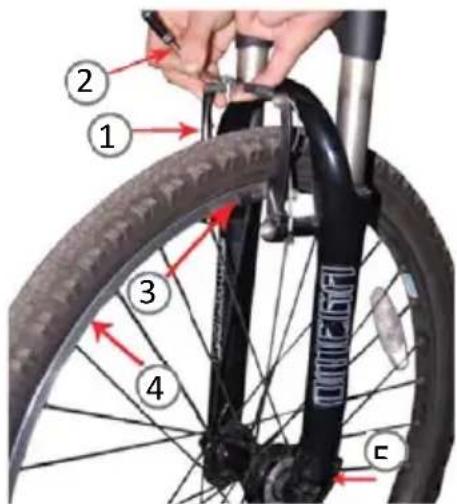
Installation of front Disc brake *
- Take out the Disc brake, and spin off the two bolts in front of the disk brake;
-
Take visual inspection of the distance between the two brake blocks of the Disc brake should be 3 to 4mm;
-
Put the Disc brake plate into between the two brake blocks, and fix the Disc brake on the fixed hanger of the Disc brake of Front fork with two inner hexangular M6 × 16mm bolts by 8 to 10N.m torque;
-
After the bolts are tightened, rotate the front wheel, and listen to whether there is any abnormal sound; if there is, need adjust the Disc brake (Please refer to Chapter 4 for the specific debugging method).


① Disc brake plate ② Disc brake ③ Inner hexangular M6×16mm bolt
④ Brake block ⑤ Fixed hanger of the Disc brake
Note: when fixing the Disc brake bolt, drag the lower part of the Disc brake with hand, and push the Disc brake upward as far as possible.
* Option, depends about brake type on your model
Reflection and lighting system *
The reflection system includes a reflector on the rim, front and rear passive lamp, backpack, helmet and reflective patch on riding clothes. The lighting system is mainly the battery or the self-power-generated front and rear lamp. These items help to mark your own position when riding at night, convenient for pedestrians and other vehicles on the roads to avoid (recommendation: purchasers in accordance with local laws and standards use the reflector and lighting system).
There are two kinds of lighting system:
- Connect to battery on the E-bike
Lighting system is switched On/Off via the LCD controller. For more information, see the chepter "LCD Controller"
- Powered by dry battery.
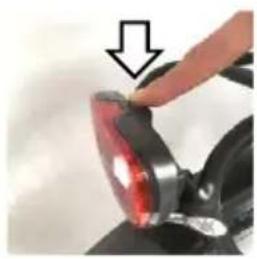
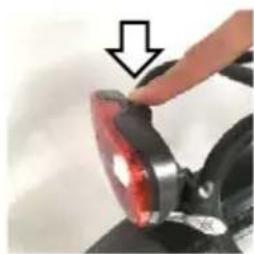
The photos below shows how to turn on the front and back dry battery light.
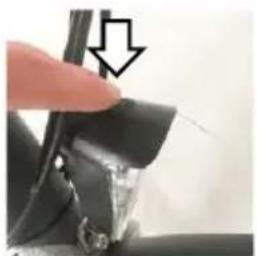
Front Light Back Li
ght
*Some models have Lighting System controlled by the LCD Controller, some of them have Dry batteries and controlling by the On/Off button on the Light units.
Rear rack
1 The largest load of the rear rack is 25Kg.
2 Do not adjust the rear rack arbitrarily, please consult the supplier to make an adjustment if necessary.
3 Do not transport heavy objects; if a heavy object is put on the rear rack, the bike's steering performance will be affected and the braking performance will be reduced, as will result in danger
Front Suspension Lock (option)
If you want to Lock front suspension, Turn the lever clock "LOCK" position.
To unlock front suspension, turn the lever counterclockwise into "UNLOCK" position

7 USE AND MAINTENANCE
Your e-bike is designed for regular road for a single person. Using your e-bike for extreme maneuvers, such as extreme off-road use, jumping, or carrying excessive load will damage the e-bike and could cause serious injury.
Do not use high pressure water streams to clean your e-bike, as water might seep inside the motor or the wiring compartment and cause rusting of electric parts or short circuits. Please use damp cloth with neutral detergent to clean the bike body. Do not use alkali-based or caid based detergent such as rust cleaners as it may result in damage and/or failure of the bike body.
Avoid parking your e-bike outside when there is rain or snow. At the end of a trip where there was rain or snow, bring the e-bike inside and use a clean, dry towel to eliminate any wetness.
Everyday use and inspection of electric bike
In everyday use of the electric bike, a number of mechanical, electrical parts will be worn, screws and other fasteners are also easy to lose and the functions of the electrical appliances would be lost. If the occurrence of these phenomena is not noted, it is prone to failure, and it is also prone to the risk when cycling, so drivers must be responsible for inspection and maintenance in peacetime.
WARNING:
If you find any broken or loose part on the bike, do not ride a bike! Fix, tight or replace broken part before each ride!
If any safety-critical components need to change, please contact an authorized service for replacement.
Check procedure before each ride:
1.Brakes
- Ensure front and rear brakes work properly
- Ensure brake shoe pads are not over worn and are correctly positioned in relation to the rims.
- Ensure brake control cables are lubricated.correctly adjusted and display no obvious wear.
- Ensure brake levers are lubricated and tightly secured to the handlebar.
Brake maintenance
In order to maintain your bicycle's braking performance, it is important to perform maintenance on the braking system at the intervals (every 2 months or often, depends about driving intensity):
- Replacing worn disk brakes or pads: The surface markings are no longer visible or the metal structure is under 2 mm from the rim or from the disk.
- The position of mechanical disk brakes must be adjusted regularly as they wear.
- Mechanical brakes: Replacing brake cables and housings.
- Hidraulic brakes: Check hydraulic installation and brake circuits.
2.Wheels and Tires
Ensure tires are inflated to within the recommended limit as displayed on the tire sidewall.
SAFETY WARNING: Danger of wheel failure due to rim wear. Replace wheel immediately when any part of above groove wears off.
- Ensure tires have thread and have no bulges or excessive wear.
- Ensure rims run true and have no obvious wobbles or kinks.
- Ensure all wheel spokes tight and not broken.
- Check that axle nuts are tight. If your bicycle is fitted with quick release axles, make sure locking levers are correctly tension and in the closed position.
3. Steering
- Ensure handlebar and stem are correctly adjusted and tightened, and allow proper steering.
- Ensure that the handlebars are set correctly in relation to the forks and the direction of travel.
- Check that the headset locking mechanism is properly adjusted and tightened.
- If the bicycle is fitted with handlebar end extensions. Ensure they are properly positioned and tightened
4.Frame and Fork
- Check that the frame and fork are not bent or broken.
- If either are bent or broken, they should be replaced.
5.Chain
- Ensure chain is oiled, clean and runs smoothly.
- Please go to the qualified technician for adjusting the correct chain tension
- Extra care is required in wet or dusty conditions.
7.Bearings
- Ensure all bearings are lubricated, run freely and display no excess movement, grinding or ratting.
- Check headset, wheel bearing, pedal bearings and bottom bracket bearings.
8.Cranks and pedals
- Ensure pedals are securely tightened to the cranks.
- Ensure cranks are securely tightened to the axle and are not bent.
9.Derailleurs
- Check that front rear mechanisms are adjusted and function properly.
- Ensure control levers are securely attached
- Ensure derailleurs, shift levers and control cables are properly lubricated
10.Accessories
- Ensure that all reflectors are properly fitted and not obscured
- Ensure all other fittings on the bike are properly and securely fastened, and functioning.
- Ensure the rider is wearing a helmet
IMPORTANT : if this safety procedure is too difficult for you, it is better to contact one of our technical workshops to carry out this type of procedure.
Maintenance
In order to ensure traffic safety, from time to time, check whether electrical appliances work properly, whether there is any lost wire and whether mechanical parts are normal, and clean, wipe, oil the chain, fluted disc, flywheel and Derailleur regularly (consult your supplier for the model of the oil product) so as to maintain the normal function of each part at any time.
Warning!
Don not over lubricate. If oil gets on the wheel rims or the brake shoes, it will reduce brake performance and a long distance to stop the bicycle will be necessary. Injury to the rider or to others can occur
Using a light machine oil (20W) and the following guidelines, lubricate the bicycle:
| Pedal | Every 6 months | Put 4 drops of oil where catch pedal axle goes into the pedal |
| Chain Every | 6 months Put 1 drop of oil on each roller of the chain |
| B.B. Every 6 | months Contact a professional technician |
| Motor Every | 1 year Contact a professional technician |
Note: the above maintenance instructions are for general reference, and the appropriate maintenance cycle should be shortened or extended based on how you use your eBicycle, taking into account the frequency and manner of use and other conditions;
8 RIDING TECHNOLOGY
A correct cycling posture is the mother to safety: the riding posture is determined by the position of figure and shadow of the contact point (handlebar, seat, Pedal) of the bicyclist and bicycle. However the posture is closely related to the height and size of the bicyclist. So a single-bicycle cycling posture not only determines the efficiency of muscle contraction movement, but at the same time determines whether the bicyclist can manipulate the handlebar and brake safely. Therefore, a correct cycling position is the mother to safety. The safe cycling techniques are described one by one in the following:
- Adjust three points to suit your body; bicycling is just like doing the clothes, and it is necessary to measure the figure and make adjustments. The method of adjusting three points is a combination of bicycle sports mechanics, exercise physiology and safety driving three principles.
1) Adjust the position of the seat: tread the Pedal downward by heel to enable all muscle of the lower extremity joints contracts smoothly, and at the same time the principle is the legs can slightly stretch straight.
2) Front and rear position: tread the position of the Pedal to the inclined 45° , and then adjust the seat before and after, to tie in with the greatest position of the Pedal as the principle.
3) Adjust the front and rear and the height of the handlebar: for the height of the handlebar, in general, the upwarping type handle is about 30 to 50 mm higher than the seat, and the flat type handle is the same high as the seat. The top of the below curved type is the same height as the seat. After adjusting, pay attention to the direction of the handlebar and then lock.
- Sitting posture on the seat: similar to the posture on horseback, the weight is scattered on the handlebar and Pedal, and all the weight must not be placed above to prevent the pain in the hip.
- Skills of the Pedal: the position of the foot is one third in the front of the length of shoes, and it is the most appropriate to fall on the middle of the Pedal. Feet must be parallel with the centerline of the bike, and it will diminish the efficiency of the Pedal
if the feet are too open or narrow; the speed should maintain uniform, or else the drivers may feel tired; it in particular notes that the hook pulling action of the latter part will hook the Pedal up.
- Slowdown technology: the speed change gear slows down but does not accelerate, as is to seek for the stability of the number of change is used for more labor-saving and comfortable, and the time for speed change is 1: climbing, 2: uphill, 3: uneven road surface, 4: against the wind and 5: when feeling tired. It can also be said the time is when feeling not comfortable in the process of riding.revolutions Pedal, so as to relieve the fatigue arising from uneven force. So, the speed
- Brake technology: as we all know the principle of hard braking is first stopping the brake and then stopping the bike, then stopping the front brake, but in case of an emergency, everyone will stop all together. If the braking distance is appropriate, the bike can stop securely; if the slowdown is too fast, people often would be thrown forward and in order to prevent this danger, the best way is intermittent braking, and meanwhile the hip is pushed backward. In rainy days, increase the braking distance due in safety and reduce the running speed.
Riding in Wet Conditions
- This electric bicycle can withstand light rain and small splashes, but is not designed to be subjected to inclement weather, heavy showers, or submersion in water. Use caution when riding in wet conditions as it will take longer to use the brakes to slow down, and also when turning as the tires may slip. The electrical components on the bike are not fully waterproof, and water damage is not covered under warranty.
Riding at Night
- Riding at night comes with more risks than riding during the day due to decreased visibility so riders are encouraged to exercise increased caution. Before riding at night make sure that reflectors are installed on your eBike. For increased visibility also ensure the front headlight and rear tail light are turned on and adjusted such that other people on the road can see them clearly. Riders should we colored clothing at night.
9 TROUBLESHOOTING
If your Bike does not operate as usual or appears to be faulty please read carefully this section. Many operational issues can be resolved by users.
This simple procedure helps in restoring stable conditions for electric circuits.
Please contact Manufacturer Customer Care if the problem is unresolved or you have other concerns.
| SYMPTOMS POSSIBLE SOLUTIONS | |
| Failed speed change or too low maximum velocity | Low battery voltageBad governorhandleBad controller | Chargethe battery fullyReplace the governor handle, controller |
| Turn on the power supply, but the motor does notwork | Bad governorhandleBad electric door lock and contact pointBad controller | Replace the governor handle,controllerRe-weldthecontact partsignal. |
| Inadequate mileage of one-time charging continuation line | Tirelacks of airpressureInadequate charging or failed chargerThe battery has been damaged or its lifehasexpiredFrequent braking startup, overloading | TireisfullofairThe battery is adequate orreplace thechargerReplace thebattery |
| The charger is not charged | The charger wiring is loose or damagedThe battery weld line falls off or is damaged | Weldthe connecting lineor replaceWeldthe connecting line |
| The booster has no power assisting | The induced cartridge has poor contact or is damagedThe booster wiring is bad or damaged | Adjust the induced cartridge or replaceRe-connect or replace |
10 TECHNICAL SPECIFICATIONS
| Model m100 t100 c100/c101 | | |
| Type | MTB eBike Trekking eBike Woman/Man | City eBike |
| Battery | 36V 15Ah Lithium battery | 36V 15Ah Lithium battery | 36V 14Ah LG Lithium battery |
| Battery Capacity | 540Wh 540Wh | 504Wh | |
| Charger Voltage/Current | AC220-240V AC / 42V 2A DC | AC220-240V AC / 42V 2A DC | AC220-240V AC / 42V 2A DC |
| Charging Time | 6-7h 6-7h 6-7h | |
| Motor Power / Motor | Ananda M81 250W | Ananda M81 250W | Ananda M81 250W |
| Max Speed EN 15194, EPAC | 25km/h (PAS) 25km/h (PAS) 25km/h (PAS) | |
| Range * | 120-130 km | 120-130km | 120-130km |
| LCD Diaply / Controller | Ananda LCD D10 | Ananda LCD D10 | Ananda LCD D10 |
| Rim / Fork | PowerWheel, alu, 29”/ Suntour XCM, travel 100mm | Double wall aluminium alloy/Lockout, Travel: 60mm | Double wall aluminium alloy/Suntour NEX, 60mm travel |
| Tire size | Maxxis Rekon 29” x 2.40 | CST 29” x 2.10 | CST C1698 27.5” x 1.75” |
| Brakes Front | Tektro brake HD-M275 180mm | Tektro HD -T275, 180mm | Tektro HD -T275, 180mm |
| Brakes Rear | Tektro brake HD-M275 180mm | Tektro HD -T275, 160mm | Tektro HD -T275, 160mm |
| Gear Machine | Shimano Alivio 9 | Shimano Acera 8 speed | Shimano Altus RD-M310 8 speed |
| Brakes Handle | Tektro Hydraulic lever HD-M275 | Tektro HD -T275, aluminium | Tektro HD -T275, aluminium |
| Shifter | Shimano Alivio 9 speed, 11-34T | Shimano Acera 8 speed | Shimano Altus SL-M310 8 speed |
| Max Load | 100kg 100kg | 100kg | |
| Rear Rack load | - 15kg | 15kg | |
| Weight Gross/Net | 31/24kg | 31/24kg | 30/24kg |
Since the product is improved continuously, the specification and instruction in this manual are subject to change without separate notice.
* May vary, depending on driving conditions, terrain configuration, etc....
Adapter shall be installed near the equipment and shall be easily accessible. The AC plug considered as disconnect device of adapter.

This symbol on the product(s) and / or accompanying documents means that used electrical and electronic products should not be mixed with general household waste. For proper treatment, recovery and recycling, please take this product(s) to designated collection points where it will be accepted free of charge. Alternatively, in some countries you may be able to return your products to your local retailer upon purchase of an equivalent new product. Disposing of this product correctly will help save valuable resources and prevent any potential negative effects on human health and the environment, which could otherwise arise from inappropriate waste handling. Please contact your local authority for further details of your nearest designated collection point. Penalties may be applicable for incorrect disposal of this waste, in accordance with your national legislation.
Disposal of waste batteries
Check local regulations for disposal of waste batteries or call your local customer service in order to get instructions on the disposal of old and used batteries. The batteries in this product should not be disposed of with household waste. Be sure to dispose of old batteries in special places for
disposal of used batteries that are found in all retail shops where you can buy batteries.
Hereby, M SAN Grupa d.d. declares that the radio equipment type TV set is in compliance with Directive
• Machinery Directive 2006/42/EC
• LVD Directive 2014/35/EU
• EMC Directive 2014/30/EU
• RoHS Directive 2011/65/EU.

The full text of the EU declaration of conformity is available at the following internet address: www.msan.hr/dokumentacijaartikala
JAMSTVENI LIST HR
MS ENERGY
MODEL UREĐAJA
SERIJSKI BROJ
DATUM PRODAJE
BROJ RAČUNA PRODAVATELJA
POTPIS I PEČAT PRODAVATELJA
POŠTOVANI!
Zahvaljujemo na kupnji MS ENERGY uređaja i nadamo se da ćete biti zadovoljni odabirom. Ako u jamstvenom roku bude potreban popravak proizvoda, molimo savjetujte se sa ovlaštenim prodavačem ili nas kontaktirajte na dolje navedene brojeve i adrese. MOLIMO VAS DA PRIJE UPORABE PROIZVODA PAŽLJIVO PROČITATE UPUTE PRILOŽENE UZ PROIZVOD!
-
Ovim jamstvom M SAN Grupa kao davatelj jamstva u Republici Hrvatskoj jamči besplatan popravak istog u skladu s važećim propisima i u skladu s uvjetima opisanim u ovom jamstvenom listu.
Ovim jamstvom jamčimo da će predmet ovog jamstva raditi bez pogreške uzrokovane eventualnom lošom izradom ili lošim materijalom izrade. Svi, eventualno nastali, kvarovi biti će besplatno otklonjeni u ovlaštenom servisu u jamstvenom roku.
-
UVJETI JAMSTVA Jamstveni rok počinje od dana kupnje proizvoda i traje 12 mjeseci (bicikli) / 12mjeseci ili prijeđenih 3600km (eRomobili).
Korisnik je obavezan redovito održavati svoj proizvod. Potrebno je redovito kontrolirati sve vitalne i pomične dijelove i po potrebi ih ponovno pritegnuti. Preporuka je obavljanje periodičnog servisa jednom godišnje ili svakih 3000km.
-
U slučaju kvara na proizvodu koji je predmet ovog jamstva, obvezujemo se da ćemo isti popraviti u najkraćem mogućem roku, a najkasnije u roku od 45 dana. Ako se proizvod ne može popraviti ili se ne popravi u roku od 45 dana, biti će zamijenjen novim. Jamstvo će biti produženo za vrijeme trajanja popravka.
-
Jamstvo se priznaje samo uz račun o kupnji, te uz ovaj jamstveni list koji mora biti ispravno popunjen odnosno mora sadržavati datum prodaje, pečat i potpis prodavatelja.
JAMSTVO NE OBUHVAĆA:
POTPIS I PEČAT PRODAVCA
POŠTOVANI!
Zahvaljujemo na kupovini MS ENERGY uređaja i nadamo se da ćete biti zadovoljni izborom. Ako u periodu u kojem imate pravo na reklamaciju bude potreban popravak proizvoda, molim savetujte se sa ovlašćenim prodavačem koji Vam je proizvod prodao i/ili nas kontaktirajte na dolje navedene brojeve i adrese. MOLIMO VAS DA PRIJE UPOTREBE PROIZVODA PAŽLJIVO PROČITAJTE TEHNIČKU DOKUMENTACIJU I UPUTSTVA KOJA SU PRILOŽENI UZ PROIZVOD!
- Ovom izjavom o saobraznosti proizvođač proizvoda, preko KIM TEC CG d.o.o., kao uvoznika i davaoca prava u Crnoj Gori besplatan popravak istog u skladu s vazećim propisima i u skladu s uslovima opisanim u ovoj izjavi o saobraznosti. Ovom izjavom o saobraznosti istićemo da će predmet ovog prava raditi bez greške uzrokovane eventualnom lošom izradom i lošim materijalom izrade. Svi eventualno nastali kvarovi biće besplatno otklonjeni u ovlašćenom servisu u predviđenom roku za reklamaciju.
- USLOVI REKLAMACIJE: Izjava o saobraznosti počinje od dana kupovine proizvoda i traje 24 mjeseca (12 mjeseci na bateriju) (Bicikl) / 24 mjeseca (12 mjeseci na bateriju) ili prijeđenih 3600km (Trotinet).
Korisnik je obavezan redovno održavati svoj proizvod. Potrebno je redovno kontrolisati sve vitalne i pokretne dijelove i po potrebi ih ponovo pritegnuti.
Preporuka je da se obavlja redovni periodični servis jednom godišnje ili svakih 3000km.
- U slučaju kvara na proizvodu koji je predmet reklamacije, obavezujemo se da ćemo isti popraviti u najkraćem mogućem roku, a najkasnije u roku od 15 dana. Ako se proizvod ne može popraviti ili se ne popravi u roku od 15 dana, biće zamijenjen novim.
- Pravo na reklamaciju se priznaje uz fiskalni račun o kupovini, ili uz ovu izjavu o saobraznosti koji mora biti ispravno popunjen odnosno mora sadržati datum prodaje, pečat i potpis prodavca.
- Davalac izjave o saobraznosti osigurava servis i rezervne djelove u razumno m roku od datuma kupovine.
PRAVO NA REKLAMACIJU NE OBUHVATA
- Garancija nije važeće za romobile koji se koriste za profesionalnu upotrebu. Pod profesionalnom upotrebom smatra se i korišćenje proizvoda pojačanim intenzitetom, tj. ako proizvod u prosjeku mjesečno prelazi više od 300km.
- Redovnu provjeru, održavanje uz zamjenu dijelova koji se troše normalnom upotrebom. Prilagođavanje ili promjene za poboljšanje proizvoda za primjenu koje nijesu opisane u tehničkim uputstvima za korišćenje, osim ako je za te promjene predočena saglasnost KIM TEC CG d.o.o.
- Potrošne dijelove kao što su: Sijalice, Bužir kočnice, Sajle i Pakne kočnica, Sajle mjenjača, Zamjena unutrašnje ili spoljnje gume uslijed istrošenosti ili ispuštanja, zamjenu ili popravak nogara te popravak ili zamjenu bilo kojeg dijela ako se ustanovi da je do kvara došlo uslijed nepažnje, mehaničke sile ili neodržavanja (lom rame, lulica ili osovina, iskrivljenje točka i sl.).
- Ako kupac ne priloži ispravan reklamni list ili račun o kupovini.
- Ako se kupac nije pridržavao uputstva o korišćenju proizvoda.
- Ako je proizvod otvaran, prepravljan ili popravljan od neovlašćene osobe.
- Ako su kvarovi na proizvodu nastali djelovanjem više sile kao što su: udar groma, strujni udaru u električnoj mreži elementarne nepogode i slično. Ako su kvarovi nastali oštećivanjem zbog nepropisane upotrebe ili nepravilnim transportovanjem. Ako je kvar nastao greškom u sistemu na koji je proizvod prikljućen.
- Ova izjava o saobraznosti ne mijenja zakonska potrošačka prava važeća u Crnoj Gori u odnosu na ona koja propisuje proizvođač. Naziv davaoca izjave o saobraznosti: Kim Tec CG d.o.o., Čemovsko polje bb, 81000 Podgorica, Crna Gora
CENTRALNI SERVIS (CALL CENTAR): Kim Tec CG d.o.o., Ćemovsko Polje bb, 81000 Podgorica
Tel: 020/608-251, E-mail za upite: servis@kimtec-cq.com
DATUM PRIJEMA UREĐAJA U SERVIS
DATUM POPRAVKE
DATUM PRIJEMA UREĐAJA U SERVIS
DATUM POPRAVKE
DATUM PRIJEMA UREĐAJA U SERVIS
DATUM POPRAVKE
ГАРАНТЕН ЛИСТ
MS ENERGY
MK
МОДЕЛ НА УРЕД
СЕРИСКИ БРОЈ
ДАТУМ НА ПРОДАЖБА
БРОЈ НА СМЕТКА
ПОТПИС И ПЕЧАТ НА ПРОД
ПОЧИТУВАНИ!
Kosova Electronic Service Center
ACEASTĂ GARANTIE NU INCLUDE:


