
Rview S2 - Rear Camera Tracer - Free user manual and instructions
Find the device manual for free Rview S2 Tracer in PDF.


| Brand | Tracer |
| Model | Rview S2 |
| Product Type | Rearview Camera Set (License Plate Frame Camera + Folding Monitor) |
| Camera Frame Dimensions | 546 x 140 x 21 mm (as per manual) |
| Monitor Screen Diagonal | 4.3 inches |
| Camera Resolution | 756 x 582 pixels |
| Monitor Resolution | 800 x 480 pixels |
| Viewing Angle | 120 degrees |
| Camera Inclination Adjustment | 30 degrees |
| Night Vision | 4 IR diodes for night mode |
| Power Supply | 12V DC, 60 mA (camera and monitor each) |
| Connecting Cable Length (Camera to Monitor) | 6 m (600 cm) |
| Power Cable Length | 1 m (100 cm) |
| Camera Cable Length | 50 cm |
| Monitor Cable Length | 50 cm |
| Installation | Requires connection to vehicle reverse light circuit; professional installation recommended |
| Function | Automatically displays rear view when reverse gear engaged |
| Maintenance | Clean with soft, damp cloth; do not use harsh chemicals |
| Safety Warning | Does not replace rearview mirror; blind spots exist; use only as aiding device |
| Spare Parts & Repairability | Contact manufacturer or authorized service center for spare parts |
| Environmental Disposal | Do not dispose as household waste; recycle according to local regulations (WEEE) |
Frequently Asked Questions - Rview S2 Tracer
User questions about Rview S2 Tracer
0 question about this device. Answer the ones you know or ask your own.
Ask a new question about this device
Download the instructions for your Rear Camera in PDF format for free! Find your manual Rview S2 - Tracer and take your electronic device back in hand. On this page are published all the documents necessary for the use of your device. Rview S2 by Tracer.
USER MANUAL Rview S2 Tracer
natural_image
Line drawing of a sedan with attached electrical plug and battery (no text or symbols)- During the installation, the camera set requires tampering with the vehicle's electrical system – therefore it is recommended that you visit a professional car service in order to install it.
- In case you decide to install it yourself, follow this instruction manual; should you have any questions, contact the manufacturer or a professional car service.
- The manufacturer shall not be held responsible for any damages to the product or vehicle resulting from improper installation of the camera set.
- The rearview camera set cannot replace the rearview mirror and does not lessen the necessity for the driver to concentrate. When driving, do not rely solely on the image from the camera – it is only an additional, supporting view with a limited angle of vision (blind spots).
- The manufacturer shall not be held responsible for any damages resulting from collision or damages to the vehicle(s) resulting from maneuvers carried out using solely the image from the camera.
BOX CONTENTS / TECHNICAL SPECIFICATIONS
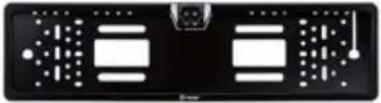 | Registration plate frame with camera (1 pc.)Dimensions: 546 x 140 x 21 cmResolution: 756 x 582 pixViewing angle: 120 degreesCamera inclination adjustment: 30 degreesPower supply: 12 V / 60 mAPower cable length / video: 50 cmNight mode - 4 IR diodes |
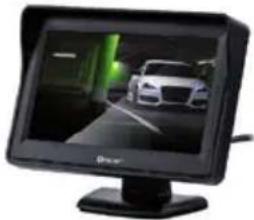 | Folding monitor (1 pc.)Resolution: 800x480 pixScreen diagonal: 4.3 inchesPower supply: 12 V / 60 mAPower cable length / video: 50 cm |
 | Connecting cable CAMERA - SCREEN (1 pc.)Power supply/video cable length: 600 cm |
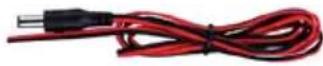 | CAMERA/SCREEN power supply cable (1 pc.)Cable length: 100 cm |
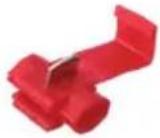 | cable QUICK CONNECTOR / CONNECTOR (2 pcs.) |
INSTALLATION OF THE SET
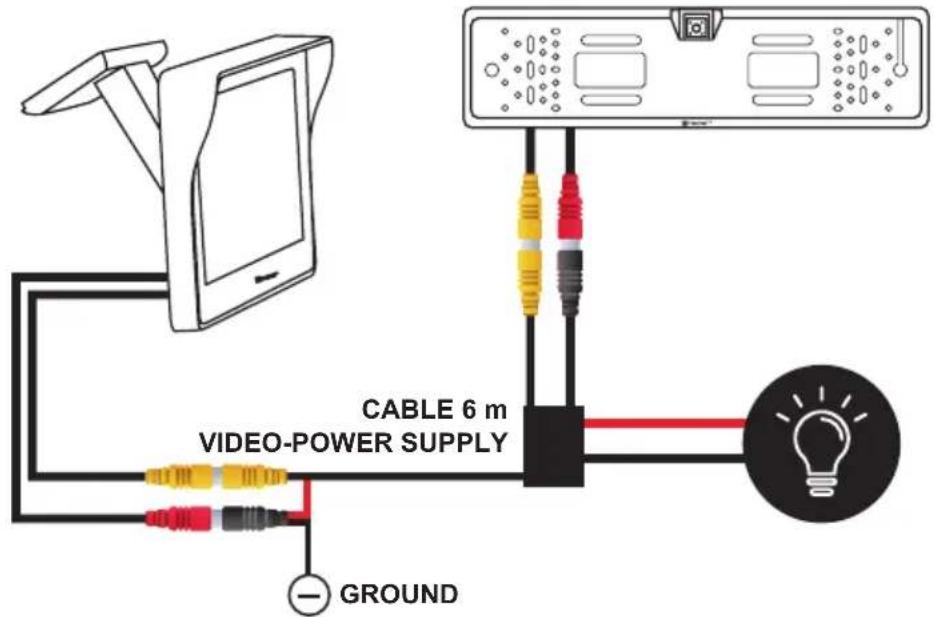
MOUNTING THE CAMERA FRAME ON THE CAR
- Remove the original plate along with the frame.
- Locate the point (trunk handle, any other technical opening) where you can insert the cable (50 cm length) into the trunk.
- If there is no factory-made inlet available, it is necessary to drill a hole with diameter allowing to insert first the yellow, and second – the red cinch cable fitted at the end of the frame wiring.
- Before installing the frame, you have to decide how to fix the plate frame (see sec. 5)!
- The plate is fixed at the top by the UPPER PLATE CLIP; however, at the bottom, it should be fixed individually by the user:
a. You may fix it using screws used to fix the frame to the body of the car.
b. You may fasten the plate to the frame using additional screws (not supplied), using MULTI-PURPOSE MOUNTING HOLES in the frame.
c. You may fix the plate to the frame using zip ties (not supplied), using MULTI-PURPOSE MOUNTING HOLES in the frame.
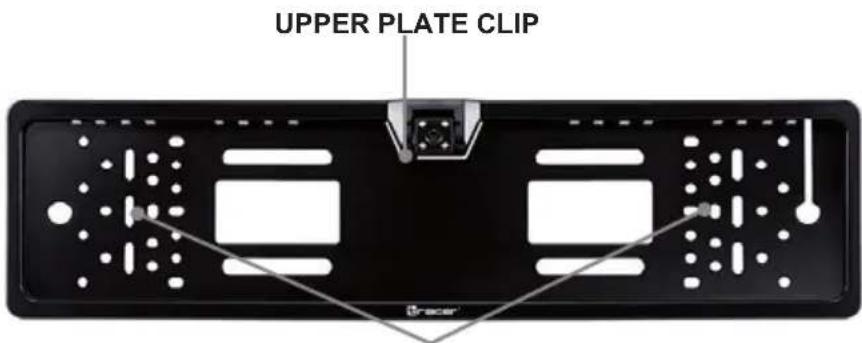
MULTI-PURPOSE MOUNTING HOLES:
• Fixing the registration plate
• Fastening the frame to the body of the car
- Fasten the frame using original fixing of the factory-made plate frame; but first remember to insert the cables through the specially made hole in the car body.
- Find the power cable connected to the taillight using the wiring diagram of the vehicle or using the 12V electric meter (not supplied).
- Using the supplied QUICK CONNECTOR/CONNECTOR, fasten the taillight power cable to the red wire in the 6M CABLE (it will power the camera and the LCD screen).
- The black wire from the 6M CABLE should be connected to the car ground.
- Connect the red end of the FRAME WIRE to the black end of the 6M CABLE.
- Connect the yellow end of the FRAME WIRE to the yellow end of the 6M CABLE.
GUIDING THE 6M CABLE THROUGH THE CABIN
natural_image
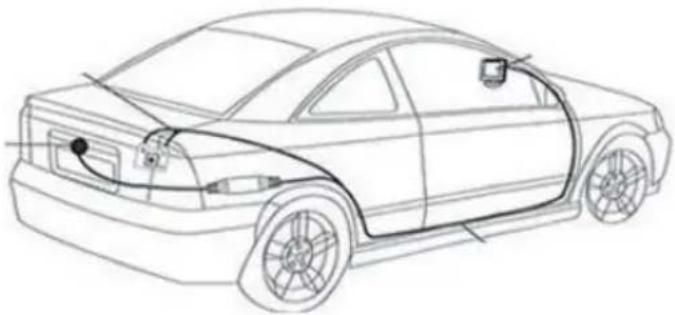
Line drawing of a sedan with attached electrical plug and battery (no text or symbols)- Plan the route of the cable from the trunk (taillight area) to the car dashboard, i.e. the point where you will install the screen.
- It is recommended not to guide the cable on the surface – it will be exposed to wear and tear.
- Guide the wire under the car liner, headliner, or plastic elements of the car.
CONNECTING THE SCREEN
SCREEN CABLE CABLE 6 M
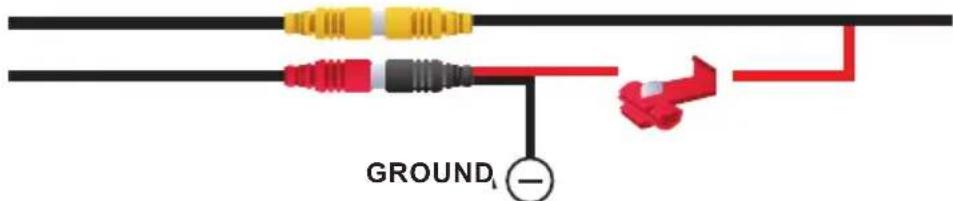
- Place the screen in the desired location on the dashboard.
- Connect the red wire of the 6M CABLE to the red wire of the SCREEN POWER SUPPLY CABLE. You can use the supplied (QUICK) CONNECTOR for that purpose.
- Connect the red plug of the SCREEN CABLE to the black plug of the SCREEN POWER SUPPLY CABLE.
- Connect the yellow plug of the SCREEN CABLE to the yellow plug of the 6M CABLE.
- Connect the black wire of the POWER SUPPLY CABLE to the car ground (e.g. in the compartment under the steering wheel, or in the fuse box area).
If you have performed all the steps correctly, when you put the car in reverse, the power supply from the taillight should activate the rearview camera and the screen; as a result, the screen should display the camera image.
BEZPEČNOSTNÍ PODMÍNKY
natural_image
Line drawing of a sedan with attached electrical plug and battery (no text or symbols)natural_image
Line drawing of a sedan with attached electrical plug and sensor array (no text or symbols)natural_image
Line drawing of a sedan with attached electrical plug and sensor array (no text or symbols)natural_image
Line drawing of a sedan car with visible engine compartment and battery outlet (no text or symbols)natural_image
Line drawing of a sedan with attached electrical plug and battery (no text or symbols)natural_image
Line drawing of a sedan with attached electrical plug and motor (no text or symbols)Symbol of electronic and electrical equipment waste (WEEE – Waste Electronic and Electrical Equipment).
Using the WEEE symbol means that this product cannot be treated as household waste. By providing appropriate recycling you help to save the natural environment. In order to get more detailed information about the recycling of this product, contact the local authority representative, waste treatment service provider or the store in which the product has been purchased.

Brand : Tracer
Model : Rview S2
Category : Rear Camera