IAN 310716 - Exercise bike CRIVIT - Free user manual and instructions
Find the device manual for free IAN 310716 CRIVIT in PDF.


User questions about IAN 310716 CRIVIT
0 question about this device. Answer the ones you know or ask your own.
Ask a new question about this device
Download the instructions for your Exercise bike in PDF format for free! Find your manual IAN 310716 - CRIVIT and take your electronic device back in hand. On this page are published all the documents necessary for the use of your device. IAN 310716 by CRIVIT.
USER MANUAL IAN 310716 CRIVIT
natural_image
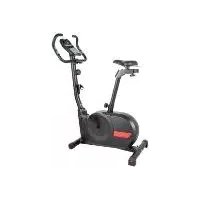
Exterior view of a black stationary exercise bike with adjustable arm and seat (no visible text or symbols)ERGOMETER
EROOMPER Ocscience.org 2004 EROOMPRO Institute
VLO BROWSTRE Notes of all other EXERCISE BIKE
CE
[Unreadable]
(1)2017.1.2. Networks and Digital Networks in the US (2)2017.1.3. Networks and Digital Networks in the US (3)2017.1.4. Networks and Digital Networks in the US (4)2017.1.5. Networks and Digital Networks in the US (5)2017.1.6. Networks and Digital Networks in the US (6)2017.1.7. Networks and Digital Networks in the US (7)2017.1.8. Networks and Digital Networks in the US (8)2017.1.9. Networks and Digital Networks in the US (9)2017.1.10. Networks and Digital Networks in the US (10)2017.1.11. Networks and Digital Networks in the US (11)2017.1.12. Networks and Digital Networks in the US (12)2017.1.13. Networks and Digital Networks in the US (13)2017.1.14. Networks and Digital Networks in the US (14)2017.1.15. Networks and Digital Networks in the US (15)2017.1.16. Networks and Digital Networks in the US (16)2017.1.17. Networks and Digital Networks in the US (17)2017.1.18. Networks and Digital Networks in the US (18)2017.1.19. Networks and Digital Networks in the US (19)2017.1.20. Networks and Digital Networks in the US (20)2017.1.21. Networks and Digital Networks in the US (21)2017.1.22. Networks and Digital Networks in the US (22)2017.1.23. Networks and Digital Networks in the US (23)2017.1.24. Networks and Digital Networks in the US (24)2017.1.25. Networks and Digital Networks in the US (25)2017.1.26. Networks and Digital Networks in the US (26)2017.1.27. Networks and Digital Networks in the US (27)2017.1.28. Networks and Digital Networks in the US (28)2017.1.29. Networks and Digital Networks in the US (29)2017.1.30. Networks and Digital Networks in the US (30)2017.1.31. Networks and Digital Networks in the US (31)2017.1.32. Networks and Digital Networks in the US (32)2017.1.33. Networks and Digital Networks in the US (33)2017.1.34. Networks and Digital Networks in the US (34)2017.1.35. Networks and Digital Networks in the US (35)2017.1.36. Networks and Digital Networks in the US (36)2017.1.37. Networks and Digital Networks in the US (37)2017.1.38. Networks and Digital Networks in the US (38)2017.1.39. Networks and Digital Networks in the US (39)2017.1.40. Networks and Digital Networks in the US (40)2017.1.41. Networks and Digital Networks in the US (41)2017.1.42. Networks and Digital Networks in the US (42)2017.1.43. Networks and Digital Networks in the US (43)2017.1.44. Networks and Digital Networks in the US (44)2017.1.45. Networks and Digital Networks in the US (45)2017.1.46. Networks and Digital Networks in the US (46)2017.1.47. Networks and Digital Networks in the US (47)2017.1.48. Networks and Digital Networks in the US (48)2017.1.49. Networks and Digital Networks in the US (49)2017.1.50. Networks and Digital Networks in the US (50)2017.1.51. Networks and Digital Networks in the US (51)2017.1.52. Networks and Digital Networks in the US (52)2017.1.53. Networks and Digital Networks in the US (53)2017.1.54. Networks and Digital Networks in the US (54)2017.1.55. Networks and Digital Networks in the US (55)2017.1.56. Networks and Digital Networks in the US (56)2017.1.57. Networks and Digital Networks in the US (57)2017.1.58. Networks and Digital Networks in the US (58)2017.1.59. Networks and Digital Networks in the US (59)2017.1.60. Networks and Digital Networks in the US (60)2017.1.61. Networks and Digital Networks in the US (61)2017.1.62. Networks and Digital Networks in the US (62)2017.1.63. Networks and Digital Networks in the US (63)2017.1.64. Networks and Digital Networks in the US (64)2017.1.65. Networks and Digital Networks in the US (65)2017.1.66. Networks and Digital Networks in the US (66)2017.1.67. (67)2017/
![CRIVIT IAN 310716 - [Unreadable] - 1](/content/2026/05/810094/images/8a97ae379319cd780b3f5a7831d70b4426a317e552c023ff4353eb3850c9f7f1.jpg)
1口
IAN 310716IAN 310716
[Unreadable]
![CRIVIT IAN 310716 - [Unreadable] - 2](/content/2026/05/810094/images/cfcc3efbdff0586b92e924ab3091cdcdf0d33882cb4cf102abb8fe9fcb7634b3.jpg)
text_image
Technical diagram showing mechanical assembly and circuit layout with labeled components and a grid-based display panel.![CRIVIT IAN 310716 - [Unreadable] - 3](/content/2026/05/810094/images/8e81c44b68bec9f827af8ff38c4537475607dc7c8dd370b1e4a2e22cb14052fc.jpg)
text_image
Technical diagram showing six different mechanical assembly configurations labeled A through H, with numbered components and directional arrows.![CRIVIT IAN 310716 - [Unreadable] - 4](/content/2026/05/810094/images/9e79cbe85ecf1526c0f9ac2d14efb37707f477ff1b9bc2d0dddb6d90e715a12c.jpg)
text_image
Technical diagram showing six labeled mechanical or electrical component assembly steps (I–N), with numbered components and directional arrows.![CRIVIT IAN 310716 - [Unreadable] - 5](/content/2026/05/810094/images/17dedf712351d425330cfe67122f21e9227db82feaec4a8f0c33ec63635affb9.jpg)
text_image
Technical diagram showing six different mechanical or electrical component assembly steps labeled O, P, Q, R, S, and S.DE AT CH
Operating the computer 27 - 29
General training tips 29
Full workout 29
Intensity level of training 29 - 30
Moving the equipment 30
Storage and cleaning 30
Disposal 30
Notes on the guarantee and
service handling 30
1 x Pedal, links (7L)
Programme MANUAL (manuel)
Misure (I x A x P): ca. 116 x 140 x 56 cm
Peso: ca. 37 kg
With your purchase you have decided on a high-quality product. Get to know the product before you start to use it.

Carefully read the following instructions for use.
Use the product only as described and only for the given areas of application. Keep these instructions safe. When passing the product on to a third party, always make sure that the documentation is included.
Package contents/parts list (Fig. A)
1 x instructions for use
1 x ergometer
1 x base frame (1)
1 x steering column (2)
1 x saddle post (3)
1 x handlebars (4)
1 x foot, front (5)
1 x foot, rear (6)
1 x pedal, left (7L)
1 x pedal, right (7R)
2 x foot straps (8)
1 x computer (9)
1 x saddle (10)
1 x handlebar column cover (11)
1 x handlebar cover, front (12)
1 x handlebar cover, rear (13)
1 x water bottle holder (14)
1 x power cable (15)
1 x screws and tool set
4 x screws M8 x 72mm (16)
4 x washer M 8 (17)
4 x screws ST 2.9 x 16mm (18)
1 x washer M 8 (19)
1 x spring washer M 8 (20)
1 x T-screw (21)
1 x Allen key (22)
1 x combination tool with Phillips screwdriver and open-end spanner 13, 15, 19mm (23)
1 x combination tool with Phillips screwdriver and socket wrench 13, 14mm (24)
Technical data
Dimensions (W x H x D): approx.
116 × 140 × 56cm
Weight: approx. 37kg
Energy supply: 230V\~50Hz/0.5A
Non-speed dependent braking system
Compatible with standard heart-rate monitor chest straps with unencrypted 5kHz transmission (not included in the package contents).
Maximum load of tablet mount: 1kg
Factor of inertia: 5.026kgm²
Power consumption: 60 W

Danger of crushing fingers!

Maximum load: 150kg

Delta-Sport Handelskontor GmbH hereby declares that this product complies with the following basic
requirements as well as other relevant statutory provisions:
2014/53/EU - RED Directive
2011/65/EU - RoHS Directive
Full declarations of conformity are available under http://www.conformity.delta-sport.com/

Date of manufacture (month/year): 10/2018
Device class: HA (for use in private households, exactitude A)/not intended for therapeutic training.
Tested according to:
This item was developed as exercise equipment to provide you with a full-body workout. The equipment is designed for private use and is not suitable for medical or commercial purposes. The equipment is suitable for indoor use.

Safety information
Risk of injury!
- This apparatus may be used by children from 14 years of age upwards, as well as by persons with diminished physical, sensory or mental abilities, or those with little experience and knowledge, if they are supervised or instructed with regard to its safe use, provided they also understand the potential risks of such use. Children must not play with the apparatus.
- Consult your doctor before you start training. Make sure that you are healthy enough to train.
- Do not use the equipment if you are injured or your health is impaired.
- This equipment is designed for a maximum body weight of 150kg. Do not use the equipment if you weigh more than this.
• Always keep the instructions for use with the suggested exercises to hand.
• Always remember to warm up before training and train according to your current performance ability.
High exertion and overtraining can lead to serious injuries. Stop exercising immediately and contact a doctor if you experience pain, weakness or fatigue.
- WARNING NOTICE! The heart-rate monitoring system can malfunction. Over-intense training can lead to severe injury or death. If you notice an unusual reduction in your performance, stop training immediately.
- Pregnant women should only train after consulting with their doctor.
- The equipment should only be used by one person at a time.
- The equipment is not suitable for therapeutic purposes.
- Keep a clear space of approximately 0.6m around all sides of the training area (Fig. Y).
- Only train on a flat, level, non-slip surface.
- Do not use the equipment near stairs/steps or terraces.
- Finish the workout session immediately if you feel dizzy or have a rapid heartbeat etc., and consult a doctor immediately.
- To prevent injuries due to incorrect handling, the equipment must only be assembled by an adult. Ensure that you only use the equipment once it has been fully assembled.
- Hydrate sufficiently during your workout.
- Ensure that the foot straps on the pedals are properly fitted. Improper fitting can lead to injuries.
- Do not use the equipment to stand on, or instead of a ladder.
- To avoid injury, never carry the equipment by yourself up or down stairs or over other obstacles.
- Keep loose clothing away from the pedals.
- Do not exercise when you are tired or have poor concentration. Do not exercise directly after eating a meal. Wait for about two hours before starting your work-out.
- Ventilate the exercise room sufficiently but avoid draughts.
- Warning! The item must not be used by people who have a pacemaker!
Risk of electric shock!
- Only plug the equipment in if the mains voltage of the socket corresponds with the specification on the name plate.
- Connect the equipment to an easily accessible socket only, so that you can quickly disconnect it in the event of a fault.
- Do not operate the equipment if it is visibly damaged or if the power cable or mains plug is faulty.
- If the power cable of the ergometer is damaged it must be replaced by the manufacturer or its customer service agent or a similarly qualified person.
- Only parts corresponding to the original device data may be used in repairs. There are electrical and mechanical parts in this ergometer that are necessary for protecting against sources of danger.
- Do not open the housing. Leave that to specialised repairers.
Contact a specialist repair workshop for this. Liability and warranty claims are excluded for repairs that are independently carried out, and for improper connection or incorrect operation.
- Do not submerge the equipment, the computer, power cable or mains plug in water or other fluids.
- Never touch the mains plug with wet or damp hands.
- Never pull the mains plug out of the socket using the power cable; always take hold of the mains plug.
- Never use the power cable as a carrying handle.
- Keep the equipment, the computer, the mains plug and the power cable away from open fires and hot surfaces.
- Lay the power cable in such a way that it isn't a trip hazard.
- Do not bend the power cable or
lay it over sharp edges.
- Only use the equipment indoors.
- Always turn off the equipment and disconnect the mains plug from the socket when you are not using it, or when cleaning it, or if a malfunction occurs.
- Do not allow the power cable to come into contact with hot parts.
- Never pour liquid into the equipment or the computer.
- Do not use steam cleaners to clean the equipment. This could damage the equipment.
⚠️ Special precaution – risk of injury for children!
- Keep children away from the packaging materials. There is a risk of suffocation!
• Children must not be allowed play with the equipment. - The equipment is not suitable as play equipment and must be stored somewhere that is inaccessible to children when not in use. To eliminate the risk of injury, children must not be within reach of the equipment during the workout.
- Cleaning and user maintenance must not be carried out by children without supervision.
- Point out to children specifically that the equipment is not a toy.
Risks due to wear and tear
- The equipment must only be used if it is in perfect condition. Check the equipment for damage and wear before each use.
The safety of the equipment can only be guaranteed if it is regularly inspected for damage and wear. If for example the V-belt or grips are showing signs of damage, do not use the equipment.
- Use only original replacement parts.
- Protect the equipment from extreme temperatures, sun and dampness. Improper storage and use of the equipment could lead to premature wear and tear, and possible breakages in the structure, which could result in injuries.
- Check the equipment regularly for damage or deterioration. If the equipment is damaged, it must no longer be used.
- Do NOT secure or screw the device permanently to the floor. Doing so can cause considerable damage to the device.
- Regularly ensure that nuts and screws are tightly fastened.
- Ensure that defective parts, e.g. connecting parts, are replaced straight away by a specialist repairer only. Only use the equipment again once all defective parts have been replaced.
- Check the equipment regularly for visible signs of wear and damage. Check the screw connections regularly.
Assembly
The equipment should be assembled by two people.
Take care with floors that are susceptible to damage! Use a mat if necessary, to protect the floor.
Step 1 (Fig. D)
- Stand the base frame (1) on a solid, level floor. Warning: To protect the floor from being scratched, cover it with a suitable material.
Note: To make it easier to assemble the legs, turn the base frame around so that the screw holes are facing upwards. - Screw the front foot (5) to the front of the base frame using two screws (16) and two washers (17).
Note: Ensure that the rollers on the front foot (5) are pointing forwards. - Screw the rear foot (6) to the back of the base frame with two screws (16) and two washers (17).
Step 2 (Fig. E)
- Screw the right pedal (7R) clockwise into the pedal crank (1R) using the combination tool (23).
- Screw the left pedal (7L) anticlockwise into the pedal crank (1L) using the combination tool (23).
- Fasten the foot straps (8) to the pedals (7R) (7L) (Fig. F).
Note: The pedal straps must be able to keep your feet firmly secured. If the straps feel uncomfortably tight, loosen them slightly.
Step 3
- Remove the pre-mounted screws, spring washers and washers from the base frame (Fig. G).
- Slide the handlebar column cover (11) onto the handlebars (2) (Fig. H).
- Hold the handlebar column (2) on the base frame (1) and connect the sensor cables (1a) and (2a) together (Fig. 1).
Note: Make sure that the cables are firmly connected so as to ensure reliable signal transmission.
- Slide the handlebar column into the base frame.
Note: Make sure that the cables are not trapped in the process.
- Fix the handlebar column with the previously removed screws, spring washers and washers using the open-end spanner (Fig. J).
- Slide the handlebar column cover over the screws to cover them.
Step 4
- Hold the computer (9) on the handlebar column and connect the sensor cable (2b) from the handlebars to the sensor cable (9a) from the computer (Fig. K).
Note: Make sure that the cables are firmly connected so as to ensure reliable signal transmission.
- Pass the two heart-rate cables (9b) through the opening (2c) to the handlebar column (Fig. L).
- Remove the screws from the back of the computer (9) and fasten the computer with these screws to the handlebar column (Fig. M).
- Remove the pre-mounted screws from the rear of the handlebar column (Fig. N).
- Set the rear handlebar cover (13) onto the handlebar column to cover the computer screws, and fix the rear handlebar cover with the previously removed screws (Fig. N).
- Position the handlebars (4) in the handlebar mount (2d) (Fig. P) and connect the two heart rate cables (9b) from the computer to the heart rate cable (4a) from the handlebars (Fig. O).
Note: Make sure that the cables are firmly connected so as to ensure reliable signal transmission.
- Snap the clasp on the handlebar mount (2d) shut (Fig. P).
- Set the front handlebar cover (12) onto the handlebar column and fix the handlebars and the handlebar cover using the washer (19), spring washer (20) and T-screw (21) (Fig. Q).
Note: Be careful not to trap the cables when fixing the front handlebar cover.
- Then fix the front and rear handlebar covers using the screws (18) (Fig. R). Fix using a standard Phillips screwdriver, size PH1 (not included in the package contents).
Step 5 (Fig. S)
- Slide the saddle post (3) into the seat tube (1c) in the base frame and tighten the saddle post using the fastening screw (1b).
Note: Turn the fastening screw to release the locking catch on the saddle post (Fig. U).
- Fix the saddle (10) to the saddle adjusting rail (3a) and position the saddle horizontally.
Note: To position the saddle horizontally, use a standard spirit level (not included in the package contents).
Note: The saddle adjusting rail (3a) can be moved into any position desired (Fig. V).
4. Tighten the nuts on the saddle using the combination tool (24).
Step 6 (Fig. T)
- Remove the pre-mounted screws from the handlebar column.
- Fix the water bottle holder (14) to the handlebar column with the two previously removed screws.
Note: The use of the water bottle holder is optional.
Disassembly
The equipment is disassembled in the reverse order.
Use
- Select an exercise area of approx. 3.00 × 1.80m (L x W).
• Exercise on a flat and non-slip surface only.
Turning the equipment on and off (Fig. X)
- Connect the cable (15) to the equipment and a plug in order to connect the equipment to the mains.
- Press the switch (1d) to turn the equipment on.
- Once you have finished exercising, press the switch to turn the equipment off.
Setting the seat, feet and handlebar positions
- Fix the saddle so that your leg is stretched out when you are touching the pedal with your heel and your knee is below the pedal axle.
- Position your feet in the centre of the pedals. When training on the ergometer, the movement should come from the balls of your feet so that you have better leverage and your movements are easier.
- Make sure that at least half the length of your foot is on the pedal during training.
- Tighten the foot straps on the pedals to ensure that your feet have a good grip.
- Position the handlebars using the T-screw so that your arms are almost fully outstretched when holding the handlebars.
USB connection
The computer has a USB connection for connecting your smartphone or tablet.
- To connect your smartphone or tablet, connect a USB cable (not included in the package contents) to the USB socket on the computer and to your smartphone or tablet.
Using the smartphone or tablet holder
- Place your smartphone or tablet on the smartphone or tablet holder.
- Fix your smartphone or tablet with the clip (9c).
Operating the computer
Display (Fig. C)
The following information and functions are shown on the display:
- Depending on the display status, heart rate from 40 to 220 beats per minute or BMR, body fat and BMI measurements are displayed (91).
- Depending on the display status, BMI, body fat, sex, height, weight or age are displayed (9m).
- A training duration with pause mode of between 00:00 and 99:59 is displayed (9n).
- Resistance with 32 resistance levels is displayed (90).
- A pedalling rate of 0 to 999 rotations per minute is displayed alternately with current speed of between 0.0 to 99.9km / hr (9p).
- The distance pedalled, from 0.0 to 99.9km is displayed (9q).
- Resistance of between 0 to 999 Watts is displayed (9r).
- Energy burn* of between 0 to 9999 kilojoules is displayed (9s).
• Information screen with help function for using the menu (9t).
* The calculation is based on pre-programmed standard values that serve as a guideline only.
Changing the language
- The display and the computer buttons use words and abbreviations in English. The display can be switched to German.
- Press the RECOVERY button (9e) and the PROGRAM button (9f) to switch between English and German.
Setting the user profile
Before starting your workout, up to four different user profiles can be programmed. The preset values in each user profile determine the data in the HRC programme and in the BMI/ BMR and body fat measurements.
- The user profile U0 is neutral. No user data are preset.
-
In the U1, U2 and U3 user profiles, personal data such as age, sex, weight and height of the user are set and stored.
-
Switch the equipment on as described in the section "Turning the equipment on and off".
- Turn the selection dial to select the desired user profile.
- Press the MODE button (9h) to confirm your selection.
- Enter the relevant values in the fields "Age" (9m), "Sex" (9m), "Weight" (9m), and "Height" (9m) by turning the selection dial (9g) and confirming the selection with the MODE button (9h).
Selecting a programme
-
Press the PROGRAM button (9f).
-
Select the desired programme using the selection dial (9g).
-
Press the MODE button (9h) to confirm your selection.
QUICKSTART programme
- Select the QUICKSTART programme, as described under "Selecting a programme", or press the QUICKSTART button (9i).
Note: The computer will start automatically with the QUICKSTART programme.
-
Turn the selection dial to set the resistance level.
-
Start the workout.
Note: The resistance level can be altered as desired during the workout.
WATT programme
With this programme you can complete a session that is not dependent on rotational speed. The preset resistance level (Watts) remains unchanged and is adjusted to the current pedalling rate and training speed every 0.5 to 4 seconds.
-
Select the WATT CONTROL programme, as described under "Selecting a programme".
-
Enter the relevant values in the fields "Watt" (9r), "Time" (9n), "Distance" (9q), "Kilojoule" (9s) and "Pulse" (9l) by turning the selection dial (9g) and confirming the selection with the MODE button (9h).
-
Start moving the pedals to begin the workout.
Note: The preset value for Watts can be changed in increments of five during the workout, using the selection dial.
MANUAL programme
-
Select the MANUAL programme, as described under "Selecting a programme".
-
Enter the relevant values in the fields "Time" (9n), "Distance" (9q), "Kilojoule" (9s) and "Pulse" (9l) by turning the selection dial (9g) and confirming the selection with the MODE button (9h).
-
Start moving the pedals to begin the workout.
Note: The resistance level can be altered as desired during the workout.
HRC programme
Note: This programme will only work with a chest strap (not included in the package contents).
In this programme, the resistance is adjusted automatically according to the preset target heart rate:
- When your current heart rate is below the target heart rate you have set, the resistance will be raised every 10 seconds by one level (up to a maximum of 16).
- When your current heart rate is above the target heart rate you have set, the resistance will be lowered every 10 seconds by one level (up to a minimum of 1).
-
Select the HRC programme, as described under "Selecting a programme".
-
Turn the selection dial (9g) to select one of the following target heart rate profiles:
• HRC 1: 55% of maximum heart rate
• HRC 2: 75% of maximum heart rate
• HRC 3: 90% of maximum heart rate
• HRC 4: maximum heart rate (can be set freely using the selection dial)
Note: To achieve maximum heart rate, use the following formula: 220 - age in years.
3. Press the MODE button (9h) to confirm your selection.
4. Enter the relevant values in the fields "Watt" (9r), "Time" (9n), "Distance" (9q), "Kilojoule" (9s) and "Pulse" (9l) by turning the selection dial (9g) and confirming the selection with the MODE button (9h).
5. Start moving the pedals to begin the workout.
USER programme
With this programme, an individual workout can be compiled and stored.
The user's settings in the personal programme will be stored permanently and do not have to be re-entered each time.
-
Select the USER programme, as described under "Selecting a programme", or press the USER button (9j).
-
Press the MODE button (9h) to programme an individual workout.
-
Enter the relevant values for the bars (9o) in the fields "Time" (9n), "Distance" (9q), "Kilojoule" (9s) and "Pulse" (9l) by turning the selection dial (9g) and confirming the selection with the MODE button (9h).
-
Start moving the pedals to begin the workout.
Note: If you start pedalling straight away, the computer will start up a previously saved workout.
INTERVAL programme
The INTERVAL programme is pre-programmed. The high-intensity and low-intensity phases alternate at equal intervals and with equal levels of intensity each time.
Because of the significant variations in intensity we recommend that this programme is only used after two or three weeks of training.
Note: The resistance level cannot be altered during the workout.
-
Select the INTERVAL programme, as described under "Selecting a programme".
-
Turn the selection dial (9g) to select one of the following intensity level profiles:
• L1 - prepared beginner
• L2 - advanced
• L3 - fitness athletes and professionals
-
Press the MODE button (9h) to confirm your selection.
-
Enter the relevant values in the fields "Time" (9n), "Distance" (9q), "Kilojoule" (9s) and "Pulse" (9l) by turning the selection dial (9g) and confirming the selection with the MODE button (9h).
-
Start moving the pedals to begin the workout.
CLIMBING programme
The CLIMBING programme is pre-programmed. The resistance is increased steadily.
Because of the high intensity level we recommend that this programme is only used after two or three weeks of training.
Note: The resistance level cannot be altered during the workout.
-
Select the CLIMBING programme, as described under "Selecting a programme".
-
Turn the selection dial (9g) to select one of the following intensity level profiles:
• L1 - prepared beginner
- L2 - advanced
• L3 - fitness athletes and professionals
3. Press the MODE button (9h) to confirm your selection.
4. Enter the values in the "Watt" field (9r) by turning the selection dial (9g) and confirming the selection with the MODE button (9h).
5. Start moving the pedals to begin the workout.
TEST programme
This programme lasts a maximum of 12 minutes. The aim of this programme is to determine your current level of fitness.
After 12 minutes of exercising, the computer will display values for average speed, distance covered, total kilojoule burn and average heart rate for the completed test workout. The values are saved.
- Select the TEST programme, as described under "Selecting a programme".
- Turn the selection dial (9g) to set the resistance level.
Note: The resistance level cannot be altered during the workout.
- Start moving the pedals to begin the workout.
- Always keep your palms on the hand pulse sensors during the test so that your heart rate can be monitored. Do not exceed the maximum heart rate.
Note: If you start pedalling straight away, the computer will use the value set during the last workout for this programme.
BMI BMR FAT-Programme
- Select the BMI BMR FAT programme, as described under "Selecting a programme".
- Place your palms on both hand pulse sensors.
- Put your hands around the hand pulse sensors until the measurement has been taken.
-
After around 5 to 10 seconds, the following values will be displayed:
-
Body fat and BMI are shown alternately in the display field (9m).
- BMR is shown in the display field (91).
- "Err" indicates that the measurement has not been taken successfully. Repeat the measurement process.
Evaluation of fat measurement
Note: Please note that this measurement does not represent a medical measurement. The measured value may differ from the actual value. For a precise measurement of your body fat content, please contact your doctor.
| Sex | Low | Good | Normal | Too | high |
| male | <13% | 13- | 25.8% | 26-30% >30% |
| Sex Low | Good No | Normal Too | high | |
| female <23 | % 23- | 35.8% | 36-40% |
Evaluation of BMI measurement
The BMI (body mass index) serves as an assessment scale for evaluating body weight.
Note: Please note that this measurement does not represent a medical measurement.
| Age BMI Men BMI Women | |
| 19-24 years 19 | 24 18-23 |
| 25-34 years 20 | 25 19-24 |
| 35-44 years 21 | 26 20-25 |
| 45-54 years 22 | 27 21-26 |
| 55-64 years 23 | 28 22-27 |
| 65+ years 24-29 | 23-28 |
| Category | BMI |
| Emaciated | <15 |
| Underweight | <17.5 |
| Borderline | <19 |
| Normal | 19-24 |
| Overweight | 25-29 |
| Obese | 30-39 |
| Morbidly obese | 40+ |
Evaluation of BMR measurement
The BMR (basal metabolic rate) is the required energy to maintain the body's functions.
To determine your body's energy factor, multiply the BMR result from the computer by your activity level according to the table below. The result is displayed in kilojoules (kJ).
| Level of activity | Activity factor |
| Slightly active | BMR × 1.2 (e.g. sedentary activity) |
| Normally active | BMR × 1.3 |
| Fairly active | BMR × 1.4 (e.g. light training three to four hours a week) |
| Very active | BMR × 1.6 (e.g. a lot of training, four to five times a week) |
| Extremely active | BMR × 1.9 (e.g. hard training and physical work) |
Recovery measurement
The recovery measurement indicates whether your recovery heart rate lies within a healthy or less healthy range. After completing the recovery measurement, you will be given a score:
• F1 = very good heart rate recovery
• F6 = poor heart rate recovery
1. After your workout has finished, press the RECOVERY button (9e) to measure your recovery heart rate.
2. Place your palms on both hand pulse sensors.
- Time (9n) and Heart Rate (9l) will be displayed. The time counts down from 00:60 to 00:00.
- Put your hands around the hand pulse sensors until the countdown from 60 seconds has finished. Your score is then displayed.
Note: A standard chest strap (not included in the package contents) can also be used.
- Press the RECOVERY button (9e) to return to the main menu.
Pausing the workout
- Press the PAUSE button (9d) to pause your workout. The timer will be paused.
- Press the PAUSE button (9d) again to continue the workout.
- Press the PAUSE button (9d) for longer than three seconds to restart the computer.
Resetting the display
To reset the display, delete saved settings, or end a workout ahead of time, press the RESET button (9k).
General training tips
- Wear comfortable sportswear.
- Warm up before each training session and cool down gradually.
• Take breaks between the exercise routines and keep hydrated. - If you are a beginner, never train with too much intensity. Increase the intensity of the training sessions slowly.
- Perform all exercises smoothly and quickly, and not jerkily.
- Make sure you breathe steadily. Exhale during exertion and inhale upon release.
- Maintain correct body posture while exercising.
- Make sure that your feet are properly positioned on the pedals.
- Hold the handlebars throughout your workout.
- Maintain an upright body position throughout your workout.
Full workout
Warming up
Take sufficient time before each training session to warm up. Some simple exercises to enable you to do this are shown below.
You should repeat each exercise two to three times.
Neck muscles
- Turn your head slowly to the left and to the right. Repeat this movement four to five times.
- Rotate your head slowly, first in one direction, then in the other.
Arms and shoulders
- Clasp your hands behind your back and pull them carefully upwards. If you bend your upper body forwards at the same time, this will give all of your muscles an optimum warm-up.
- Rotate both your shoulders forwards at the same time and then change direction after one minute.
-
Pull your shoulders up to your ears and then let them drop again.
-
Circle your right and left arms alternately forwards and then, after one minute, backwards.
Important: Don't forget to keep breathing steadily throughout!
Exercising
- Mount the ergometer.
- Position your feet on the pedals and secure them with the foot straps.
- Hold the handlebars throughout the workout.
- Select a training programme, as described in the section "Selecting a programme" and start the workout.
Note: Maintain an upright position throughout your workout.
Recovery
- Ensure that you take sufficient time to recover during and after the workout.
- The recovery period should be longer for a beginner than it is for a fit athlete.
Intensity level of training
- Decide what your training goal is. Note: Training goals can include weight reduction or fat burning, or increasing your endurance.
- Decide how often you want to train to achieve your training goal. The following training schedules are recommended:
- Programme for basic health: 2-3 times a week, for 20-30 mins each time.
- Programme for optimal health: 4-5 times a week, for 45-60 mins each time.
- To increase the intensity level of your training, choose between the following training zones:
- Regeneration zone: In the regeneration zone, you are training with 50 - 60% of the maximum heart rate. The effort level is light and relaxed. This zone is the base from which you will increase your performance. If you are a beginner or have a health condition, you should train in the regeneration zone.
- Fat-burning zone: In the fat-burning zone, you are training with 60-70% of the maximum heart rate. This zone strengthens your heart at the same time as being ideal for fat burning. This training is more effective, the longer you do it.
- Aerobic zone: In the aerobic zone, you are training with 70 - 80% of the maximum heart rate. In this zone, you burn more carbohydrates than fat. The stress is higher. Heart and lungs are strengthened. If you want to be faster, stronger and have more endurance, you should train in the aerobic zone.
- Anaerobic zone: In the anaerobic zone, you are training with 80 - 90% of the maximum heart rate. Training in the anaerobic zone is high-performance training, in which typical symptoms such as exhaustion, tiredness or heavy breathing arise.
- Warning zone: In the warning zone, you are training with 90 - 100% of the maximum heart rate. The warning zone is the zone with the highest intensity. If you are extremely fit and are experienced in high-performance training, train in the warning zone.
Please be aware that training in this zone can easily lead to overexertion and injury.
Moving the equipment
- Turn the equipment off and unplug from the mains.
- Place your right foot on the front foot of the equipment with the rollers.
- Take hold of the ergometer by the handlebars and tip it carefully towards you.
- Roll the ergometer to the desired location and return it to an upright position slowly.
Note: Keep your back straight while moving the equipment.
Note: Take care with floors that are susceptible to damage!
The roller axle can slip out of place easily when rolling over obstacles, which stops the rollers from moving and can leave marks on the floor.
Storage and cleaning
CAUTION: Before cleaning the equipment, it must be switched off and unplugged from the mains.
The equipment must always be kept dry, and cleaned of any dirt after each use.
Use a lightly dampened cloth to clean the equipment and the computer, and avoid contact with water.
Store the Item in a dry, dust free location away from direct sunlight. When not in use, remove the plug from the mains socket.
Disposal
Dispose of the article and the packaging materials in accordance with current local regulations. Packaging materials such as foil bags are not suitable to be given to children. Keep the packaging materials out of the reach of children.

Dispose of the products and the packaging in an environmentally friendly manner.

The recycling code is used to identify various materials for recycling.
The code consists of the recycling symbol - which is meant to reflect the recycling cycle - and a number which identifies the material.

Devices that are marked with the symbol shown here may not be disposed of with domestic waste. You are obliged to
dispose of these kinds of used electrical and electronic devices separately. Ask your local authority about possible methods for regulated disposal.
Notes on the guarantee and service handling
The product was produced with great care and under constant supervision. You receive a three-year warranty for this product from the date of purchase. Please retain your receipt.
The warranty applies only to material and workmanship and does not apply to misuse or improper handling. Your statutory rights, especially the warranty rights, are not affected by this warranty.
With regard to complaints, please contact the following service hotline or contact us by e-mail.
Our service employees will advise as to the subsequent procedure as quickly as possible. We will be personally available to discuss the situation with you.
Any repairs under the warranty, statutory guarantees or through goodwill do not extend the warranty period. This also applies to replaced and repaired parts.
Repairs after the warranty are subject to a charge.
IAN: 310716
GB Service Great Britain
Tel.: 0800 404 7657
E-Mail: deltasport@lidl.co.uk