
ZPG6074SP - Cooker Zelmer - Free user manual and instructions
Find the device manual for free ZPG6074SP Zelmer in PDF.

| Product Type | Gas Hob |
| Brand | Zelmer |
| Model | ZPG6074SP |
| Number of Burners | 4 |
| Burner Types | WOK (3.3 kW), Large (2.5 kW), Medium (1.5 kW), Small (1.0 kW) |
| Burner Diameters | WOK ∅130 mm, Large ∅100 mm, Medium ∅75 mm, Small ∅55 mm |
| Fuel Type | Natural Gas (2E G20) or LPG (3B/P G30) with nozzle conversion |
| Gas Connection | G1/2" threaded shaft |
| Electrical Supply | 220-240 V, 50/60 Hz (for ignition) |
| Ignition System | Electric spark ignition via control knobs |
| Safety Features | Flame failure device (anti-gas flow security) on each burner |
| Hob Material | Glass ceramic top |
| Burner Components | Grates, caps, crowns, burner bodies |
| Control Type | Rotary knobs with ignition function |
| Installation Requirements | Cut-out in countertop, fixed with brackets; gas and electrical connection by qualified installer |
| Cleaning Care | Hand wash grates, caps, crowns; use damp cloth for glass; avoid abrasive cleaners; use scraper for stubborn stains |
| Maintenance | Clean burner outlets regularly; replace nozzles for gas conversion; flame adjustment screw under knob |
| Compliance | CE marked; meets 90/396/EEC, 93/68/EEC, 2006/95/EC, 2004/108/EC |
| Warranty | Warranty card must be filled by installer |
Frequently Asked Questions - ZPG6074SP Zelmer
User questions about ZPG6074SP Zelmer
0 question about this device. Answer the ones you know or ask your own.
Ask a new question about this device
Download the instructions for your Cooker in PDF format for free! Find your manual ZPG6074SP - Zelmer and take your electronic device back in hand. On this page are published all the documents necessary for the use of your device. ZPG6074SP by Zelmer.
USER MANUAL ZPG6074SP Zelmer
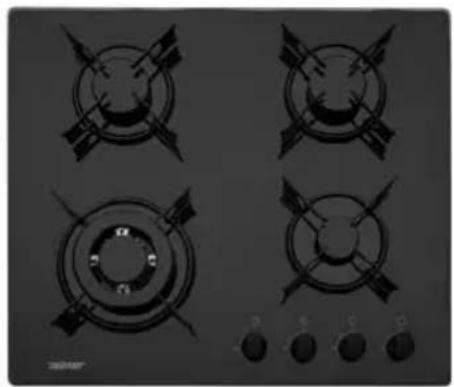
natural_image
Four identical gas stove topixes with crosshair arrows, placed on a dark surface with control buttons at the bottom (no text or symbols visible)ZPG6074SP
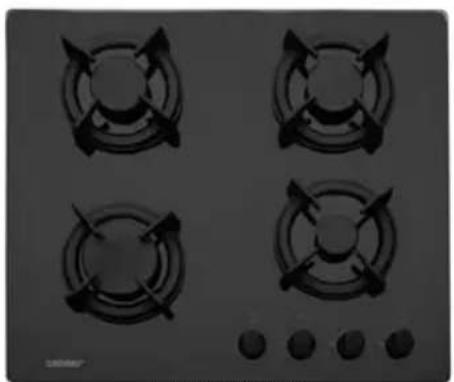
natural_image
Four identical gas stove covers with cross-shaped blades and control knobs (no text or symbols visible)ZPG6085SP
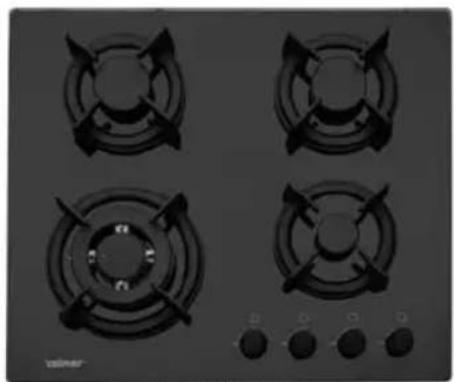
natural_image
Four identical gas stove flanges on a dark surface, with control buttons at the bottom (no visible text or symbols)ZPG6114CP
natural_image
Four identical gas stove flanges with control knobs, no visible text or symbolsZPG6125CP
PL
Szanowni Klienci!
CZ
Vážení zákazníci!
RU
UA
Шановні Клієнти!
natural_image
Mechanical diagram showing a rotating shaft and rotating base with directional arrows (no text or symbols)C
natural_image
Mechanical diagram showing a rotating shaft and base with directional arrows indicating motion (no text or symbols)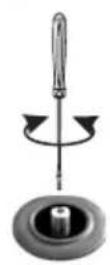
D
Congratulations on your choice of our appliance, and welcome among the users of Zelmer products.
In order to achieve best possible results we recommend using exclusively original Zelmer accessories. They have been specially designed for this product.
Please read this instruction manual carefully. Pay special attention to important safety instructions. Keep this User's Guide for future reference.
Safety instructions
Please read all the manual carefully before you start using the appliance.
The appliance is intended for domestic usage. In case it is used for food business purposes, the warranty conditions shall be changed.
The appliance can be used indoor only.
REMARK: At first start-up of the plate an insignificant amount of smoke and unpleasant odour can be emitted.
ATTENTION: When in use a gas cooking appliance will produce heat and moisture in the room in which it has been installed. Ensure there is a continuous air supply, keeping natural air inlets open or installing a mechanical ventilation (cooker hood with a venting hose).
When using the hob for a long period of time, the ventilation should be improved, by opening a window or increasing the mechanical ventilation speed.
Do not install the hob near the cooling or flammable materials (i.e. curtains, towels etc.).
Do not use any aerosol near the hob.
The diameter of a cookware should be always bigger than the diameter of the burner crown which shall be used.
Do not use the gas hob in order to heat the rooms and warming up harmful or volatile materials or liquids etc.
ATTENTION: In case the surface of the hob plate is damaged, disconnect from the electricity to avoid he hazard of electrical shock.
Do not start the appliance if the supplying cord is damaged or the casing is visibly damaged.
Take care that the power supply cord is not in contact with hot parts of the hob.
In case the undetachable power supply cord is damaged, it must be replaced by the manufacturer or its service agent or similarly qualified person in order to avoid a hazard.
It can be refurbished by qualified staff only. Improper refurbishment can cause serious hazard for the user.
Use only genuine nozzles, grates, knob rings, available in authorised service outlets.
case of any defects, please contact service desk.
- Some elements get hot during the hob operation.
Do not touch the hot parts of the appliance. Burns hazard! Let the appliance cool down before cleaning.
Never leave the appliance unattended with ignited burners, especially when frying, as the overheated fat can cause fire.
Do not apply aggressive detergents like emulsion, milk, paste, etc. for cleaning the hob. They can for instance remove some information graphical marks such as warning marks, etc.
This appliance is not intended for use by persons (including children) with reduced physical, sensory or mental capabilities, or lack of experience and knowledge, unless they have been given supervision or instruction concerning use of the appliance by a person responsible for their safety.
●children should be supervised to ensure that they do not play with the appliance.
Pay attention when the boiling starts to prevent spillage of liquids on the burners.
The ceramic plate is sensitive for the spot impacts i.e. a bottle with seasonings, salt-cellar, etc.
Sugar can react with the hob leaving the irremovable stains. Remove from the hob immediately.
Make sure you understood the instructions above.
Hob installation (Fig. A)
ATTENTION: The hob installation can be executed only by an authorised qualifi ed installer.
The figure presents the necessary dimensions and the method of gas hob assembling.
① Make a cut-out in the counter according to the dimensions.
② Remove all separate (grates, caps, crowns of the burners, etc.).
③ Turn the hob. Cut off 4 long enough pieces of the gasket and glue them along the hob edge.
④ Insert the hob into the cut-out and fasten it from under with brackets.
The appliance must be installed according to the construction law in force, within the scope of the gas devices installation in living premises.
Make sure the counter is made of heat resistant material, so that it does not get deformed by the hob heating.
Gas and electrical connections
THE MANUFACTURER DOES NOT BEAR ANY RESPONSIBILITY FOR POSSIBLE DAMAGED CAUSED BY NON-OBSERVANCE OF STANDARDS AND REGULATIONS IN FORCE AS WELL AS HOB CONNECTION EXECUTED BY NOT AUTHORISED PERSON.
REMARK: Connection of the hob both to electrical and gas fitting can be executed by qualified authorised installer only.
Before connecting the hob to the electrical and gas fi tting check the information on the nameplate and herewith manual.
Before installing make sure that the local distribution conditions (the type of gas, its pressure) and the appliance adjustment are compliant.
The conditions of gas adjustment of the appliance are indicated on the nameplate.
The appliance is not connected to the fumes conduits. It should be installed and connected according to the binding installation regulations. The appropriate requirements concerning ventilation should be taken into consideration.
The flexible gas connection shall be assembled such way, that it is not in contact with the furniture parts in move (i.e. drawer) and it shall be not located in the are with not enough space.
The wiring supplying the power to the hob shall be secured with properly selected safety device.
Upon installing the hob, the installer is obliged to check the tightness of the gas fi tting.
REMARK: The installer is obliged to fi ll in the warranty card, which is the basis for the warranty and guaranty.
Replacing the nozzles for the other type of gas (Fig. B)
ATTENTION: The hob nozzles replacing can be executed only by an authorised qualified installer.
The gas hob is the nozzles are defaulted for 2E (G20) gas. The other kinds of gas are:
| BURNER GAS PRESSURE NOZZLE | MARKING | THERMAL CAPACITY | ||
| WOK | 2E (G20)3B/P (G30) | 20 mbar37 mbar | 1.360.86 | 3300 W |
| LARGE | 2E (G20)3B/P (G30) | 20 mbar37 mbar | 1.180.72 | 2500 W |
| MEDIUM | 2E (G20)3B/P (G30) | 20 mbar37 mbar | 0.920.58 | 1500 W |
| SMALL | 2E (G20)3B/P (G30) | 20 mbar37 mbar | 0.750.49 | 1000 W |
① Remove the cap and crown.
② Unscrew the nozzle using a special spanner.
③ Replace the nozzle screwing the appropriate one according to the table.
After the nozzles exchange adjust the burners (see "FLAME ADJUSTMENT".
Upon nozzles replacement glue an adequate label indicating the gas type near the end of shaft connecting the hob manifold.
Technical specification
The technical parameters of the hob are indicated at the nameplate of the appliance.
The hob is equipped with a shaft with threaded end of G1/2" diameter for connecting to gas supply fi tting. In case of connection to LPG cylinder (propane -butane) the ending of the fl exible hose ∅ 8 x 1mm is screwed on the threaded shaft end.
The gas hob is the 1st class appliance equipped with a connecting cord with protecting stand. It requires connection to the socket equipped with an earth pin.
the appliance meets the requirements of the standards in force.
The appliance is in conformance with the requirements of the following directives:
Appliances burning gaseous fuels - 90/396/EEC, 93/68/EEC.
–Low Voltage Devices (LVD) – 2006/95/EC.
- Electromagnetic compatibility (EMC) - 2004/108/EC.
The product has been labelled with CE mark on the nameplate.
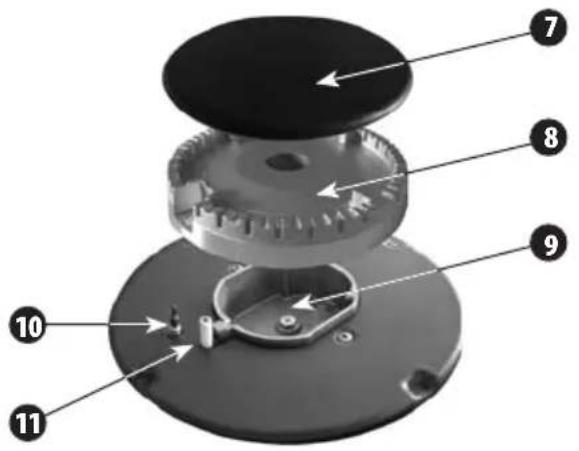
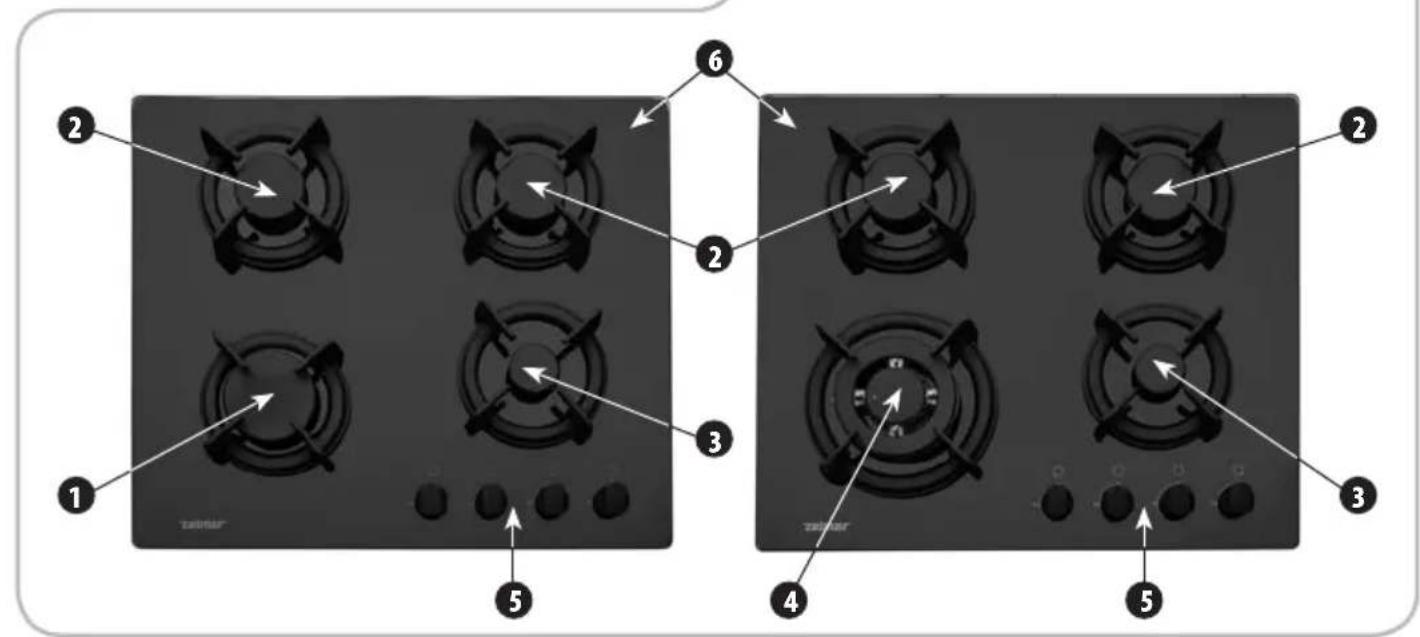
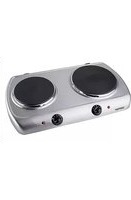
The appliance outline
(Fig. D)
| 1 Large burner | ∅ 100 mm | 2.5 kW |
| 2 Medium burner | ∅ 75 mm | 1.5 kW |
| 3 Small burner | ∅ 55 mm | 1.0 kW |
| 4 WOK burner | ∅ 130 mm | 3.3 kW |
5 Burner control knobs with electric ignition candle
6 Burner grate
7 Burner cap
8 Burner crown
9 Burner body
10 Ignition candle
11 Anti-gas flow security device
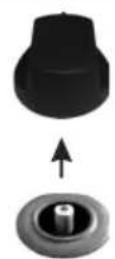
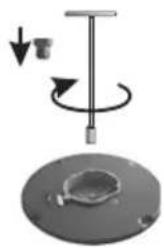
Flame adjusting
(Fig. C)
① Switch on the burner and set the minimum flame ■.
② Remove the ring knob from the spindle.
③ Adjust the flame turning the screw inside the spindle with an appropriate screwdriver.
Check if the fl ame is not off in case of fast switching from maximum to minimum fl ame.
In case of 3B/P (G30) gas, the screw must be screwed until it turns(clockwise).
Hob operation
Ignition
Turn (counter clockwise) the adequate ring knob to position. Press it until it moves and hold (still pressed) upon ignition of the burner during approximately 10 seconds.
If after approx. 15 seconds of holding the knob pressed in 4 the burner shall not ignite, wait minimum 1 minute before the next attempt.
In case the flame has been accidentally extinguish, switch off the burner turning the ring knob into □ position and wait 1 minute before you switch it on again.
Usage
In order to obtain maximum efficiency with the minimum gas consumption apply the tips below:
use the cookware with a diameter adequate to the given burner, see the table below:
| BURNER COOKWARE DIAMETER | |
| WOK ∅ 130 mm ∅ 240-260 mm | |
| LARGE ∅ 100 mm ∅ 180-260 mm | |
| MEDIUM ∅ 75 mm ∅ 120-220 mm | |
| SMALL∅ 55 mm | ∅ 80-160 mm |
- when it starts boiling set the ring knob in minimum position ■.
always cover the cookware with lids. - In case of electricity supply break, you can ignite the burners with matches.
- Do not place any cookware on two burners in the same time.
- Use only dry and clean cookware, which height equal approximately 2/3 of their diameter.
● Never try to repair the hob yourself.
Cleaning and maintenance
Remember to keep the hob clean on a regular basis.
The grates, caps and burner crown shall be washed with warm water and detergent, then rinse and dry all elements.
All outlets in the hob burner crown must be permeable, and the caps shall be well positioned on them.
Cleaning of the glass plate
- Do not use the steam cleaning equipment to clean the glass plate.
- Easy dirtiness at first damp with warm water, then wipe dry with a sponge.
● Strong dirtiness at first damp with warm water, then wipe dry with a special sponge for glass cleaning.
The remains of limestone and other sediments shall be removed by application of a small amount of a special preparation for ceramic glass cleaning or white vinegar, and then remove it with dry cloth.
- Sweets, melted aluminium, plastics, remove with a scraper for glass and then clean the area with damp cloth. If necessary use the liquid for ceramic glass cleaning.
Ecology – environment protection
Each user can protect the natural environment. It is neither diffi cult nor expensive.
In order to do it: put the cardboard packing into recycling paper container,, put the polyethylene (PE) bags into container for plastic. When worn out, dispose the appliance to particular disposal centre, because of the dangerous elements of this appliance, which can be hazardous for natural environment.
Please do not dispose into domestic waste disposal!!!
The manufacturer/importer does not accept any liability for any damages resulting from unintended use or improper handling. The manufacturer/importer reserves his rights to modify the product any time in order to adjust it to law regulations, norms, directives, or due to construction, trade, aesthetic or other reasons, without notifying in advance.
- PL
- Szanowni Klienci!
- CZ
- Vážení zákazníci!
- RU
- UA
- Шановні Клієнти!
- Safety instructions
- Hob installation (Fig. A)
- Gas and electrical connections
- Replacing the nozzles for the other type of gas (Fig. B)
- Technical specification
- Flame adjusting
- (Fig. C)
- Hob operation
- Ignition
- Usage
- Cleaning and maintenance
- Cleaning of the glass plate
- Ecology – environment protection
Brand : Zelmer
Model : ZPG6074SP
Category : Cooker